
How to Use Frames in Canva
Learn how to use frames in Canva to creatively display images, videos, and designs. Step-by-step guide to adding and customizing frames for eye-catching layouts.
To use frames in Canva, navigate to the "Elements" tab, search for "Frames", and select your desired shape. You can then drag and drop an image or video onto the frame to fill it, or upload your own media and place it inside.
Here's a more detailed breakdown:
1. Accessing Frames:
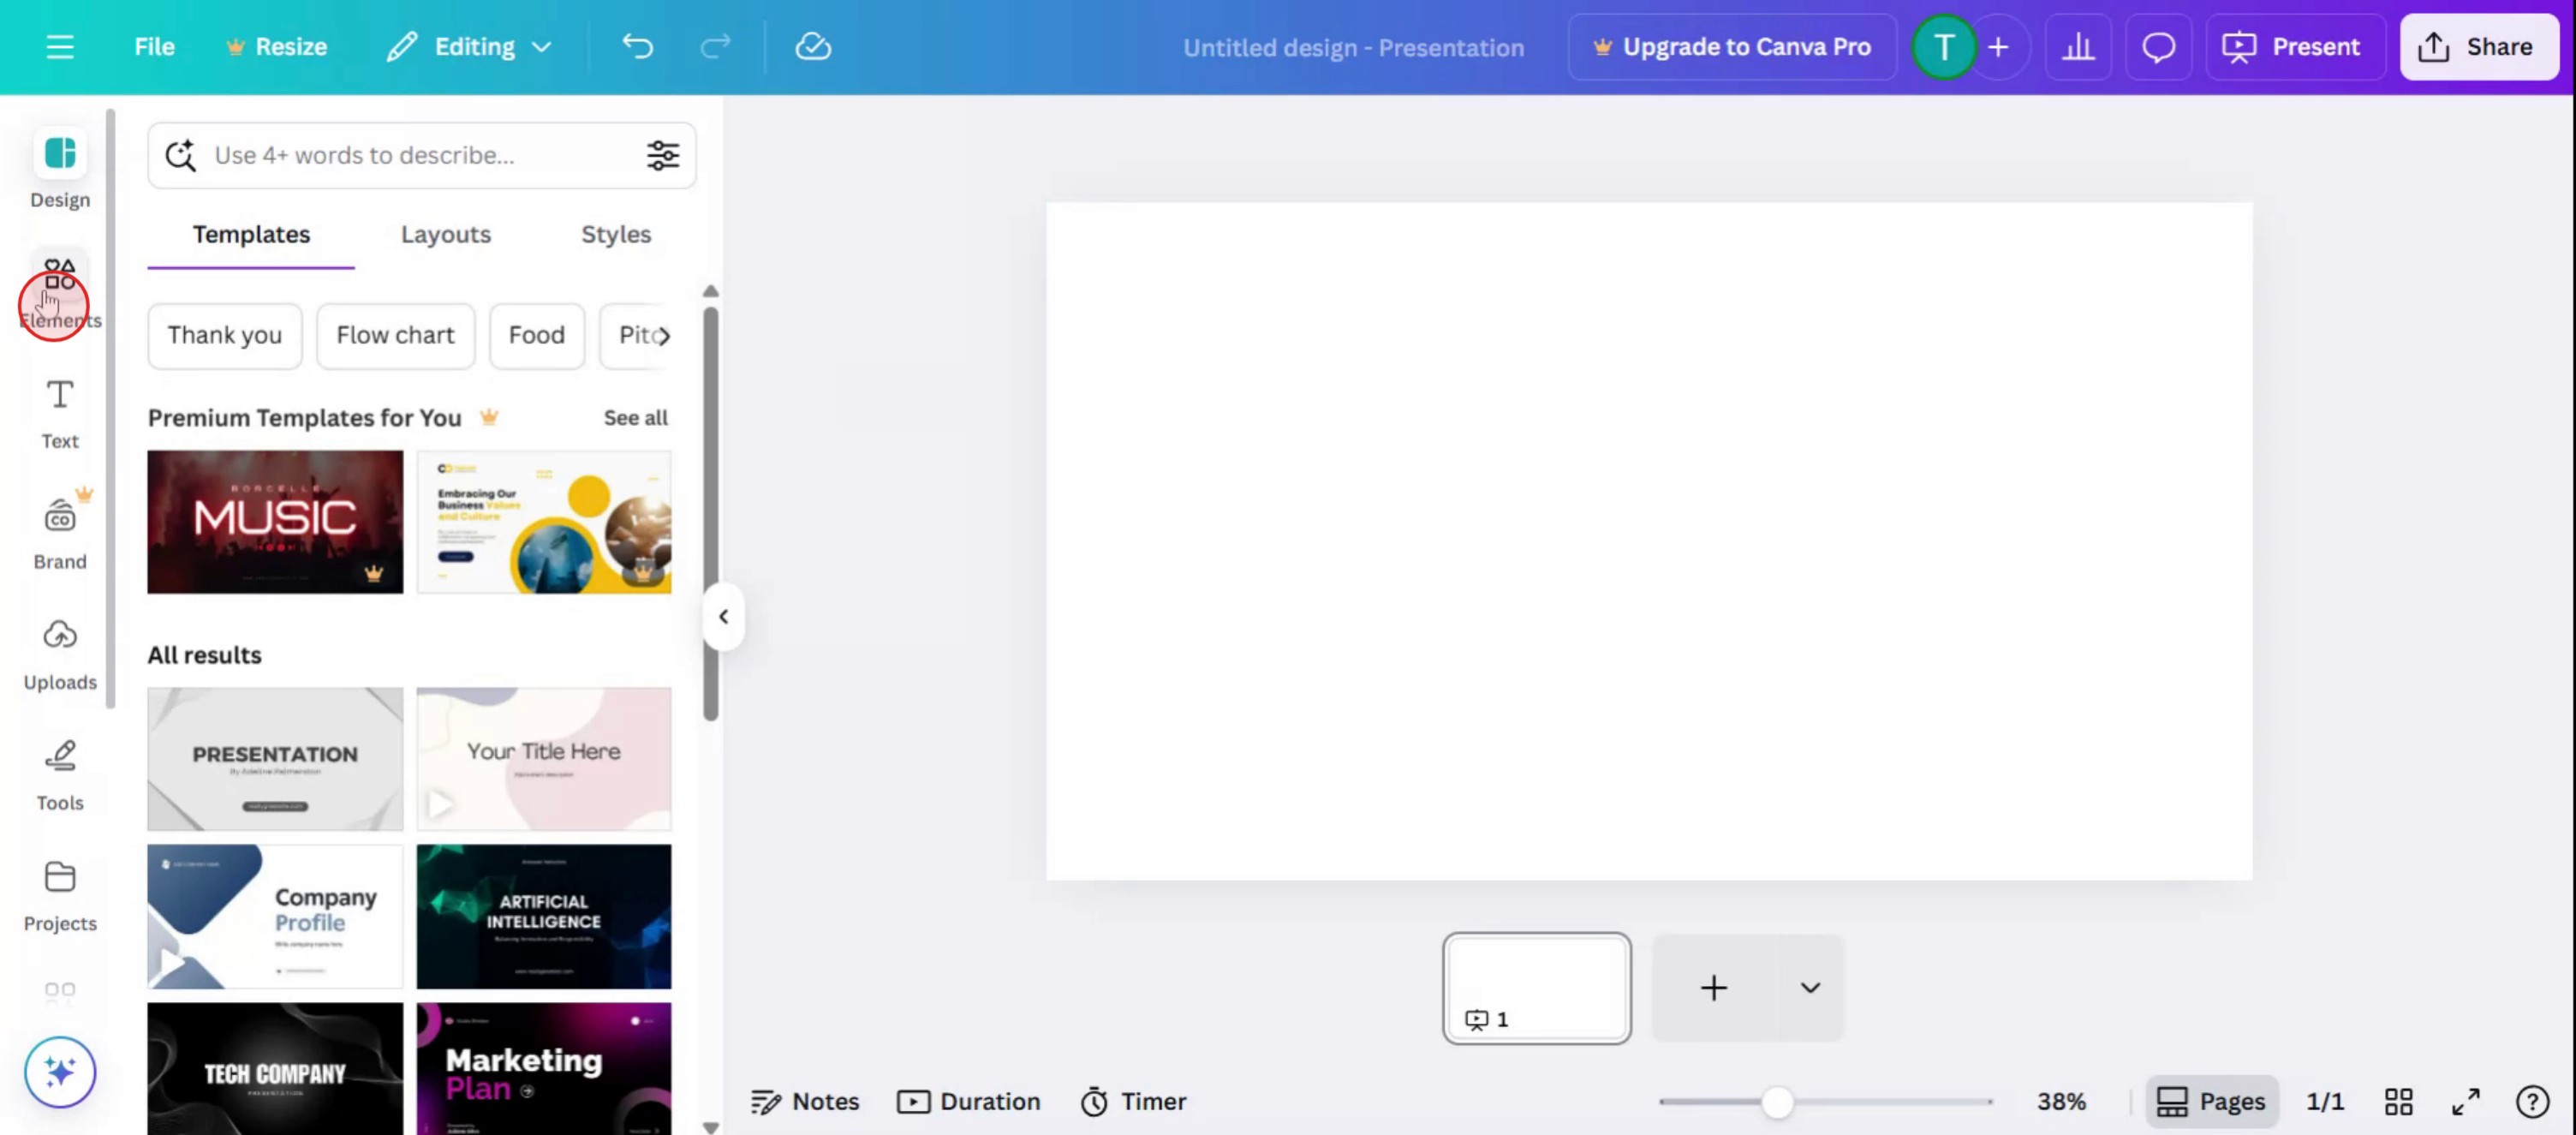
Open your design in Canva. Go to the "Elements" tab on the left sidebar. Search for "Frames" or scroll down to find the "Frames" section.
2. Adding a Frame:
Click on a frame to add it to your design. You can resize and reposition the frame by dragging its corners and edges.
3. Adding Content to the Frame:
From Canva's Media Library: Click on the frame you want to fill. Tap "Replace" in the editor toolbar. Select "Photos" or "Videos". Search for or choose an image/video to add.
From Uploads: Click on the frame you want to fill. Tap "Replace" in the editor toolbar. Select "Camera Roll" or "Uploads". Upload your own media if needed. Click on the image or video to add it to the frame.
4. Adjusting Content Within the Frame:
Click on the frame to select it. You can adjust the size and position of the content within the frame by dragging it.
5. Customizing Frames:
You can further customize the frame and its content using Canva's various editing tools. For example, you can change the frame's color, add effects to the image, or add text to the design.
Step-by-Step-Guide: How to Use Frames in Canva
Step 1
select the Elements option.
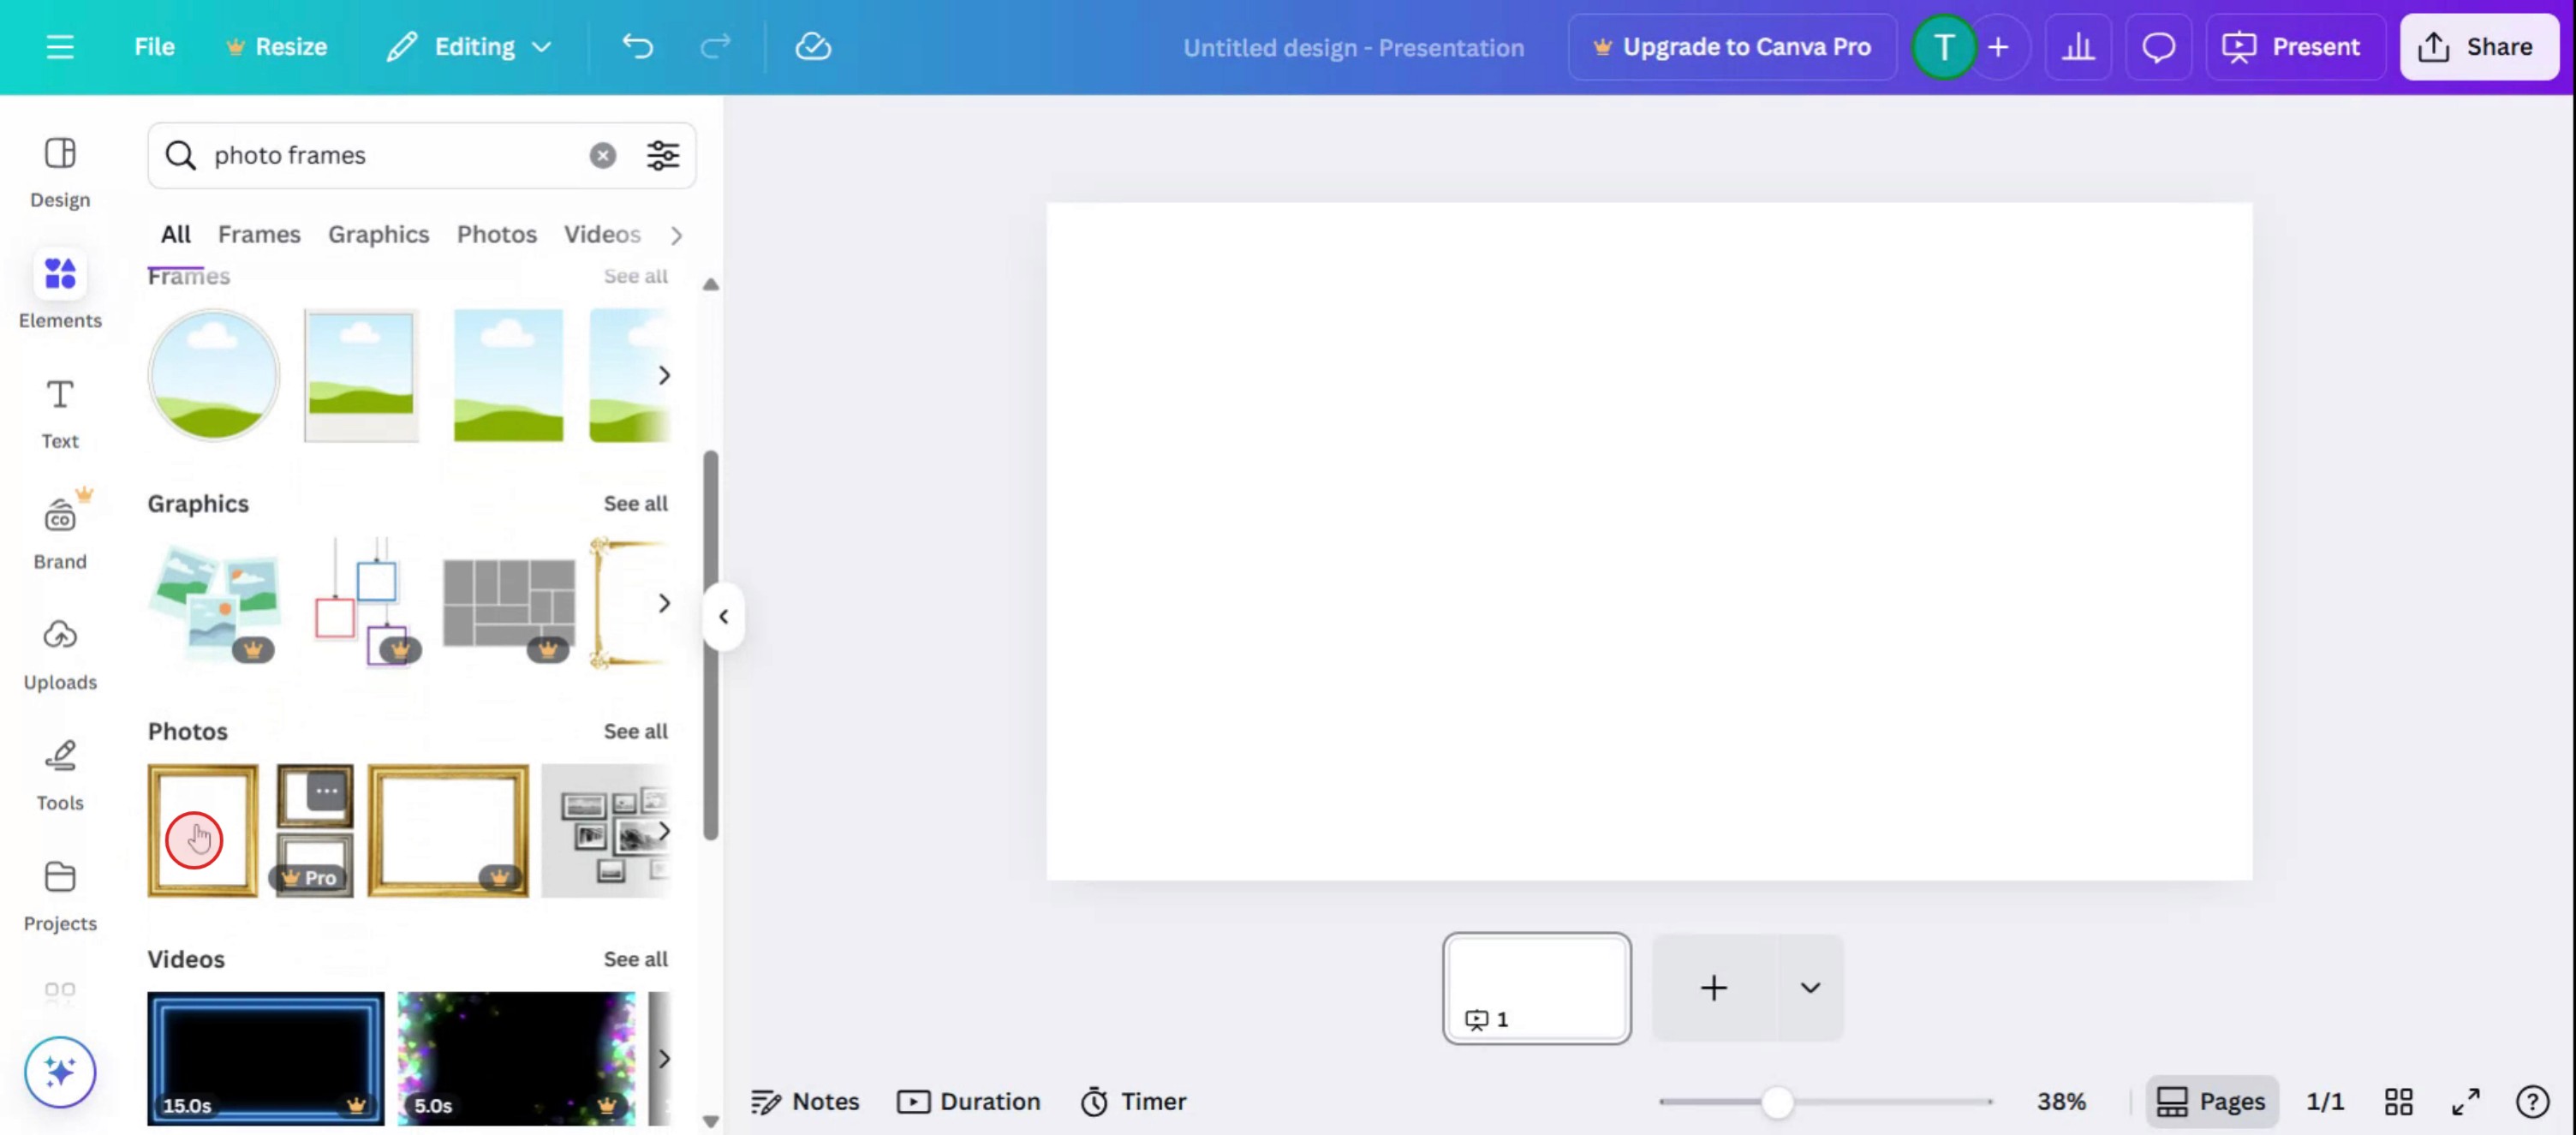
Step 2
In the search bar, type frames to locate the available options.

Step 3
Choose a frame that best meets your requirements.
Step 4
Click on Upload to add the image.

Step 5
Customize the frame and image according to your preferences.

Pro Tips for Using Frames in Canva
Open Your Design or Create a New One
Log in to Canva and choose a template or create a custom-sized design to begin.Go to the Elements Tab
On the left-hand side panel, click on “Elements” to access design components.Search for Frames
In the search bar within the Elements tab, type “frames” and press enter to see all available frame options.Choose a Frame Style
Browse the collection and click on any frame shape you like. It will appear on your canvas.Drag and Drop Images Into the Frame
From the Uploads tab or Photos section, drag an image over the frame. The image will snap into place automatically.Adjust the Image Inside the Frame
Double-click on the image to reposition, resize, or zoom in/out within the frame boundaries.Add Effects or Filters if Needed
Click the image inside the frame to apply filters, adjust brightness, or add effects for a polished look.
Common Pitfalls and How to Avoid Them
Image Not Snapping Into Frame
Make sure you are dragging the image directly over the frame and not next to it. Wait for it to "snap" before releasing.Accidentally Moving the Frame Instead of Image
Be careful when adjusting. Double-click to move the image inside the frame rather than dragging the entire frame.Using Incorrect Frame Size for Layout
Choose frame sizes that match your overall layout. Oversized or small frames can disrupt your design flow.Applying Filters to the Whole Design Instead of Image
Select only the image inside the frame before adding filters or adjustments.Overcrowding With Too Many Frames
Too many different frames can make your design look cluttered. Keep it minimal for a clean appearance.
Common FAQs About Using Frames in Canva
What are frames in Canva used for?
Frames allow you to place images inside custom shapes like circles, letters, or grids.How do I insert a photo into a frame?
Drag an image over the frame until it snaps inside automatically.Can I resize the frame after inserting the image?
Yes, select the frame and drag its corners to resize while keeping the image inside.Can I crop the image inside the frame?
Double-click the image to crop or reposition it within the frame.Are frames available in the free version of Canva?
Yes, many frames are available for free, although some premium styles require Canva Pro.How to screen record on mac?
To screen record on a Mac, you can use Trupeer AI. It allows you to capture the entire screen and provides AI capabilities such as adding AI avatars, add voiceover, add zoom in and out in the video. With trupeer’s AI video translation feature, you can translate the video into 30+ languages.How to add an AI avatar to screen recording?
To add an AI avatar to a screen recording, you'll need to use an AI screen recording tool. Trupeer AI is an AI screen recording tool, which helps you create videos with multiple avatars, also helps you in creating your own avatar for the video.How to screen record on windows?
To screen record on Windows, you can use the built-in Game Bar (Windows + G) or advanced AI tool like Trupeer AI for more advanced features such as AI avatars, voiceover, translation etc.How to add voiceover to video?
To add voiceover to videos, download trupeer ai chrome extension. Once signed up, upload your video with voice, choose the desired voiceover from trupeer and export your edited video.How do I Zoom in on a screen recording?
To zoom in during a screen recording, use the zoom effects in Trupeer AI which allows you to zoom in and out at specific moments, enhancing the visual impact of your video content.
People also ask
Technical Documentation Generator
Related Tutorials

