
How to Highlight Text in Canva
Learn how to highlight text in Canva using background colors, shapes, or effects. Step-by-step guide to make your text stand out in any design.
Step-by-Step-Guide: How to Highlight Text in Canva
Step 1
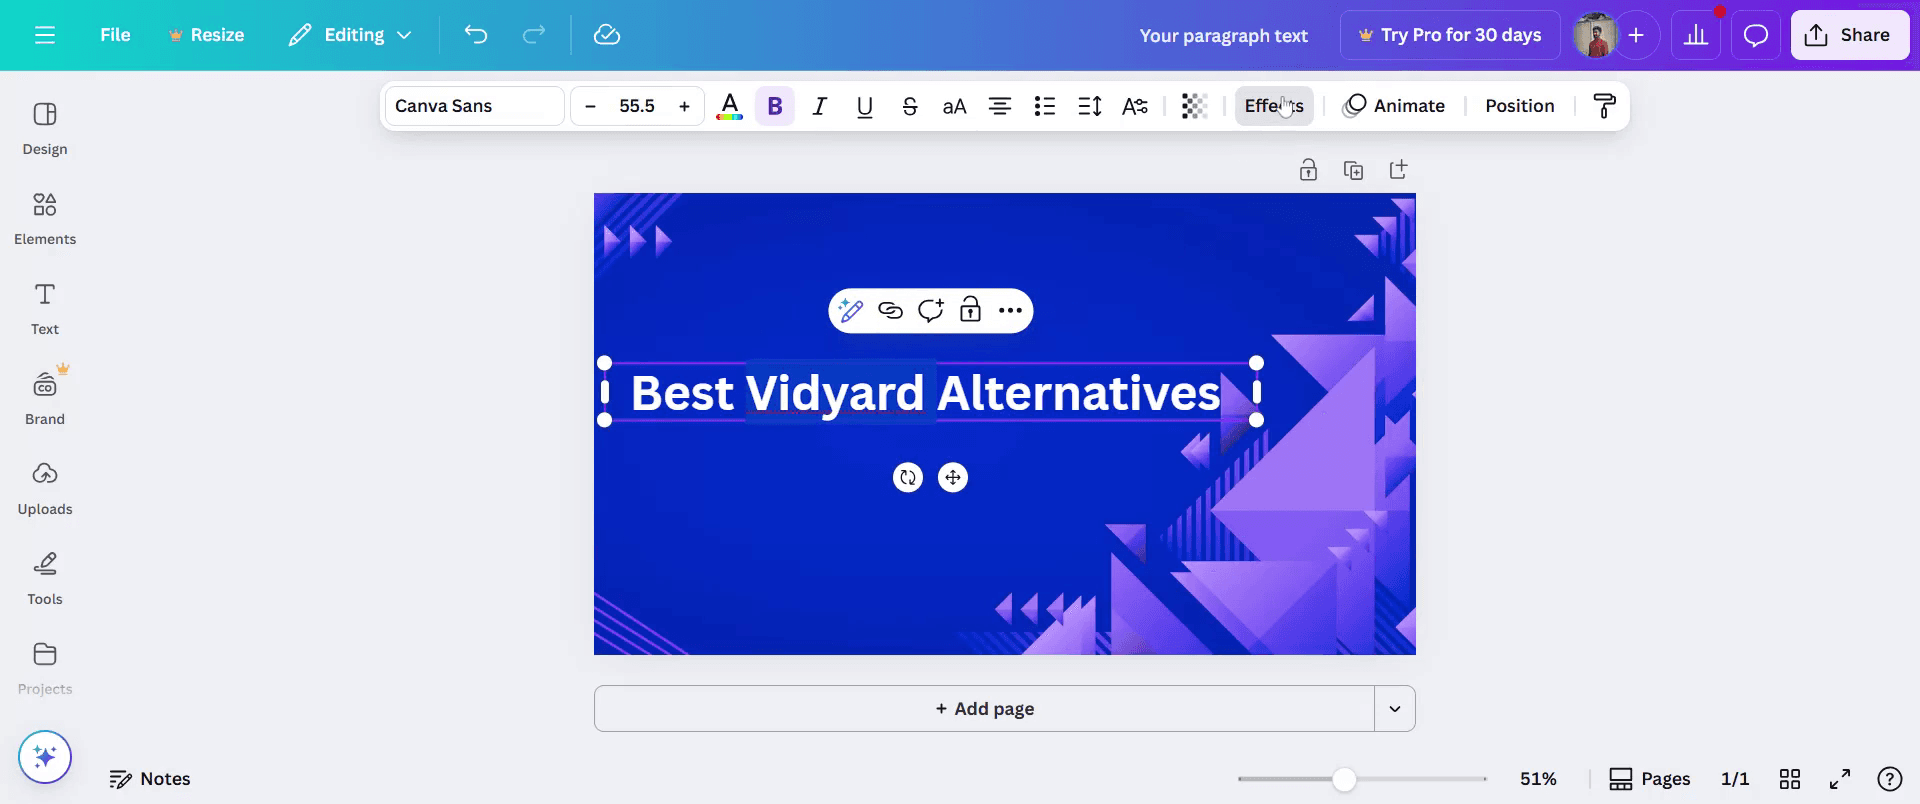
Begin by selecting the text you wish to edit in Canva.

Step 2
Next, click on the "Effects" option to access text modification features.
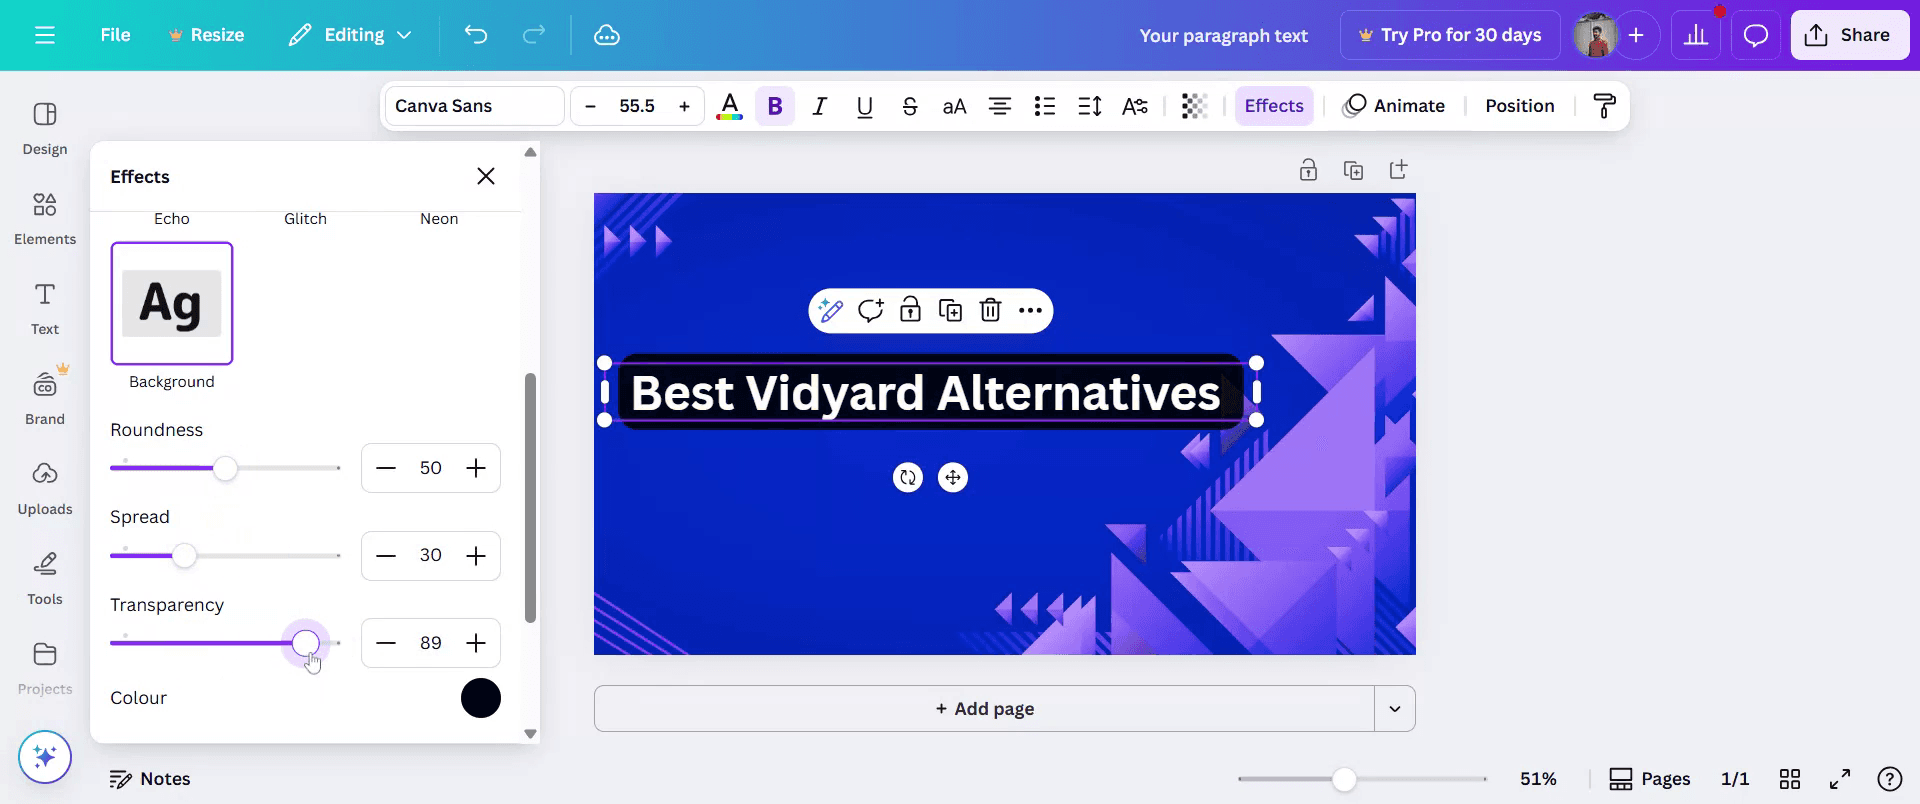
Step 3
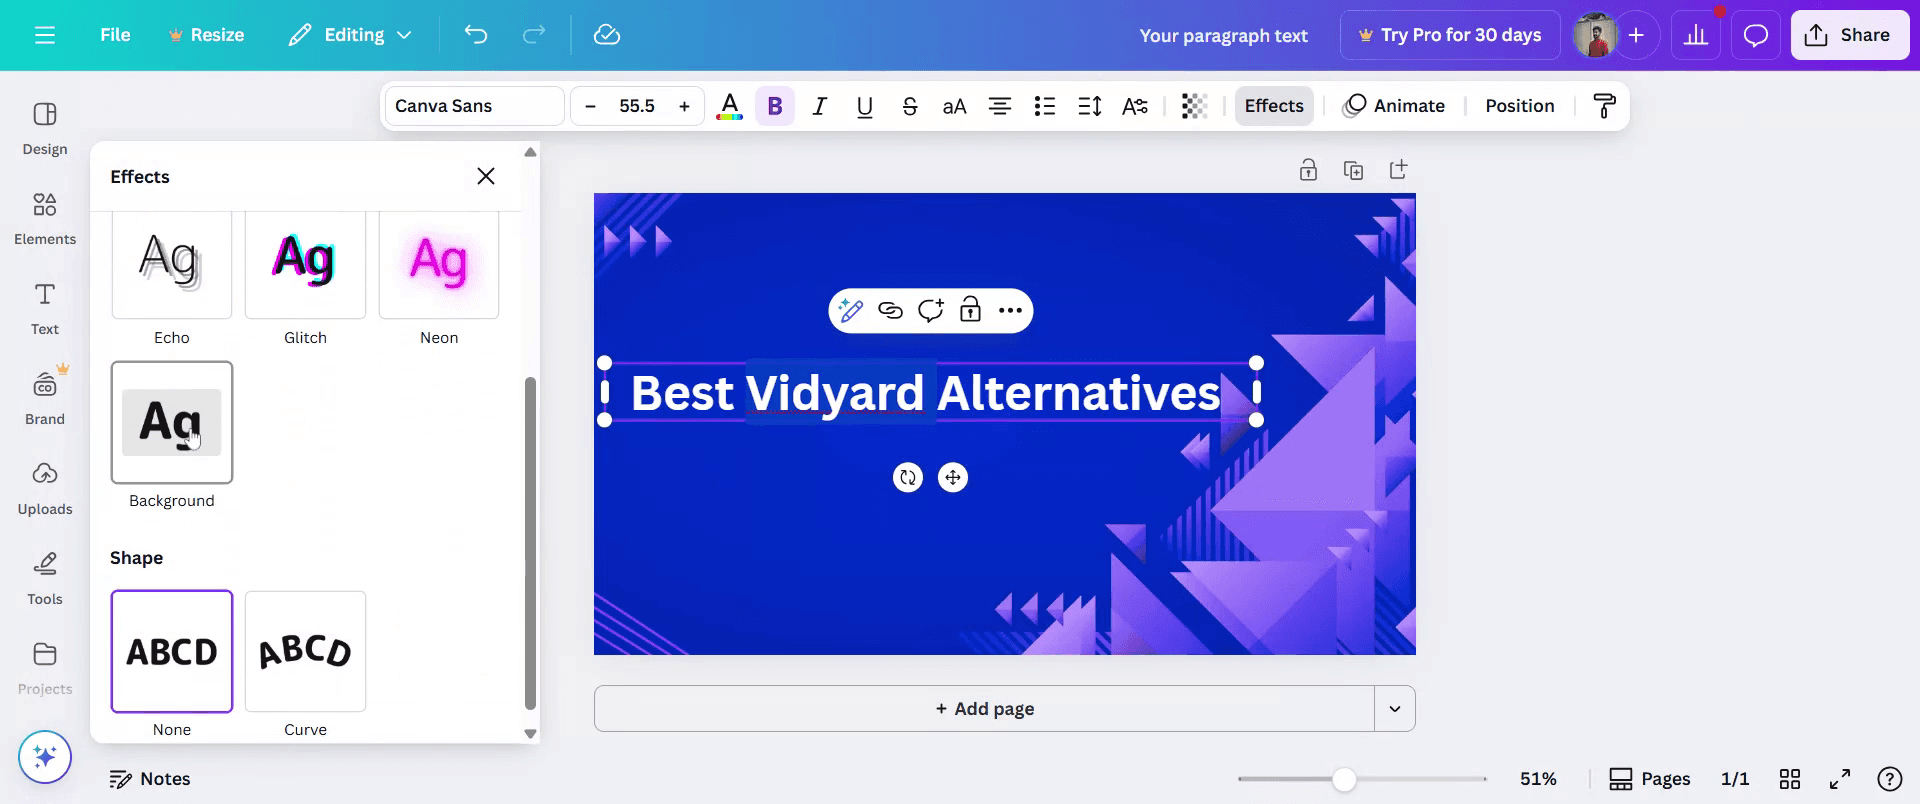
In the Effects panel, select the "Background" option to apply a background to your text.
Step 4
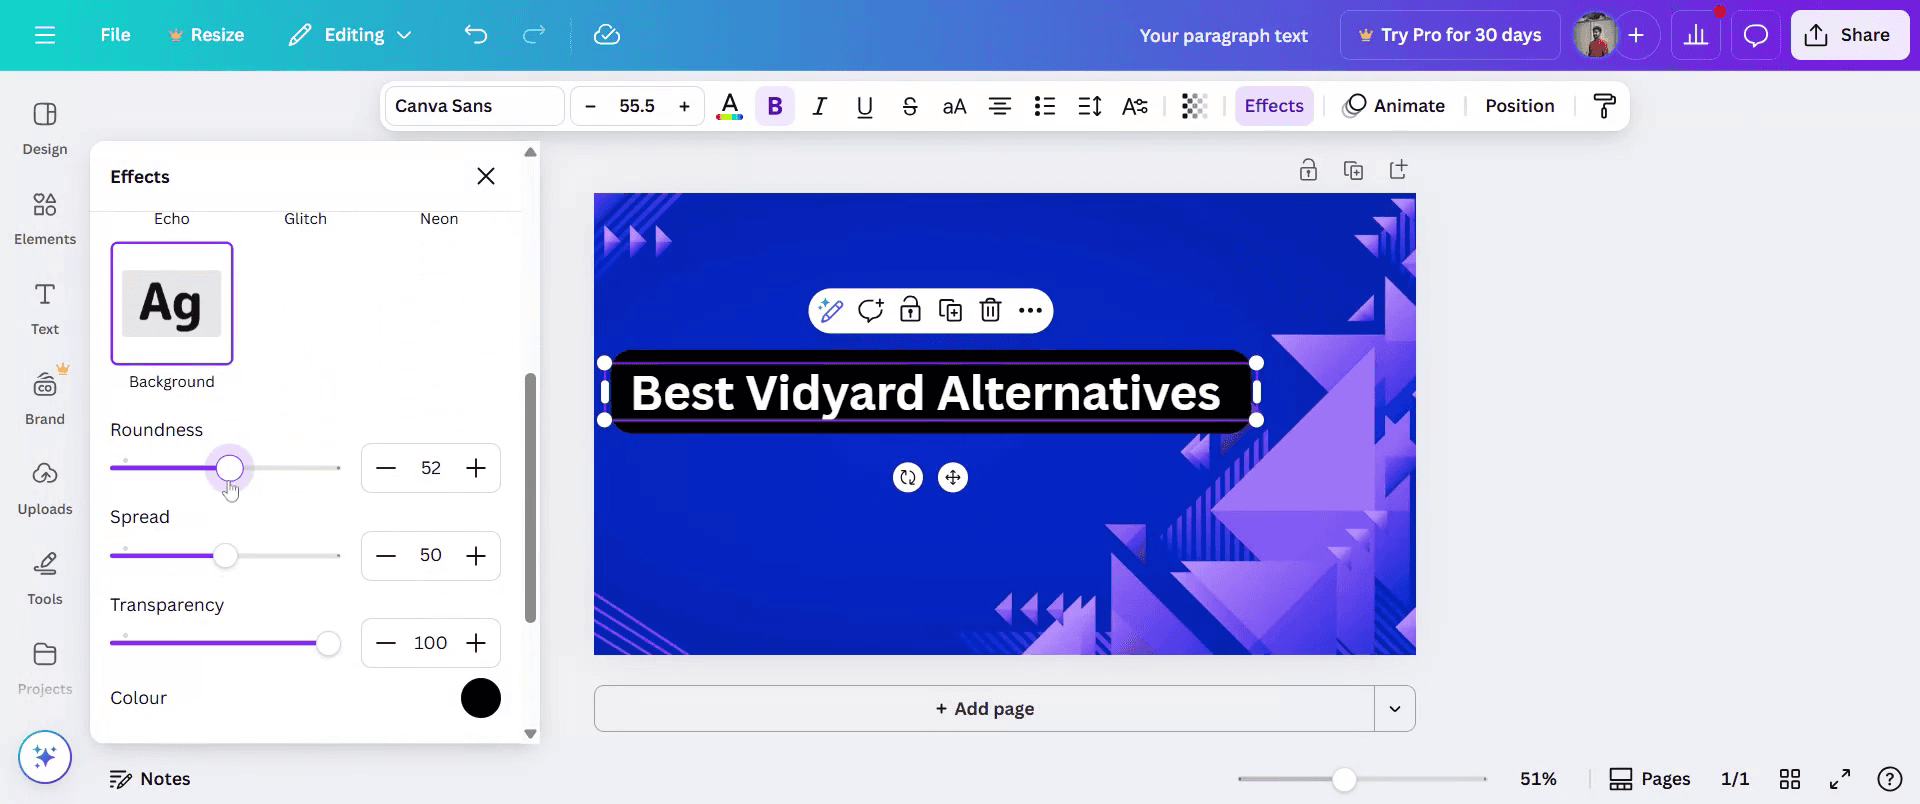
Adjust the background settings to your preference. You can modify the roundness, spread, and transparency for a personalized look.
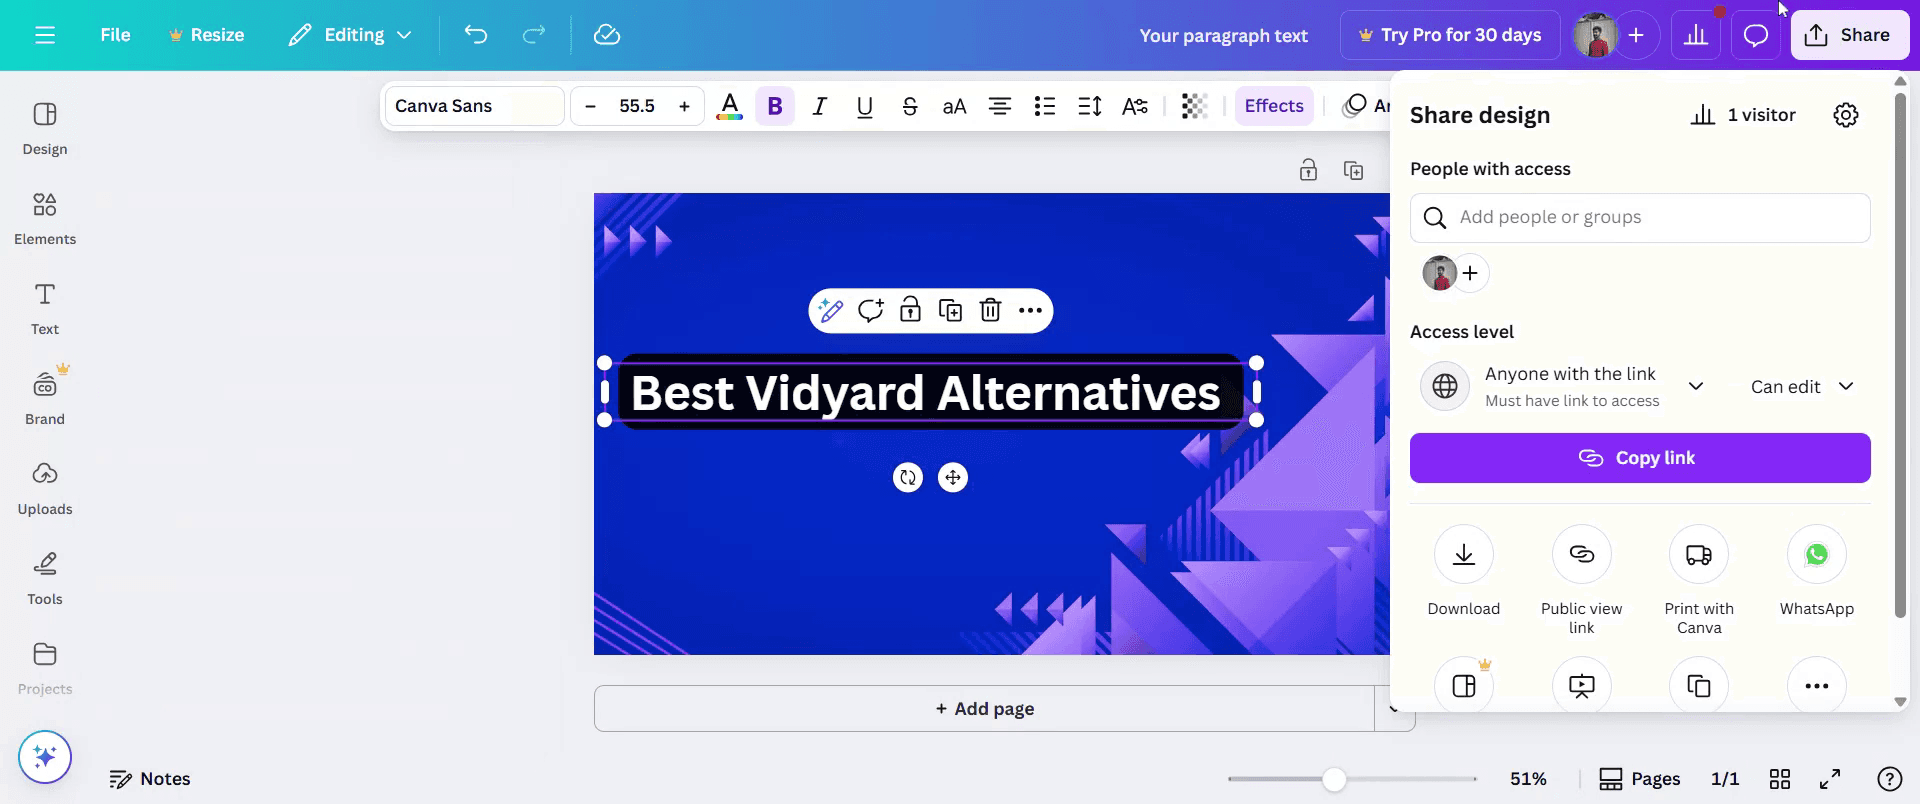
Step 5
Once satisfied with the appearance, click the "Share" button to distribute your design.
Step 6
Your text highlighting task is complete. Thank you for following along.
Pro Tips for Highlighting Text in Canva
Open Your Design in Canva
Log in to Canva and open the design where you want to highlight text.Select the Text Box or Text Area
Click on the specific text or text box that you want to apply a highlight effect to.Click on the Effects Button
From the top toolbar, click the “Effects” option to open the text styling panel.Choose the Background Effect
In the Effects panel, select the “Background” style under Text Effects to simulate a highlighted appearance.Adjust Background Settings
Customize the highlight by changing the background color, transparency, and roundness to suit your design.Resize or Reposition the Text if Needed
After applying the highlight effect, adjust the text size or placement to keep the layout visually balanced.
Common Pitfalls and How to Avoid Them
Highlight Not Visible Enough
If the highlight color is too light or matches the text, increase contrast by using bold colors or adjusting transparency.Using Shadow Instead of Background
Some users mistakenly apply the Shadow effect thinking it's a highlight. Be sure to choose “Background” under text effects.Effect Not Available on All Fonts
Certain text effects may not work with every font. Try switching to a different font if the background option is not visible.Highlight Appears Misaligned
If the background shape looks uneven, adjust the roundness and padding sliders for better alignment.Trying to Highlight Part of a Word
Canva applies text effects to the entire selected text box. To highlight specific words, split them into separate text boxes.
Common FAQs About Highlighting Text in Canva
How do I highlight text in Canva?
Select the text, click on Effects, and choose the Background effect.Can I change the highlight color?
Yes, you can customize the background color in the Effects panel.Can I highlight only one word in a sentence?
No, effects apply to the whole text box. To highlight individual words, use separate text boxes.Is the highlight feature available in the free version?
Yes, the Background effect is available for free users.Can I adjust the transparency of the highlight?
Yes, the transparency slider in the Effects panel lets you control the intensity of the highlight.How to screen record on mac?
To screen record on a Mac, you can use Trupeer AI. It allows you to capture the entire screen and provides AI capabilities such as adding AI avatars, add voiceover, add zoom in and out in the video. With trupeer’s AI video translation feature, you can translate the video into 30+ languages.How to add an AI avatar to screen recording?
To add an AI avatar to a screen recording, you'll need to use an AI screen recording tool. Trupeer AI is an AI screen recording tool, which helps you create videos with multiple avatars, also helps you in creating your own avatar for the video.How to screen record on windows?
To screen record on Windows, you can use the built-in Game Bar (Windows + G) or advanced AI tool like Trupeer AI for more advanced features such as AI avatars, voiceover, translation etc.How to add voiceover to video?
To add voiceover to videos, download trupeer ai chrome extension. Once signed up, upload your video with voice, choose the desired voiceover from trupeer and export your edited video.How do I Zoom in on a screen recording?
To zoom in during a screen recording, use the zoom effects in Trupeer AI which allows you to zoom in and out at specific moments, enhancing the visual impact of your video content.
Related Tutorials

