

How to Make a Gradient in Canva
Learn how to add gradient backgrounds or overlays in Canva using built-in elements and simple design tricks—perfect for professional, eye-catching designs.
In this document, you will learn how to create a gradient in Canva. We will walk you through the process of selecting your background, adding new colors, and sharing your design.
These steps will help you create visually appealing designs with gradient effects in Canva.
Canva makes it easy to add beautiful gradients to your designs, whether you’re working with backgrounds, shapes, or even text. You can use ready-made gradient graphics or create custom gradients right inside the editor.
Method 1: Using Pre-Designed Gradient Elements
1. Open your design
Start with a blank canvas or open an existing project.
2. Go to the “Elements” tab
Click “Elements” on the left panel, then type “gradient” in the search bar.
3. Choose a gradient
Under “Graphics,” you’ll see various gradient options—linear, radial, colorful, subtle, etc.
4. Add and adjust
Click to add it to your design. Resize, rotate, or change colors (if editable) using the toolbar.
Method 2: Creating a Custom Gradient (for Canva Pro Users)
1. Select the element
Click on a shape, background, or text box you want to apply the gradient to.
2. Open the color picker
Click the color tile in the top toolbar.
3. Choose “Gradient” tab
If available, switch to the Gradient tab.
4. Add and adjust color stops
Click “+” to add color stops (up to 10).
Click each stop to assign a color.
Drag to reposition stops or adjust angles.
5. Pick a gradient type
Choose from Linear, Radial, or other styles depending on what’s available.
Tips for Better Gradient Designs
Play with contrast: Combine dark and light colors for depth.
Use brand colors: Save custom gradients to your Brand Kit for consistency.
Apply across elements: Gradients aren’t just for backgrounds—you can use them on text, icons, and overlays too.
Step-by-Step-Guide: How to Make a Gradient in Canva
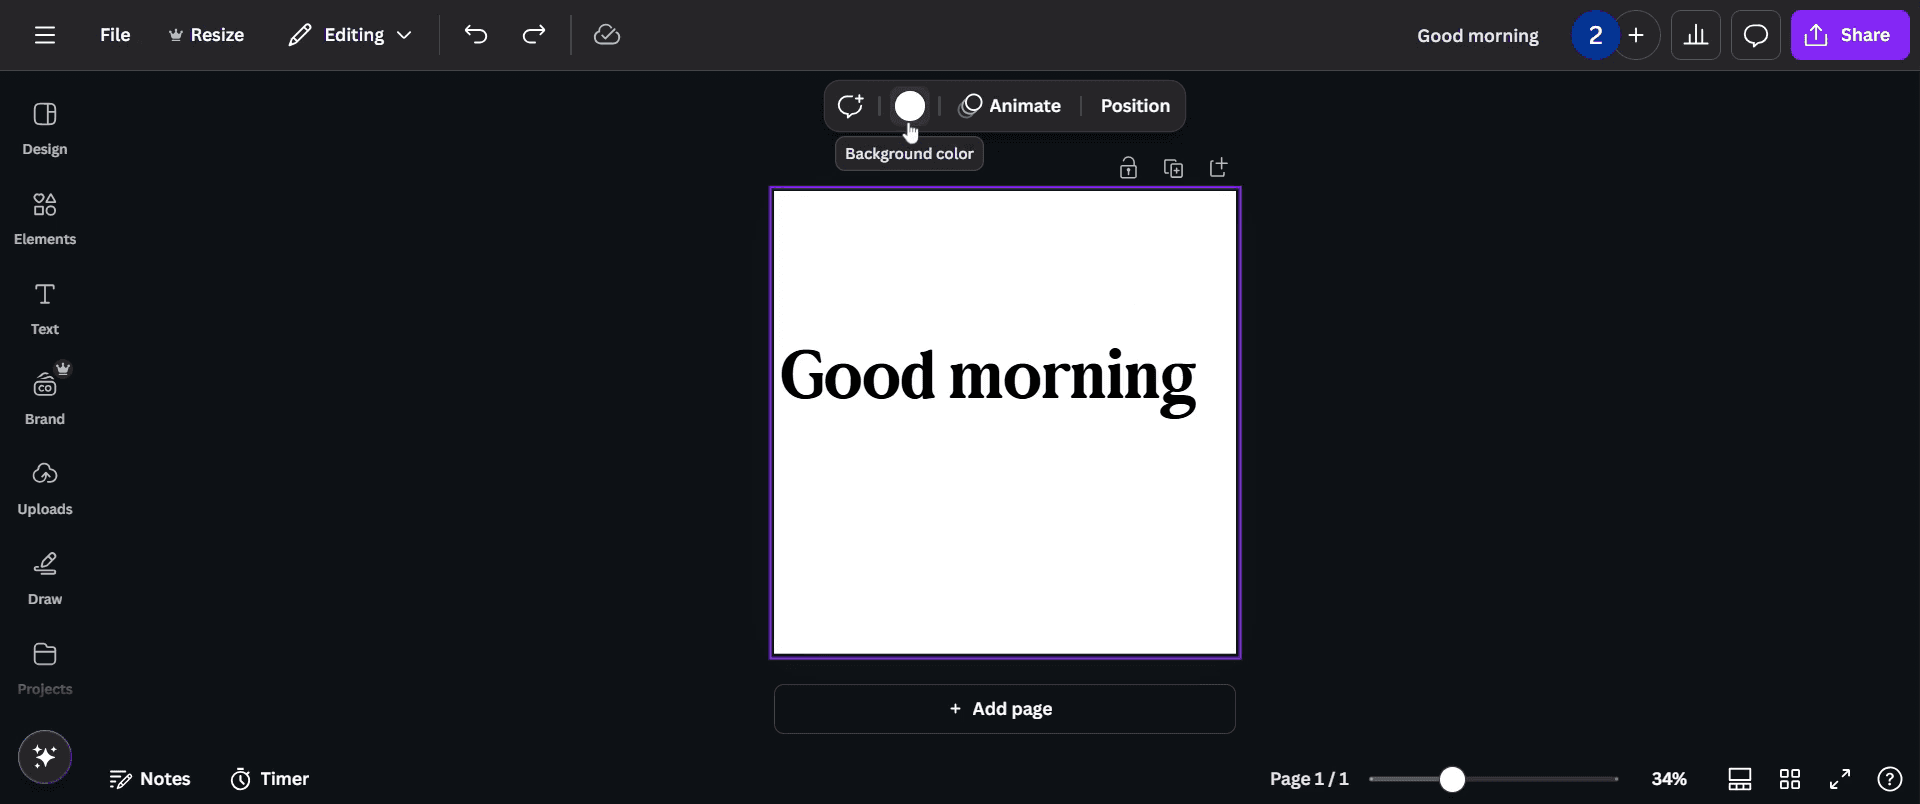
Step 1
Click on the background to highlight it.

Step 2
Go and click on the "Background Color" option.
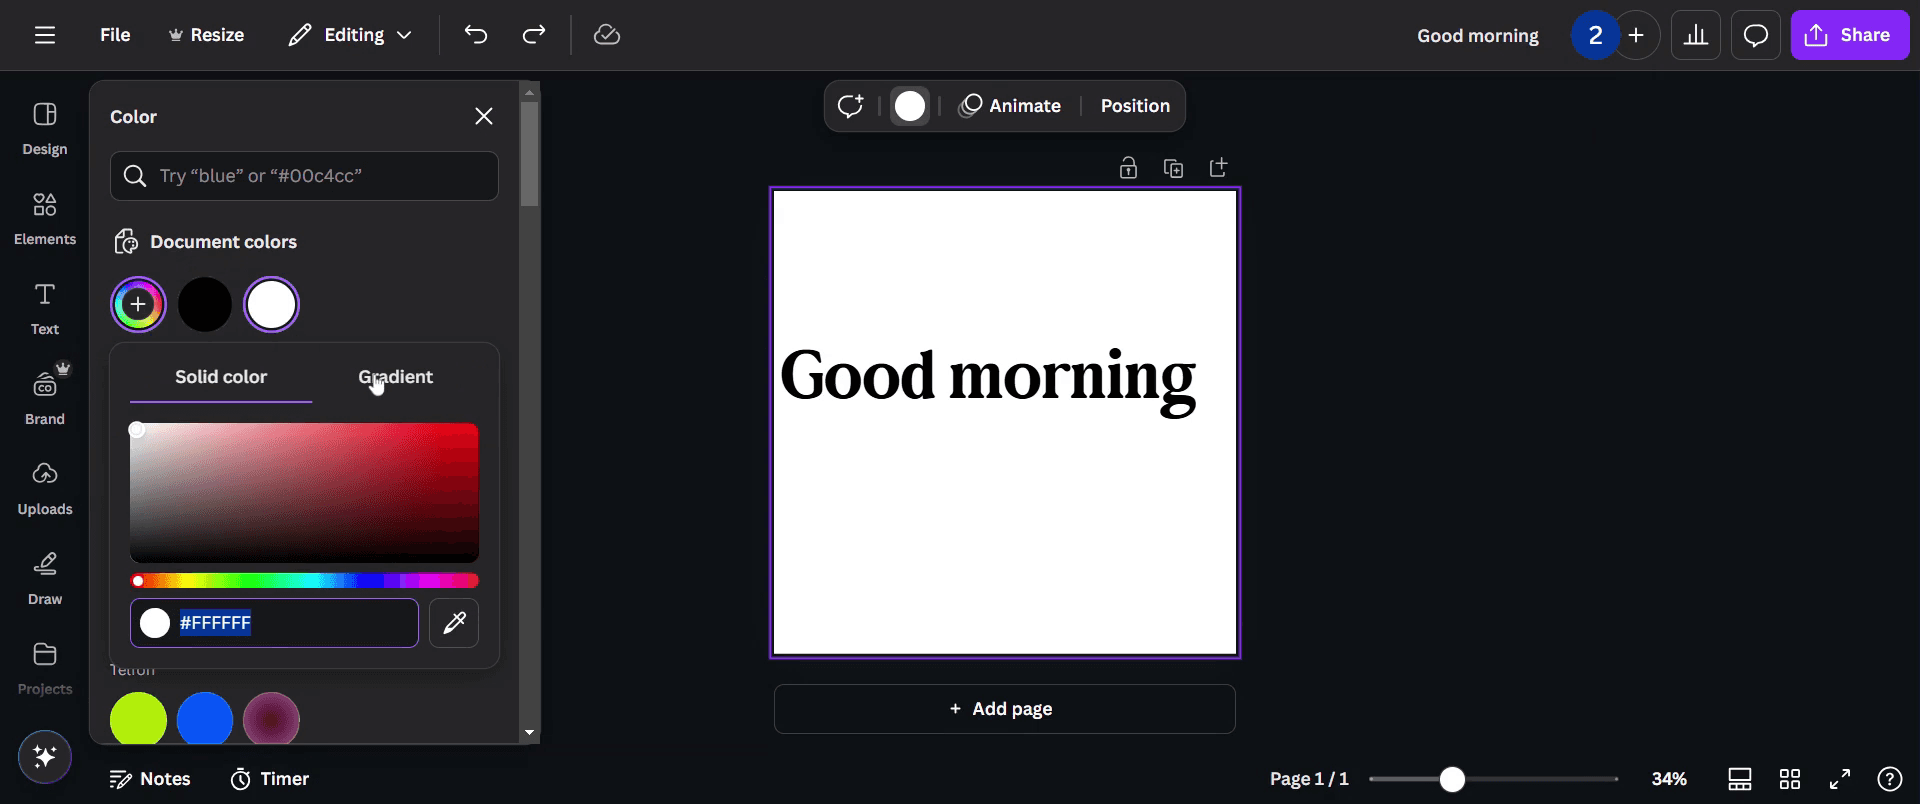
Step 3
Choose the "Add New Colors" option from the document colors section.

Step 4
Select the "Gradient" section.
Step 5
Here, you can choose and add a new gradient color.
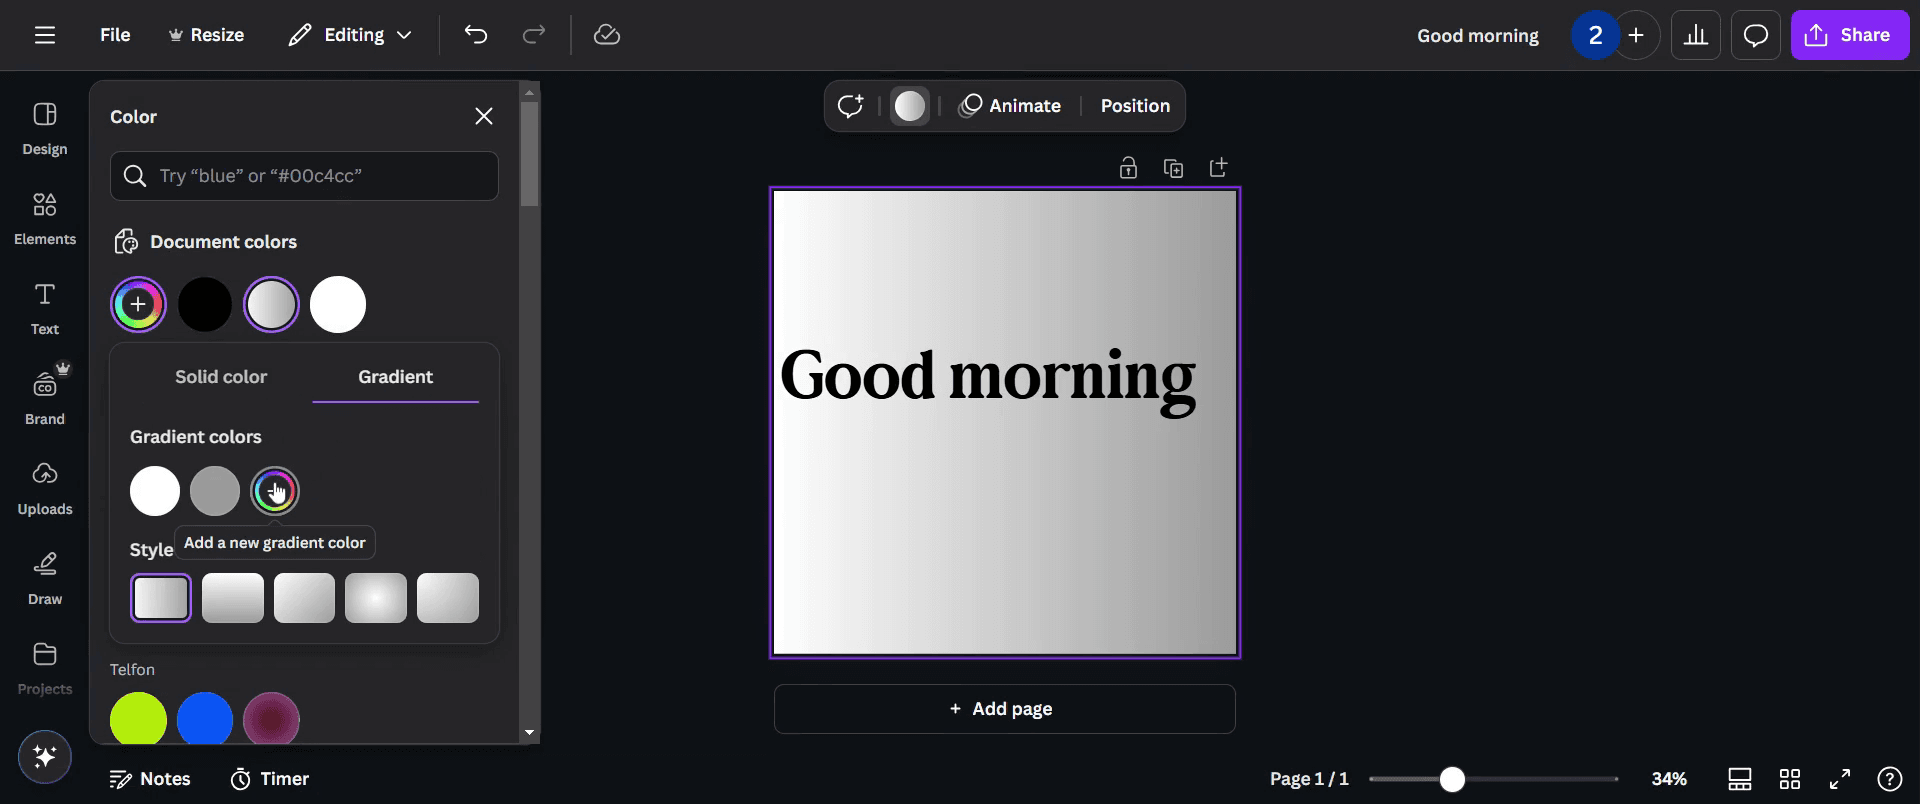
Step 6
Customize your gradient by selecting colors according to your preference.

Step 7
Once you are satisfied with the colors and design, click the "Share" button.

Pro-tips for making a gradient in Canva
Use the Gradient element from the Elements tab to quickly add a smooth transition effect to your design
Adjust transparency levels to blend the gradient seamlessly with the background or other design elements
Experiment with different gradient colors to create eye-catching visual effects that enhance your design
Common pitfalls & how to avoid them while making a gradient in Canva
Choosing clashing colors can make the gradient look unappealing, use complementary colors for a smooth transition
Not adjusting transparency may result in harsh edges, use the transparency tool to soften the gradient effect
Overusing gradients can make designs look cluttered, apply them strategically to maintain a clean professional look
Common FAQs for making a gradient in Canva
1. Can I create a custom gradient in Canva?
Currently, Canva does not support fully customizable gradients, but you can layer gradient elements and adjust transparency for a similar effect
2. How do I change the colors of a gradient in Canva?
Select a gradient element, click on the color options at the top, and choose new colors to customize the look
3. Can I apply a gradient to text in Canva?
Canva does not directly support gradient text, but you can create a gradient background and use a clipping mask effect to achieve the look
4. How do I make a gradient background in Canva?
Simply select a gradient from the Elements tab, resize it to cover the entire canvas, and adjust the colors to fit your design,
5. How to screen record on mac?
To screen record on a Mac, you can use Trupeer AI. It allows you to capture the entire screen and provides AI capabilities such as adding AI avatars, add voiceover, add zoom in and out in the video. With trupeer’s AI video translation feature, you can translate the video into 30+ languages.
6. How to add an AI avatar to screen recording?|
To add an AI avatar to a screen recording, you'll need to use an AI screen recording tool. Trupeer AI is an AI screen recording tool, which helps you create videos with multiple avatars, also helps you in creating your own avatar for the video.
7. How to screen record on windows?
To screen record on Windows, you can use the built-in Game Bar (Windows + G) or advanced AI tool like Trupeer AI for more advanced features such as AI avatars, voiceover, translation etc.
8. How to add voiceover to video?
To add voiceover to videos, download trupeer ai chrome extension. Once signed up, upload your video with voice, choose the desired voiceover from trupeer and export your edited video.
9. How do I Zoom in on a screen recording?
To zoom in during a screen recording, use the zoom effects in Trupeer AI which allows you to zoom in and out at specific moments, enhancing the visual impact of your video content.
People also ask
Related Tutorials

