
How To Remove Backgrounds In Canva – Easy Editing Guide
Learn how to remove image backgrounds in Canva using the Background Remover tool. Perfect for creating clean, professional-looking designs in just a few clicks.
This guide provides a straightforward process for removing backaground from images using Canva, allowing you to create a standing effect.
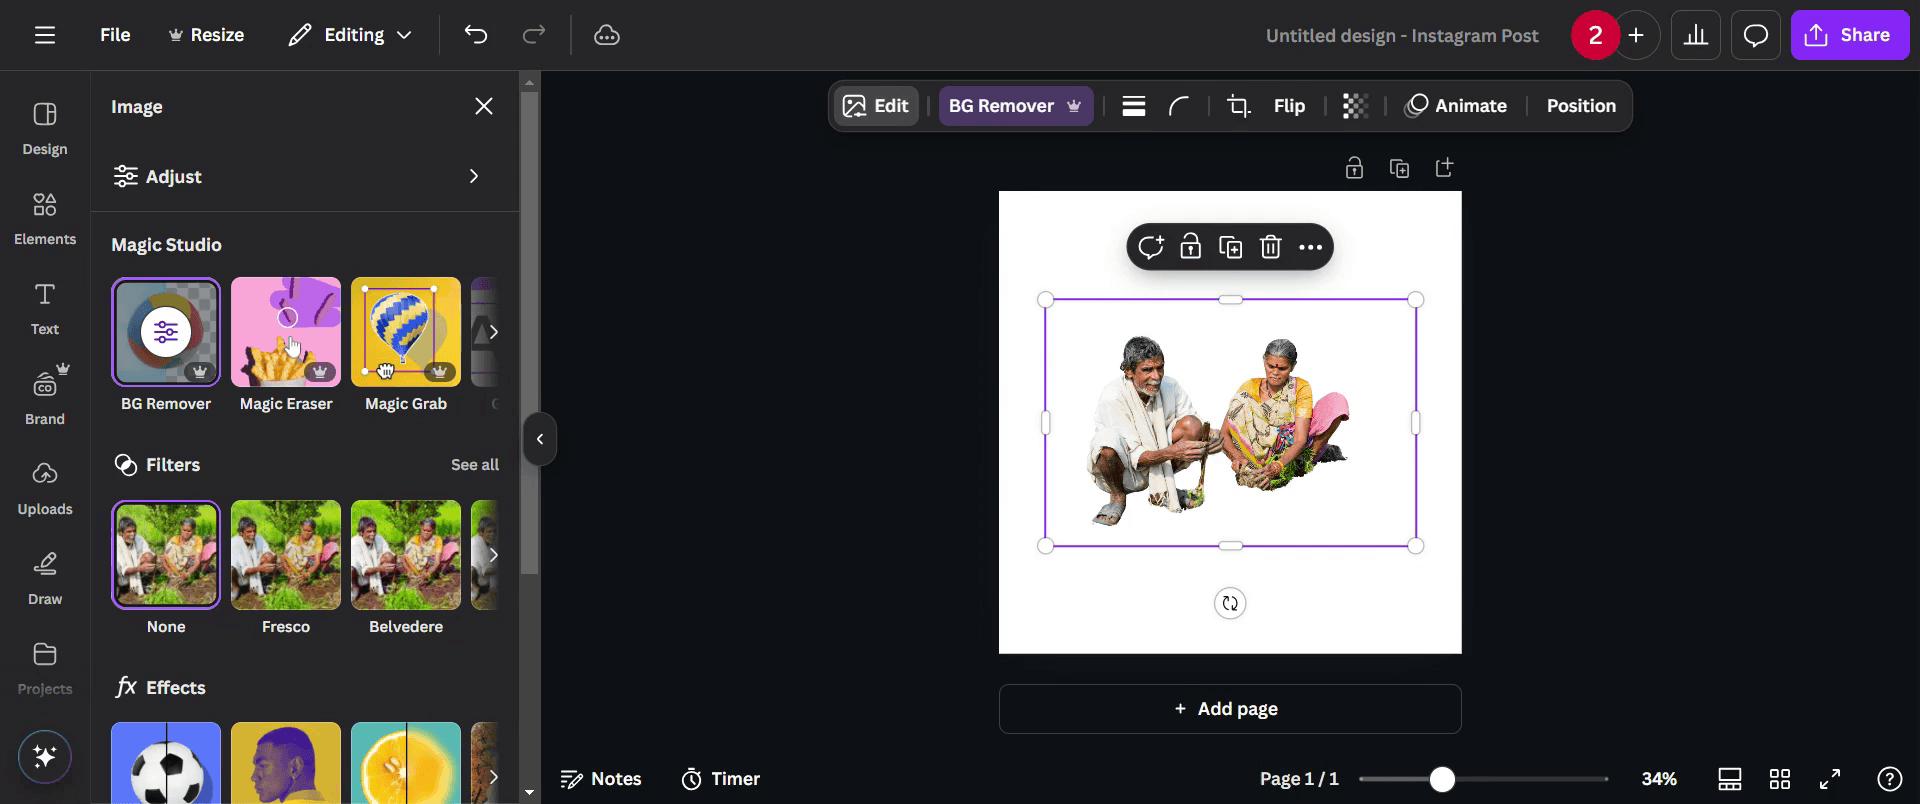
If you want to remove the background from an image in Canva, the easiest way is to use the BG Remover tool found under the Edit Image section. It automatically erases the background and leaves you with a clean, transparent image.
Here’s how to do it:
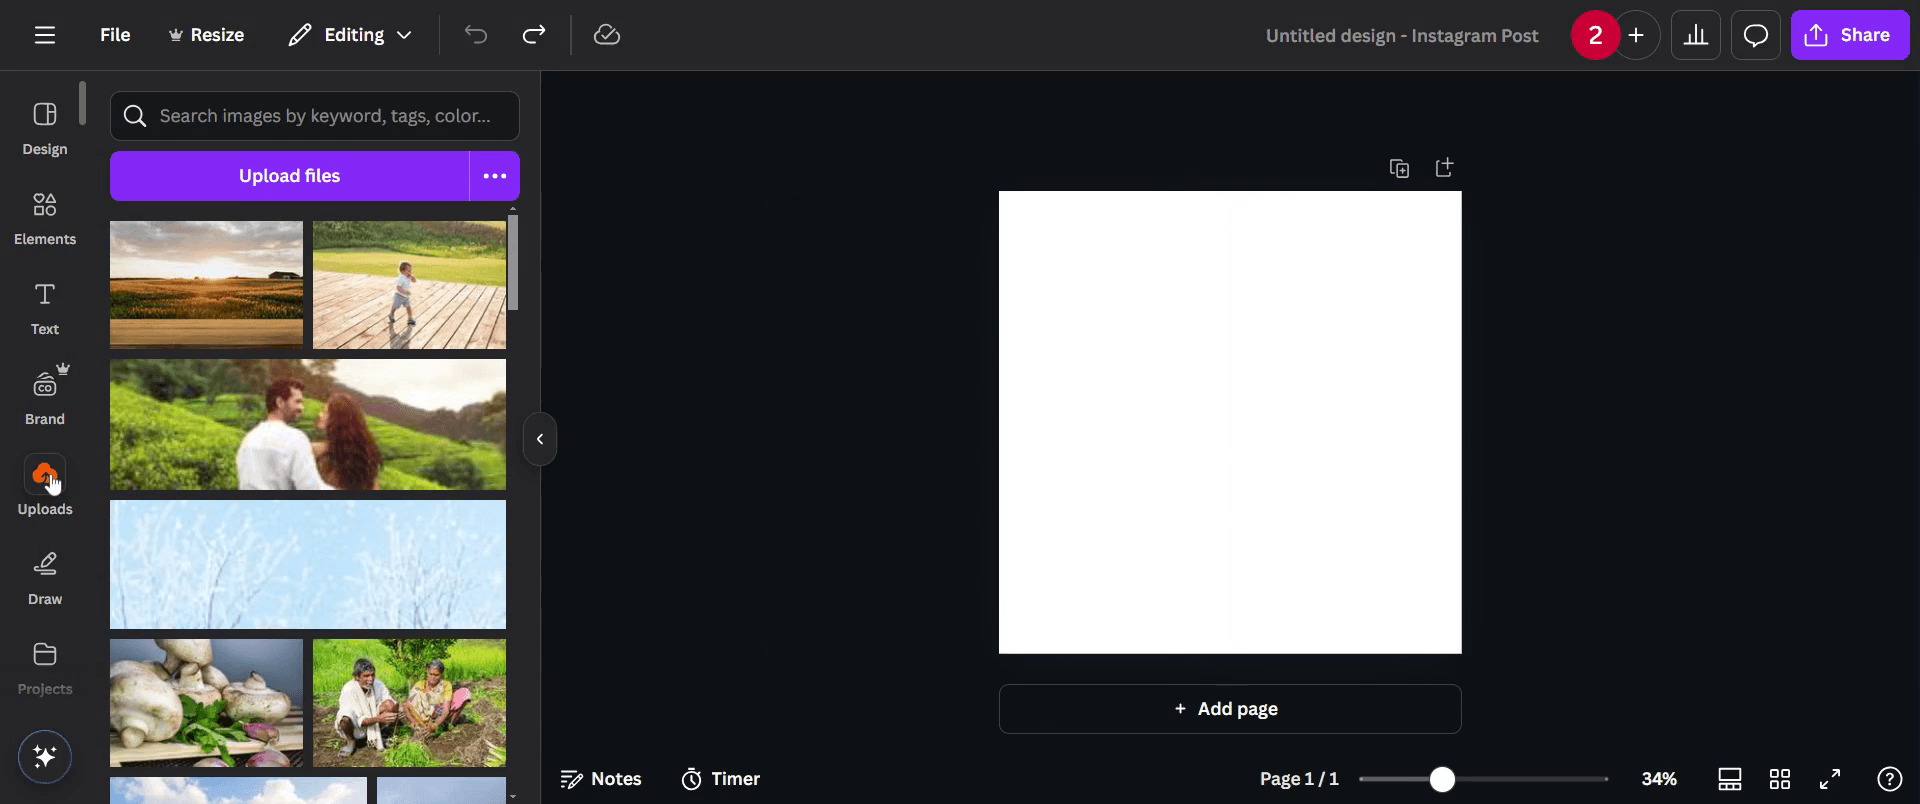
1. Upload your image:
First, upload the image you want to edit to your Canva design.
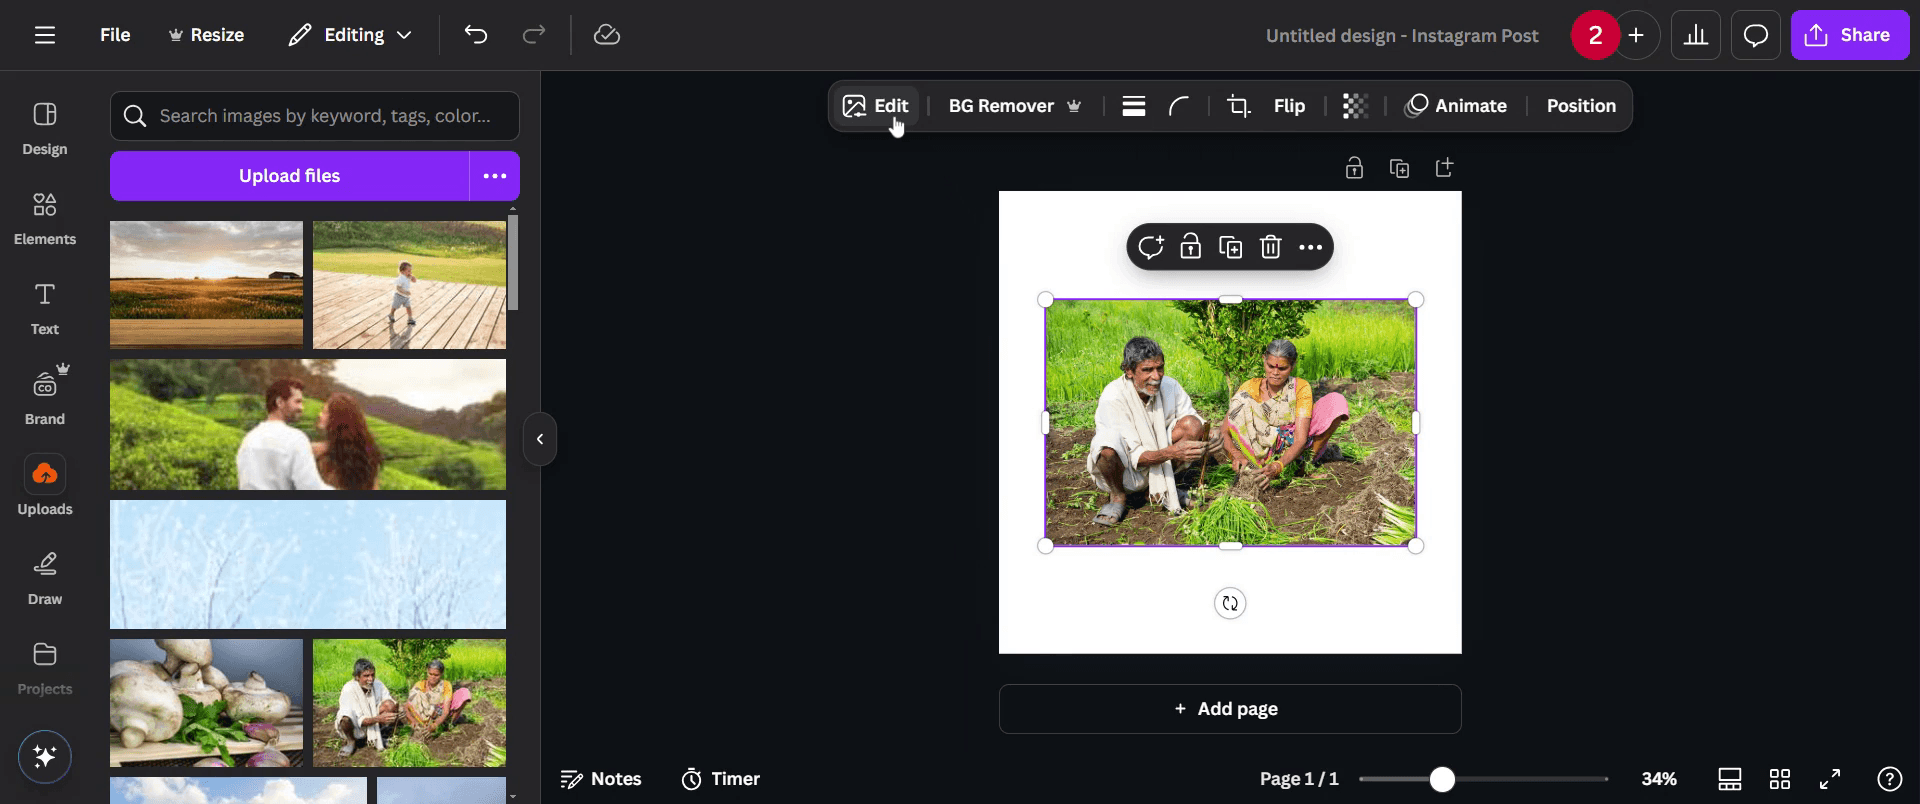
2. Select and edit the image:
Click on the image to select it, then hit Edit Image in the top toolbar.
3. Use BG Remover:
Scroll down to the Tools section and click on BG Remover. Canva will instantly remove the background for you.
4. Fine-tune (optional):
Need more control? You can use the Erase and Restore brushes to clean up any parts that were missed or over-erased. Just click Configure to access them.
5. Apply changes:
Once you’re happy with how it looks, click Apply to save your edits.
Step-by-Step Guide: How To Remove Backgrounds In Canva
Step 1
Begin by navigating to the upload section in Canva. Click on 'Uploads' option.
Step 2
Click on it and select the image from which you want to remove the background.

Step 3
After uploading, click on the image to highlight it.

Step 4
Proceed to the edit options, and click on 'Edit' option.
Step 5
locate the 'BG Remover' tool and Click on it.
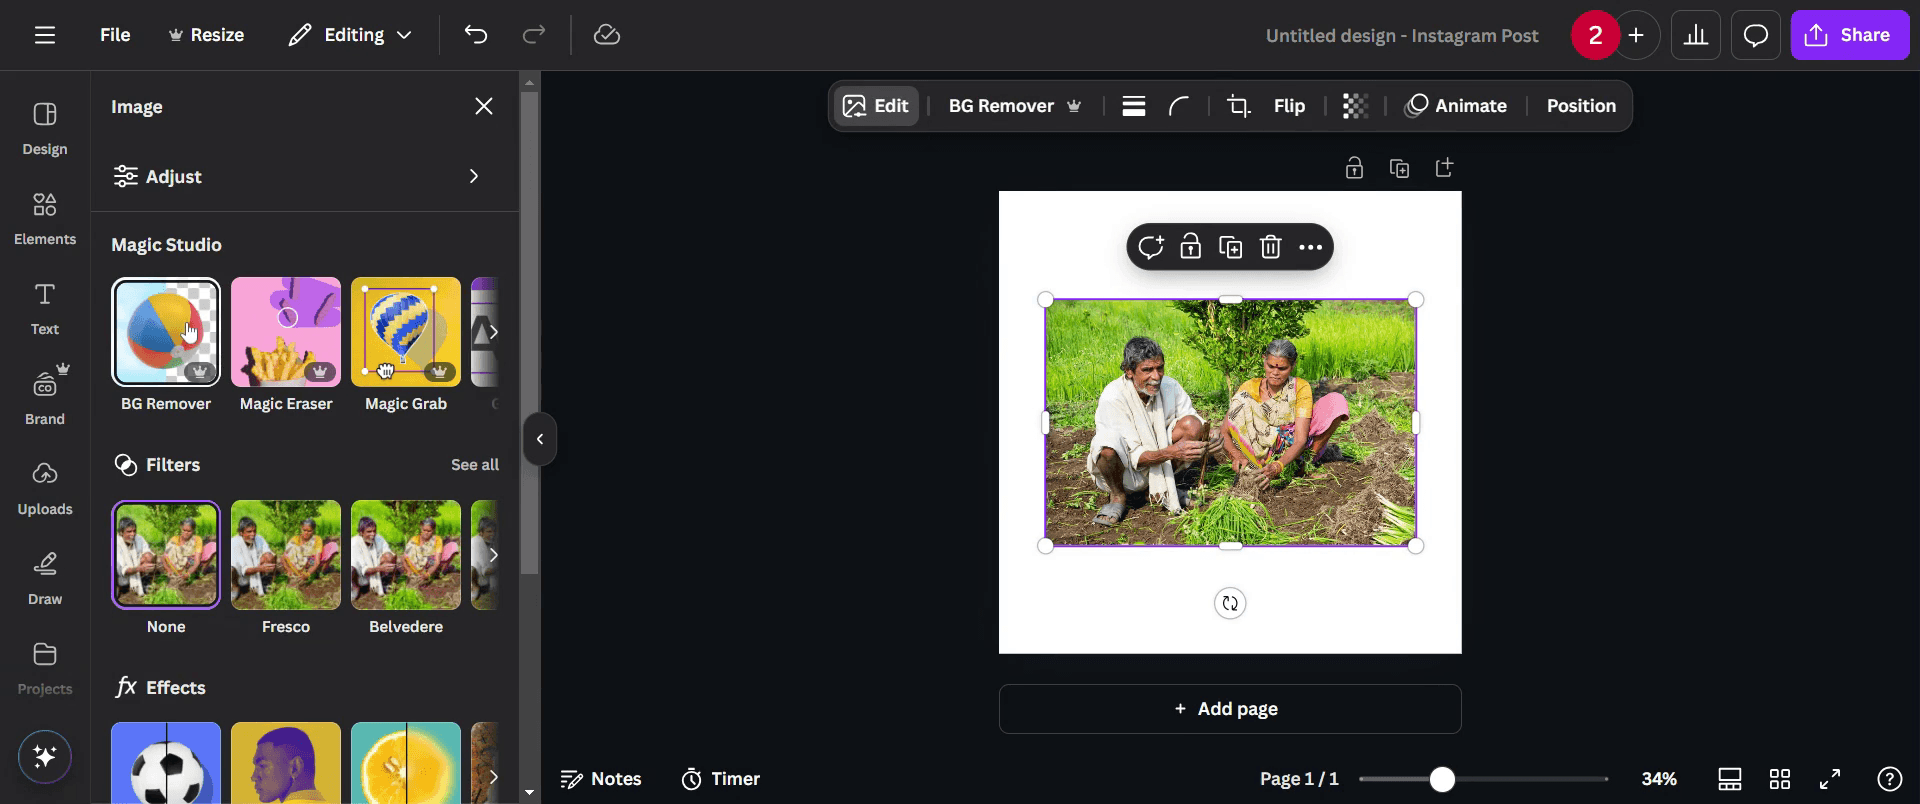
Step 6
The background of your image will be automatically removed.
Step 7
Once you are satisfied with the changes, click on the 'share' button to distribute your completed work.

Pro-tips for removing backgrounds in Canva for stunning graphics
Use Canva Pro’s Background Remover tool for a quick and precise cutout of your subject
Adjust the brush size in the Background Remover tool to refine edges and remove unwanted areas manually
Experiment with different background colors or transparent backgrounds to make your design stand out
Common pitfalls & how to avoid them while removing backgrounds in Canva
Using low-quality images can result in rough edges after background removal, always upload high-resolution images
Not refining the cutout manually may leave unwanted artifacts, use the erase and restore brush for a cleaner look
Forgetting to download the image with a transparent background may result in unwanted white spaces, always select PNG with transparency
Common FAQs for removing backgrounds in Canva for stunning graphics
Is the background remover tool available in the free version of Canva?
No, the Background Remover tool is only available for Canva Pro usersCan I manually refine the background removal in Canva?
Yes, you can use the erase and restore brushes to fine-tune the cutout after using the Background Remover toolWhat file format should I use to save an image with a transparent background?
Download your image as a PNG and check the Transparent Background option before savingWhy is my background remover not working in Canva?
Ensure you have an active Canva Pro subscription and check your internet connection, as the tool requires online processingHow to screen record on mac?
To screen record on a Mac, you can use Trupeer AI. It allows you to capture the entire screen and provides AI capabilities such as adding AI avatars, add voiceover, add zoom in and out in the video. With trupeer’s AI video translation feature, you can translate the video into 30+ languages.How to add an AI avatar to screen recording?
To add an AI avatar to a screen recording, you'll need to use an AI screen recording tool. Trupeer AI is an AI screen recording tool, which helps you create videos with multiple avatars, also helps you in creating your own avatar for the video.How to screen record on windows?
To screen record on Windows, you can use the built-in Game Bar (Windows + G) or advanced AI tool like Trupeer AI for more advanced features such as AI avatars, voiceover, translation etc.How to add voiceover to video?
To add voiceover to videos, download trupeer ai chrome extension. Once signed up, upload your video with voice, choose the desired voiceover from trupeer and export your edited video.How do I Zoom in on a screen recording?
To zoom in during a screen recording, use the zoom effects in Trupeer AI which allows you to zoom in and out at specific moments, enhancing the visual impact of your video content
Suggested Reads
Technical Documentation Generator
How to Add Rupee Symbol in Google Sheets
How to Change Currency Format in Google Sheets
How to Add Bullet Points in Google Sheets
How To Change Ownership Of A Google Sheet
How To Calculate Percentage In Google Sheets
Related Tutorials

