
How to Adjust Opacity in Canva – Easy Transparency Guide
Learn how to adjust the opacity of images, text, and elements in Canva. Make designs subtle or layered with this simple step-by-step tutorial.
This guide provides a straightforward method for changing opacity in Canva.
By following these steps, you can easily modify the opacity of your selected element to achieve the desired visual effect.
Opacity in Canva controls how transparent an element appears. Lower opacity means more transparency, while 100% is fully visible.
Step-by-Step Guide:
1. Select the Element
Click on the image, text box, shape, or other element you want to make transparent.
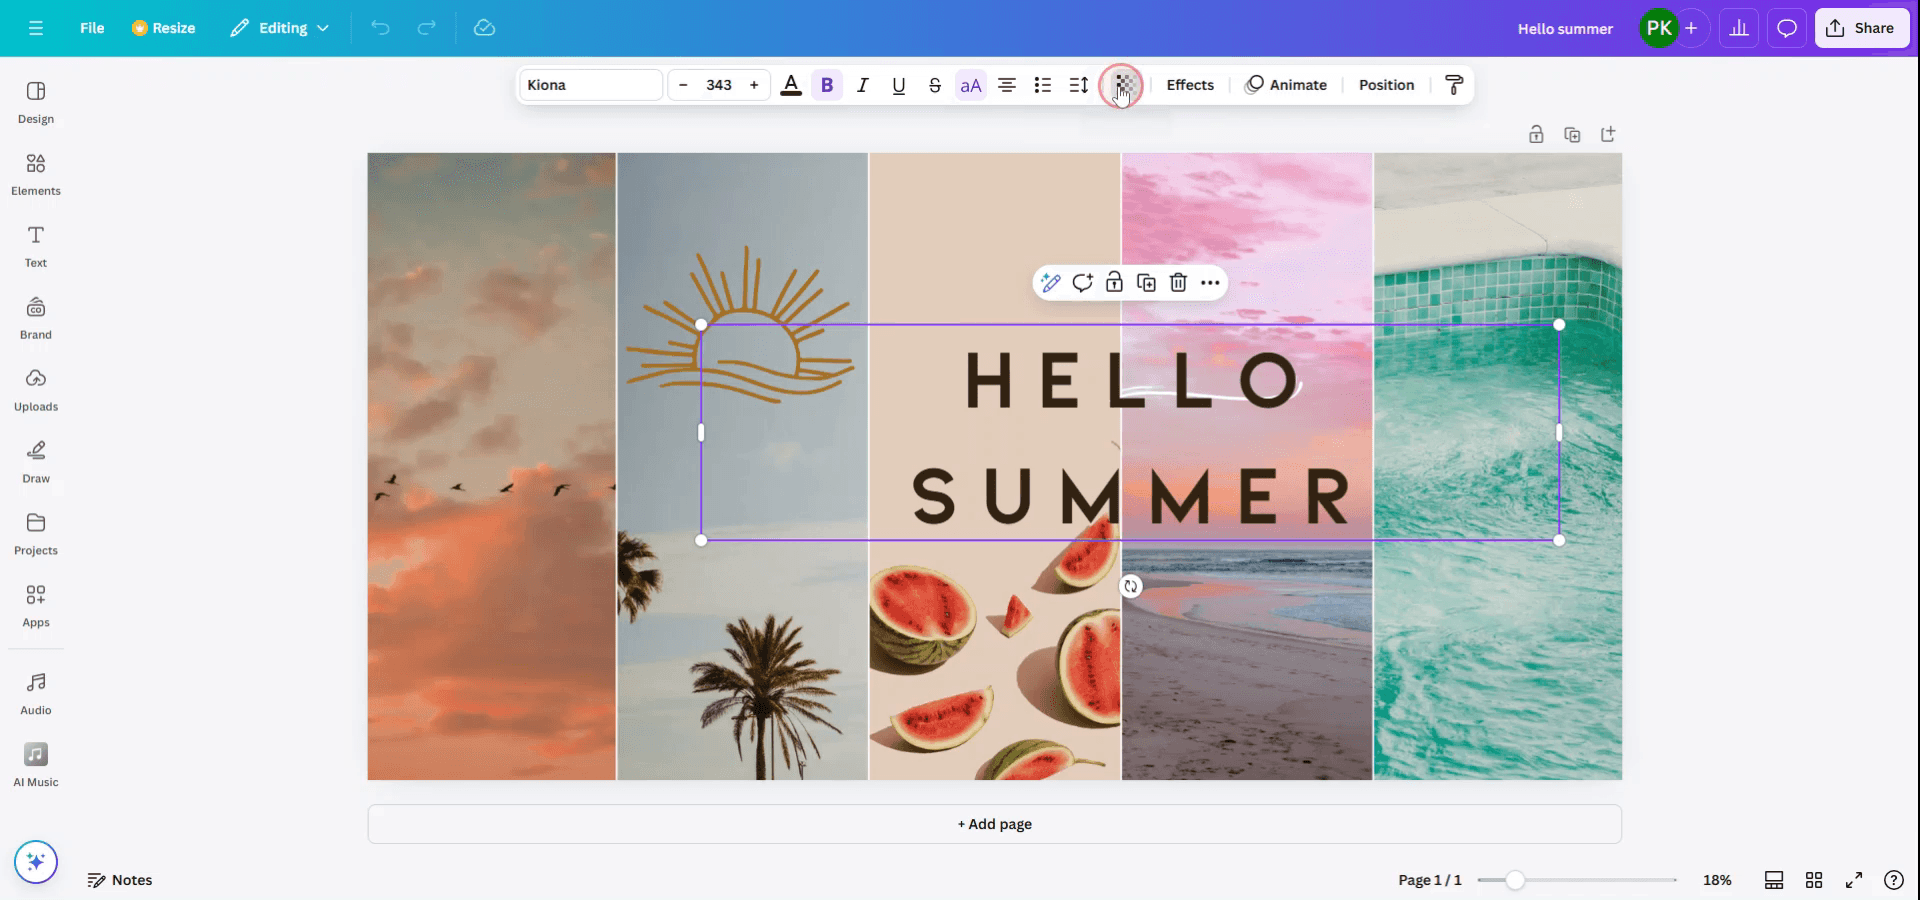
2. Access the Transparency Option
Look for the checkerboard icon (Transparency tool) in the top-right toolbar of the Canva editor.
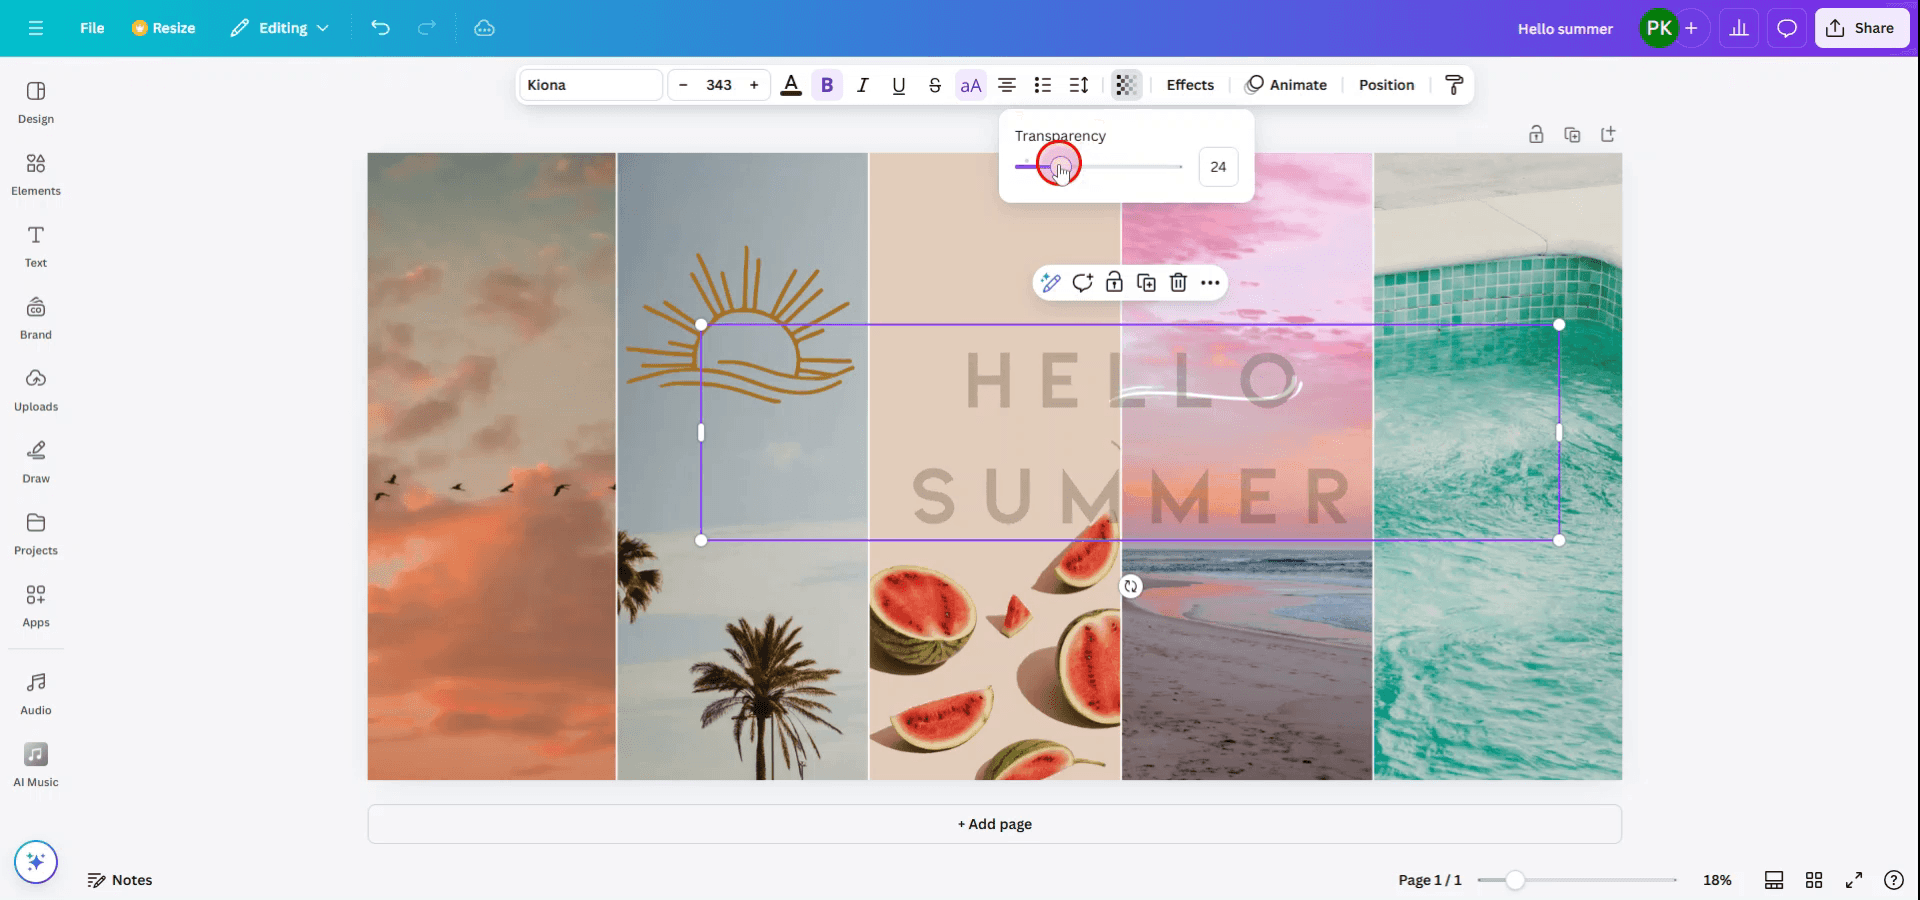
3. Adjust the Transparency Slider
Drag the slider left to decrease opacity (more transparent) or right to increase it (less transparent).
You can also type a specific number (from 0 to 100) into the input field.
4. Preview the Changes
As you move the slider, you’ll see the element become more or less transparent in real time.
5. Save Your Design
Once you’re happy with the transparency, click "Share" or "Download" to export your design.
Step-by-Step Guide: How to adjust opacity in Canva
Step 1
To change the opacity of an element in Canva, begin by selecting the specific element whose transparency you wish to modify.

Step 2
Once the element is selected, a toolbar will appear at the top of the screen. Locate and select the 'Transparency' option on this toolbar. A slider will then appear, allowing you to adjust the element's transparency to your preference.
Pro tips for changing opacity in Canva
Select the Element You Want to Adjust:
Click on the image, text box, shape, or other element you want to change the opacity for.Use the Transparency Slider:
Once your element is selected, click the "Transparency" button in the toolbar at the top. This will bring up a slider that allows you to adjust the opacity of the selected element.Adjust the Slider:
Move the slider left or right to decrease or increase opacity. Moving the slider to 0% will make the element fully transparent, while 100% keeps it fully opaque.Apply Opacity to Layers:
If you have overlapping elements, you can change the opacity of individual layers for a blended effect. This is especially useful for background images or color overlays.Use Opacity for Color and Gradient Effects:
For text or shapes, you can adjust opacity to create transparent effects on colors or gradients, allowing you to blend them seamlessly with the background.
Common pitfalls and how to avoid them for changing opacity in Canva
Opacity Not Visible After Adjusting:
Ensure the element you're adjusting has a visible color or image behind it. If it's a fully transparent image, it might appear invisible.Accidentally Changing Other Elements' Opacity:
Make sure you’ve selected the correct element before adjusting the opacity. If you change the wrong layer, press "Undo" or deselect the element.Opacity Setting Not Reflecting After Download:
Ensure you're downloading in the correct format (like PNG for transparent images) so that the opacity effect is visible in the final file.Opacity Impacting Text Readability:
Be cautious when applying opacity to text, as it can reduce readability. Consider adjusting opacity subtly or adding contrasting backgrounds behind the text.Not Using Layers Properly:
Use the "Position" feature to layer elements effectively. Adjusting opacity on background images and layering transparent text or shapes can create a visually appealing design.
Common FAQs for changing opacity in Canva
How do I change the opacity of an image or text in Canva?
Select the element, click the "Transparency" button in the toolbar, and adjust the slider to change the opacity.Can I adjust opacity for multiple elements at once?
You will need to adjust each element’s opacity individually. Grouping elements may help, but opacity adjustments must still be made one by one.Why is the opacity not visible in my downloaded file?
Make sure you're downloading your file in a format that supports transparency, such as PNG. PDF formats may not retain transparency.Can I make a color semi-transparent?
Yes, you can change the opacity of any color or gradient applied to shapes or backgrounds to achieve a semi-transparent effect.Can I apply opacity to a whole design or page?
You cannot apply opacity to the entire design at once. You will need to adjust each element's opacity individually.How to screen record on mac?
To screen record on a Mac, you can use Trupeer AI. It allows you to capture the entire screen and provides AI capabilities such as adding AI avatars, add voiceover, add zoom in and out in the video. With trupeer’s AI video translation feature, you can translate the video into 30+ languages.How to add an AI avatar to screen recording?
To add an AI avatar to a screen recording, you'll need to use an AI screen recording tool. Trupeer AI is an AI screen recording tool, which helps you create videos with multiple avatars, also helps you in creating your own avatar for the video.How to screen record on windows?
To screen record on Windows, you can use the built-in Game Bar (Windows + G) or advanced AI tool like Trupeer AI for more advanced features such as AI avatars, voiceover, translation etc.How to add voiceover to video?
To add voiceover to videos, download trupeer ai chrome extension. Once signed up, upload your video with voice, choose the desired voiceover from trupeer and export your edited video.How do I Zoom in on a screen recording?
To zoom in during a screen recording, use the zoom effects in Trupeer AI which allows you to zoom in and out at specific moments, enhancing the visual impact of your video content.
Suggested Reads
Technical Documentation Generator
How to Create a Journal in Canva
How to Create Pattern out of text in Canva
Related Tutorials

