Как использовать фреймы в Canva
Узнайте, как использовать фреймы в Canva, чтобы креативно показывать изображения, видео и дизайны. Пошаговое руководство по добавлению и настройке фреймов для эффектных макетов.
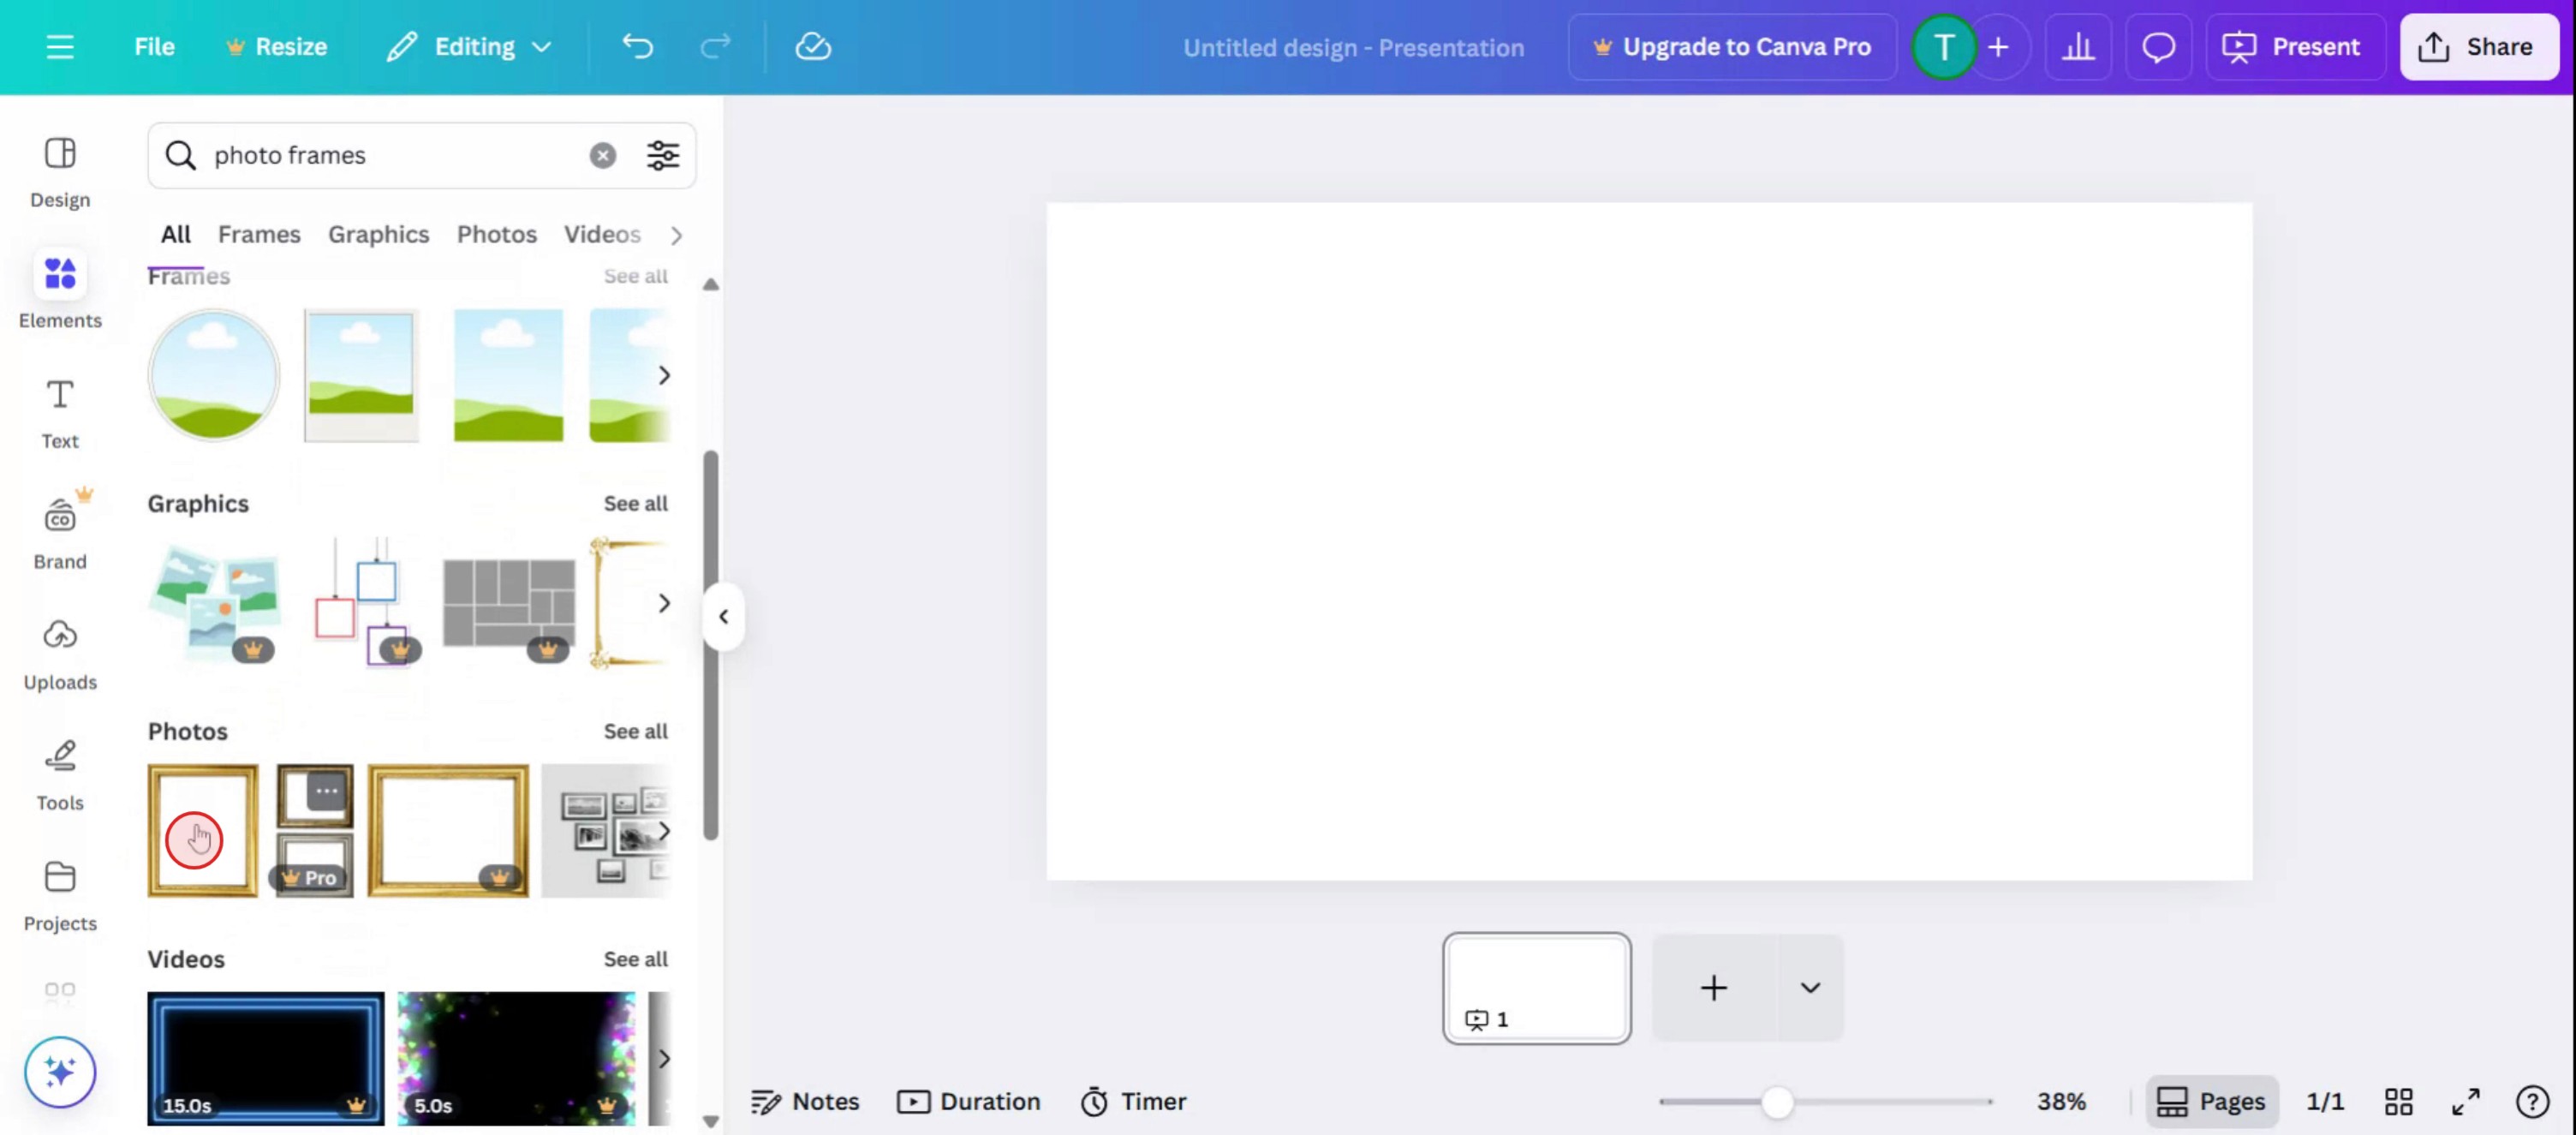
To use frames in Canva, navigate to the "Elements" tab, search for "Frames", and select your desired shape. You can then drag and drop an image or video onto the frame to fill it, or upload your own media and place it inside.
Here's a more detailed breakdown:
1. Accessing Frames:
Open your design in Canva. Go to the "Elements" tab on the left sidebar. Search for "Frames" or scroll down to find the "Frames" section.
2. Adding a Frame:
Click on a frame to add it to your design. You can resize and reposition the frame by dragging its corners and edges.
3. Adding Content to the Frame:
From Canva's Media Library: Click on the frame you want to fill. Tap "Replace" in the editor toolbar. Select "Photos" or "Videos". Search for or choose an image/video to add.
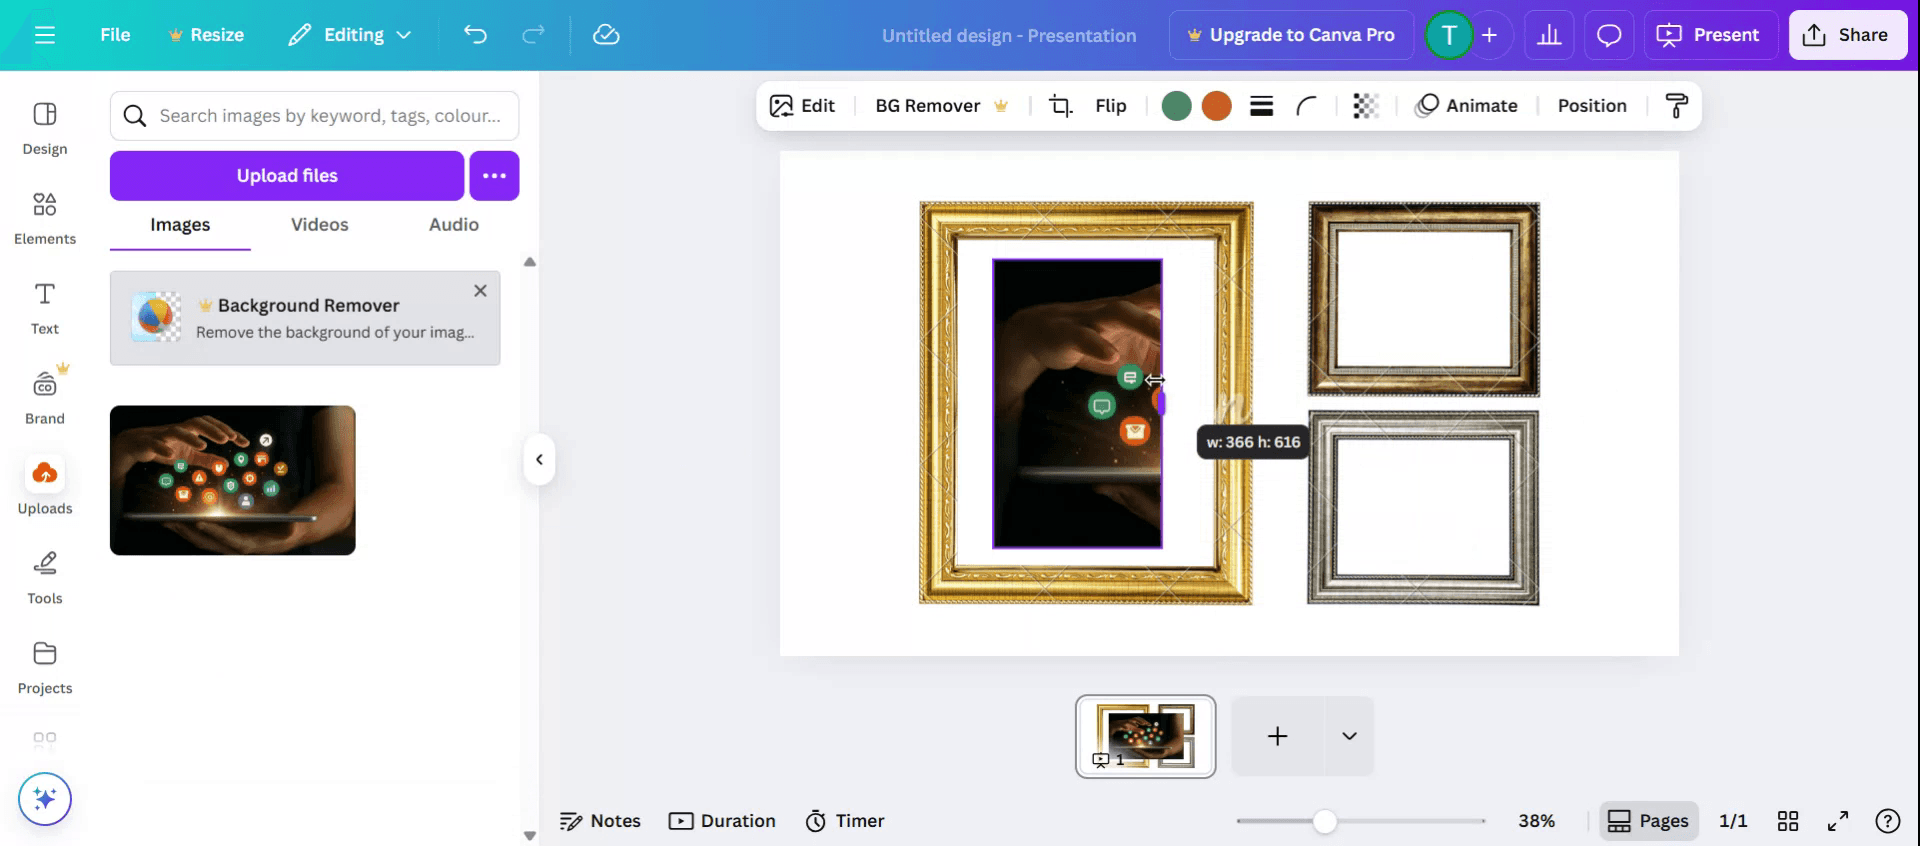
From Uploads: Click on the frame you want to fill. Tap "Replace" in the editor toolbar. Select "Camera Roll" or "Uploads". Upload your own media if needed. Click on the image or video to add it to the frame.
4. Adjusting Content Within the Frame:
Click on the frame to select it. You can adjust the size and position of the content within the frame by dragging it.
5. Customizing Frames:
You can further customize the frame and its content using Canva's various editing tools. For example, you can change the frame's color, add effects to the image, or add text to the design.
Step-by-Step-Guide: How to Use Frames in Canva
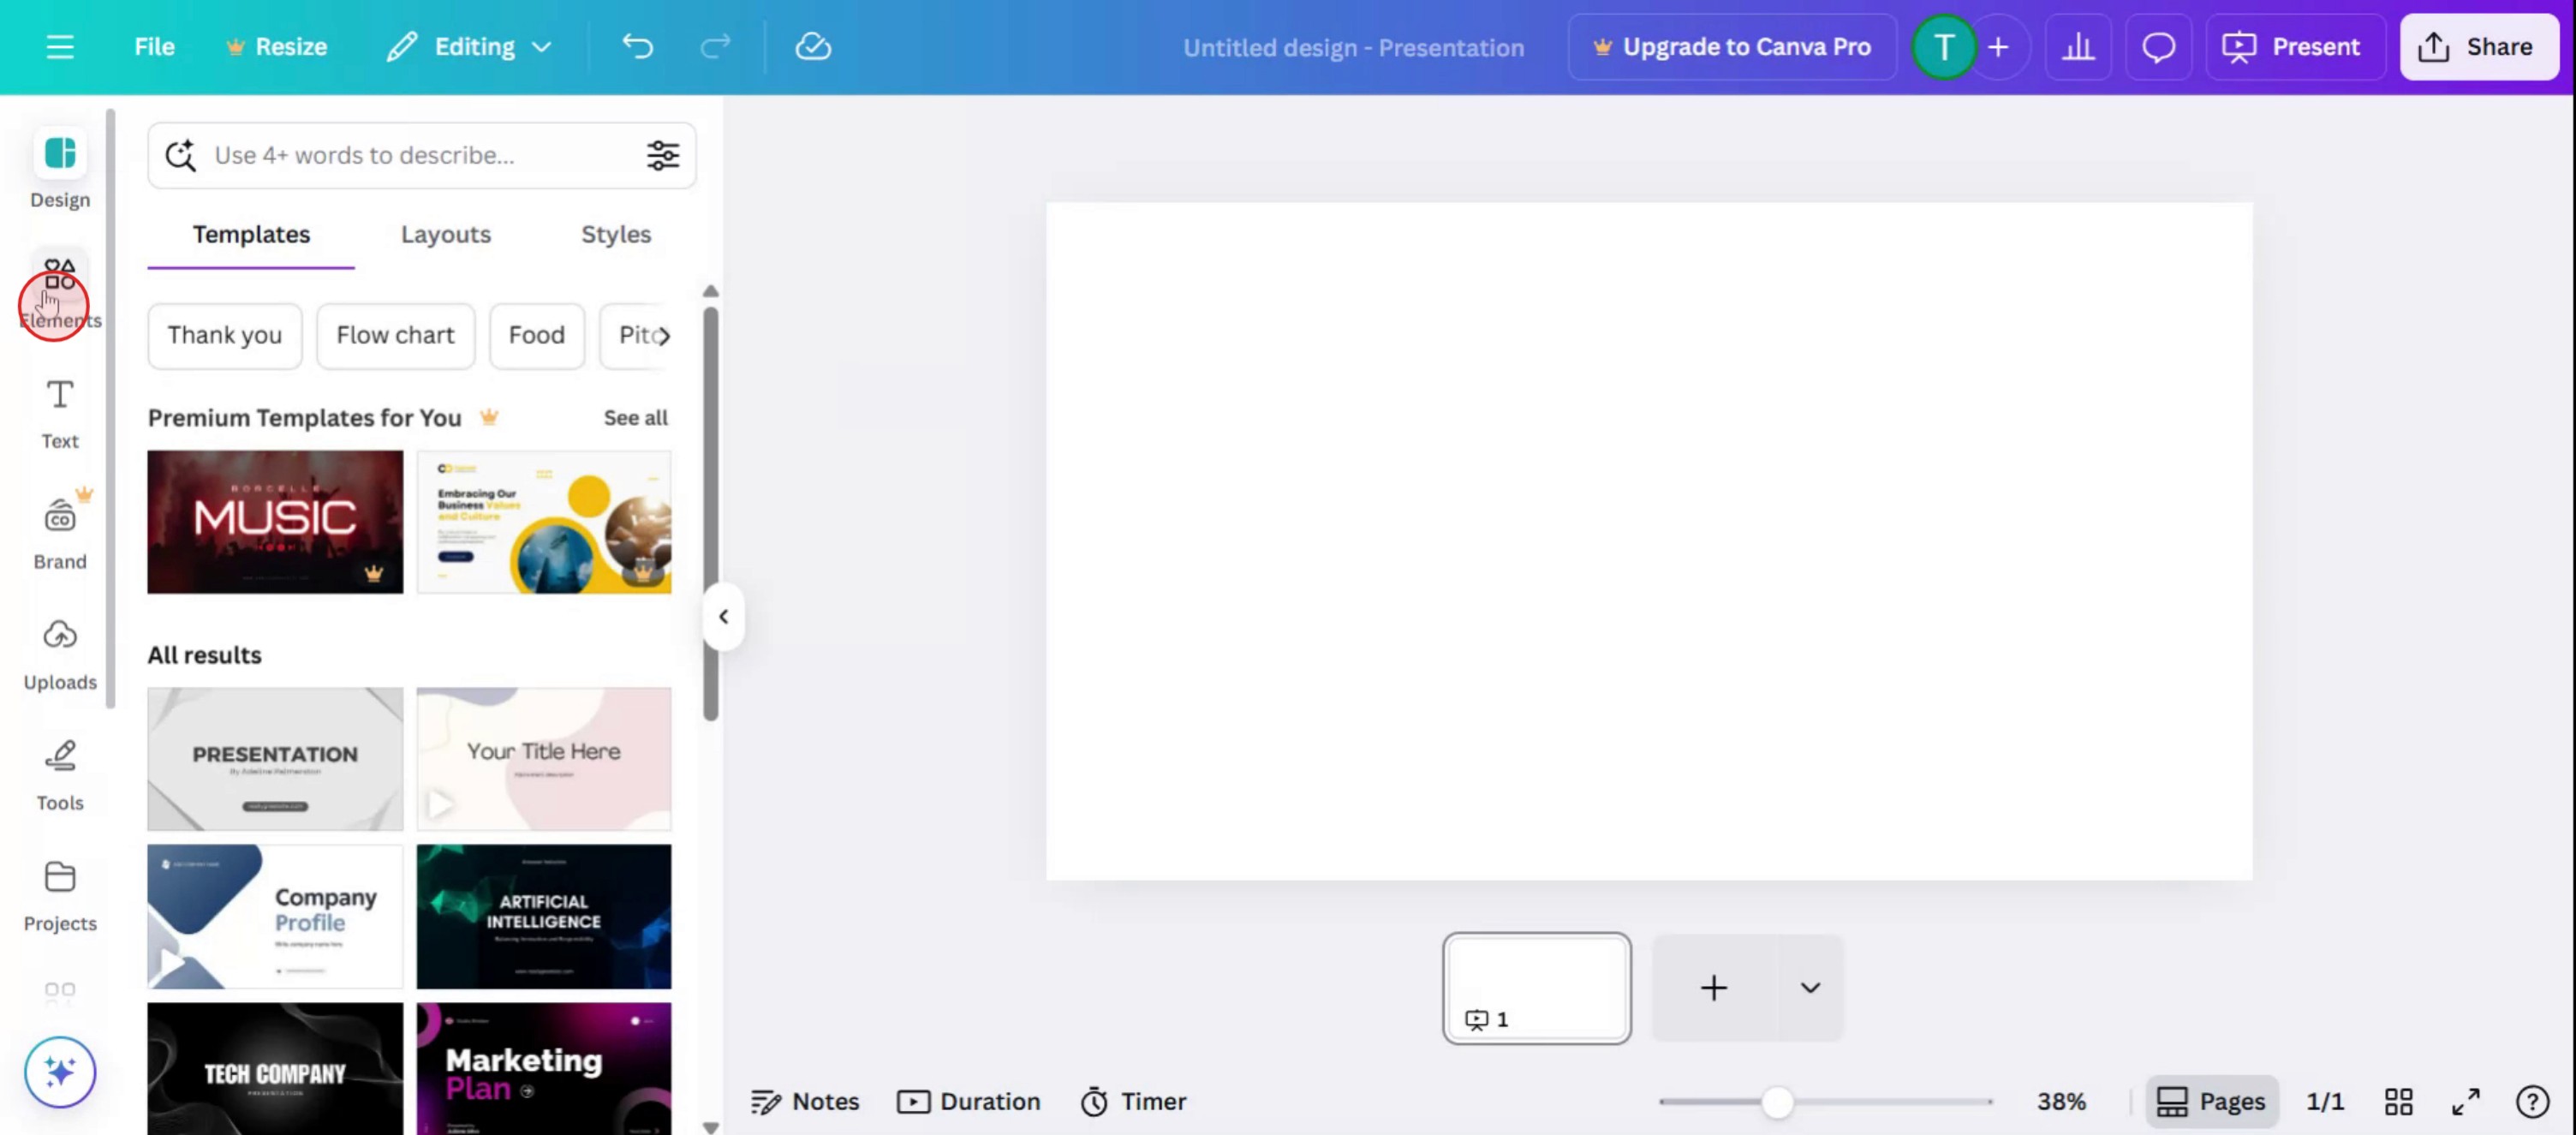
Step 1
select the Elements option.
Step 2
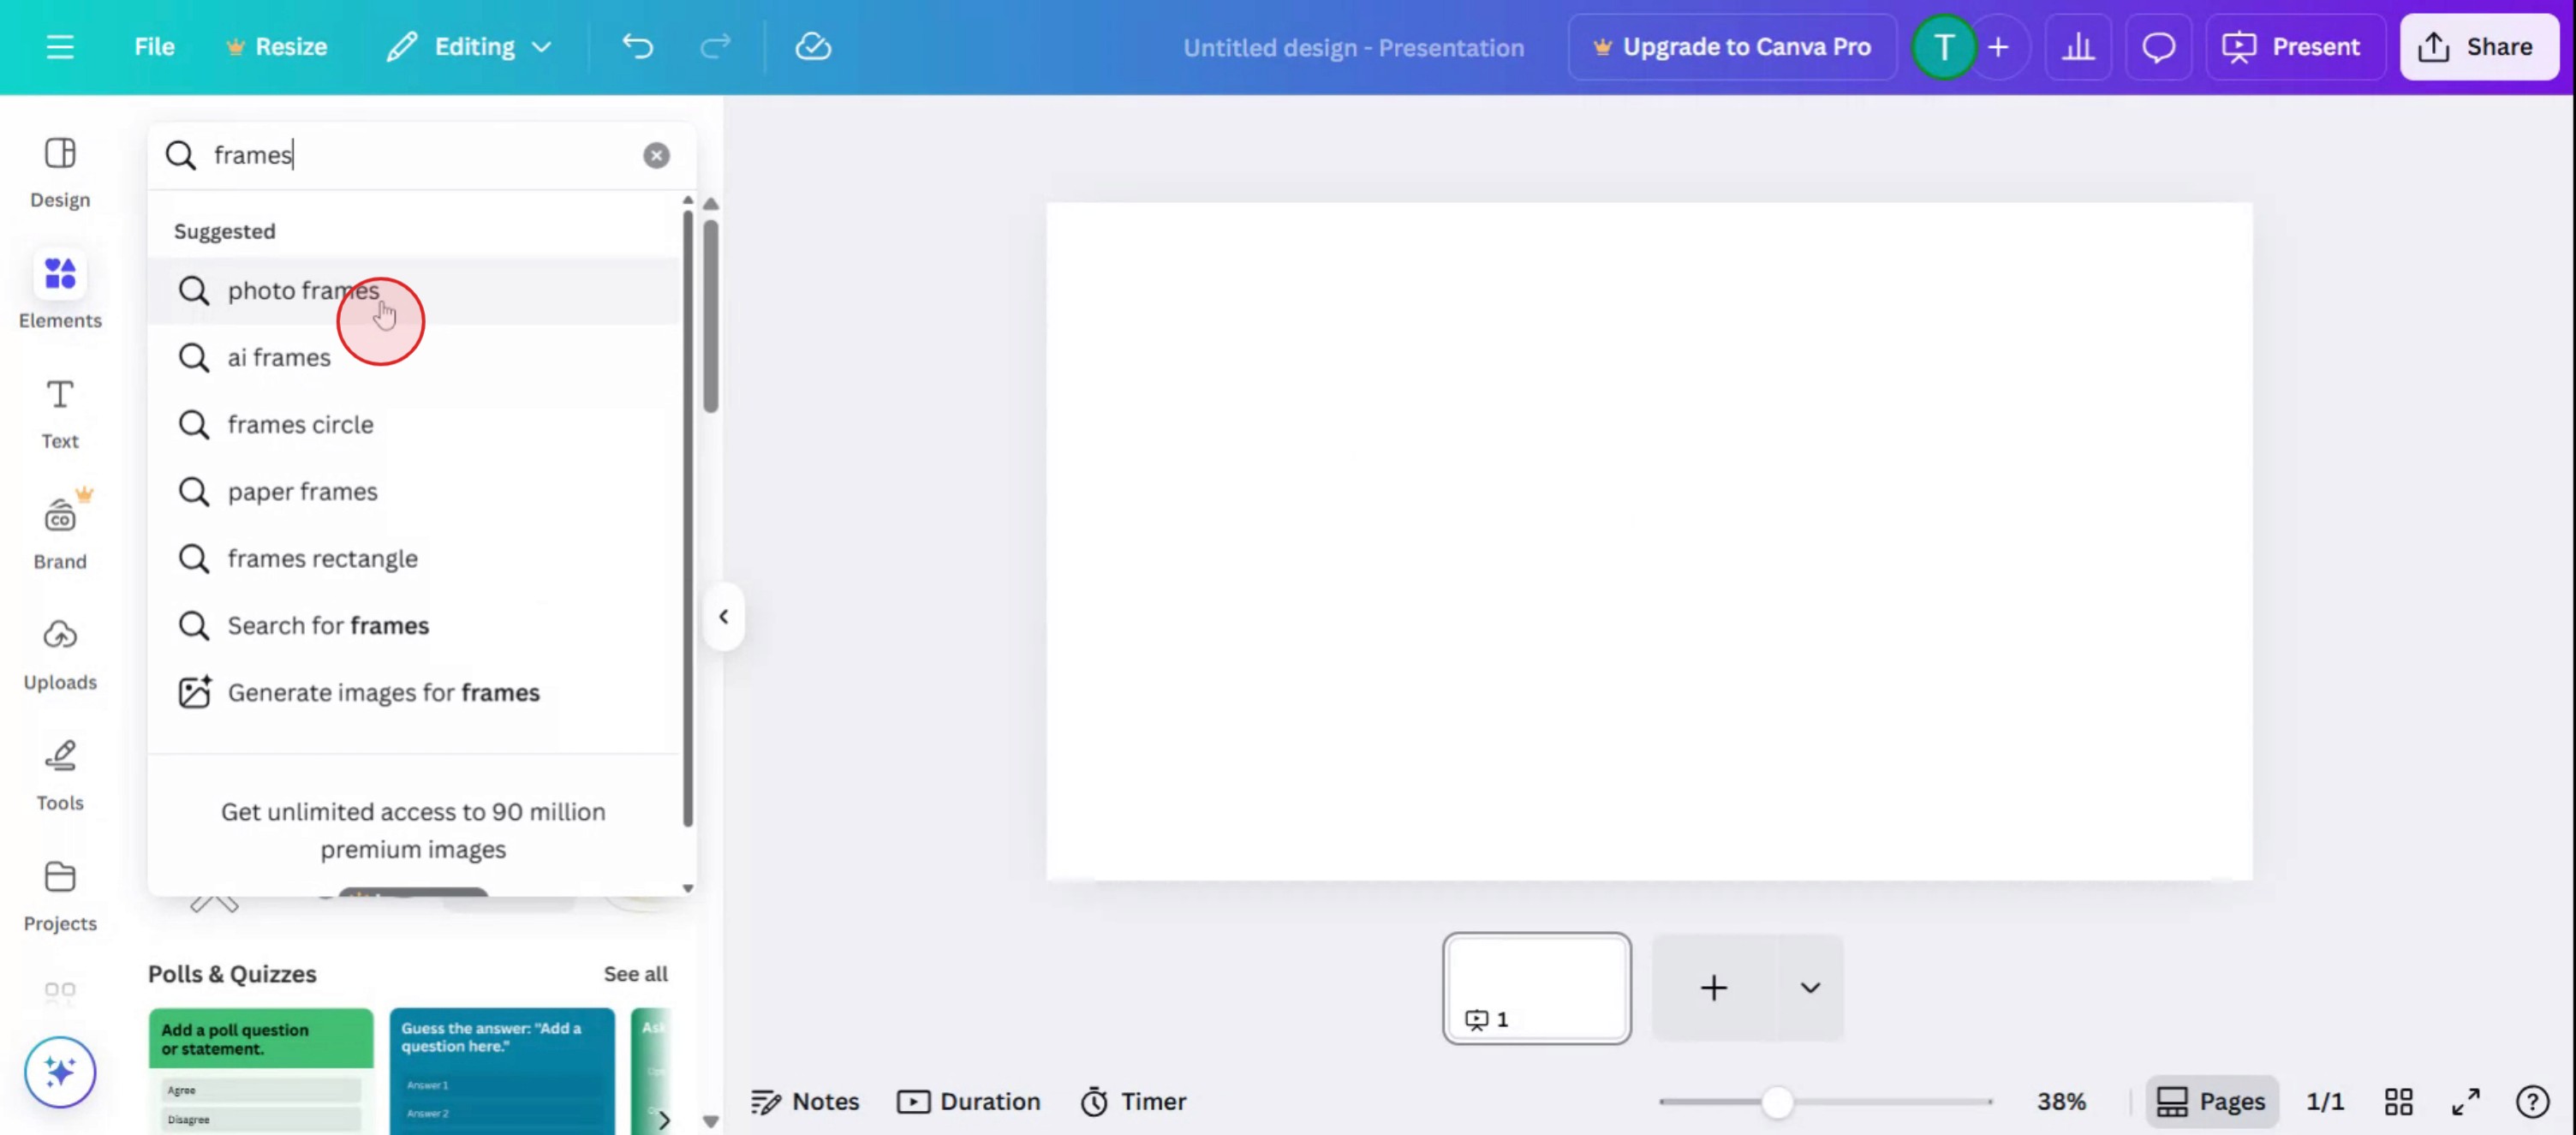
In the search bar, type frames to locate the available options.
Step 3
Choose a frame that best meets your requirements.
Step 4
Click on Upload to add the image.

Step 5
Customize the frame and image according to your preferences.
Полезные советы по использованию фреймов в Canva
Откройте свой дизайн или создайте новый
Войдите в Canva и выберите шаблон или создайте дизайн нужного размера, чтобы начать.Перейдите на вкладку «Элементы»
На панели слева нажмите «Элементы», чтобы получить доступ к компонентам дизайна.Найдите фреймы
В строке поиска на вкладке «Элементы» введите «frames» и нажмите Enter, чтобы увидеть все доступные варианты фреймов.Выберите стиль фрейма
Просмотрите коллекцию и нажмите на любую форму фрейма, которая вам нравится. Она появится на вашем холсте.Перетащите изображения во фрейм
На вкладке «Загрузки» или в разделе «Фото» перетащите изображение на фрейм. Изображение автоматически встанет на место.Настройте изображение внутри фрейма
Дважды щелкните по изображению, чтобы изменить его положение, размер или приблизить/отдалить в пределах границ фрейма.Добавьте эффекты или фильтры при необходимости
Нажмите на изображение внутри фрейма, чтобы применить фильтры, настроить яркость или добавить эффекты для более аккуратного вида.
Частые ошибки и как их избежать
Изображение не «прилипает» к фрейму
Убедитесь, что вы перетаскиваете изображение прямо поверх фрейма, а не рядом с ним. Подождите, пока оно «прилипнет», прежде чем отпустить.Случайно перемещаете фрейм вместо изображения
Будьте внимательны при настройке. Дважды щелкните, чтобы переместить изображение внутри фрейма, а не перетаскивайте весь фрейм.Использование неподходящего размера фрейма для компоновки
Выбирайте размеры фреймов, которые соответствуют общей компоновке. Слишком большие или маленькие фреймы могут нарушить логику дизайна.Применение фильтров ко всему дизайну вместо изображения
Выбирайте только изображение внутри фрейма перед добавлением фильтров или корректировок.Слишком много фреймов
Слишком большое количество разных фреймов может сделать дизайн визуально перегруженным. Держите всё минимальным, чтобы внешний вид был чистым.
Common FAQs About Using Frames in Canva
What are frames in Canva used for?
Frames allow you to place images inside custom shapes like circles, letters, or grids.How do I insert a photo into a frame?
Drag an image over the frame until it snaps inside automatically.Can I resize the frame after inserting the image?
Yes, select the frame and drag its corners to resize while keeping the image inside.Can I crop the image inside the frame?
Double-click the image to crop or reposition it within the frame.Are frames available in the free version of Canva?
Yes, many frames are available for free, although some premium styles require Canva Pro.How to screen record on mac?
To screen record on a Mac, you can use Trupeer AI. It allows you to capture the entire screen and provides AI capabilities such as adding AI avatars, add voiceover, add zoom in and out in the video. With trupeer’s AI video translation feature, you can translate the video into 30+ languages.How to add an AI avatar to screen recording?
To add an AI avatar to a screen recording, you'll need to use an AI screen recording tool. Trupeer AI is an AI screen recording tool, which helps you create videos with multiple avatars, also helps you in creating your own avatar for the video.How to screen record on windows?
To screen record on Windows, you can use the built-in Game Bar (Windows + G) or advanced AI tool like Trupeer AI for more advanced features such as AI avatars, voiceover, translation etc.How to add voiceover to video?
To add voiceover to videos, download trupeer ai chrome extension. Once signed up, upload your video with voice, choose the desired voiceover from trupeer and export your edited video.How do I Zoom in on a screen recording?
To zoom in during a screen recording, use the zoom effects in Trupeer AI which allows you to zoom in and out at specific moments, enhancing the visual impact of your video content.
People also ask
Technical Documentation Generator
Похожие руководства