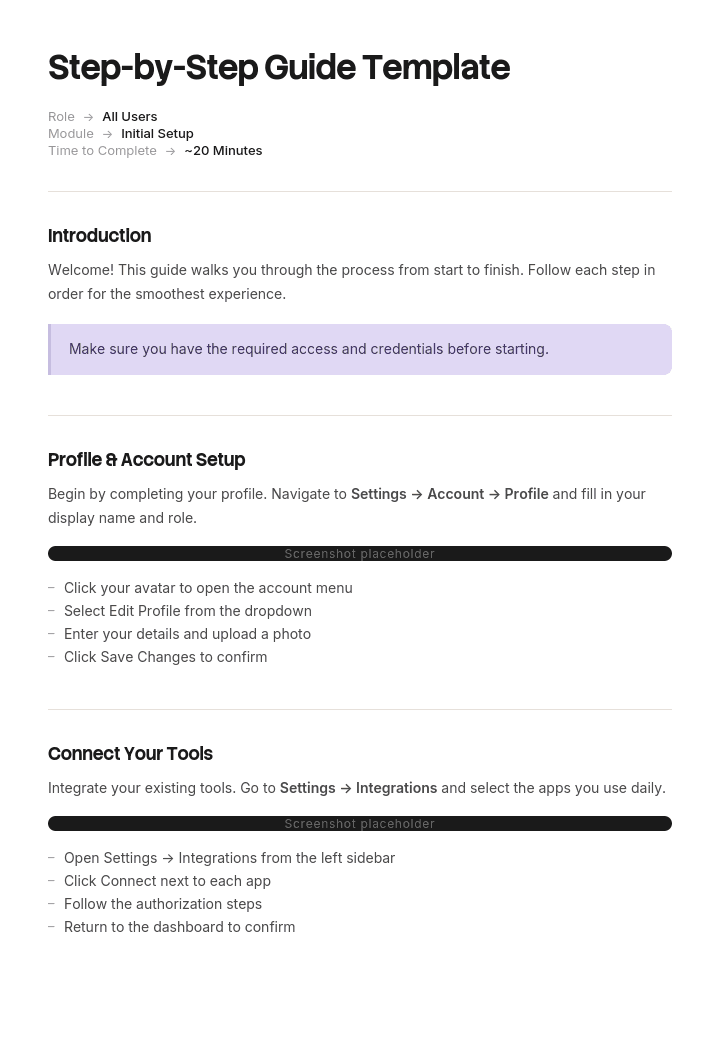
Use this template
Step-by-step guides are the most reliable way to teach someone how to do something - whether it's onboarding a new hire, training a customer or rolling out a new process. With Trupeer, you can save hours on documentation by starting with a ready-to-use step-by-step guide template, customizing it with your brand guidelines, and turning your step-by-step instructions into an engaging video tutorial in minutes.
What is a free step-by-step guide template?
A free step-by-step guide template is a reusable structure for taking somebody through a task in order, from wherever they are now to a finished result.
It is the most common shape in all of documentation and the most casually written. The structure looks obvious, so people write numbered steps and consider the job done, and most of the resulting guides work adequately for a reader who sits down with a clear half hour and completes the whole thing.
Very few readers do that.
The template is not the guide. Numbered lists are not difficult. What separates a guide that gets completed from one that gets abandoned is a design decision about interruption, and almost nobody makes it deliberately.
Format follows use. A step-by-step guide template Word file suits guides that get reviewed and issued. A step by step guide template Google Docs version suits guides several people edit and that get linked rather than sent. A step-by-step guide PDF is what you circulate when the layout matters and the content is settled.
Readers stop halfway
Watch anyone follow a guide of more than about six steps and the pattern is consistent.
They start. Somewhere in the middle something interrupts them: a phone call, a colleague, a system that takes four minutes to respond, a step that requires something they do not have to hand, or simply the end of the time they had allocated.
They come back later, sometimes much later, and the first question is not what do I do next. It is where was I.
If the guide cannot answer that question, three things happen, in ascending order of expense. They guess and continue, which usually works. They restart from the beginning, which wastes time and occasionally undoes completed work. Or they abandon it in a partially completed state, which is the worst outcome, because a half configured system, a half completed form or a half migrated account is frequently worse than an untouched one.
Almost every published step-by-step template ignores this entirely. The steps describe actions and nothing describes states, so there is no way to look at the screen in front of you and work out which numbered step you finished.
How to customize this template in Trupeer
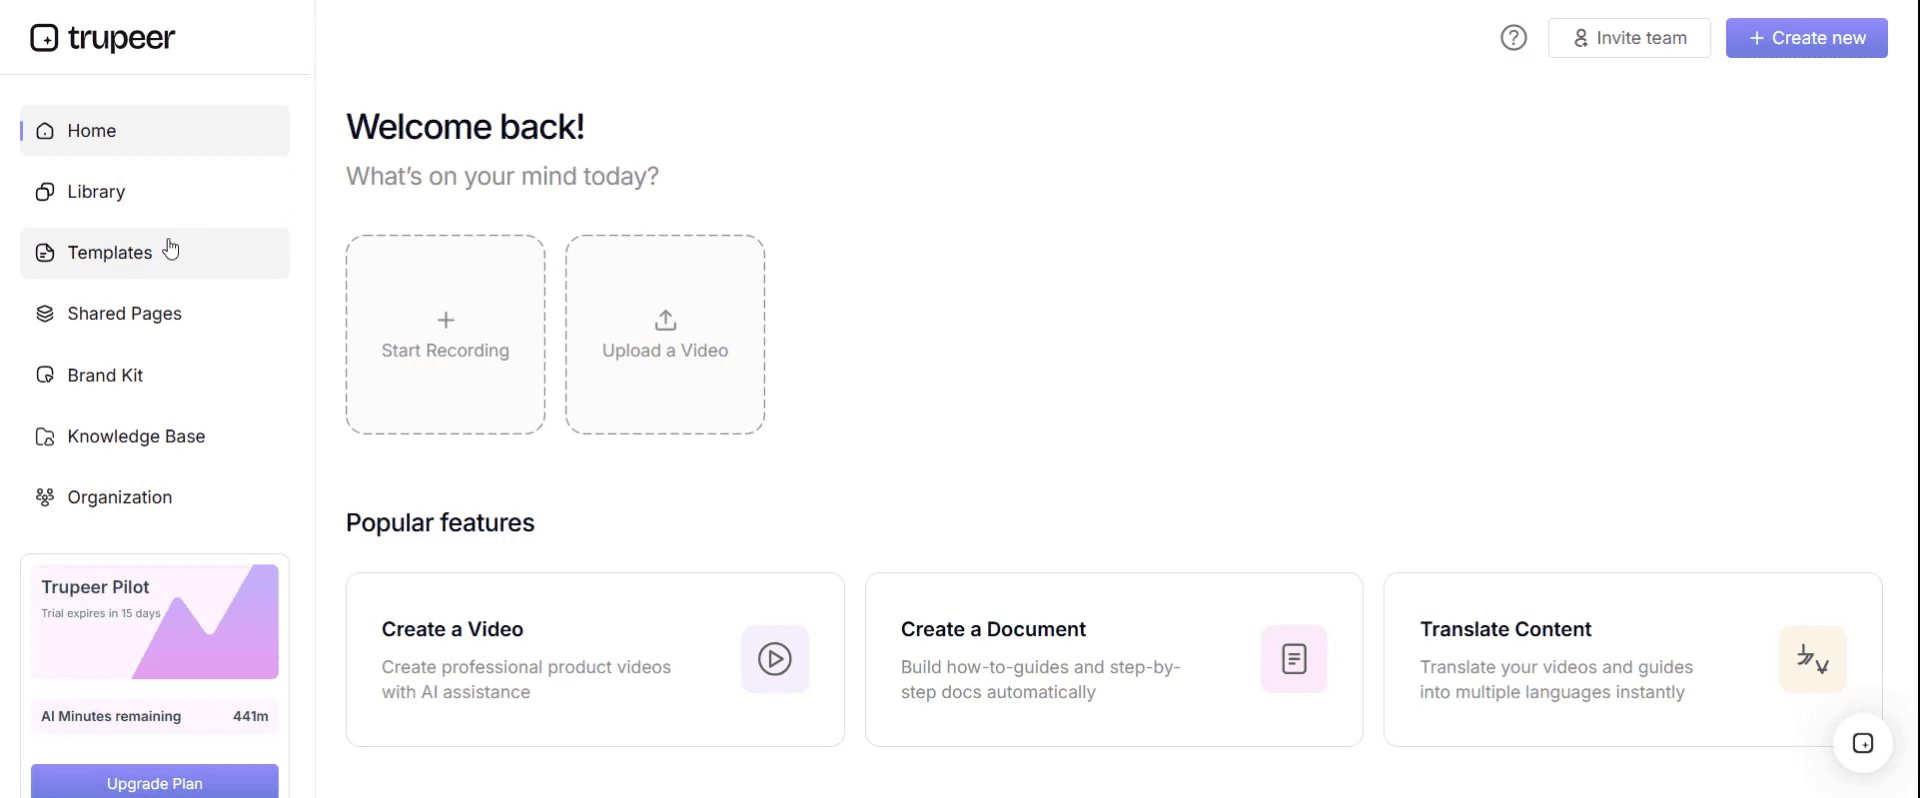
Step 1: Open the Templates Section
Go to the Templates section from the main navigation.
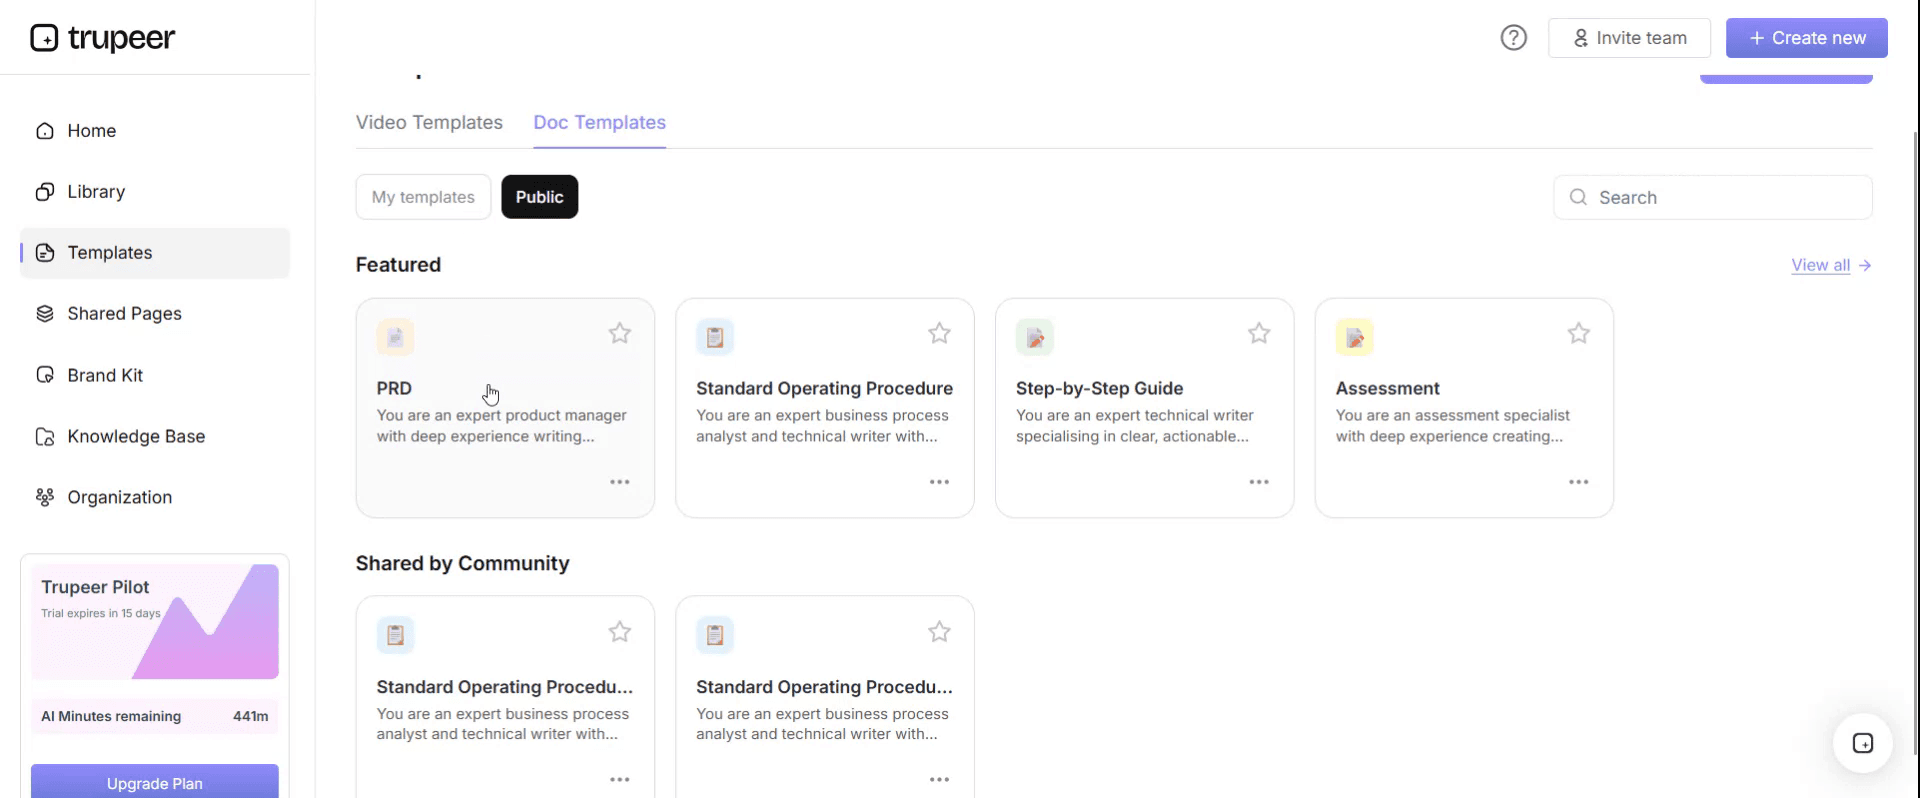
Step 2: Select and Open a Template
Click on any template you want to work with to open it.
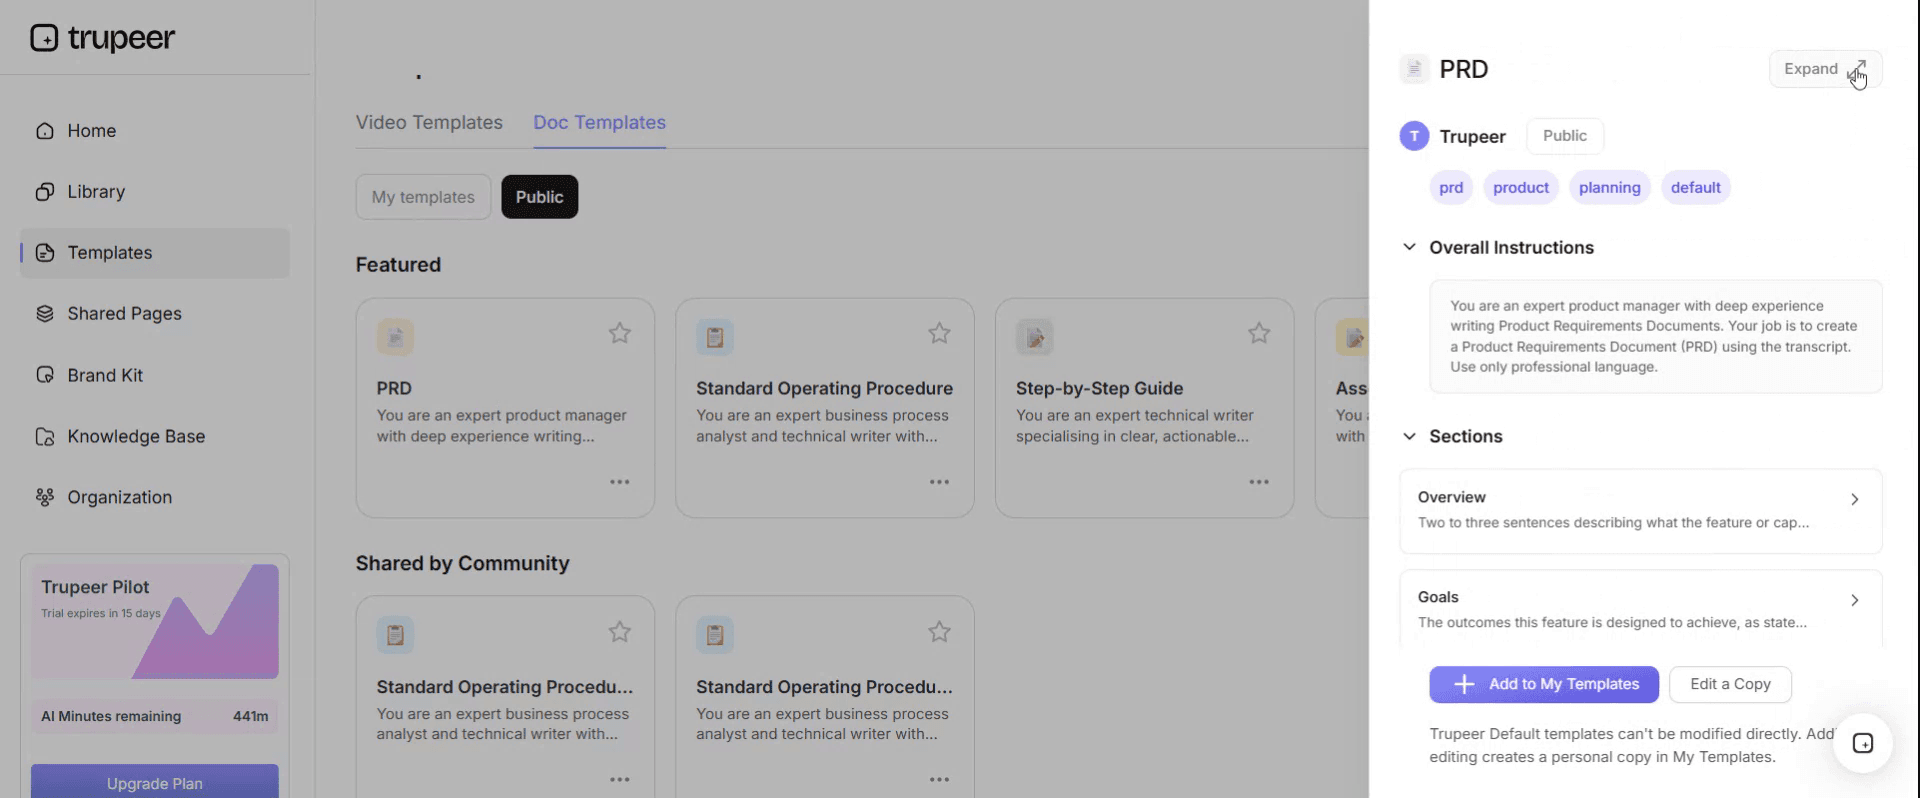
Step 3: Expand the Template View
If needed, expand the template view to see the full layout and details clearly.
Step 4: Edit the Template
Click on Edit to start modifying the selected template.
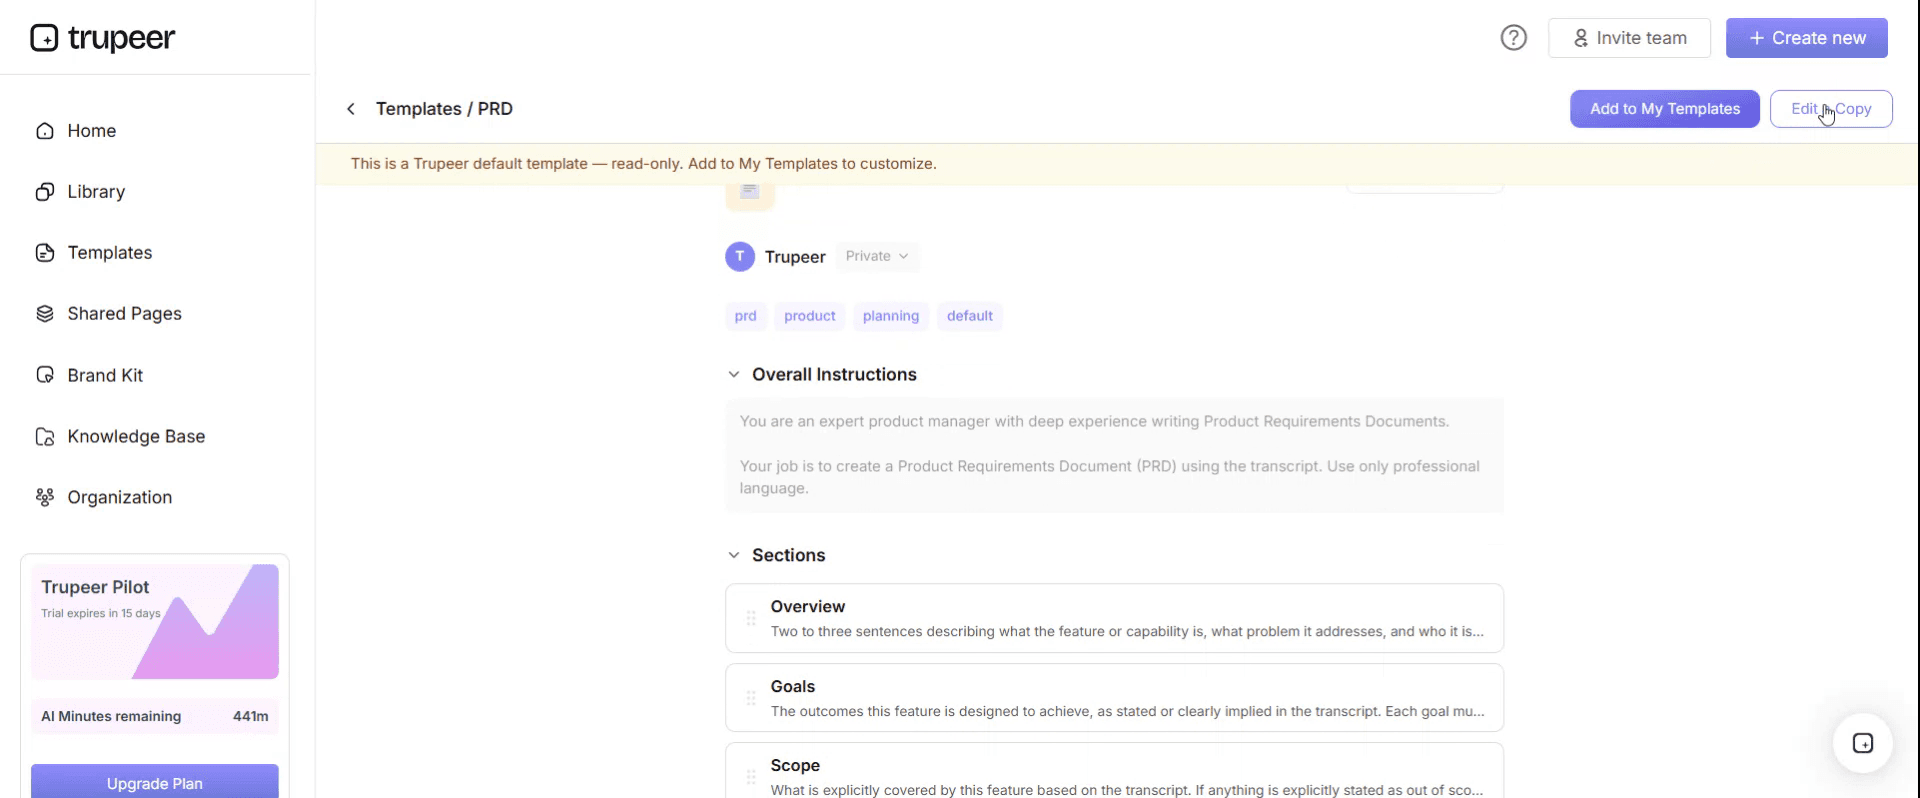
Within the editor, you can:
Add new sections
Define or update formatting rules
Add a logo and adjust its position and related settings
Step 5: Save Your Customized Template
After making all necessary changes, click Save to store the updated template as your own.
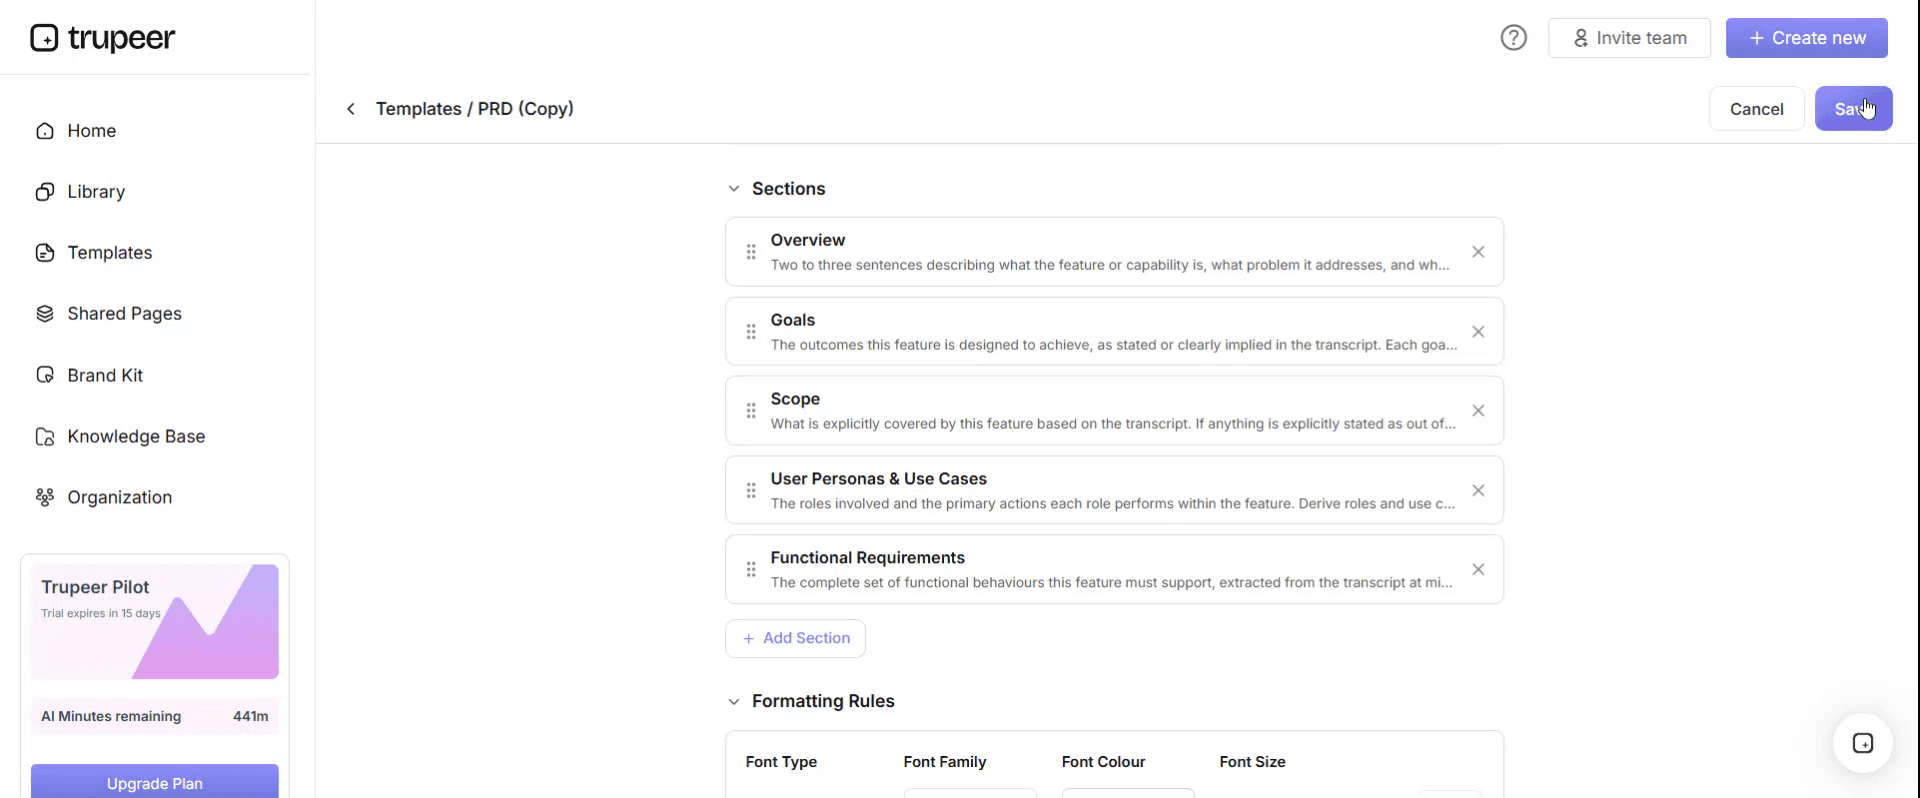
Step 6: Preview and Fine-Tune the Template
When you want to see how your customized template looks, open the Preview.
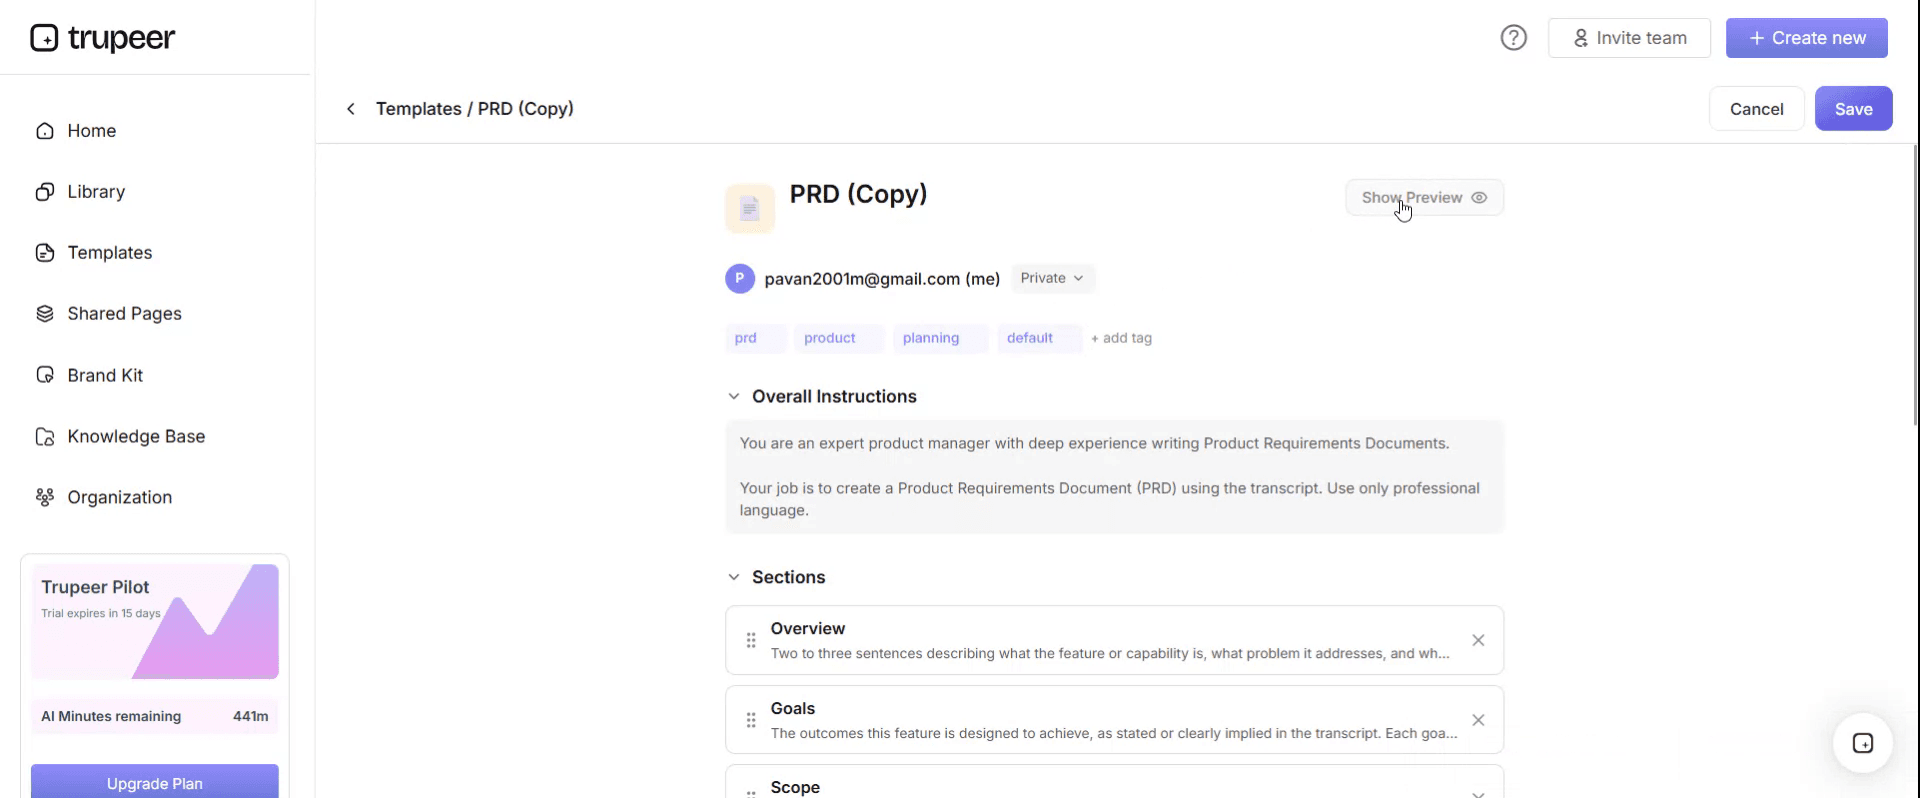
From the preview screen, you can continue to make adjustments directly if needed, ensuring the template appears exactly as you want.
With a step-by-step guide template you can:
Save hours on documentation: Capture step-by-step instructions in a clean, structured format that's easy to fill in and share.
Improve retention: Video-based instruction improves recall and accuracy compared to text alone.
Scale training: Reach hundreds of learners with one video instead of repeating yourself - ideal for training videos and customer success.
Stay on-brand: Apply your logo, fonts, colors and tone using Trupeer's brand kit.
Localize globally: Translate guides into 65+ languages with one click.
Stay updated: Edit the guide and Trupeer regenerates the video automatically when processes change.
Designing for resumption
Four changes, none of which costs more than a line per step.
Describe the state after each step, not just the action. "Click Save" tells a returning reader nothing. "Click Save. The record now shows a green Saved badge and a reference number" lets them look at their screen and know exactly where they stopped. This is the single most valuable change and it is what the state column in the template below is for.
Mark where it is safe to pause. Most steps are safe. Some genuinely are not, and those are the ones that hurt. If steps eleven to fourteen must be completed in one go because step eleven disables something that step fourteen replaces, say so before step eleven, with the time it will take. A reader who knows a four minute run is coming will wait until they have four minutes.
Number the steps, and never use bullets. Bullets have no position. A reader cannot say they got to the fourth bullet with any confidence, and they cannot describe where they are to a colleague or a helpdesk.
Put a short state summary at the top. Three or four lines describing what the situation looks like at the main stages, so somebody returning can identify themselves without reading the whole guide. This costs a paragraph and prevents most restarts.
The test is quick. Open your guide, pick a step in the middle, and ask whether a reader who stopped there yesterday could work out where they were from what is in front of them today. In most guides the answer is no.
How big should a step be?
Step size is the other decision people make by accident, and resumption gives a rule for it.
A step should be one action, producing one observable result, at a point where a reader could stop.
Three practical tests. If the step contains the word "and" joining two actions, it is two steps. If you cannot describe what the reader will see afterwards, the step has no observable result and needs splitting or rewording. And if stopping mid step would leave things in a state the guide does not describe, the step is doing too much.
The opposite error is real but rarer. Steps broken so fine that the reader loses the thread, typically one interface interaction per step across forty steps, produce a guide that is exhausting to follow and hides the shape of the task. Group these under a heading per phase rather than merging the steps.
For most tasks, somewhere between six and twenty steps is right. If you are past thirty, check whether the guide is covering two tasks that should be separate, or whether what you are producing is really a step by step guide book, which is a different document with different rules.
What a step-by-step guide template must contain
Eight components. The third and fourth are what most templates omit.
Component | What it does |
|---|---|
Title as the task | What the reader is trying to do, in their words. |
What you need first | Access, information, equipment, time required. Anything that would stop them mid task. |
Numbered steps with states | Action, then what they should see afterwards. |
Pause markers | Where it is safe to stop, and explicitly where it is not. |
Where was I | A short summary of what each main stage looks like, for returning readers. |
Images where recognition beats description | Not one per step. Covered below. |
If it goes wrong | The two or three most common failures with their fixes. |
Version and last verified | When somebody last followed this and it worked. |
The time estimate in the second row matters more than it looks. A reader who knows a task takes twenty minutes will start it when they have twenty minutes. A reader who does not know will start it with five, and become the person who stops at step eight.
Free step-by-step guide template: the structure to copy
Filled with a real example rather than placeholders. The task is setting up multi factor authentication on a work account.
Copy from here.
Title. Set up multi factor authentication on your work account.
What you need first. Your work laptop, your mobile phone, about ten minutes. Steps eleven to fourteen must be done together and take about four minutes, so do not start unless you can finish.
Where was I. If you are returning to this guide, find yourself here. If your phone has no authenticator app installed, you are before step four. If the app is installed but shows no account, you are between steps four and seven. If the app shows your account and generates a six digit code, you are past step nine. If you can no longer receive text message codes, you are past step eleven and must complete the guide today.
Steps.
# | Do this | You should now see | Pause here? |
|---|---|---|---|
1 | Open the account portal on your laptop and sign in | Your name in the top right and a Security tile | Yes |
2 | Select Security, then Multi factor authentication | A page headed Multi factor authentication with Not enabled in grey | Yes |
3 | Select Begin setup | A QR code on screen with a countdown timer | Yes, but the code expires in ten minutes and you will need to restart from step 3 |
4 | On your phone, install the authenticator app from your app store | The app icon on your home screen | Yes |
5 | Open the app and select Add account | A camera view asking you to scan a code | Yes |
6 | Scan the QR code on your laptop screen | Your work email address listed in the app with a six digit code counting down | Yes |
7 | Type the current six digit code into the laptop | A green tick and the word Verified | Yes |
8 | Select Continue | A page headed Recovery codes showing ten codes | Yes |
9 | Save the recovery codes somewhere you can reach without your phone | Your own record of the ten codes | Yes. Do not skip this step, it is what gets you back in if you lose your phone |
10 | Select I have saved my codes | A page headed Remove old sign in methods | Yes, and this is the last safe pause |
11 | From here to step 14 without stopping, about four minutes. Select Remove text message sign in | A confirmation dialogue warning that text codes will stop working | No |
12 | Confirm | Text message sign in listed as Removed | No |
13 | Sign out and sign in again to test | A prompt for your authenticator code | No |
14 | Enter the code from your app | Signed in, and the Security tile showing Multi factor authentication enabled | Complete |
If it goes wrong. The QR code expired, so return to step three and generate a new one. The code is rejected as incorrect, which is almost always the phone clock being out of sync, fixed by enabling automatic time in phone settings. You have lost access between steps eleven and fourteen, which needs the service desk and identity verification in person.
Version and last verified. Version 3, followed end to end on 12 June by somebody who had not done it before.
Copy to here.
Step-by-step guide example: sixty three people locked out
Nantwich Building Society, with about nine hundred staff, rolled out multi factor authentication using a self service guide emailed to everyone.
The guide had fourteen steps. It was accurate, it was well written, and every instruction in it was correct.
It described actions and not states, and it said nothing about where you could stop.
Step eleven removed text message sign in. Step fourteen completed the new method and confirmed it worked. Between those two, the account had no working second factor, and the guide gave no indication that this mattered.
Staff started the guide at their desks, which meant they were interruptible. A large number stopped somewhere between steps seven and eleven, which was harmless, and came back later unable to tell where they were. Many restarted from step one, which invalidated the enrolment they had already completed and produced a confusing error.
Sixty three people stopped between step eleven and step fourteen.
Those sixty three could no longer sign in at all. Recovering each one required identity verification in person, because the entire point of the control being configured is that it cannot be reset over the phone. Average resolution was about forty minutes, which is roughly forty two hours of IT time, and every one of those people was unable to work in the meantime.
The service desk took two hundred and seventeen calls in the first week. The rollout, planned for two weeks, took six.
The rewrite changed nothing about what the reader does. It added a state description to every step, a where was I block at the top, and a marker before step eleven saying that steps eleven to fourteen must be completed together and would take about four minutes.
The second wave covered four hundred staff. Thirty one service desk calls, four lockouts.
Nothing about the task got easier. The guide simply stopped assuming that everybody would read it in one sitting.
How to create a step-by-step guide with pictures
Images are the difference between a guide people follow and one they give up on, and the common approaches are both wrong.
One image per step produces a document nobody scrolls through and a maintenance burden that guarantees the images go stale. No images at all forces the reader to translate your words into their screen, which is where most misunderstandings happen.
Use images where recognition beats description. Four cases cover most of it. When the reader must find one control among many similar ones. When a screen is unfamiliar and they need to confirm they are in the right place. When the correct end state is hard to describe but obvious to see. And when something looks wrong but is not, such as a warning message that is expected.
Four rules make them work. Annotate directly on the image, because an unmarked screenshot of a busy screen is a puzzle rather than an instruction. Crop tightly to the relevant area, since a full screen capture reduced to fit a page is unreadable. Show the state after the action rather than a hand about to perform it. And date them, because an image showing an interface that no longer exists undermines the whole document.
The practical obstacle is never the taking of the first set. It is the recapture after every change, which is covered further down.
Step-by-step guide examples worth studying
Three sources are more useful than published templates, because they were written for real readers who could complain.
Manufacturer setup guides for consumer hardware, which are ruthless about step size and state description because their support costs depend on it.
Public sector service guidance, particularly digital government services, which is written for a genuinely universal audience and tends to be the clearest instructional writing available.
Your own most successful help page, measured by traffic without an accompanying support ticket. Whatever that page does, do more of it.
When looking at any step-by-step guide example, check two things. Whether you could tell where you were if you stopped in the middle, and whether the step size is consistent. Inconsistent granularity, where step three is one click and step four is a fifteen minute sub process, is the most common fault in otherwise good guides.
Do step-by-step guide generators work?
The category has improved and it is worth understanding what it does and does not do.
A step-by-step guide generator records what you do on screen and produces a numbered document with screenshots. What it removes is the tedious half: capturing, cropping, annotating and placing images, and writing down the click sequence you would otherwise do from memory. That is genuinely most of the production time, and it also catches the steps you perform automatically and would have omitted.
What generation does not supply is judgement. It does not know which steps are unsafe to stop between, what the reader needs before starting, what commonly goes wrong, or which of the forty captured screens actually needed an image. Those are the parts that make a guide good, and they take a person about fifteen minutes on top.
The sensible use is to generate the mechanical layer and then add the four things above. A generated guide published unedited is a click transcript, which is better than nothing and considerably worse than a guide.
Step-by-step guide, how-to guide or work instruction?
Three closely related documents, distinguished mainly by reader and setting.
A step-by-step guide is the general form: ordered instructions to complete a task, for a reader who may be unfamiliar.
A how to guide is essentially the same document in a documentation set, usually one of many, and organised around what the reader is trying to achieve.
A work instruction is the workplace form, carrying additional obligations: who is authorised to perform it, safety content, version control and sign off. The work instructions template covers those, and anything involving equipment or hazards belongs there rather than here.
A standard operating procedure sits above all three, describing a whole process across roles rather than one task. The SOP template covers it.
The choice matters less than most people think. What matters is that the document is written for somebody who will be interrupted.
What a free step-by-step guide template cannot fix
A task that is genuinely too hard. If a guide needs forty steps and six warnings, the underlying process or interface is doing the damage. Write the guide, and report the observation to whoever can change the thing.
Missing prerequisites. No free step-by-step guide template and no step-by-step user guide template Word free download will tell you what your reader needs before starting, and it is the most common reason people stop.
Images that no longer match. Every screenshot is a commitment to recapture it. Most guides go stale here first.
Never testing it. Every question a first time reader asks is a defect. Answer it in the document rather than in person, or you will answer it again next week.
Show the steps rather than describing them
The whole argument on this page rests on a document with a state description and an image at the points that matter. That is more work than a numbered list, and the extra work is exactly what gets cut when somebody writes a guide at the end of a busy week.
Trupeer AI removes most of it. Somebody performs the task once while recording, and the output is a written step-by-step guide with screenshots already captured, annotated and placed, alongside a video, in your own branding. Because it records an actual performance, it captures the clicks people forget to mention and the screens they assume everybody recognises.
Record it. Brand it. Translate it. Trupeer it.
Three things follow that matter here. The written guide and the video serve genuinely different readers, and a reader who has stopped halfway usually prefers the written one because they can scan to their position rather than scrub through a video. Re-recording after an interface change is faster than recapturing a screenshot set, which is what decides whether images stay accurate. And where readers span several languages, the same recording produces the same guide in each, so nobody is following an older version of the truth.
What you still add yourself is the judgement layer: what the reader needs before starting, where it is unsafe to pause, and what commonly goes wrong. Fifteen minutes, and it is the difference between a click transcript and a guide.
The material sits in your knowledge base and doubles as training. Consistency across your documents is a matter of setting the brand kit once, and setup is covered in the document template setup guide.
Frequently Asked Questions
Is there a step-by-step guide template Word version?
Word suits guides that get reviewed and issued, and the step table above transfers directly. Build the step-by-step guide template Word file as a four column table: number, action, what you should see, and whether it is safe to pause.
Two table settings prevent a specific problem. Repeat the header row on every page, and switch off row splitting across pages, because a step broken across a page fold is the step people misread.
Is there a step-by-step user guide template Word free version?
Yes, and most published ones are a numbered list with a title. A step-by-step user guide template Word free download gives you the shape, which was never the hard part.
The two columns worth adding are the state description and the pause marker. Neither appears in any general template I have seen, and together they are what make a guide survive being put down and picked up again.
Is there a step by step guide template Google Docs version?
Google Docs suits guides that several people maintain and that get shared by link rather than attachment, which describes most internal guides. A step by step guide template Google Docs file works well for that.
Two features are worth using deliberately. Comments let the person who performs the task correct the person who wrote it down, which is the best quality mechanism available. And version history means you can see when a step last changed, which is useful when somebody reports that a guide no longer matches reality.
Is there a step-by-step guide PDF format worth using?
PDF suits a guide that is finished, circulated widely, or printed. Export a step-by-step guide PDF when the content is settled and the layout matters, with the version and date visible on the page.
Do not use it as the working copy. Guides describing software change often, and a format that discourages editing produces a document that quietly stops being true rather than one that stays stable.
What is a good step-by-step guide generator?
The category is moving quickly, so the useful thing is what to judge one on rather than which to pick.
Ask whether it captures and annotates images automatically, whether it produces an editable document rather than a locked one, and how quickly you can regenerate after an interface change. That last question matters most over time. What no step-by-step guide generator supplies is the judgement layer: prerequisites, unsafe pause points and common failures, which you add in about fifteen minutes.
Where can I find step-by-step guide examples?
Manufacturer setup guides and digital government service guidance are the two best public sources, because both are written for readers who cannot be trained first and both carry a direct support cost when they fail.
Study step-by-step guide examples for granularity rather than for design. Consistent step size, one action each, with a described result, is what distinguishes a guide that gets completed. Design is the part that transfers least.
How do I create a step-by-step guide with pictures without it taking days?
Record the task once rather than capturing screenshots individually. Capturing, cropping, annotating and placing images one at a time is where the days go, and it is also where guides get abandoned halfway through production.
Then be selective. Learning how to create a step-by-step guide with pictures properly is mostly learning to use fewer of them: at the points where the reader must recognise something rather than at every step.
Is a step by step guide book different from a guide?
A step by step guide book is a longer form covering many related tasks in sequence, closer to a manual than to a single guide, and usually intended to be worked through rather than dipped into.
The design rules invert. A book assumes a reader progressing through it, so cross references between chapters are reasonable. A single guide assumes somebody arriving at one task, so it must stand alone. Mixing the two assumptions is what produces guides that only make sense if you have read the previous section.