

How to Decrease Checkbox Indent in Google Docs
Learn how to reduce the indent space for checkboxes in Google Docs using simple ruler adjustments or format tweaks. Perfect for cleaner to-do lists.
This guide will walk you through the process of reducing indent in Google Docs.
Follow these simple steps to decrease checkbox indent.
If you're using checkboxes (checklists) in Google Docs and want to reduce the indentation, there are multiple ways to do it via menu commands, ruler adjustments, or keyboard shortcuts.
1. Use the "Decrease Indent" Command
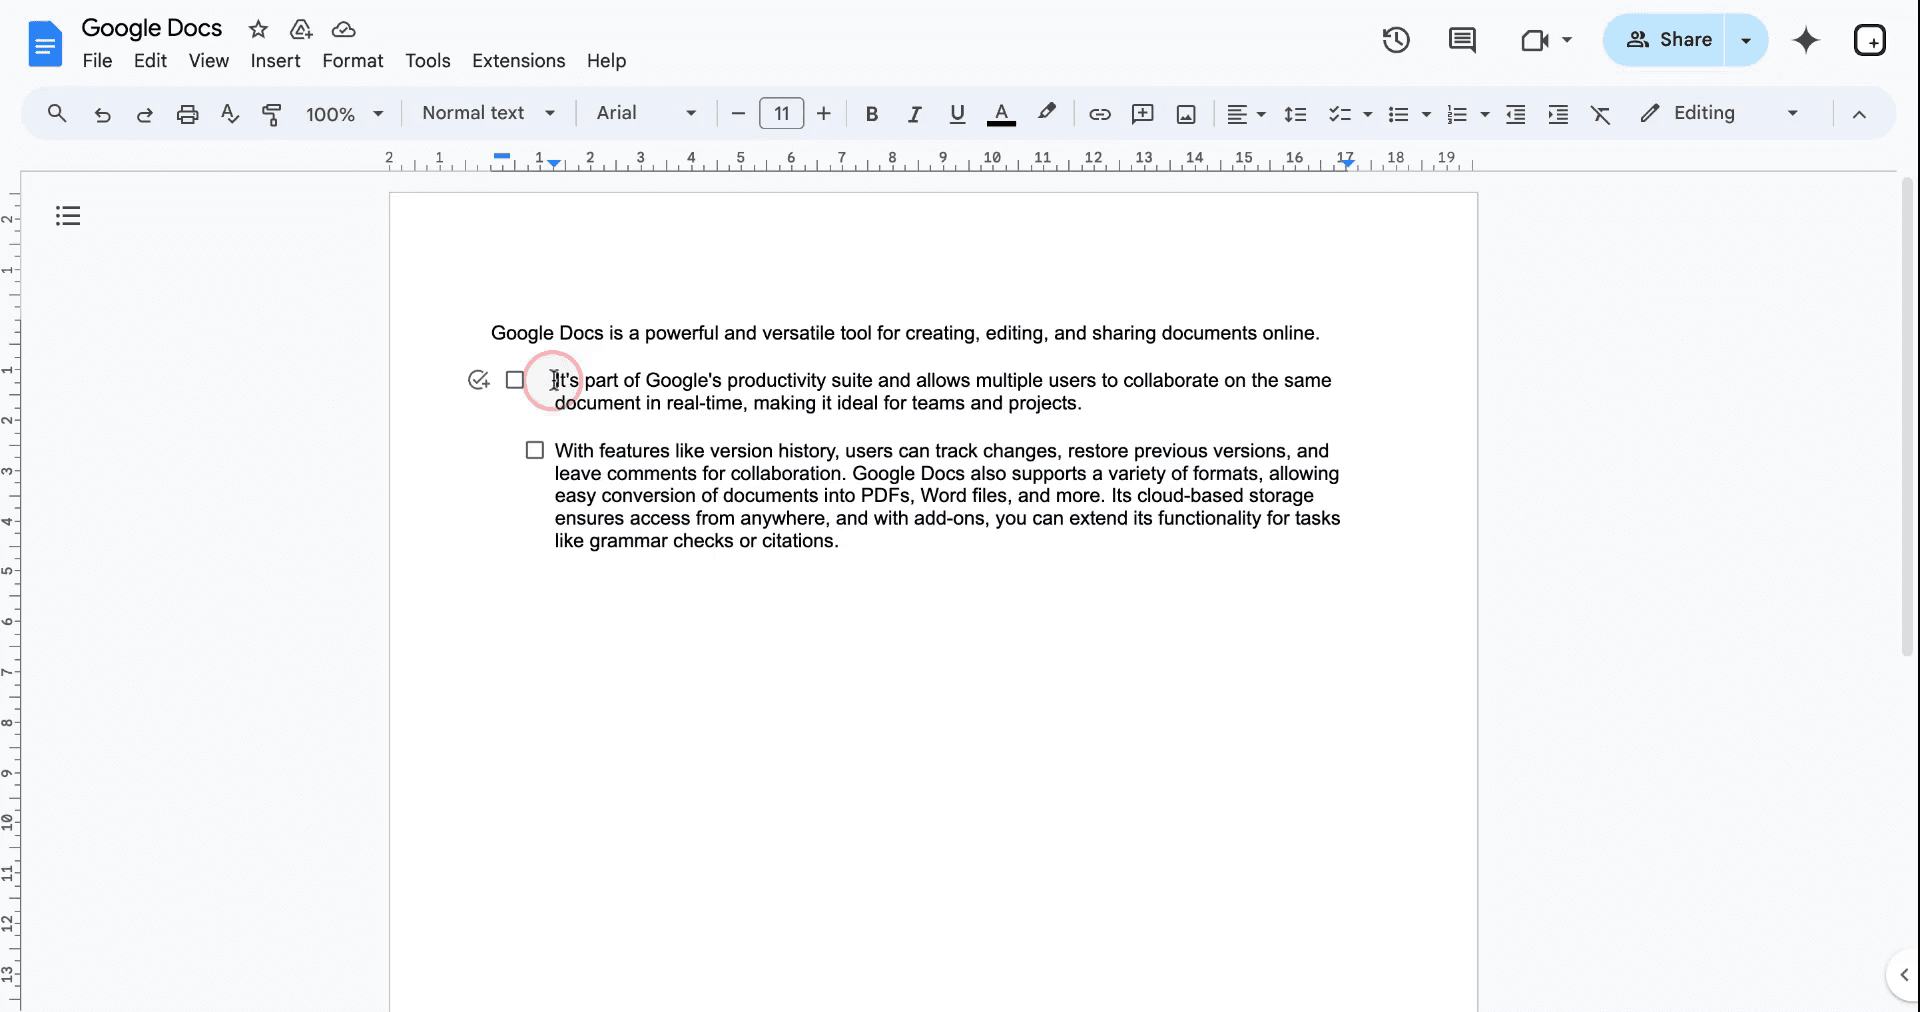
Highlight the checkbox line(s).
Go to Format > Align & indent > Decrease indent.
This will shift the checkbox and text closer to the left margin.
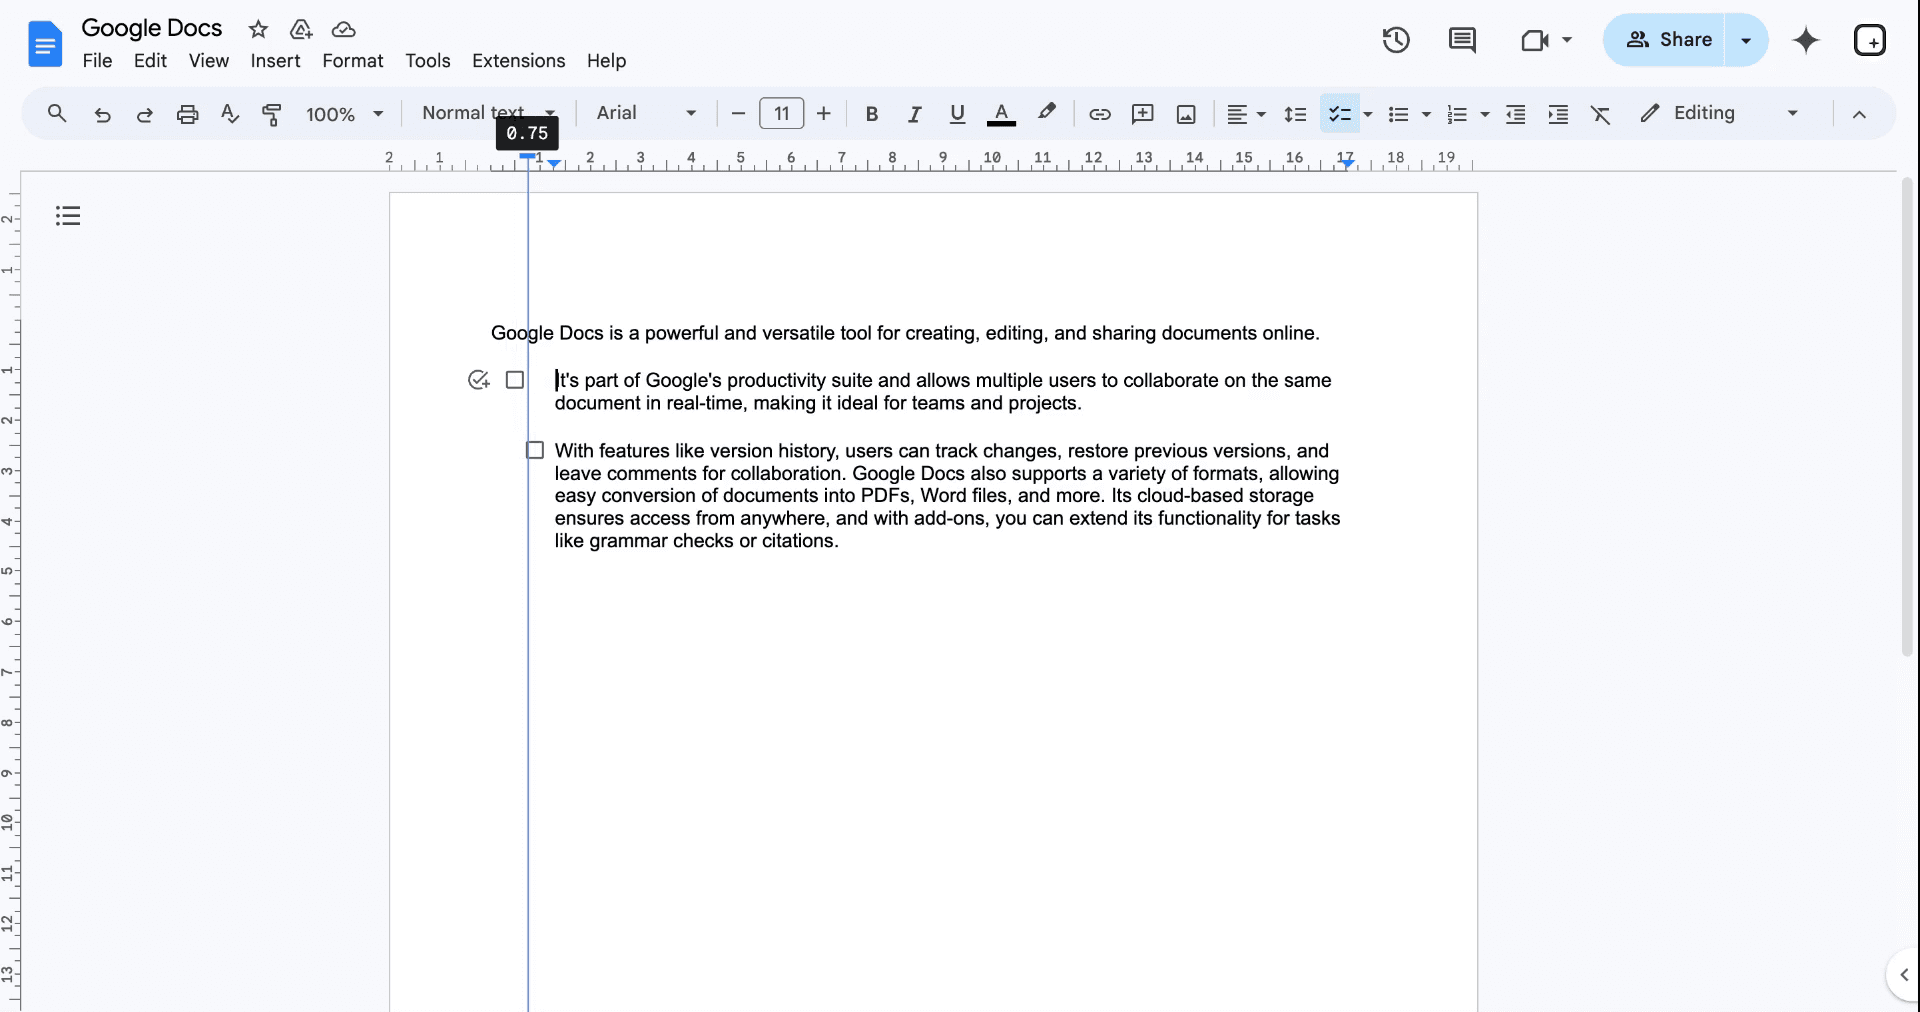
2. Adjust the Ruler
Make sure the ruler is visible (View > Show ruler).
Select the checkbox item(s).
Drag the blue left indent markers (triangle and rectangle) to the left to reduce spacing.
3. Use Keyboard Shortcuts
Press Ctrl + Shift + M (Windows/ChromeOS) or Cmd + Shift + M (Mac) to decrease indent.
Use Ctrl/Cmd + Shift + L to increase indent.
4. For Checklists Specifically
Checklist behavior may vary depending on formatting, but the above methods apply.
If indentation persists, ensure no list-style or paragraph formatting overrides are present.
5. If Inside a Table
Click within the cell that contains the checkbox.
Use the ruler or decrease indent option.
Adjust table width if needed to free up space.
Step-by-Step Guide: How To Decrease Checkbox Indent in Google Docs
Step 1
Begin by navigating to the section of your document where you wish to reduce the indent.
Step 2
Observe the toolbar above your document, where a rectangular dash and a triangle are displayed. Click on the rectangular icon and drag it to the right or left to adjust the indent as desired.
Pro tips for successfully decreasing checkbox indent using checkbox in google docs
Adjust Using the Ruler: After inserting a checkbox, use the ruler at the top to move the checkbox left or right for precise indentation control.
Modify the List Format: Right-click on the list, select List options > Align & Indent, and adjust the indent to decrease space.
Use Keyboard Shortcuts: Press Tab to increase and Shift + Tab to decrease the indent of the checkbox list.
Apply to Multiple Checkboxes: Select all checkboxes, then adjust the indent using the ruler or the format options for consistency across items.
Preview Before Finalizing: After adjusting, review the document to ensure the indentation looks clean and aligns with the rest of the content.
Common pitfalls and how to avoid them for decreasing checkbox indent using checkbox in google docs
Accidentally Adjusting Text Indentation Instead of Checkbox: Changing the text indent can cause the checkbox to misalign.
Fix: Use the ruler to adjust the checkbox indent, not the text indent.Indenting Beyond the Left Margin: Moving the checkbox too far left may cause it to disappear from view.
Fix: Use the ruler and stop when the checkbox reaches the left margin or a reasonable indent level.Forgetting to Apply Indent to All Checkboxes: Adjusting one checkbox might leave others out of alignment.
Fix: Select all checkboxes and adjust the indent at once for consistent formatting.Overcomplicating with List Settings: Using excessive list options or formatting can lead to unwanted results.
Fix: Stick to simple adjustments via the ruler or Align & Indent options.Not Testing After Changes: Changing indent settings without previewing may result in misalignment.
Fix: Always preview the document after making changes to ensure the formatting looks correct.
Common FAQs for how to decrease checkbox indent using checkbox in google docs
How do I decrease the indent for checkboxes in Google Docs?
Use the ruler to move the checkbox or adjust the indent via List options > Align & Indent.Can I adjust the checkbox indent without affecting the text?
Yes, adjust the checkbox indent separately using the ruler or List options without modifying text indentation.Is there a keyboard shortcut for adjusting checkbox indent?
Yes, press Shift + Tab to decrease the indent and Tab to increase it.How do I change the indent for multiple checkboxes?
Select all checkboxes and adjust the indent simultaneously using the ruler or Align & Indent settings.Why isn’t my checkbox indent changing?
Ensure you’re adjusting the correct setting (checkbox indent vs. text indent) and use the ruler or List options for precise control.How to screen record on mac?
To screen record on a Mac, you can use Trupeer AI. It allows you to capture the entire screen and provides AI capabilities such as adding AI avatars, add voiceover, add zoom in and out in the video. With trupeer’s AI video translation feature, you can translate the video into 30+ languages.How to add an AI avatar to screen recording?
To add an AI avatar to a screen recording, you'll need to use an AI screen recording tool. Trupeer AI is an AI screen recording tool, which helps you create videos with multiple avatars, also helps you in creating your own avatar for the video.How to screen record on windows?
To screen record on Windows, you can use the built-in Game Bar (Windows + G) or advanced AI tool like Trupeer AI for more advanced features such as AI avatars, voiceover, translation etc.How to add voiceover to video?
To add voiceover to videos, download trupeer ai chrome extension. Once signed up, upload your video with voice, choose the desired voiceover from trupeer and export your edited video.How do I Zoom in on a screen recording?
To zoom in during a screen recording, use the zoom effects in Trupeer AI which allows you to zoom in and out at specific moments, enhancing the visual impact of your video content.
People also ask
Technical Documentation Generator
How to Use Text to Speech in Google Docs
How to Insert a Video into Google Docs
How to Double Space in Google Docs
Related Tutorials

