
Come scaricare una board di Miro
Scopri come scaricare una lavagna Miro come immagine o PDF. Segui questa guida rapida per esportare la tua lavagna Miro per l'uso offline o per condividerla con il tuo team
Per scaricare una bacheca Miro, devi prima esportarla in un formato desiderato, come PDF o immagine. Quindi, puoi scaricare il file esportato sul tuo dispositivo. Miro offre diverse opzioni di esportazione, tra cui PDF, immagine, CSV e backup della bacheca.
Passaggi per scaricare una bacheca Miro:
Apri la bacheca Miro: Vai alla bacheca che vuoi scaricare.
Accedi al menu di esportazione: Fai clic sui tre puntini verticali (di solito nell'angolo in alto a sinistra) e seleziona "Board" per trovare le opzioni di esportazione.
Scegli il formato di esportazione: Seleziona il formato desiderato, ad esempio "Salva come PDF" o "Salva come immagine".
Seleziona le impostazioni di esportazione (se applicabile): Se hai scelto PDF, potresti avere opzioni per la dimensione del file (piccola o qualità migliore).
Per le immagini, potresti poter selezionare la dimensione (ad es., Piccola, Media, Grande o Vettoriale). Avvia l'esportazione: Fai clic sul pulsante di esportazione.
Scarica il file: Una volta completata l'esportazione, il file verrà scaricato sul tuo dispositivo, di solito nella cartella Download.
Guida passo passo: come scaricare una bacheca Miro
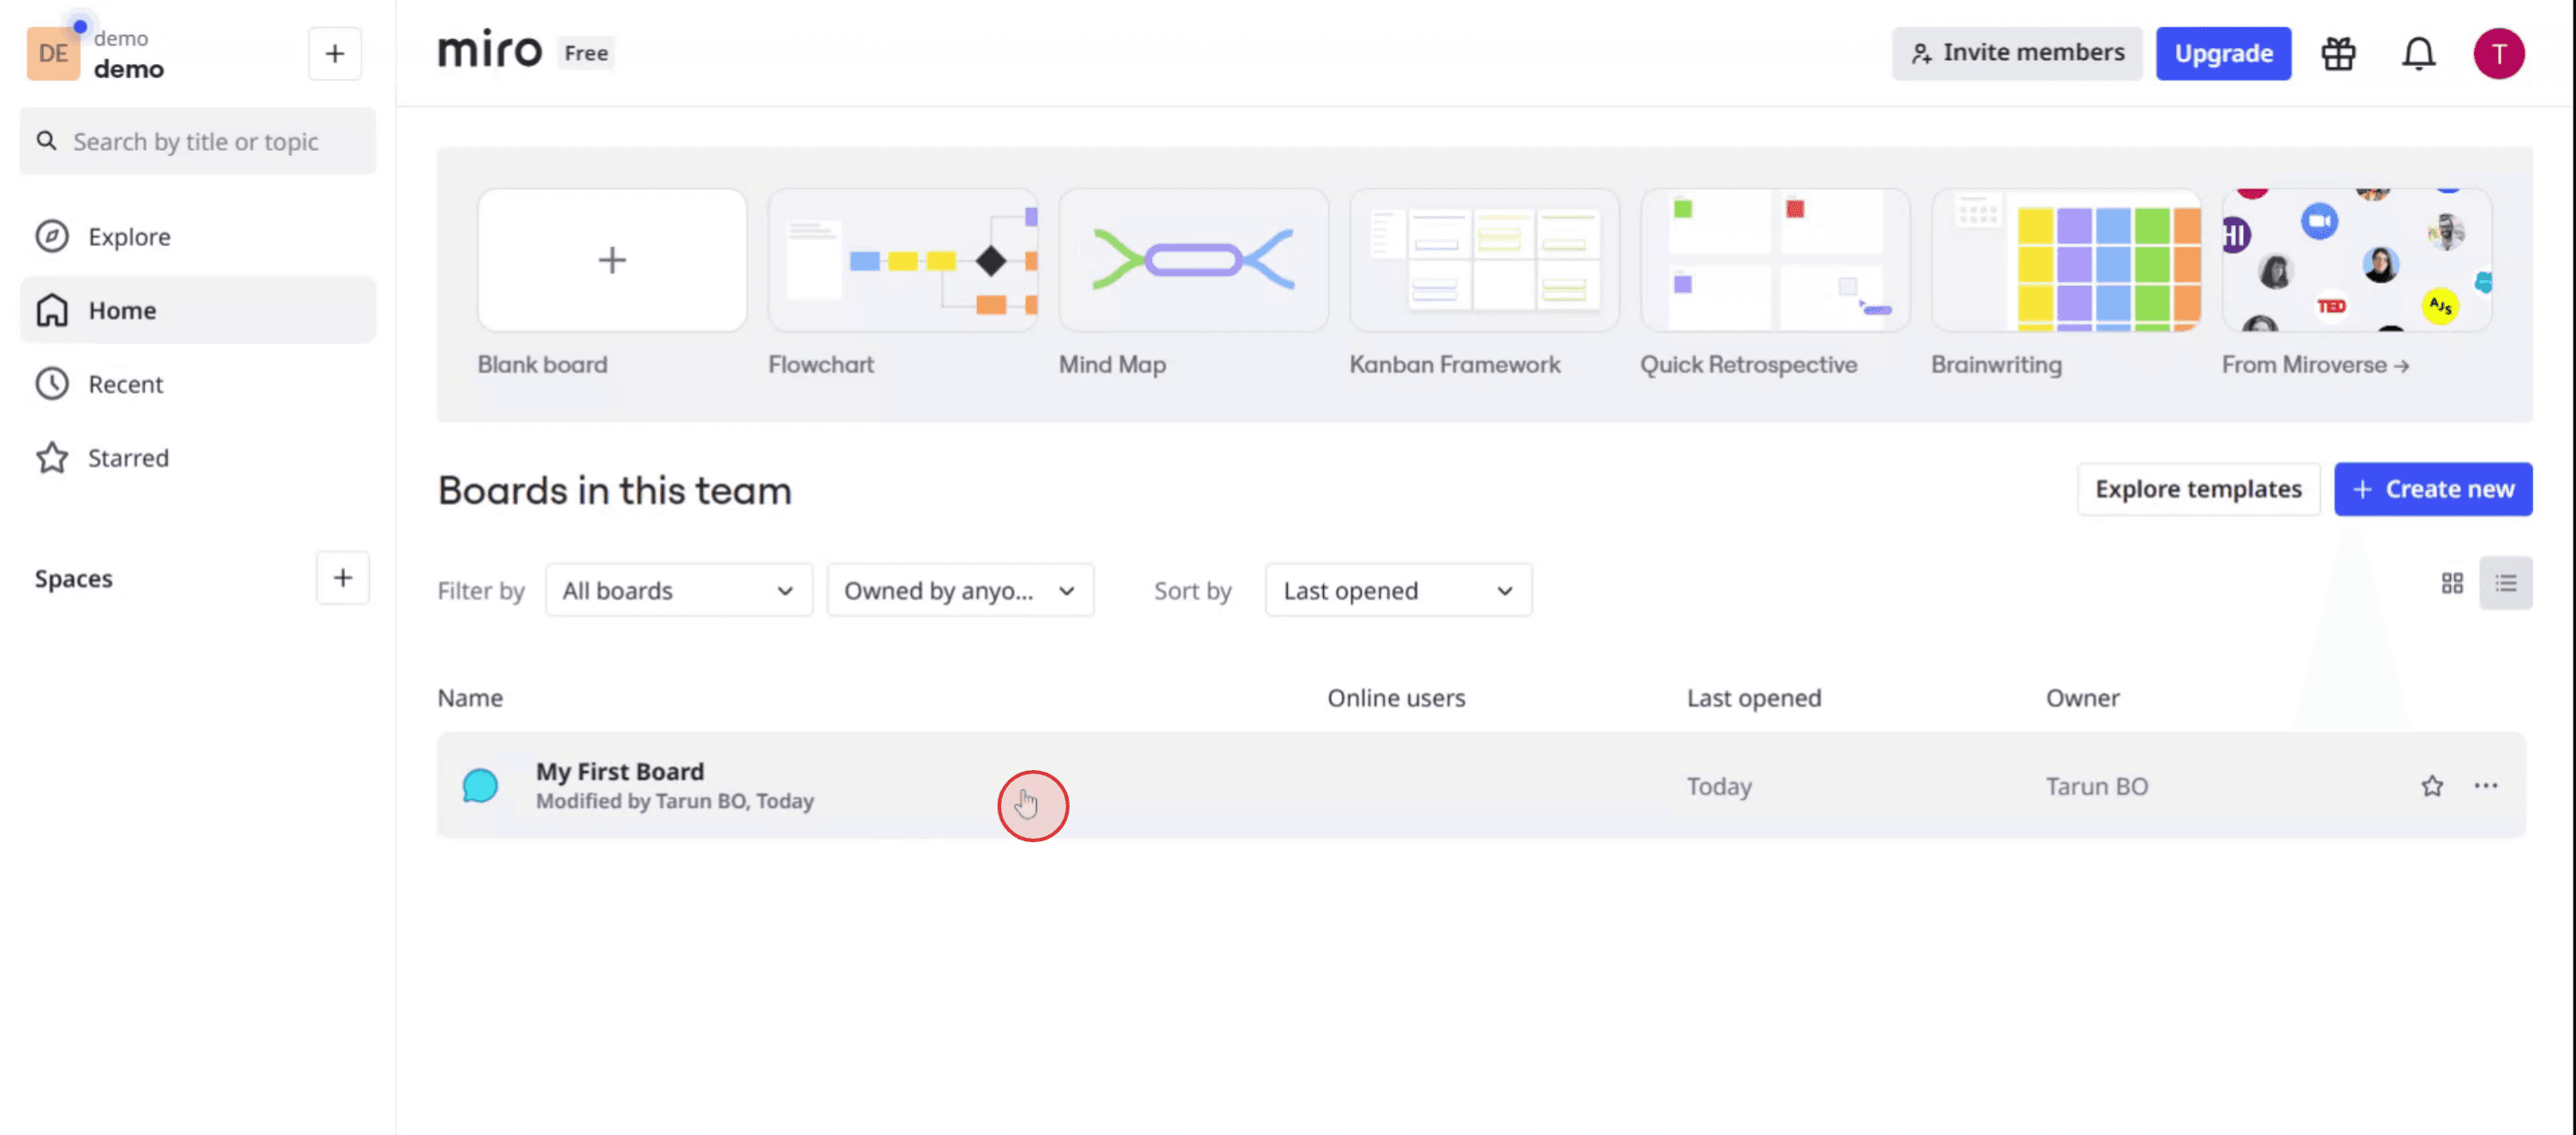
Passaggio 1
Seleziona la bacheca Miro desiderata,
Passaggio 2
Quindi, individua e fai clic sull'opzione 'Export'.
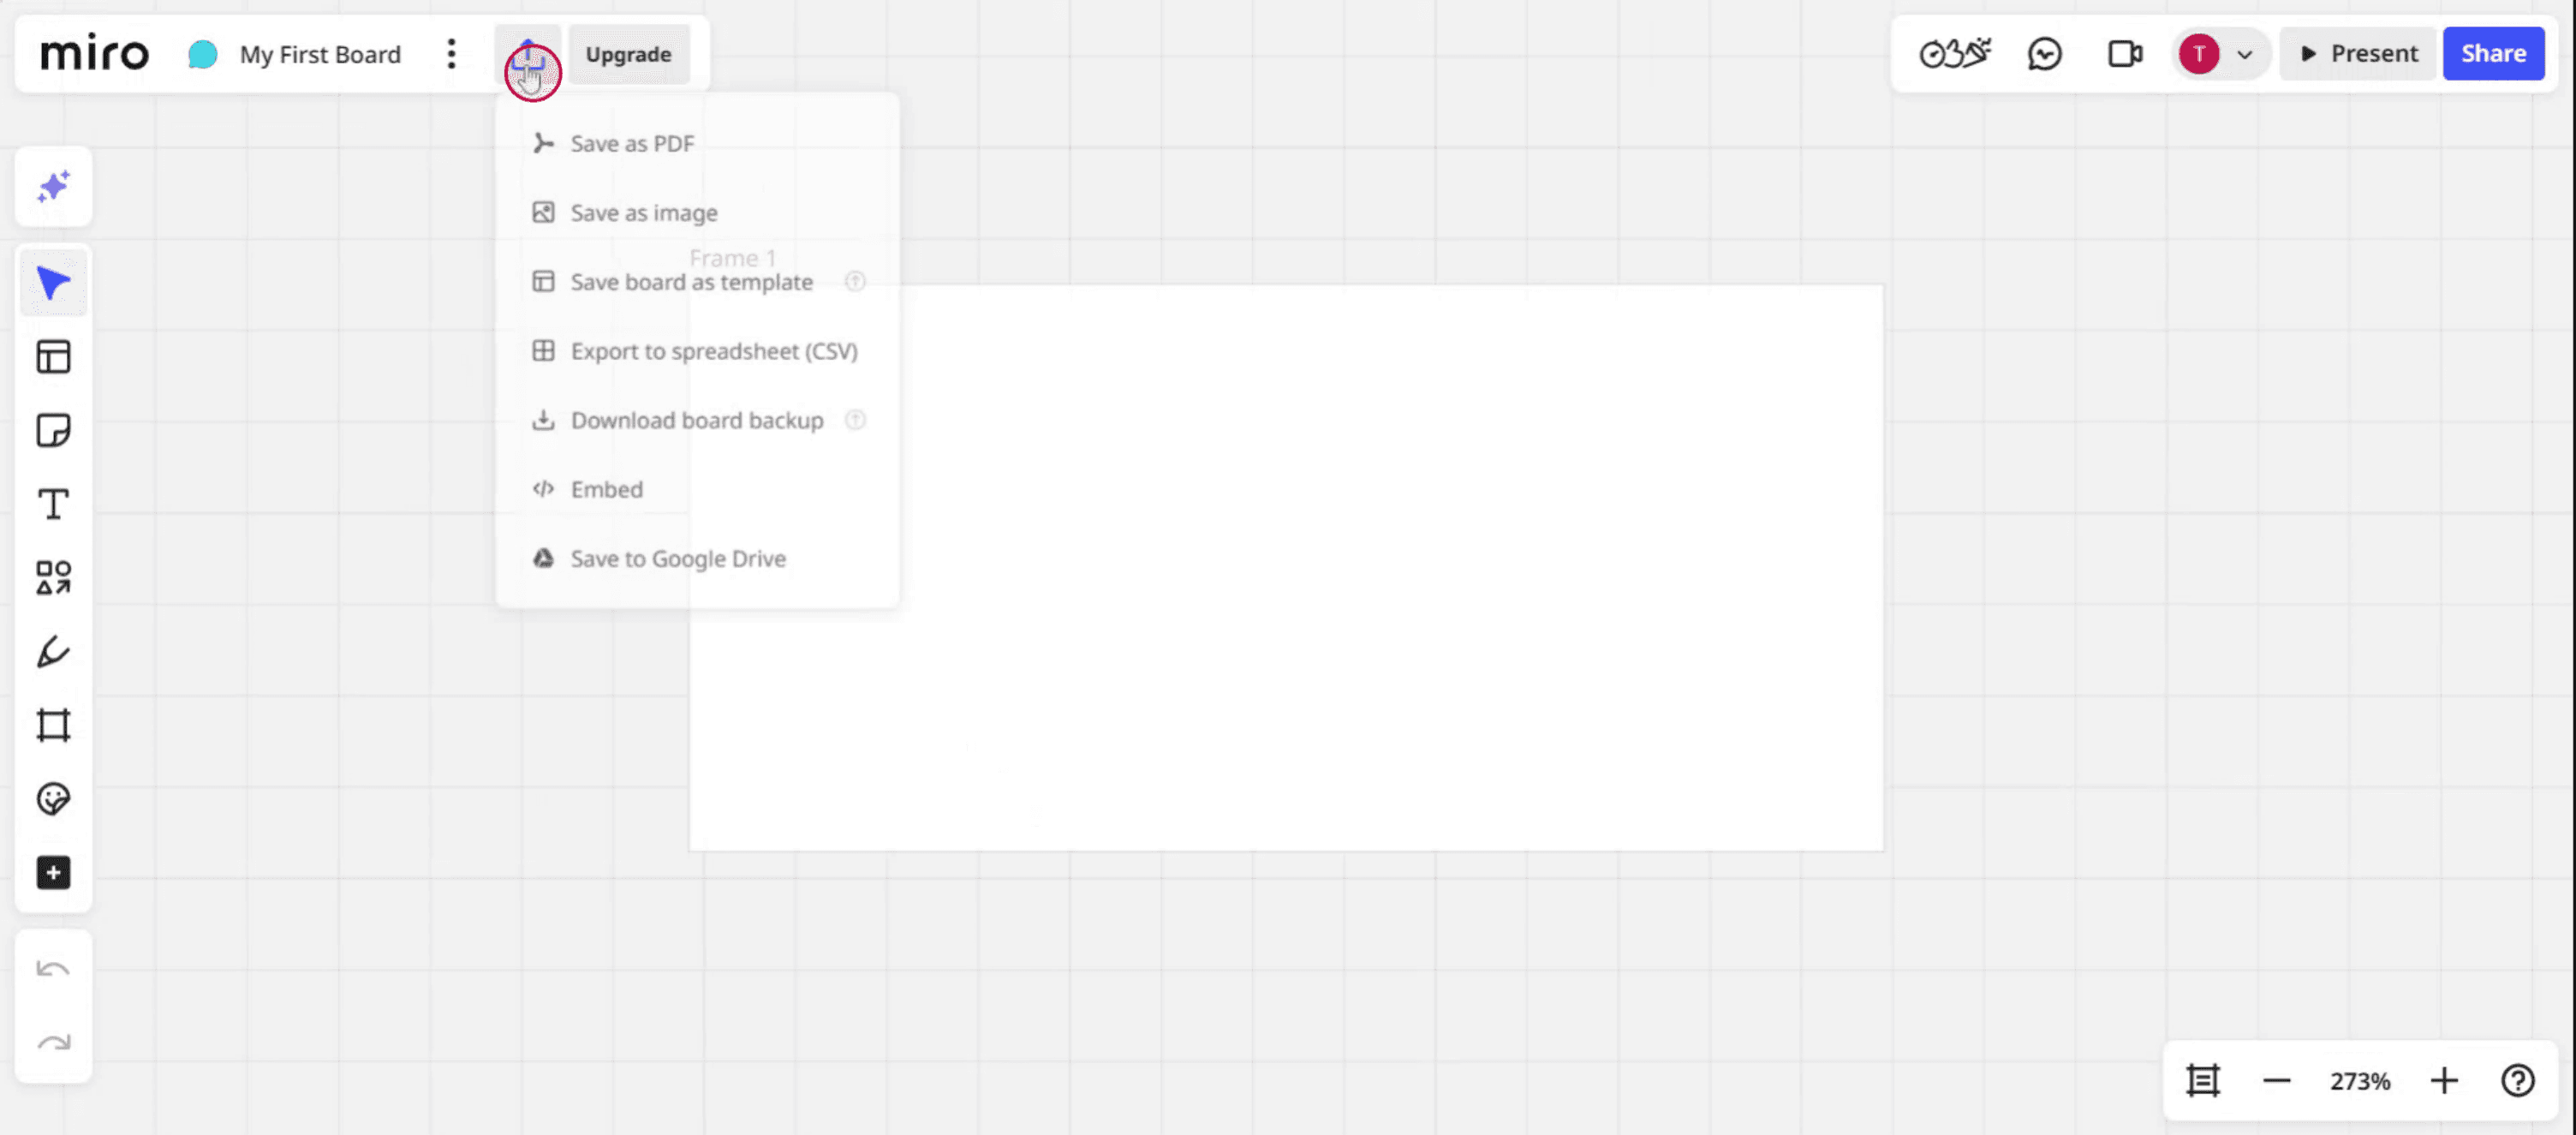
Passaggio 3
Seleziona l'opzione per scaricare come PDF.

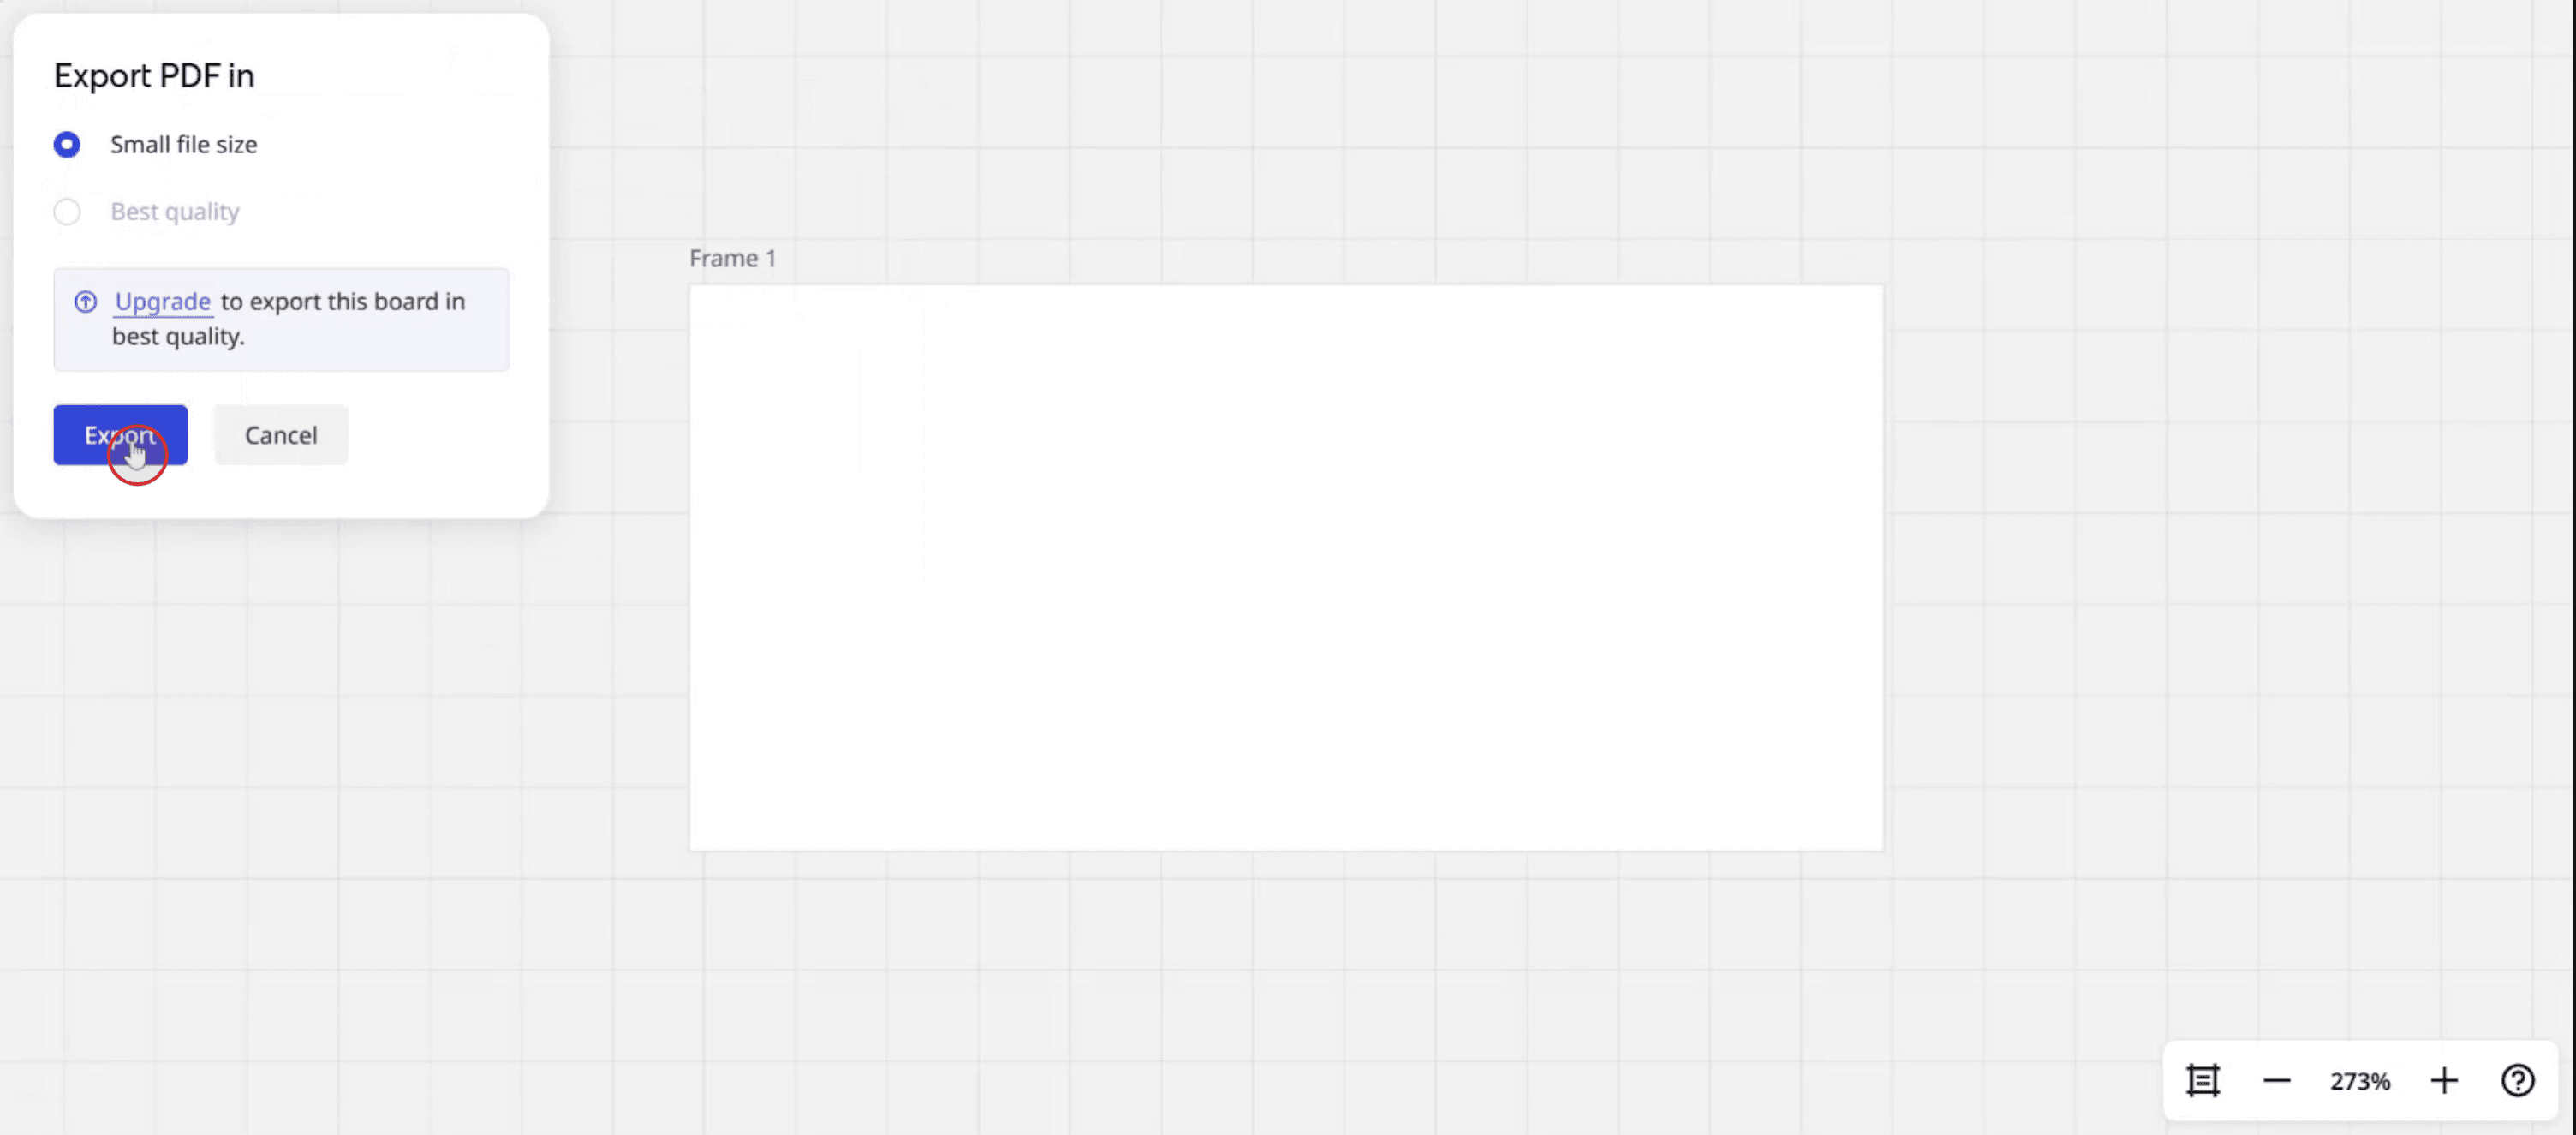
Passaggio 4
Fai clic su 'Export' per completare il processo.
Consigli pratici per scaricare una bacheca Miro
Apri la tua bacheca Miro
Accedi al tuo account Miro e apri la bacheca che vuoi scaricare.Fai clic sui tre puntini nell'angolo in alto a destra
Individua il menu Altro (tre puntini verticali) nella barra degli strumenti superiore della bacheca.Seleziona Esporta come immagine o PDF
Nel menu a discesa, scegli “Esporta come immagine” o “Esporta come PDF” in base al formato file che preferisci.Scegli l'area di esportazione
Puoi esportare l'intera bacheca o selezionare un frame specifico. Per le bacheche grandi, usare i frame garantisce un layout e un'organizzazione migliori nel download.Regola le impostazioni di esportazione
Seleziona la risoluzione dell'immagine (per PNG) o il formato carta (per PDF). Assicurati di controllare eventuali opzioni aggiuntive come la visibilità dello sfondo o l'inclusione della griglia.Fai clic su Esporta e attendi che il file venga generato
Dopo aver confermato le impostazioni, fai clic sul pulsante Esporta. Miro preparerà il file e avvierà il download.Salva il file sul tuo dispositivo
Una volta che il file è pronto, verrà scaricato automaticamente oppure ti verrà fornito un link per il download. Salvalo sul tuo computer o nello storage cloud.
Errori comuni e come evitarli
L'opzione di esportazione non è visibile
Assicurati di avere il livello di accesso corretto. Solo gli editor e i proprietari della bacheca possono esportare contenuti.L'immagine o il PDF sono vuoti o ritagliati
Usa sempre i frame quando esporti bacheche grandi per evitare di perdere contenuti nel file di output.Output a bassa risoluzione
Se la qualità dell'immagine è scarsa, seleziona l'alta risoluzione nelle impostazioni di esportazione prima di scaricare.Bacheca troppo grande da esportare
Suddividi la bacheca in più frame o sezioni se è troppo grande per essere esportata come un'unica immagine o PDF.Non si scarica su mobile
Alcune opzioni di esportazione potrebbero non funzionare correttamente sui browser mobili. Usa la versione desktop per ottenere i migliori risultati.
Domande frequenti comuni sul download di una lavagna Miro
Come posso esportare una lavagna Miro come PDF o immagine?
Fai clic sul menu a tre puntini sulla lavagna, quindi scegli “Esporta come immagine” o “Esporta come PDF.”Posso esportare solo una parte della lavagna?
Sì, usa i frame per definire ed esportare solo sezioni specifiche della lavagna.Perché non riesco a vedere l'opzione di esportazione?
Potresti non avere i permessi corretti. Solo gli editor o i proprietari della lavagna possono accedere agli strumenti di esportazione.In quali formati posso scaricare la mia lavagna Miro?
Puoi scaricarla in PNG, PDF e talvolta come CSV (per tabelle o lavagne con dati).C'è un modo per scaricare una lavagna Miro con sfondo trasparente?
Quando esporti in PNG, puoi abilitare o disabilitare lo sfondo nelle impostazioni di esportazione.Come registrare lo schermo su Mac?
Per registrare lo schermo su un Mac, puoi usare Trupeer AI. Consente di catturare l'intero schermo e offre funzionalità AI come l'aggiunta di avatar AI, l'aggiunta di voiceover, l'aggiunta di zoom avanti e indietro nel video. Con la funzione di traduzione video AI di Trupeer, puoi tradurre il video in oltre 30 lingue.Come aggiungere un avatar AI a una registrazione dello schermo?
Per aggiungere un avatar AI a una registrazione dello schermo, dovrai usare uno strumento di registrazione dello schermo con IA. Trupeer AI è uno strumento di registrazione dello schermo con IA, che ti aiuta a creare video con più avatar e ti aiuta anche a creare il tuo avatar per il video.Come registrare lo schermo su Windows?
Per registrare lo schermo su Windows, puoi usare la Game Bar integrata (Windows + G) o uno strumento AI avanzato come Trupeer AI per funzionalità più avanzate come avatar AI, voiceover, traduzione, ecc.Come aggiungere una voce narrante al video?
Per aggiungere una voce narrante ai video, scarica l'estensione Chrome di trupeer ai. Una volta registrato, carica il tuo video con voce, scegli la voce narrante desiderata da Trupeer ed esporta il tuo video modificato.Come faccio a ingrandire in una registrazione dello schermo?
Per ingrandire durante una registrazione dello schermo, usa gli effetti di zoom in Trupeer AI che ti consentono di zoomare avanti e indietro in momenti specifici, migliorando l'impatto visivo dei contenuti video.
Le persone chiedono anche
Generatore di documentazione tecnica
Come ruotare un documento in Canva
Come usare la maschera in Canva
Tutorial correlati

