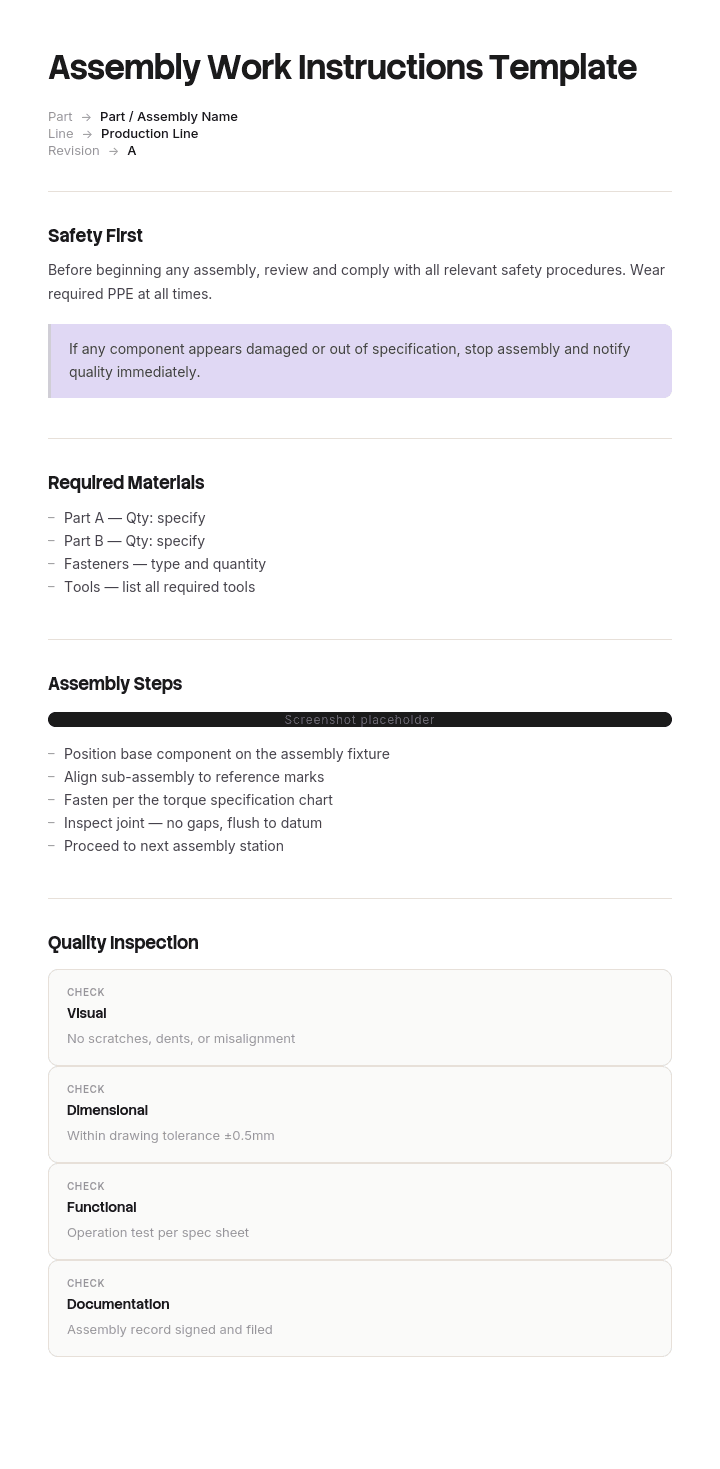
Use this template
Assembly work instructions are the difference between consistent quality and recurring rework. With Trupeer, you can save hours on writing assembly instructions by starting with a free assembly work instructions template, customizing it with your brand guidelines, and turning written instructions into video walkthroughs operators can watch right at the line.
An assembly work instruction has one job: let a trained operator build the part correctly without asking anyone. If they have to ask, the instruction failed.
Generic templates miss what assembly actually needs. Part numbers, fastener specs, torque values, tools and fixtures, sequence dependencies, and the checkpoint that catches the error before it reaches the next station. This free assembly work instructions template has those fields built in.
Anatomy of one assembly step
The step is the unit that matters. Get this block right and the document builds itself.
Element | Example |
|---|---|
Step number | 4 of 11 |
Action | Fit bracket to housing and torque fasteners |
Parts | BRK-2214 x1, M6x20 bolt PN-0451 x4, washer PN-0088 x4 |
Tools and fixtures | Torque wrench 5 to 25 Nm, fixture FX-08 |
Specification | 12 Nm ±1, tighten in diagonal sequence |
Visual | Photo or clip showing fastener sequence |
Quality check | Verify gap under 0.5 mm at both mating faces |
If it fails | Loosen, reseat bracket, re-torque. Do not exceed 2 attempts, then tag for rework |
Time | 90 seconds |
One action per step. If a step contains "and then", split it. The most common defect source on any line is a step that quietly contained two operations, one of which the operator learned to skip.
The assembly work instructions template
Header block, completed once per document:
Field | Enter |
|---|---|
Document number and revision | WI-0142, Rev C |
Assembly name and part number | Pump sub-assembly, PN-77120 |
Workstation or cell | Cell 3, Station 2 |
Total cycle time | 14 minutes |
Written by and date | Name, date |
Approved by and date | Name, date |
Related drawing or BOM | DWG-77120-A, BOM Rev 4 |
PPE required | Safety glasses, cut-resistant gloves |
Safety and ESD notes | ESD wrist strap required at Station 2 |
Step block, repeated per step: step number, action, parts, tools and fixtures, specification, visual, quality check, failure action, time.
Sign-off block, completed at the end: operator name, quantity built, date, first-article inspection result, inspector sign-off, deviations noted.
How to customize this template in Trupeer
Step 1: Open the Templates Section
Go to the Templates section from the main navigation.
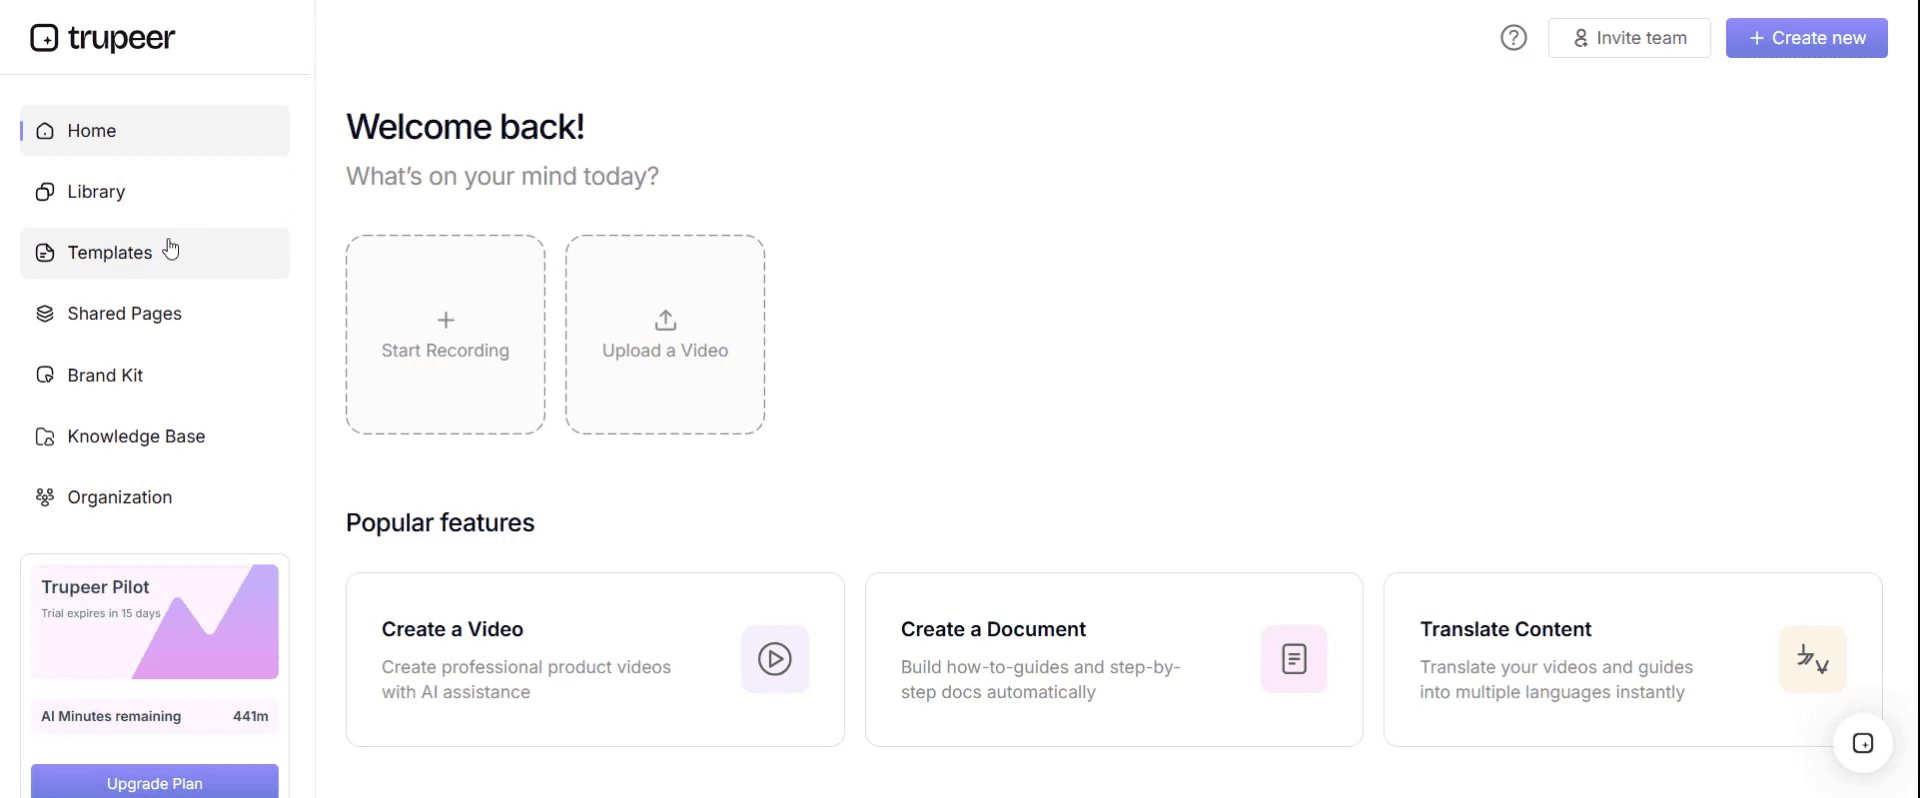
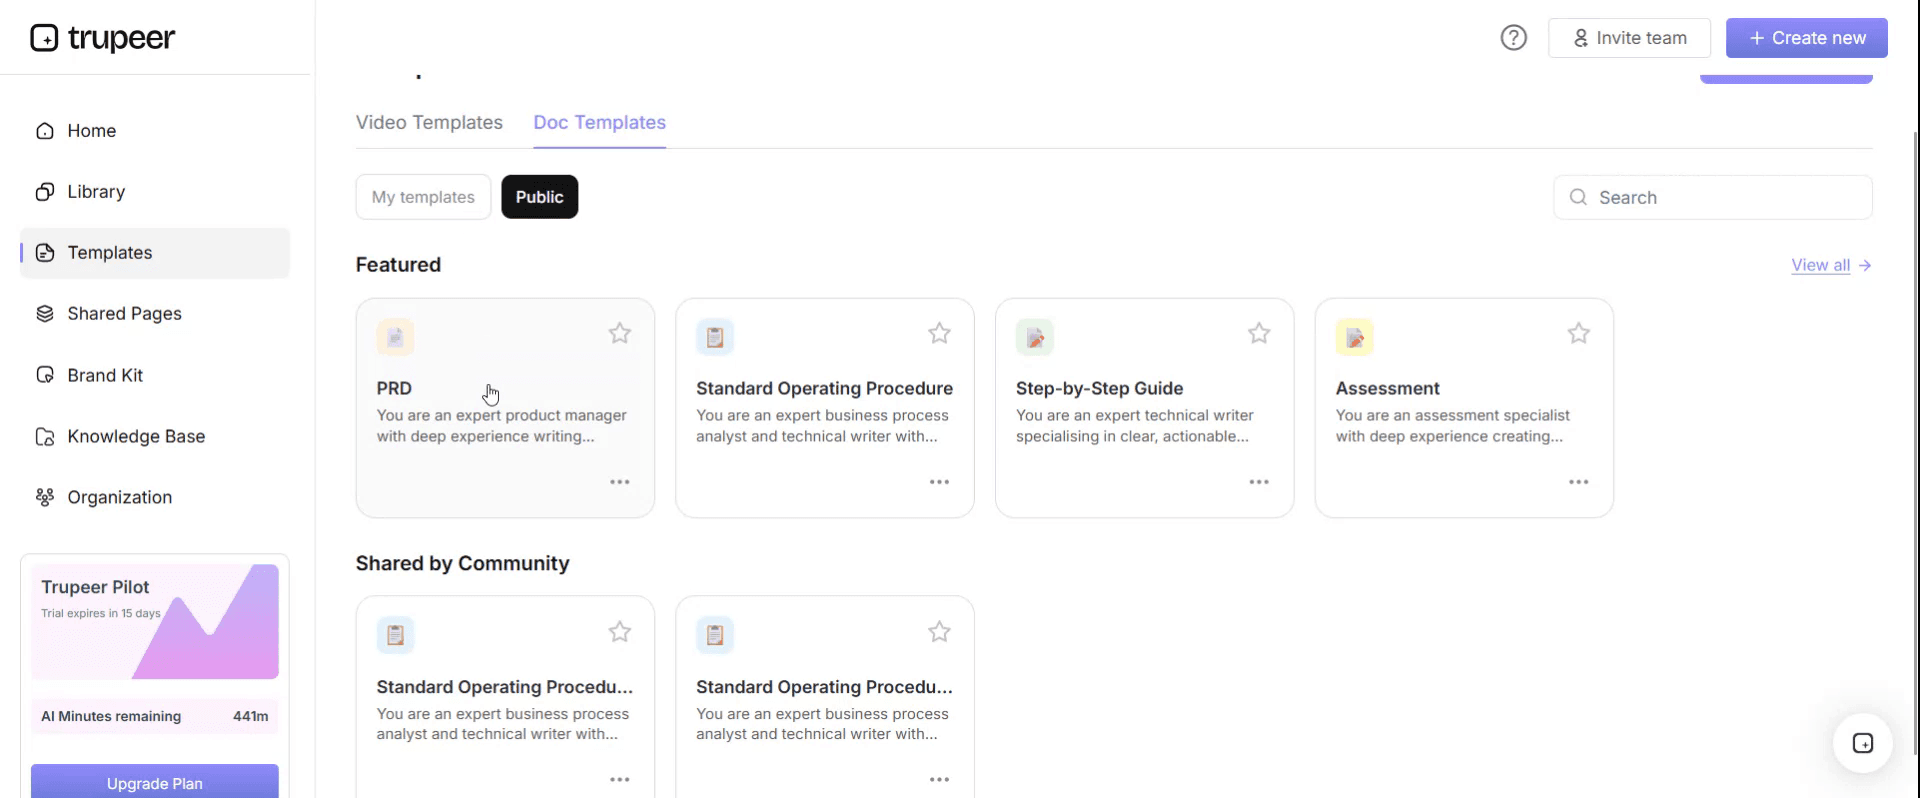
Step 2: Select and Open a Template
Click on any template you want to work with to open it.
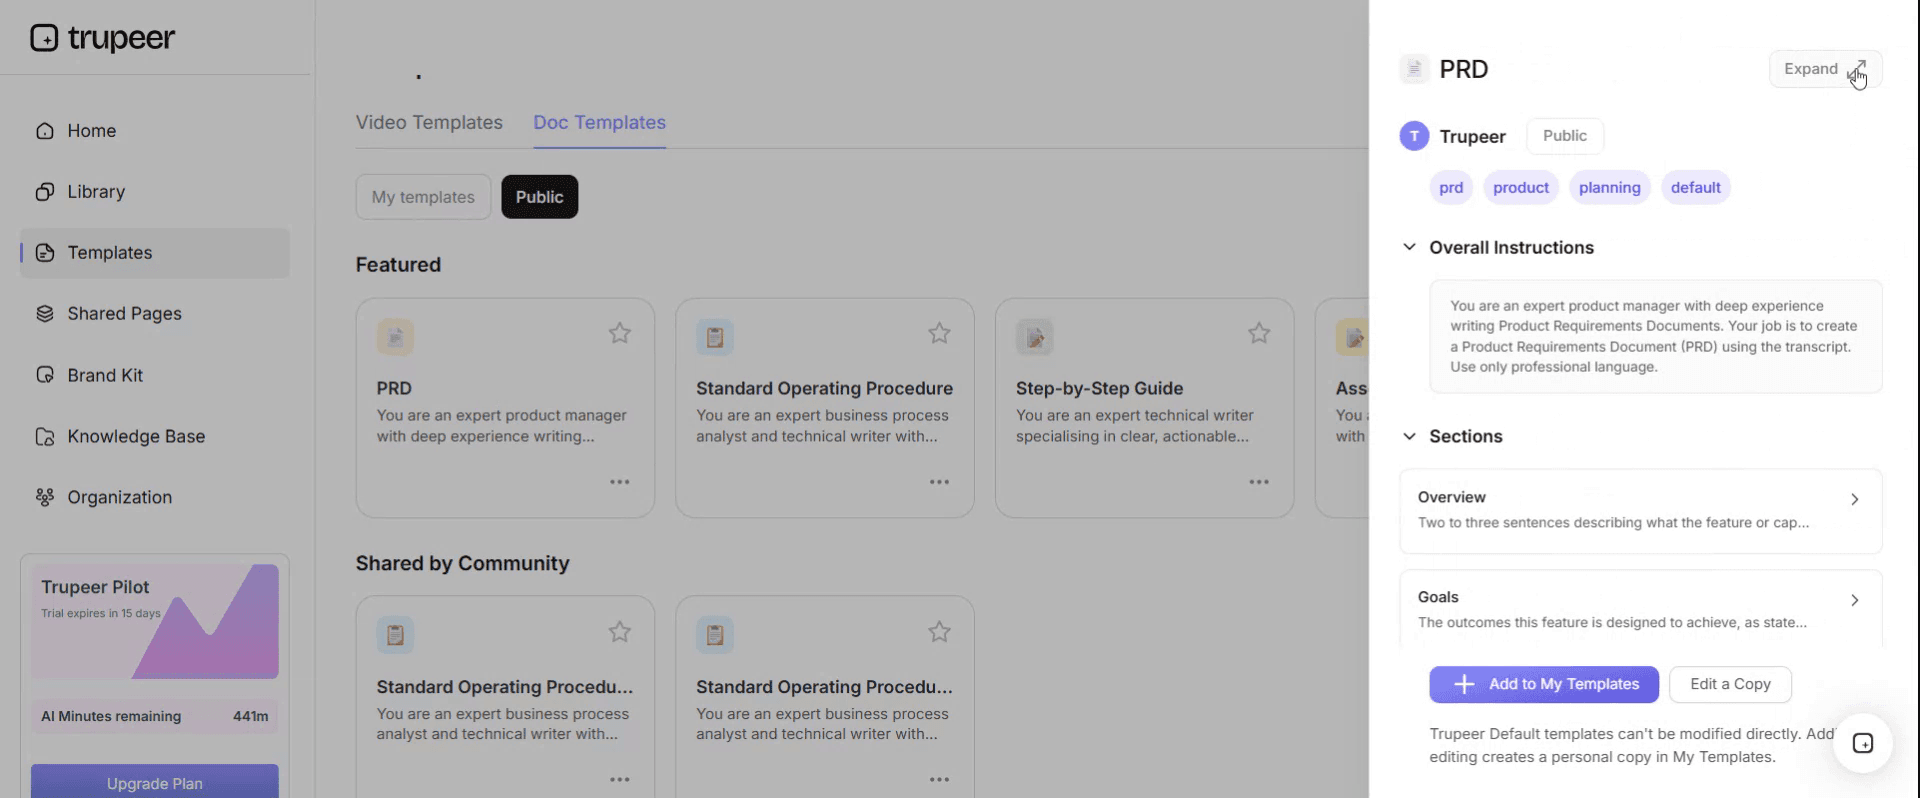
Step 3: Expand the Template View
If needed, expand the template view to see the full layout and details clearly.
Step 4: Edit the Template
Click on Edit to start modifying the selected template.
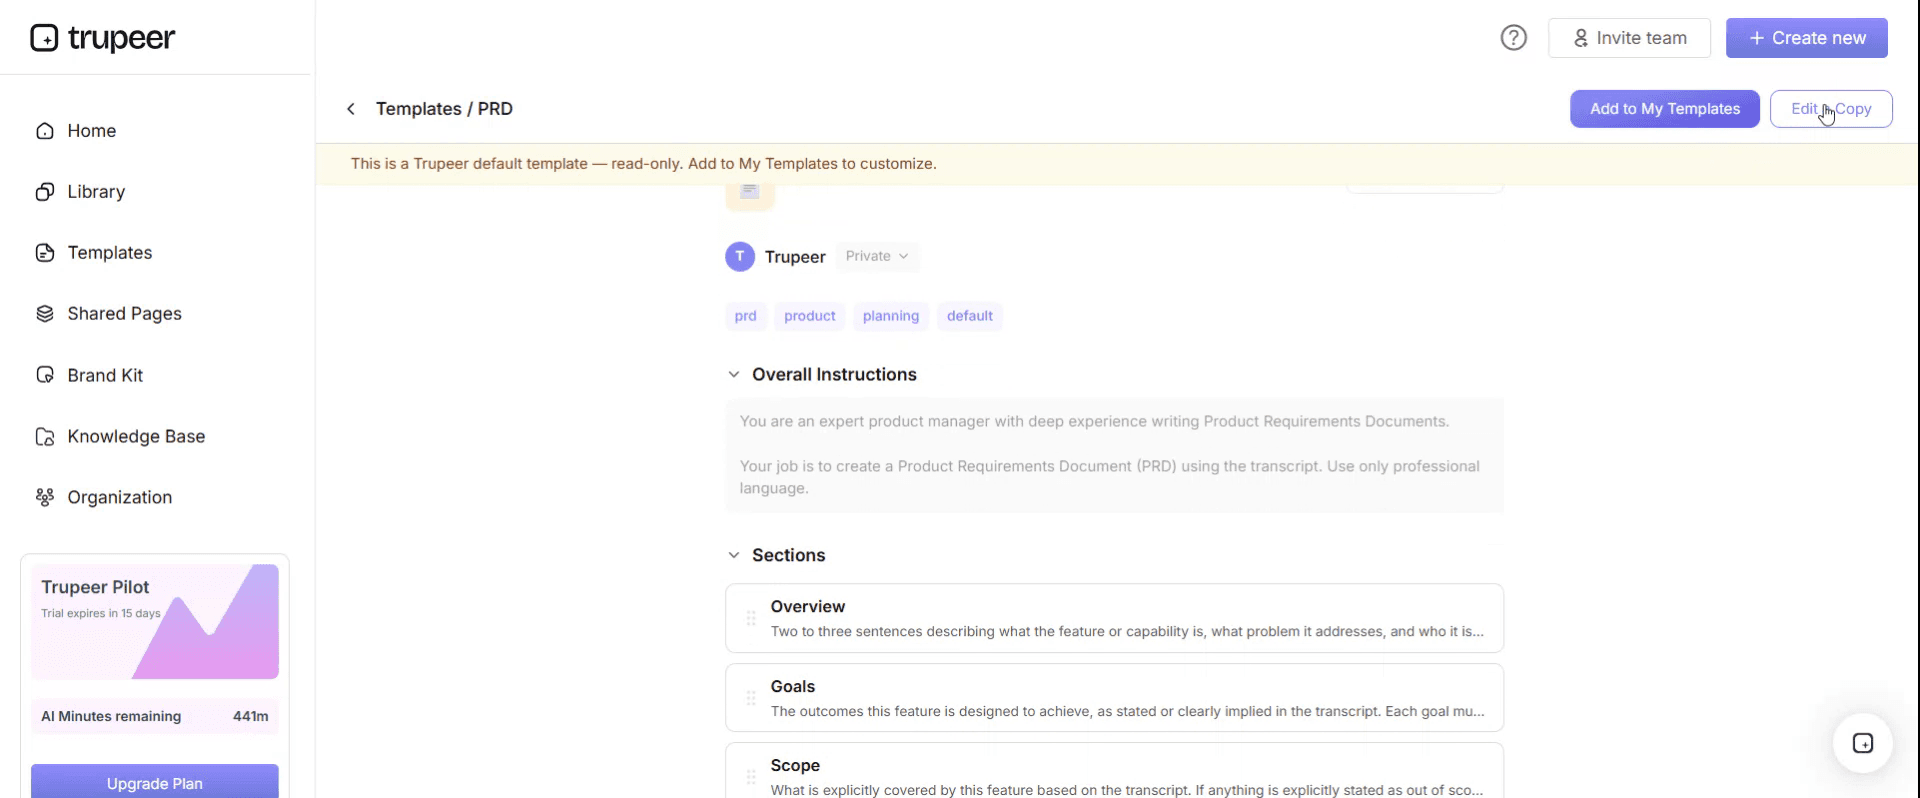
Within the editor, you can:
Add new sections
Define or update formatting rules
Add a logo and adjust its position and related settings
Step 5: Save Your Customized Template
After making all necessary changes, click Save to store the updated template as your own.
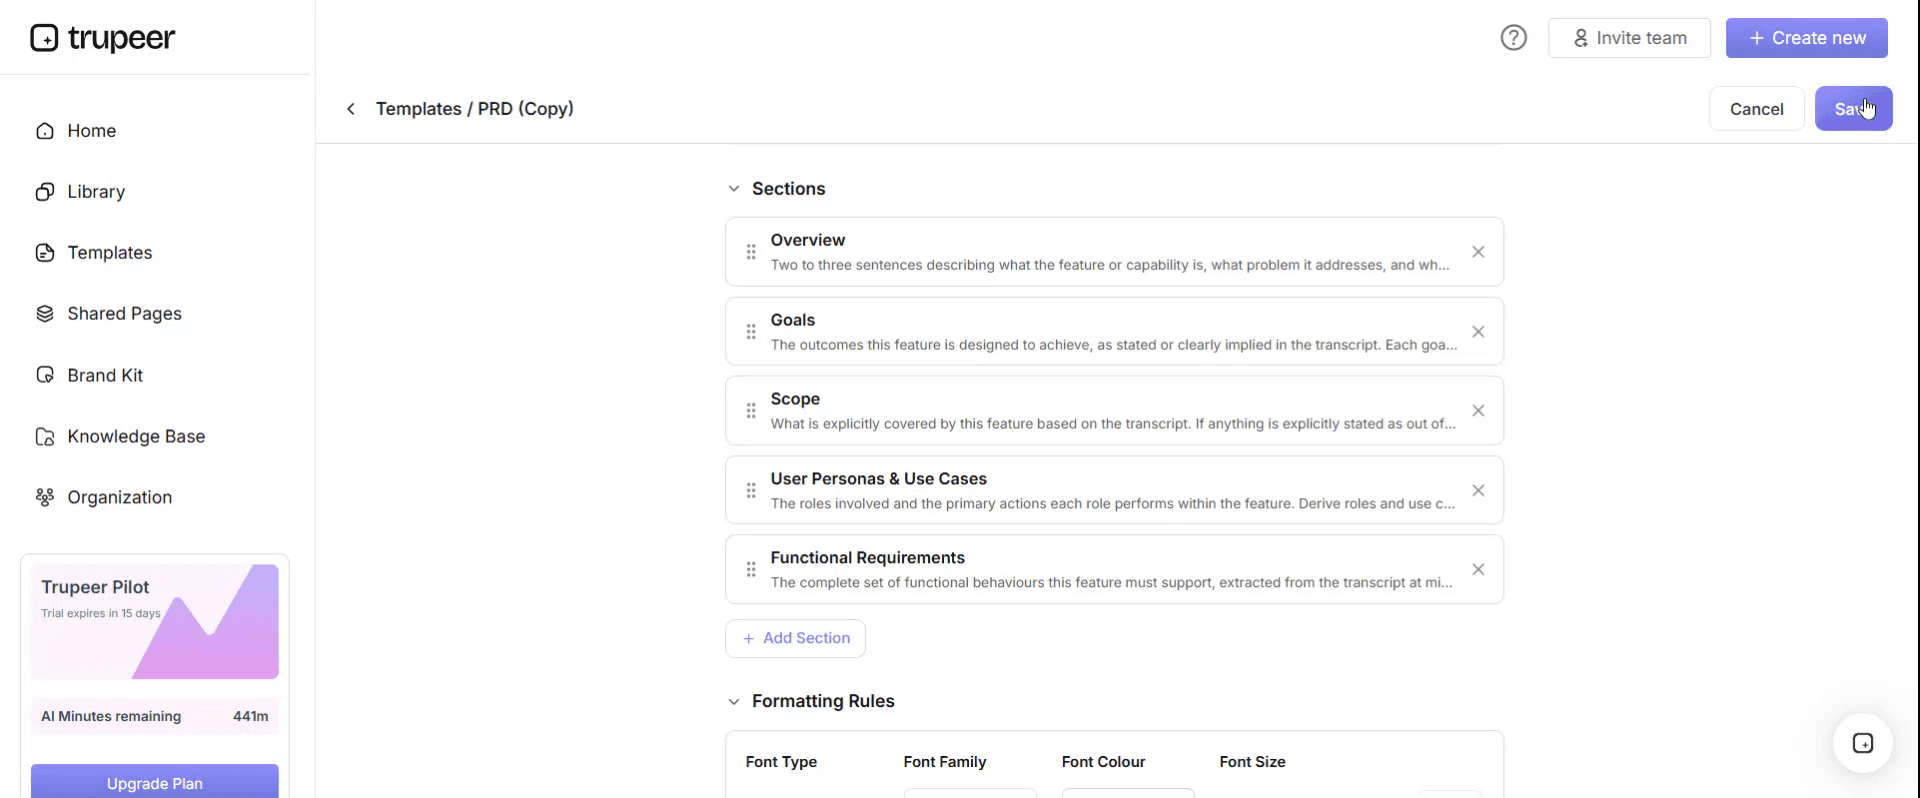
Step 6: Preview and Fine-Tune the Template
When you want to see how your customized template looks, open the Preview.
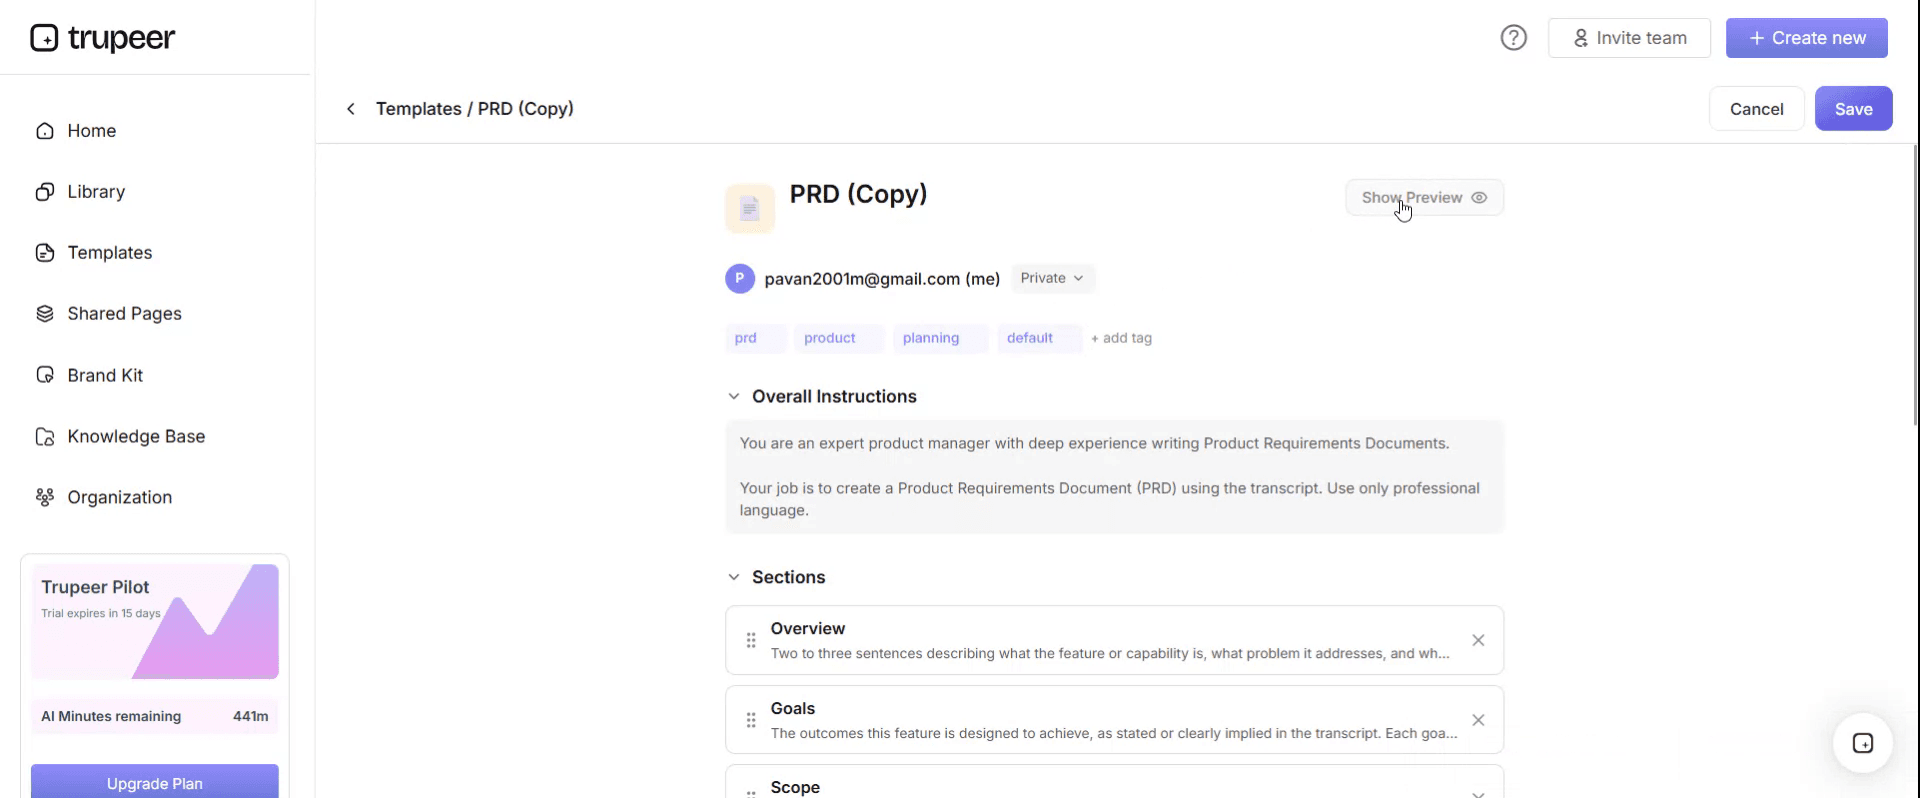
From the preview screen, you can continue to make adjustments directly if needed, ensuring the template appears exactly as you want.
Filled-in assembly work instruction example
WI-0142 Rev C. Pump sub-assembly PN-77120. Cell 3, Station 2. Cycle time 14 minutes. PPE: safety glasses, cut-resistant gloves.
# | Action | Parts and tools | Spec | Quality check | Time |
|---|---|---|---|---|---|
1 | Load housing into fixture, locating pin to the rear | HSG-7712, fixture FX-08 | Pin fully seated, no rock | Housing does not lift when tapped | 30s |
2 | Press bearing into housing bore | BRG-3390, arbor press, arbor AR-12 | Press to shoulder, 2 to 4 kN | Bearing flush to bore face | 60s |
3 | Fit shaft through bearing, rotate to check | SHF-5510 | Turns freely by hand, no binding | Free rotation, no axial play over 0.1 mm | 45s |
4 | Fit bracket, torque 4 fasteners diagonally | BRK-2214, M6x20 PN-0451 x4, torque wrench | 12 Nm ±1 | Gap under 0.5 mm both faces, paint mark each fastener | 90s |
5 | Fit seal, lip facing inboard | SEAL-1180, seal driver SD-04 | Seated flush, lip undamaged | Visual: lip orientation correct, no nicks | 45s |
6 | Fit impeller, torque retaining nut | IMP-4402, nut PN-0620, torque wrench | 18 Nm ±1 | Impeller does not contact housing when rotated | 75s |
7 | Fit cover, torque 6 fasteners in star pattern | COV-8890, M5x16 PN-0433 x6 | 8 Nm ±0.5, star sequence | All 6 paint marked, cover seated evenly | 120s |
8 | Leak test at 2 bar for 30 seconds | Test rig TR-02 | No pressure drop over 0.05 bar | Pass or fail recorded on rig printout | 60s |
9 | Apply label with part and serial number | Label LBL-7712, printer P-3 | Label square, legible, serial recorded | Serial matches build record | 30s |
10 | Record build and attach rig printout | Build record sheet | All fields complete | Inspector sign-off | 45s |
11 | Transfer to Station 3 in returnable tote | Tote RT-14 | Max 6 per tote, dividers fitted | No unit contact | 30s |
Sign-off: operator, quantity, date, first-article inspection result, inspector, deviations.
Notice that every step has a specification, a check and a time. Those three make it a work instruction. Without them it's a description of the job.
What a work instructions template must contain
Document number and revision. Operators must be able to tell whether they're holding the current version. Uncontrolled revisions are the most common audit finding.
Scope and part number. Which assembly, which variant, which station.
PPE and safety notes. Before step one, not buried in the middle.
Tools and fixtures list. Including calibration-controlled tools by ID.
Parts list with part numbers. Descriptions alone cause the wrong-part errors.
One action per step, in sequence.
Specifications with tolerances. "Tighten firmly" is not a specification. "12 Nm ±1" is.
A visual per step. Assembly is spatial. Text alone cannot convey orientation.
Quality checkpoints. What to verify, and what the pass condition is.
Failure actions. What the operator does when the check fails, so they don't improvise.
Cycle time per step. For line balancing and for spotting drift.
Approval and sign-off. Who wrote it, who approved it, who built it.
Work instructions vs SOPs vs process documents
These three get used interchangeably and they sit at different levels.
Work instruction | Standard operating procedure | Process document | |
|---|---|---|---|
Scope | One task at one station | One complete procedure across roles | How work flows across a function |
Detail | Every action, spec and tolerance | Steps and responsibilities | High level, often a diagram |
Audience | The operator doing the task | The team performing the procedure | Managers and auditors |
Answers | Exactly how do I do this | Who does what, in what order | How does this function operate |
Length | One or two pages per task | Two to ten pages | Varies |
Example | Torque the cover fasteners to 8 Nm in star sequence | The full sub-assembly build procedure | The manufacturing process from goods-in to dispatch |
The practical rule: an SOP tells you the procedure has a torque step. The work instruction tells you it's 8 Nm in a star sequence, and shows you the pattern. If you find yourself writing tolerances into an SOP, you're writing a work instruction.
Standard work instructions, sometimes called standardized work instructions, are the lean manufacturing version of the same document, with cycle time and takt time treated as first-class fields.
How to write assembly work instructions in eight steps
Watch the job being done by someone good at it. Not the process as documented. The process as performed. The difference is where your improvements are.
Record it while you watch. You will not remember the hand orientation at step four, and neither will the operator you're writing for.
Break it into single actions. One verb each. If a step needs "and", it's two steps.
Pull specifications from the drawing, not from memory. Torque values, tolerances and part numbers come from controlled documents.
Add a visual to every step. Photograph or clip the actual part at the actual station, in the orientation the operator sees it.
Write the quality check and the pass condition. Then write what happens when it fails.
Have a new operator build it from your draft. Every question they ask marks a step that needs rewriting. This is the only real test.
Version it, approve it and put it at the station. An instruction in a shared drive is not at the point of use.
Why visual work instructions matter more in assembly
You cannot describe a hand motion in a sentence. Orientation, sequence, how much force, which way the seal lip faces. Text handles none of it well, which is why assembly is the strongest case for visual work instructions of any documentation type.
Errors drop where orientation is shown rather than described. Seals, gaskets and connectors fitted backwards are the classic text-only failure.
Training time falls. New operators reach standard cycle time faster watching than reading.
Language stops being a barrier. A photo of the correct fastener sequence reads the same in any language.
Ambiguity has nowhere to hide. A written step can be read two ways. A clip cannot.
The practical version: photograph or record the step at the station, annotate the part and direction, and place the visual next to the step rather than in an appendix.
Digital or paper on the shop floor
Paper still wins on some lines and it's worth being honest about why.
Paper works when the station has no screen, the environment is hostile to devices, the assembly rarely changes, or the operator prefers it. Its real cost is revision control. The moment a revision changes, every printed copy at every station becomes a liability, and the audit finding writes itself.
Digital works when revisions are frequent, you need the same instruction in several languages, you want completion and cycle time captured automatically, or the instruction includes video. Its cost is hardware and the habit change.
Most manufacturers end up hybrid: digital as the controlled master, printed copies at stations that need them, with a printed-on date and a revision number so an out-of-date sheet is visible at a glance.
Accessibility and multilingual instructions
Two things that get skipped and cause real problems on a mixed line.
Accessibility. Don't rely on color alone to signal a warning, since red-green color blindness affects roughly one in twelve men. Keep type large enough to read at arm's length under shop lighting. Use plain language and short sentences. Provide the instruction in more than one mode, so a visual step is also described in text for anyone using a screen reader.
Language. If your line runs in more than one language, translated work instructions are a safety issue rather than a nicety. An operator following instructions in their second language works slower and makes more errors, and will not always say so. Translating your instructions into the languages actually spoken on the floor is one of the cheapest quality improvements available, and it's the thing paper-based documentation makes prohibitively expensive.
Other work instruction templates
Template | Use it for | Fields that become essential |
|---|---|---|
Standard work instructions template | Lean manufacturing standard work | Cycle time, takt time, work sequence, WIP |
Visual work instructions template | Any spatial or manual task | Image per step, annotation, orientation callouts |
Manufacturing work instructions template | Machining, forming, finishing | Machine, program number, setup, in-process checks |
Safety work instructions template | Safe work method statements | Hazard, control, PPE, permit, emergency action |
Quality work instructions template | Inspection and test | Sample size, gauge, tolerance, disposition |
ISO 9001 work instructions template | Audited quality systems | Document control, revision history, approval, training record |
Digital work instructions template | Screen-based instructions at the station | Completion tracking, revision push, embedded video |
Engineering work instructions template | Prototype and NPI builds | Drawing revision, deviation log, engineering sign-off |
Production work instructions template | Line and cell operations | Station, changeover, line balance |
Project work instructions template | One-off or site work | Site conditions, permits, sequence dependencies |
Construction work instructions template | On-site trades | Method statement, site risk, inspection hold points |
All of these sit under the [work instructions templates] hub if you need a different one.
ISO 9001 and audit requirements
ISO 9001 doesn't mandate a specific work instruction format. What it requires is control of documented information, which in practice means an auditor will check four things.
Revision control. Every document numbered and revision-marked, with obsolete versions withdrawn from the floor.
Approval. Evidence that a competent person approved the instruction before use.
Availability at the point of use. The instruction must be where the work happens.
Training records. Evidence operators were trained on the current revision, not a superseded one.
The revision history block and approval fields in this template exist for exactly this. The most common finding isn't a badly written instruction, it's a correct instruction at Rev C with Rev B still hanging at the station.
Common mistakes
Vague specifications. "Tighten securely" cannot be inspected or defended in an audit.
No visual. The single biggest cause of orientation errors in assembly.
Multiple actions in one step. The hidden operation is the one that gets skipped.
Written from the drawing instead of the bench. Produces instructions that are technically correct and physically impossible.
No failure path. Operators improvise when a check fails, and improvisation is where variation enters.
Stale revisions on the floor. Correct document, wrong version, same defect.
No cycle time. You lose the ability to balance the line or notice drift.
Never tested with a new operator. The author always thinks it's clear.
Download the free assembly work instructions template
Free, editable and printable, with no watermark.
Format | Best for |
|---|---|
Word (.docx) | Writing and revising the instruction, printing for the station |
Excel (.xlsx) | Step-by-step grids, cycle time totals, standard work sheets |
Printable PDF | Controlled copies at the workstation |
Google Docs | Collaborative review before approval |
Google Sheets | Live standard work and line balance sheets |
Turn a build into an instruction with Trupeer AI
Record the assembly once and Trupeer AI produces the written work instruction and a narrated video walkthrough from the same pass, with the steps captured in the order they actually happened rather than the order someone remembered. Apply your brand kit so every document matches your quality system. Setup is in the template guide.
Then solve the language problem properly. Translate it into 65+ languages so every operator reads the instruction in their own, and store the set in your knowledge base as the controlled master. Use the same recordings for operator training rather than writing training material twice.
Record it. Document it. Translate it. Trupeer it.
With an assembly work instructions template you can:
Save hours on documentation: Skip the blank page with a structure built for assembly tasks.
Reduce defects: Clear visual instructions cut assembly errors significantly.
Stay on-brand: Apply your logo, fonts and colors using Trupeer's brand kit.
Train operators faster: Pair instructions with video walkthroughs at the line.
Standardize across plants: Use the same instructions across every site and shift.
Reach global teams: Translate assembly instructions into 65+ languages with one click.
Great assembly work instructions turn complex builds into consistent, error-free operations. Use this template to capture every assembly clearly and visually.
Frequently Asked Questions
What are assembly work instructions?
Assembly work instructions are step-by-step task guides that walk operators through how to build or assemble a product correctly. They include parts, tools, sequence, torque specs, quality checks and safety requirements - typically supported by visuals or video for clarity.
What should assembly work instructions include?
Effective assembly work instructions include the part name and revision, parts and BOM, required tools, assembly sequence (numbered steps), torque or fastening specs, quality checkpoints, safety precautions, common errors to avoid and a final inspection checklist.
What is the difference between assembly instructions and an SOP?
An SOP describes a broader process - including roles, scope and quality standards. Assembly work instructions are task-specific - they focus on the precise steps to assemble a particular product. Assembly instructions often live inside an SOP for the broader manufacturing process.
Why are visuals important in assembly instructions?
Visuals - photos, exploded diagrams or video - dramatically improve assembly accuracy. They help operators see exactly what each part looks like, where it goes and how it fits. Visuals also bridge language gaps and reduce reliance on text in multilingual workforces.
How do you create assembly work instructions?
Start by observing the assembly being done by an experienced operator. Capture the BOM, tools and sequence. Add photos or video for each step. Specify torque values and quality checks. Test the instructions with a less-experienced operator and refine based on where they get stuck.