
كيفية تغيير حجم التصميم في Canva – خطوات سريعة لأي تنسيق
تعرّف على كيفية تغيير حجم تصميم في Canva سواءً مع Pro أو بدونه. غيّر الأبعاد بسهولة لوسائل التواصل الاجتماعي أو الطباعة أو المقاسات المخصصة.
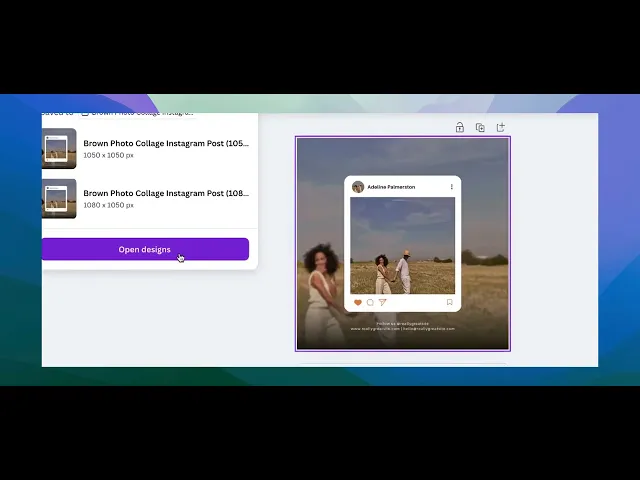
توفّر هذه الوثيقة عملية مفصّلة لضبط أبعاد اللوحة ومساحة العمل باستخدام ميزة تغيير الحجم في Canva.
لتغيير حجم تصميمك في Canva، انقر على زر "تغيير الحجم" في أعلى المحرّر. يمكنك الاختيار من بين الأحجام المسبقة الإعداد أو إدخال أبعادك المخصصة. وإذا كنت بحاجة إلى شيء أكثر تقدّمًا، فإن أداة "Magic Switch" يمكن أن تساعدك في إعادة تنسيق تصميمك لمنصات مختلفة أو حتى ترجمته إلى لغات أخرى.
الخطوات التفصيلية:
1. افتح أداة تغيير الحجم:
في محرّر Canva، ابحث عن زر "تغيير الحجم" في القائمة العلوية، وعادةً ما يكون مميّزًا بأيقونة.
2. اختر الطريقة التي تريد بها تغيير الحجم:
الأحجام المحددة مسبقًا: اختر من بين الأحجام الشائعة لمنصات مثل Instagram وFacebook وغيرها.
الحجم المخصص: اكتب العرض والارتفاع اللذين تريدهما. يمكنك أيضًا قفل أو إلغاء قفل نسبة الأبعاد حسب احتياجاتك.
Magic Switch: استخدم هذه الأداة لتكييف تصميمك بسرعة إلى تنسيقات أو لغات مختلفة، أو حتى إلى أنواع محتوى مثل العروض التقديمية أو منشورات وسائل التواصل الاجتماعي.
3. طبّق تغيير الحجم:
حدّد الصفحات التي تريد تغيير حجمها، سواء كانت كلها أو صفحات معيّنة فقط. سيقوم Canva بعد ذلك بتعديل التصميم ونسخه وتغيير حجمه، أو إنشاء عدة نسخ جديدة اعتمادًا على اختيارك.
4. غيّر حجم العناصر الفردية:
لتعديل حجم مربعات النصوص أو الصور أو غيرها من العناصر، ما عليك سوى سحب مقابض الزوايا أو إدخال الأبعاد بدقة.
دليل خطوة بخطوة: كيفية تغيير حجم التصميم في Canva
الخطوة 1
ابدأ بفتح تصميمك في Canva. في أعلى الشاشة، انقر على "تغيير الحجم."

الخطوة 2
اختر خيار "الحجم المخصص" لتحديد الأبعاد التي تريدها. بعد تحديده، يمكنك اختيار نسخ التصميم وتغيير حجمه وفقًا لذلك.

الخطوة 3
انتظر حتى يكتمل تنزيل التصميم. بعد الانتهاء، ستلاحظ أن الملف قد تم تغيير حجمه بنجاح.

الخطوة 4
لتغيير حجم التصميم يدويًا، ارجع إلى الصفحة الرئيسية. في الصفحة الرئيسية، أنشئ تصميمًا جديدًا.
ارجع إلى صفحة الرئيسية.
انقر إنشاء تصميم > الحجم المخصص وأدخل الأبعاد الجديدة.

الخطوة 5
انسخ جميع العناصر من التصميم الأصلي والصقها في التصميم الجديد بالأبعاد المعدلة.
قد تحتاج إلى تعديل موضع العناصر أو حجمها لتناسب الأبعاد الجديدة.

نصائح احترافية لتعديل أبعاد لوحة في Canva بنجاح
استخدم أداة "Resize" لمستخدمي Pro: إذا كنت تستخدم Canva Pro، فاستخدم خيار "Resize" في شريط الأدوات العلوي لتعديل أبعاد تصميمك فورًا.
اضبط الأبعاد يدويًا للمستخدمين المجانيين: أنشئ تصميمًا جديدًا بأبعاد مخصصة بالنقر على "Custom Size" في الصفحة الرئيسية وإدخال العرض والارتفاع المطلوبين.
اقفل نسبة الأبعاد لإعادة التحجيم بشكل متناسب: عند تغيير الحجم، تأكد من تفعيل أيقونة "lock" للحفاظ على تناسب تصميمك.
عدّل العناصر بعد تغيير الحجم: بعد تغيير الأبعاد، أعد تموضع العناصر وعدّل حجمها للتأكد من أنها تتلاءم تمامًا مع حجم اللوحة الجديد.
نزّل بالدرجة الدقة الصحيحة: عند تغيير الحجم للطباعة أو للشاشات الكبيرة، نزّل التصميم بصيغة PNG أو PDF Print للحفاظ على الجودة.
أخطاء شائعة وكيفية تجنبها عند تعديل أبعاد لوحة في Canva
فقدان محاذاة التصميم: قد يؤدي تغيير الأبعاد إلى إرباك تنسيق عناصر التصميم.
الحل: أعد تموضع العناصر وعدّل أحجامها بعد ضبط أبعاد اللوحة لاستعادة المحاذاة.تشوّه نسبة الأبعاد: قد يؤدي تغيير الحجم دون الحفاظ على نسبة الأبعاد إلى تمديد تصميمك أو ضغطه.
الحل: استخدم أيقونة "lock" للحفاظ على التناسب أثناء تغيير الحجم.إمكانية تغيير الحجم المحدودة للمستخدمين المجانيين: لا يمكن لمستخدمي Canva المجانيين تغيير حجم التصاميم الموجودة مباشرةً.
الحل: أنشئ يدويًا تصميمًا جديدًا بالأبعاد المطلوبة، ثم انسخ والصق العناصر من التصميم القديم.انخفاض جودة الصورة: قد يؤدي تكبير التصميم إلى خفض دقة الصور المضمّنة.
الحل: ابدأ بصور عالية الدقة لتجنب مشاكل الجودة عند تغيير الحجم.مساحات فارغة غير مقصودة: قد يؤدي تغيير الحجم إلى إنشاء مناطق فارغة إضافية في تصميمك.
الحل: املأ المساحات الجديدة أو عدّلها بعناصر تصميم مكملة أو بألوان خلفية.
الأسئلة الشائعة حول كيفية تعديل أبعاد لوحة في Canva
كيف أغيّر حجم لوحة في Canva؟
يمكن للمستخدمين المحترفين استخدام أداة "Resize" في شريط الأدوات العلوي. يحتاج المستخدمون المجانيون إلى إنشاء تصميم جديد بأبعاد مخصصة.ما هي الأبعاد القصوى المسموح بها في Canva؟
يتيح Canva أقصى حجم للتصميم يبلغ 8000 × 3125 بكسل.هل يمكنني تغيير حجم لوحة دون فقدان جودة التصميم؟
نعم، استخدم صورًا عالية الدقة وحافظ على نسبة الأبعاد للحفاظ على الجودة عند تغيير الحجم.هل تغيير الحجم متاح لمستخدمي Canva المجانيين؟
لا يمكن للمستخدمين المجانيين تغيير حجم تصميم موجود مباشرةً، ولكن يمكنهم إعادة إنشائه يدويًا بأبعاد جديدة.كيف أسجّل الشاشة على mac؟
يمكنك استخدام Trupeer AI لـتسجيل الشاشة على جهاز Mac. يتيح لك التقاط الشاشة بالكامل ويوفر إمكانات ذكاء اصطناعي مثل إضافة شخصيات افتراضية بالذكاء الاصطناعي، وإضافة تعليق صوتي، والتكبير والتصغير في الفيديو. مع ميزة ترجمة الفيديو بالذكاء الاصطناعي من trupeer، يمكنك ترجمة الفيديو إلى أكثر من 30 لغة.كيف أضيف شخصية افتراضية بالذكاء الاصطناعي إلى تسجيل الشاشة؟
لإضافة شخصية افتراضية بالذكاء الاصطناعي إلى تسجيل شاشة، ستحتاج إلى استخدام أداة تسجيل شاشة بالذكاء الاصطناعي. Trupeer AI هي أداة تسجيل شاشة بالذكاء الاصطناعي، تساعدك على إنشاء فيديوهات مع عدة شخصيات، كما تساعدك أيضًا في إنشاء شخصيتك الخاصة للفيديو.كيف أسجّل الشاشة على windows؟
لتسجيل الشاشة على Windows، يمكنك استخدام شريط الألعاب المدمج (Windows + G) أو أداة ذكاء اصطناعي متقدمة مثل Trupeer AI للحصول على ميزات أكثر تقدمًا مثل الشخصيات الافتراضية بالذكاء الاصطناعي، والتعليق الصوتي، والترجمة، إلخ.كيف أضيف تعليقًا صوتيًا إلى الفيديو؟
لإضافة تعليق صوتي إلى الفيديوهات، نزّل إضافة Chrome الخاصة بـ trupeer ai. بعد التسجيل، ارفع الفيديو الخاص بك مع الصوت، واختر التعليق الصوتي المطلوب من trupeer ثم صدّر الفيديو المعدّل.كيف أستخدم التكبير في تسجيل الشاشة؟
للتكبير أثناء تسجيل الشاشة، استخدم تأثيرات التكبير في Trupeer AI التي تتيح لك التكبير والتصغير في لحظات محددة، مما يعزز التأثير البصري لمحتوى الفيديو الخاص بك.
يسأل الناس أيضًا
دروس ذات صلة

