
How to Resize in Canva
Learn how to resize designs in Canva with or without a Pro account. Change dimensions for social media, print, or custom sizes in just a few clicks.
This guide provides a step-by-step process for resizing designs in Canva. The resizing feature allows users to adjust their designs to fit different dimensions and formats.
Note that resizing in Canva is a feature available with a Pro Membership, which requires an upgrade to access.
You can resize images, text, videos, or entire designs in Canva using resize handles, position settings, or the Resize & Magic Switch feature (for Pro users).
1. Resize Using Handles:
Click the element (image, text, video) you want to resize.
Drag the corner handles to resize while maintaining aspect ratio.
Use side handles to stretch width or height independently.
2. Resize with Position Settings:
Select the element.
In the top toolbar, click on Position or Size (depending on your version).
Enter specific Width and Height values.
Use the lock icon to maintain or unlock aspect ratio.
3. Using Resize & Magic Switch (Pro feature):
Open your design.
Click Resize & Magic Switch from the top menu.
Choose a preset size or enter custom dimensions.
Select Resize (to update current design) or Copy & resize (to create a new one).
4. Resizing an Entire Design:
Available for Canva Pro, Teams, Education, and Nonprofits.
Go to Resize & Magic Switch, select your new dimensions or template (e.g., Instagram Post, A4), and confirm.
5. Resizing Videos:
Select the video element.
Use the resize handles or enter exact size under Position settings.
Videos can also be resized using Magic Switch for optimal social media formats.
Step-by-Step Guide: how to resize in Canva
Step 1
To resize a design in Canva, begin by opening an existing design.
Step 2
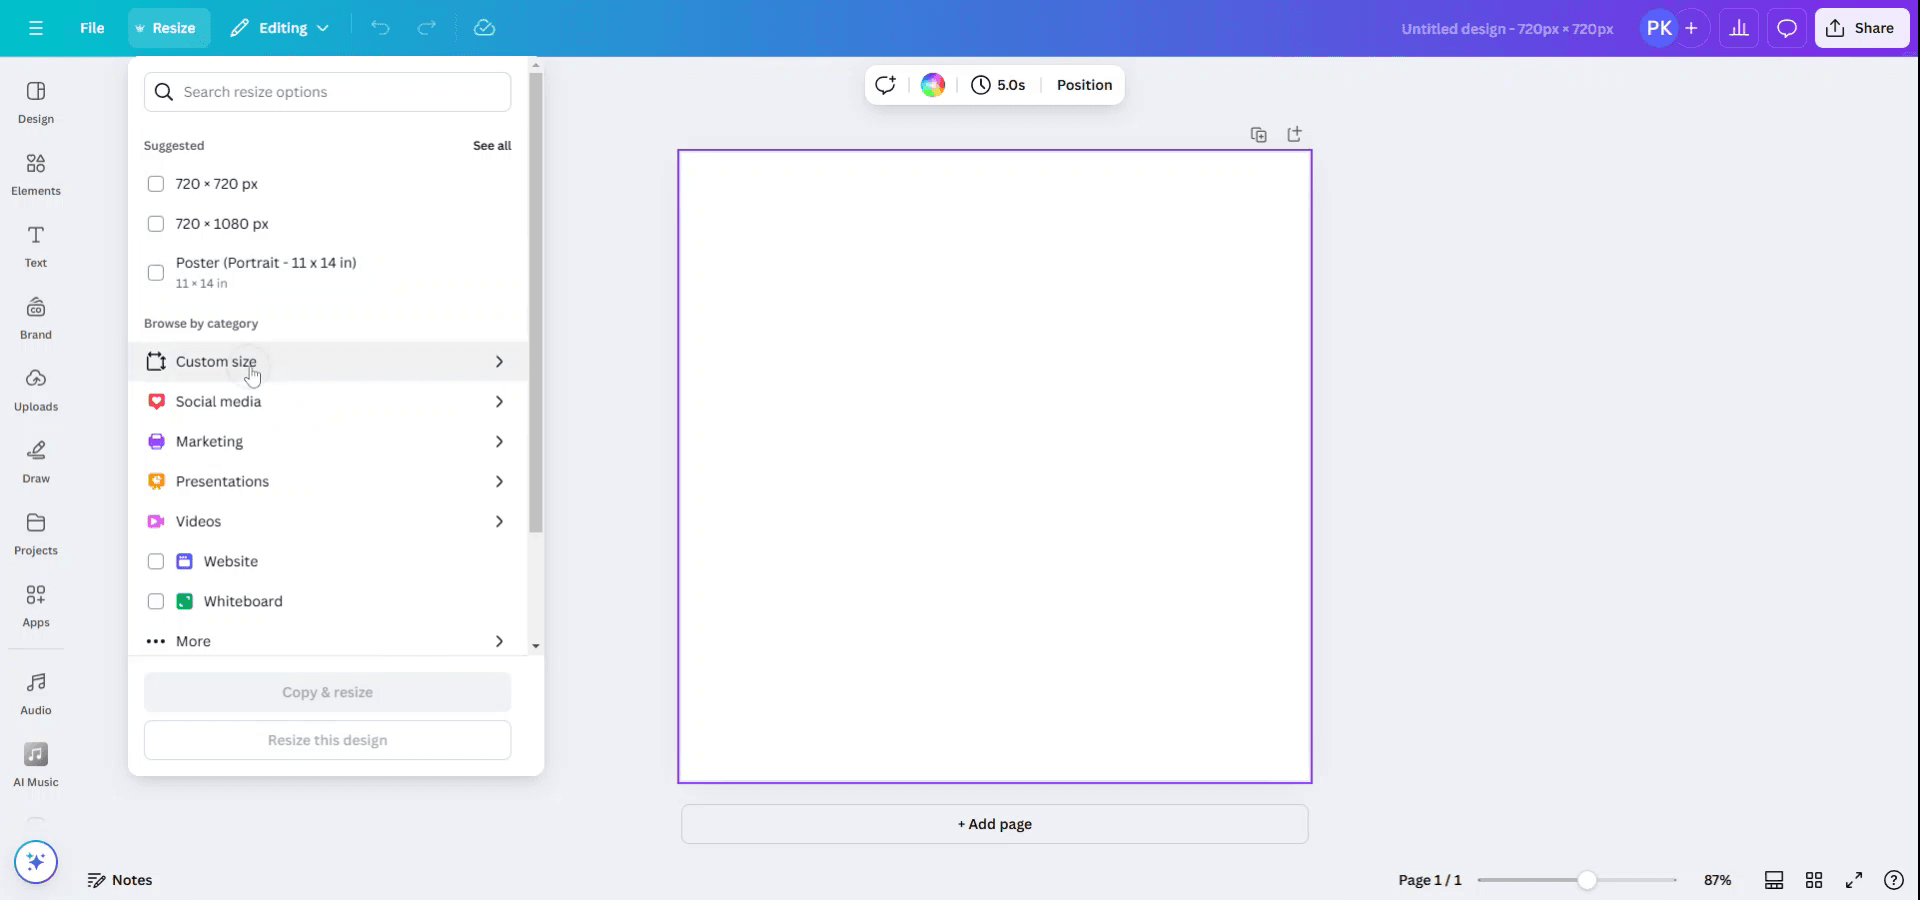
Once the design is open, navigate to the menu at the top and click on the 'Resize' button. Please note that this is a feature available only to Canva Pro members, so ensure your subscription is upgraded to access this functionality.

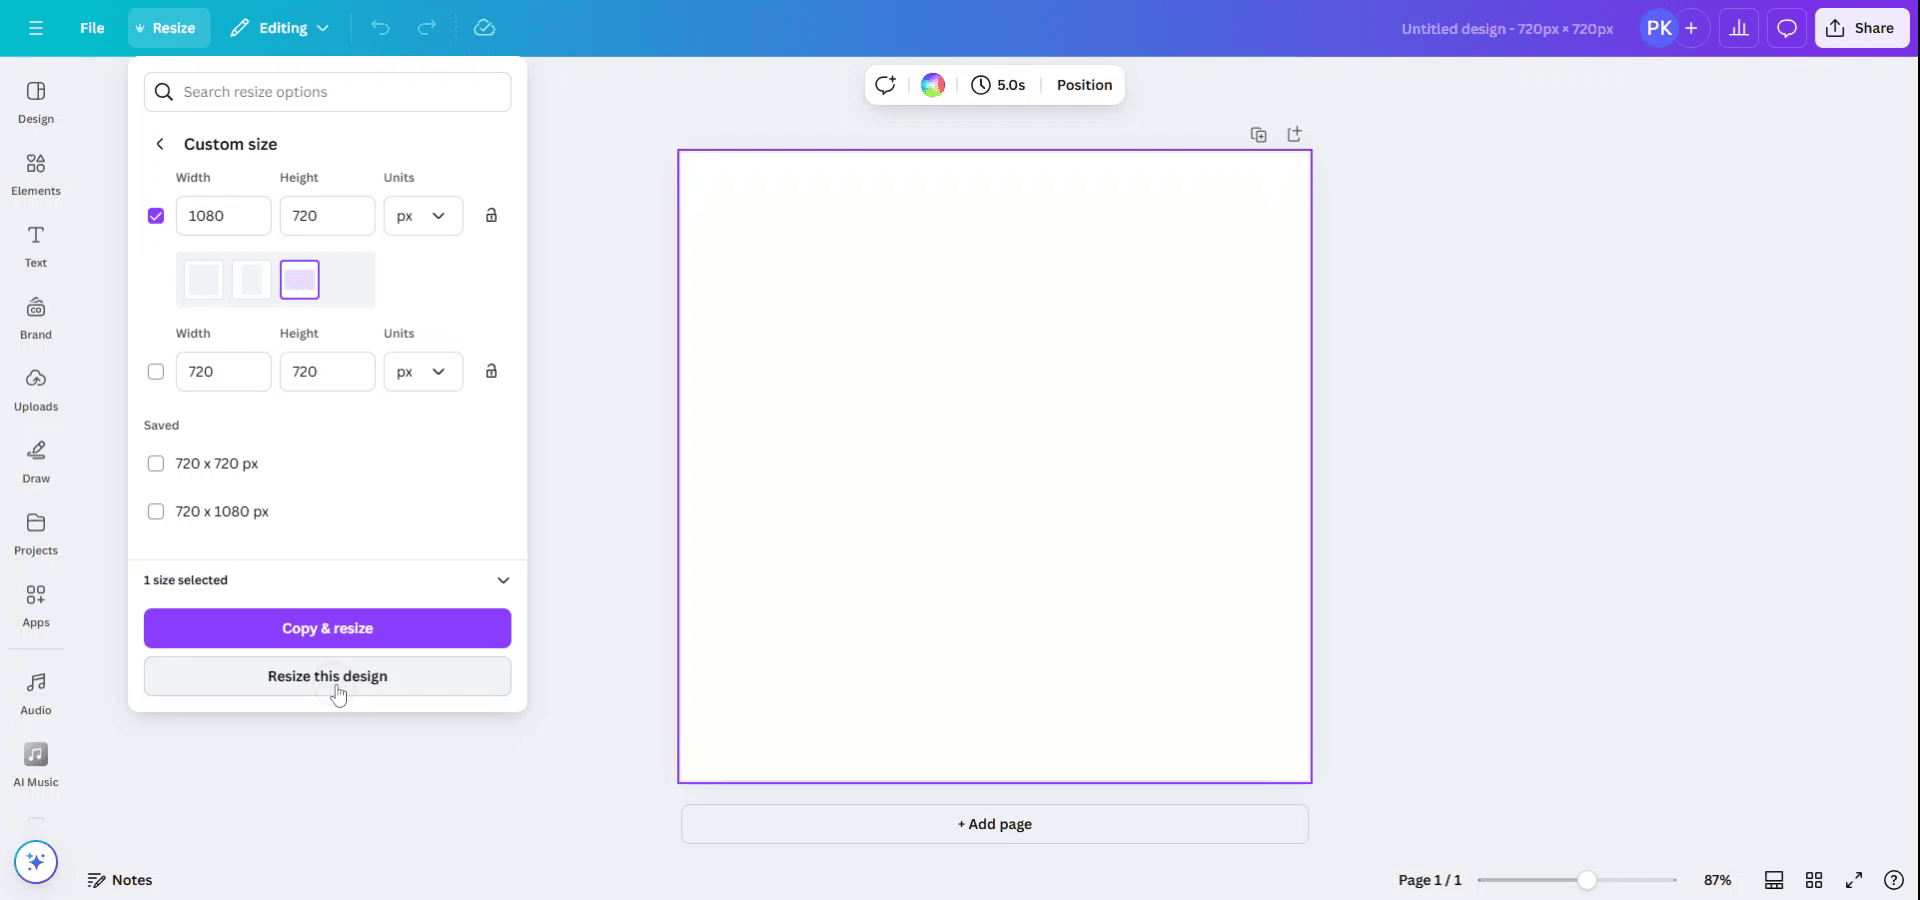
Step 3
After selecting 'Resize', you will see suggested resizing options. You may choose from these suggestions or explore different categories to find the right size. If you have specific dimensions in mind, click on 'Custom Size' to enter your own measurements.
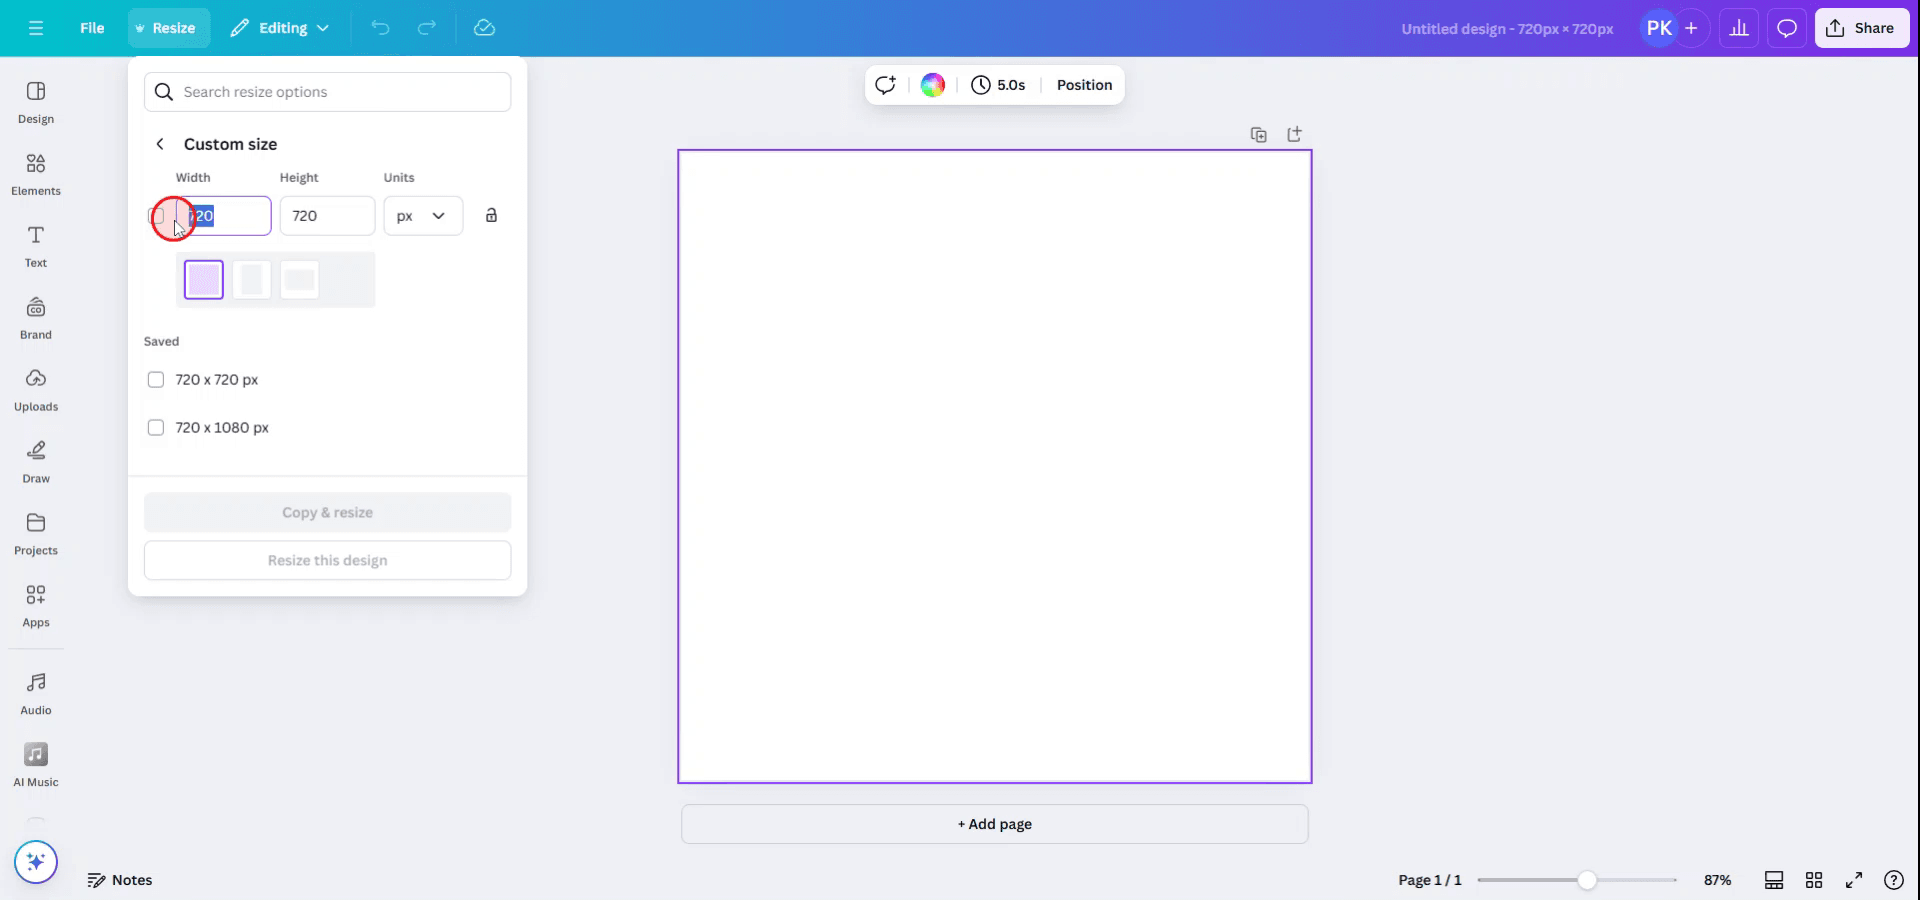
Step 4
Enter the desired width and height for your design to suit your requirements.
Once you've entered the dimensions, verify that everything is correct and then click on 'Resize' to adjust your design accordingly.
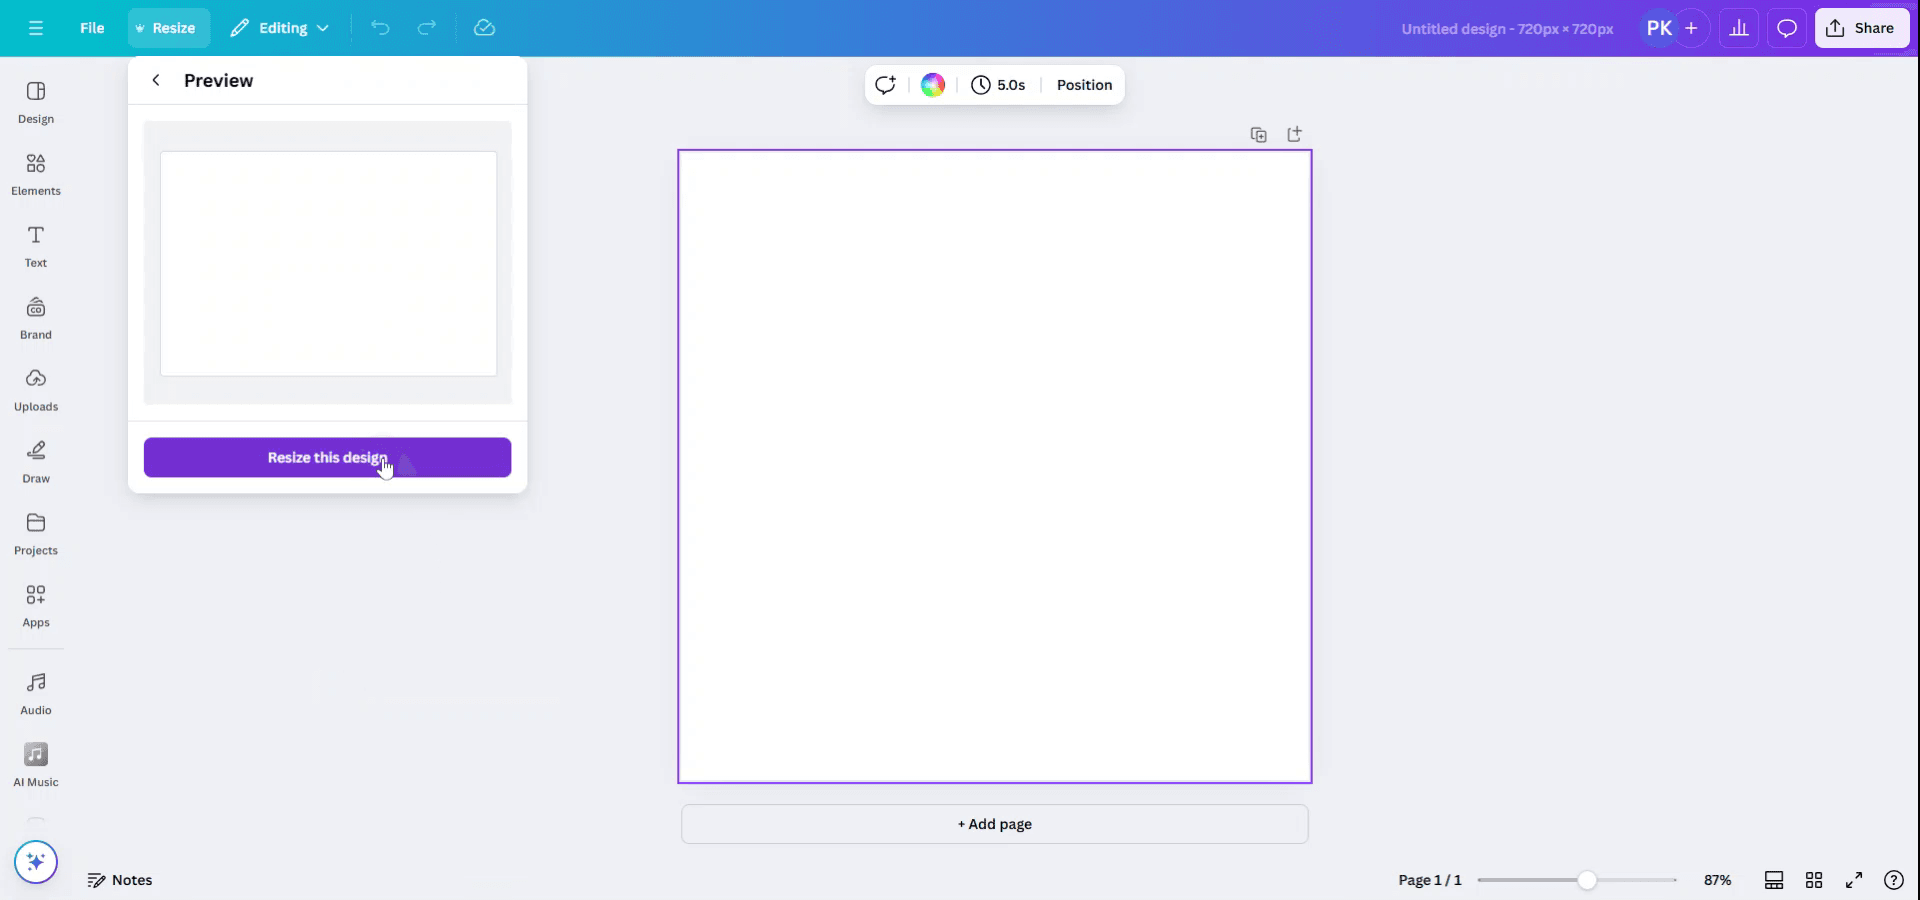
Step 5
At this stage, you have the option to either resize the existing design or to 'Copy & Resize', which will open your design in a new window with the new dimensions.
Step 6
A preview of the resized design will be displayed. Click 'Confirm' to finalize the resizing of your design.
Pro tips for resizing in Canva
Use the Resize Tool (Canva Pro): If you're a Canva Pro user, use the "Resize" button on the top left to quickly adjust your design to different dimensions. You can choose from preset sizes or enter custom dimensions.
Manually Resize Elements: To resize individual elements (like text, images, or shapes), click on the element and drag the corner handles to adjust the size. Hold "Shift" while resizing to maintain aspect ratio.
Resize to Fit Canvas: If you've added a larger element that doesn’t fit within your design, you can click the element and use the resize handles to make it smaller or adjust the layout accordingly.
Copy & Resize: If you're working with a template, use the "Make a copy" button before resizing to keep the original design intact.
Use Grid or Alignment Tools: Use Canva’s grid or alignment guides to help position resized elements perfectly within the canvas.
Common pitfalls and how to avoid them for resizing in Canva
Distorting Elements While Resizing: Sometimes, resizing can cause elements to look stretched or squished.
Fix: Hold the "Shift" key while resizing to maintain the original proportions.Misaligned Elements After Resizing: After resizing, elements may lose alignment within your design.
Fix: Use Canva’s alignment tools or the grid view to ensure elements are properly aligned.Incorrect Aspect Ratio: Resizing the entire design might change its aspect ratio, affecting the final output.
Fix: Keep the aspect ratio locked (by holding "Shift") or use preset sizes for consistency.Resizing Image Quality: Enlarging a small image can reduce its resolution and make it pixelated.
Fix: Use high-resolution images that won't degrade in quality when resized.Not Considering Design Layout: Resizing a design might affect how the elements are distributed and make them appear cluttered or poorly aligned.
Fix: Resize elements incrementally and check the overall design before finalizing.
Common FAQs for resizing in Canva
How do I resize my Canva design?
Click on the "Resize" button (Canva Pro) to adjust to preset or custom dimensions, or manually drag the edges of elements to resize them.Can I resize a Canva design without losing quality?
For better results, avoid enlarging small images and use high-resolution elements. Canva Pro users can resize the whole design while maintaining quality.Can I resize a template in Canva?
Yes, you can resize templates by either using the "Resize" tool (Pro) or by manually resizing the canvas and elements.Does resizing affect my design layout?
Yes, resizing can impact your layout. Be sure to check alignment and spacing after resizing to ensure everything looks good.Can I resize text in Canva?
Yes, simply click on the text box and drag the corner handles to resize. Use the toolbar to adjust font size for more precise control.How to screen record on mac?
To screen record on a Mac, you can use Trupeer AI. It allows you to capture the entire screen and provides AI capabilities such as adding AI avatars, add voiceover, add zoom in and out in the video. With trupeer’s AI video translation feature, you can translate the video into 30+ languages.How to add an AI avatar to screen recording?
To add an AI avatar to a screen recording, you'll need to use an AI screen recording tool. Trupeer AI is an AI screen recording tool, which helps you create videos with multiple avatars, also helps you in creating your own avatar for the video.How to screen record on windows?
To screen record on Windows, you can use the built-in Game Bar (Windows + G) or advanced AI tool like Trupeer AI for more advanced features such as AI avatars, voiceover, translation etc.How to add voiceover to video?
To add voiceover to videos, download trupeer ai chrome extension. Once signed up, upload your video with voice, choose the desired voiceover from trupeer and export your edited video.How do I Zoom in on a screen recording?
To zoom in during a screen recording, use the zoom effects in Trupeer AI which allows you to zoom in and out at specific moments, enhancing the visual impact of your video content.
Suggested Reads
Technical Documentation Generator
How to Turn an Image into a Coloring Page in Canva
How to Print Double Sided on Canva
Related Tutorials

