

How To Make Wavy Text In Canva – Creative Text Effects Guide
Learn how to create wavy text in Canva using curve and spacing tools. This step-by-step guide helps you design eye-catching, flowing typography for any project.
In this process, you will learn how to access and view layers in Canva. This will help you manage your designs by seeing all elements and their positions within a project.
Step-by-Step Guide: How To Make Wavy Text In Canva
Step 1
To begin, click on any existing project in Canva that you want to work on.

Step 2
Once the project is open, click on the page you want to view.

Step 3
You will see an option labeled "Position."
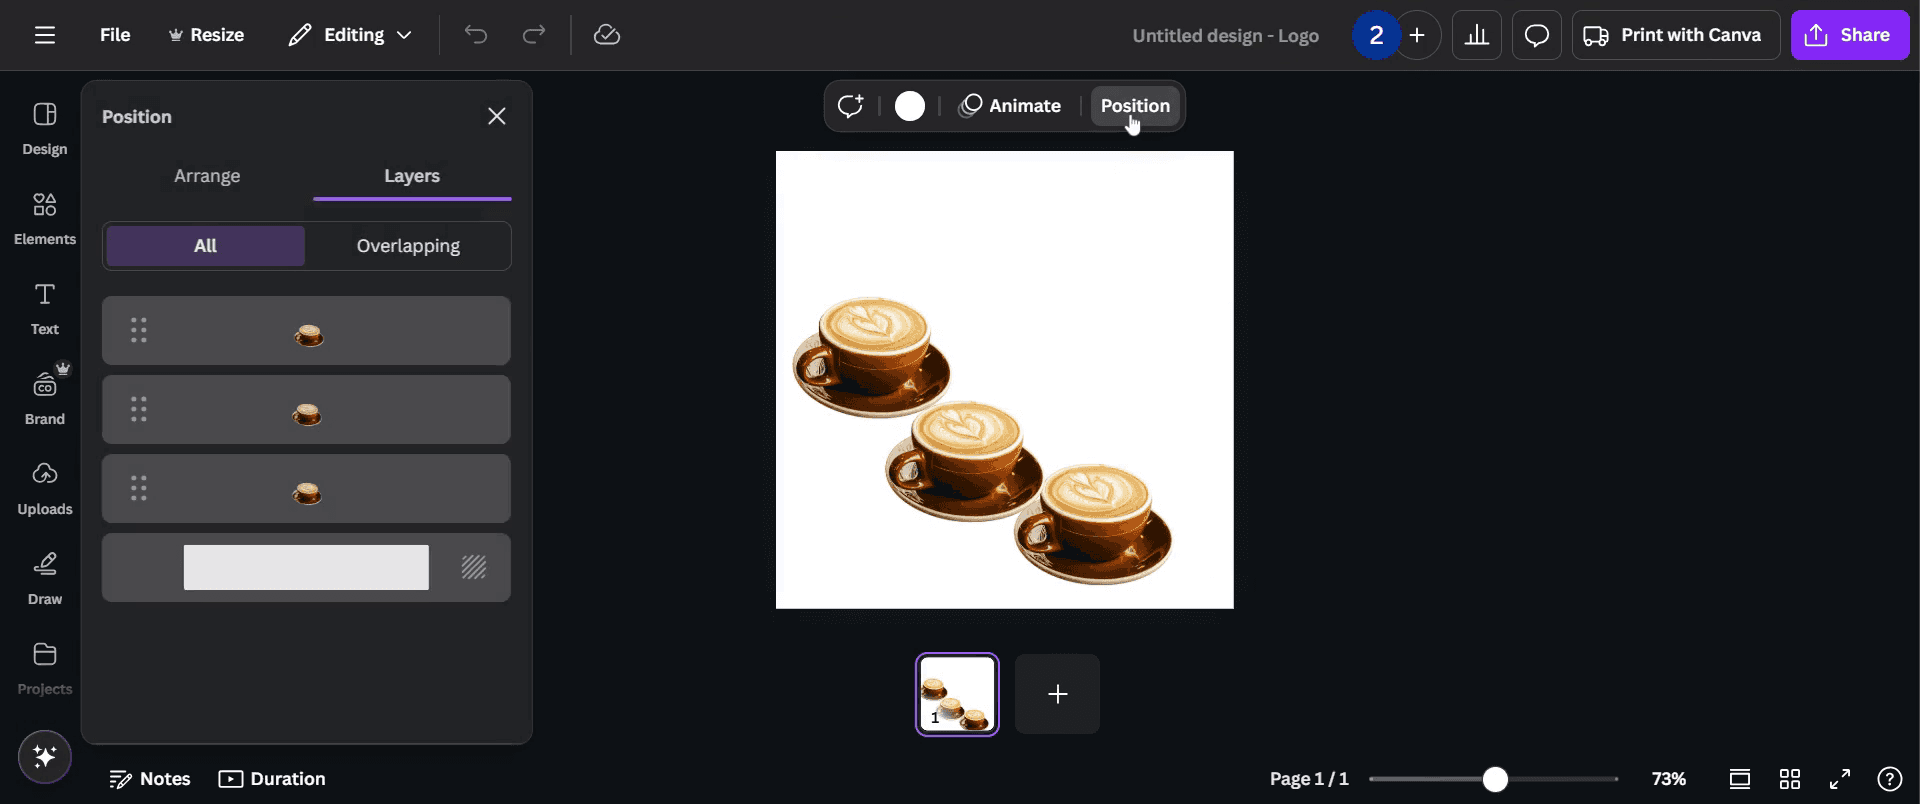
Step 4
In this panel, you can highlight the layers by selecting them.

Step 5
You can also achieve this by directly clicking on the image within your design, you will see a more option, click on that.

Step 6
In dropdown menu click on "Layers" option.
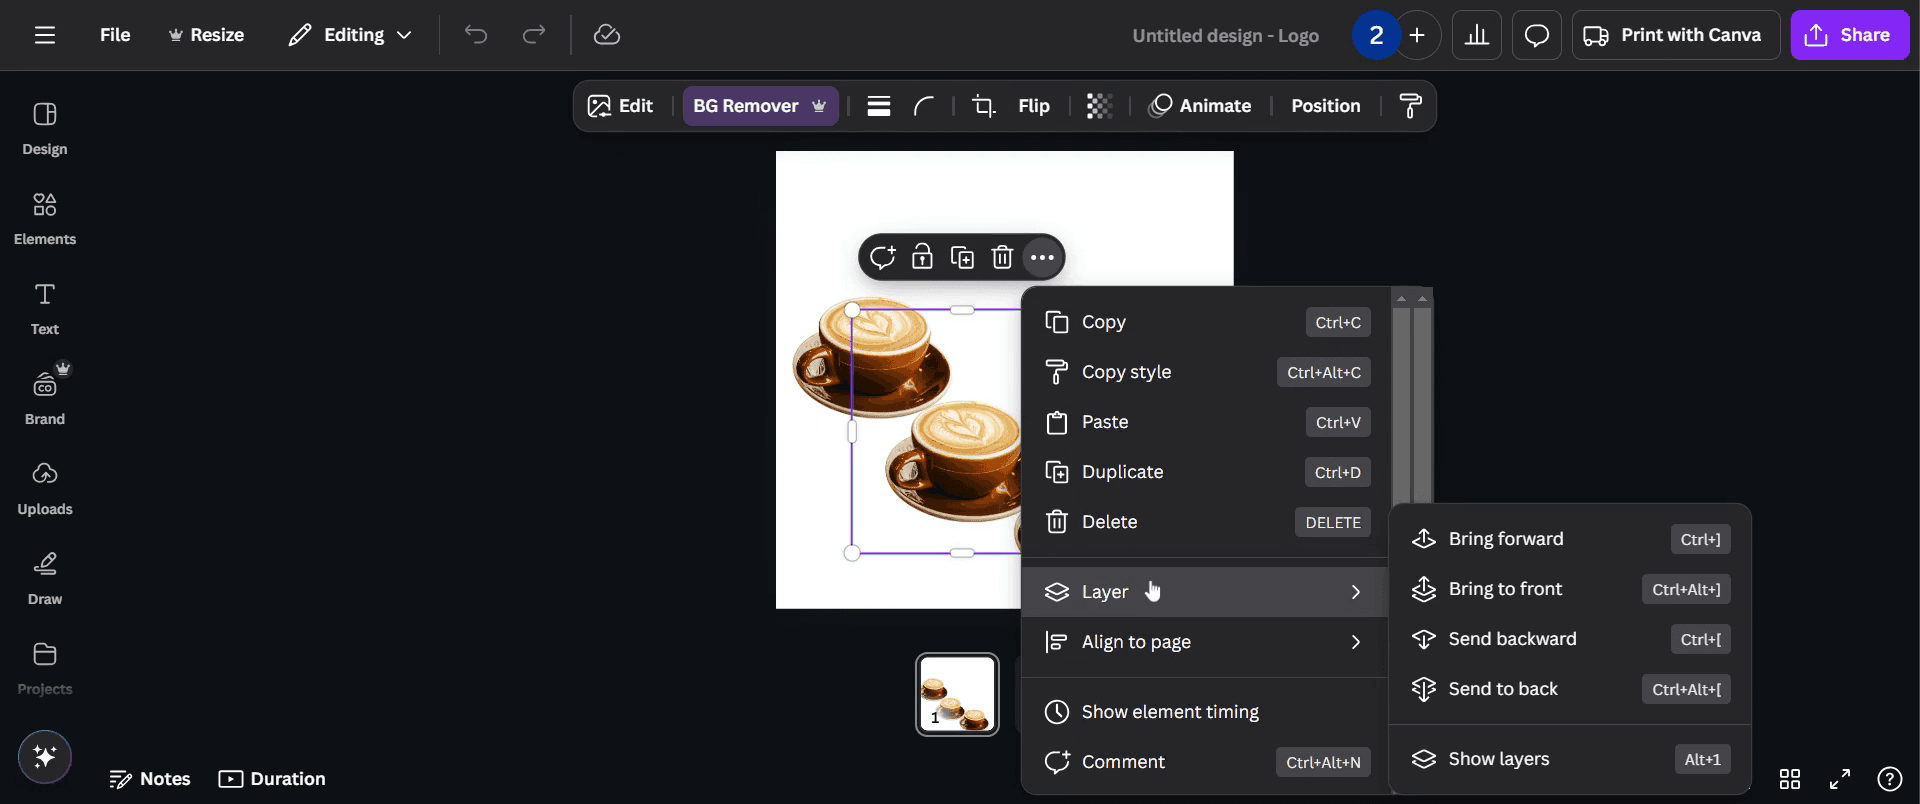
Step 7
You can easily view all the layers and their respective positions within the project.

Pro-tips for seeing layers in Canva
Use the Position tool to view and manage overlapping elements in your design.
Arrange elements by sending them forward or backward to organize layers effectively.
Group elements together to maintain their positioning while adjusting other layers.
Common pitfalls & how to avoid them while seeing layers in Canva
Difficulty selecting layers, use the Layers Panel (if available in Canva Pro) or the Position tool to adjust elements.
Overlapping elements causing confusion, use transparency adjustments to make hidden layers visible temporarily.
Accidental rearrangement, lock important layers to prevent unwanted changes while editing.
Common FAQs for seeing layers in Canva
How do I move a layer forward or backward?
Select the element, click Position, and choose Forward or Backward to adjust its placement.Is there a way to rename layers in Canva?
No, Canva does not support naming layers, but grouping elements can help keep designs organized.How can I select a layer hidden behind another?
Click on the overlapping area multiple times until the desired layer is selected, or move the top layer temporarily.Does Canva have a dedicated layer panel like Photoshop?
Canva Pro includes a Layers Panel, but free users need to manage layers using the Position tool manually.How to screen record on mac?
To screen record on a Mac, you can use Trupeer AI. It allows you to capture the entire screen and provides AI capabilities such as adding AI avatars, add voiceover, add zoom in and out in the video. With trupeer’s AI video translation feature, you can translate the video into 30+ languages.How to add an AI avatar to screen recording?
To add an AI avatar to a screen recording, you'll need to use an AI screen recording tool. Trupeer AI is an AI screen recording tool, which helps you create videos with multiple avatars, also helps you in creating your own avatar for the video.How to screen record on windows?
To screen record on Windows, you can use the built-in Game Bar (Windows + G) or advanced AI tool like Trupeer AI for more advanced features such as AI avatars, voiceover, translation etc.How to add voiceover to video?
To add voiceover to videos, download trupeer ai chrome extension. Once signed up, upload your video with voice, choose the desired voiceover from trupeer and export your edited video.How do I Zoom in on a screen recording?
To zoom in during a screen recording, use the zoom effects in Trupeer AI which allows you to zoom in and out at specific moments, enhancing the visual impact of your video content.
Suggested Reads
Technical Documentation Generator
How to Turn an Image into a Coloring Page in Canva
How to Print Double Sided on Canva
Related Tutorials

