
How to Curve Text in Canva – Quick Step-by-Step Guide
Want curved text in Canva? Learn how to use the Curve Text feature to easily bend text for logos, labels, and more.
This guide provides a step-by-step process on how to make text curve in canva.
Follow these clear instructions to enhance your design projects with curved text elements.
Curving text in Canva is a great way to create dynamic, circular, or semi-circular typography for logos, headers, or design accents.
Step-by-Step Guide
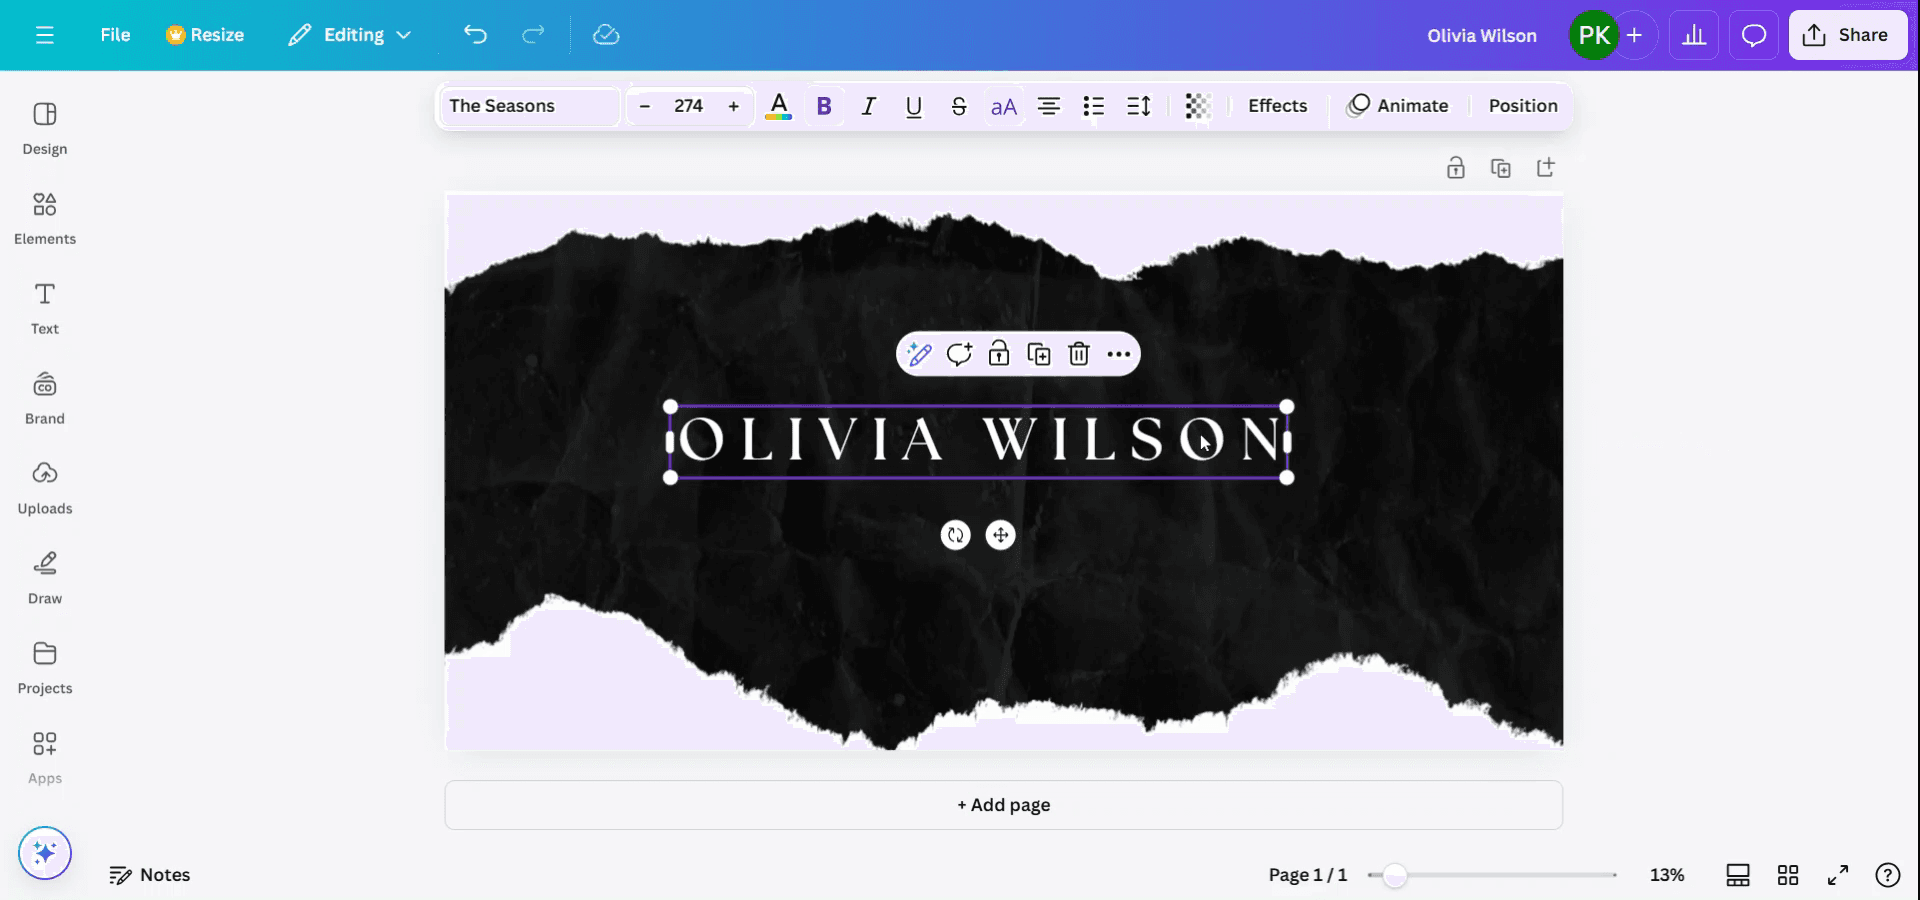
Select the Text
Click on the text box you want to curve.
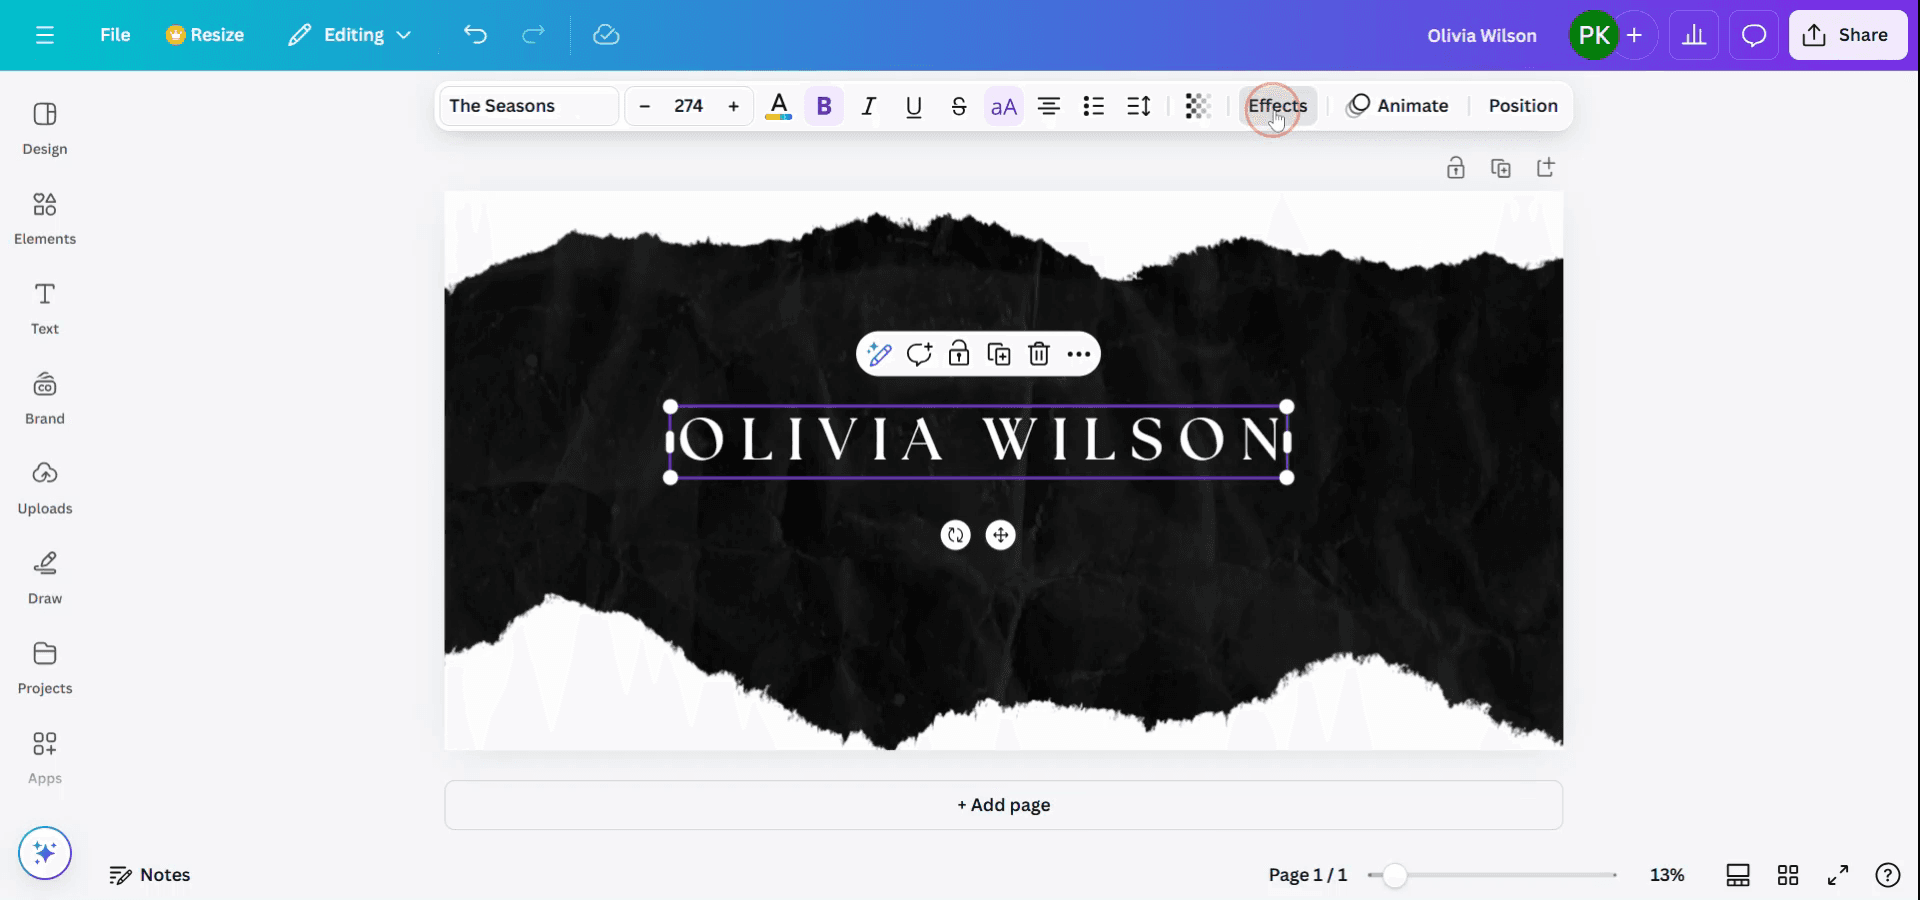
Open the Effects Panel
In the top toolbar, click on “Effects”.
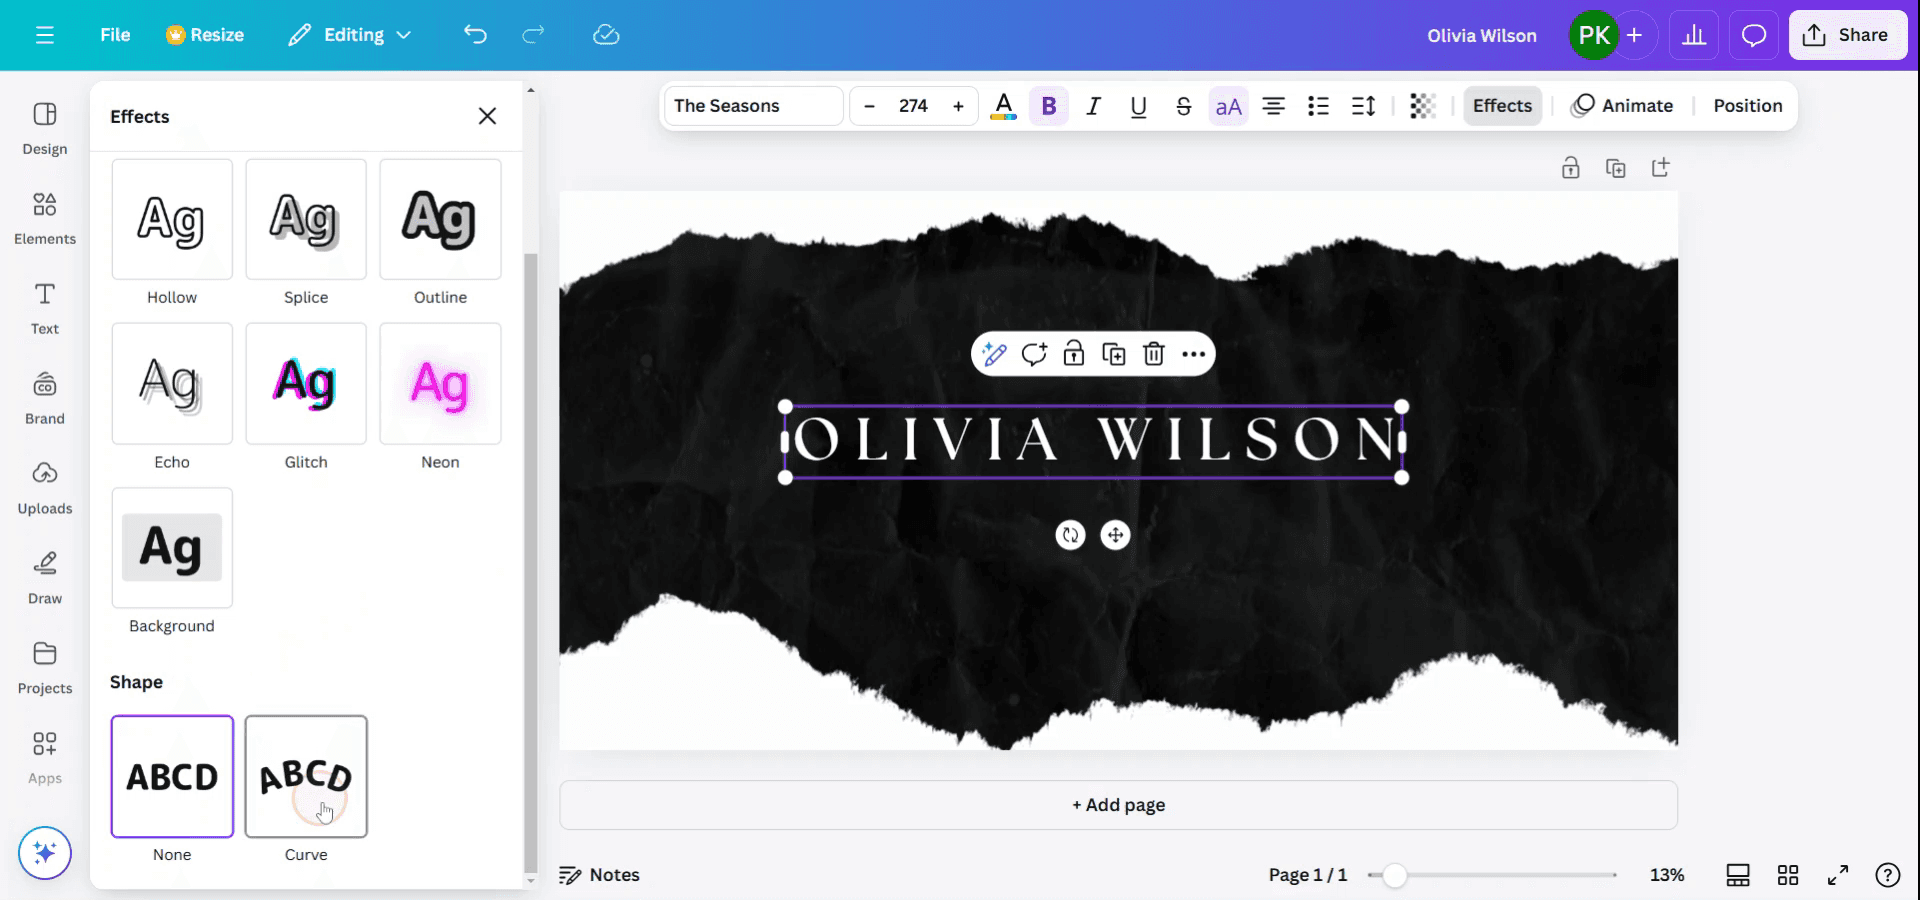
Apply the Curve Effect
Under Text Effects, select “Curve”.
Your text will instantly curve in a standard arc.
Adjust the Curve
Use the Curve slider to control the curvature:
Slide right to increase the curve (upward arc).
Slide left for a reverse curve (downward arc).
Fine-Tune (Optional)
Use Letter Spacing to spread out characters for a cleaner curve.
Combine with Line Spacing or Font Size for additional control.
Step-by-Step Guide: How To Curve Text in Canva
Step 1
Begin by opening your design in Canva and selecting the text you wish to curve.
Step 2
Once the text is selected, a toolbar will appear at the top of the screen. Click on the 'Effects' option.
Step 3
After selecting 'Effects,' explore the various styles and shapes presented at the bottom of the interface.
Choose the 'Curve' option from the available shapes.
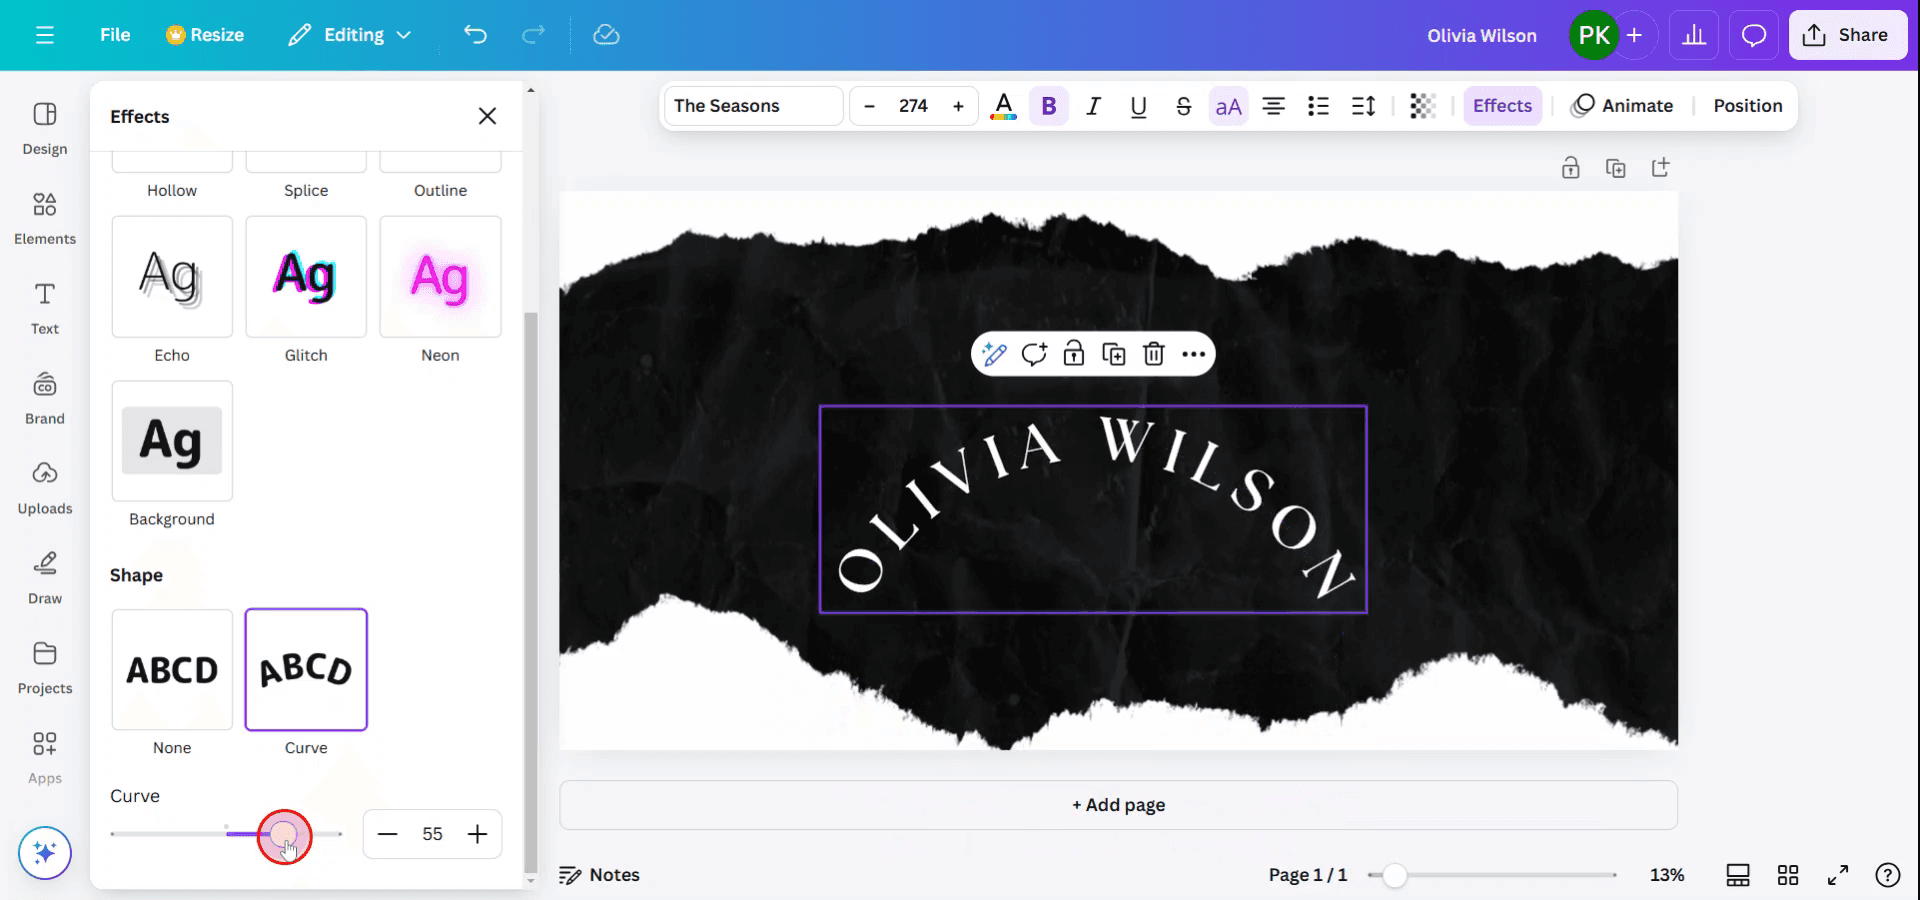
Step 4
Observe that the text is now curved. You can adjust the curvature to your preference by modifying the curve settings.
Pro tips on how to make text curve in Canva
Select Your Text:
Click on the text box you want to curve.Open the "Effects" Panel:
Once the text is selected, click on the “Effects” button on the top toolbar.Choose the "Curve" Effect:
In the “Effects” panel, scroll down and select the “Curve” option.Adjust the Curve:
After selecting the curve, use the slider to adjust the intensity of the curve. Drag it left or right to make the text more or less curved, depending on your design needs.Fine-Tune the Position:
Use the rotation handles to adjust the text’s orientation if necessary, and adjust the size or position of the text box to fit the curve appropriately.
Common pitfalls and how to avoid them for curving text in Canva
Text Becomes Too Distorted:
Fix: Avoid using extreme curve settings that make the text hard to read. Adjust the curve gradually until you find a balance between style and legibility.Unable to Adjust the Text After Curving:
Fix: Once you curve the text, you can still edit it like any other text in Canva. Simply click on the text box and make changes to the content or style.Curve Doesn't Fit the Design:
Fix: Ensure your text box size is appropriately adjusted before applying the curve. If the curve distorts the text too much, try resizing the box to maintain readability.Alignment Issues After Curving:
Fix: After curving, make sure the text is still aligned properly with your design. You can use Canva's alignment tools to adjust it as needed.Not Able to Curve Multiple Lines of Text:
Fix: If your text has multiple lines, you might need to adjust each line separately or convert the text into one line before applying the curve effect.
Common FAQs for curving text in Canva
Can I curve any text in Canva?
Yes, you can curve any text in Canva, as long as it’s a text box created within the platform.How do I change the direction of the curve?
You can adjust the curve’s direction by dragging the slider left or right in the “Effects” panel to make the text curve upwards or downwards.Can I apply a curve to multiple lines of text?
While you can curve multiple lines, you’ll need to apply the effect to each line individually if you want them all curved in the same design.Can I adjust the curve after applying it?
Yes, you can always adjust the curve by selecting the text and modifying the curve slider in the “Effects” panel.Is curving text a free feature in Canva?
Yes, curving text is available in Canva’s free version.How to screen record on mac?
To screen record on a Mac, you can use Trupeer AI. It allows you to capture the entire screen and provides AI capabilities such as adding AI avatars, add voiceover, add zoom in and out in the video. With trupeer’s AI video translation feature, you can translate the video into 30+ languages.How to add an AI avatar to screen recording?
To add an AI avatar to a screen recording, you'll need to use an AI screen recording tool. Trupeer AI is an AI screen recording tool, which helps you create videos with multiple avatars, also helps you in creating your own avatar for the video.How to screen record on windows?
To screen record on Windows, you can use the built-in Game Bar (Windows + G) or advanced AI tool like Trupeer AI for more advanced features such as AI avatars, voiceover, translation etc.How to add voiceover to video?
To add voiceover to videos, download trupeer ai chrome extension. Once signed up, upload your video with voice, choose the desired voiceover from trupeer and export your edited video.How do I Zoom in on a screen recording?
To zoom in during a screen recording, use the zoom effects in Trupeer AI which allows you to zoom in and out at specific moments, enhancing the visual impact of your video content.
Suggested Reads
Technical Documentation Generator
How to Turn an Image into a Coloring Page in Canva
How to Print Double Sided on Canva
Related Tutorials

