

How to crop in Canva
Learn how to crop images, elements, and frames in Canva. This step-by-step guide shows how to crop in seconds for cleaner, focused designs.
This guide provides a detailed walkthrough of cropping and saving images using a camera application. Follow the steps to efficiently adjust your images and download them as needed.
To crop an element (such as an image or video) in Canva, select the element, click "Crop" in the toolbar, and adjust the crop handles to define the visible area. You can also double-click the element to enter crop mode. For images, Canva also offers a Smart Crop option for quick, automatic adjustments.
Detailed Steps:
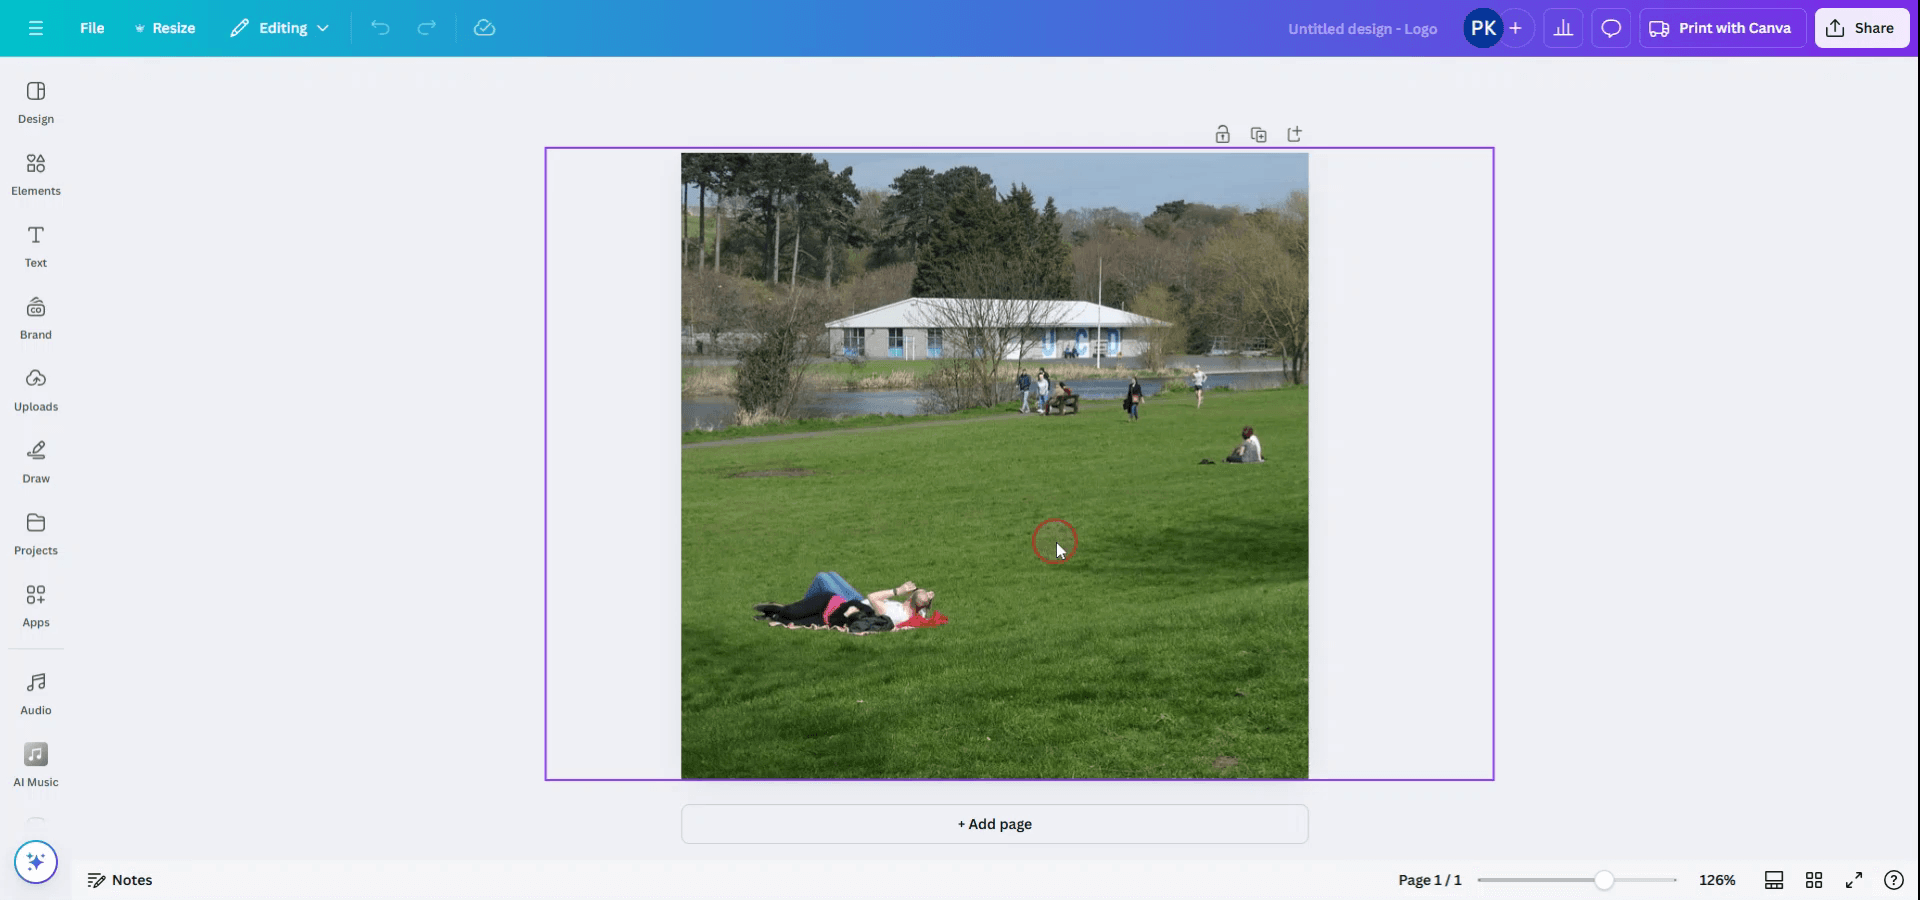
1. Select the Element:
Click on the image, video, or other element you wish to crop within your Canva design.
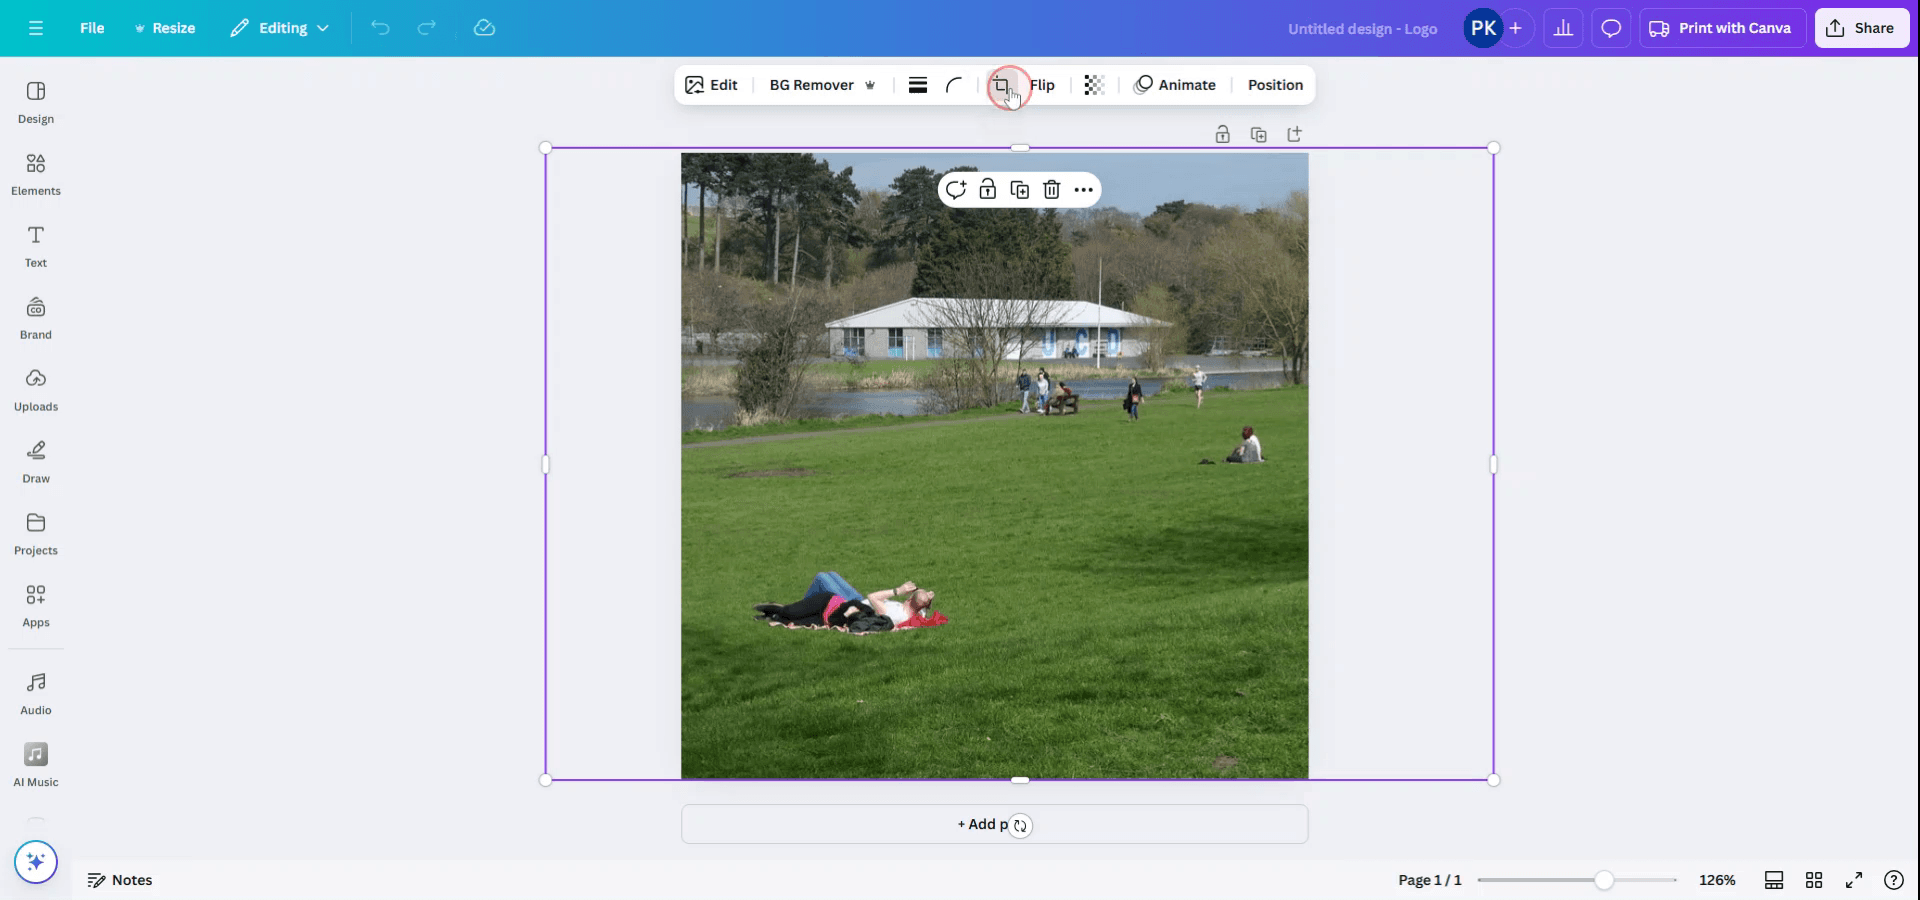
2. Access the Crop Tool:
Option 1 (Toolbar): Click the "Crop" button in the top editor toolbar.
Option 2 (Double-click): Double-click the element to enter crop mode.
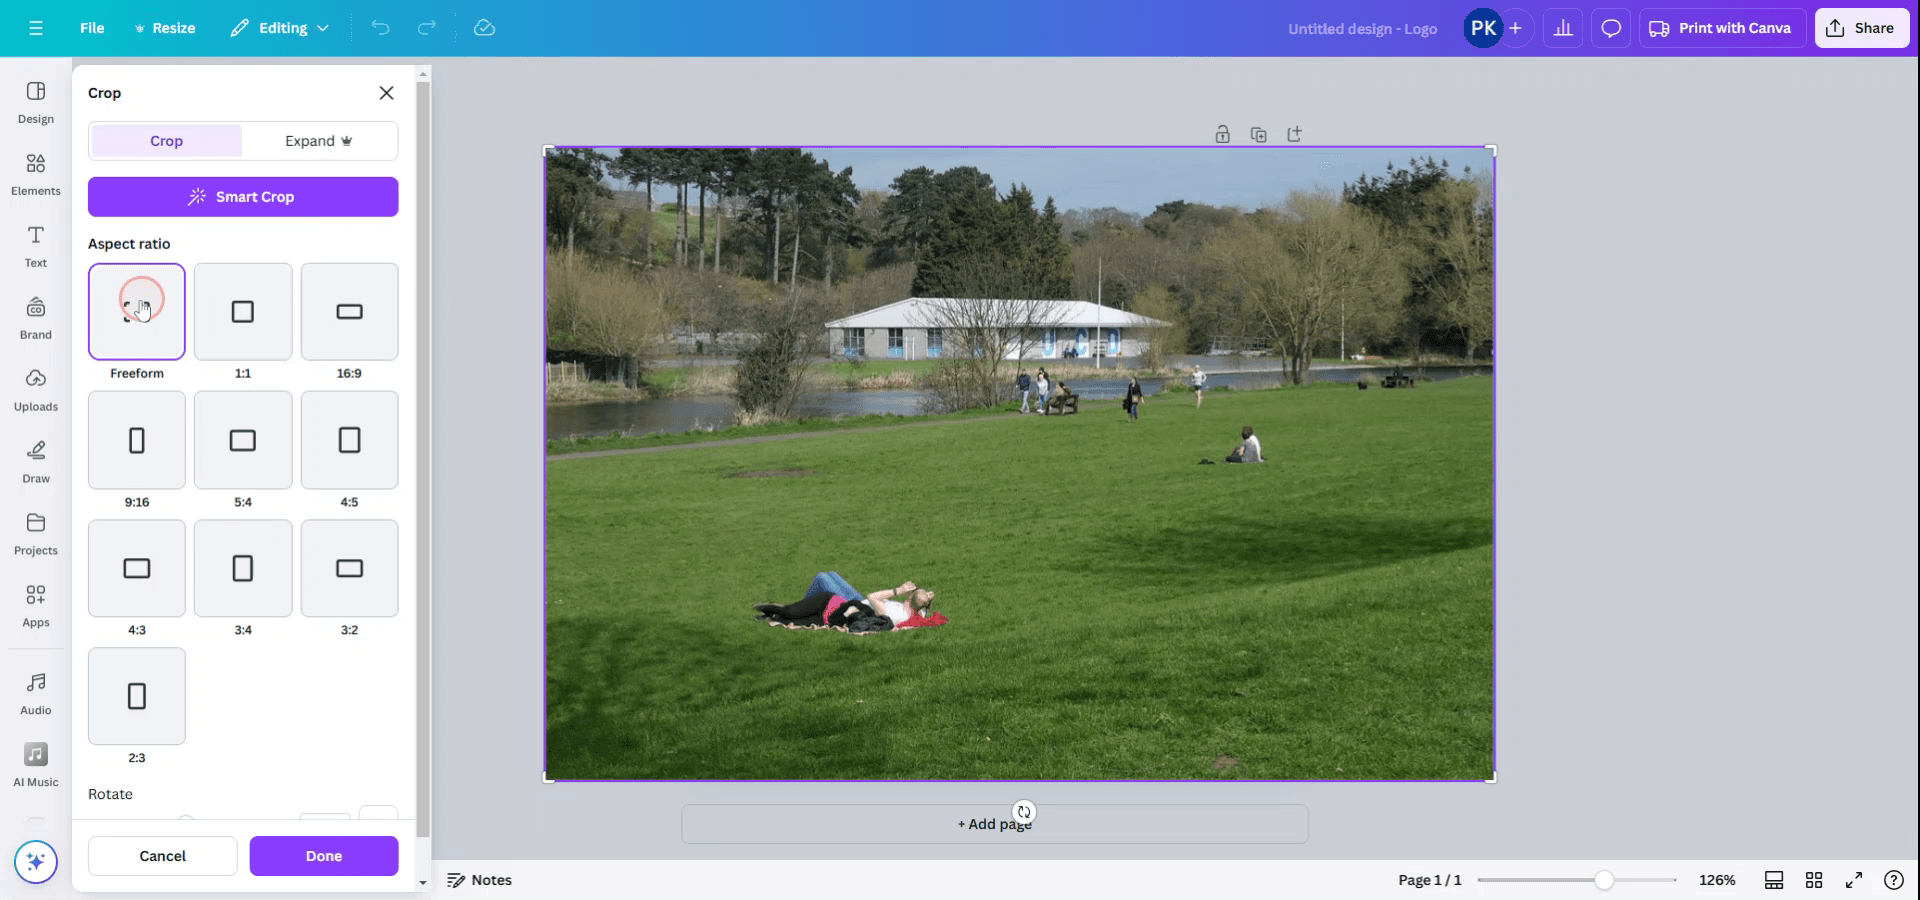
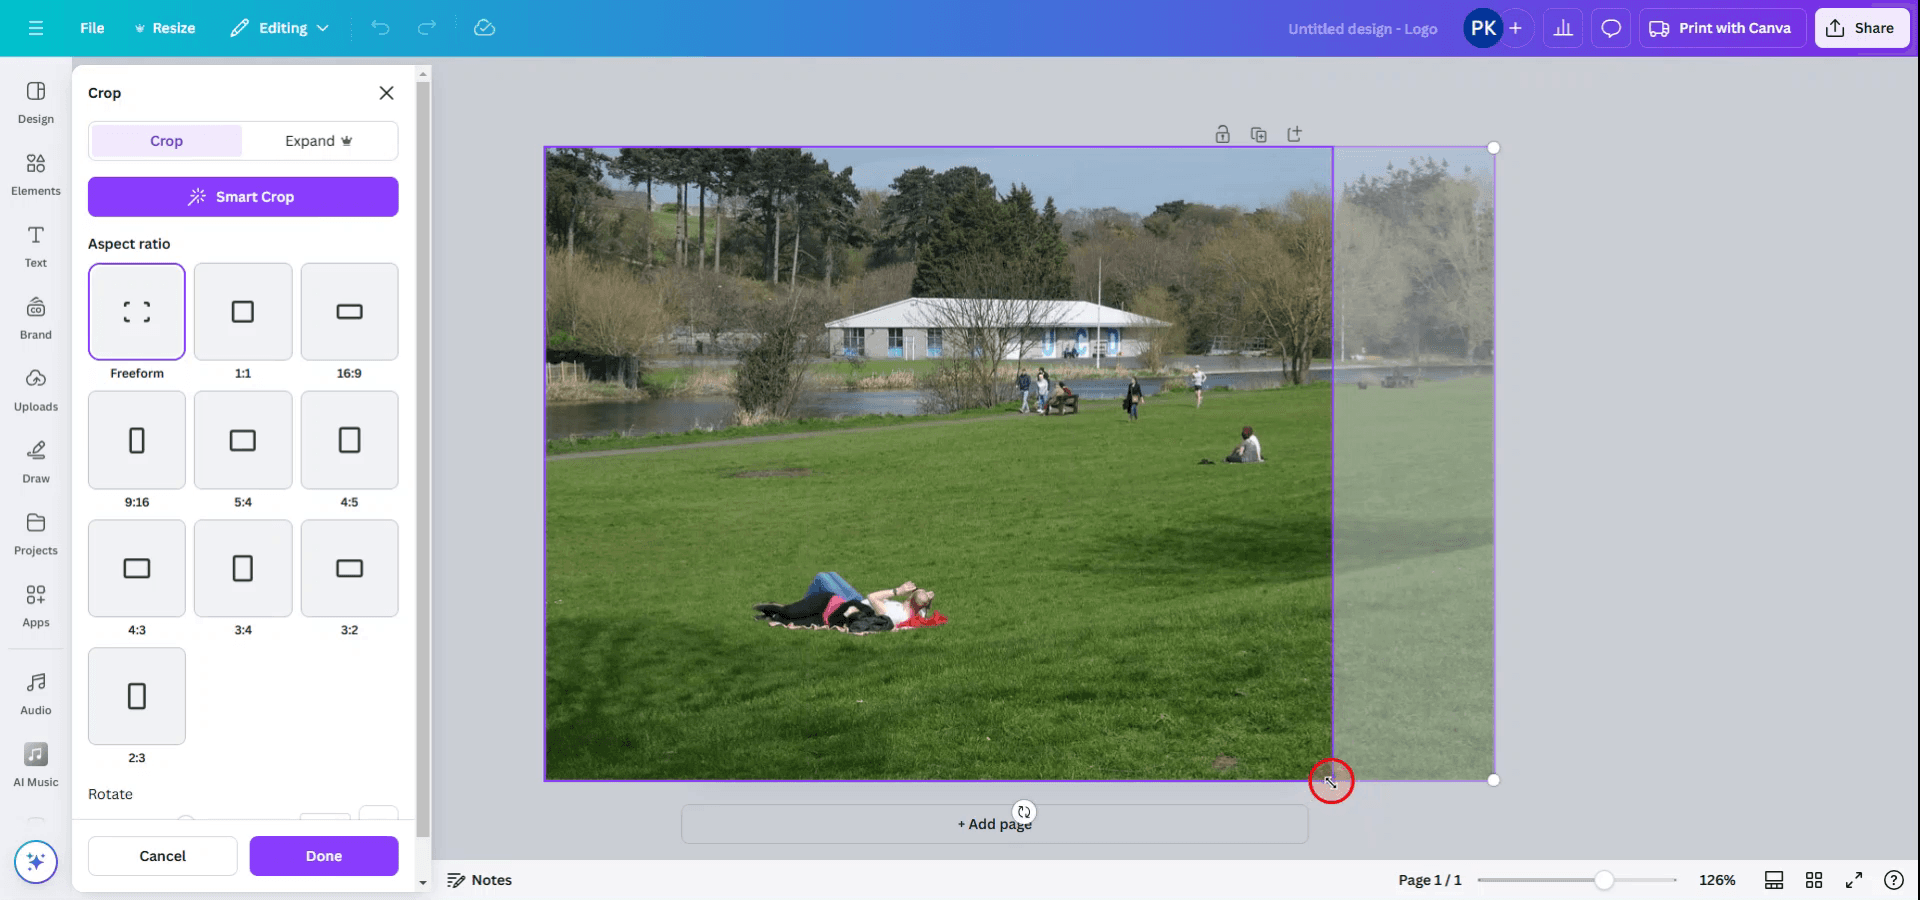
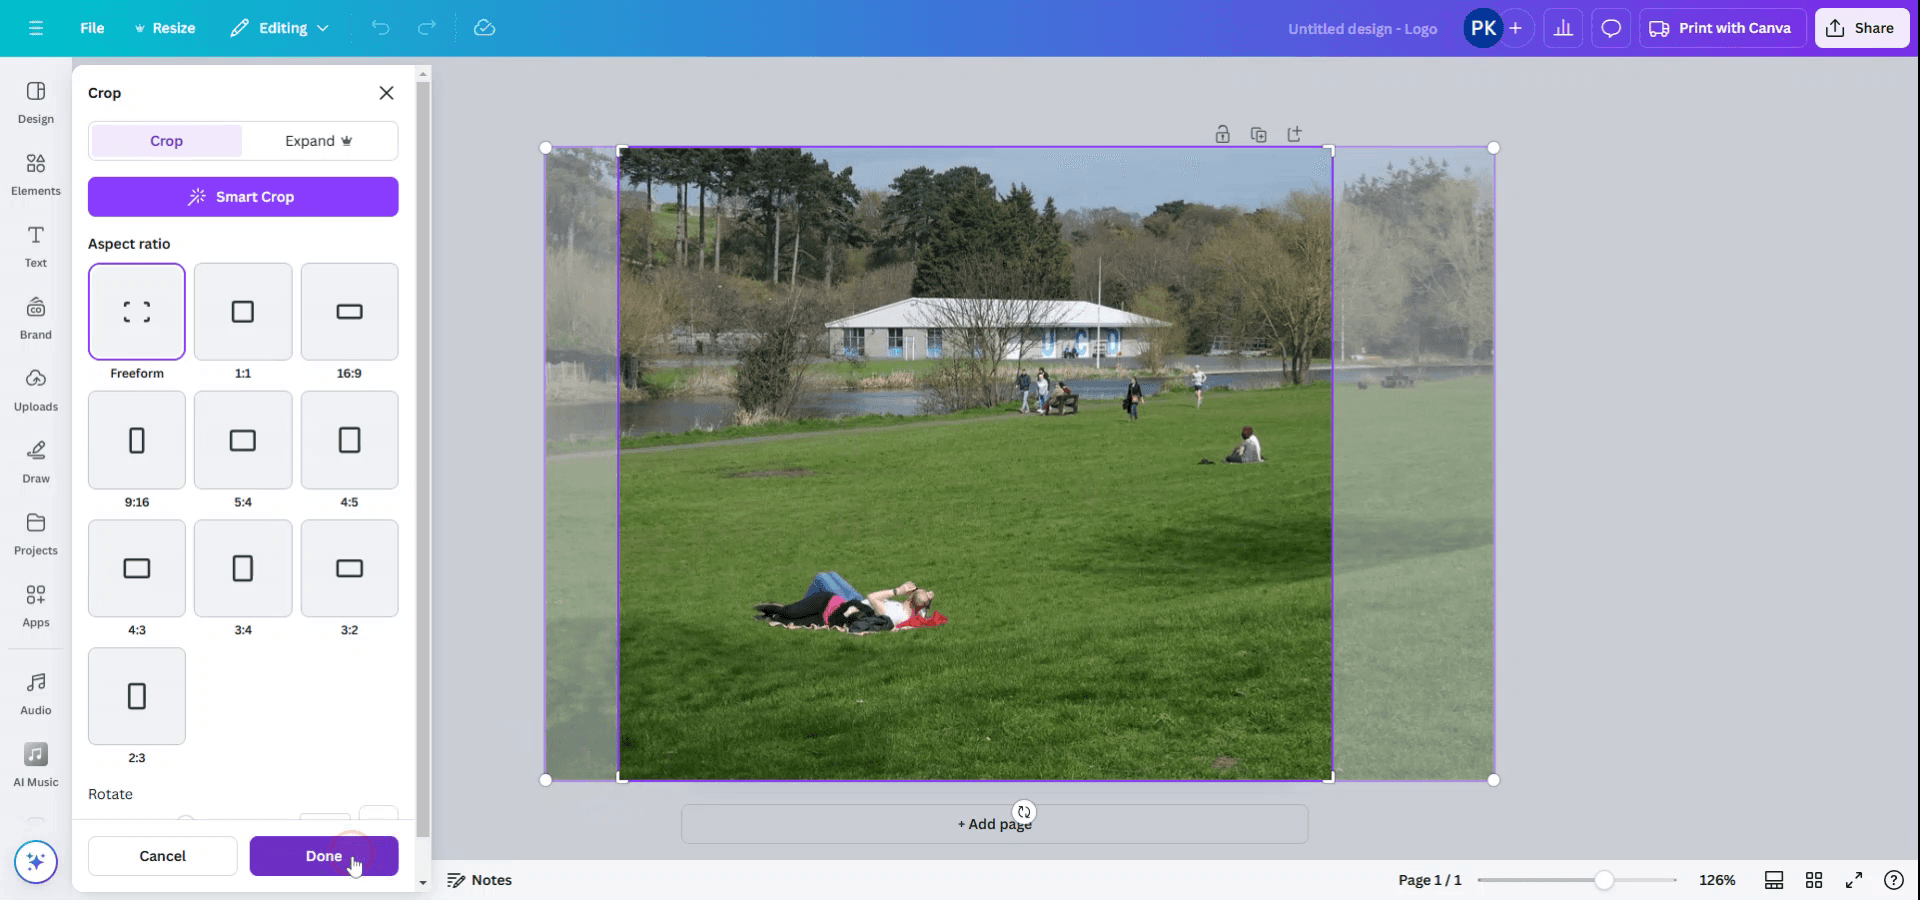
3. Adjust the Crop Area:
Drag the crop handles (located on the edges or corners) to resize or reposition the visible area.
For elements inside frames, you can move or resize them within the frame boundary.
4. Confirm the Crop:
Click "Done" in the toolbar or simply click outside the element to apply the crop.
Step-by-Step Guide: How to crop in Canva
Step 1
Begin by selecting the photo you intend to crop.
Step 2
Once the photo is selected, a toolbar will appear at the top of the interface. Proceed to click on the crop option.
Step 3
Upon clicking the crop option, a sub-menu will emerge displaying various aspect ratios. Choose the desired aspect ratio or opt for the freeform option to crop according to your personal requirements.
Step 4
If you selected freeform, adjust the edges of the photo to suit your specifications.
Step 5
Once satisfied with the adjustments, click on the Done button.
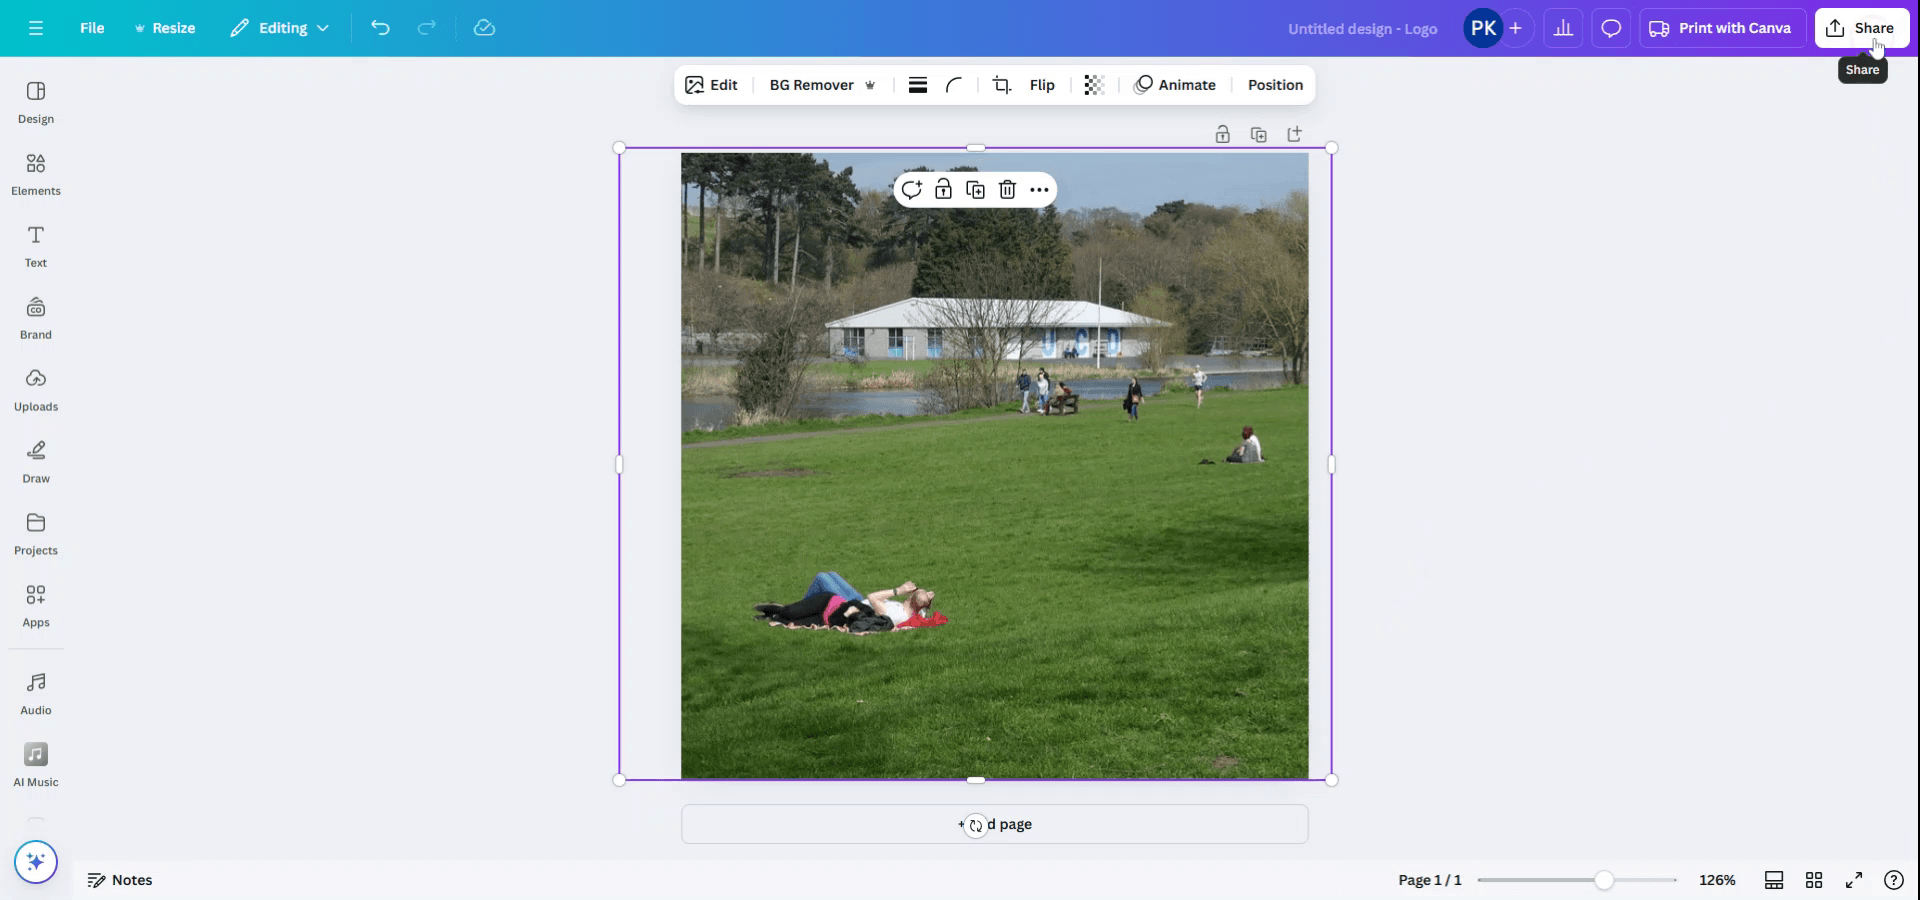
Step 6
The photo will now be cropped according to your selected dimensions. To save the image, click on the Share button located at the top right corner.
Step 7
In the Share menu, select the Download option.
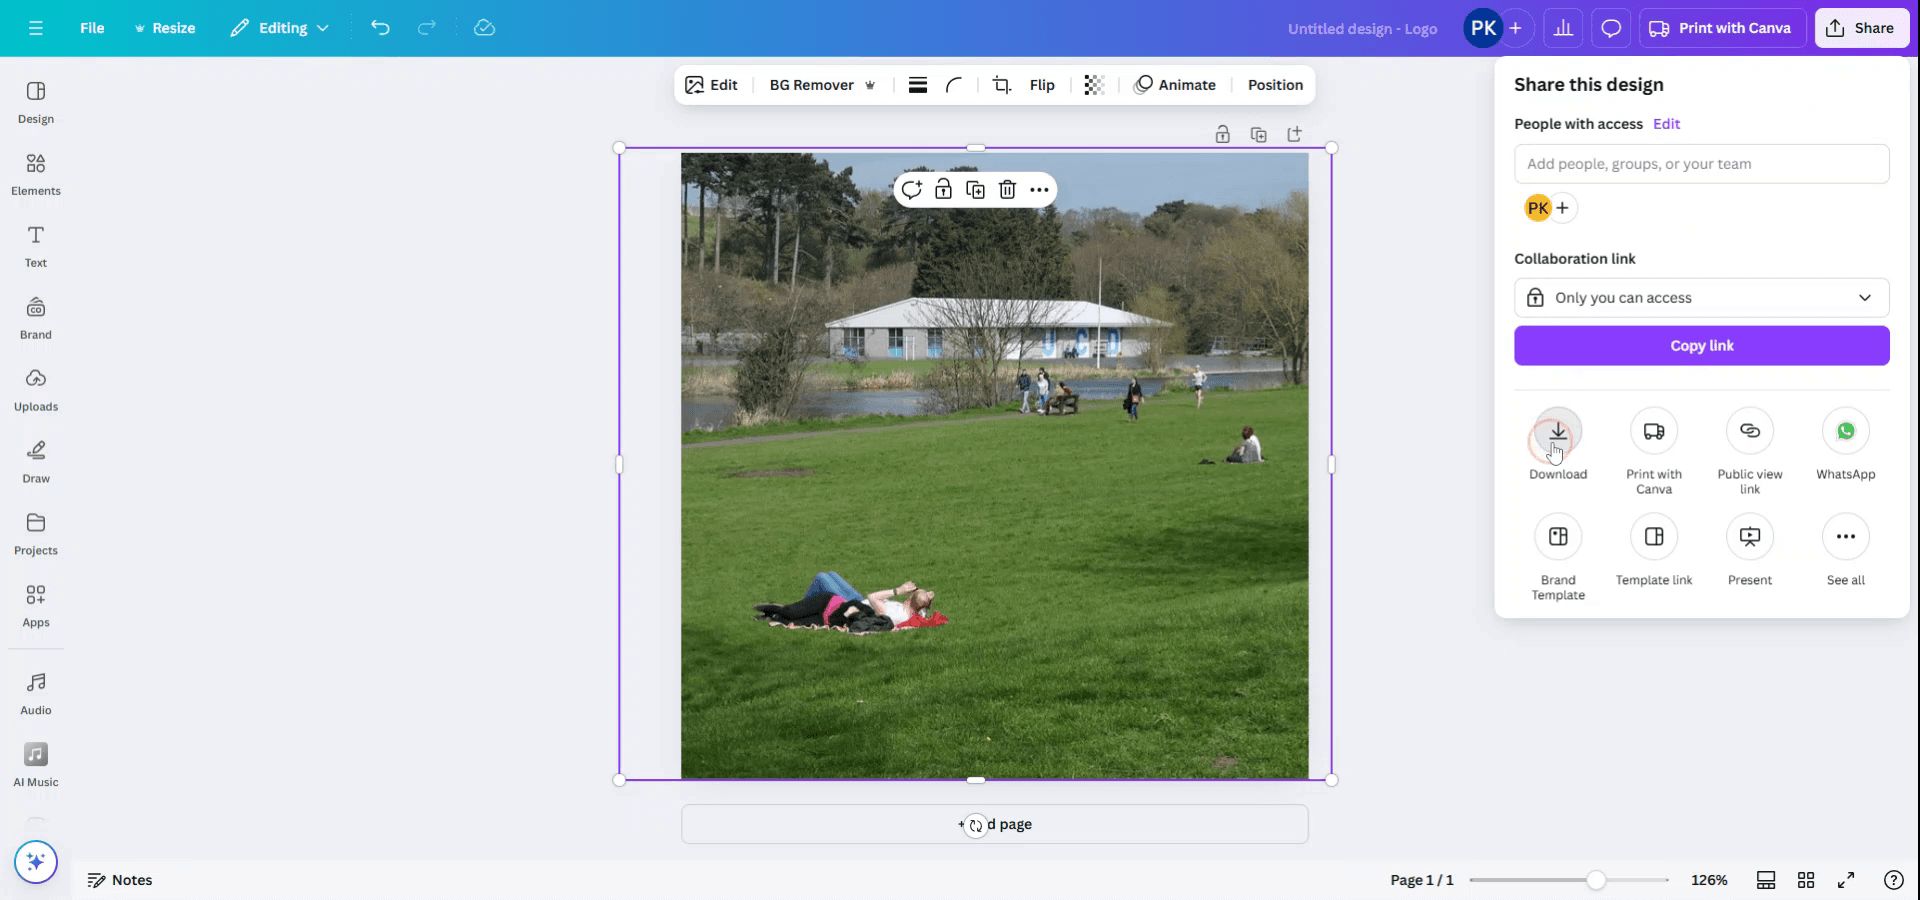
Step 8
Make any necessary adjustments to the file type and size, then click on Download to save the cropped photo.

Pro tips for cropping and downloading a photo in Canva
Select the Photo:
Click on the photo you want to crop.Click on "Crop":
Once the photo is selected, click on the "Crop" button located in the top toolbar.Adjust the Crop Area:
Drag the handles on the corners or edges of the photo to adjust the cropping area. You can move the entire image within the crop area as needed.Apply the Crop:
Once you're happy with the crop, click "Done" to apply the changes.Download the Cropped Photo:
After cropping the photo, click on the "Download" button in the top right corner of the screen. Choose your preferred format (e.g., PNG, JPG, PDF) and click "Download" again to save the image.
Common pitfalls and how to avoid them for cropping and downloading a photo in Canva
Accidentally Cropping the Wrong Area:
Fix: If you crop the wrong part of the photo, click on "Undo" in the top-left corner to revert to the previous state and crop again.Losing Quality After Download:
Fix: When downloading, ensure you're choosing a high-quality format like PNG or JPG with the highest resolution for better quality.Not Being Able to Adjust the Crop:
Fix: Ensure you’re selecting the correct photo and not an element or background before clicking the "Crop" option.Cropping the Image Too Much:
Fix: When cropping, leave some space around the subject so you don’t lose too much of the image.Not Downloading in the Desired Format:
Fix: Double-check the file format before downloading, especially if you need the image in a specific format for use.
Common FAQs for cropping and downloading a photo in Canva
How do I crop a photo in Canva?
Select the photo, click on "Crop," adjust the crop area by dragging the handles, and click "Done" to apply the crop.Can I crop an image into a shape in Canva?
Yes, after cropping, you can place the image inside a frame to shape it as needed, such as a circle or square.How do I download the cropped photo?
Once cropped, click on the "Download" button, select your preferred format, and download the image.Will cropping an image affect its quality?
Cropping the image itself doesn’t degrade quality, but make sure you’re downloading in the highest resolution possible for better quality.Can I crop a photo multiple times?
Yes, you can crop a photo as many times as needed by selecting the image and clicking on the "Crop" option again.How to screen record on mac?
To screen record on a Mac, you can use Trupeer AI. It allows you to capture the entire screen and provides AI capabilities such as adding AI avatars, add voiceover, add zoom in and out in the video. With trupeer’s AI video translation feature, you can translate the video into 30+ languages.How to add an AI avatar to screen recording?
To add an AI avatar to a screen recording, you'll need to use an AI screen recording tool. Trupeer AI is an AI screen recording tool, which helps you create videos with multiple avatars, also helps you in creating your own avatar for the video.How to screen record on windows?
To screen record on Windows, you can use the built-in Game Bar (Windows + G) or advanced AI tool like Trupeer AI for more advanced features such as AI avatars, voiceover, translation etc.How to add voiceover to video?
To add voiceover to videos, download trupeer ai chrome extension. Once signed up, upload your video with voice, choose the desired voiceover from trupeer and export your edited video.How do I Zoom in on a screen recording?
To zoom in during a screen recording, use the zoom effects in Trupeer AI which allows you to zoom in and out at specific moments, enhancing the visual impact of your video content.
Related Tutorials

