

How to Change Github Repository from Private to Public
Learn how to change a GitHub repository from private to public using repository settings. Follow this step-by-step tutorial and create developer guides with Trupeer.
To change a GitHub repository from private to public, follow these steps:
Navigate to the Repository: Go to the private repository you wish to make public on GitHub.
Access Settings: Click on the "Settings" tab located at the top of the repository page.
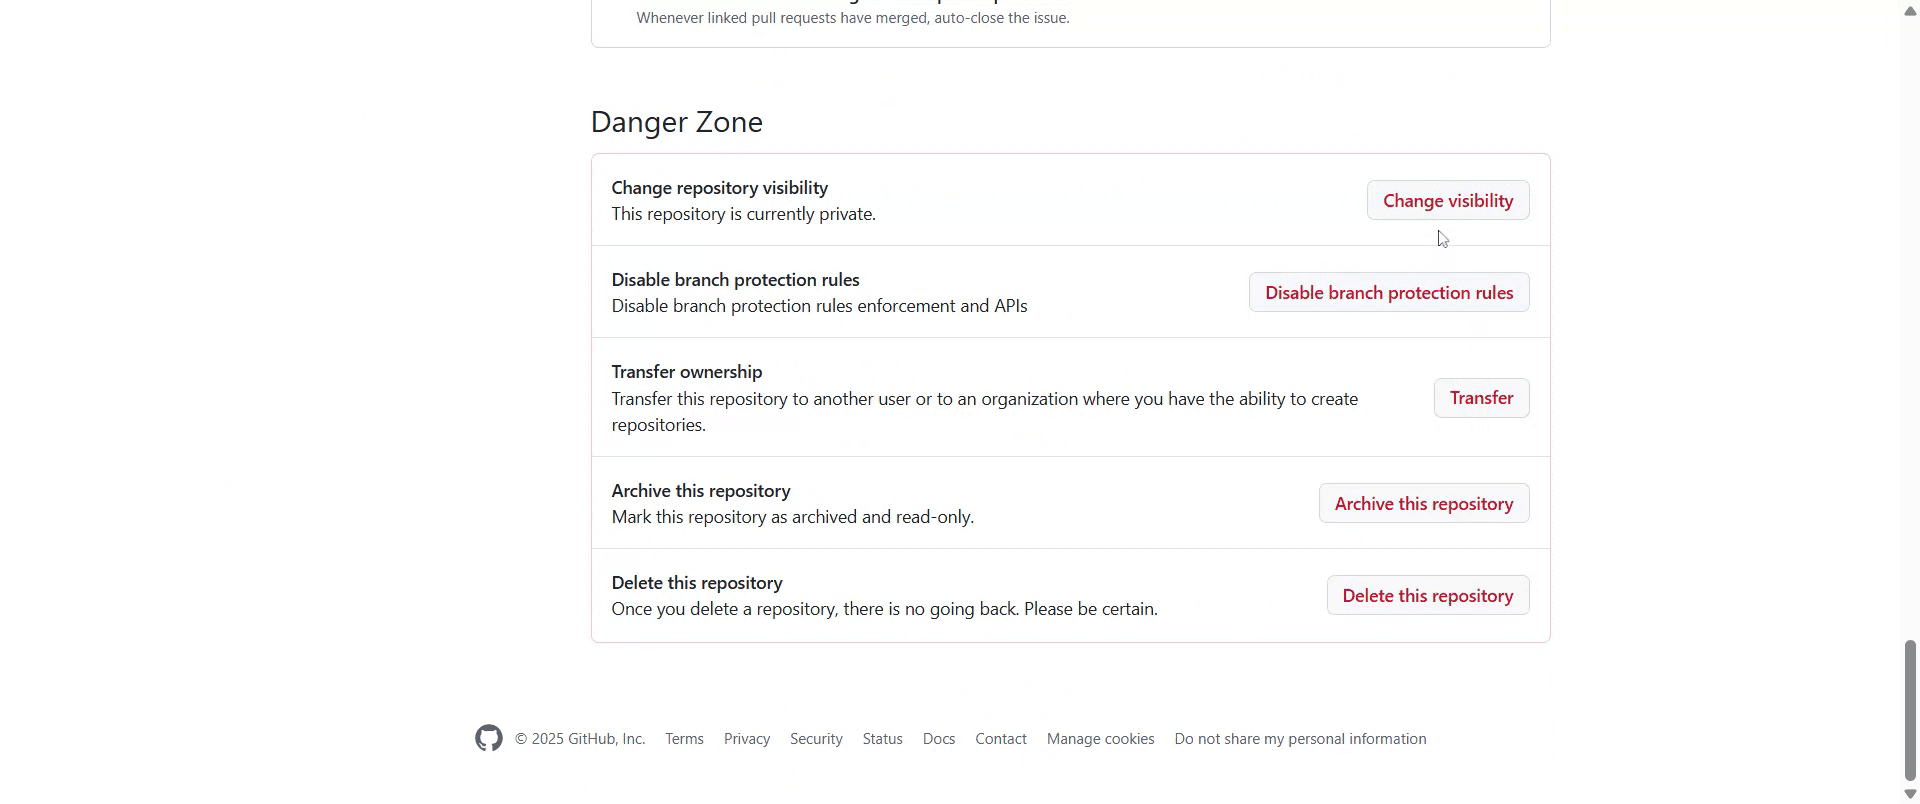
Locate Danger Zone: Scroll down the settings page until you find the "Danger Zone" section.
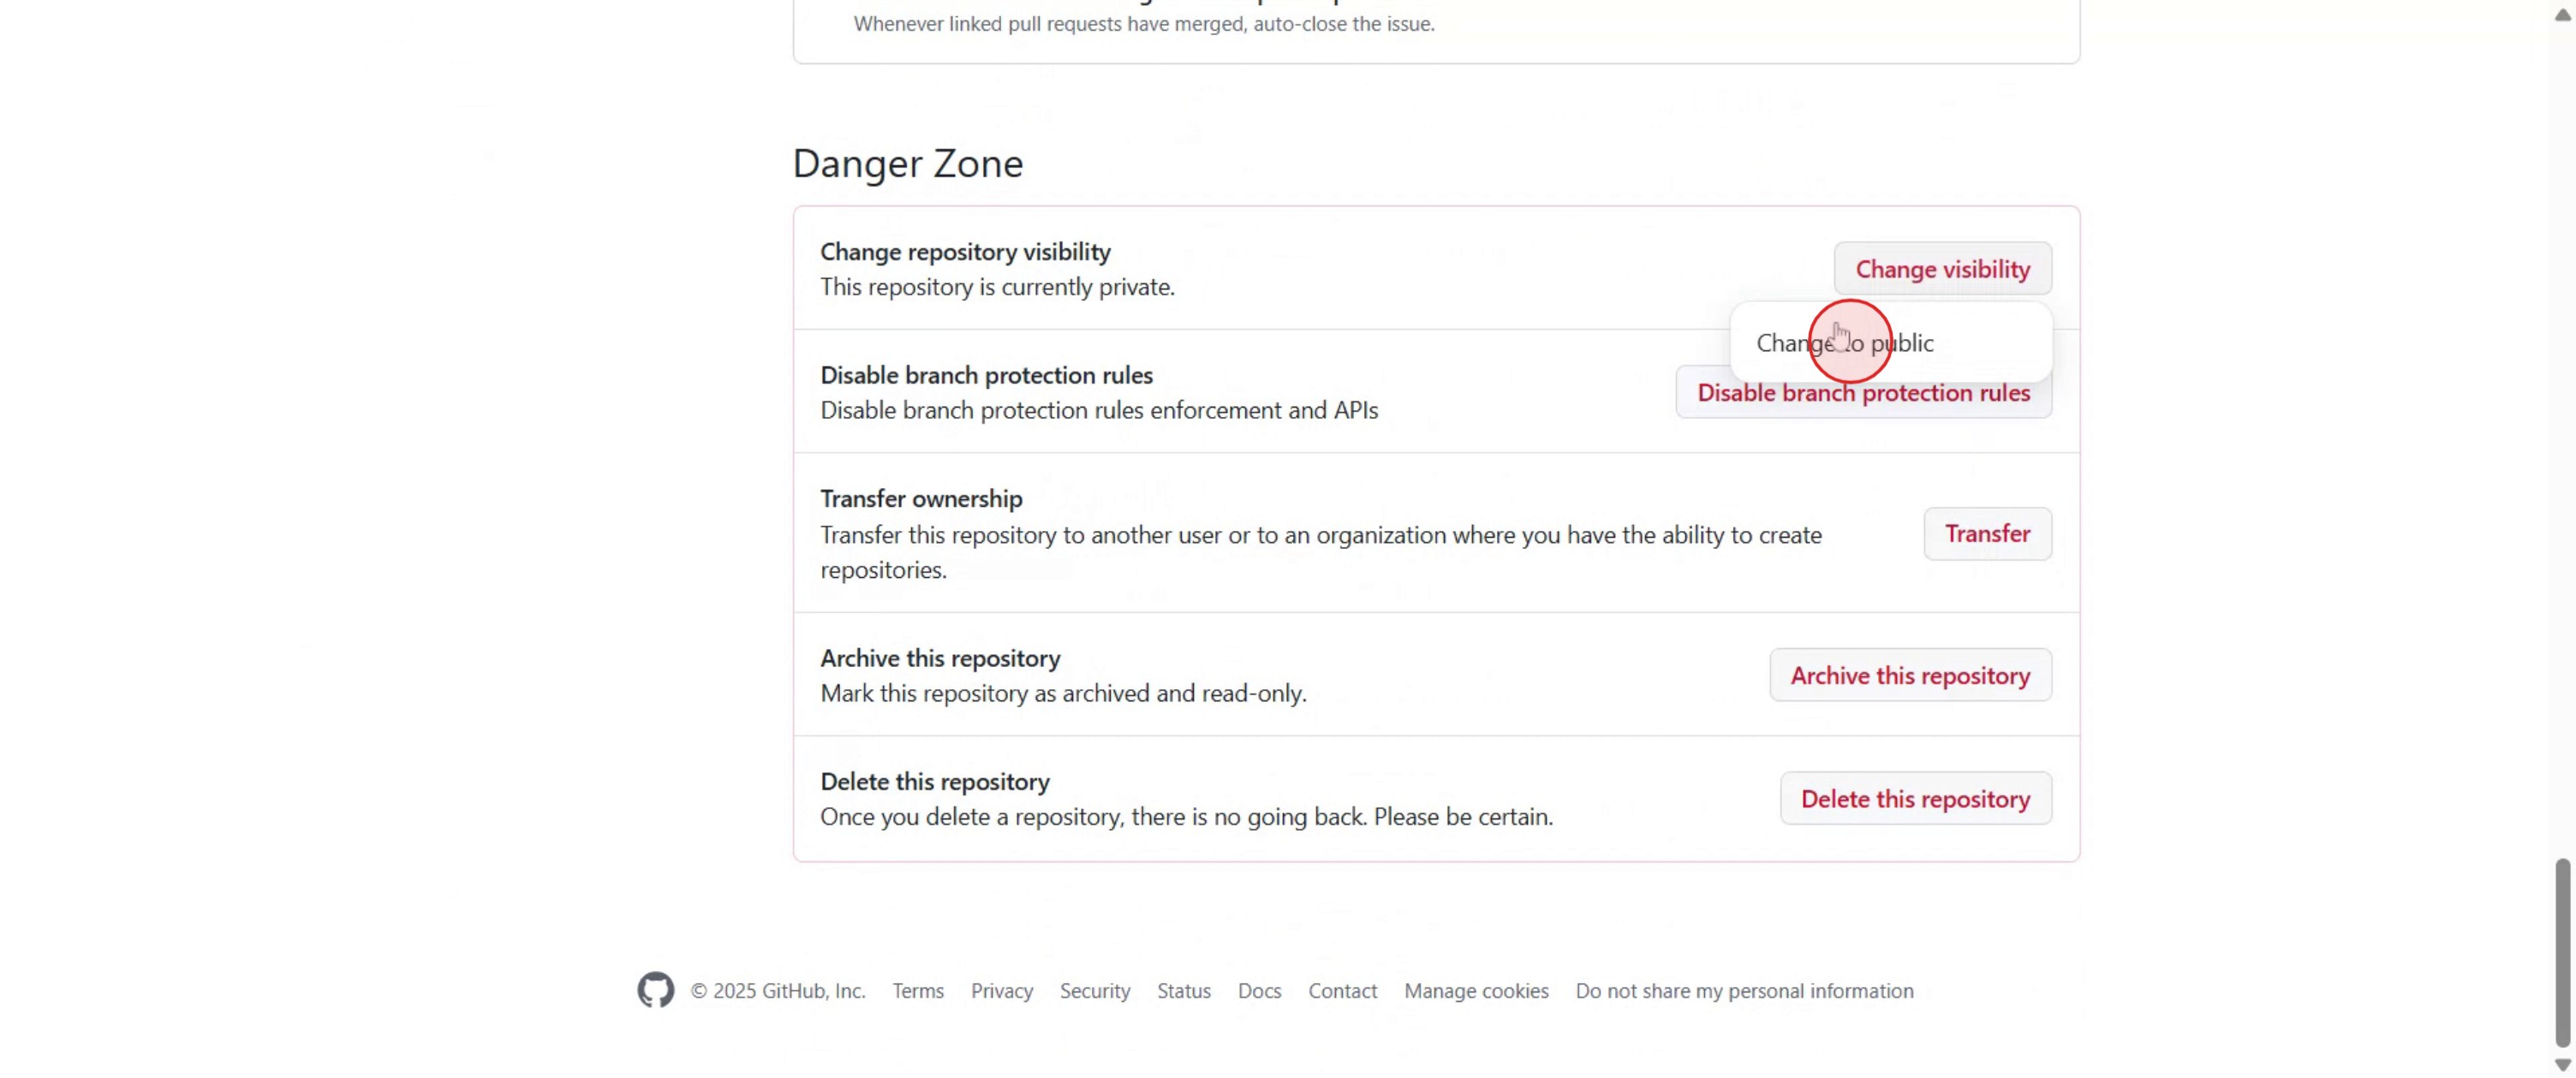
Change Visibility: Within the "Danger Zone," find the "Change repository visibility" option and click the "Change visibility" button next to it.
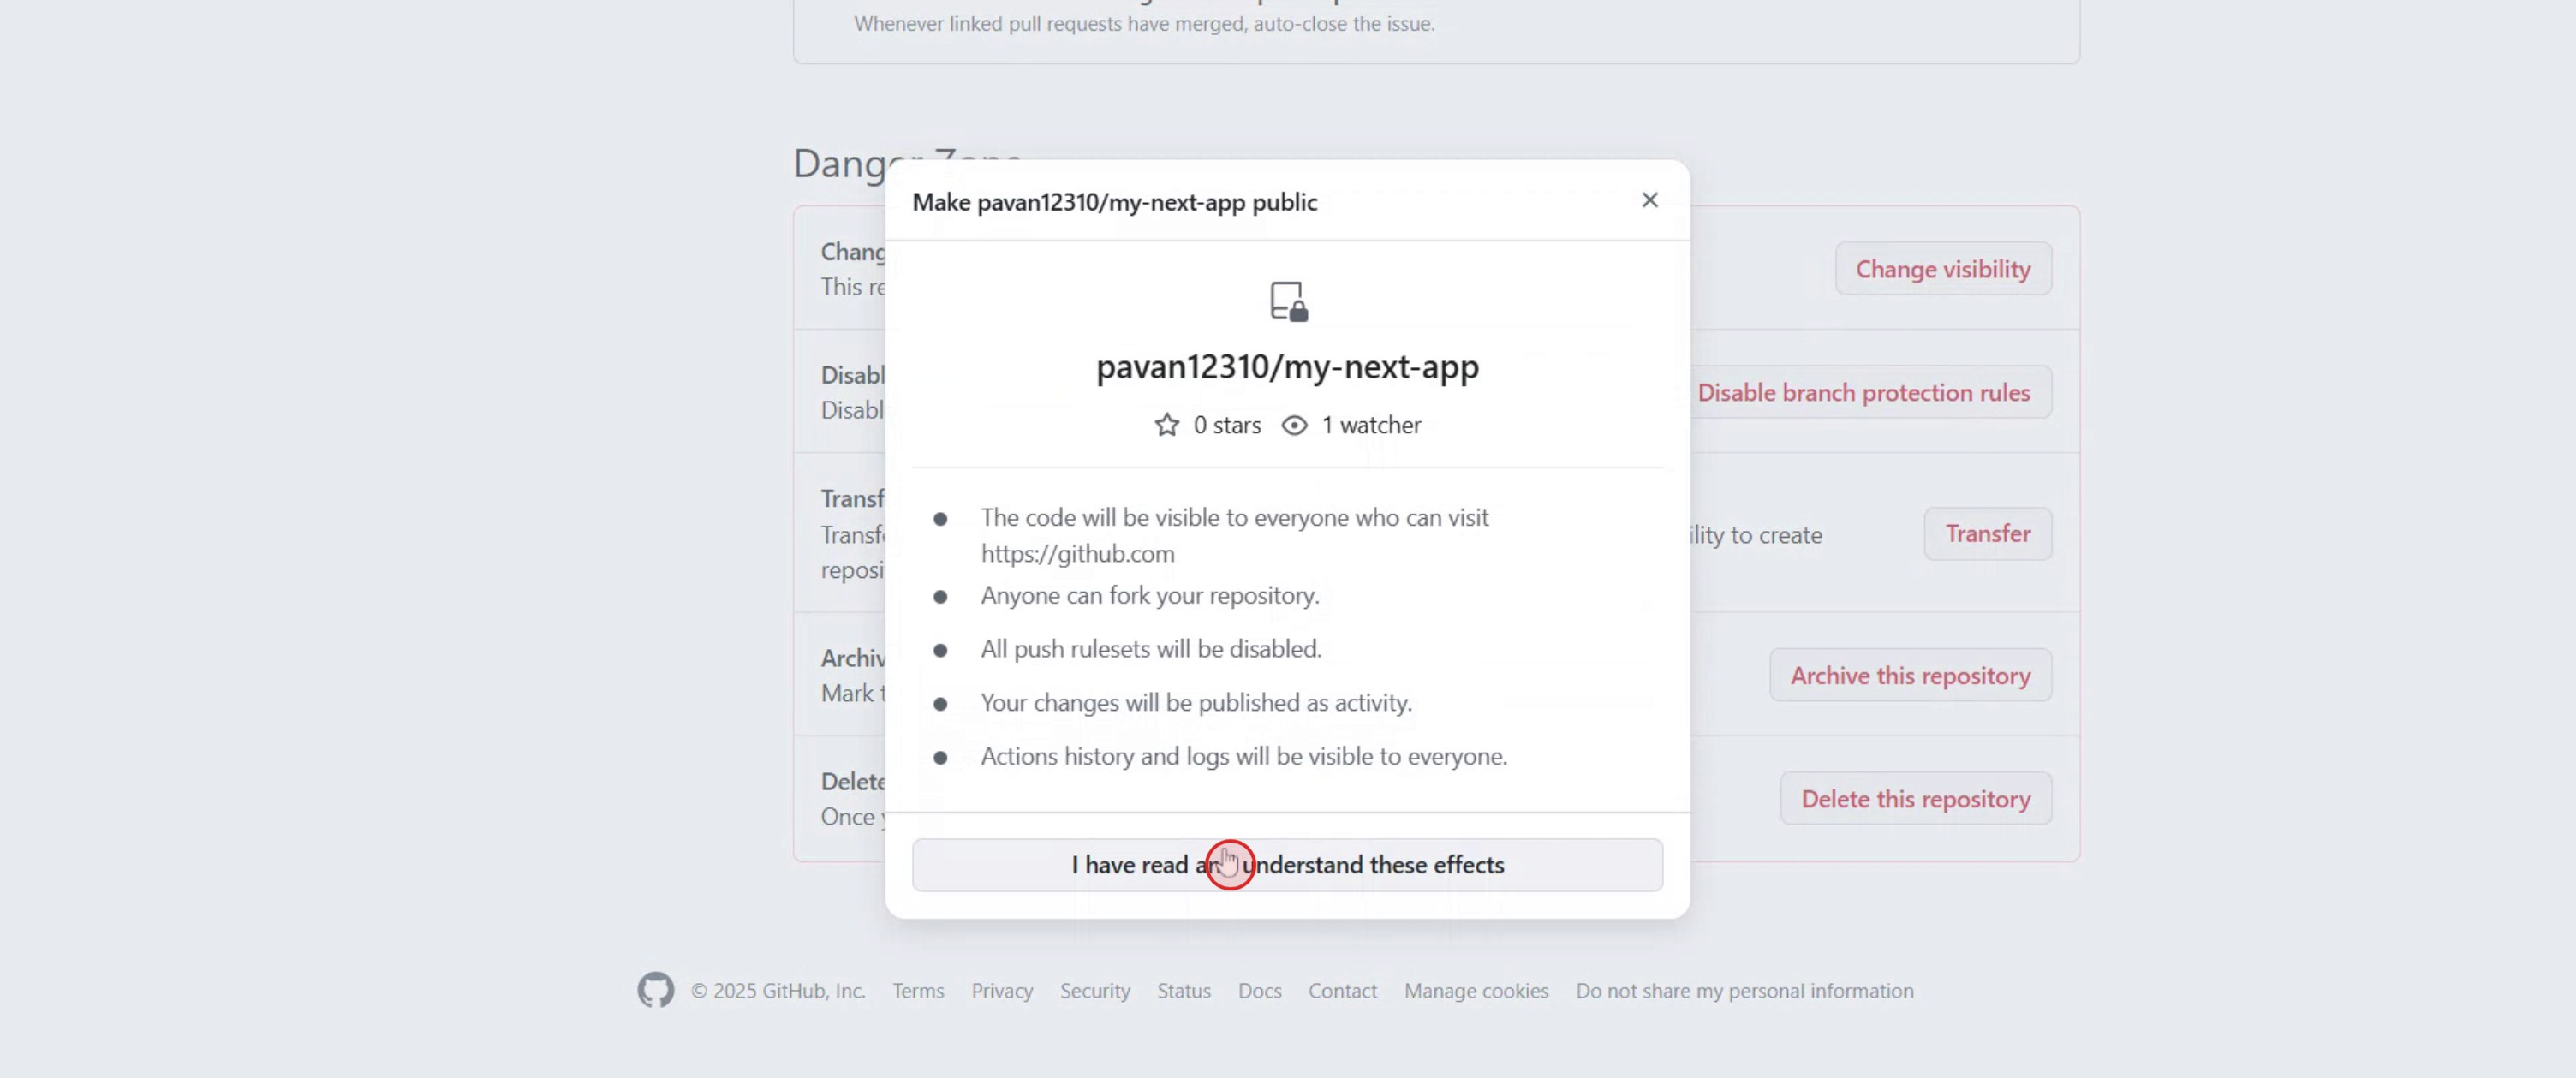
Select Public: A pop-up window will appear. Select "Change to public" from the options presented.
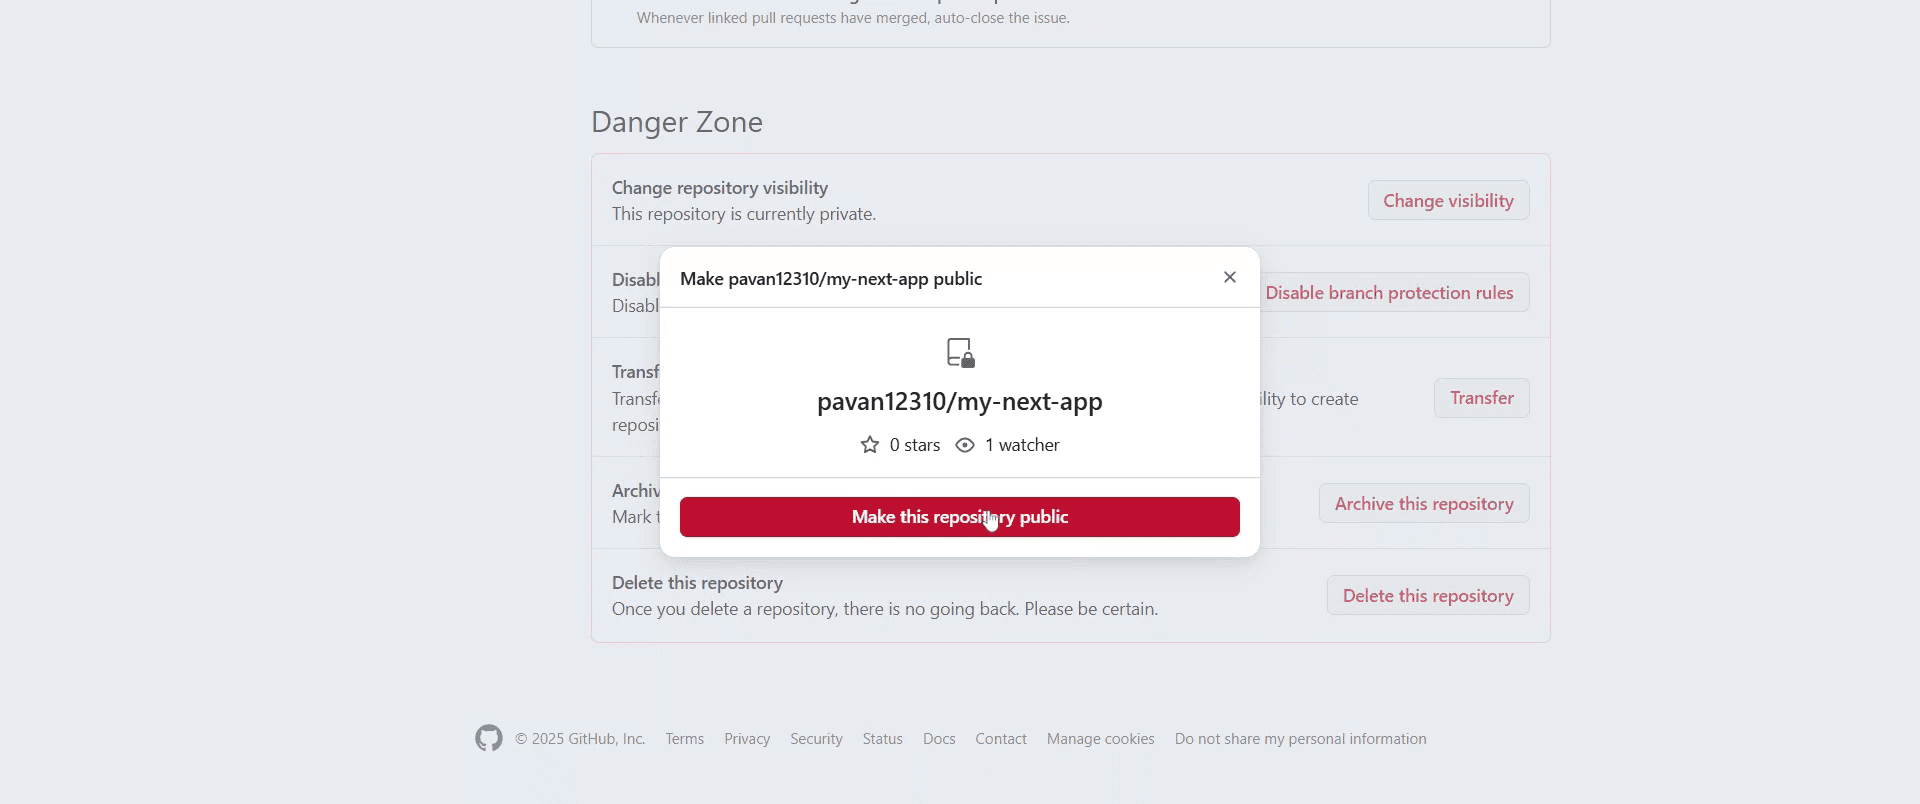
Confirm Action: GitHub will prompt you to confirm your decision. Read the confirmation message and click on the "I understand, make this repository public" button to proceed.
After confirming, your repository's visibility will be updated, and it will become publicly accessible.
Step-by-Step Guide: How to Change Github Repository from Private to Public
Step 1
Navigate to the private repository you want to change.

Step 2
Click on the 'Settings' tab, which is located at the top right of the repository page.

Step 3
Scroll down to the 'Danger Zone' section at the bottom of the settings page.
Step 4
Click the 'Change repository visibility' button and select 'Change to public'.
Step 5
A pop-up will appear asking for confirmation and click on the 'I want to make this repository public' button.

Step 6
Click on the 'I have read and understand these effects' button.
Step 7
Click 'Make this repository public'.
Step 8
Once the repository is public, all code and data in it will be visible to anyone on GitHub.

Pro Tips Change Github Repository from Private to Public
Audit sensitive data before making it public
Review your entire repository for API keys, environment variables, access tokens,.envfiles, and internal documentation before switching visibility.Check commit history, not just current files
Even if sensitive data is removed from the latest version, it may still exist in previous commits. Use Git history tools or GitHub’s secret scanning alerts.Update the README for public users
Rewrite internal notes into clear documentation that explains the project purpose, setup steps, and usage for external contributors.Add a license before going public
Without a license, others technically cannot legally use your code. Choose an appropriate open-source license like MIT, Apache 2.0, or GPL.Review repository collaborators and permissions
Ensure all collaborators are appropriate for a public project and remove anyone who shouldn’t have ongoing access.Enable GitHub security features
Turn on Dependabot alerts, code scanning, and secret scanning to protect the repository after it becomes public.Create a
.gitignoreif missing
Prevent accidental future commits of sensitive or unnecessary files by properly configuring.gitignore.
Common Pitfalls Change Github Repository from Private to Public
Accidentally exposing credentials
This is the most common and serious mistake. Once public, data can be indexed, cloned, and cached quickly.Assuming deleted files are gone forever
Deleted files can still exist in Git history unless properly removed using history-rewriting tools.Forgetting about linked services
CI/CD pipelines, cloud providers, and third-party integrations may still reference the repository after it goes public.No license included
A public repository without a license creates legal ambiguity and limits adoption.Poor documentation for first-time users
Internal-only READMEs confuse external users and reduce engagement or contributions.Ignoring issues and discussions settings
Leaving issues enabled without moderation can lead to spam or unmanageable requests.Changing visibility without stakeholder alignment
For team or company repos, switching to public without approval can cause compliance or policy issues.
Common FAQs Change Github Repository from Private to Public
1. Can I change a GitHub repository from private to public for free?
Yes. GitHub allows private-to-public visibility changes on free and paid plans.
2. Will my commit history remain intact?
Yes. All commits, branches, and tags remain unchanged when you change repository visibility.
3. Can I revert a public repository back to private?
Yes, you can change it back to private at any time, but any data already cloned or cached publicly cannot be undone.
4. Will public repositories appear in search engines?
Yes. Public repositories can be indexed by search engines and discovered by anyone.
5. Are forks and stars affected?
Stars remain intact. Forking becomes available once the repository is public.
6. Do collaborators get notified when visibility changes?
GitHub does not always send explicit notifications, so it’s best to inform collaborators manually.
7. Is it safe to make a company project public?
Only if you’ve reviewed licensing, compliance, intellectual property, and sensitive data thoroughly.
People also ask
Technical Documentation Generator
How to Share GitHub Repository via Link
How to Share Your GitHub Profile
Related Tutorials

