
How to Blur in Canva
Learn how to blur images, backgrounds, or specific elements in Canva. Step-by-step guide to using the blur effect for creative and professional designs.
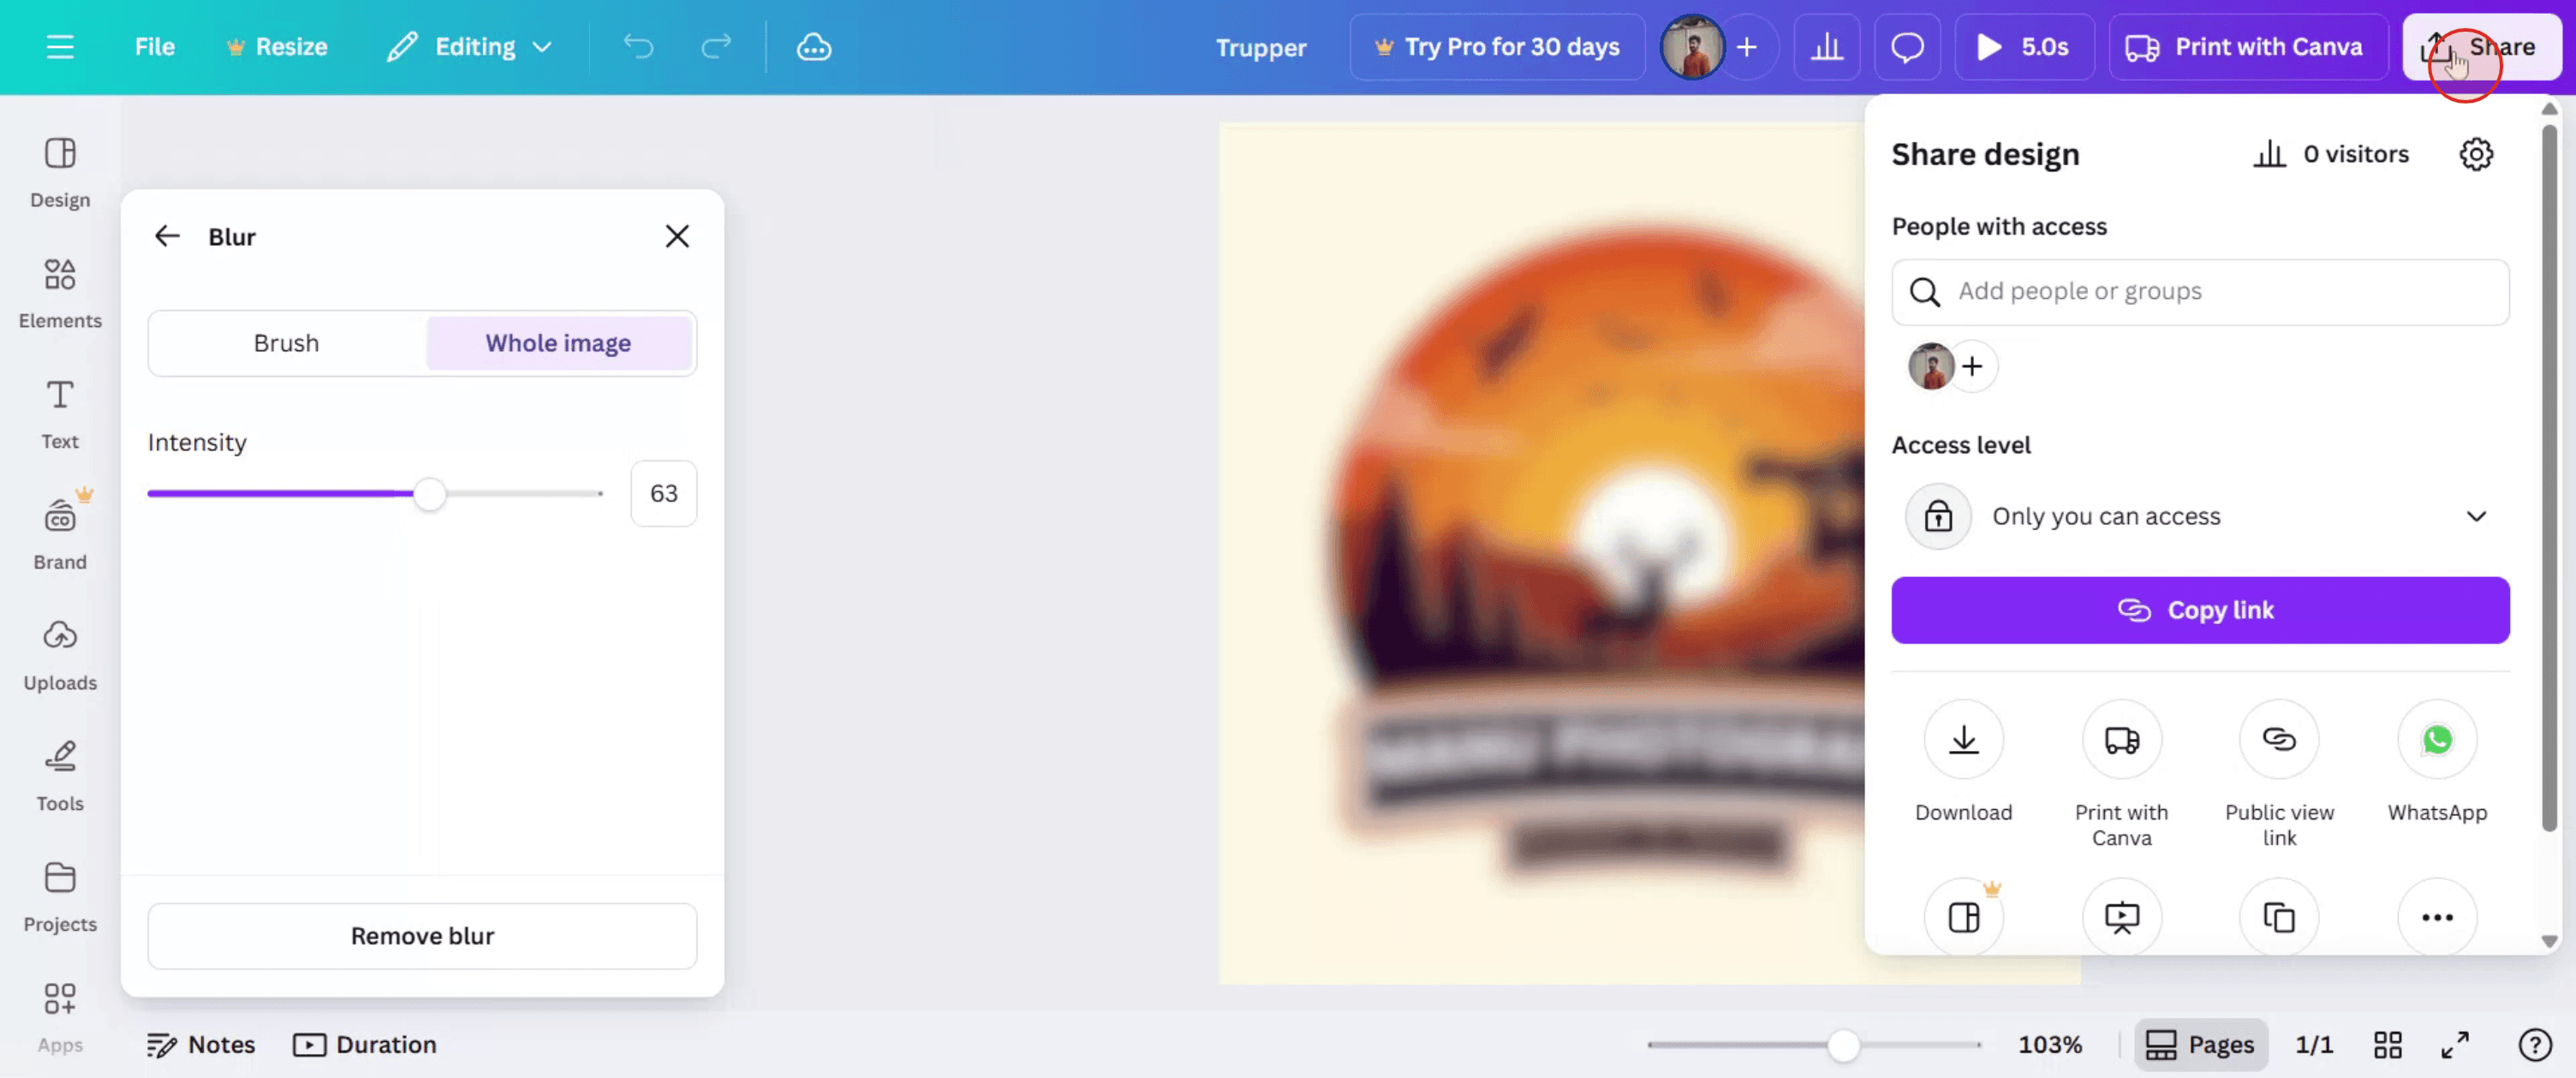
To blur an image in Canva, select the image, click "Edit Image", then "Adjust", and use the Blur slider to control the intensity. For selective blurring, use the Brush tool within the Blur effect to target specific areas. You can also blur video backgrounds by using the "Edit Photo" and "Auto Focus" features or by adjusting the sharpness in the "Adjust" tab.
Here's a more detailed breakdown:
Blurring an entire image:
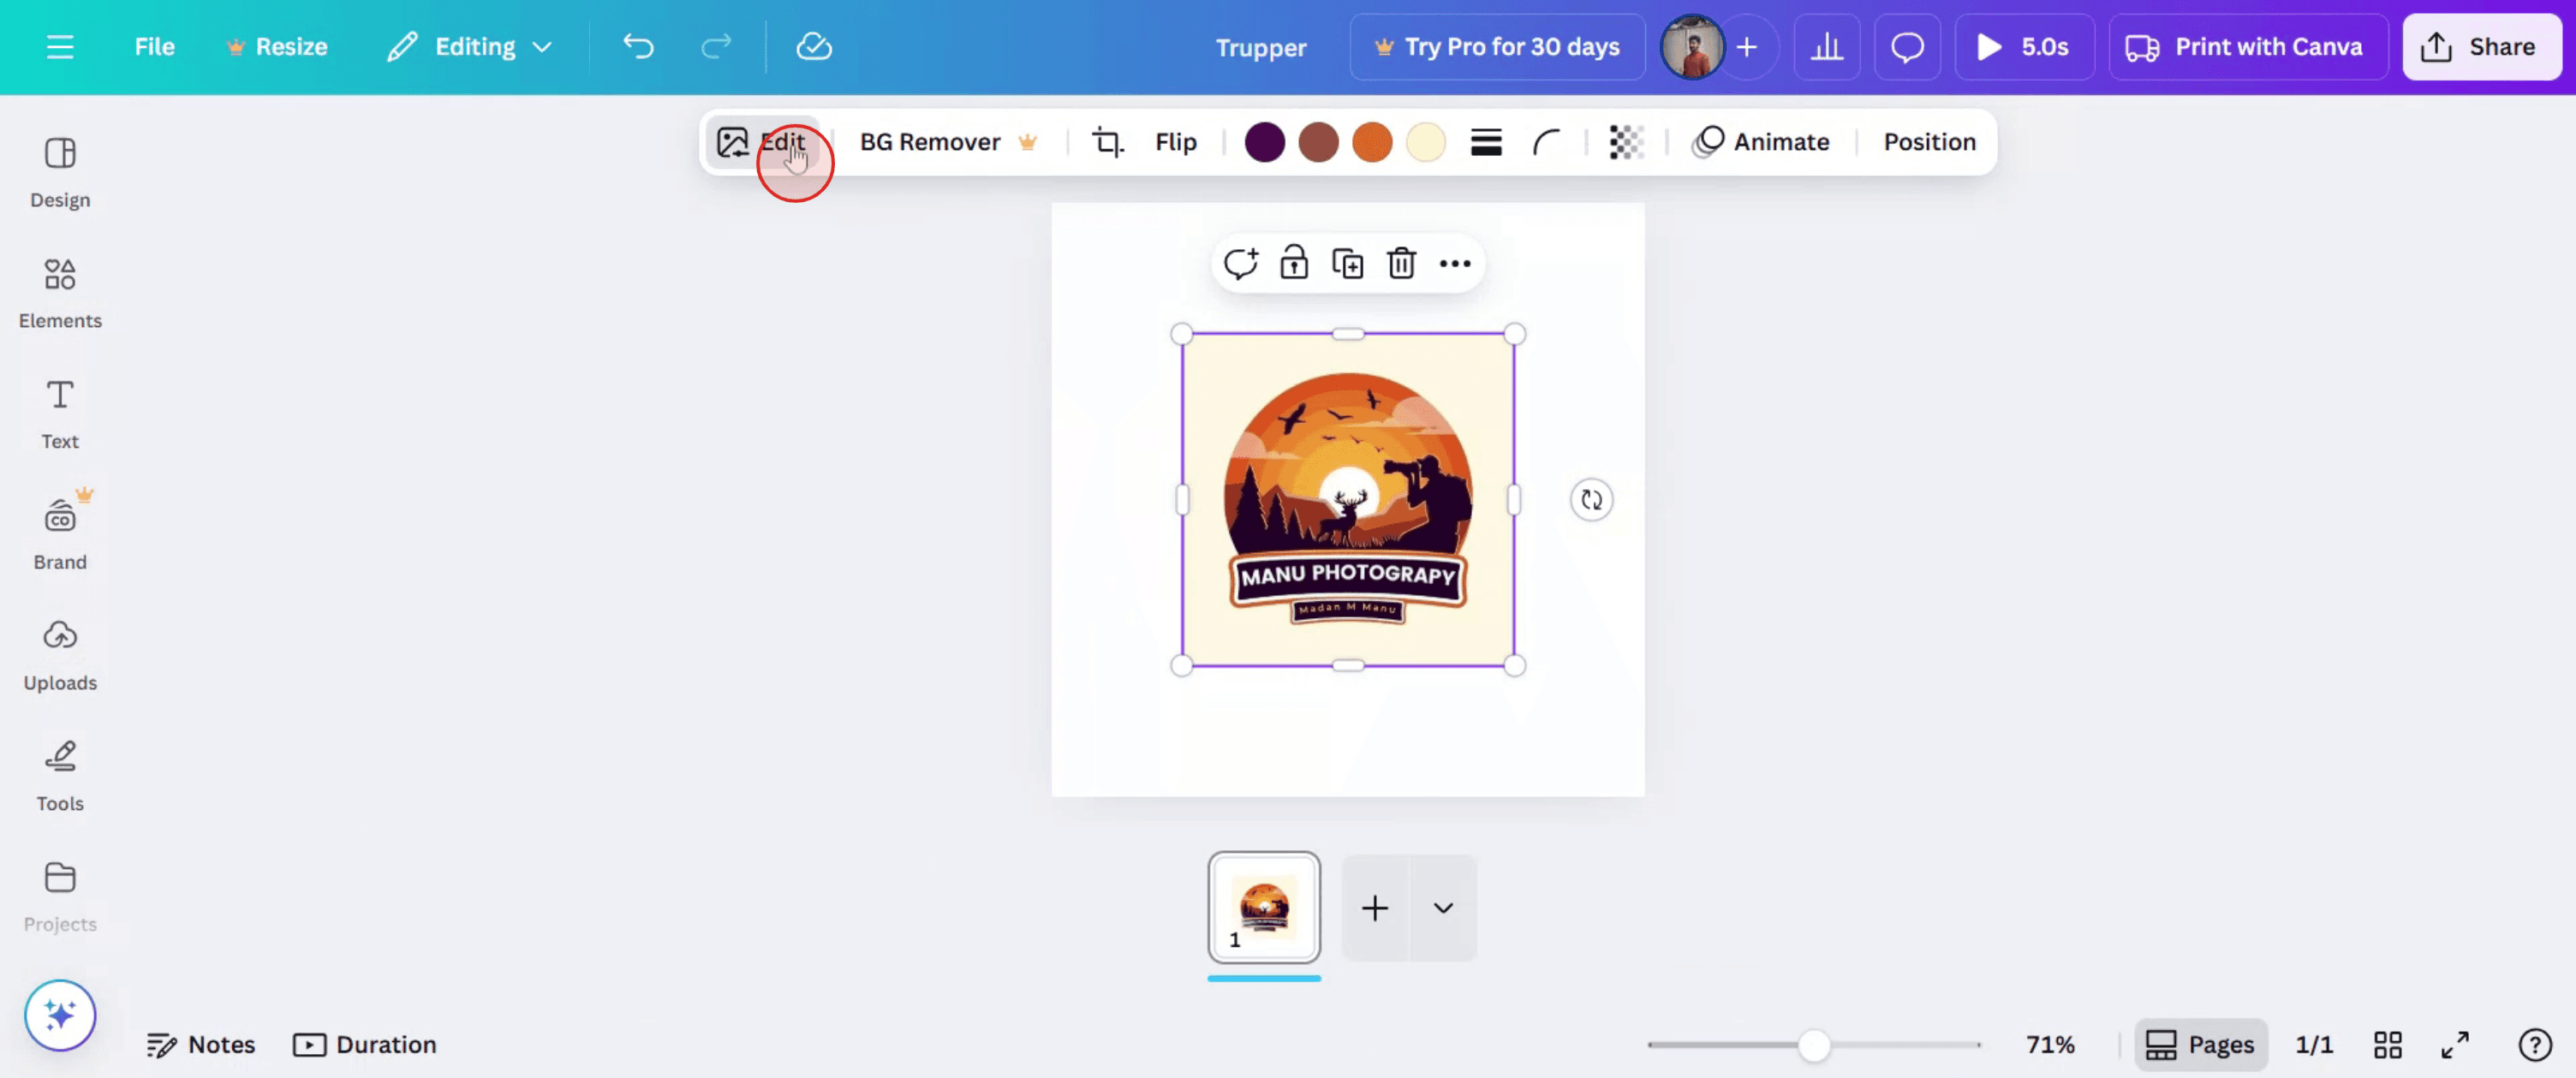
Select the image: Click on the image you want to blur within your Canva design.
Access the editor: Click on the "Edit Image" button on the top toolbar.
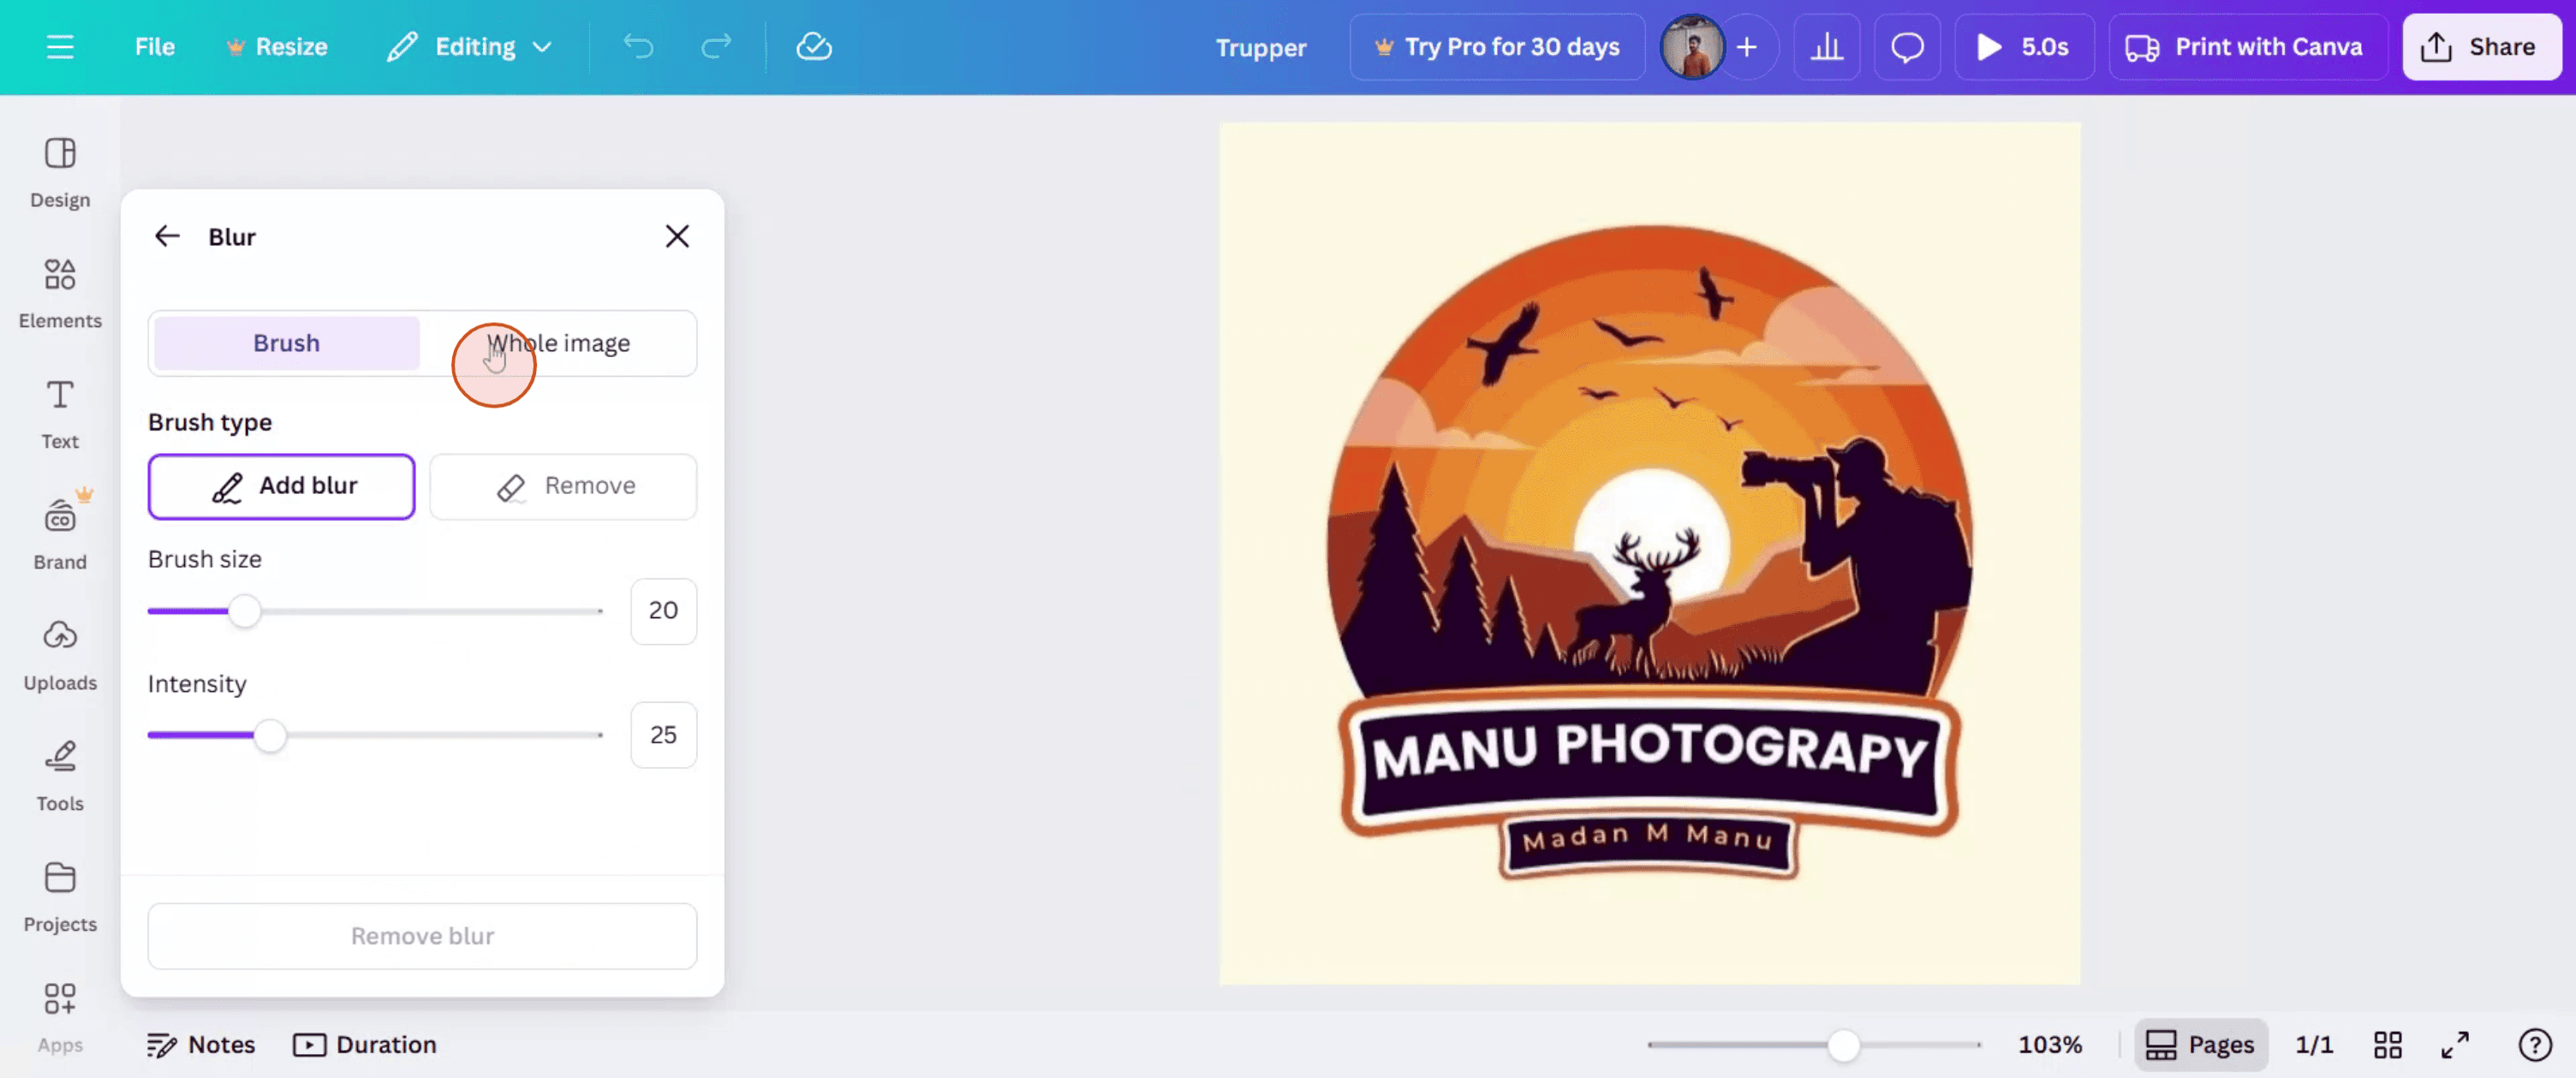
Adjust the blur: Navigate to the "Adjust" section and use the blur slider to control the intensity of the blur.
Download: Once satisfied, download your design.
Blurring specific areas:
Select the image: Click on the image you want to blur.
Access the editor: Click on the "Edit Image" button.
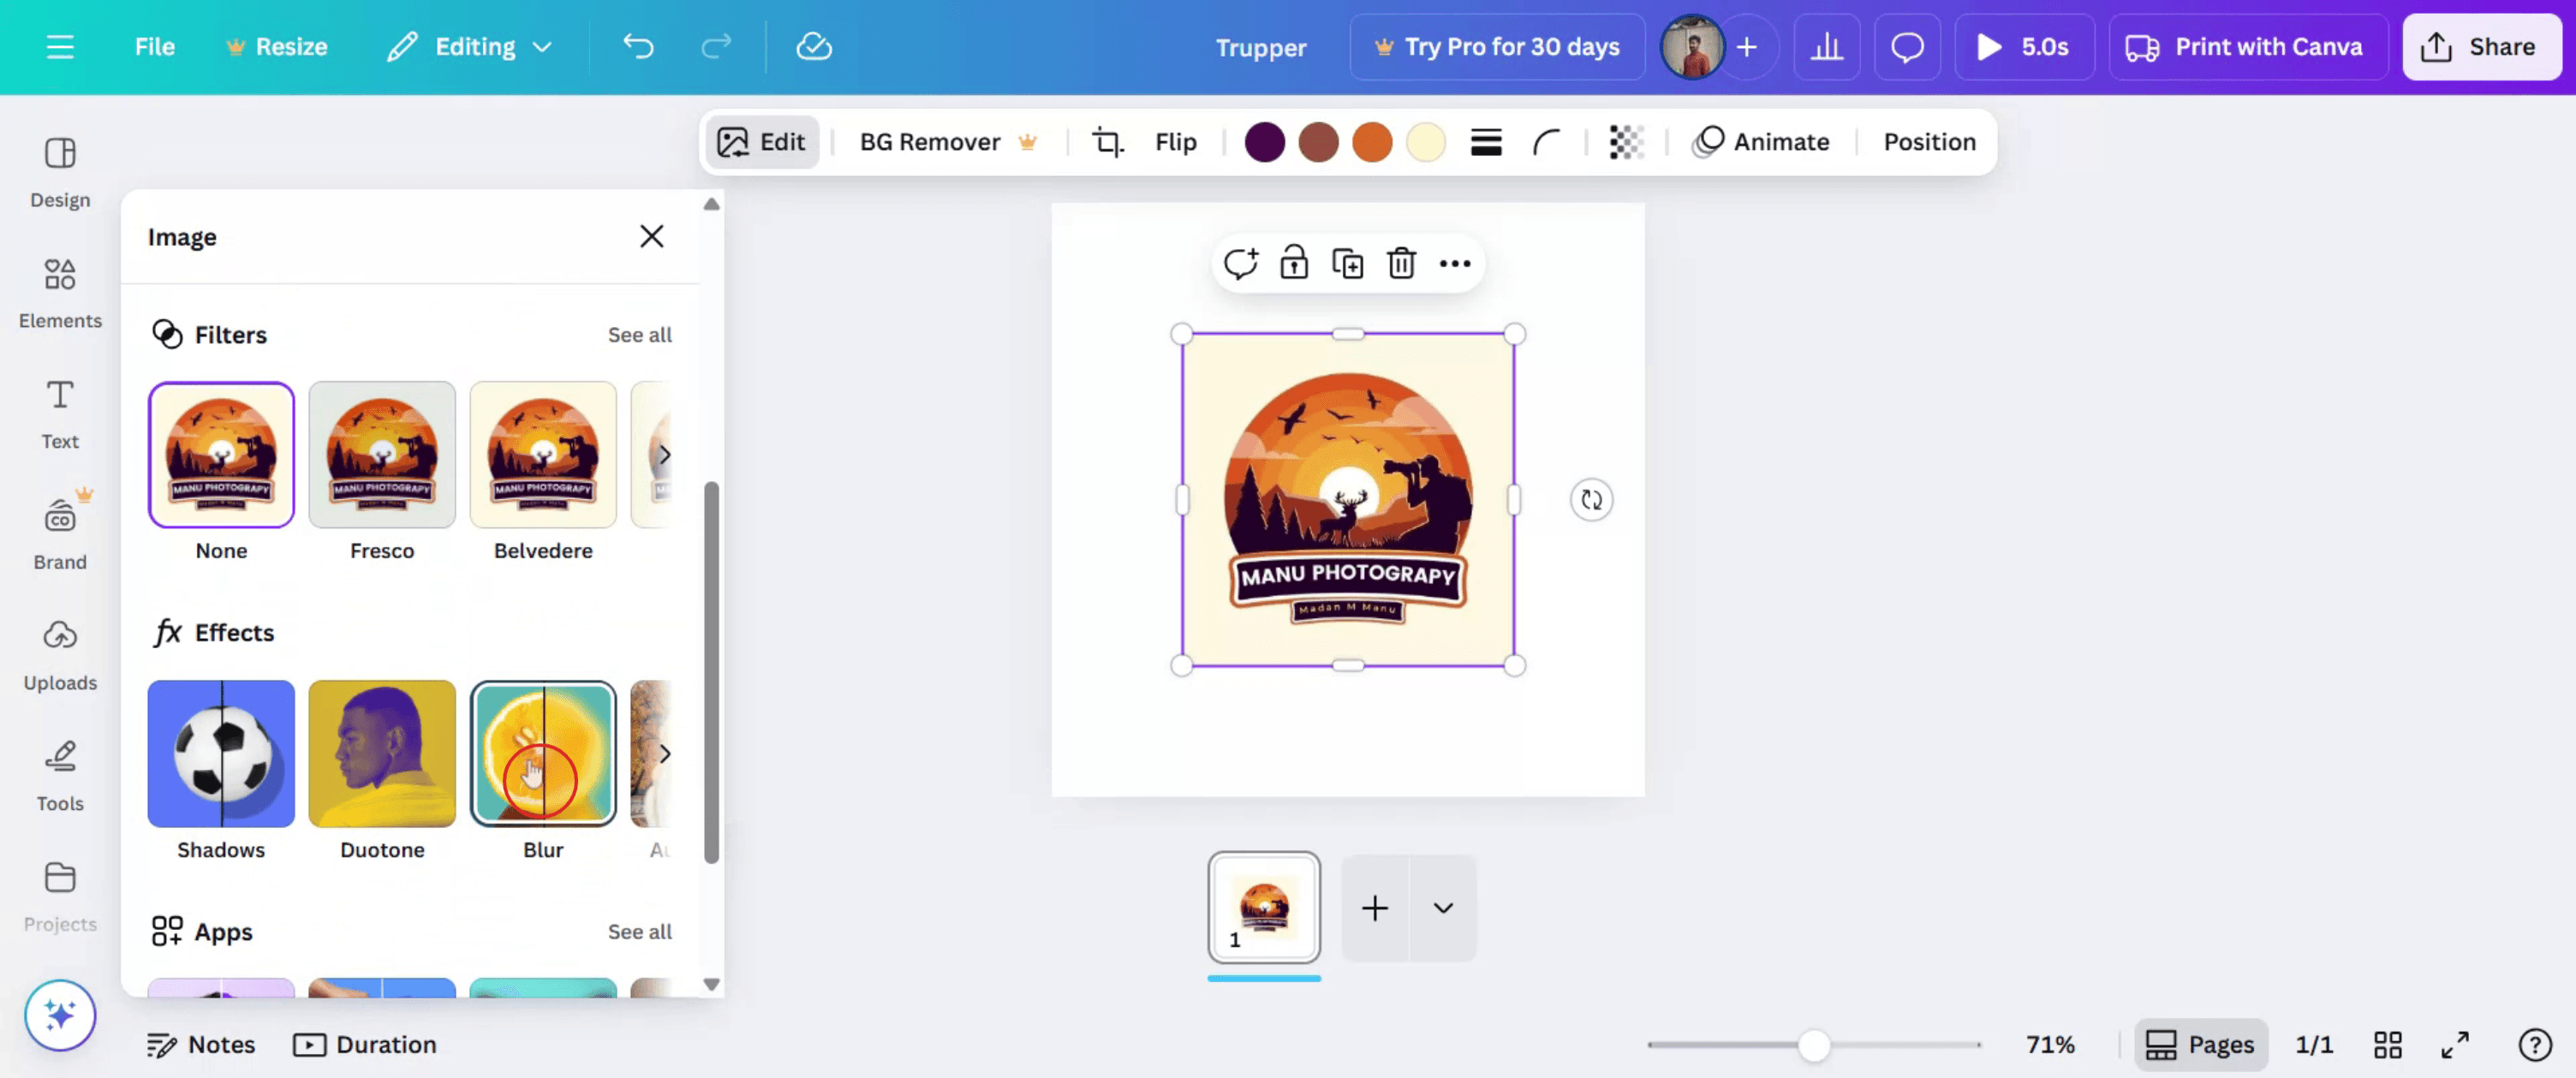
Apply blur effect: In the left panel, go to the "fx Effects" section and find the Blur effect.
Use the brush: Select the brush tool and adjust the brush size and intensity as needed.
Target areas: Click and drag the brush over the areas you want to blur.
Adjust intensity: Use the intensity slider to control the blur effect.
Step-by-Step-Guide: How to Blur in Canva
Step 1
Begin by accessing the upload section in Canva and click on it to start the process.

Step 2
After selecting, click on the image and then choose the "Edit" option.
Step 3
Within the edit menu, locate and select the "Blur" option.
Step 4
You will encounter two choices, allowing you to blur specific parts of the image. Additionally, you have the option to blur the entire image.
Step 5
Here, you can adjust the intensity of the blur effect applied to the entire image.

Step 6
Once you are satisfied with the adjustments, click on "Share" to distribute your edited image.
Pro Tips for Blurring in Canva
Open Your Design in Canva
Log in to Canva and open the design where you want to apply a blur effect.Select the Image or Element to Blur
Click on the photo, background, or graphic element that you want to blur.Click on the ‘Edit Image’ Button
With the element selected, click the “Edit Image” option from the top toolbar.Choose the Blur Tool
Scroll through the available effects and select the “Blur” tool under Adjust or Effects.Adjust the Blur Intensity
Use the blur slider to increase or decrease the amount of blur. Slide to the right for a stronger blur effect.Apply and Review the Blur
After adjusting, click outside the image to apply the effect. Preview the design to make sure the blur looks as intended.
Common Pitfalls and How to Avoid Them
Blur Tool Not Visible
Ensure the correct image is selected. If the tool still doesn’t appear, check that you are using a supported image format.Blurring the Wrong Area
Canva blurs the entire selected element. To blur only part of the image, duplicate the image and mask the section you want to affect.Image Becomes Unclear
Don’t over-blur unless necessary. Apply a subtle effect to keep important visual elements recognizable.Trying to Blur Text Directly
Text elements cannot be blurred. Convert text to an image by downloading and re-uploading it if needed.Limited Blur Options in Free Version
Some advanced blur filters may only be available in Canva Pro. Use the basic blur tool if you're using the free version.
Common FAQs About Blurring in Canva
How do I blur an image in Canva
Select the image, click Edit Image, choose the Blur tool, and adjust the slider to apply the effect.Can I blur part of an image
Not directly. To blur only part of an image, use shapes or masks over specific areas or edit externally and re-upload.Can I blur background images
Yes, background images can be selected and blurred just like any other photo or graphic.Is the blur effect available for free users
Yes, the basic blur tool is available in the free version, but advanced features may require Canva Pro.Can I remove blur after applying it
Yes, simply reselect the image, go back to the Edit Image panel, and reset or adjust the blur level.How to screen record on mac?
To screen record on a Mac, you can use Trupeer AI. It allows you to capture the entire screen and provides AI capabilities such as adding AI avatars, add voiceover, add zoom in and out in the video. With trupeer’s AI video translation feature, you can translate the video into 30+ languages.How to add an AI avatar to screen recording?
To add an AI avatar to a screen recording, you'll need to use an AI screen recording tool. Trupeer AI is an AI screen recording tool, which helps you create videos with multiple avatars, also helps you in creating your own avatar for the video.How to screen record on windows?
To screen record on Windows, you can use the built-in Game Bar (Windows + G) or advanced AI tool like Trupeer AI for more advanced features such as AI avatars, voiceover, translation etc.How to add voiceover to video?
To add voiceover to videos, download trupeer ai chrome extension. Once signed up, upload your video with voice, choose the desired voiceover from trupeer and export your edited video.How do I Zoom in on a screen recording?
To zoom in during a screen recording, use the zoom effects in Trupeer AI which allows you to zoom in and out at specific moments, enhancing the visual impact of your video content.
Suggested Reads
Technical Documentation Generator
How to Create a Journal in Canva
How to Print Double Sided on Canva
Related Tutorials

