
How to Add Bleed in Canva for Print-Ready Designs
Learn how to add bleed in Canva to ensure your designs print without white edges. Perfect for business cards, flyers, and brochures.
This document outlines a straightforward process for adding bleed to your design projects in Canva. This ensures your designs are print-ready, preventing any undesired white edges after printing.
Adding bleed ensures your print designs come out with clean, edge-to-edge color no unintended white borders.
Step-by-Step Guide:
1. Enable Print Bleed
Open your design in Canva.
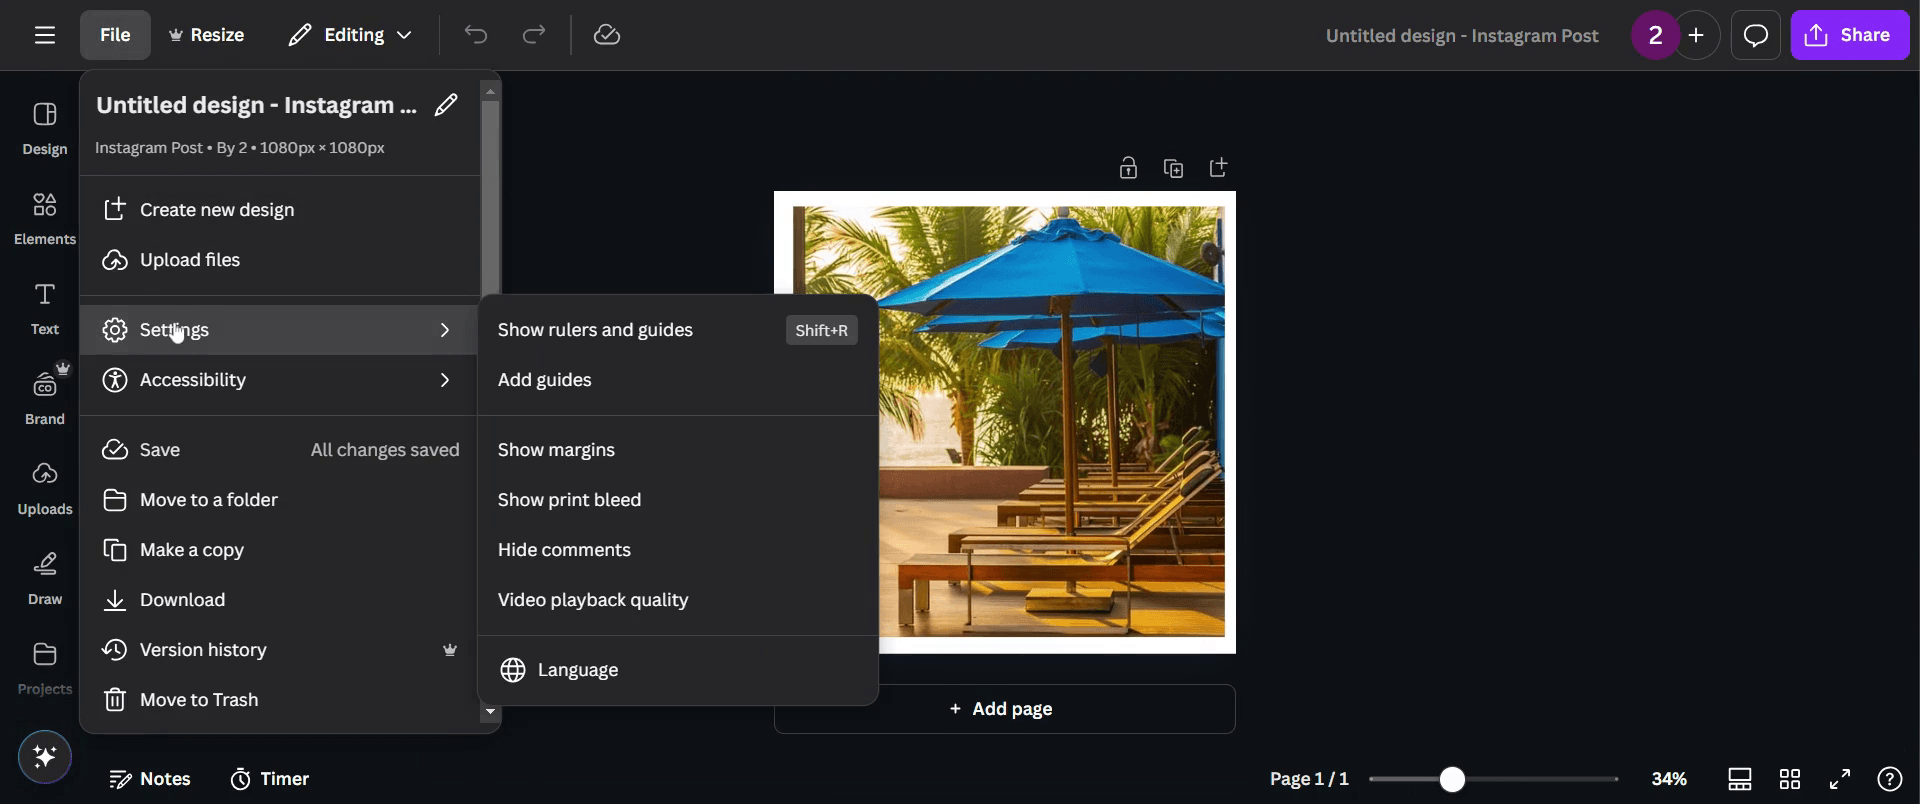
Go to the top menu, click File > Show print bleed.
A dashed line will appear near the edges this marks where bleed begins.
2. Extend Design Elements
Backgrounds, images, and colors should stretch past the dashed line to the edge of the canvas.
Keep text and key graphics inside the safe zone (within the dashed line) to avoid trimming issues.
3. Download the Print-Ready File
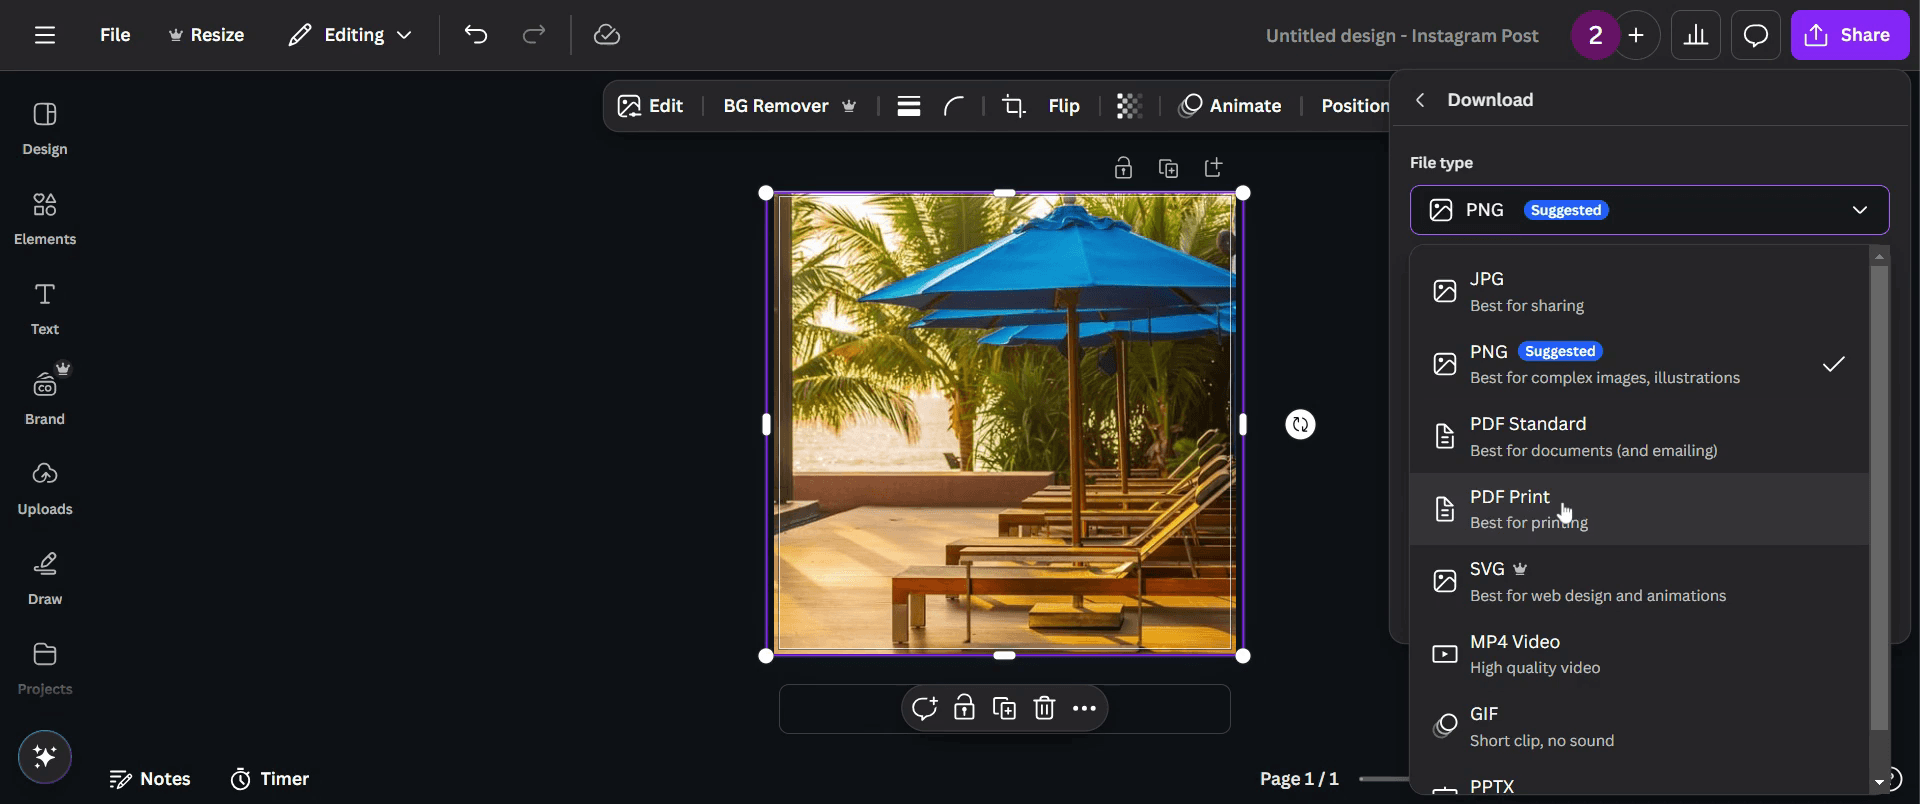
Click Share > Download.
Set file type to PDF Print.
Check "Crop marks and bleed".
Click Download.
Step-by-Step-Guide: How to Add Bleed in Canva for Print
Step 1
Select the existing project you wish to modify.

Step 2
Next, navigate to the 'File' option and click on it.

Step 3
Go and select 'Settings'.
Step 4
Click on 'Show Print Bleed'.

Step 5
Adjust your image to cover any white gaps around the edges.

Step 6
Once adjusted, proceed by clicking on the 'Share' button.

Step 7
Then click on 'Download'.

Step 8
Now, change the file type to 'PDF Print'.
Step 9
Make sure to click on 'Crop marks and bleed'.

Step 10
Finally, hit 'Download', Finally your design is ready.

Pro-tips for adding bleed in Canva
Enable the bleed setting in Canva’s File menu to ensure that important design elements don’t get cut off during printing
Extend background images and colors beyond the bleed lines to avoid white edges after trimming
Always download the design as a PDF with crop marks and bleed for professional printing results
Common pitfalls & how to avoid them while adding bleed in Canva
Forgetting to enable bleed settings may result in unwanted white borders, always check bleed settings before finalizing
Placing text or important elements too close to the bleed area can cause them to be trimmed, keep them well inside the safe margin
Not using the correct export format can affect print quality, always download with crop marks and bleed in PDF Print format
Common FAQs for adding bleed in Canva
1. Why is bleed important in Canva designs?
Bleed ensures that your design extends beyond the trim line, preventing unwanted white edges when printed
2. Can I adjust the bleed size in Canva?
Canva automatically sets a standard bleed margin, and it cannot be manually adjusted within the platform
3. How do I export a Canva design with bleed for printing?
Click on Download, choose PDF Print format, and check the Crop marks and bleed option before saving
4. Will the bleed area be visible when printing my design?
No, the bleed area will be trimmed off, leaving only the final design without unwanted borders
5. How to screen record on mac?
To screen record on a Mac, you can use Trupeer AI. It allows you to capture the entire screen and provides AI capabilities such as adding AI avatars, add voiceover, add zoom in and out in the video. With trupeer’s AI video translation feature, you can translate the video into 30+ languages.
6. How to add an AI avatar to screen recording?
To add an AI avatar to a screen recording, you'll need to use an AI screen recording tool. Trupeer AI is an AI screen recording tool, which helps you create videos with multiple avatars, also helps you in creating your own avatar for the video.
7. How to screen record on windows?
To screen record on Windows, you can use the built-in Game Bar (Windows + G) or advanced AI tool like Trupeer AI for more advanced features such as AI avatars, voiceover, translation etc.
8. How to add voiceover to video?
To add voiceover to videos, download trupeer ai chrome extension. Once signed up, upload your video with voice, choose the desired voiceover from trupeer and export your edited video.
9. How do I Zoom in on a screen recording?
To zoom in during a screen recording, use the zoom effects in Trupeer AI which allows you to zoom in and out at specific moments, enhancing the visual impact of your video content.
People also ask
Technical Documentation Generator
How to Turn an Image into a Coloring Page in Canva
How to Print Double Sided on Canva
Related Tutorials

