
Canvaのプレゼンテーションを削除する方法 – ステップバイステップチュートリアル
Canva からプレゼンテーションを削除したいですか?わずか数クリックで、デザインから Canva のプレゼンテーションを完全に削除する方法をご紹介します。
このガイドでは、Canva でプレゼンテーションを削除する方法を、手順を追って説明します。プレゼンテーションがアカウントから正しく削除されるよう、以下の詳細な手順に従ってください。
なお、最初にプレゼンテーションをゴミ箱に移動し、そこから完全に削除することもできます。
Canva のワークスペースからプレゼンテーションを削除したい場合は、ゴミ箱に移動することで簡単に行えます。方法は次のとおりです。
手順ごとの説明:
Canva ホームページへ移動する
canva.com にアクセスし、アカウントにログインします。プレゼンテーションを見つける
削除したいプレゼンテーションのデザインサムネイルを、「最近のデザイン」または「プロジェクト」から見つけます。三点メニュー(その他アイコン)をクリックする
サムネイルにカーソルを合わせ、右上隅の三点をクリックします。「ゴミ箱に移動」を選択する
ドロップダウンメニューから、デザインをワークスペースから削除するために「ゴミ箱に移動」を選択します。
追加のヒント:
編集中: エディター画面からでも、ファイル > ゴミ箱に移動. をクリックして、プレゼンテーションをゴミ箱に移動できます。
共有デザイン: デザインがあなたと共有されている場合、表示からは削除できますが、元の所有者のみが完全に削除できます。
ゴミ箱から復元: ゴミ箱に移動したデザインは、完全に削除されない限り、ゴミ箱セクションに 30 日間保存されます。必要に応じて復元できます。
ステップごとのガイド: Canva のプレゼンテーションを削除する方法
ステップ 1
Canva アカウントにアクセスし、削除したいプレゼンテーションを開きます。
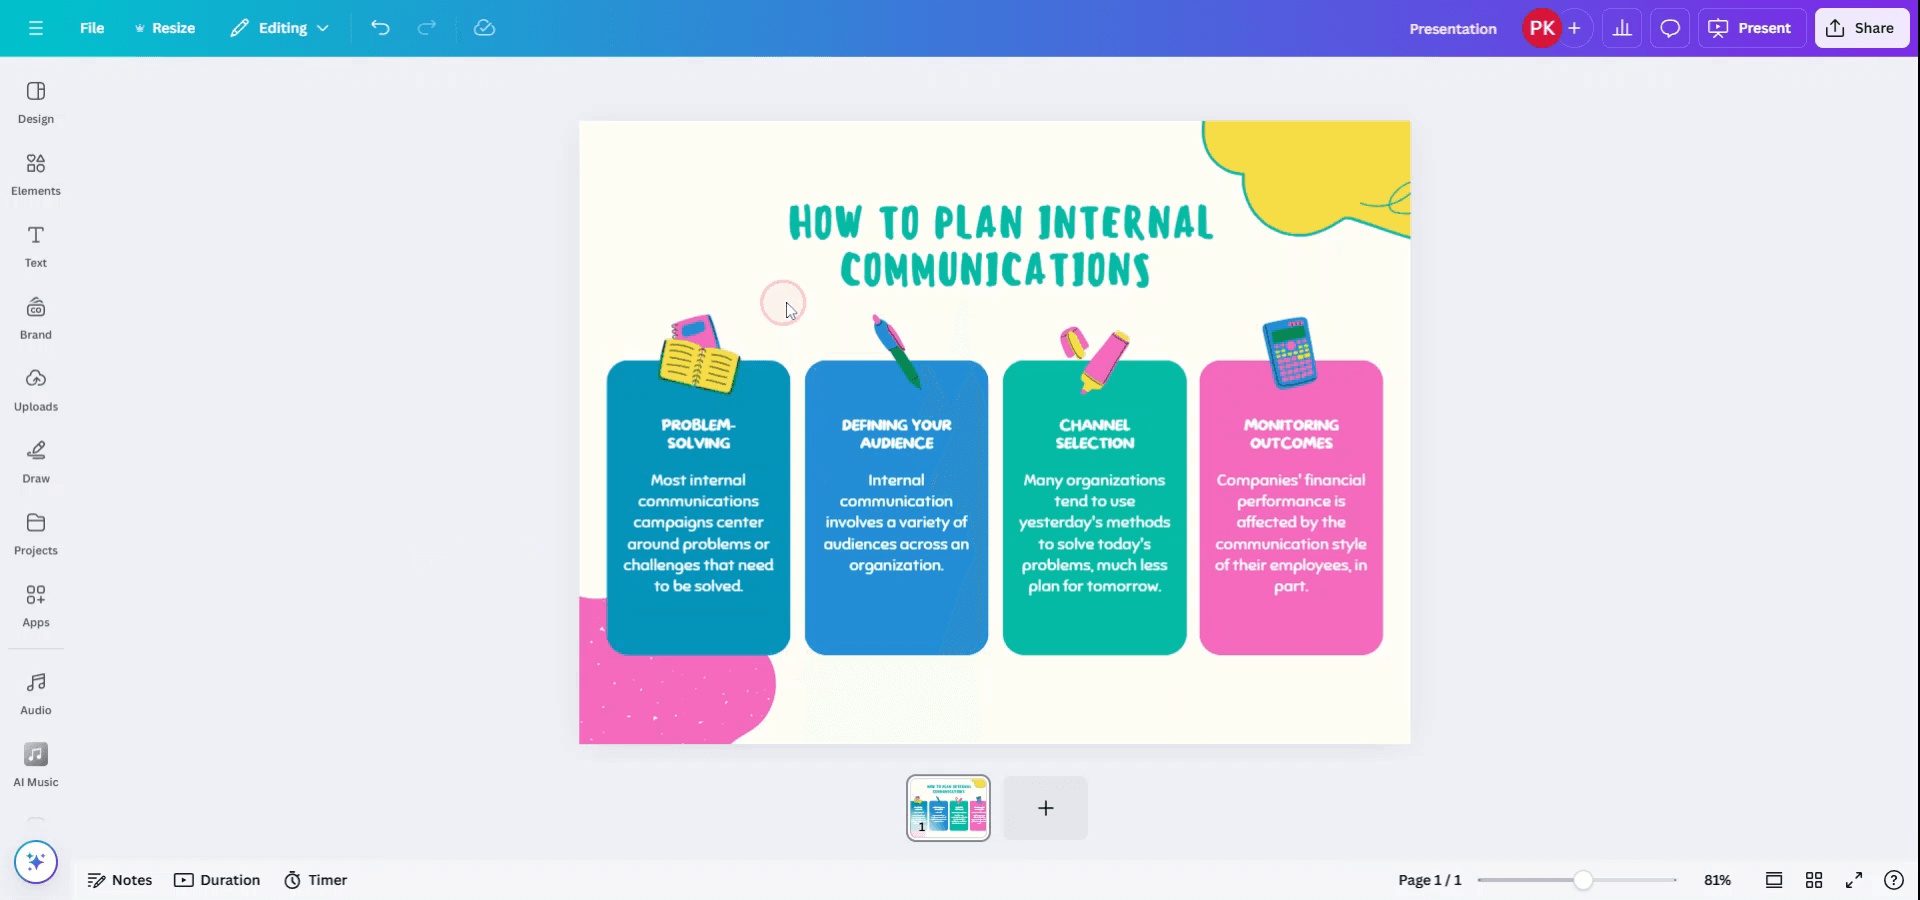
ステップ 2
開いたプレゼンテーションで、上部メニューから「ファイル」を選択します。

ステップ 3
「ファイル」ドロップダウンメニューから、「ゴミ箱に移動」を選択します。
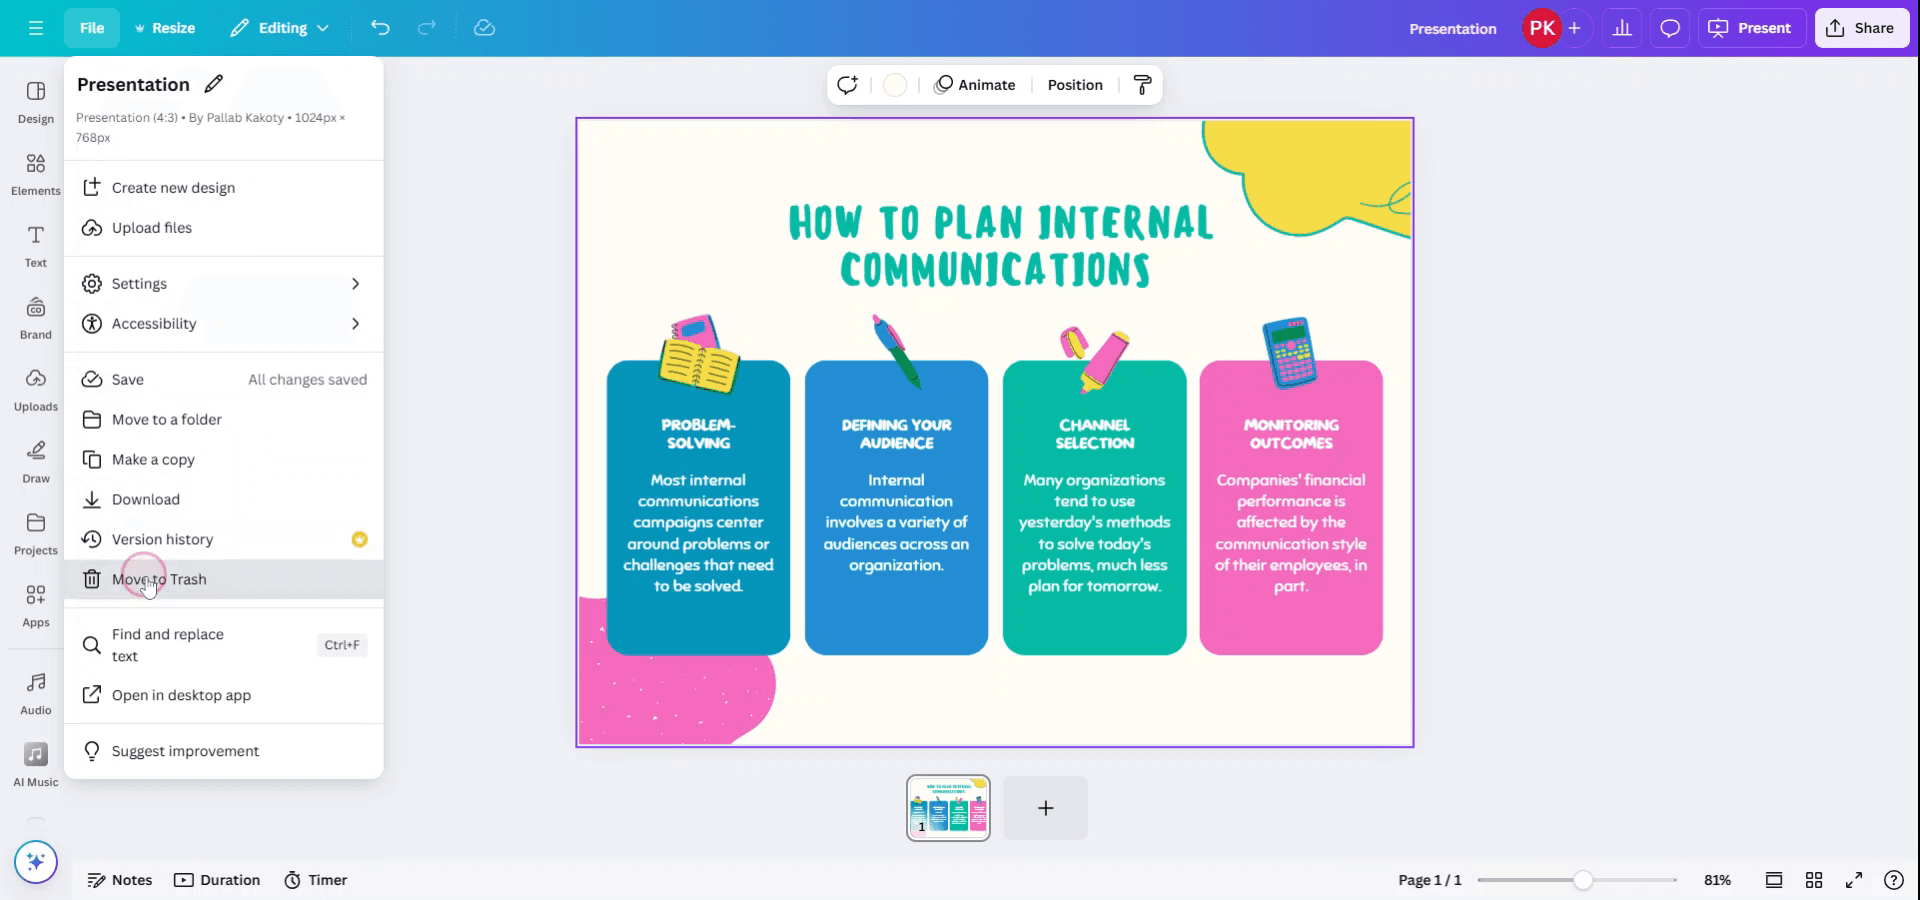
ステップ 4
プレゼンテーションをゴミ箱に移動するかどうかの確認を求めるポップアップが表示されます。

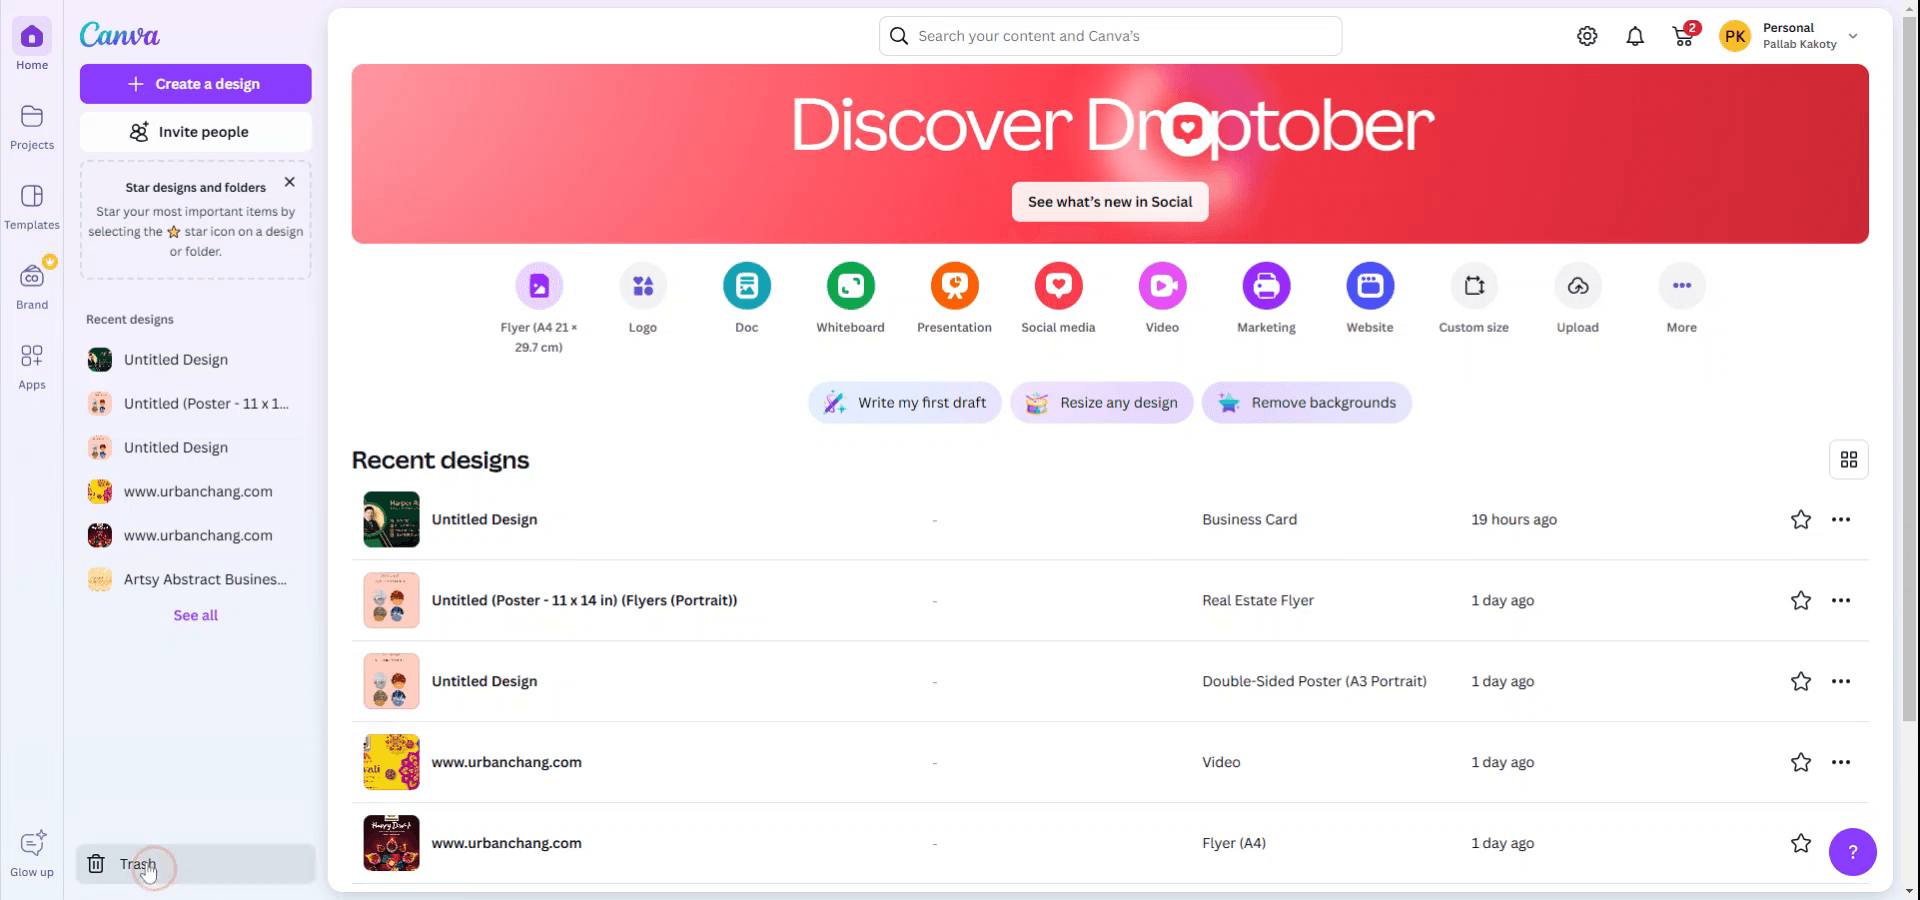
ステップ 5
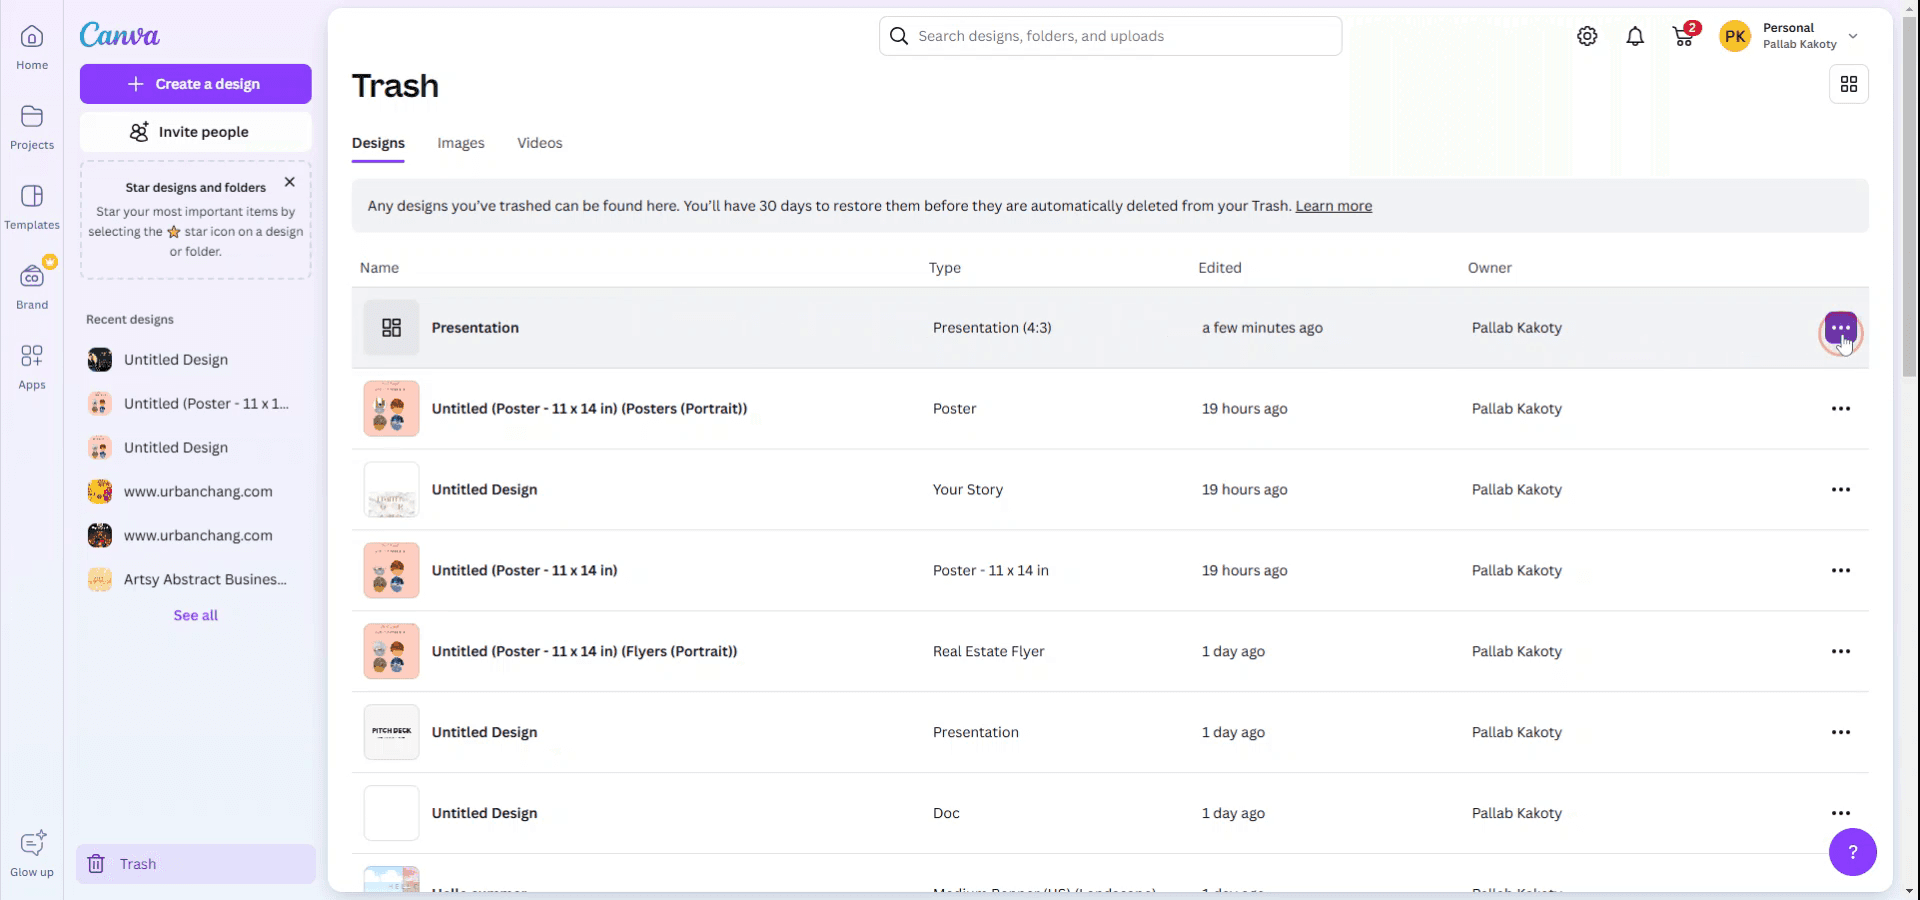
確認すると、ファイルは自動的にゴミ箱へ移動されます。完全に削除するには、ホームメニューの「ゴミ箱」をクリックします。
ステップ 6
ゴミ箱内でプレゼンテーションを見つけます。プレゼンテーションに関連付けられた三点メニューをクリックし、「ゴミ箱から削除」を選択します。
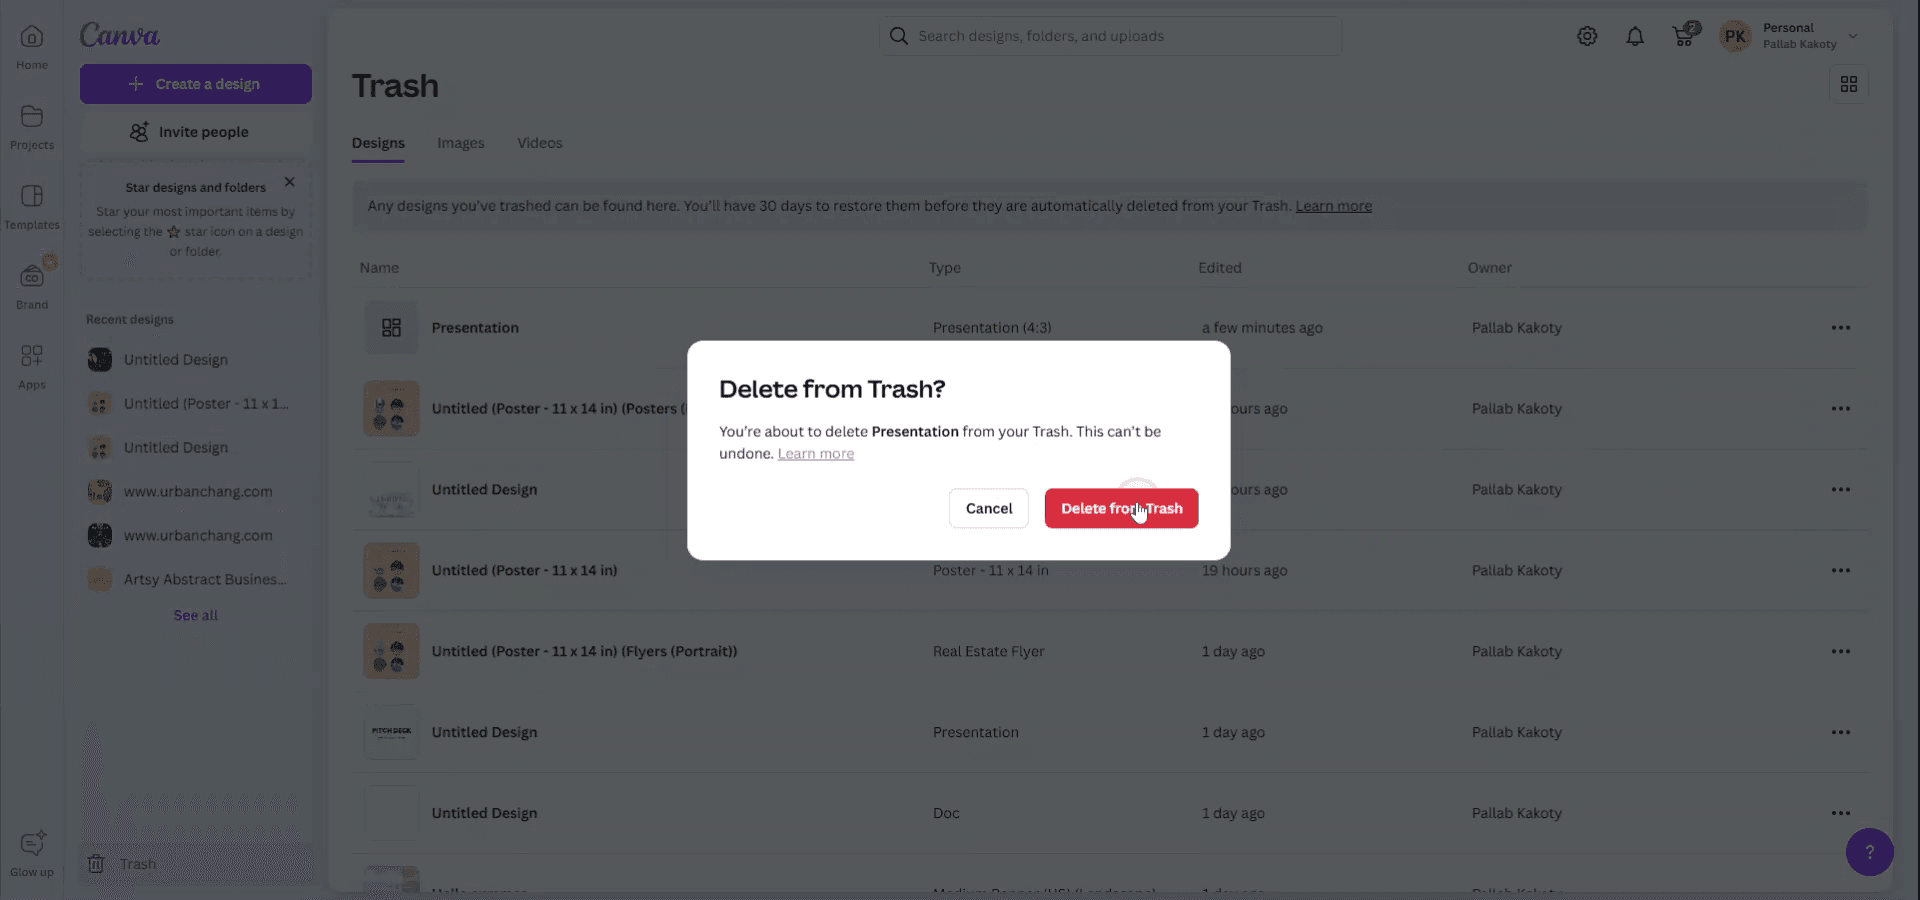
ステップ 7
プレゼンテーションをゴミ箱から完全に削除するには、最後の確認が必要です。
Canva のプレゼンテーションを削除するためのプロのコツ
Canva でデザインを開く:
Canva のホームページに移動し、削除したいデザインを開きます。「すべてのデザイン」セクションへ移動する:
左側のサイドバーで「すべてのデザイン」をクリックし、保存済みのプレゼンテーション一覧を表示します。プレゼンテーションを選択する:
削除したいプレゼンテーションにカーソルを合わせます。サムネイルに 3 つの点(その他のオプション)が表示されます。3 つの点をクリックして「ゴミ箱へ移動」を選択する:
ドロップダウンから「ゴミ箱へ移動」を選び、デザインを削除します。これにより、プレゼンテーションはゴミ箱に移動します。ゴミ箱を空にする(オプション):
プレゼンテーションを完全に削除するには、ゴミ箱(左側のサイドバーにあります)を開き、プレゼンテーションを見つけて「完全に削除」をクリックします。
Canva のプレゼンテーションを削除するときによくある落とし穴と、その回避方法
誤って間違ったファイルを削除してしまう:
対処法:「ゴミ箱へ移動」をクリックする前にデザインを必ず再確認し、正しいプレゼンテーションを削除していることを確認します。ゴミ箱を空にしないこと:
対処法: デザインをゴミ箱に移動した後でも、ゴミ箱を空にするまでは完全には削除されていないことを忘れないでください。ファイルを削除したいことが確実なら、ゴミ箱フォルダに移動して完全に削除します。削除後もデザインが表示され続ける:
対処法: ゴミ箱に移動したあと、ワークスペースからデザインが消えるまで少し時間がかかることがあります。まだ表示される場合はページを更新してください。ゴミ箱とアーカイブを混同する:
対処法: デザインを「ゴミ箱」に移動していることを確認し、アーカイブしないようにしてください。アーカイブされたデザインは削除されず、後で復元できます。削除を元に戻せない:
対処法: Canva では、ゴミ箱からアイテムを復元できる期間として 30 日間が設けられています。削除したデザインを復元する必要がある場合は、その期間内に行ってください。
Canva プレゼンテーションを削除する際によくある質問
Canva プレゼンテーションを完全に削除するにはどうすればよいですか?
「すべてのデザイン」を開き、プレゼンテーションにカーソルを合わせ、3点メニューをクリックして、「ゴミ箱に移動」を選択します。その後、ゴミ箱に移動して「完全に削除」をクリックしてください。Canva プレゼンテーションの削除を元に戻せますか?
はい、削除後30日以内であれば、ゴミ箱に移動して「復元」をクリックすることで、プレゼンテーションをゴミ箱から復元できます。プレゼンテーションを削除すると、他のユーザーに影響しますか?
共有プレゼンテーションで作業している場合、削除するとあなたのアクセス権のみが削除されます。他のユーザーは、自分のアカウントからも削除しない限り、引き続きアクセスできる場合があります。複数のプレゼンテーションを一度に削除する方法はありますか?
現在、Canva は一括削除に対応していません。各プレゼンテーションを個別に削除する必要があります。ゴミ箱内のプレゼンテーションはどうなりますか?
ゴミ箱内のプレゼンテーションは、最大30日間は復元可能です。その後、完全に削除されます。Mac で画面録画する方法は?
Mac で画面録画するには、Trupeer AI を使用できます。画面全体をキャプチャできるほか、AI アバターの追加、ナレーションの追加、動画内でのズームイン・ズームアウトなどの AI 機能も利用できます。trupeer の AI 動画翻訳機能を使えば、動画を30以上の言語に翻訳できます。画面録画に AI アバターを追加するには?
画面録画に AI アバターを追加するには、AI 画面録画ツールを使用する必要があります。Trupeer AI は AI 画面録画ツールで、複数のアバターを使った動画作成を支援し、動画用の自分自身のアバター作成もサポートします。Windows で画面録画する方法は?
Windows で画面録画するには、内蔵のゲームバー(Windows + G)を使用するか、AI アバター、ナレーション、翻訳などのより高度な機能が使える Trupeer AI のような高度な AI ツールを利用できます。動画にナレーションを追加するには?
動画にナレーションを追加するには、trupeer ai の Chrome 拡張機能をダウンロードします。サインアップ後、音声付きの動画をアップロードし、trupeer から希望のナレーションを選択して、編集済み動画をエクスポートします。画面録画でズームインするにはどうすればよいですか?
画面録画中にズームインするには、Trupeer AI のズーム効果を使用します。これにより、特定の瞬間にズームイン・ズームアウトでき、動画コンテンツの視覚的なインパクトを高められます。
こちらもよくある質問
関連チュートリアル

