
كيفية فرز البيانات في جداول بيانات Google – دليل الترتيب الأبجدي والرقمي
تعرّف على كيفية فرز البيانات في Google Sheets حسب العمود أو القيمة أو ترتيب مخصّص. يساعدك هذا الدليل خطوة بخطوة على تنظيم جدول بياناتك لتحليل أفضل.
توضح هذه العملية الخطوات اللازمة لفرز البيانات بكفاءة داخل جداول بيانات Google استنادًا إلى عمود محدد.
من خلال اتباع هذه التعليمات، يمكن للمستخدمين تنظيم بياناتهم بترتيب تصاعدي أو تنازلي، مما يضمن جدول بيانات.
1. فرز نطاق محدد
قم بتمييز الخلايا التي تريد فرزها.
انتقل إلى البيانات > فرز النطاق.
حدد "تحتوي البيانات على صف رأس" إذا كان ذلك مناسبًا.
اختر العمود وترتيب الفرز (A→Z أو Z→A).
انقر على "إضافة عمود فرز آخر" للفرز باستخدام عدة أعمدة.
انقر على فرز.
2. فرز الورقة بأكملها
انقر بزر الماوس الأيمن على حرف العمود.
اختر "فرز الورقة من A إلى Z" أو "فرز الورقة من Z إلى A".
3. خيارات الفرز المتقدمة
استخدم البيانات > فرز النطاق لتطبيق فرز متعدد المستويات.
استخدم صيغًا مخصصة في عمود مساعد لمزيد من التحكم.
دليل خطوة بخطوة: كيفية فرز البيانات في جداول بيانات Google
الخطوة 1
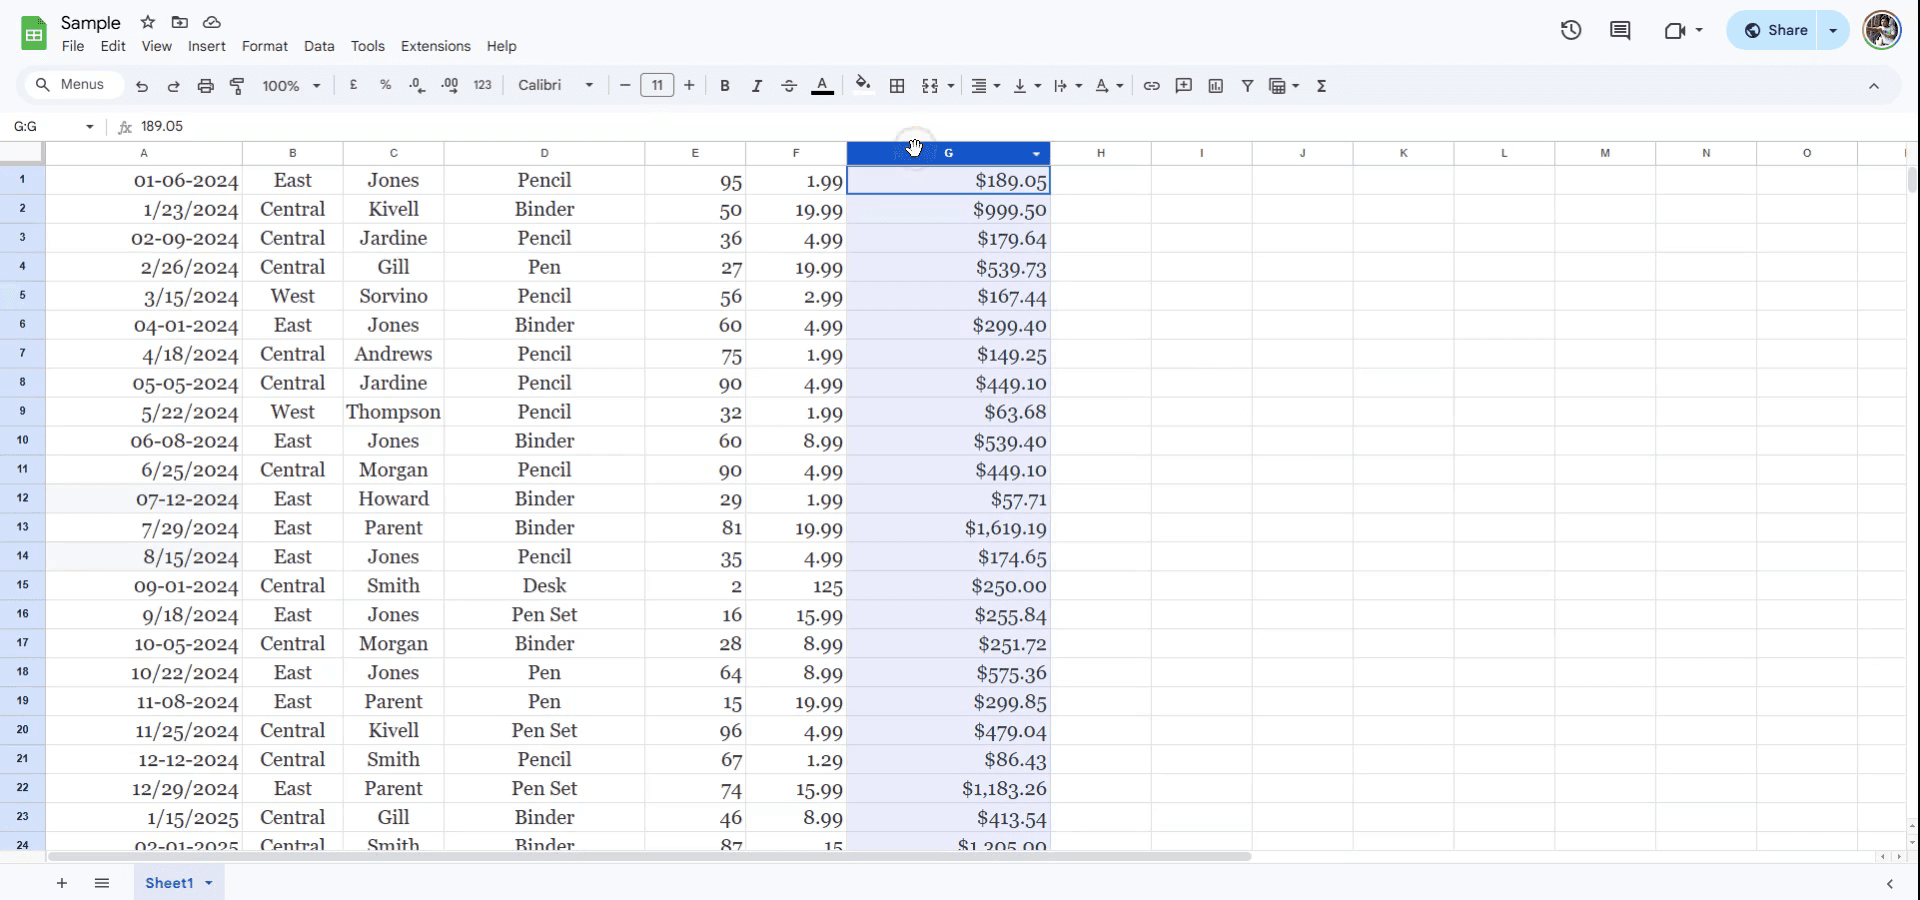
لفرز البيانات في جداول بيانات Google حسب عمود معين، ابدأ بتحديد رأس العمود الذي تريد فرزه. حدد السهم المرتبط برأس العمود وانقر عليه.
الخطوة 2
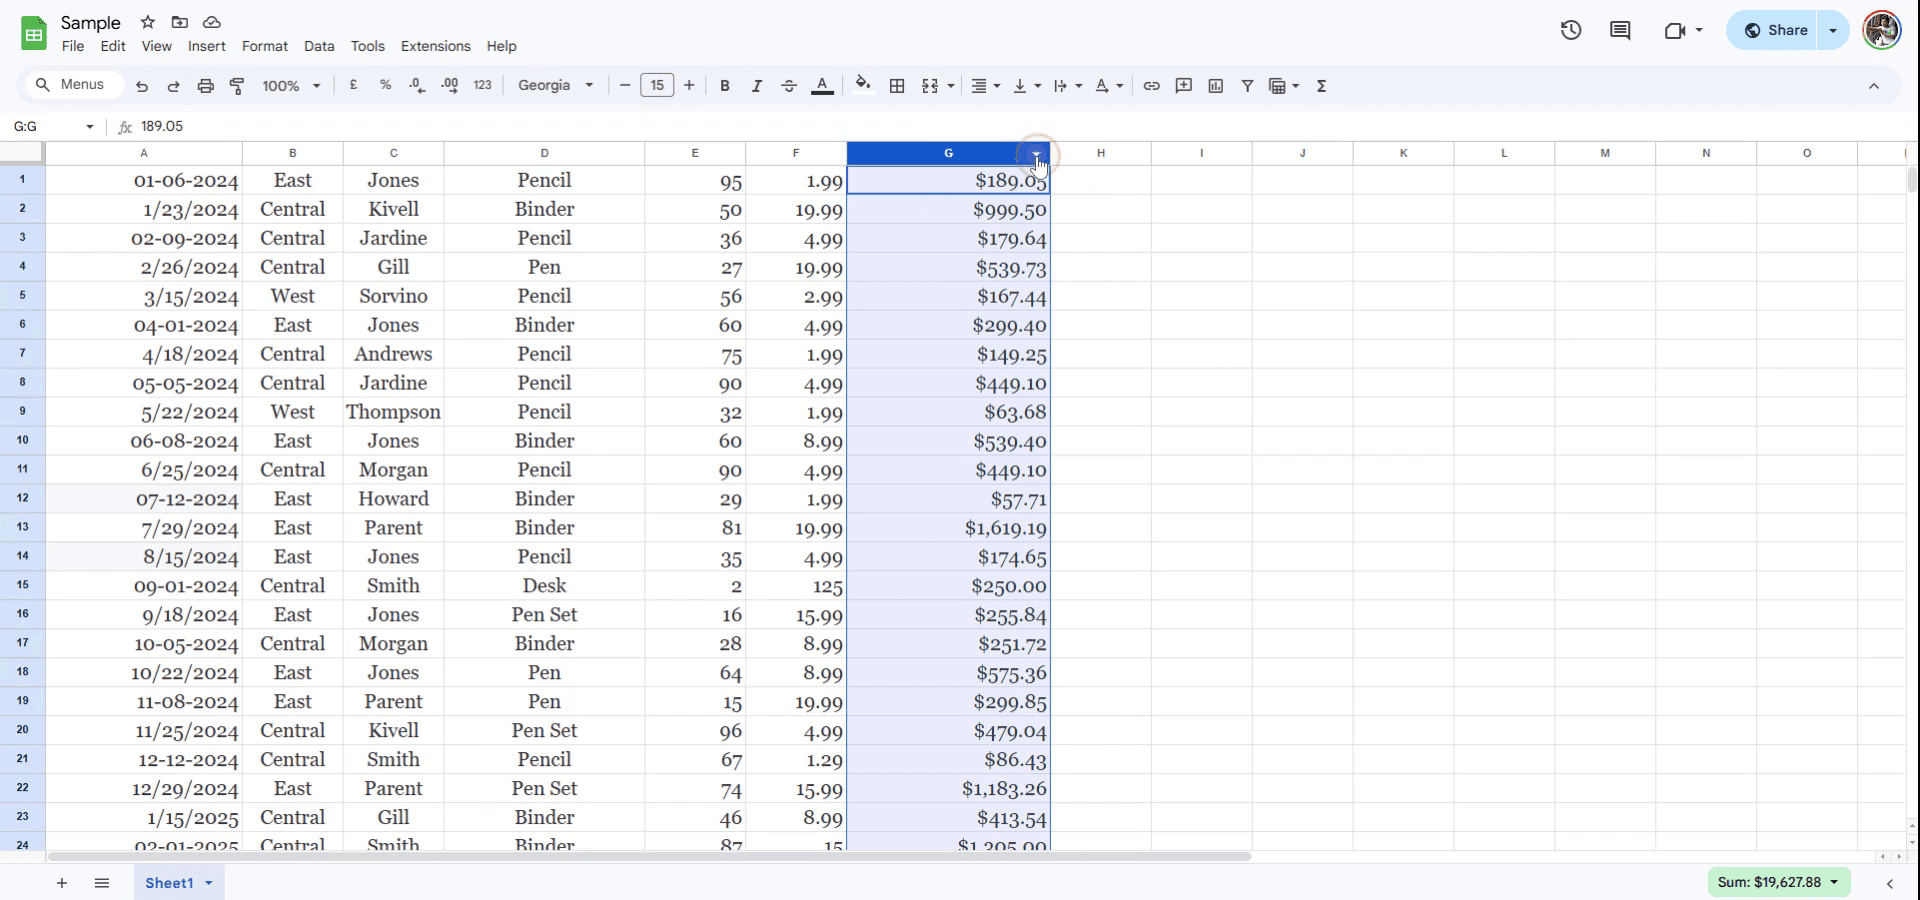
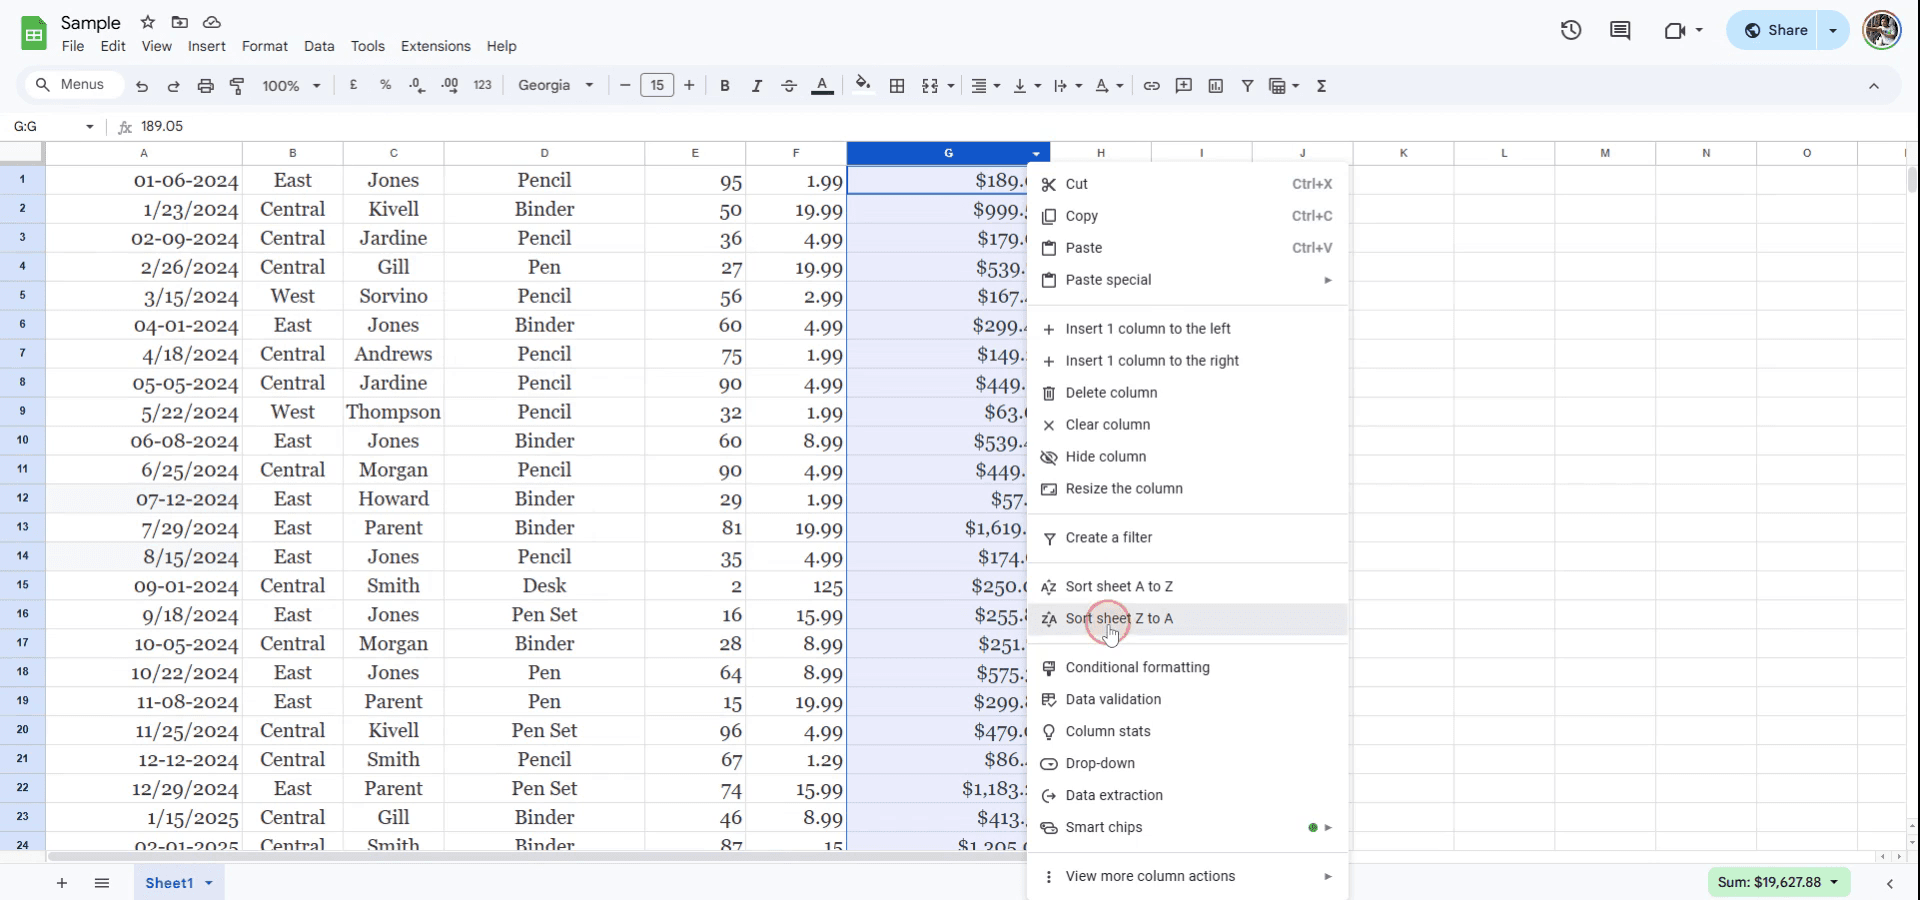
بعد النقر على السهم، انقر بزر الماوس الأيمن للوصول إلى خيارات إضافية.
الخطوة 3
إذا كنت تفضل فرز البيانات بترتيب تصاعدي، فاختر خيار "فرز الورقة من A إلى Z".
لفرزها بترتيب تنازلي، اختر "فرز الورقة من Z إلى A".
في هذا المثال، سنختار "فرز الورقة من Z إلى A" لتنظيم الورقة بترتيب تنازلي.
نصائح احترافية لفرز البيانات في Sheets
استخدم ميزة "Sort range" المدمجة: حدِّد بياناتك، ثم انتقل إلى "Data" > "Sort range"، واختر الفرز حسب عمود واحد أو أكثر بترتيب تصاعدي أو تنازلي.
تأكد من تضمين العناوين: عند الفرز، تأكد من تضمين العناوين في التحديد لتجنب فرزها مع البيانات. استخدم خيار "Data has header row" للحفاظ على مواضع العناوين.
الفرز المخصص: إذا كنت بحاجة إلى ترتيب فرز مخصص (مثلًا حسب الشهر أو نص مخصص)، فأنشئ قائمة مخصصة بالانتقال إلى "Data" > "Sort range" ثم اختيار "Advanced range sorting options."
الأخطاء الشائعة وكيفية تجنبها عند فرز البيانات في Sheets
الفرز من دون عناوين: يمكن أن يؤدي فرز البيانات من دون تحديد العناوين إلى خلط عناوين الأعمدة بالبيانات. الحل: تحقّق دائمًا من خيار "Data has header row" للحفاظ على العناوين أثناء الفرز.
تغييرات غير مقصودة في البيانات: قد يغيّر الفرز ترتيب البيانات بشكل غير مقصود، خاصة عند التعامل مع عدة أعمدة. الحل: تحقّق جيدًا من النطاق وتحديد البيانات قبل الفرز.
الفرز من دون الاحتفاظ بنسخة احتياطية: قد يؤدي فرز مجموعات بيانات كبيرة من دون نسخة احتياطية إلى فقدان البيانات أو وضعها في أماكن خاطئة. الحل: أنشئ نسخة من بياناتك قبل تطبيق الفرز.
الأسئلة الشائعة حول فرز البيانات في Sheets
كيف يمكنني فرز البيانات حسب عدة أعمدة في Sheets؟ حدِّد بياناتك، ثم انتقل إلى "البيانات" > "فرز النطاق"، وبعد ذلك اختر إضافة أعمدة إضافية للفرز حسبها.
كيف يمكنني فرز البيانات بترتيب تنازلي؟ بعد تحديد النطاق، انقر "البيانات" > "فرز النطاق" واختر "Z → A" للترتيب التنازلي.
هل يمكنني التراجع عن الفرز؟ نعم، ببساطة استخدم "Ctrl + Z" (أو "Cmd + Z" على جهاز Mac) للتراجع عن عملية الفرز والعودة إلى الترتيب الأصلي.
كيف أسجّل الشاشة على جهاز Mac؟
لتقوم بـتسجيل الشاشة على جهاز Mac، يمكنك استخدام Trupeer AI. يتيح لك التقاط الشاشة بالكامل ويوفر إمكانات الذكاء الاصطناعي مثل إضافة شخصيات افتراضية بالذكاء الاصطناعي، وإضافة تعليق صوتي، وإضافة تكبير وتصغير في الفيديو. مع ميزة ترجمة الفيديو بالذكاء الاصطناعي من trupeer، يمكنك ترجمة الفيديو إلى أكثر من 30 لغة.كيف أضيف شخصية افتراضية بالذكاء الاصطناعي إلى تسجيل الشاشة؟
لإضافة شخصية افتراضية بالذكاء الاصطناعي إلى تسجيل الشاشة، ستحتاج إلى استخدام أداة تسجيل شاشة بالذكاء الاصطناعي. Trupeer AI هي أداة تسجيل شاشة بالذكاء الاصطناعي، وتساعدك على إنشاء مقاطع فيديو بعدة شخصيات، كما تساعدك في إنشاء شخصيتك الخاصة للفيديو.كيف أسجّل الشاشة على Windows؟
لتسجيل الشاشة على Windows، يمكنك استخدام Game Bar المدمجة (Windows + G) أو أداة ذكاء اصطناعي متقدمة مثل Trupeer AI للحصول على ميزات أكثر تقدمًا مثل الشخصيات الافتراضية بالذكاء الاصطناعي، والتعليق الصوتي، والترجمة، إلخ.كيف أضيف تعليقًا صوتيًا إلى الفيديو؟
لإضافة تعليق صوتي إلى مقاطع الفيديو، نزّل إضافة trupeer ai لمتصفح Chrome. بعد التسجيل، ارفع الفيديو الخاص بك مع الصوت، واختر التعليق الصوتي المطلوب من trupeer ثم صدّر الفيديو المعدّل.كيف أقرّب/أكبّر في تسجيل الشاشة؟
للتكبير أثناء تسجيل الشاشة، استخدم تأثيرات التكبير في Trupeer AI التي تتيح لك التكبير والتصغير في لحظات محددة، مما يعزز التأثير البصري لمحتوى الفيديو الخاص بك.
يطرح الأشخاص أيضًا
كيفية إضافة رمز الروبية في Google Sheets
دروس ذات صلة

