
كيفية دمج الخلايا في Google Sheets
تعرّف على كيفية دمج الخلايا في Google Sheets للحصول على تخطيطات أنظف وتنسيق أفضل. اتبع هذا الدليل السريع للدمج أفقيًا أو عموديًا أو عبر صفوف كاملة.
تقدم هذه الوثيقة شرحًا موجزًا حول كيفية دمج الخلايا في جوجل شيتس.
اتبع الخطوات الموضحة لدمج عدة خلايا في خلية واحدة بكفاءة، مع ضمان تنسيق نظيف ومنظم في مستندك.
يمكن أن يساعد دمج الخلايا في تنظيم بياناتك من خلال دمج عدة خلايا في خلية واحدة. إليك كيفية القيام بذلك ببضع نقرات فقط:
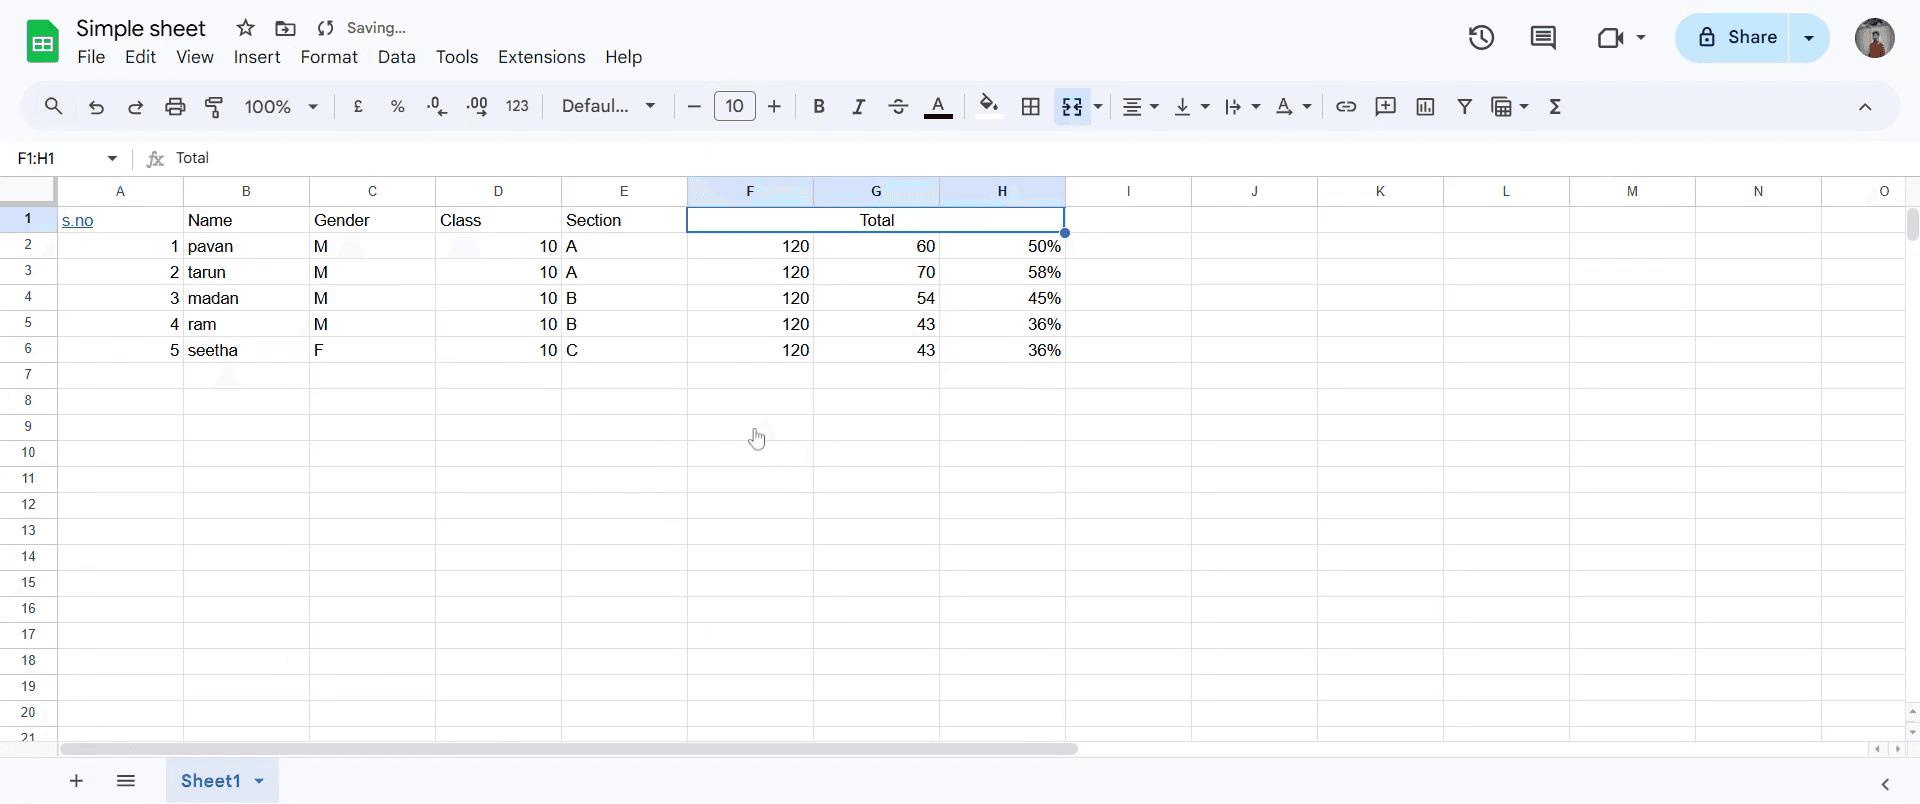
1. اختر الخلايا
انقر واسحب لتحديد الخلايا التي تريد دمجها.
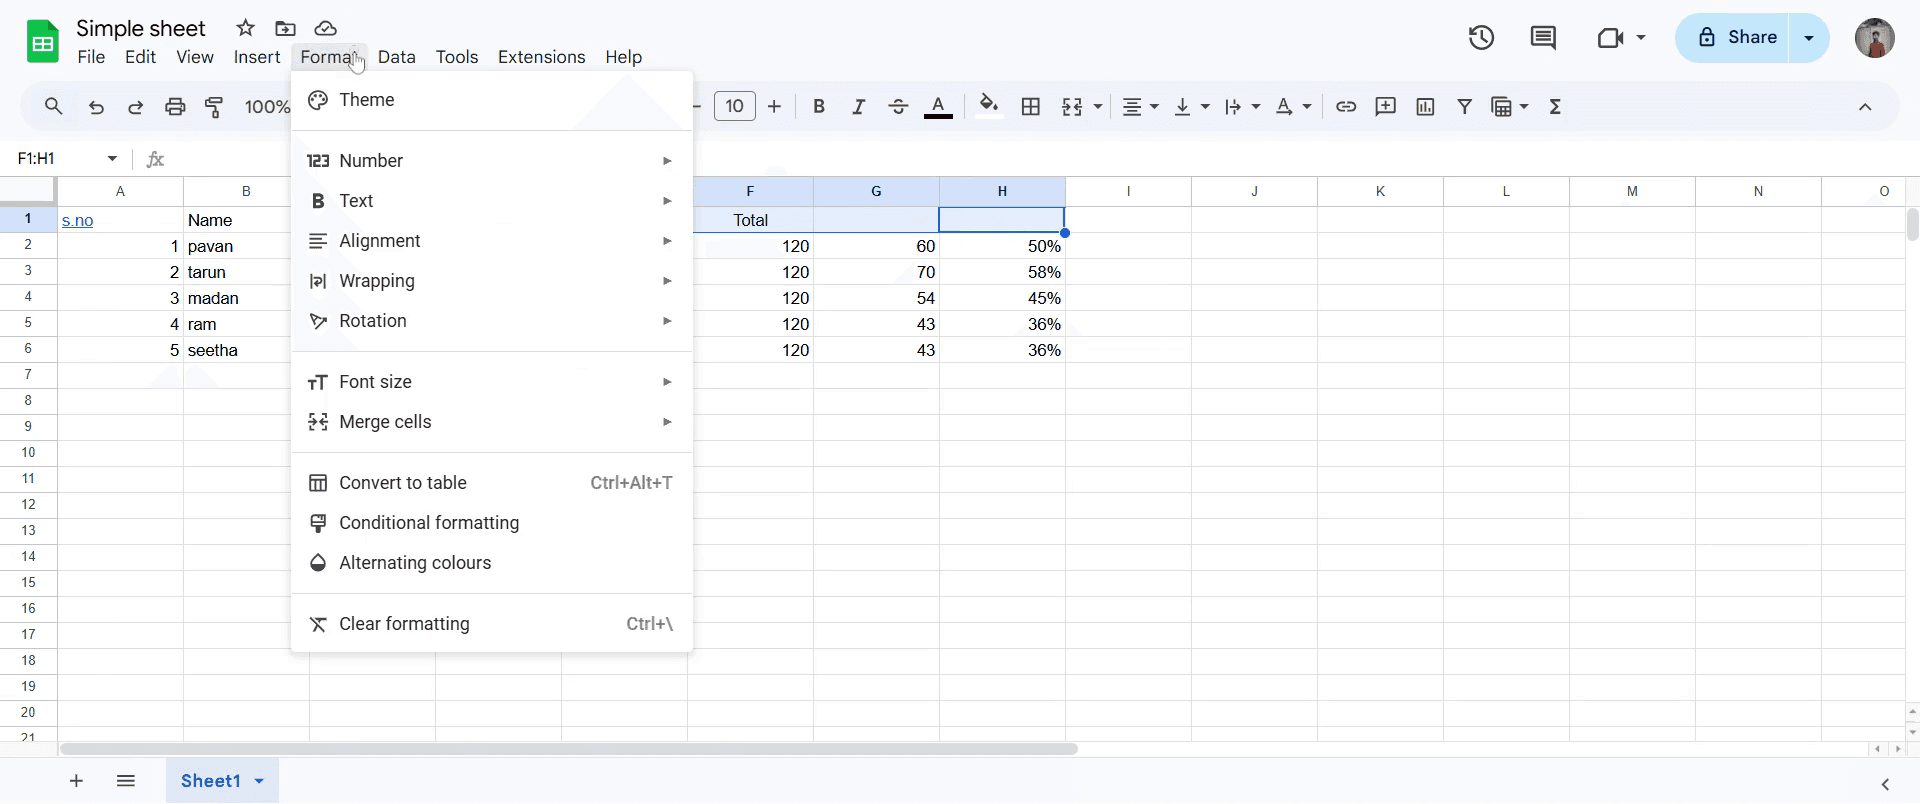
2. افتح قائمة الدمج
انتقل إلى القائمة العلوية وانقر على Format > Merge cells.
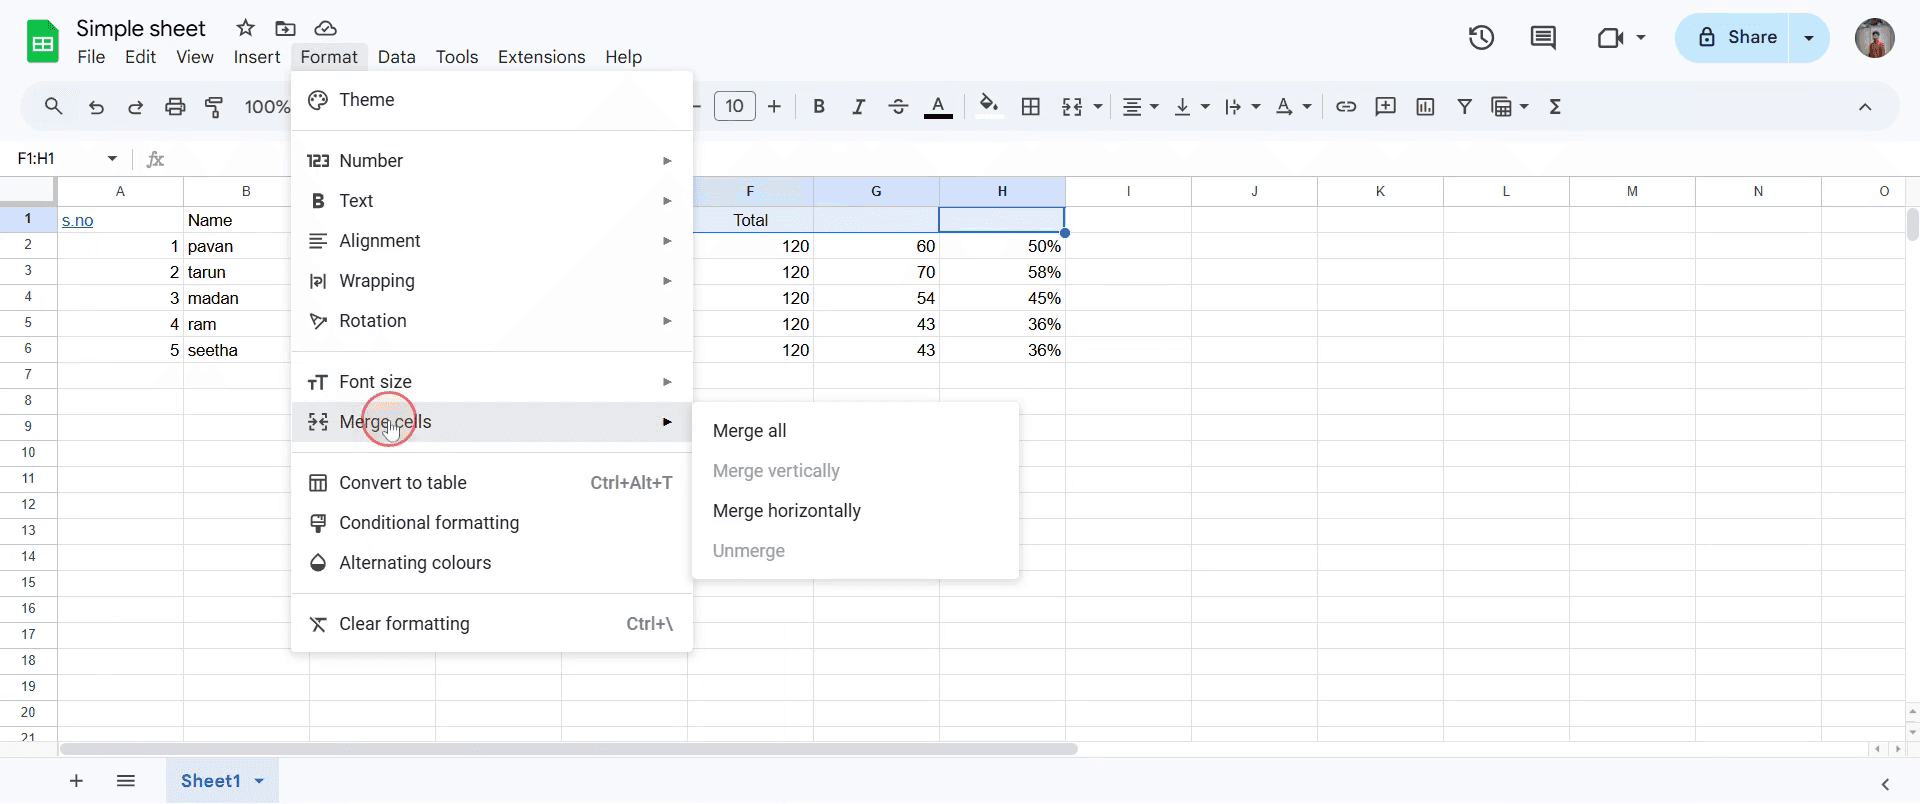
3. اختر طريقة الدمج
سترى ثلاثة خيارات:
دمج الكل – يجمع كل شيء في خلية واحدة
دمج أفقيًا – يدمج عبر كل صف
دمج عموديًا – يدمج أسفل كل عمود
4. استخدم شريط الأدوات (اختياري)
بدلاً من القائمة، يمكنك أيضًا النقر على أيقونة الدمج (سهمان يندمجان) في شريط الأدوات لدمج سريع.
5. إلغاء الدمج إذا لزم الأمر
للتراجع عن الدمج، حدّد الخلية المدمجة ثم انقر على أيقونة شريط الأدوات مرة أخرى أو انتقل إلى Format > Merge cells > Unmerge.
دليل خطوة بخطوة: كيفية دمج الخلايا في جوجل شيتس
الخطوة 1
انتقل إلى الخلايا التي ترغب في دمجها وحددها.

الخطوة 2
انتقل إلى قائمة التحرير وانقر على "تنسيق"
الخطوة 3
ابحث عن خيار دمج الخلايا وانقر عليه.
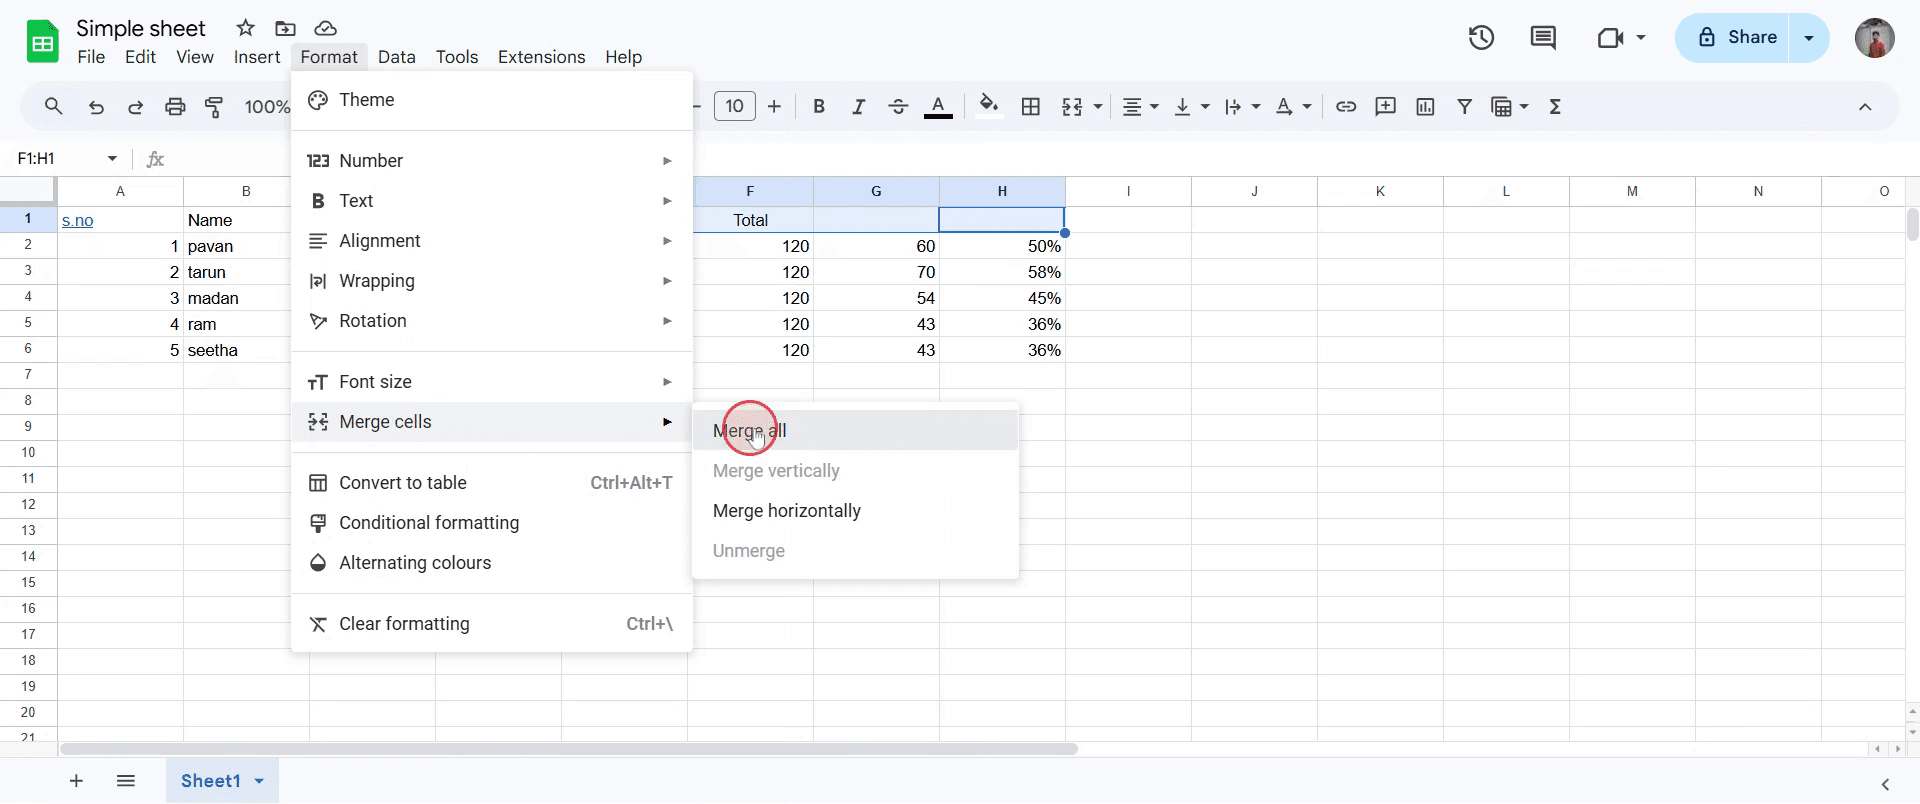
الخطوة 4
حدّد "دمج الكل" لإكمال عملية الدمج.
الخطوة 5
سيؤدي هذا إلى دمج الخلايا المحددة في خلية واحدة.
نصائح احترافية لدمج الخلايا في Google Sheets
استخدم خيار دمج الخلايا بحكمة، لأن الدمج قد يزيل مراجع الخلايا الفردية، مما يجعل استخدام بعض الصيغ أمرًا صعبًا.
بدلاً من الدمج لأغراض التنسيق، فكّر في استخدام Center Across Selection للحصول على تأثير بصري مشابه دون فقدان البيانات.
تحقق دائمًا من عدم فقدان أي بيانات مهمة عند دمج عدة خلايا، إذ سيبقى فقط المحتوى الموجود في الخلية العلوية اليسرى.
المشكلات الشائعة & كيفية تجنبها عند دمج الخلايا في Google Sheets
قد يؤدي دمج الخلايا إلى فقدان البيانات في الخلايا غير الأساسية، إذ تبقى البيانات الموجودة في الخلية العلوية اليسرى فقط، لذا احرص على نسخ أي محتوى مهم احتياطيًا قبل الدمج.
استخدام الخلايا المدمجة في الصيغ: العديد من الصيغ لا تعمل جيدًا مع الخلايا المدمجة، لذا فكّر في خيارات تنسيق بديلة عند الحاجة.
قد تعيق الخلايا المدمجة عملية الفرز والتصفية، لذا تجنب دمج الخلايا في الجداول التي تتطلب معالجة متكررة للبيانات.
الأسئلة الشائعة حول دمج الخلايا في Google Sheets
كيف يمكنني دمج الخلايا دون فقدان البيانات في Google Sheets?
يحتفظ Google Sheets فقط بالبيانات الموجودة في الخلية العلوية اليسرى عند الدمج. وللحفاظ على المحتوى الآخر، انسخه إلى مكان آخر قبل الدمج.أين يوجد خيار الدمج في Google Sheets?
يمكنك العثور على خيار الدمج عن طريق تحديد الخلايا التي تريد دمجها، ثم النقر على تنسيق > دمج الخلايا في القائمة.هل يمكنني دمج الخلايا أفقيًا أو عموديًا في Google Sheets?
نعم، يتيح لك Google Sheets دمج الخلايا أفقيًا أو عموديًا أو بالكامل، حسب التحديد الذي تختاره.لماذا يظهر زر دمج الخلايا باللون الرمادي?
قد لا يتوفر خيار دمج الخلايا إذا كنت تحاول دمج نطاق محمي أو خلية مدمجة بالفعل.كيف تسجل الشاشة على جهاز Mac?
لتسجيل الشاشة على جهاز Mac، يمكنك استخدام Trupeer AI. فهو يتيح لك التقاط الشاشة بالكامل ويوفر إمكانات ذكاء اصطناعي مثل إضافة صور رمزية بالذكاء الاصطناعي، وإضافة تعليق صوتي، وإضافة التكبير والتصغير داخل الفيديو. باستخدام ميزة ترجمة الفيديو بالذكاء الاصطناعي من trupeer، يمكنك ترجمة الفيديو إلى أكثر من 30 لغة.كيف أضيف صورة رمزية بالذكاء الاصطناعي إلى تسجيل الشاشة?
لإضافة صورة رمزية بالذكاء الاصطناعي إلى تسجيل الشاشة، ستحتاج إلى استخدام أداة تسجيل شاشة بالذكاء الاصطناعي. Trupeer AI هي أداة تسجيل شاشة بالذكاء الاصطناعي، تساعدك على إنشاء مقاطع فيديو بعدة صور رمزية، كما تساعدك أيضًا في إنشاء صورتك الرمزية الخاصة بالفيديو.كيف أسجل الشاشة على Windows?
لتسجيل الشاشة على Windows، يمكنك استخدام شريط الألعاب المدمج (Windows + G) أو أداة ذكاء اصطناعي متقدمة مثل Trupeer AI للحصول على ميزات أكثر تقدمًا مثل الصور الرمزية بالذكاء الاصطناعي، والتعليق الصوتي، والترجمة، إلخ.كيف أضيف تعليقًا صوتيًا إلى الفيديو?
لإضافة تعليق صوتي إلى مقاطع الفيديو، نزّل إضافة trupeer ai لمتصفح Chrome. بعد التسجيل، ارفع الفيديو الخاص بك مع الصوت، واختر التعليق الصوتي المطلوب من trupeer ثم صدّر الفيديو المعدّل.كيف أُكبّر في تسجيل الشاشة?
لتكبير الصورة أثناء تسجيل الشاشة، استخدم تأثيرات التكبير في Trupeer AI التي تتيح لك التكبير والتصغير في لحظات محددة، مما يعزز التأثير البصري لمحتوى الفيديو الخاص بك.
يسأل أيضًا
كيفية إضافة رمز الروبية في Google Sheets
دروس ذات صلة

