
كيفية إنشاء نص منحني في Canva
اكتشف كيفية إنشاء نص منحني في كانفا بضع نقرات فقط. دليل خطوة بخطوة لمنح تصاميمك لمسة إبداعية واحترافية.
لإنشاء نص منحني في Canva، حدِّد النص ثم انتقل إلى خيار "التأثيرات" في شريط الأدوات العلوي. اختر تأثير "الانحناء" واضبط شدة الانحناء باستخدام شريط التمرير. يمكنك أيضًا تعديل تباعد الحروف ليلتف النص حول أشكال مثل الدوائر
إليك تفصيلًا أكثر:
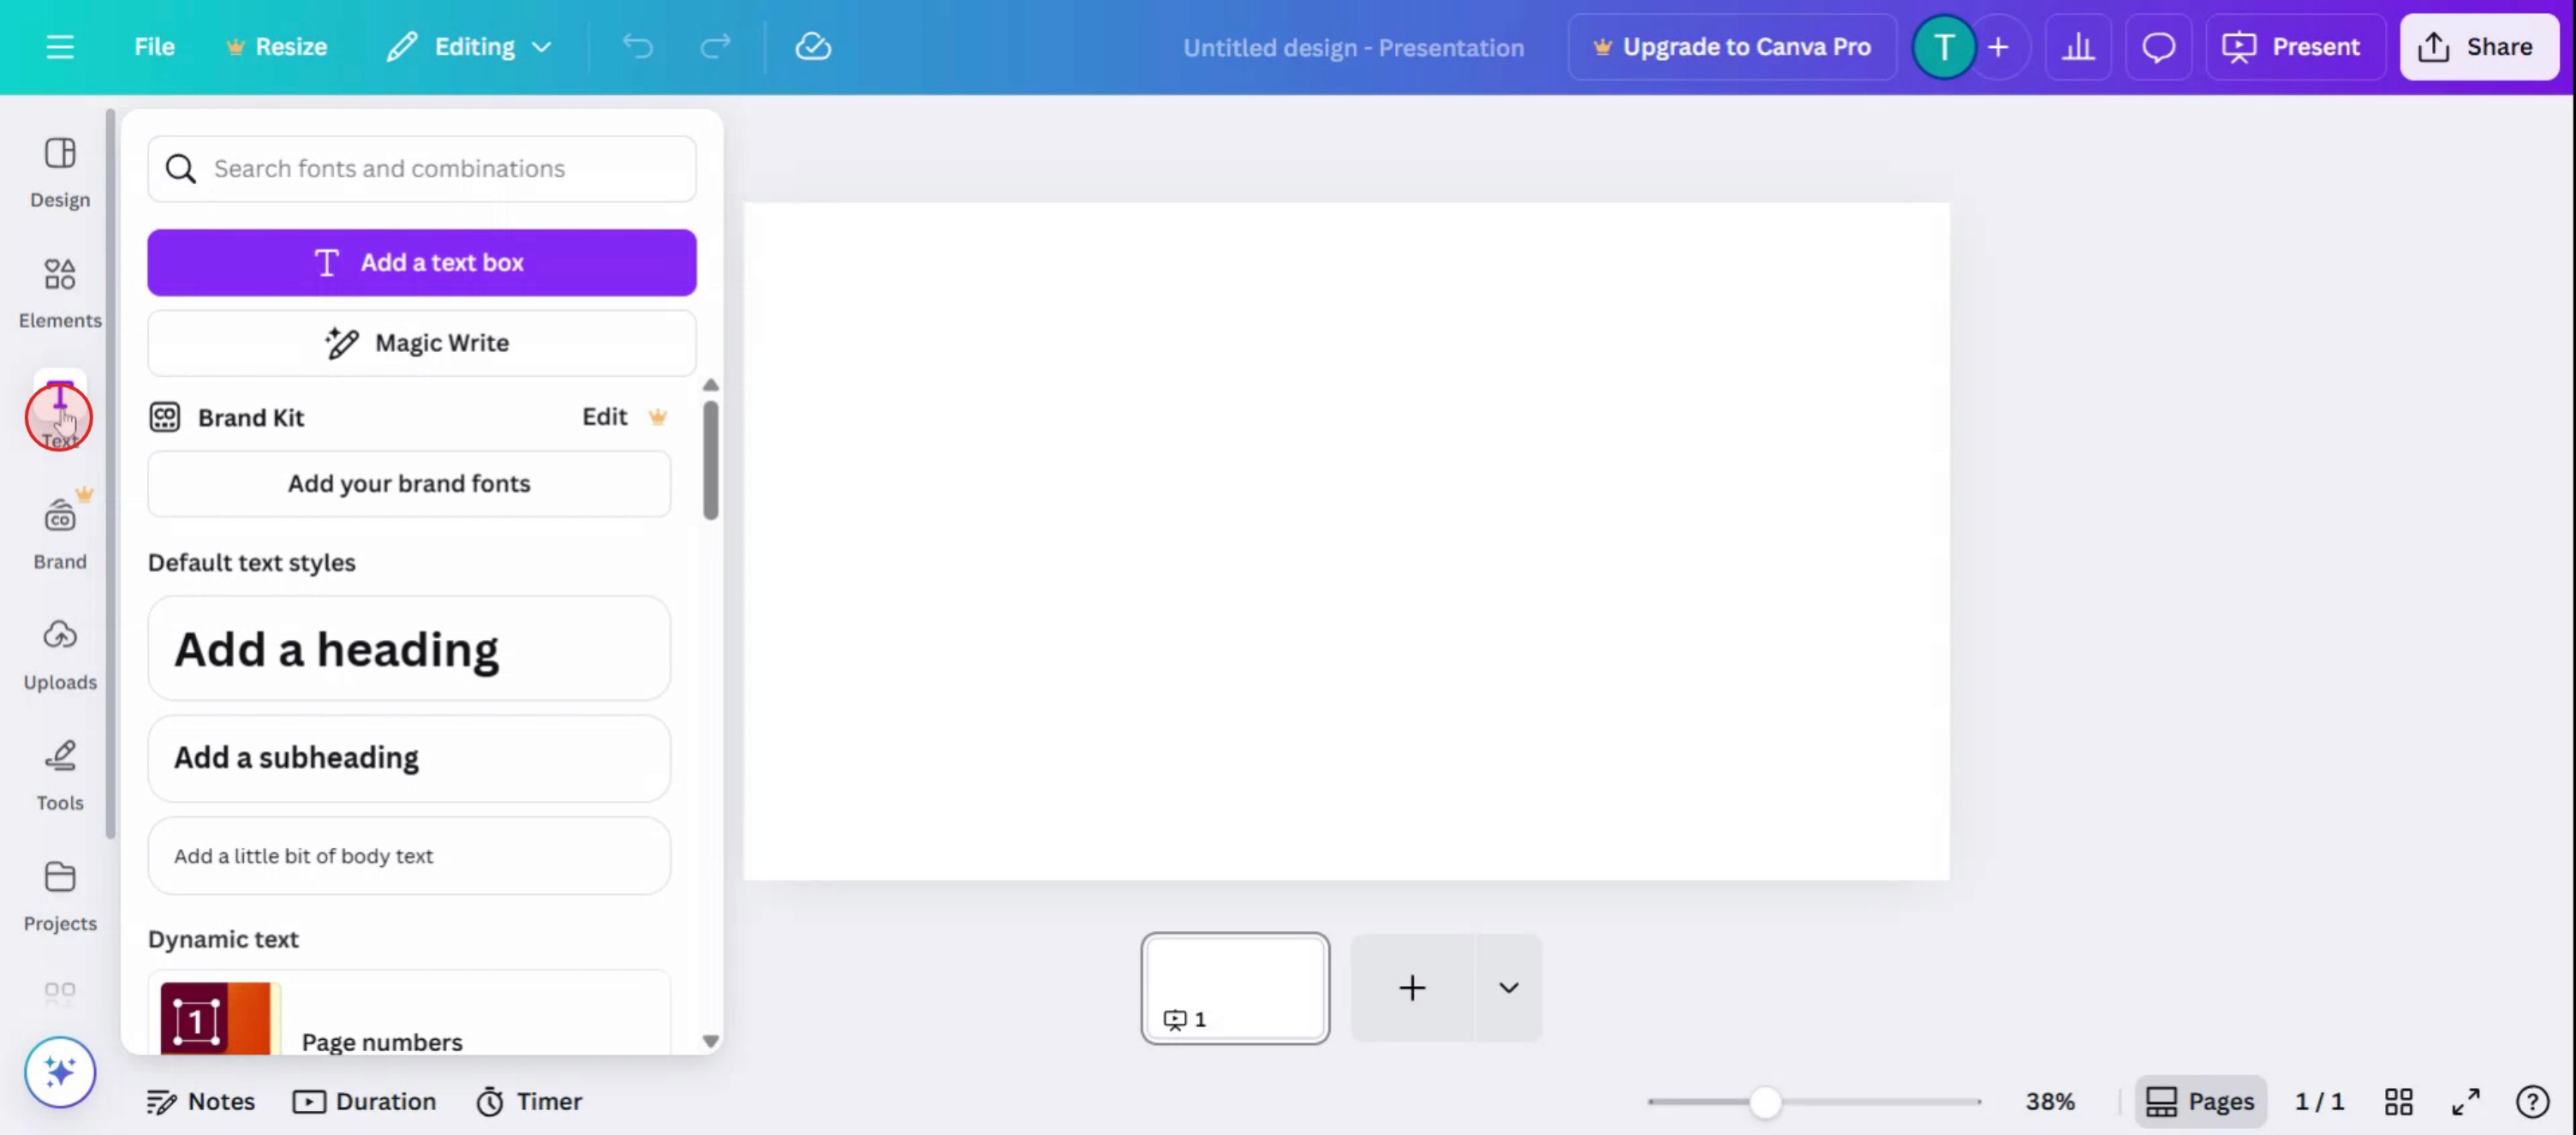
افتح تصميمك: ابدأ بفتح تصميم Canva الذي تريد إضافة نص منحني إليه.
أضف نصًا: انقر على خيار "النص" في الشريط الجانبي وأضف مربع نص. اكتب النص الذي تريده.
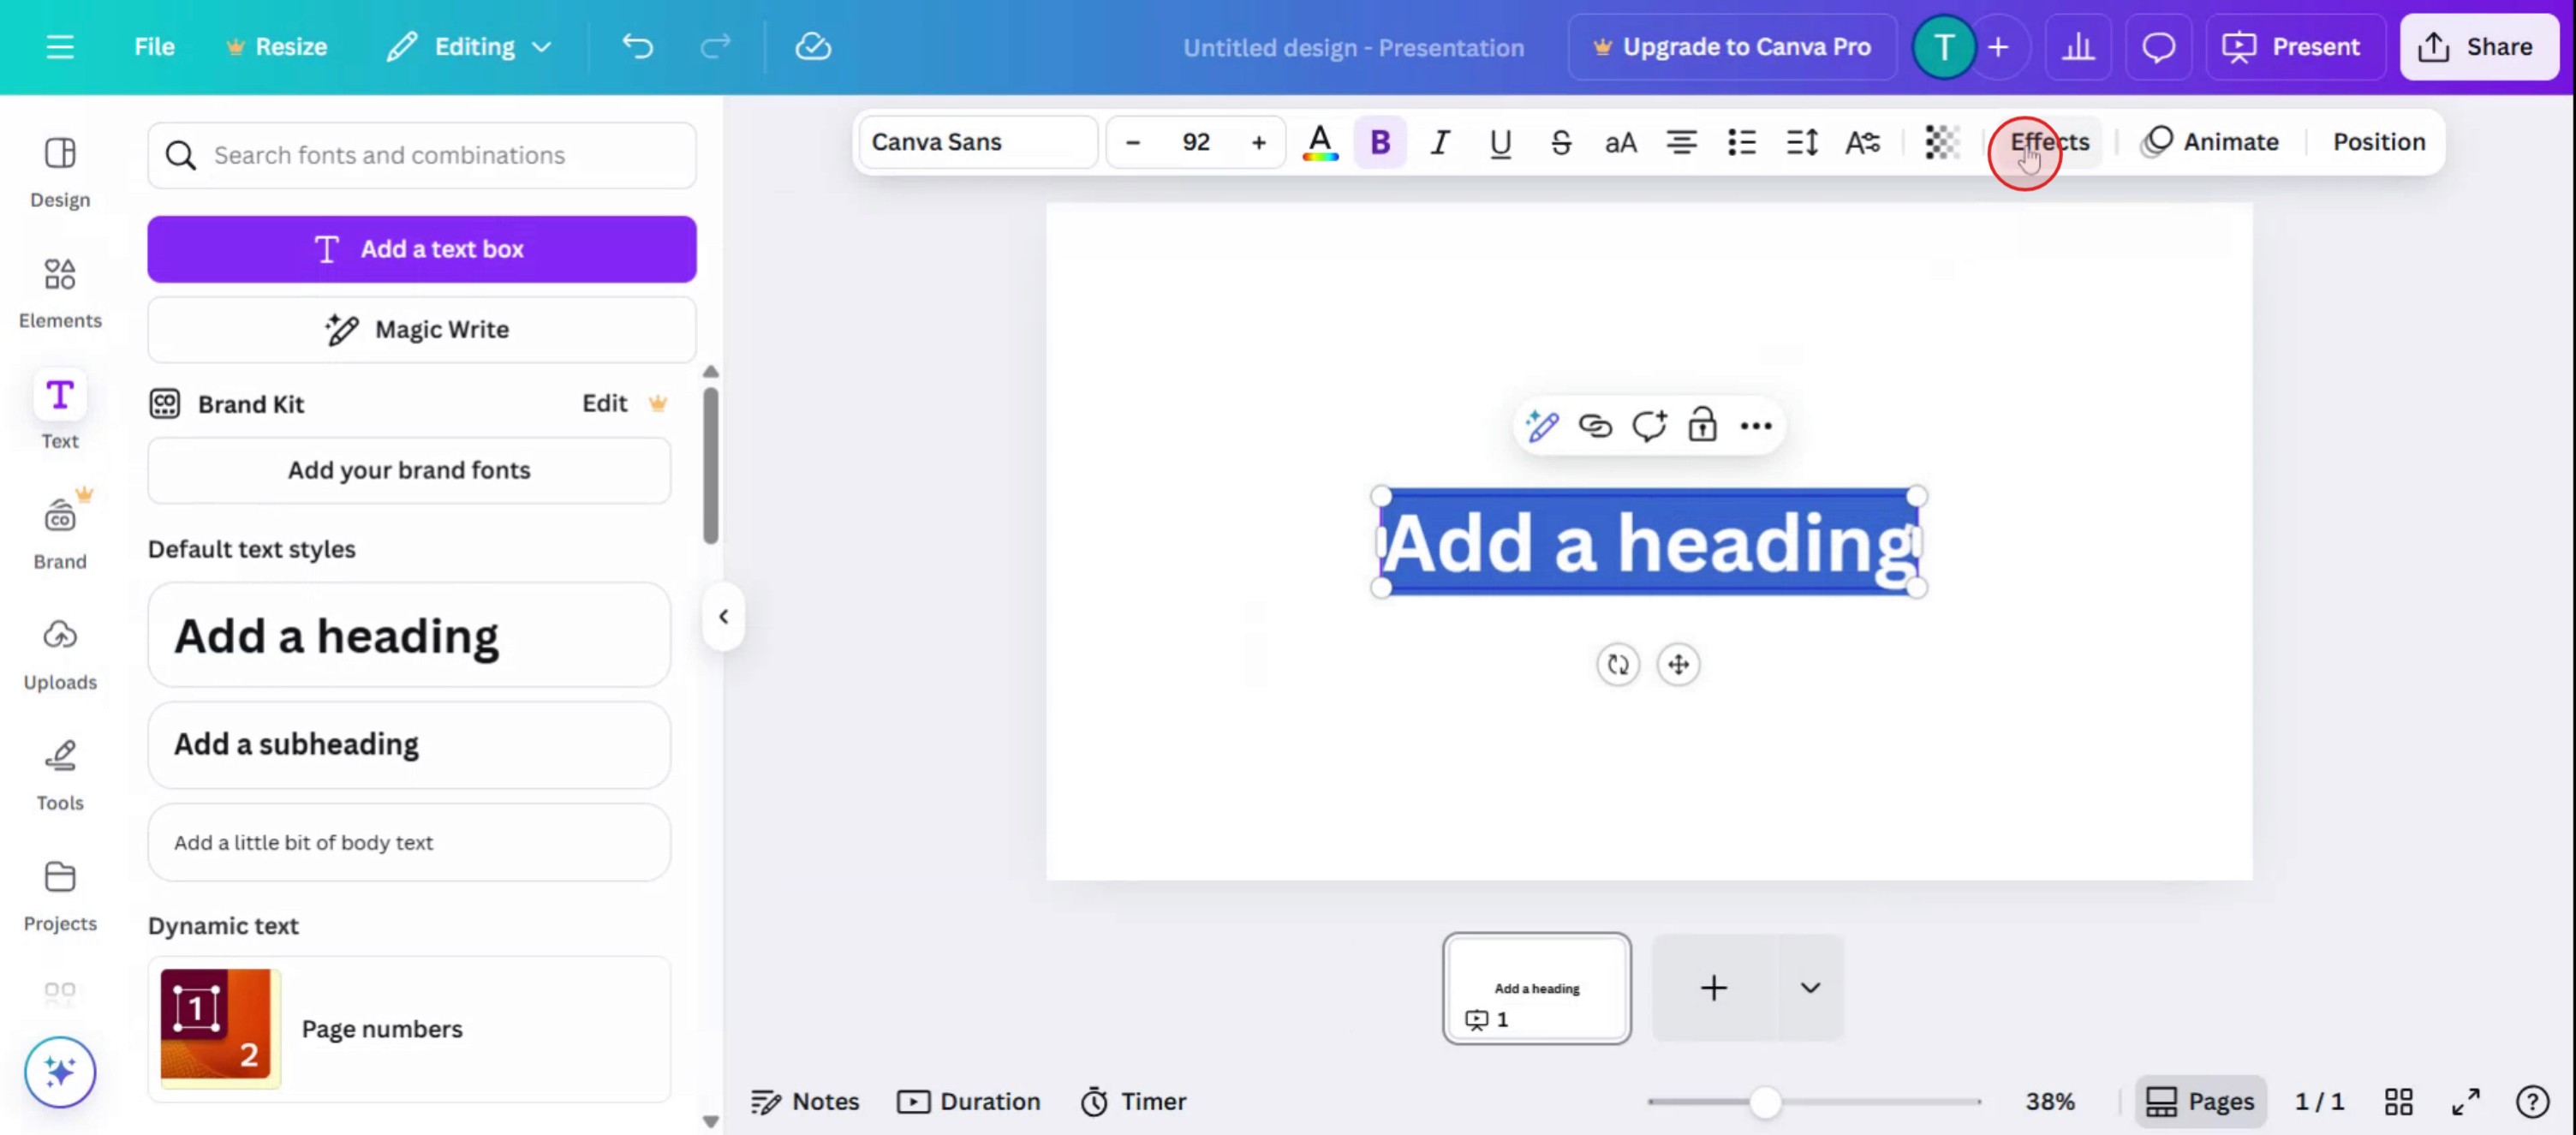
حدِّد النص: انقر على مربع النص لتحديده.
انتقل إلى التأثيرات: في شريط الأدوات العلوي، انقر على زر "التأثيرات".
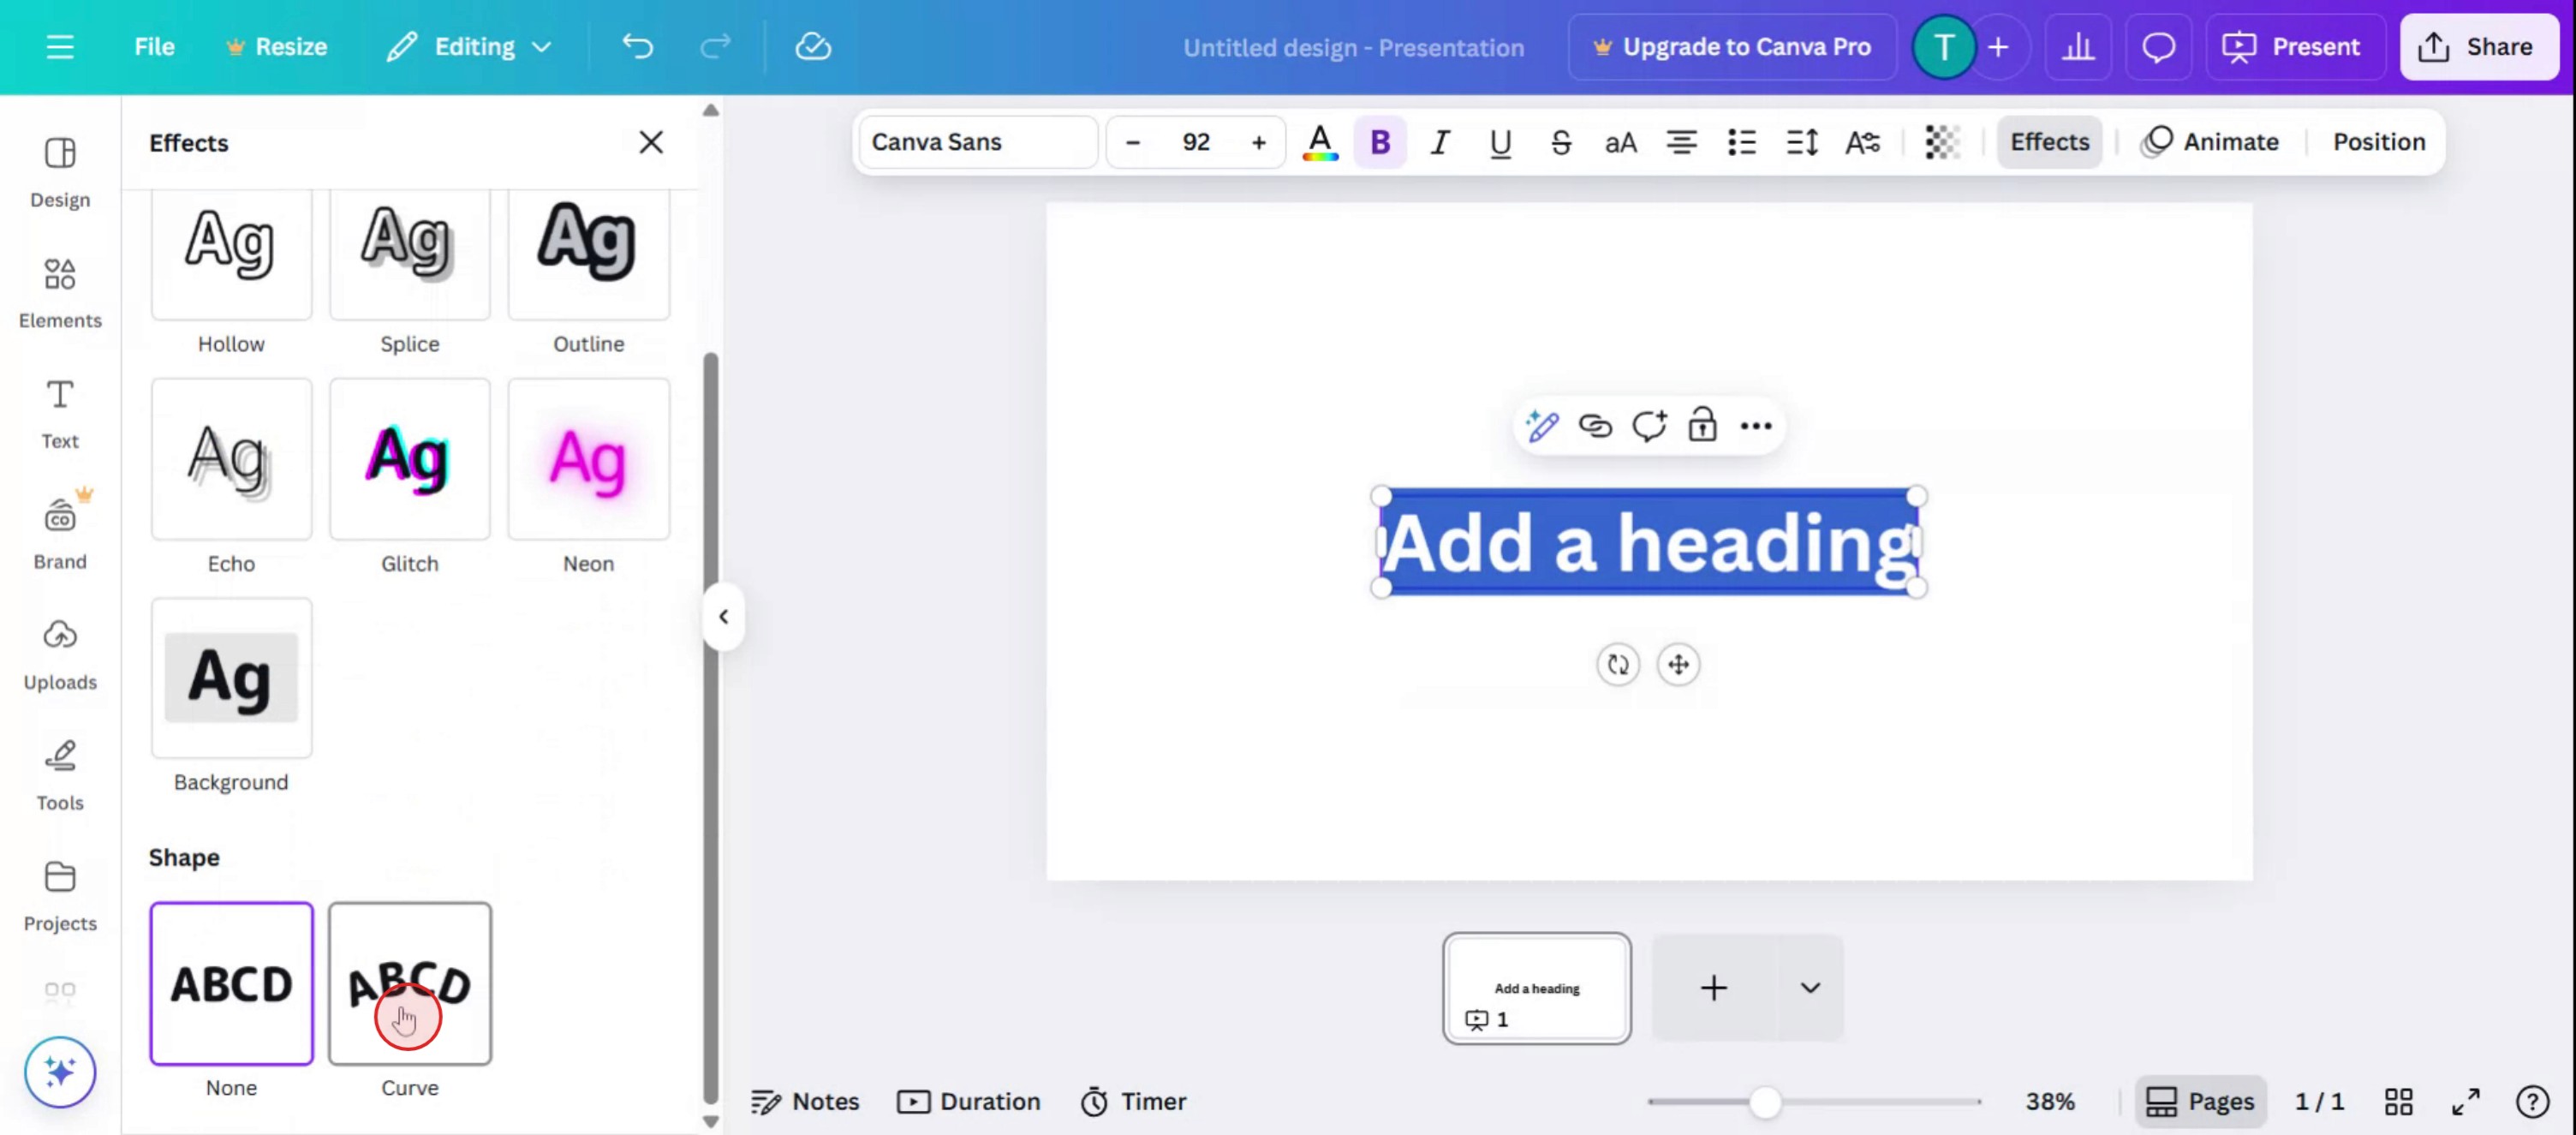
اختر الانحناء: مرّر لأسفل في لوحة التأثيرات وحدد "Curve".
اضبط الانحناء: استخدم شريط التمرير أسفل زر "Curve" لضبط تقوس النص. سحبه إلى اليمين يُنشئ انحناءً مقوسًا للأعلى، بينما سحبه إلى اليسار يُنشئ انحناءً عكسيًا.
اضبط بدقة: يمكنك مزيدًا من ضبط تباعد الحروف باستخدام خيار "Spacing" في قائمة تنسيق النص ليلتف النص بإحكام أكبر حول دائرة أو أشكال أخرى.
دليل خطوة بخطوة: كيفية إنشاء نص منحني في Canva
الخطوة 1
حدِّد زر النص.
الخطوة 2
تابع بتحديد النص حسب اختيارك.

الخطوة 3
ثم انقر على خيار "التأثيرات".
الخطوة 4
ضمن "الأشكال"، اختر "الانحناء".
الخطوة 5
لاحظ أن النص أصبح الآن منحنيًا.

نصائح احترافية لإنشاء نص منحني في Canva
افتح تصميمك في Canva
سجّل الدخول إلى Canva وافتح تصميمًا جديدًا أو موجودًا حيث تريد إضافة نص منحني.أضف مربع نص
انقر على علامة التبويب “النص” في اللوحة اليسرى واختر عنوانًا أو عنوانًا فرعيًا أو نصًا أساسيًا لإضافته إلى اللوحة.اكتب النص الذي تريده
أدخل النص الذي تريد جعله منحنيًا. يمكنك تنسيقه باستخدام أنماط الخطوط والأحجام والألوان قبل تطبيق الانحناء.حدّد مربع النص
انقر على النص حتى يظهر مربع التحديد حوله.انقر على زر ‘التأثيرات’
في القائمة العلوية، انقر على “التأثيرات” لفتح لوحة خيارات تنسيق النص.اختر خيار ‘الانحناء’
ضمن تأثيرات النص، انقر على “الانحناء”. سيصبح النص منحنيًا تلقائيًا.اضبط شريط تمرير الانحناء
استخدم شريط تمرير الانحناء لضبط درجة الانحناء. اسحب إلى اليسار لقوسٍ لأعلى أو إلى اليمين لقوسٍ لأسفل.اضبط الموضع بدقة
غيّر الحجم، ودوّر النص المنحني، وموضعه كما يلزم ليتناسب مع تصميمك.
الأخطاء الشائعة وكيفية تجنبها
عدم ظهور خيار الانحناء
تأكد من تحديد مربع نص. يظهر تأثير “الانحناء” فقط عندما يكون النص نشطًا.يصبح النص متباعدًا أكثر من اللازم
إذا كان الانحناء واسعًا جدًا، فقد تبدو الأحرف ممدودة. استخدم نصًا أقصر أو قلّل شدة الانحناء.لا يبدو الخط جيدًا عند الانحناء
قد تبدو بعض الخطوط غير متناسقة عند انحنائها. جرّب خطوطًا عريضة أو بسيطة للحصول على مظهر أنظف.لا يمكنك تعديل الأحرف بشكل فردي في النص المنحني
ينطبق الانحناء على مربع النص بالكامل. إذا أردت أنماطًا مختلفة لأحرف محددة، فأنشئ مربعات نص منفصلة.تأثير الانحناء لا يعمل في تطبيق الجوال
قد يكون تأثير الانحناء محدودًا أو أصعب في العثور عليه في تطبيق Canva للجوال. استخدم إصدار سطح المكتب للتحكم الكامل.
الأسئلة الشائعة حول إنشاء نص منحني في Canva
كيف أنحني النص في Canva؟
حدِّد مربع النص، ثم انقر على التأثيرات، ثم اختر خيار الانحناء واضبط شريط التمرير.هل يمكنني تغيير اتجاه الانحناء؟
نعم، حرِّك شريط التحكم في الانحناء إلى اليسار أو اليمين لتغيير اتجاه القوس.هل ميزة النص المنحني متاحة في النسخة المجانية من Canva؟
نعم، تتوفر ميزة انحناء النص في كلٍ من النسخة المجانية ونسخة Pro.هل يمكنني استخدام النص المنحني مع الرسوم المتحركة؟
نعم، بعد تطبيق الانحناء، يمكنك الاستمرار في إضافة حركات للنص لعروض تقديمية ديناميكية.هل يمكنني انحناء جزء فقط من الجملة؟
لا، ينطبق تأثير الانحناء على مربع النص بالكامل. استخدم مربعات نص منفصلة إذا كنت تريد انحناء كلمات معينة فقط.كيف أسجل الشاشة على Mac؟
لتسجيل الشاشة على Mac، يمكنك استخدام Trupeer AI. يتيح لك التقاط الشاشة بالكامل ويوفر إمكانات ذكاء اصطناعي مثل إضافة صور رمزية للذكاء الاصطناعي، وإضافة تعليق صوتي، وإضافة تكبير وتصغير داخل الفيديو. وباستخدام ميزة ترجمة الفيديو بالذكاء الاصطناعي من trupeer، يمكنك ترجمة الفيديو إلى أكثر من 30 لغة.كيف أضيف صورة رمزية للذكاء الاصطناعي إلى تسجيل الشاشة؟
لإضافة صورة رمزية للذكاء الاصطناعي إلى تسجيل الشاشة، ستحتاج إلى استخدام أداة تسجيل شاشة بالذكاء الاصطناعي. Trupeer AI هي أداة تسجيل شاشة بالذكاء الاصطناعي، تساعدك على إنشاء فيديوهات متعددة الصور الرمزية، كما تساعدك في إنشاء صورتك الرمزية الخاصة للفيديو.كيف أسجل الشاشة على Windows؟
لتسجيل الشاشة على Windows، يمكنك استخدام Game Bar المدمج (Windows + G) أو أداة ذكاء اصطناعي متقدمة مثل Trupeer AI للحصول على ميزات أكثر تقدمًا مثل الصور الرمزية بالذكاء الاصطناعي، والتعليق الصوتي، والترجمة، إلخ.كيف أضيف تعليقًا صوتيًا إلى الفيديو؟
لإضافة تعليق صوتي إلى الفيديوهات، نزِّل إضافة Chrome من trupeer ai. بعد التسجيل، ارفع الفيديو الخاص بك مع الصوت، واختر التعليق الصوتي المطلوب من trupeer ثم صدِّر الفيديو المعدَّل.كيف أقوم بالتكبير في تسجيل الشاشة؟
للتكبير أثناء تسجيل الشاشة، استخدم تأثيرات التكبير في Trupeer AI التي تتيح لك التكبير والتصغير في لحظات محددة، مما يعزز التأثير البصري لمحتوى الفيديو الخاص بك.
قراءات مقترحة
دروس ذات صلة

