

كيفية التحقق من السجل في Google Sheets
تعرّف على كيفية التحقق من سجل الإصدارات في جداول بيانات Google لرؤية التعديلات السابقة، وتتبع التغييرات، واستعادة الإصدارات السابقة. دليل بسيط لإدارة العمل التعاوني.
تقدّم هذه الوثيقة دليلاً شاملاً حول كيفية تتبّع وإدارة سجلّ التعديلات في مستند Google Sheets.
تعلّم كيفية التنقّل في سجلّ الإصدارات، والتعرّف على التعديلات السابقة، واستعادة الإصدارات القديمة بكفاءة.
إذا كنت بحاجة إلى تتبّع التغييرات أو استعادة إصدار سابق من جدول البيانات الخاص بك، فإن Google Sheets يسهّل ذلك من خلال ميزة سجلّ الإصدارات المدمجة.
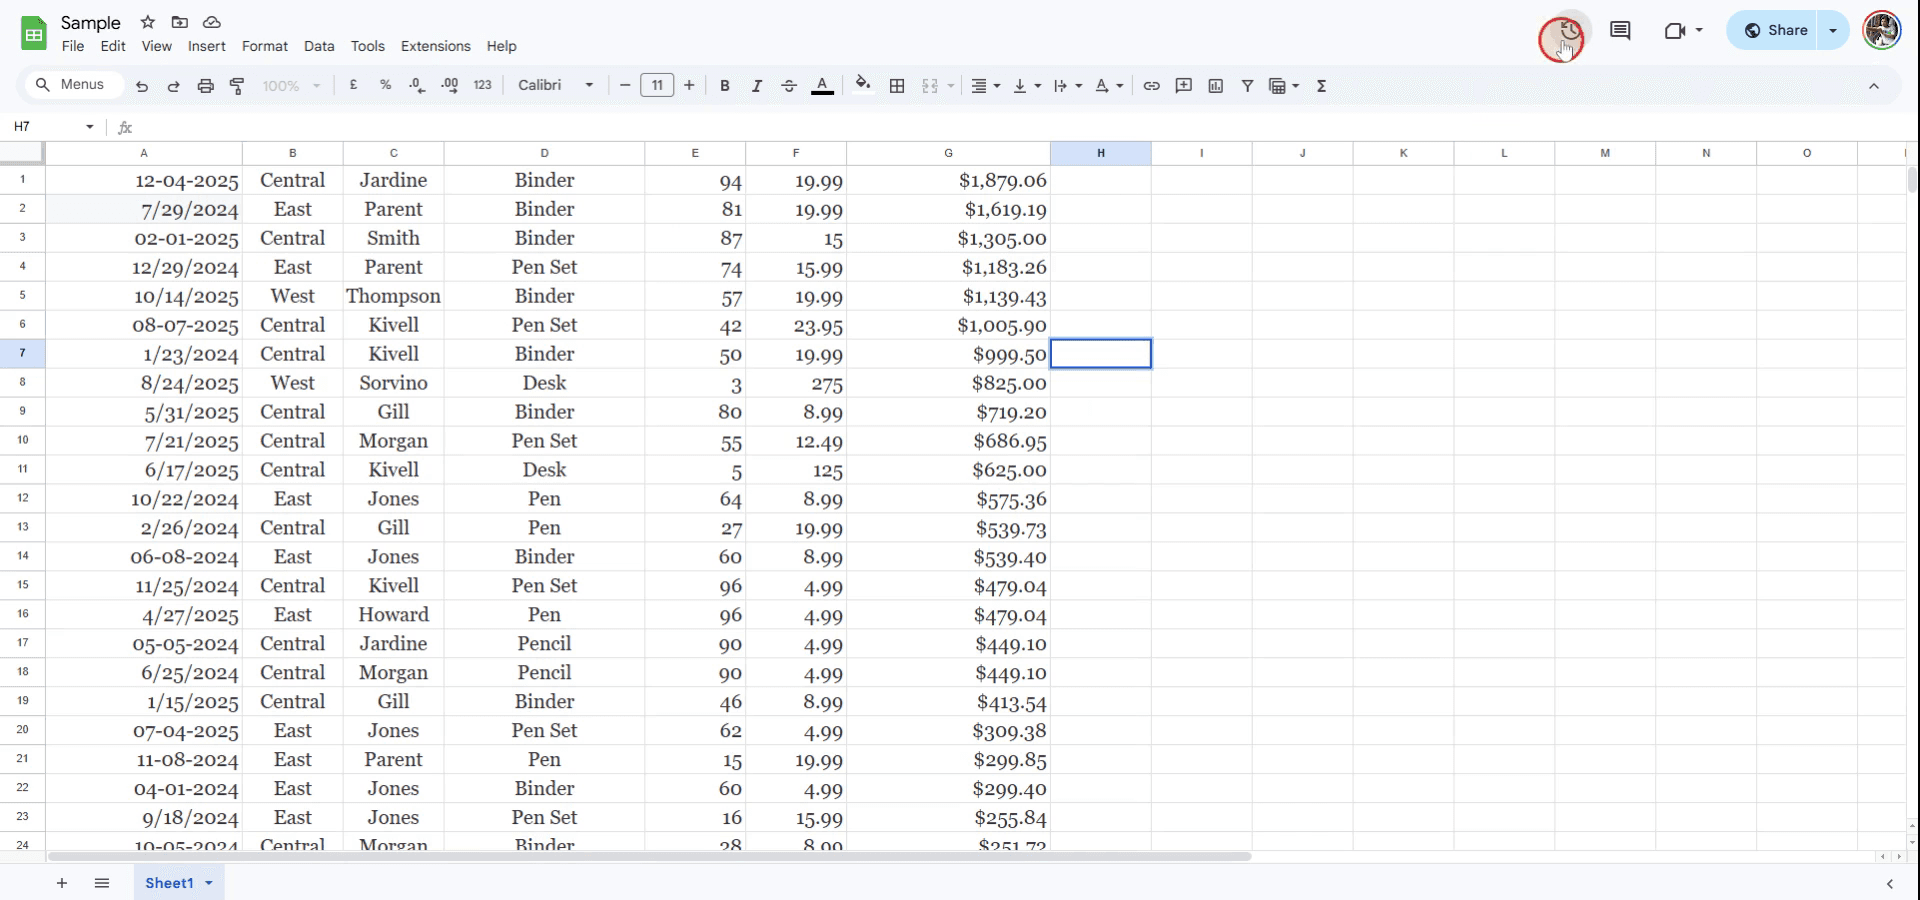
1. فتح سجلّ الإصدارات:
ابدأ بفتح جدول البيانات الذي تريد التحقق منه.
انقر على ملف > سجلّ الإصدارات > عرض سجلّ الإصدارات.
يمكنك أيضًا النقر على رابط “تم آخر تعديل…” في أعلى ورقة العمل، أو استخدام الاختصار:
Windows: Ctrl + Alt + Shift + H
Mac: Cmd + Option + Shift + H
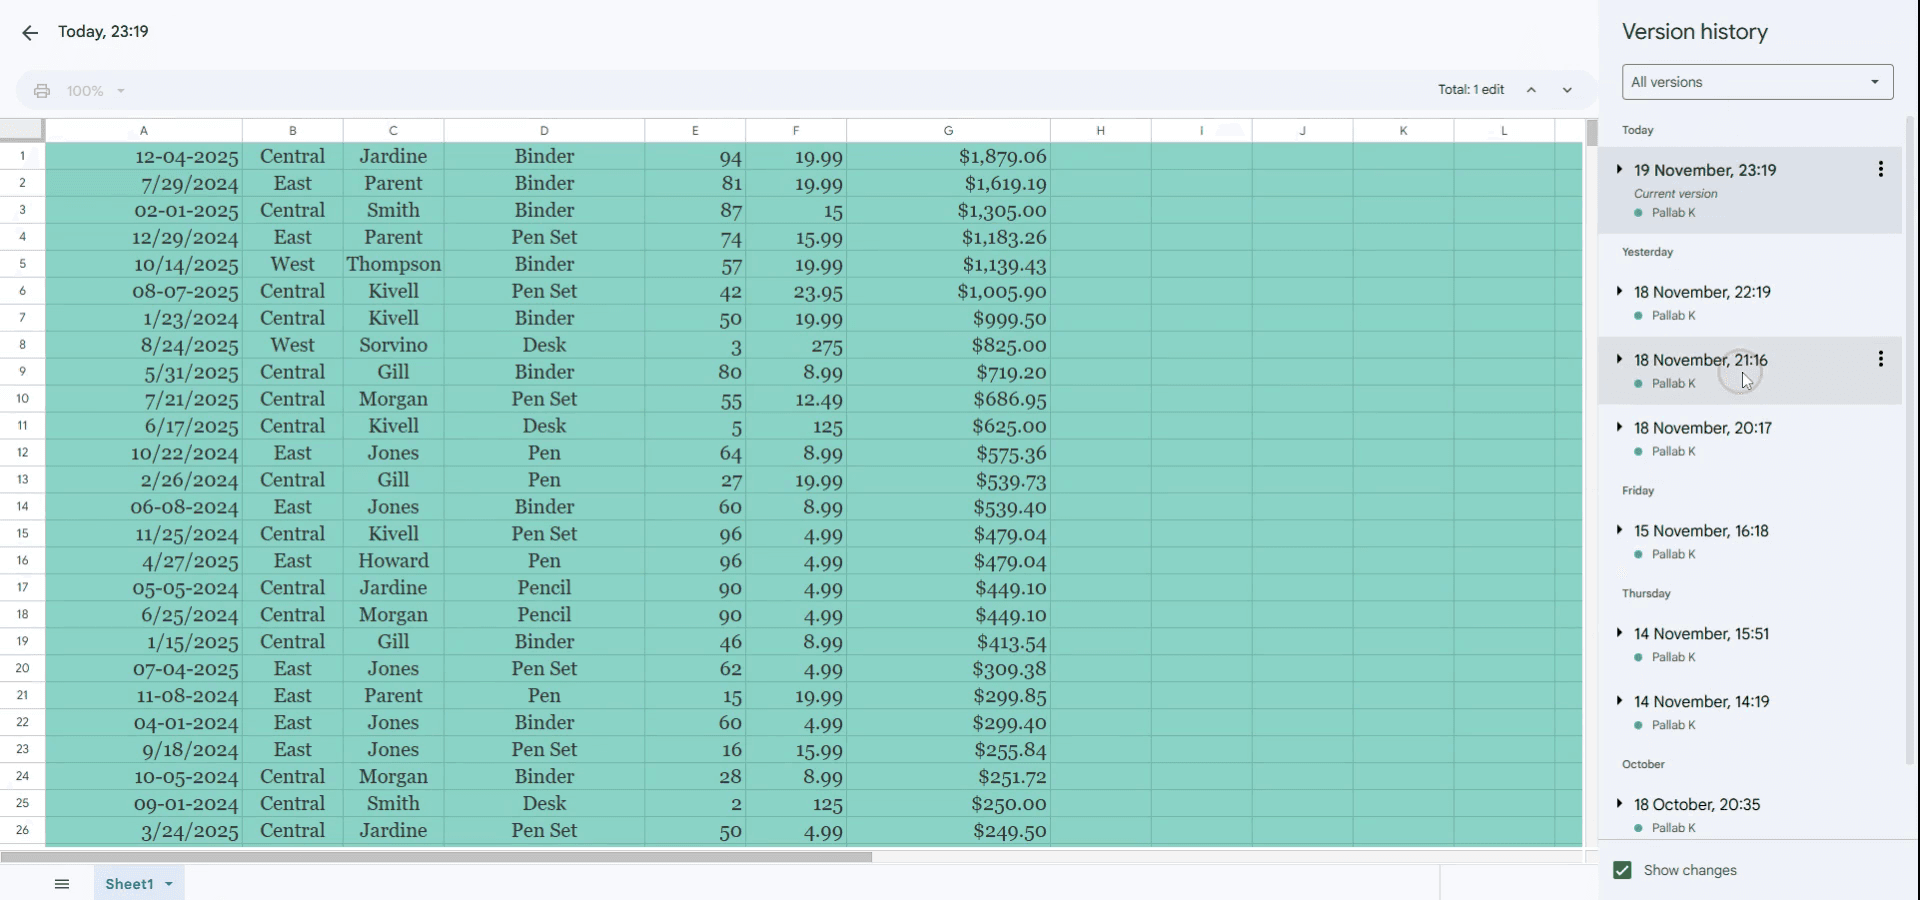
2. تصفّح الإصدارات السابقة:
سيظهر جزء على اليمين يعرض جميع الإصدارات المحفوظة من ملفك.
يتم تجميعها حسب التاريخ والوقت، وإذا أجرت جهات أخرى تعديلات فستظهر أسماؤهم أيضًا.
انقر على أي إصدار لمعاينة الشكل الذي كانت عليه الورقة في تلك اللحظة.
يمكنك أيضًا توسيع المجموعات لرؤية تغييرات أكثر تفصيلاً أُجريت خلال يوم أو ساعة.
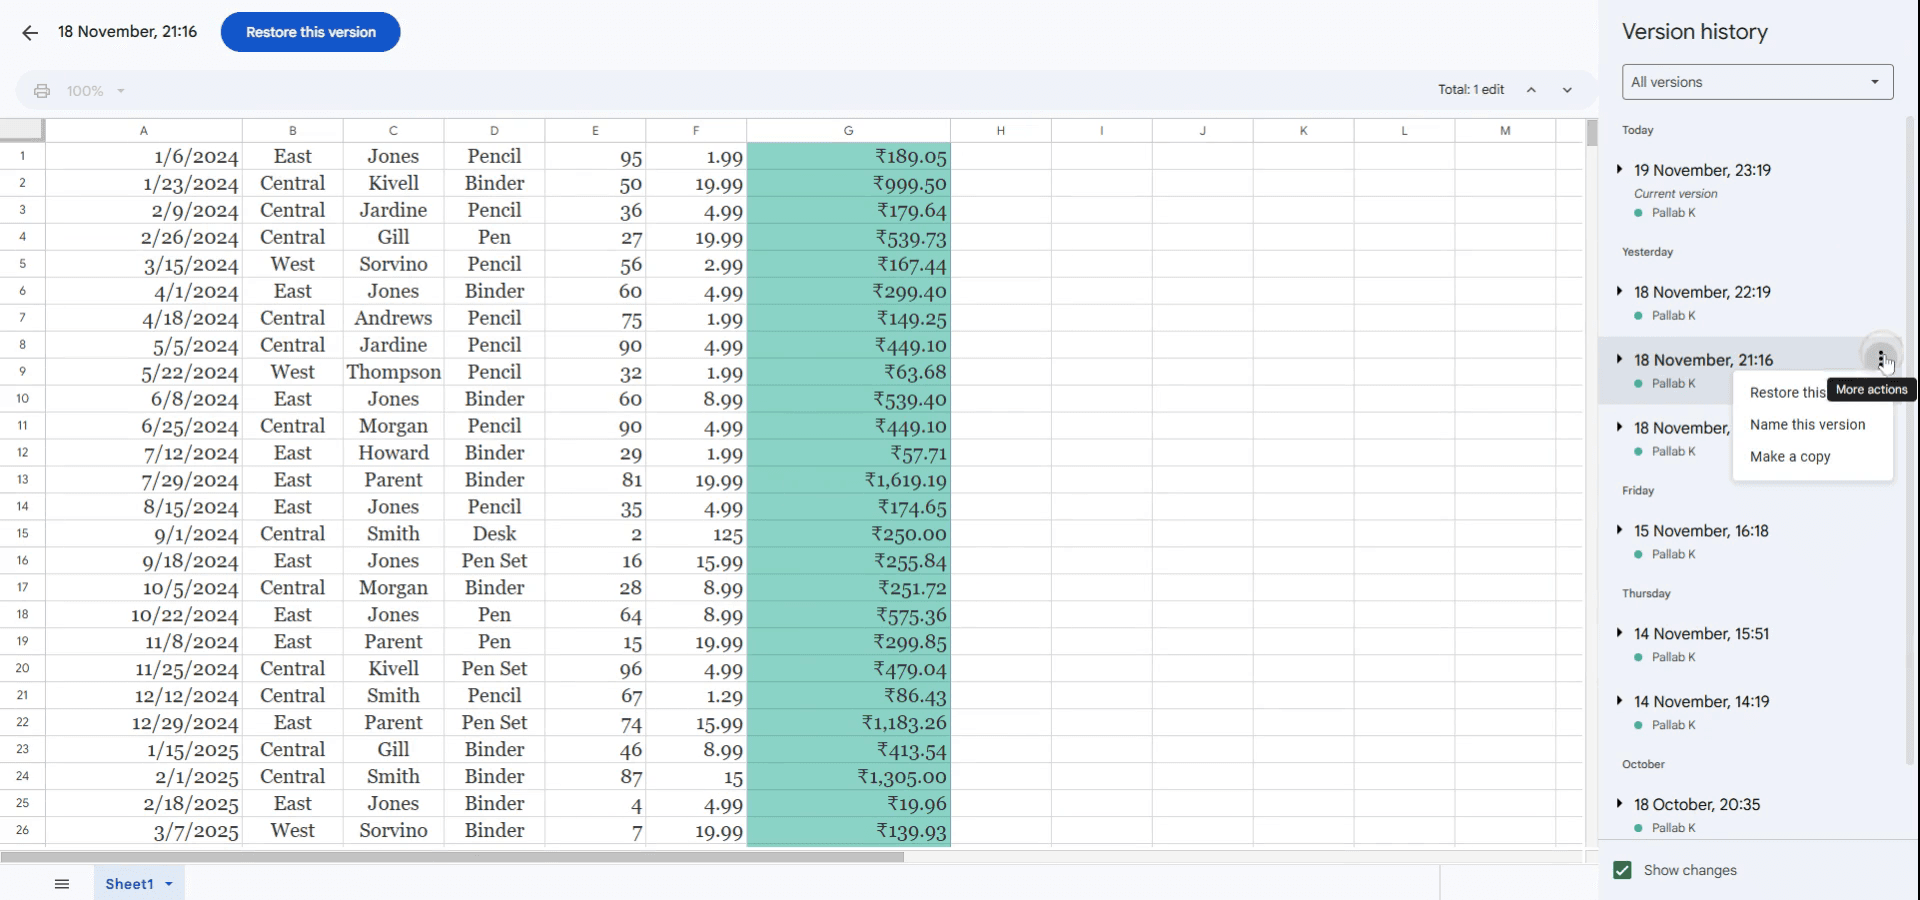
3. استعادة إصدار سابق:
إذا أردت الرجوع إلى إصدار أقدم، فحدده وانقر على "استعادة هذا الإصدار" في أعلى الجزء.
سيستبدل ذلك ورقتك الحالية بالإصدار المختار—لا تقلق، يمكنك دائمًا الرجوع مرة أخرى.
4. نصائح مفيدة:
تسمية الإصدارات المهمة: انقر على النقاط الثلاث بجانب أحد الإصدارات لمنحه اسمًا. يساعد ذلك في تتبّع التحديثات الكبرى أو المراحل المهمة.
تتبّع التعاون: يعرض سجلّ الإصدارات من أجرى كل تغيير، وهو أمر مفيد جدًا للمشاريع الجماعية.
إصلاح الأخطاء: استخدمه لاستكشاف الأخطاء عبر تحديد متى وأين حدثت المشكلة.
دليل خطوة بخطوة: كيفية التحقق من السجلّ في Google Sheets
الخطوة 1
لمراجعة سجلّ التعديلات في Google Sheets، انتقل إلى خيار "السجل" الموجود في القائمة العلوية. سيمنحك ذلك الوصول إلى سجلّ إصدارات المستند.
الخطوة 2
هنا، يمكنك عرض التعديلات التي أُجريت مع الطوابع الزمنية الخاصة بها.
الخطوة 3
إذا رغبت في الرجوع إلى إصدار محدد، فانقر على "المزيد من الإجراءات" بجانب الطابع الزمني المطلوب. ثم اختر "استعادة هذا الإصدار.
نصائح احترافية للتحقق من السجل في Google Sheets
استخدم سجل الإصدارات: لعرض سجل التعديلات في ورقتك، انتقل إلى "ملف" > "سجل الإصدارات" > "عرض سجل الإصدارات" للوصول إلى جميع التغييرات السابقة التي أُجريت على مستندك.
استعادة الإصدارات السابقة: إذا كنت بحاجة إلى الرجوع إلى إصدار أقدم، يمكنك استعادة أي إصدار من سجل الإصدارات عن طريق تحديد الطابع الزمني للإصدار والنقر على "استعادة هذا الإصدار."
تسمية الإصدارات: لتسهيل التتبع، يمكنك تسمية الإصدارات المهمة بالنقر على النقاط الثلاث بجانب الإصدار واختيار "تسمية هذا الإصدار."
المشكلات الشائعة وكيفية تجنبها عند التحقق من السجل في Google Sheets
عدم تسمية الإصدارات المهمة: بدون تسمية الإصدارات الرئيسية، قد يكون من الصعب العثور بسرعة على التغييرات المهمة. الحل: سمِّ الإصدارات المهمة حتى تتمكن من تحديدها واستعادتها بسهولة عند الحاجة.
تجاهل التغييرات في الأوراق غير الظاهرة: إذا كانت ورقتك تحتوي على عدة علامات تبويب، فتأكد من أنك تتحقق من السجل لجميع علامات التبويب، وليس النشطة فقط. الحل: تحقّق من السجل للمستند بالكامل عن طريق تحديد علامات تبويب مختلفة حسب الحاجة.
عدم حفظ الإصدارات قبل التعديلات الكبيرة: إذا أجريت تغييرات كبيرة، فمن المفيد حفظ إصدار أولاً لتجنب فقدان عملك. الحل: احفظ الإصدارات بانتظام من خلال تسميتها قبل التغييرات الكبيرة.
الأسئلة الشائعة حول التحقق من السجل في Google Sheets
هل يمكنني رؤية سجل خلية محددة في Sheets؟ يمكنك عرض سجل التغييرات للورقة بأكملها، ولكن ليس للخلايا الفردية. ومع ذلك، من خلال التحقق من سجل الإصدارات، يمكنك معرفة التغييرات التي أُجريت خلال إطار زمني محدد.
إلى أي مدى يمكنني الرجوع لعرض السجل في Sheets؟ يحتفظ Google Sheets بسجل الإصدارات إلى أجل غير مسمى ما لم يتم حذف الملف أو نقله إلى سلة المهملات.
هل يمكنني تتبع التغييرات التي أجراها مستخدمون محددون؟ نعم، في سجل الإصدارات، يمكنك معرفة من أجرى كل تغيير ومتى. وهذا مفيد لتتبع مساهمات المتعاونين.
كيفية تسجيل الشاشة على Mac؟
لتسجيل الشاشة على Mac، يمكنك استخدام Trupeer AI. فهو يتيح لك التقاط الشاشة بالكامل ويوفر إمكانات الذكاء الاصطناعي مثل إضافة صور رمزية للذكاء الاصطناعي، وإضافة تعليق صوتي، وإضافة التكبير والتصغير في الفيديو. ومع ميزة ترجمة الفيديو بالذكاء الاصطناعي من trupeer، يمكنك ترجمة الفيديو إلى أكثر من 30 لغة.كيفية إضافة صورة رمزية للذكاء الاصطناعي إلى تسجيل الشاشة؟
لإضافة صورة رمزية للذكاء الاصطناعي إلى تسجيل شاشة، ستحتاج إلى استخدام أداة تسجيل شاشة بالذكاء الاصطناعي. Trupeer AI هي أداة تسجيل شاشة بالذكاء الاصطناعي، تساعدك في إنشاء مقاطع فيديو باستخدام صور رمزية متعددة، كما تساعدك أيضًا في إنشاء صورتك الرمزية الخاصة للفيديو.كيفية تسجيل الشاشة على Windows؟
لتسجيل الشاشة على Windows، يمكنك استخدام شريط الألعاب المدمج (Windows + G) أو أداة ذكاء اصطناعي متقدمة مثل Trupeer AI للحصول على ميزات أكثر تقدمًا مثل الصور الرمزية للذكاء الاصطناعي، والتعليق الصوتي، والترجمة، إلخ.كيفية إضافة تعليق صوتي إلى الفيديو؟
لإضافة تعليق صوتي إلى مقاطع الفيديو، حمّل إضافة chrome الخاصة بـ trupeer ai. بعد التسجيل، ارفع الفيديو الخاص بك مع الصوت، واختر التعليق الصوتي المطلوب من trupeer، ثم صدّر الفيديو المعدّل.كيف يمكنني التكبير في تسجيل الشاشة؟ للتكبير أثناء تسجيل الشاشة، استخدم تأثيرات التكبير في Trupeer AI التي تتيح لك التكبير والتصغير في لحظات محددة، مما يعزز التأثير البصري لمحتوى الفيديو الخاص بك.
يسأل الناس أيضًا
كيفية إضافة رمز الروبية في Google Sheets
كيفية تغيير تنسيق العملة في Google Sheets
كيفية إضافة نقاط تعداد في Google Sheets
دروس ذات صلة

