
How to Insert Shapes in Canva – Quick Design Tips
Learn how to add and customize shapes in Canva to enhance your design. Simple steps to insert circles, squares, arrows, and more.
This document provides a detailed walkthrough on inserting and customizing shapes within the GIMP application.
The process includes selecting, customizing and manipulating shapes to fit your design needs effectively.
Adding shapes in Canva is simple and helps enhance your design layout. Here's how to do it:
Step-by-Step Guide:
Open Your Design:
Start a new design or open an existing one in Canva.
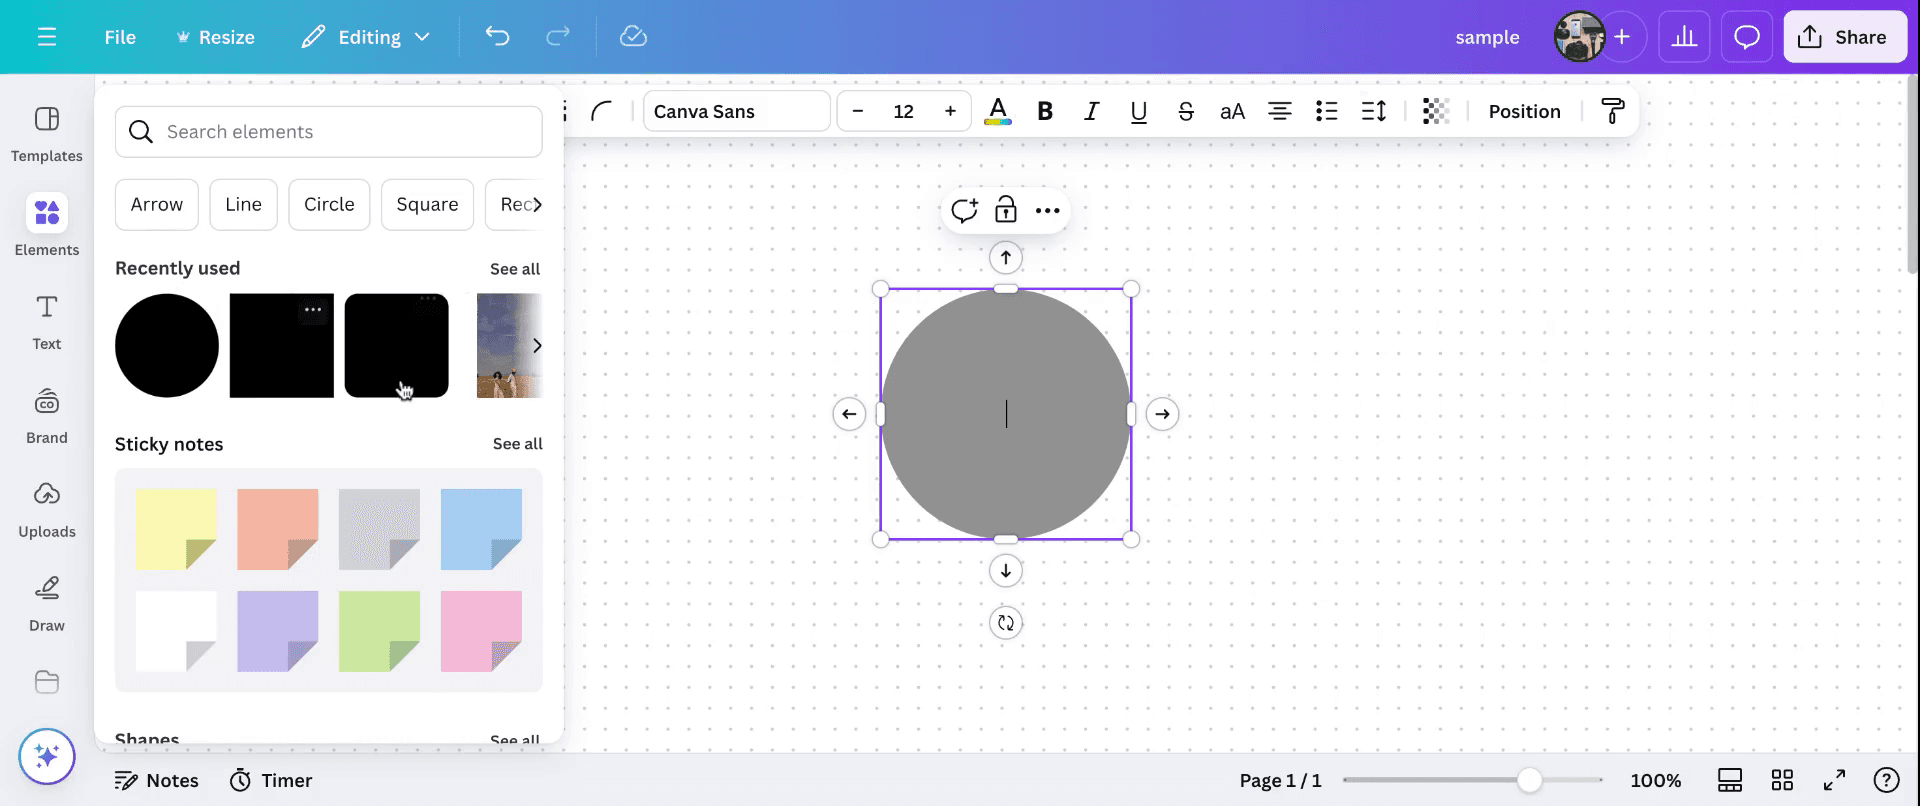
Go to the “Elements” Tab:
Located on the left-hand toolbar, click Elements.
Select “Lines & Shapes”:
Scroll to the Lines & Shapes section, or type a specific shape (e.g., "circle", "arrow", "heart") into the search bar.
Insert the Shape:
Click on the shape you want to use. It will appear on your canvas.
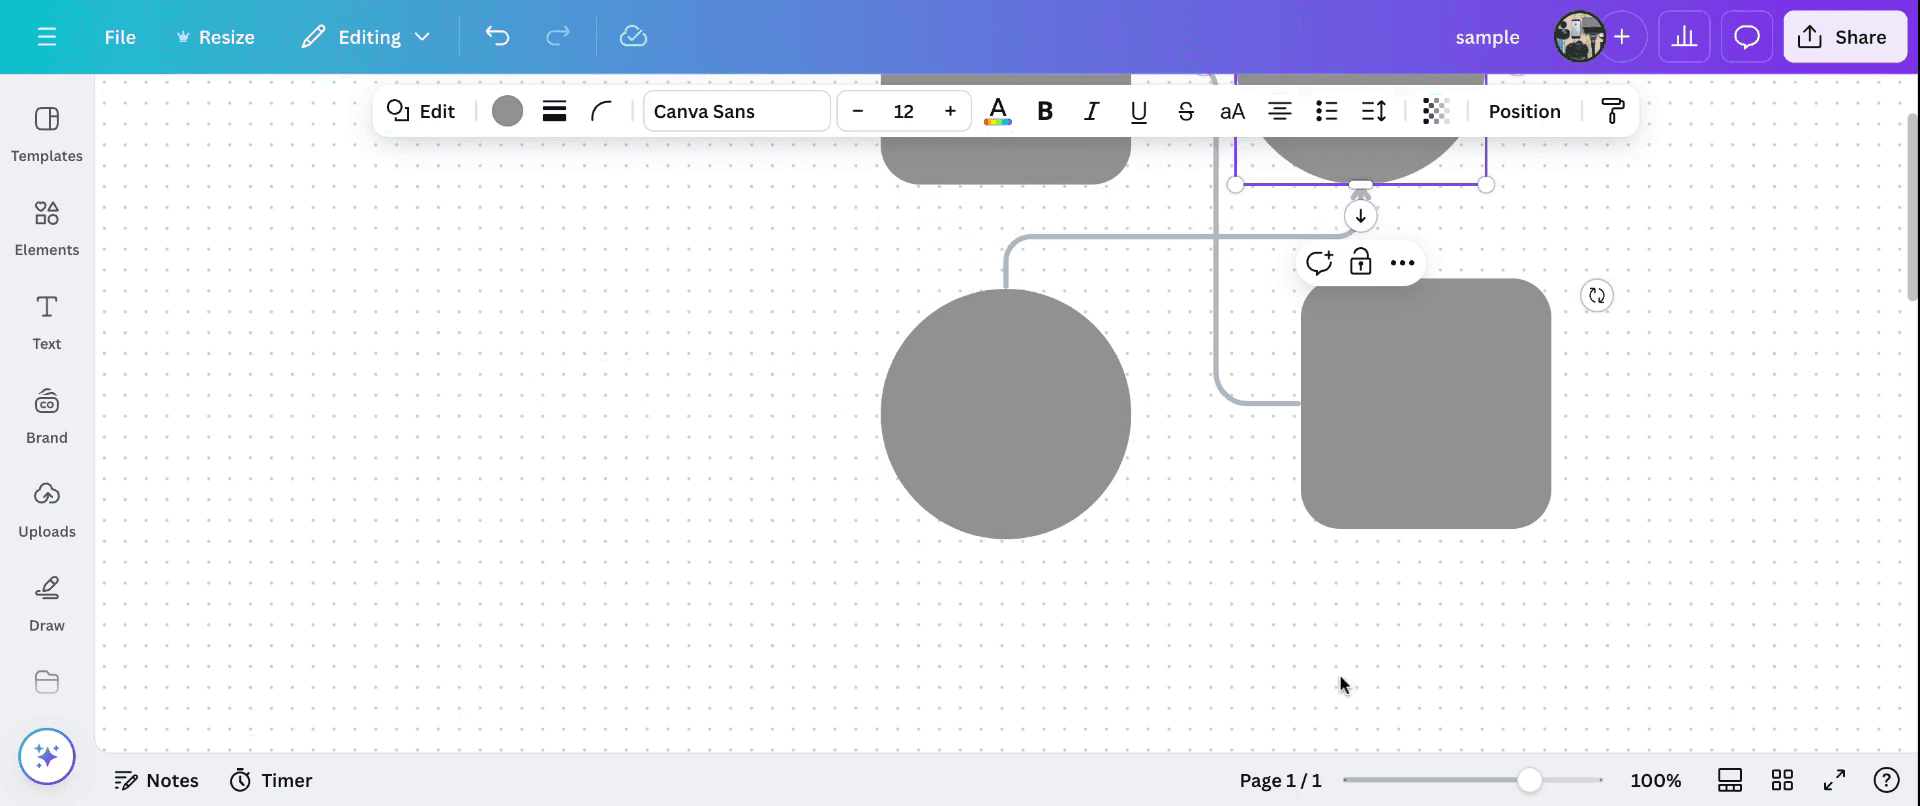
Customize the Shape:
You can:
Resize by dragging the corners.
Rotate using the rotation handle.
Change color, border thickness, transparency, and layering using the top toolbar.
Step-by-Step Guide: How To Insert Shapes in Canva
Step 1
In this tutorial, we will learn how to insert shapes in Canva . Start by navigating to the 'Elements' section and select the shapes you wish to work with. Once a shape is selected, you can customize it by choosing various tools. This allows you to adjust the shape's properties such as color and other characteristics.
Step 2
After selecting a shape, you can insert additional shapes and modify their sizes by dragging and change layouts.
Step 3
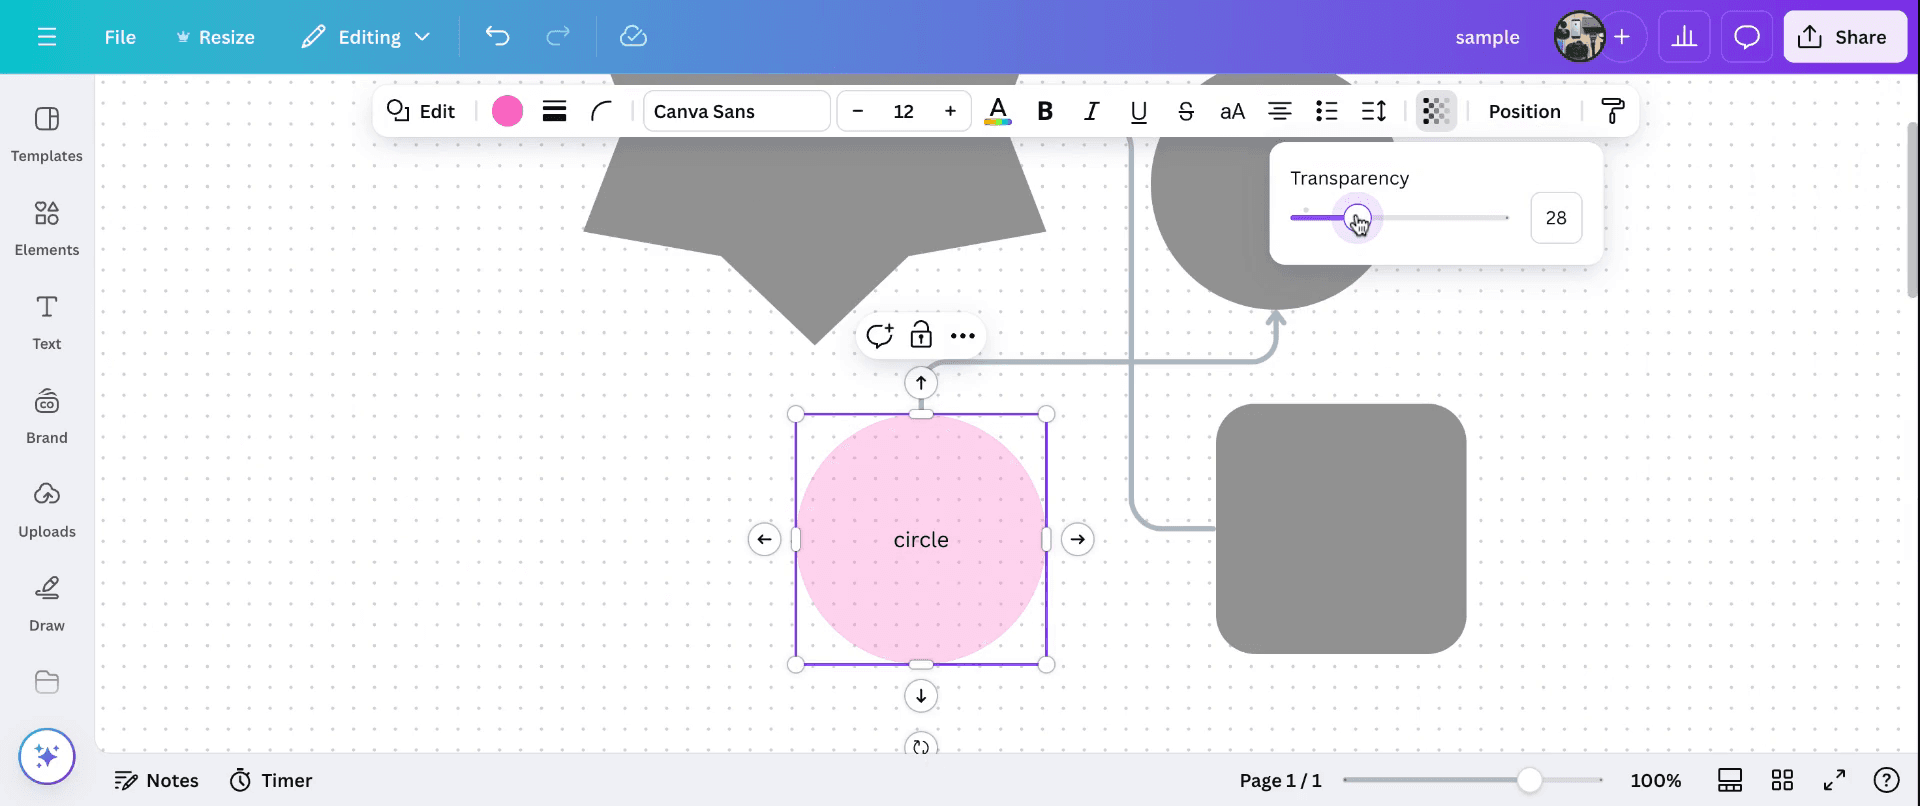
Additionally, you have the option to add text within a shape and adjust its transparency levels to suit your design requirements. This is how to insert shapes in Canva, allowing you to create intricate and personalized designs.
Pro Tips for successfully inserting shapes in Canva
Use the "Elements" Tab: Go to the Elements section and select Shapes to find a variety of options like circles, squares, triangles, and custom shapes.
Customize the Shape: Once added to your design, you can resize, rotate, and change the color of the shape to match your design style or theme.
Layer and Arrange Shapes: Use the Position tool to layer shapes, place them on top of each other, or arrange them in a specific order to create more complex designs.
Adjust Transparency: You can adjust the transparency of a shape to create effects like soft overlays or semi-transparent backgrounds.
Combine Shapes for Custom Designs: You can combine multiple shapes to create unique, custom designs. Use the Group option to group multiple shapes and make adjustments all at once.
Common pitfalls and how to avoid them for inserting shapes in Canva
Shapes Overlapping Unintentionally: Shapes might overlap awkwardly when adding multiple elements to a design.
Fix: Use the Position tool to align and distribute shapes evenly, ensuring they don't overlap unintentionally.Distorted Shapes: Resizing shapes unevenly can distort their proportions.
Fix: Hold down the Shift key while resizing to maintain the shape's original proportions.Shape Colors Clashing with Background: Sometimes the color of the shape may not stand out well against the background.
Fix: Choose colors that complement or contrast with the background to maintain visibility. You can also adjust the transparency to balance the design.Shapes Not Aligned Properly: Misalignment can make your design look unprofessional or uneven.
Fix: Use Canva’s Snap to Grid or alignment tools to ensure shapes are aligned correctly.Too Many Shapes Overcrowding the Design: Adding too many shapes can make your design look cluttered and messy.
Fix: Keep the design clean by using only essential shapes, and ensure there's enough space between them to avoid visual clutter.
Common FAQs for inserting shapes in Canva
How do I insert a shape in Canva?
Go to the Elements tab, select Shapes, and choose the shape you want to add to your design. Then, drag it into your design space.Can I customize the color of a shape in Canva?
Yes, after adding the shape, you can click on it and choose a color from the color palette or add custom colors to match your design.Can I resize or rotate the shape?
Yes, you can resize the shape by dragging its corners or rotate it by clicking the rotate handle at the top of the shape.How do I layer multiple shapes?
To layer shapes, select the shape and use the Position button to move it forward or backward, allowing you to stack shapes on top of each other.Can I combine multiple shapes into one design?
Yes, you can combine shapes by grouping them together. Select multiple shapes, right-click, and choose Group to combine them into a single element for easy adjustments.Thank you for following this tutorial.How to screen record on mac?
To screen record on a Mac, you can use Trupeer AI. It allows you to capture the entire screen and provides AI capabilities such as adding AI avatars, add voiceover, add zoom in and out in the video. With trupeer’s AI video translation feature, you can translate the video into 30+ languages.How to add an AI avatar to screen recording?
To add an AI avatar to a screen recording, you'll need to use an AI screen recording tool. Trupeer AI is an AI screen recording tool, which helps you create videos with multiple avatars, also helps you in creating your own avatar for the video.How to screen record on windows?
To screen record on Windows, you can use the built-in Game Bar (Windows + G) or advanced AI tool like Trupeer AI for more advanced features such as AI avatars, voiceover, translation etc.How to add voiceover to video?
To add voiceover to videos, download trupeer ai chrome extension. Once signed up, upload your video with voice, choose the desired voiceover from trupeer and export your edited video.How do I Zoom in on a screen recording?
To zoom in during a screen recording, use the zoom effects in Trupeer AI which allows you to zoom in and out at specific moments, enhancing the visual impact of your video content.
Suggested Reads
Technical Documentation Generator
How to Turn an Image into a Coloring Page in Canva
How to Print Double Sided on Canva
Related Tutorials

