

How to Add Background Video in Webflow – Step-by-Step Guide
Want to enhance your site design? Learn how to add a looping background video in Webflow for a dynamic, modern visual experience.
This document provides a detailed guide on how to seamlessly integrate a background video into your Web flow project. Follow the steps below to achieve a professional and visually appealing background setting for your website.
Step-by-Step-Guide: How to Add Background Video in Webflow
Step 1
Click on the Add Elements option.
Step 2
Drag and drop the background audio option.

Step 3
Upload a video,
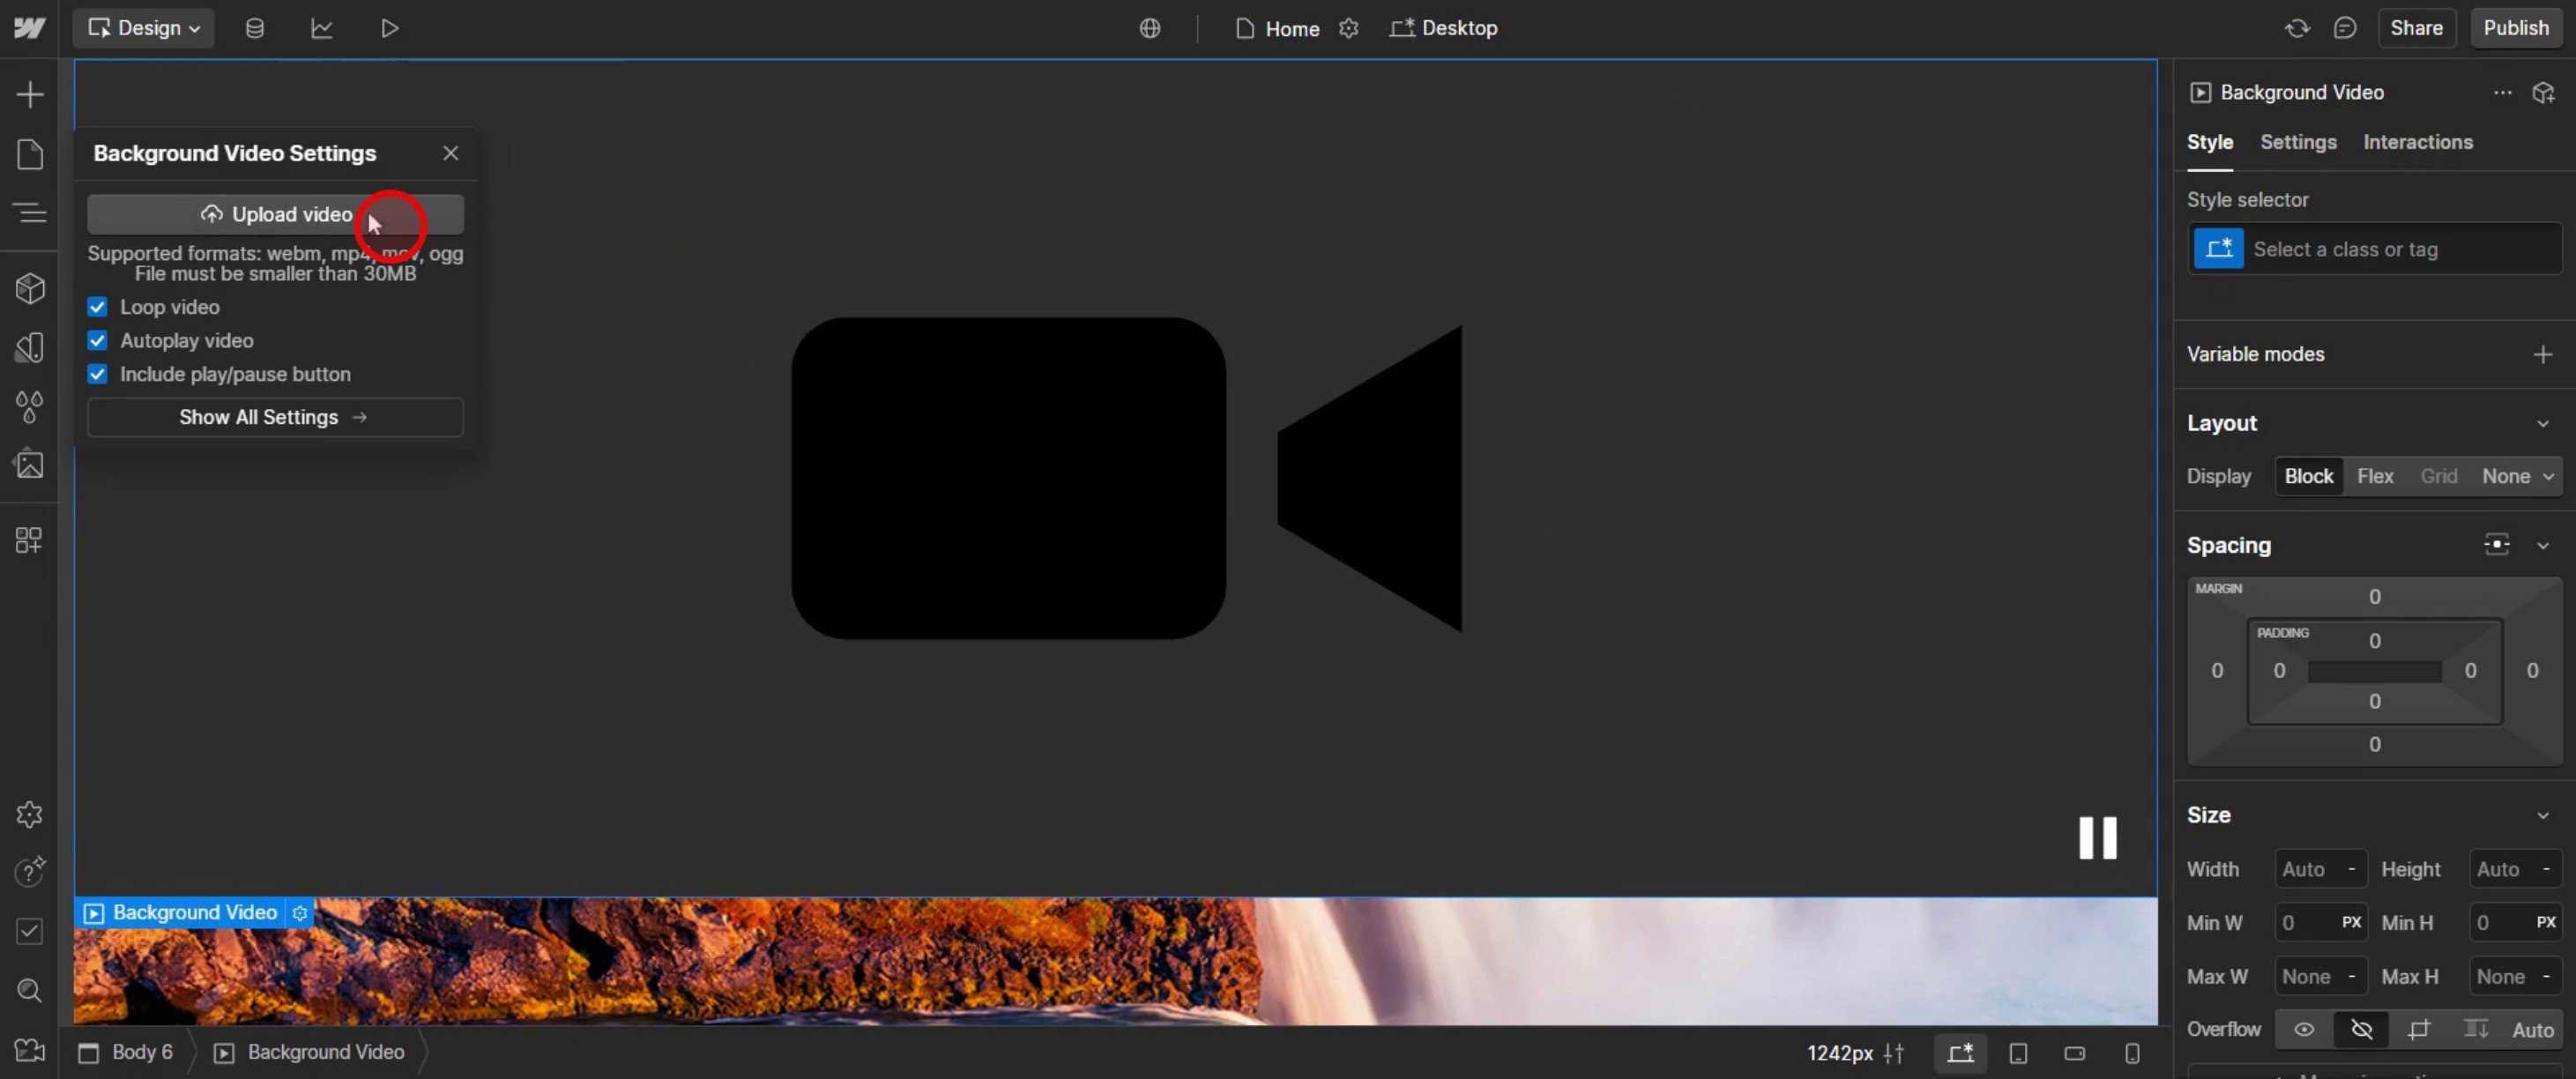
Step 4
Close the background audio tab.

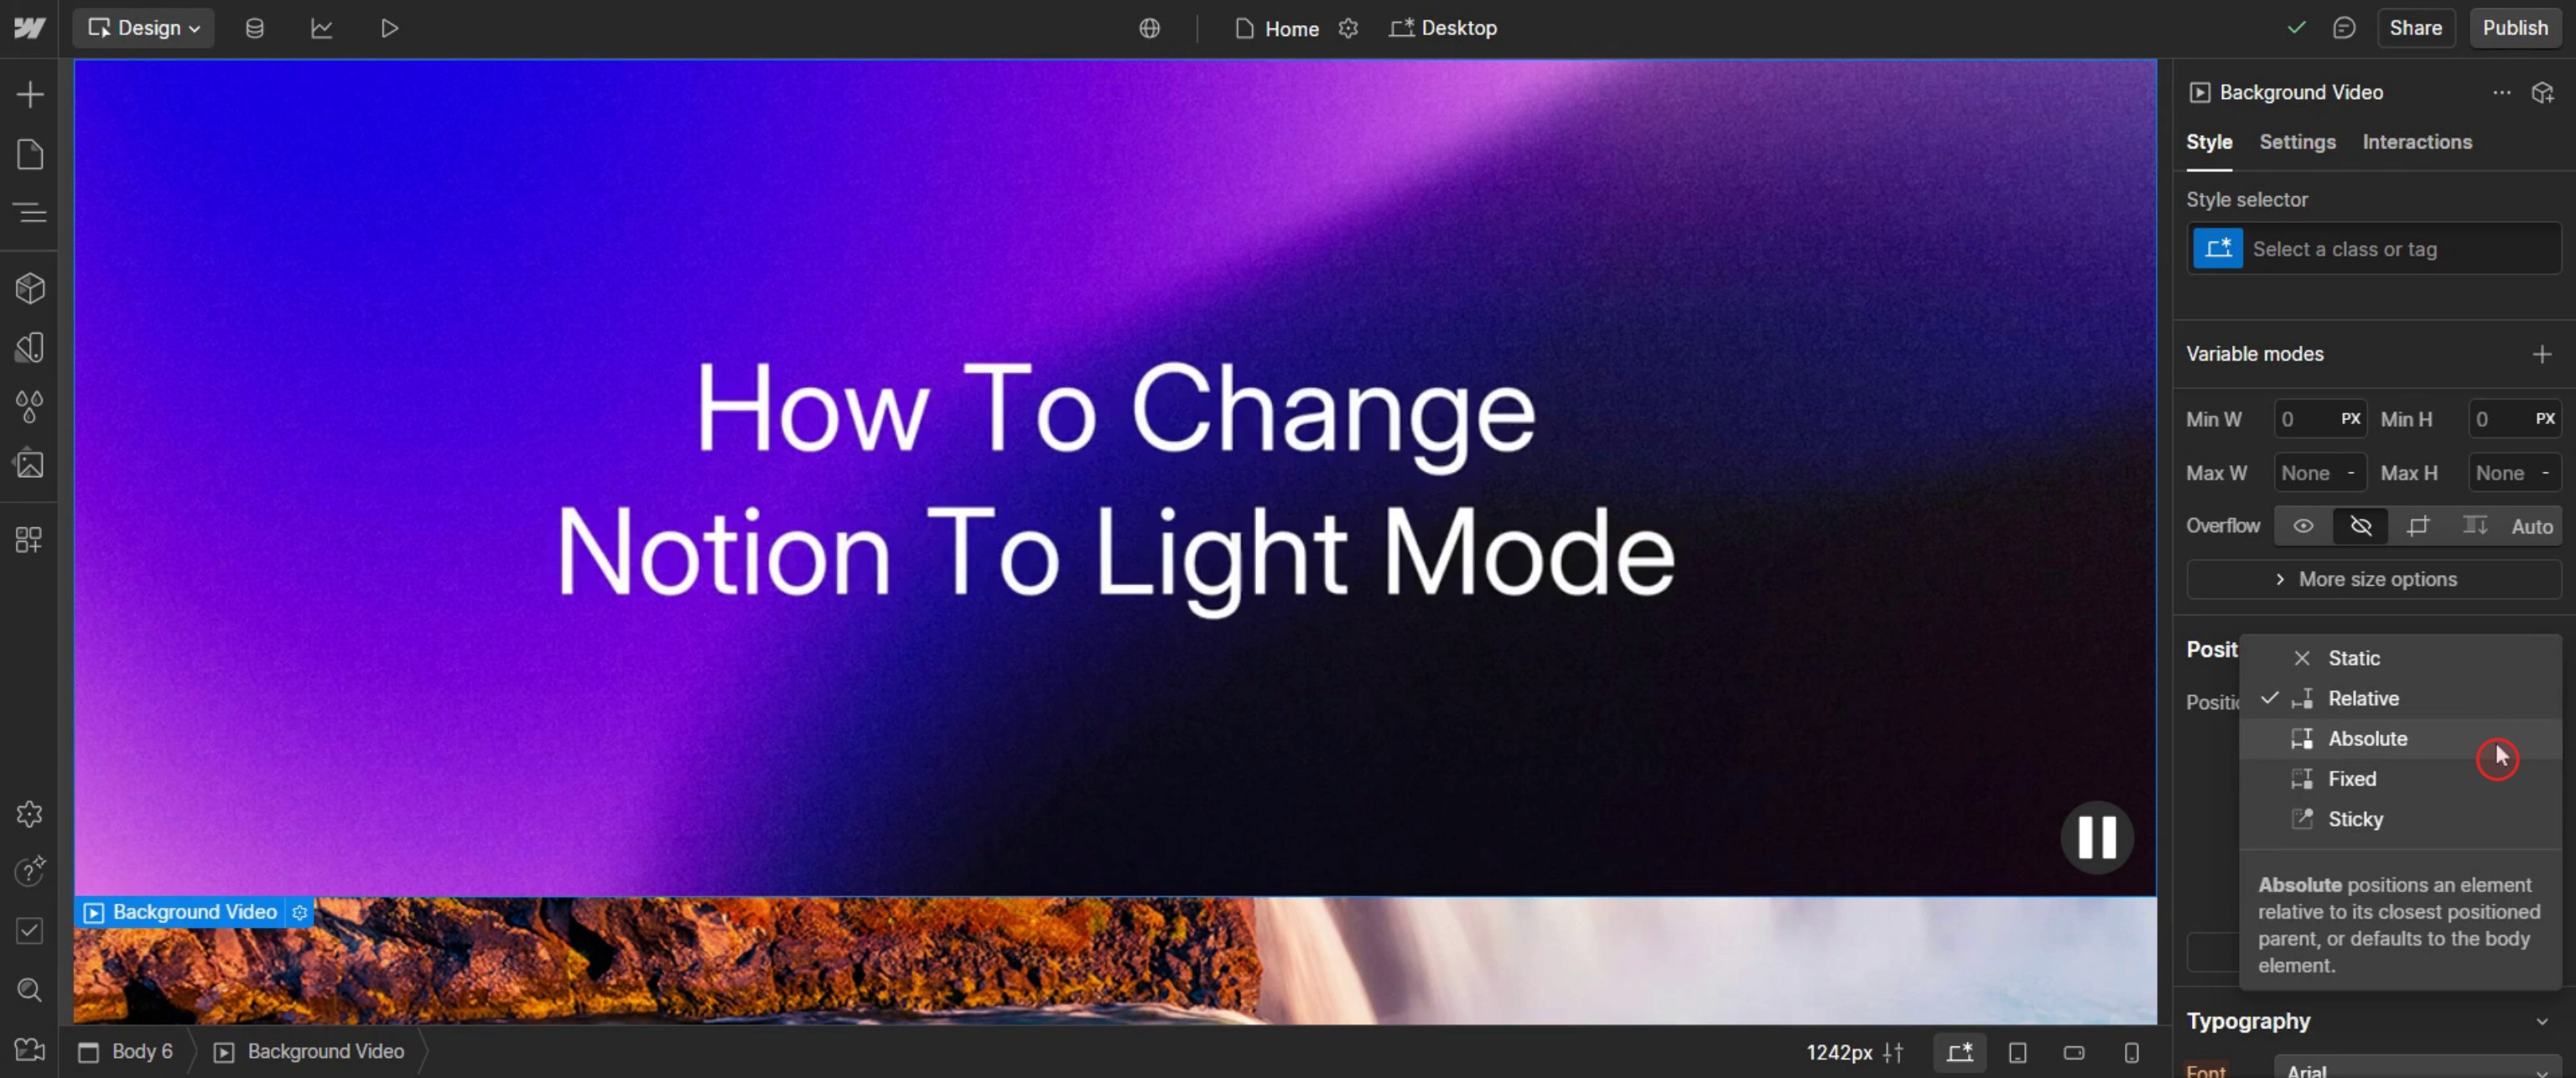
Step 5
Click on the position drop-down menu.

Step 6
Choose absolute,
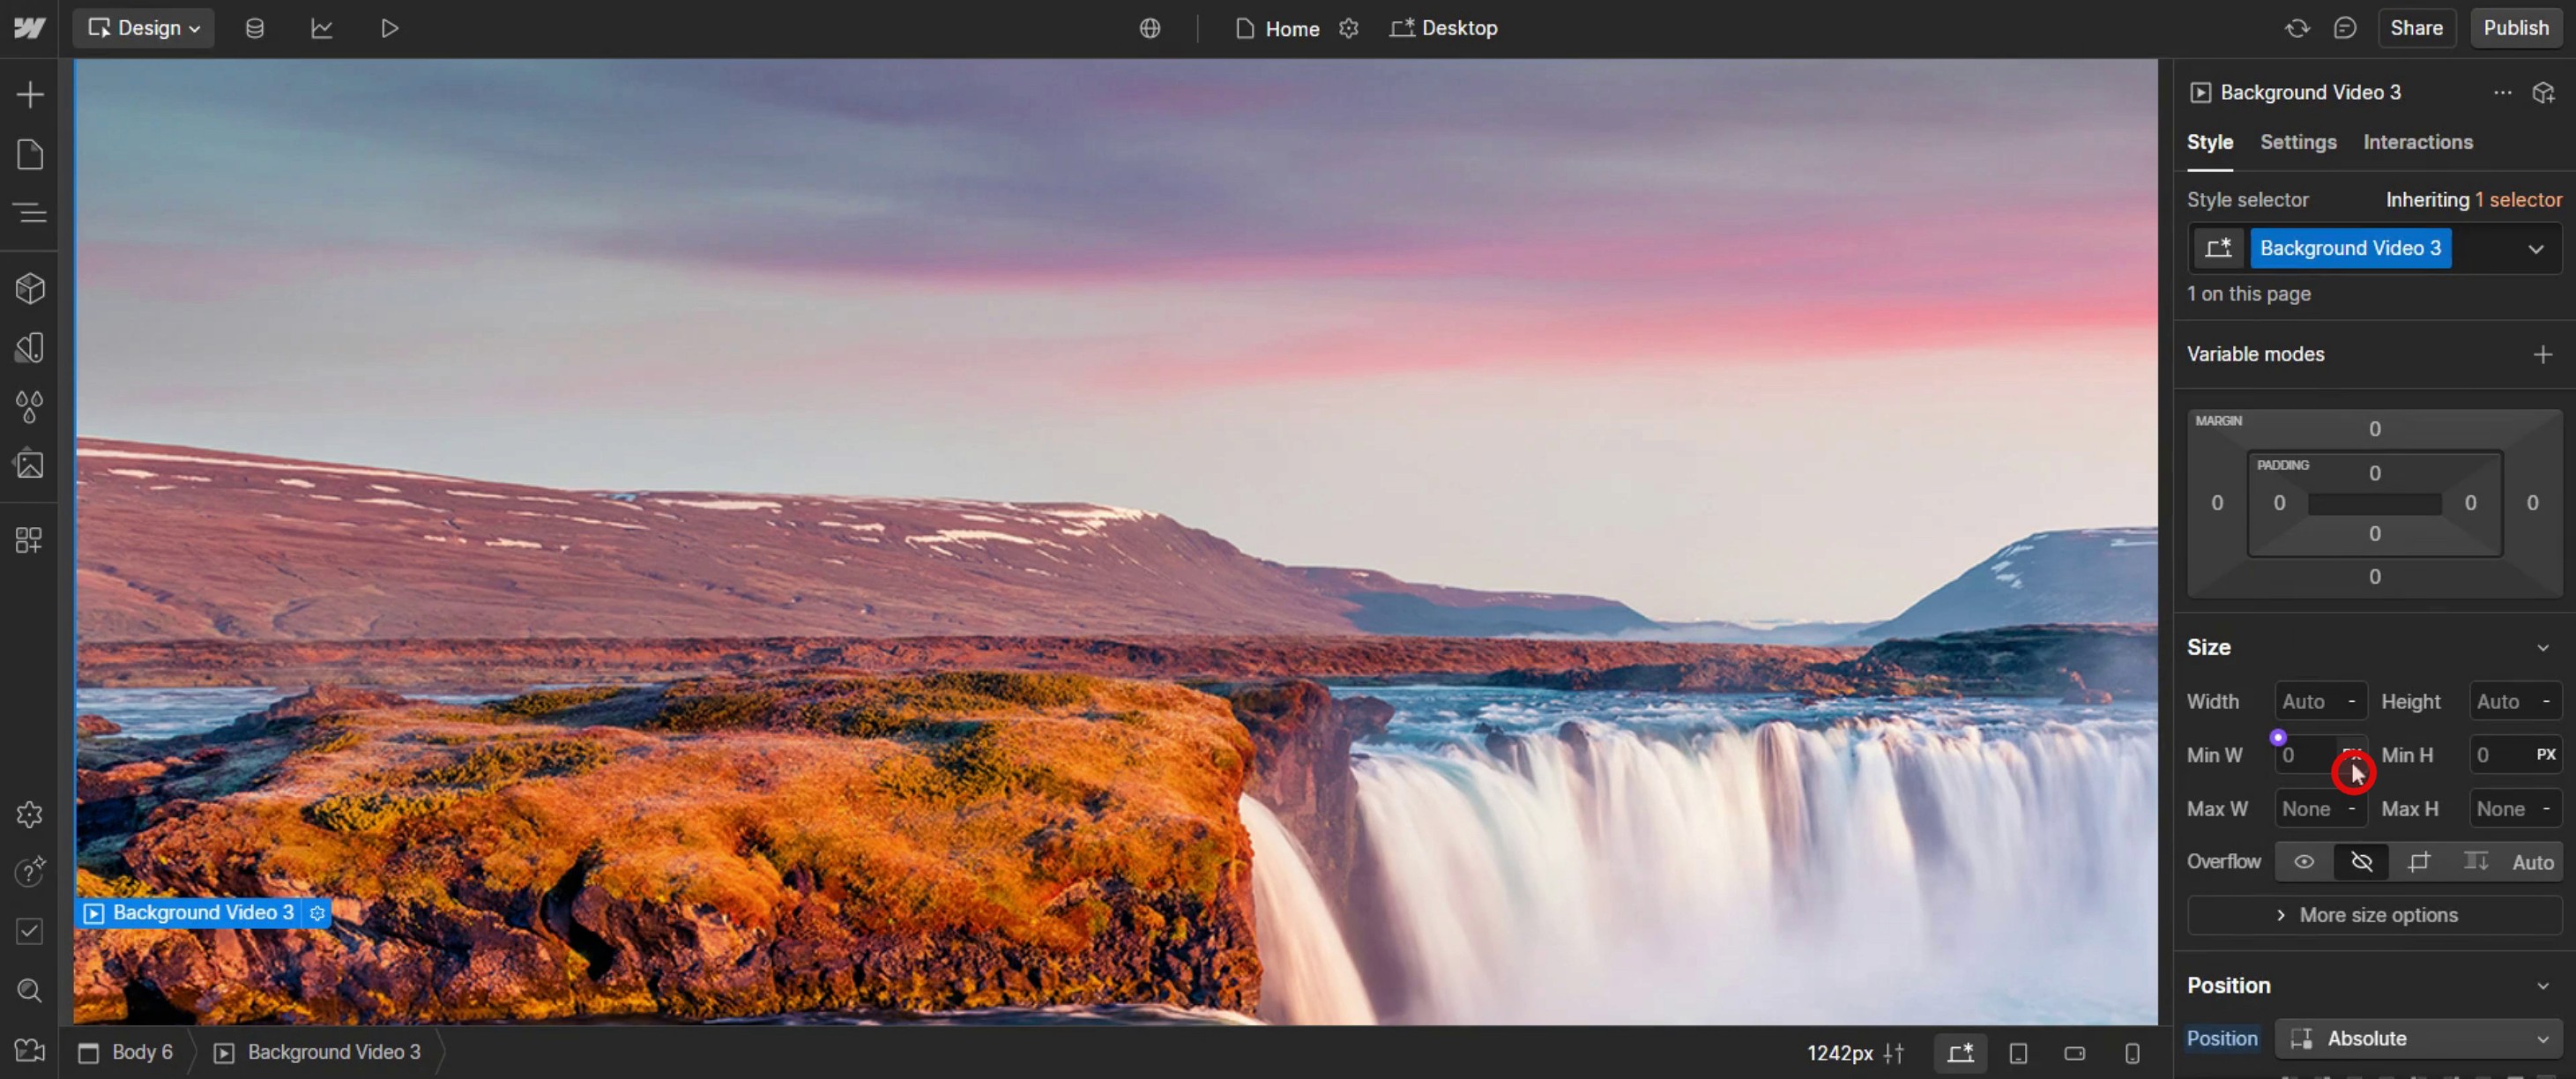
Step 7
Enter a width that suits your design requirements.
Step 8
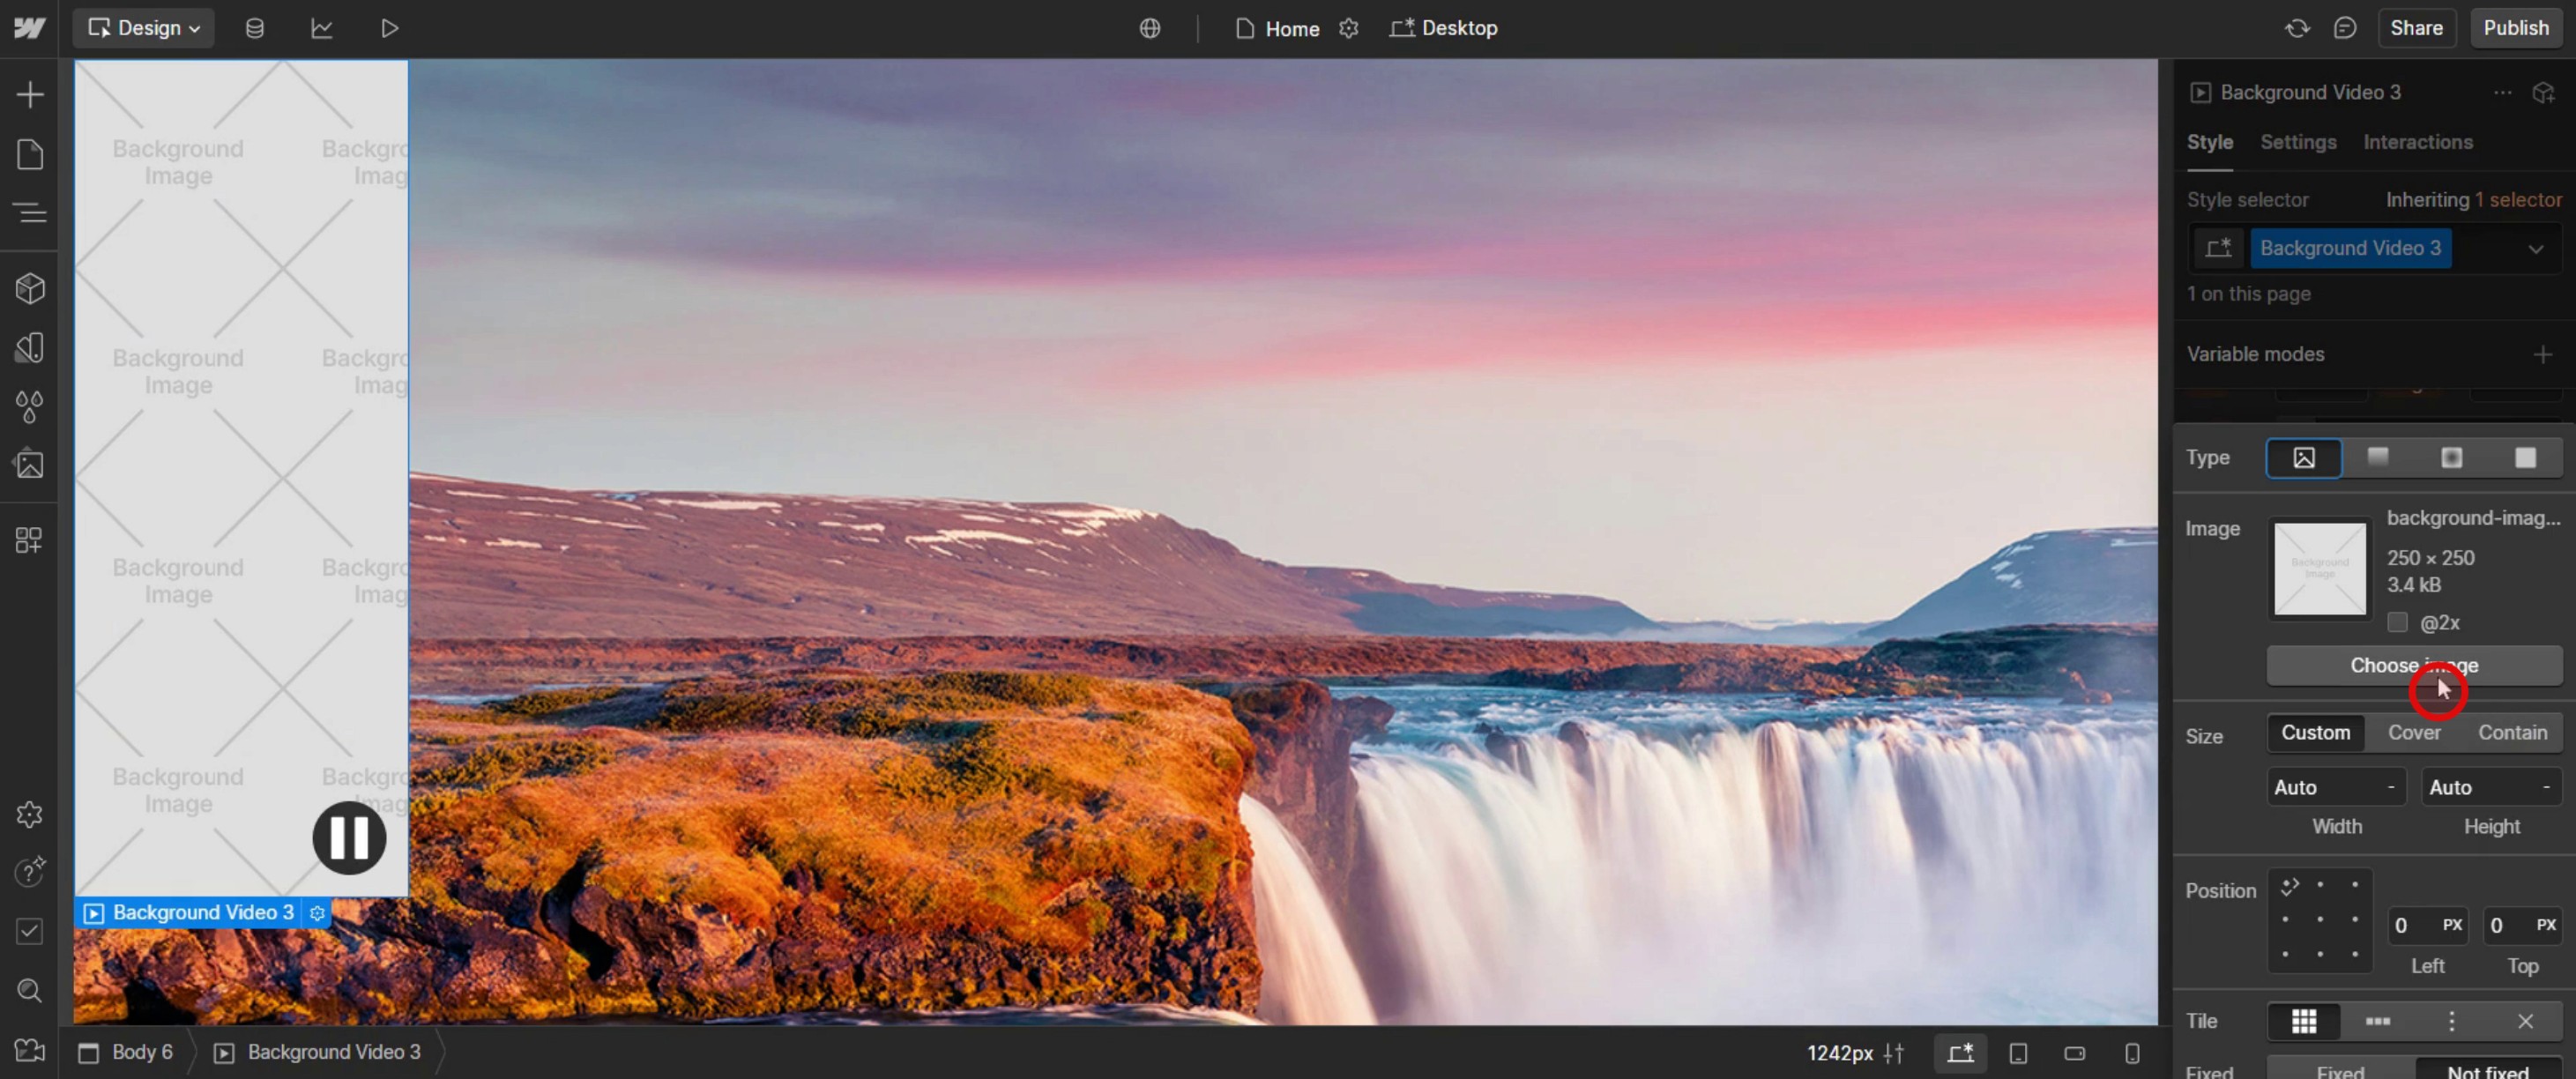
Select a background image.
This is the step-by-step process to add a background video in Web flow. Let’s explore some tips for it.
Pro-tips for adding background video in Web flow
Use Web flow Background Video Element – Web flow provides a built-in Background Video element that allows you to easily add and customize looping videos for your site.
Optimize Video File Size – Large video files can slow down page load speed. Use compressed MP4 files and keep them under 5MB for better performance.
Choose the Right Loop Settings – Web flow automatically loops background videos, but you can adjust playback speed or mute audio for a seamless experience.
Common pitfalls & how to avoid them
Using Unsupported File Formats – Web flow only supports MP4 video files for background videos. Ensure your video is in the correct format before uploading.
Slow Page Loading Due to Large Videos – Uploading high-resolution videos can affect site speed. Use video compression tools to reduce file size without losing quality.
Video Not Playing on Mobile – Some mobile browsers disable autopay for background videos. Always add a fallback image to ensure a smooth user experience.
Common FAQs for adding background video in Web flow
Why is my background video not playing on mobile?
Some browsers disable autopay to save data. Web flow provides an option to add a fallback image for mobile users.What is the maximum file size for background videos in Web flow?
Web flow allows background videos up to 30MB, but for better performance, keep them under 5MB using video compression.Can i add multiple background videos on one page?
Yes, but adding too many large video files may slow down page loading. Optimize videos and use them strategically.How to screen record on mac?
To screen record on a Mac, you can use Trupeer AI. It allows you to capture the entire screen and provides AI capabilities such as adding AI avatars, add voiceover, add zoom in and out in the video. With trupeer’s AI video translation feature, you can translate the video into 30+ languages.How to add an AI avatar to screen recording?
To add an AI avatar to a screen recording, you'll need to use an AI screen recording tool. Trupeer AI is an AI screen recording tool, which helps you create videos with multiple avatars, also helps you in creating your own avatar for the video.How to screen record on windows?
To screen record on Windows, you can use the built-in Game Bar (Windows + G) or advanced AI tool like Trupeer AI for more advanced features such as AI avatars, voiceover, translation etc.How to add voiceover to video?
To add voiceover to videos, download trupeer ai chrome extension. Once signed up, upload your video with voice, choose the desired voiceover from trupeer and export your edited video.How do I Zoom in on a screen recording?
To zoom in during a screen recording, use the zoom effects in Trupeer AI which allows you to zoom in and out at specific moments, enhancing the visual impact of your video content.
Related Tutorials

