Как защитить Google Doc паролем — советы по конфиденциальности и совместному доступу
Google Docs не предлагает прямую защиту паролем, но вы всё равно можете обезопасить свои файлы. Узнайте эффективные способы защитить ваш Google Doc с помощью настроек общего доступа, разрешений Google Drive и вариантов от сторонних сервисов.
This guide provides a detailed walkthrough of password protecting a google doc.
Google Docs doesn’t offer a built-in option to password-protect documents, but there are still a few effective ways to keep your files secure:
1. Add a Password Before Uploading (Recommended)
Using Microsoft Word:
You can download your Google Doc as a Word file. Once downloaded, open it in Microsoft Word, go to the File menu, click Info, then choose Protect Document > Encrypt with Password. Set a strong password, save the file, and then upload the protected Word document back to Google Drive.
Using Acrobat Pro:
If you prefer using a PDF, download your Google Doc as a PDF file. Open it in Adobe Acrobat Pro, go to the File menu, select Password Protect, and set a password. After saving it, upload the protected PDF to Google Drive or share it securely.
2. Use Google Workspace Add-ons
There are several add-ons available, like “Password Protect for Google Documents,” that can help you secure your files. These tools usually let you encrypt the document and save it as a password-protected PDF, which you can then share safely.
3. Restrict Sharing Access (Basic Security)
For a simple level of protection, you can control who has access. Click the Share button in your document and set the general access to “Restricted.” This way, only people you’ve specifically added can view or edit the document.
Step-By-Step Guide : How to Password Protect a Google Doc
Step 1
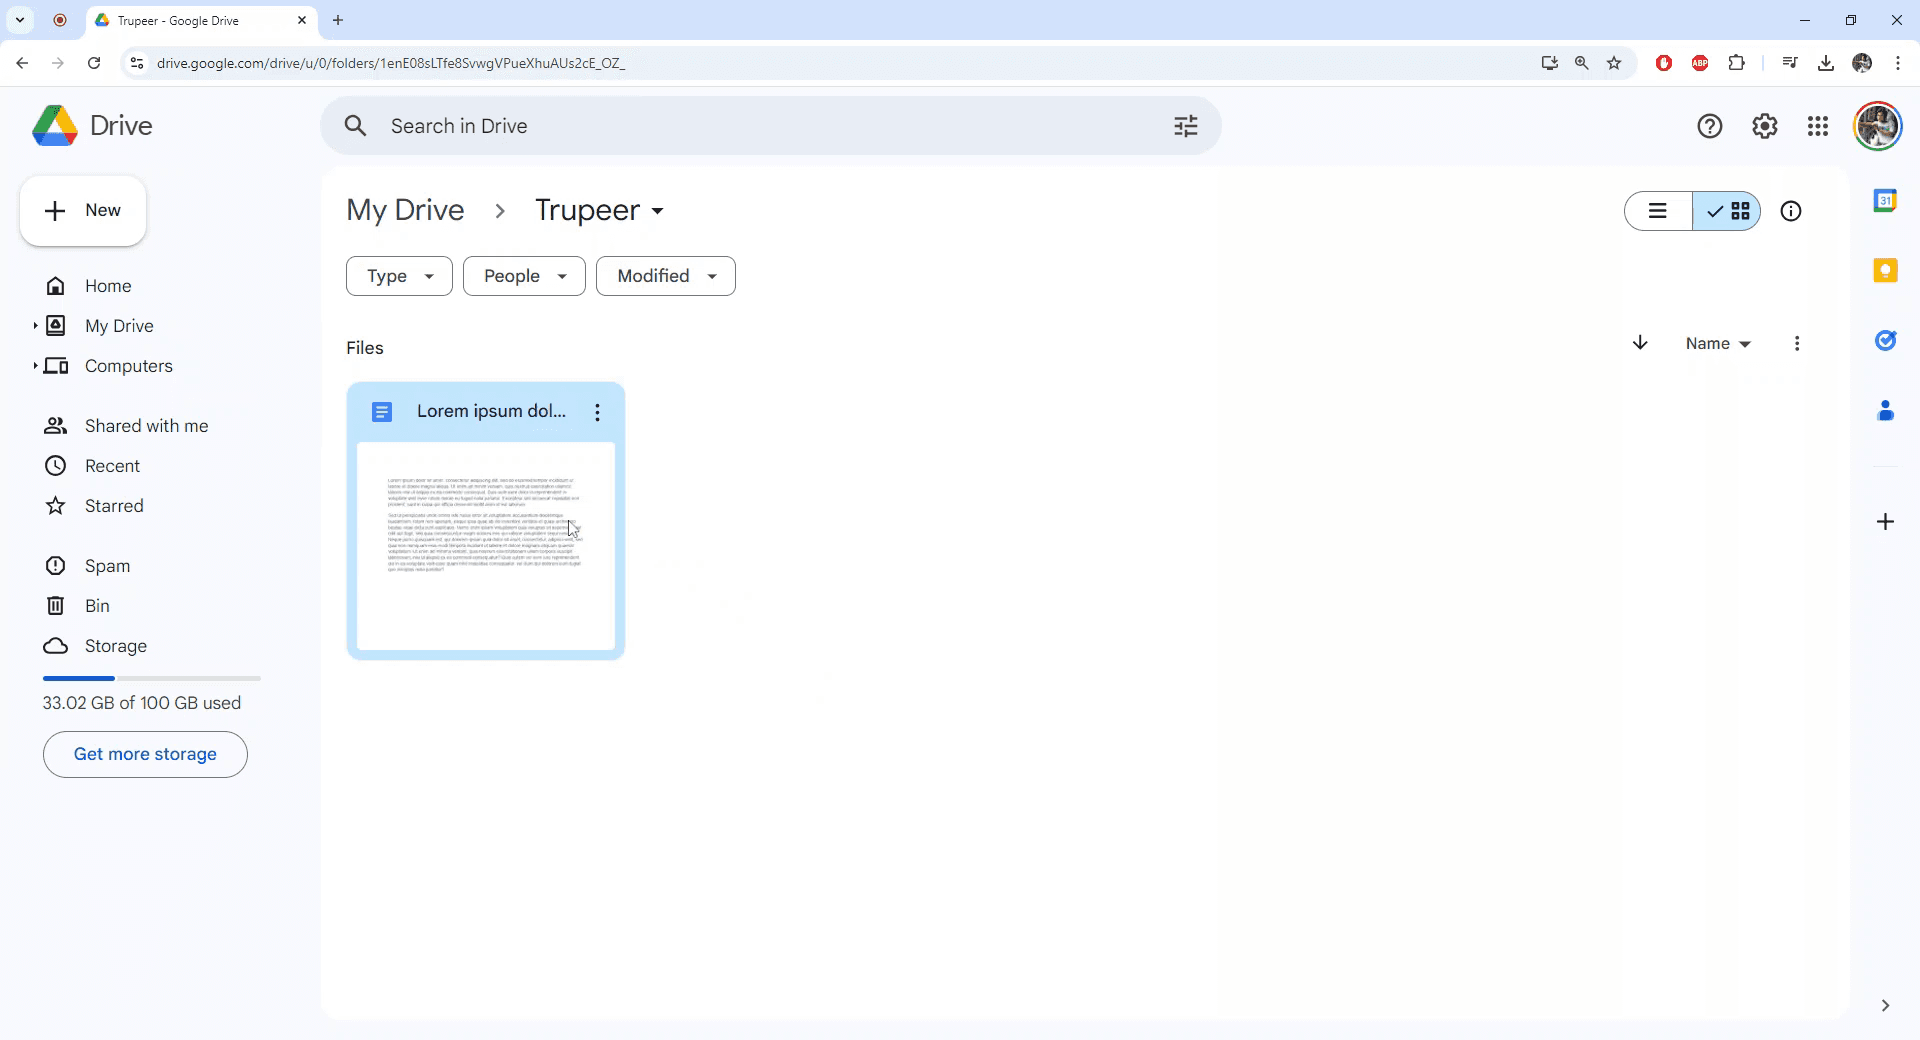
To begin locking a Google Docs file, first navigate to the file within your Google Drive that you wish to lock.
Step 2
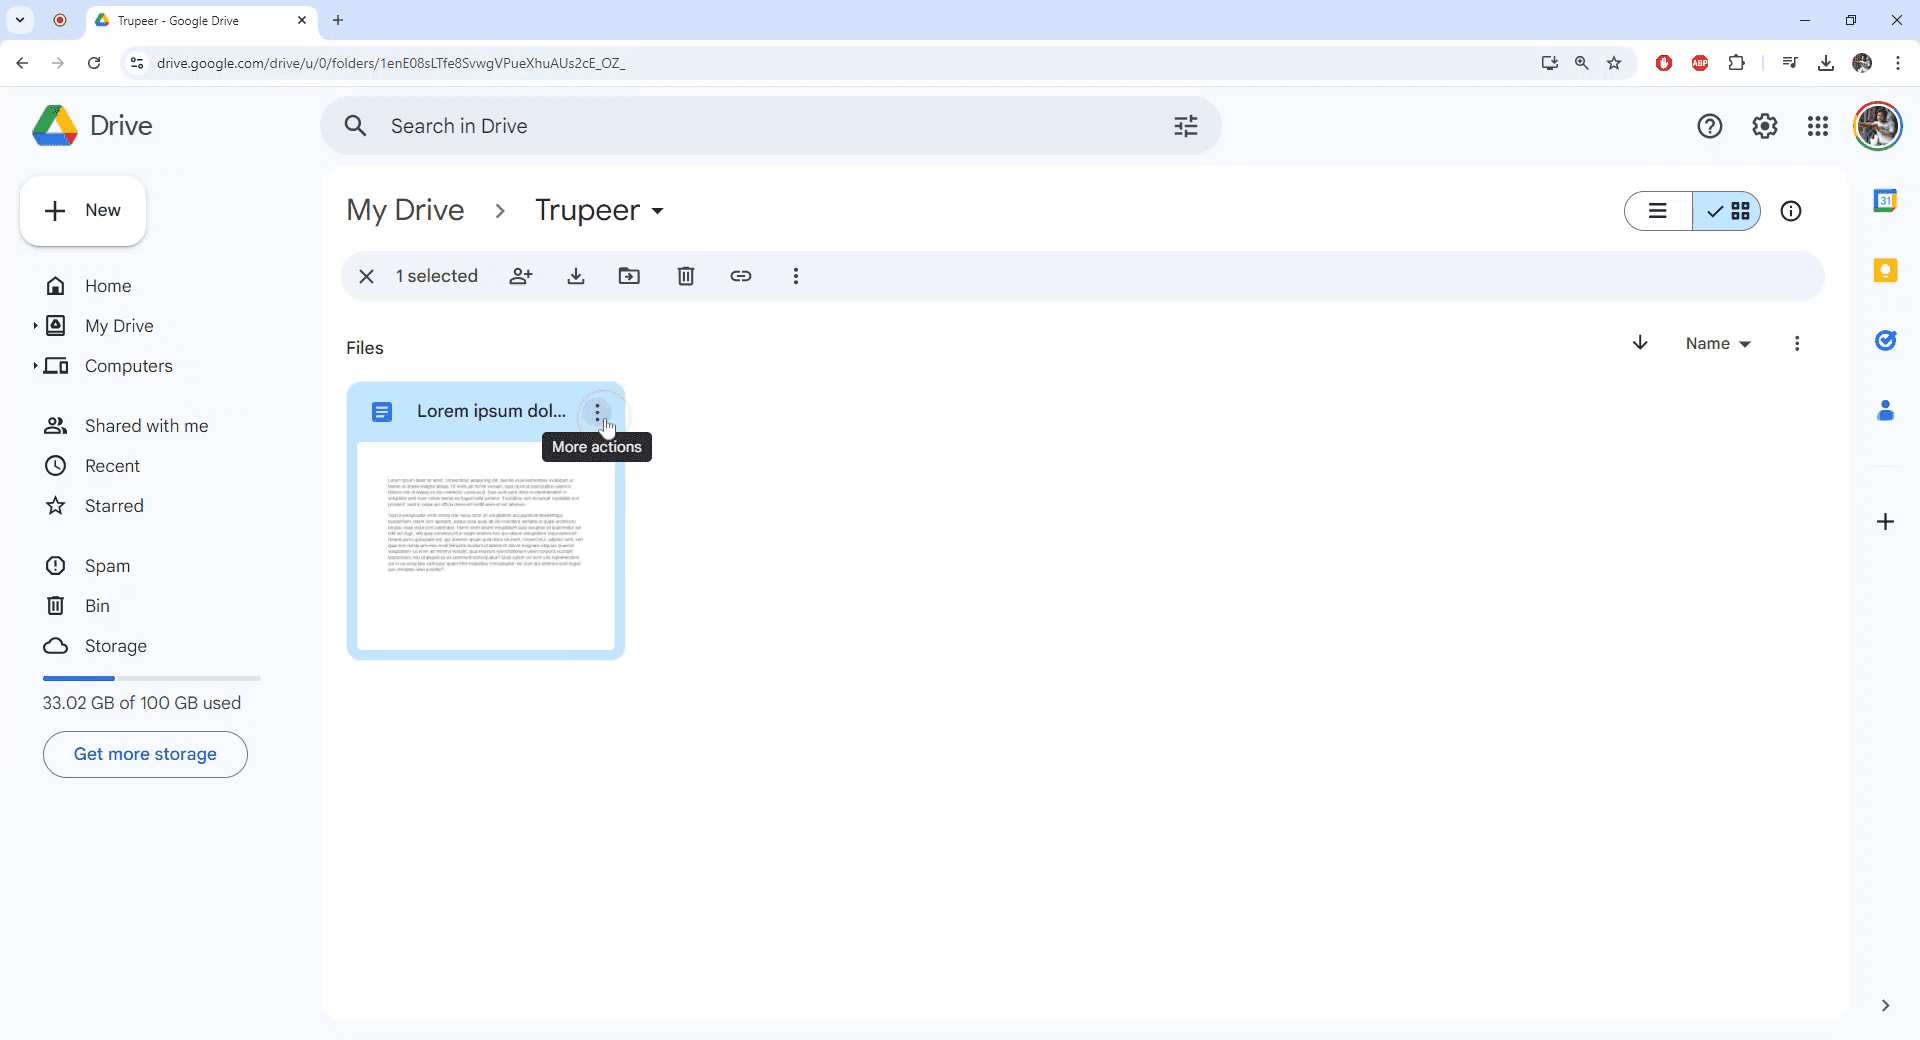
Click on the three vertical dots to access more actions for the selected file.
Step 3
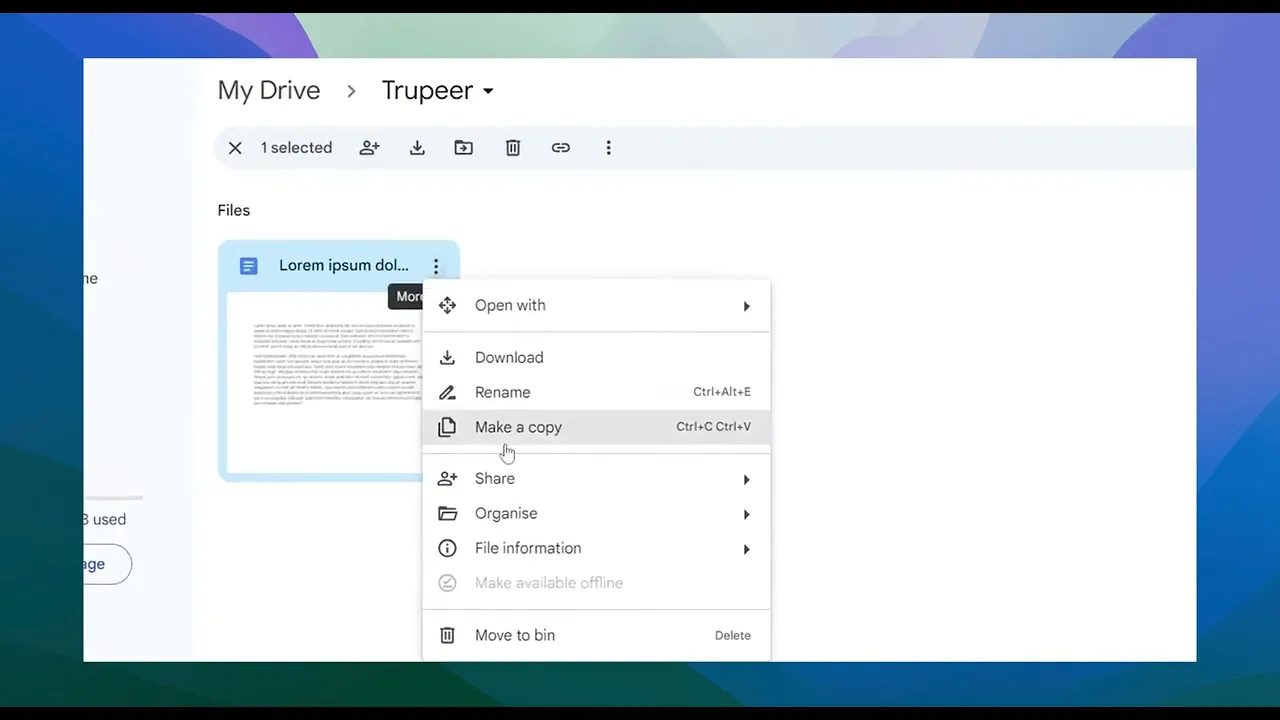
Select "File Information" from the dropdown menu that appears.
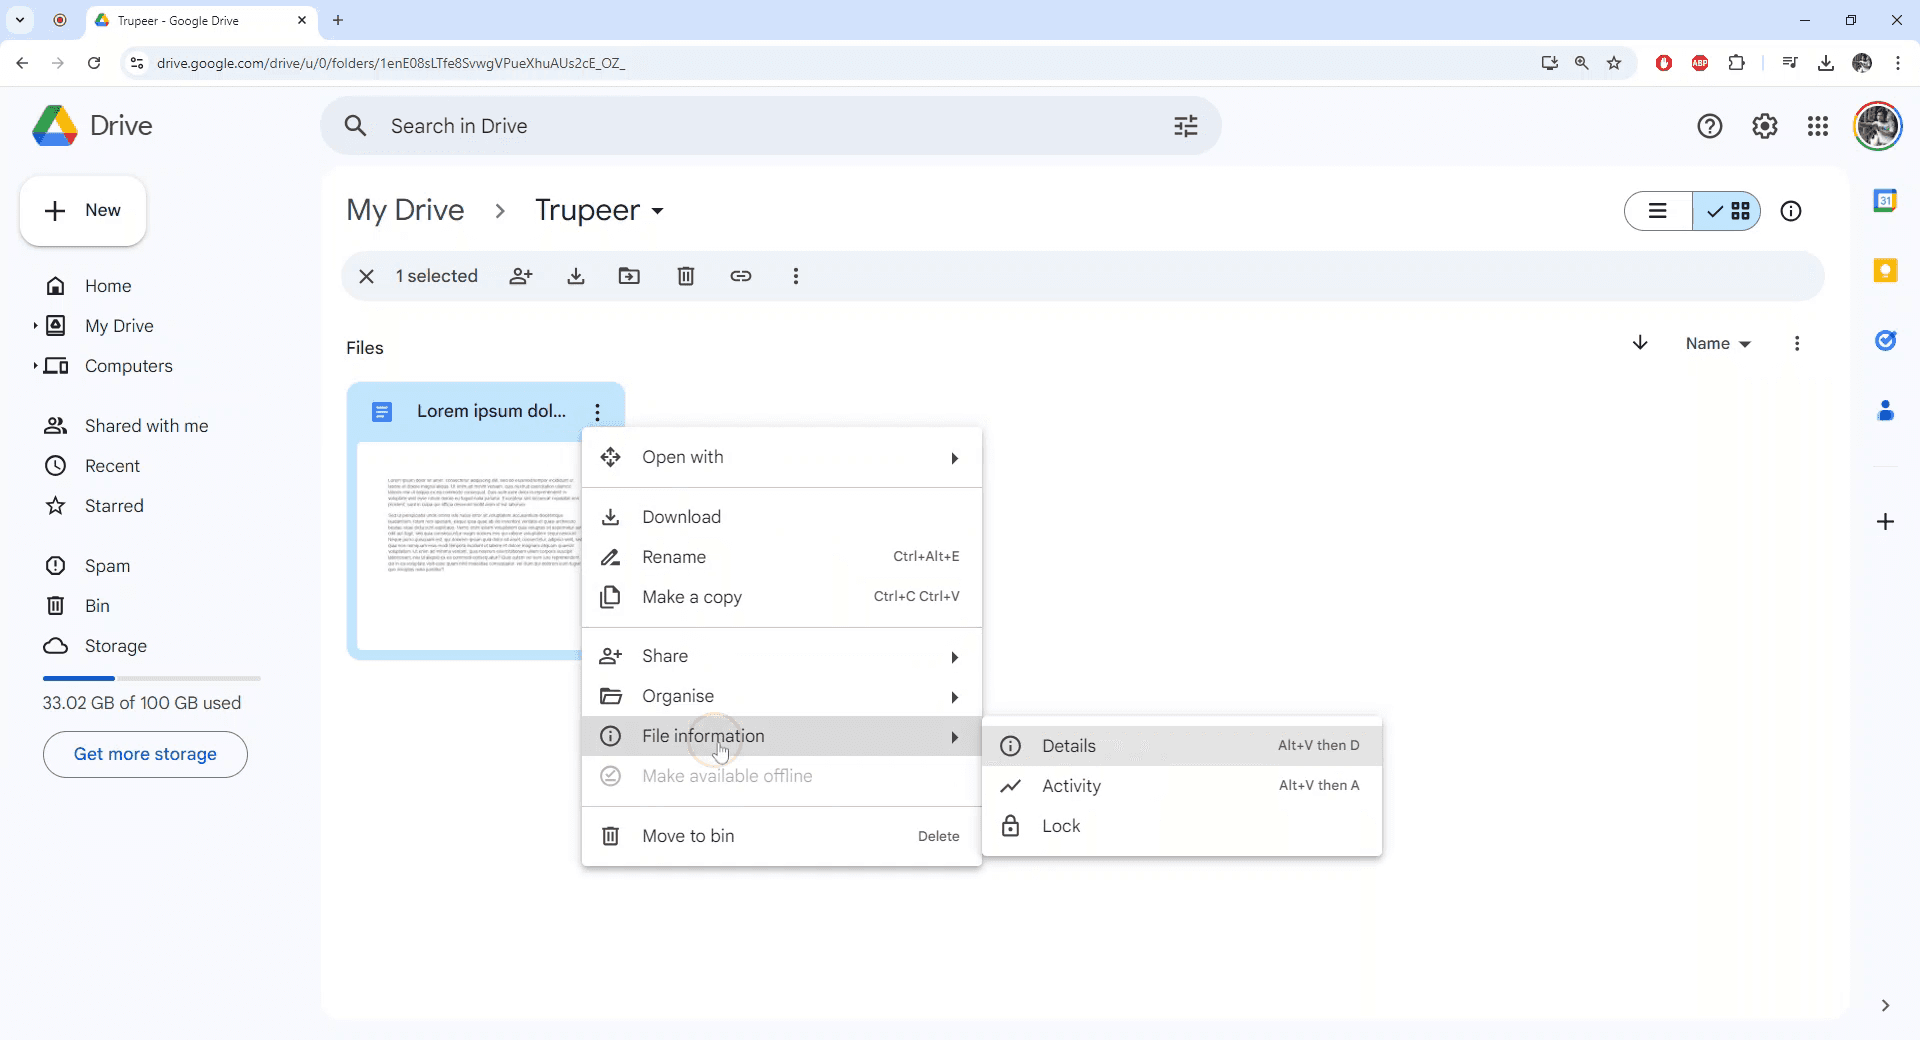
Step 4
Choose the "Lock" option. A confirmation dialog will prompt you to proceed with locking the file. Confirm by clicking "Lock."
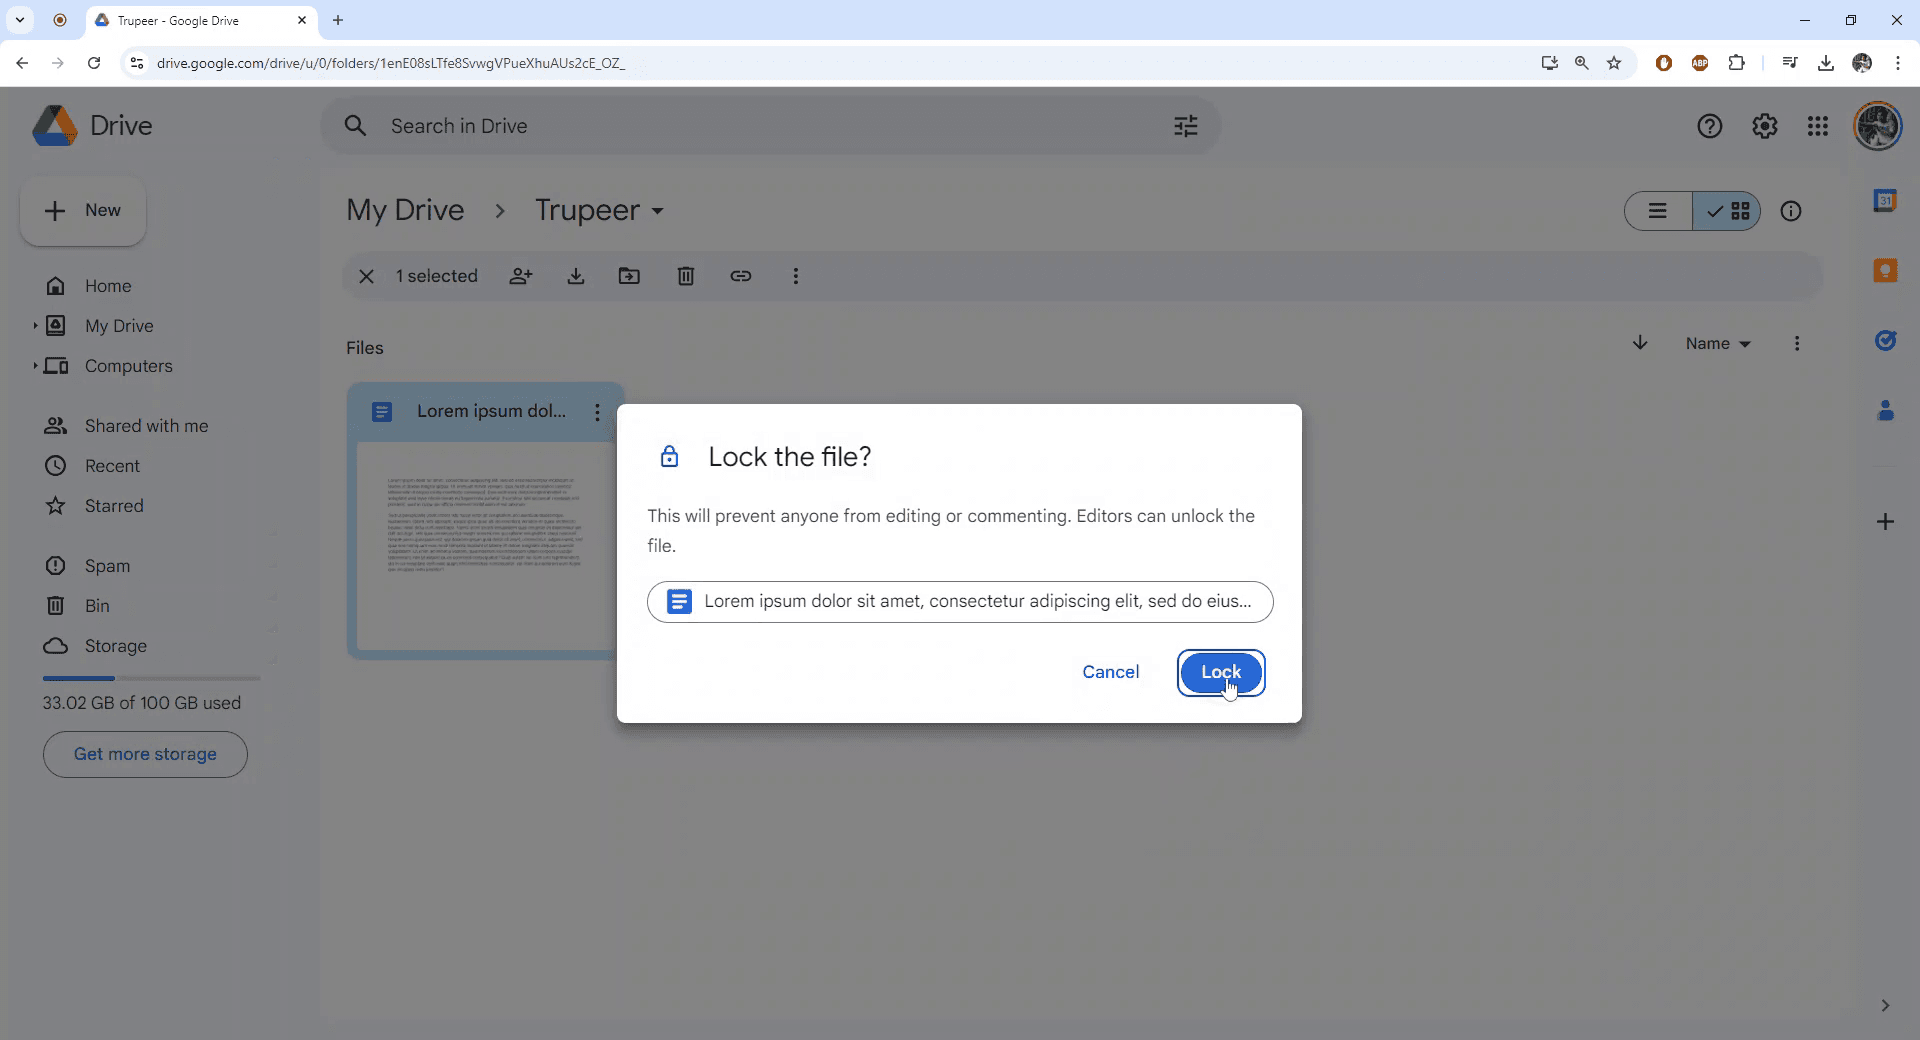
Step 5
The file is now successfully locked. Proceed to open the file to verify the status.
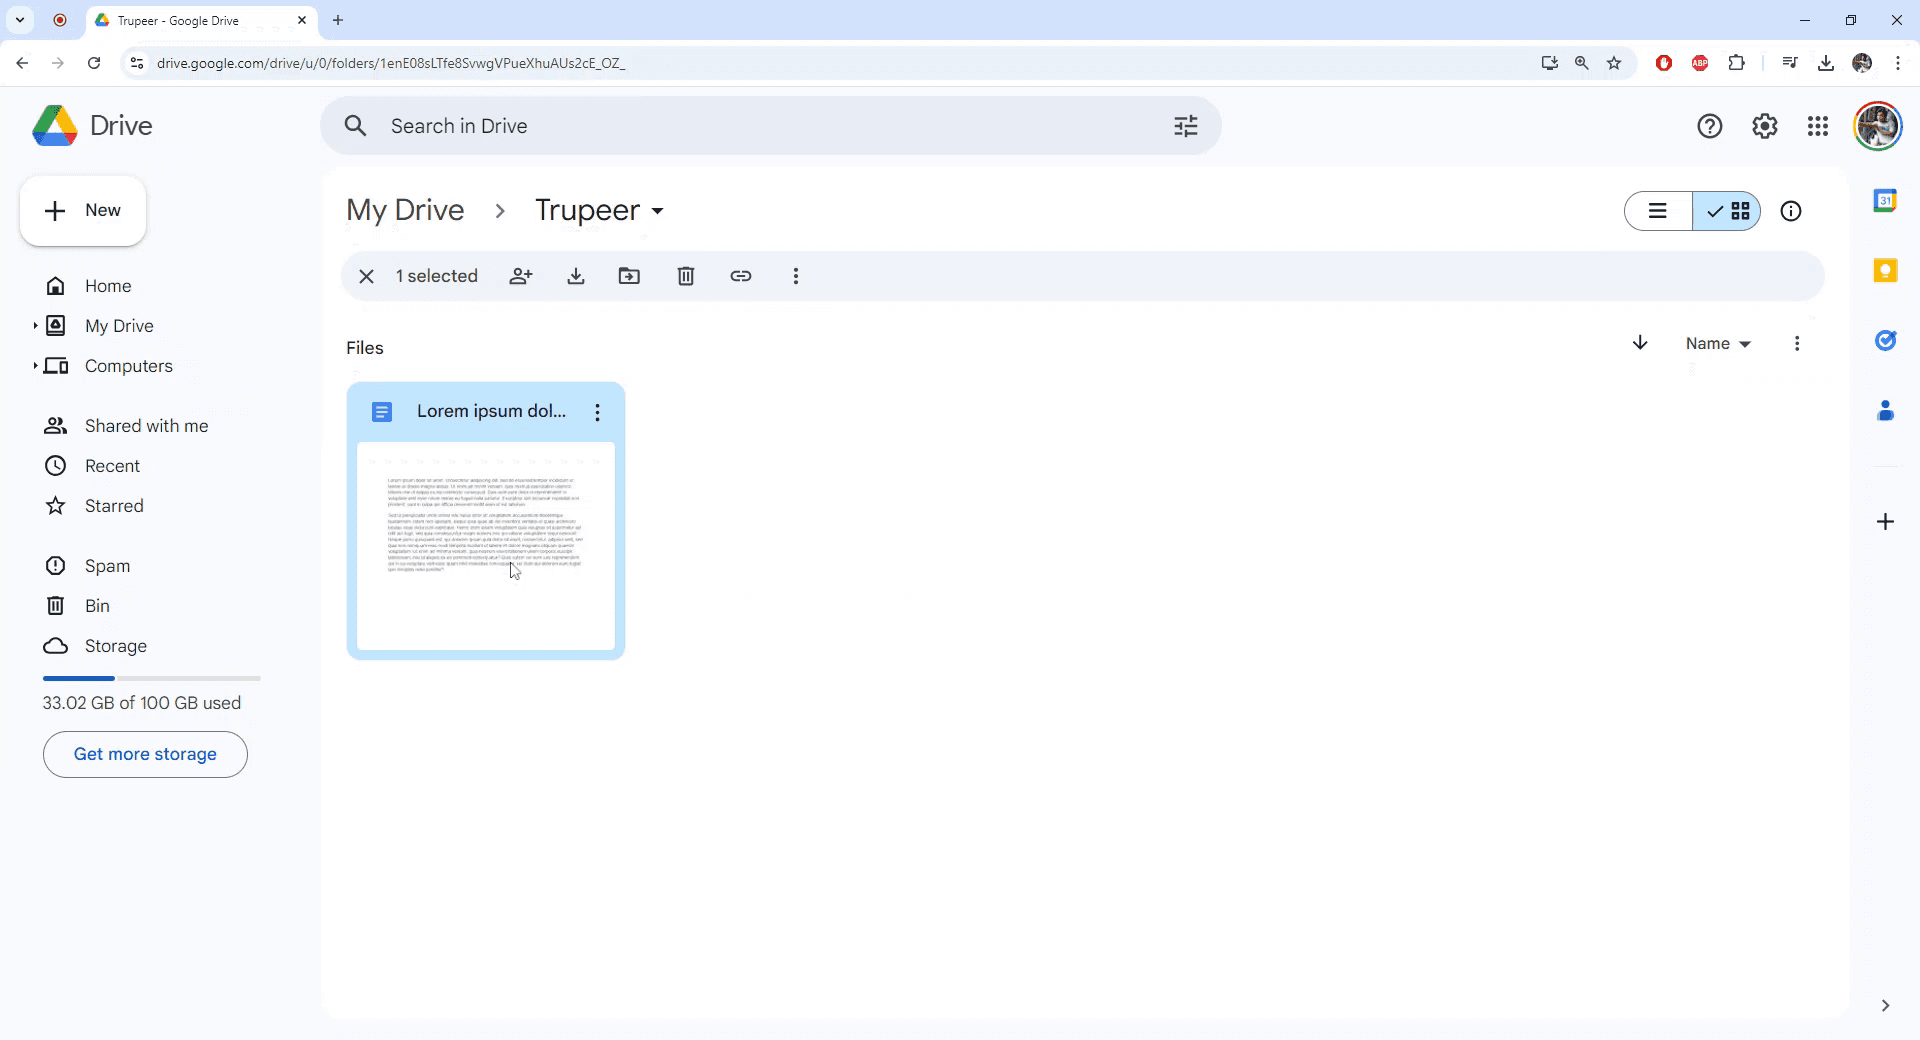
Step 6
Upon opening, you will notice that the file is locked and editing capabilities have been disabled.
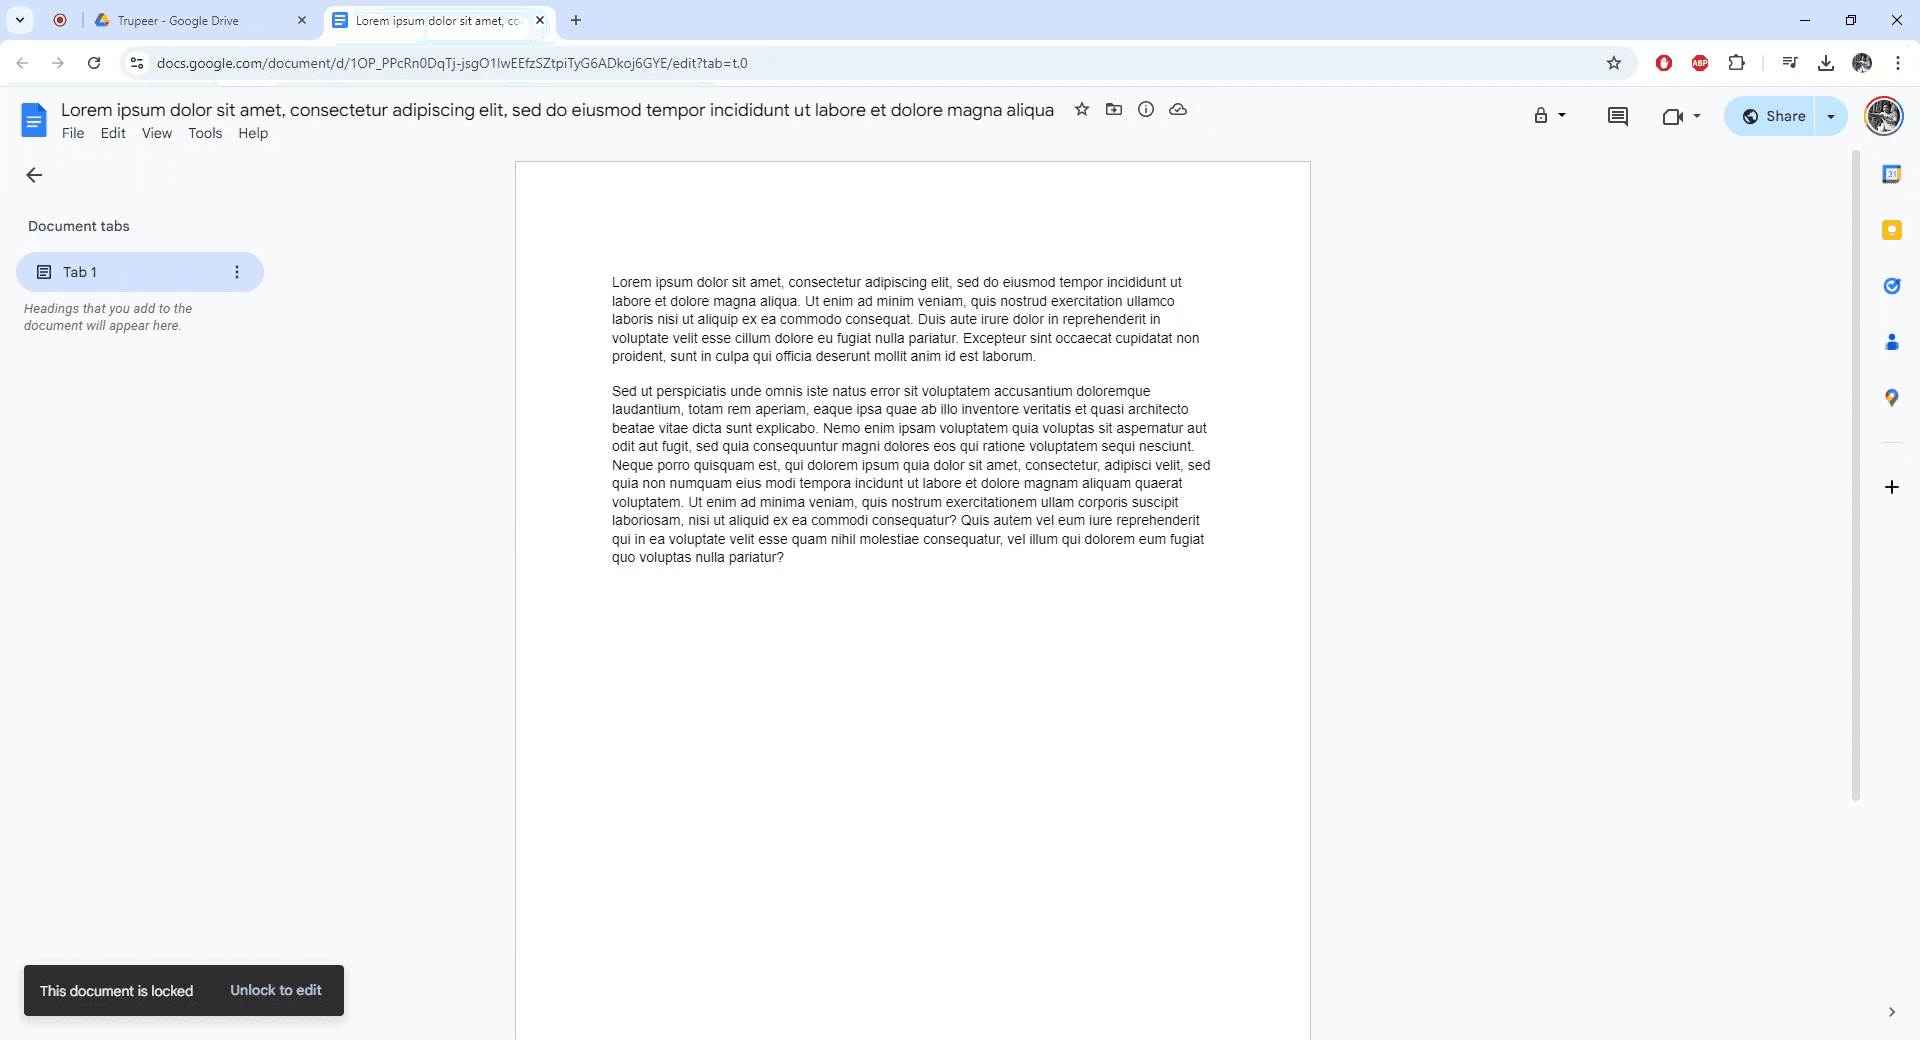
Pro tips on how to password protect a google doc
Set File Permissions: Go to File > Share and adjust the permissions to Viewer or Commenter for those you want to limit access to.
Use "View Only" Mode: Set the document to View Only to prevent editing, ensuring no unauthorized changes are made.
Disable Download, Print, and Copy: In the Share settings, click on Advanced, then check Disable options to download, print, and copy for extra security.
Use Google Workspace Admin Settings: If you’re part of an organization, set up stricter file access controls via your Google Workspace Admin Console.
Share with Specific People: Limit access by sending the link only to specific people with View or Comment permissions.
Common pitfalls and how to avoid them on how to password protect a google doc
Setting Incorrect Permissions: Granting Edit permissions when you want the file locked can allow unwanted changes.
Fix: Always double-check that permissions are set to Viewer or Commenter before sharing.Forgetting to Disable Download/Print/Copy: Even if the document is locked for editing, users can still copy or print it.
Fix: Use the Advanced settings in Share to disable downloading, printing, and copying of the file.Accidentally Sharing the Link Publicly: Sharing a link with the wrong group can expose the file to unauthorized users.
Fix: Ensure that the link is shared only with the intended individuals and the permissions are set appropriately.Not Locking a Document Before Sharing: Sharing a document before locking it can lead to unauthorized access.
Fix: Always lock the document before sharing it to ensure no one can make changes or access sensitive content.Not Regularly Checking Permissions: Permissions may be changed inadvertently by collaborators.
Fix: Regularly review the sharing settings and access permissions to ensure they remain locked as intended.
Часто задаваемые вопросы о том, как защитить паролем Google Doc
Как запретить редактирование Google Doc?
Установите права «Просмотр» или «Комментирование» в настройках «Доступ», чтобы предотвратить редактирование.Можно ли запретить другим скачивать или печатать мой Google Doc?
Да: в разделе «Дополнительно» в настройках «Доступ» установите параметр «Отключить параметры для скачивания, печати и копирования».Как ограничить доступ к Google Doc, не делая его общедоступным?
Поделитесь ссылкой только с конкретными людьми и установите права «Просмотр» или «Комментирование».Можно ли заблокировать файл Google Doc, если он уже опубликован?
Да, вы можете в любое время обновить права доступа через настройки «Доступ».Как заблокировать файл Google Doc с датой окончания доступа?
Если у вас Google Workspace, вы можете задать дату окончания доступа для определенных пользователей к документу в настройках «Доступ».Как сделать запись экрана на Mac?
Чтобы сделать запись экрана на Mac, вы можете использовать Trupeer AI. Он позволяет записывать весь экран и предоставляет возможности ИИ, такие как добавление AI-аватаров, добавление голосового сопровождения, добавление зума (приближение и отдаление) в видео. С функцией перевода видео с помощью ИИ от trupeer вы можете перевести видео на 30+ языков.Как добавить AI-аватар в запись экрана?
Чтобы добавить AI-аватар в запись экрана, вам нужно использовать инструмент для записи экрана с ИИ. Trupeer AI — это инструмент для записи экрана с ИИ, который помогает создавать видео с несколькими аватарами, а также позволяет создать собственный аватар для видео.Как сделать запись экрана на Windows?
Чтобы сделать запись экрана на Windows, вы можете использовать встроенную панель Game Bar (Windows + G) или расширенный инструмент ИИ, например Trupeer AI, для более продвинутых функций: AI-аватары, голосовое сопровождение, перевод и т. д.Как добавить голосовое сопровождение в видео?
Чтобы добавить голосовое сопровождение в видео, скачайте chrome-расширение trupeer ai. После регистрации загрузите видео с голосом, выберите нужный вариант голосового сопровождения в trupeer и экспортируйте отредактированное видео.Как увеличить масштаб при записи экрана?
Чтобы увеличить масштаб во время записи экрана, используйте эффекты зума в Trupeer AI — они позволяют приближать и отдалять в определенные моменты, усиливая визуальное воздействие вашего видеоконтента
Рекомендуем к прочтению
Technical Documentation Generator
Как использовать преобразование текста в речь в Google Docs
Как добавить подзаголовок в Google Docs
Как использовать «Найти и заменить» в Google Docs
Похожие руководства