
Hoe u de wachtruimte in Zoom uitschakelt
Wil je deelnemers direct laten deelnemen aan je Zoom-vergadering? Leer hoe je de Wachtruimte-functie in Zoom uitschakelt met eenvoudige stappen op desktop of mobiel
Hier is een stapsgewijze handleiding:
Meld u aan bij het Zoom-webportaal: ga naar de Zoom-website en meld u aan met uw accountgegevens.
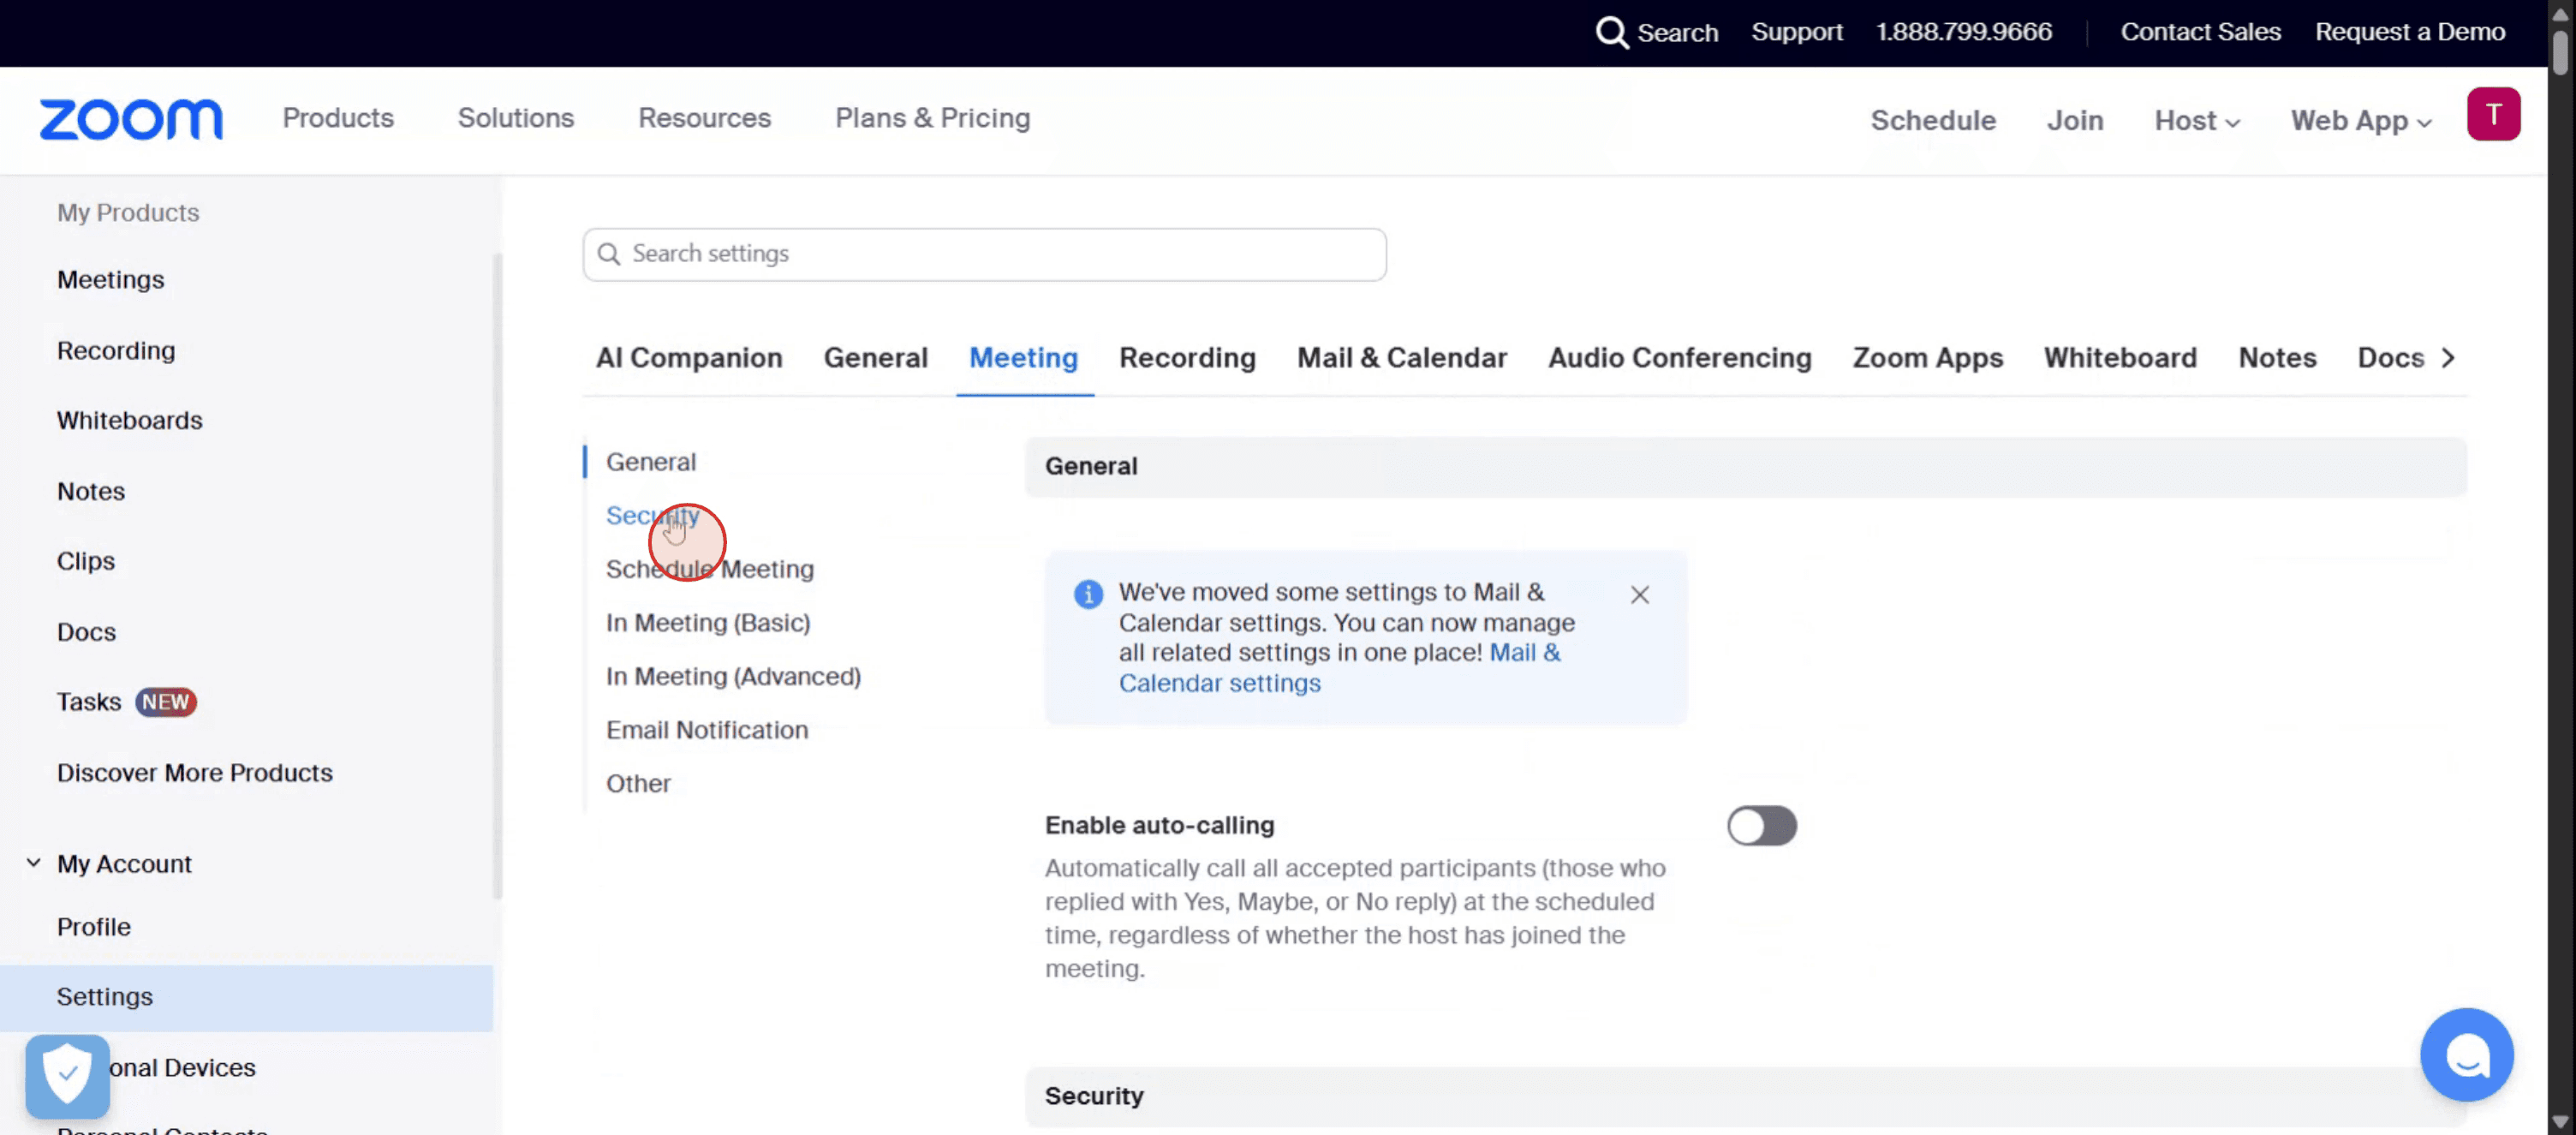
Ga naar Instellingen: klik in het navigatiemenu op "Instellingen".
Zoek de Wachtruimte: vind onder het tabblad "Vergadering" de sectie "Beveiliging".
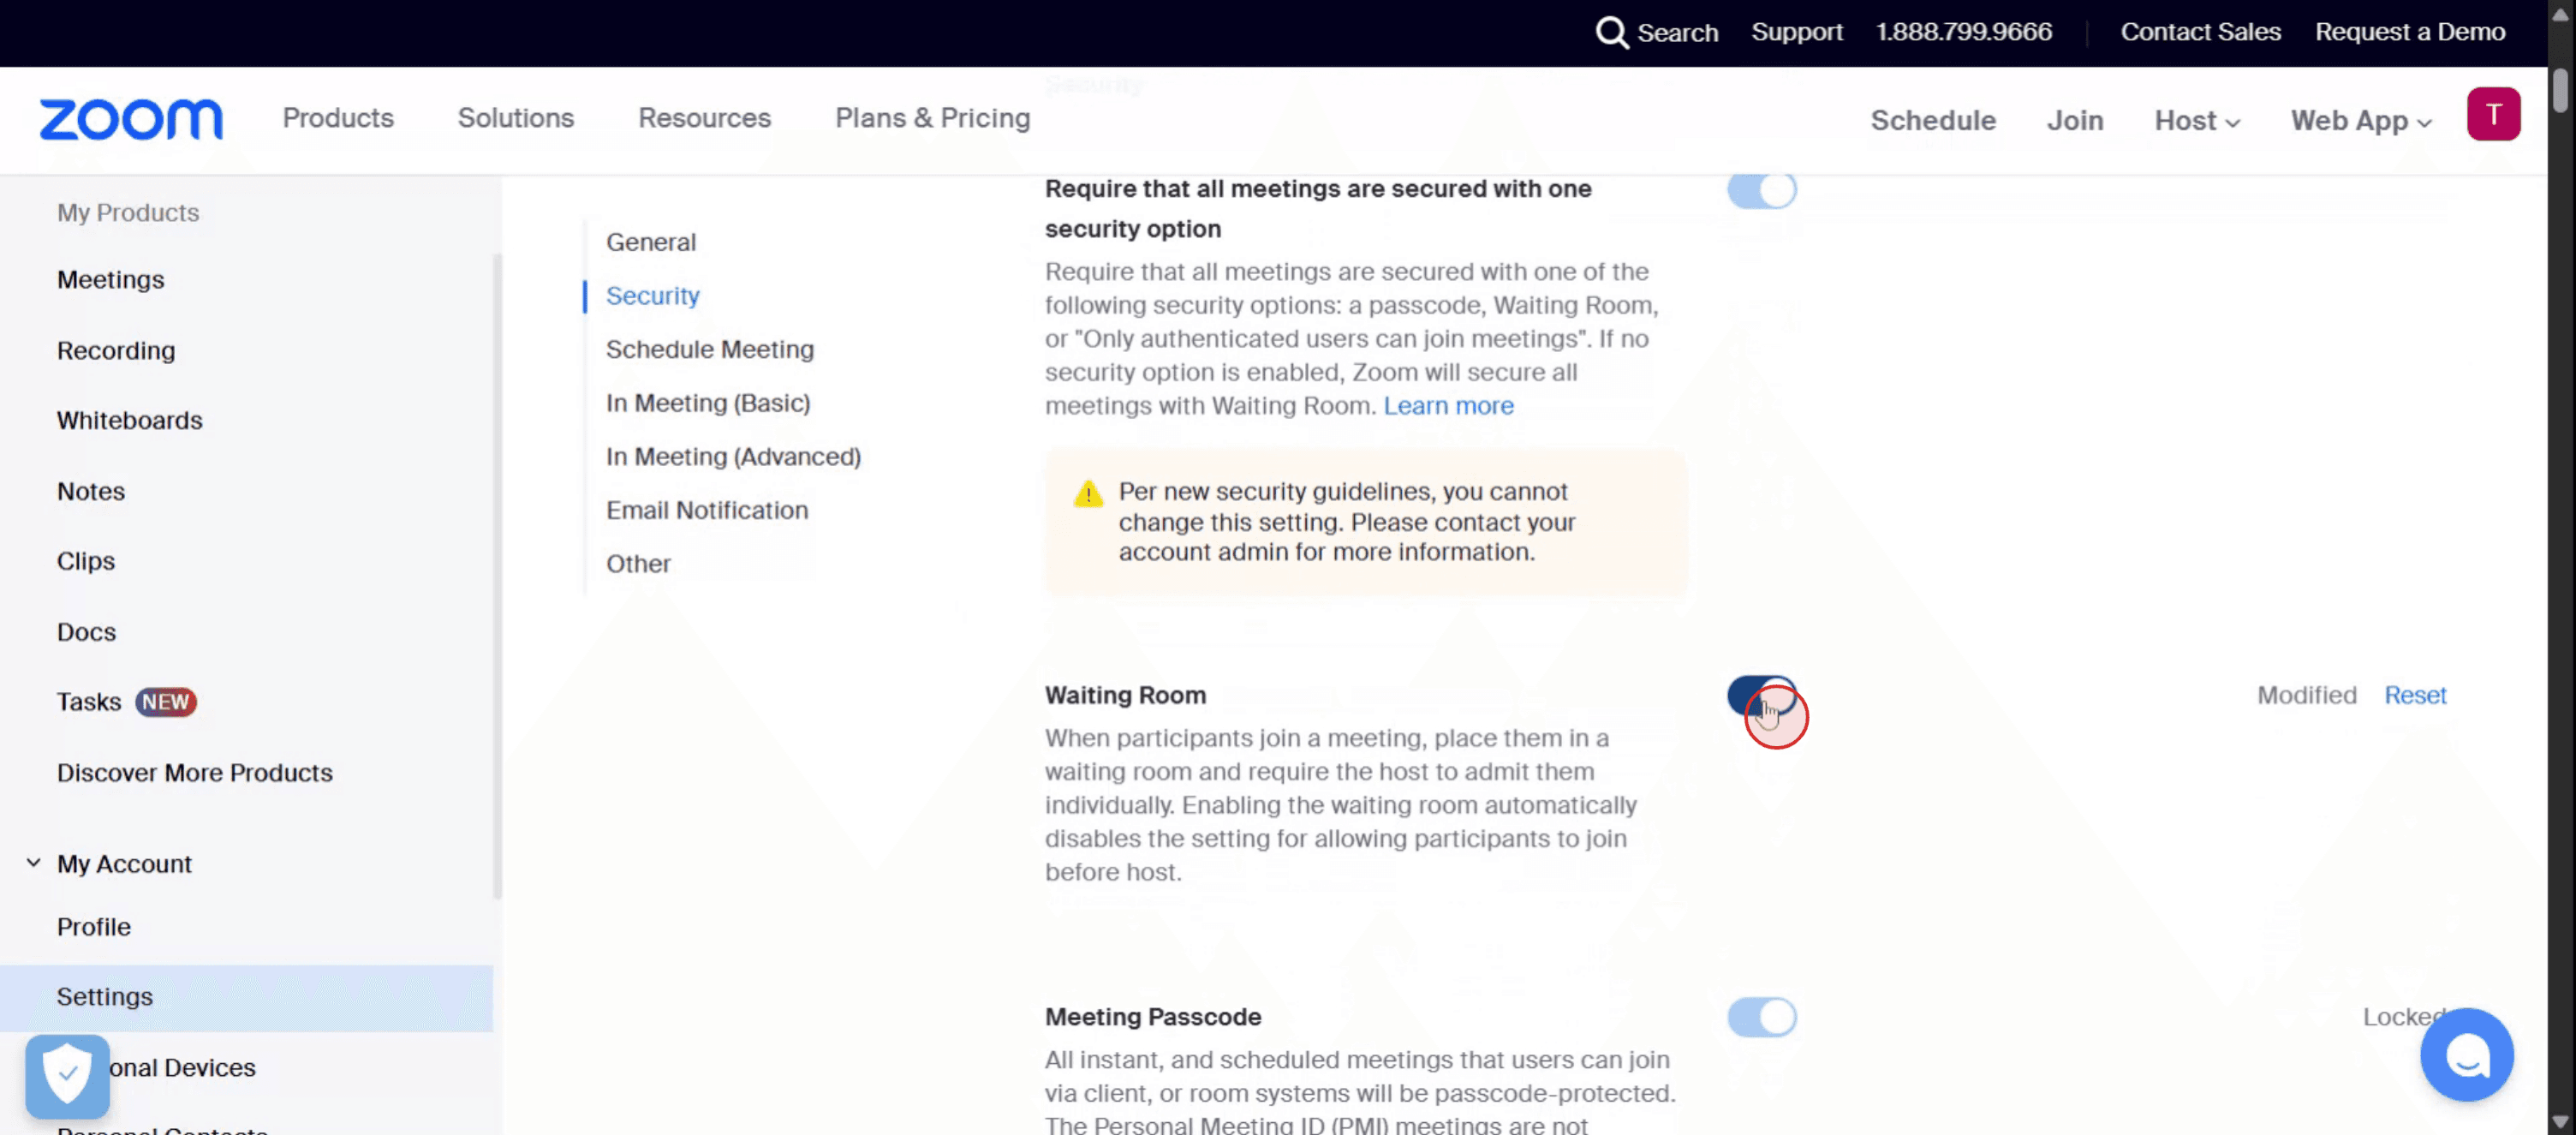
Schakel de Wachtruimte uit: zet de optie "Wachtruimte" uit.
Controleer de wijziging: als er een verificatiedialoogvenster verschijnt, klik dan op "Uitschakelen" om te bevestigen.
Controleer op beheerdersvergrendeling: als de schakelaar grijs is, is deze vergrendeld door uw beheerder.
U moet contact met hen opnemen om wijzigingen aan te brengen.
Stapsgewijze handleiding: hoe u de Wachtruimte in Zoom uitschakelt
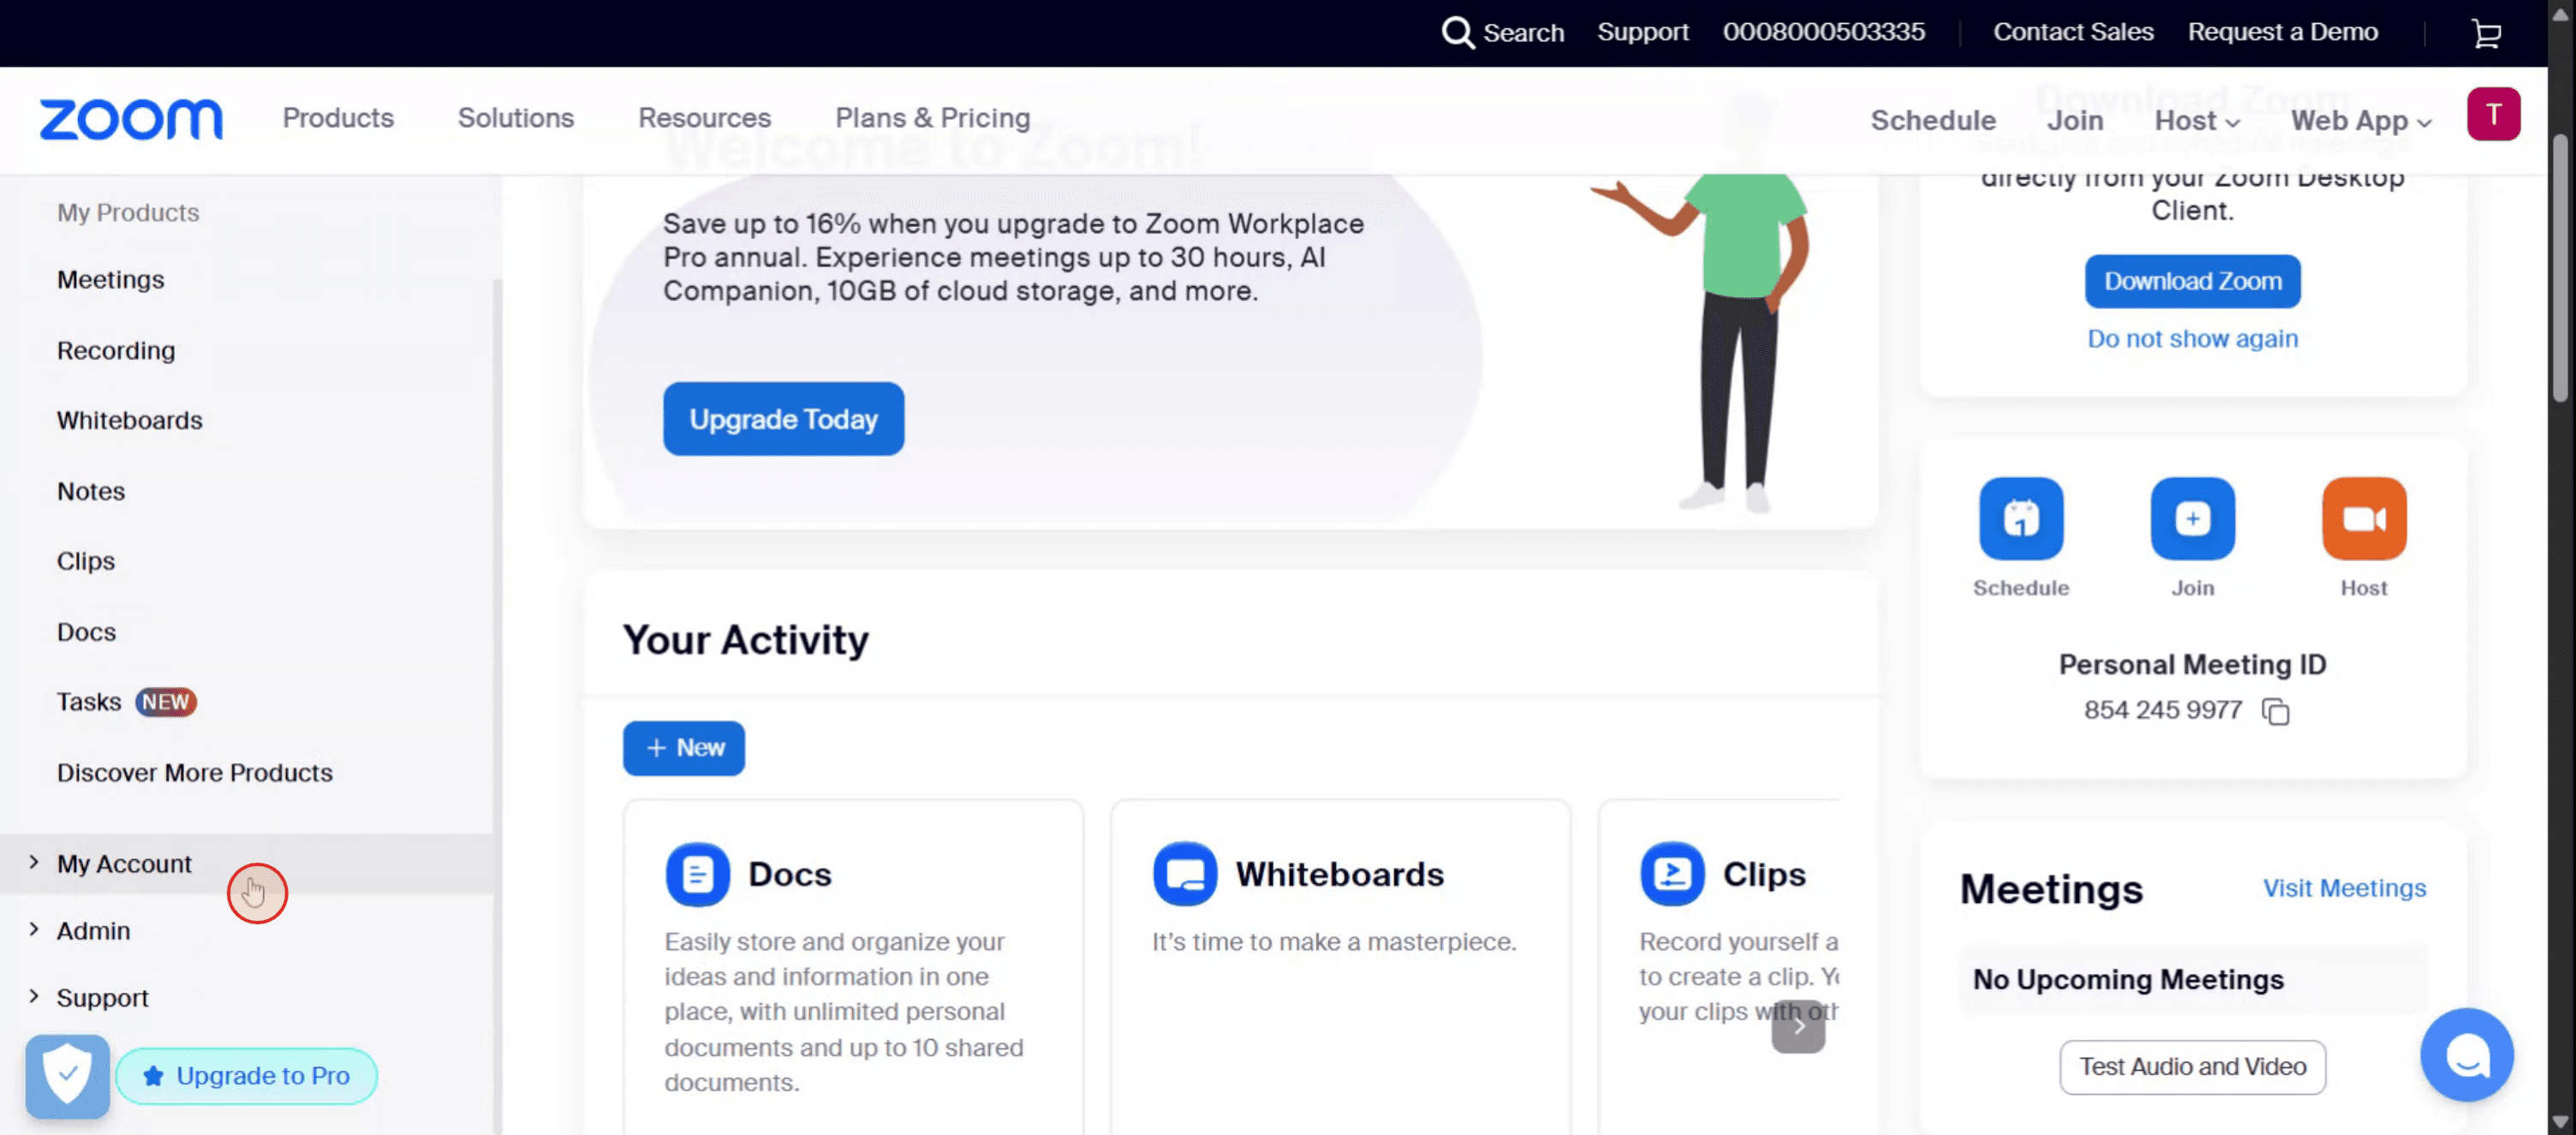
Stap 1
Ga om te beginnen naar de optie Mijn account in het linkermenu van Zoom en selecteer deze.
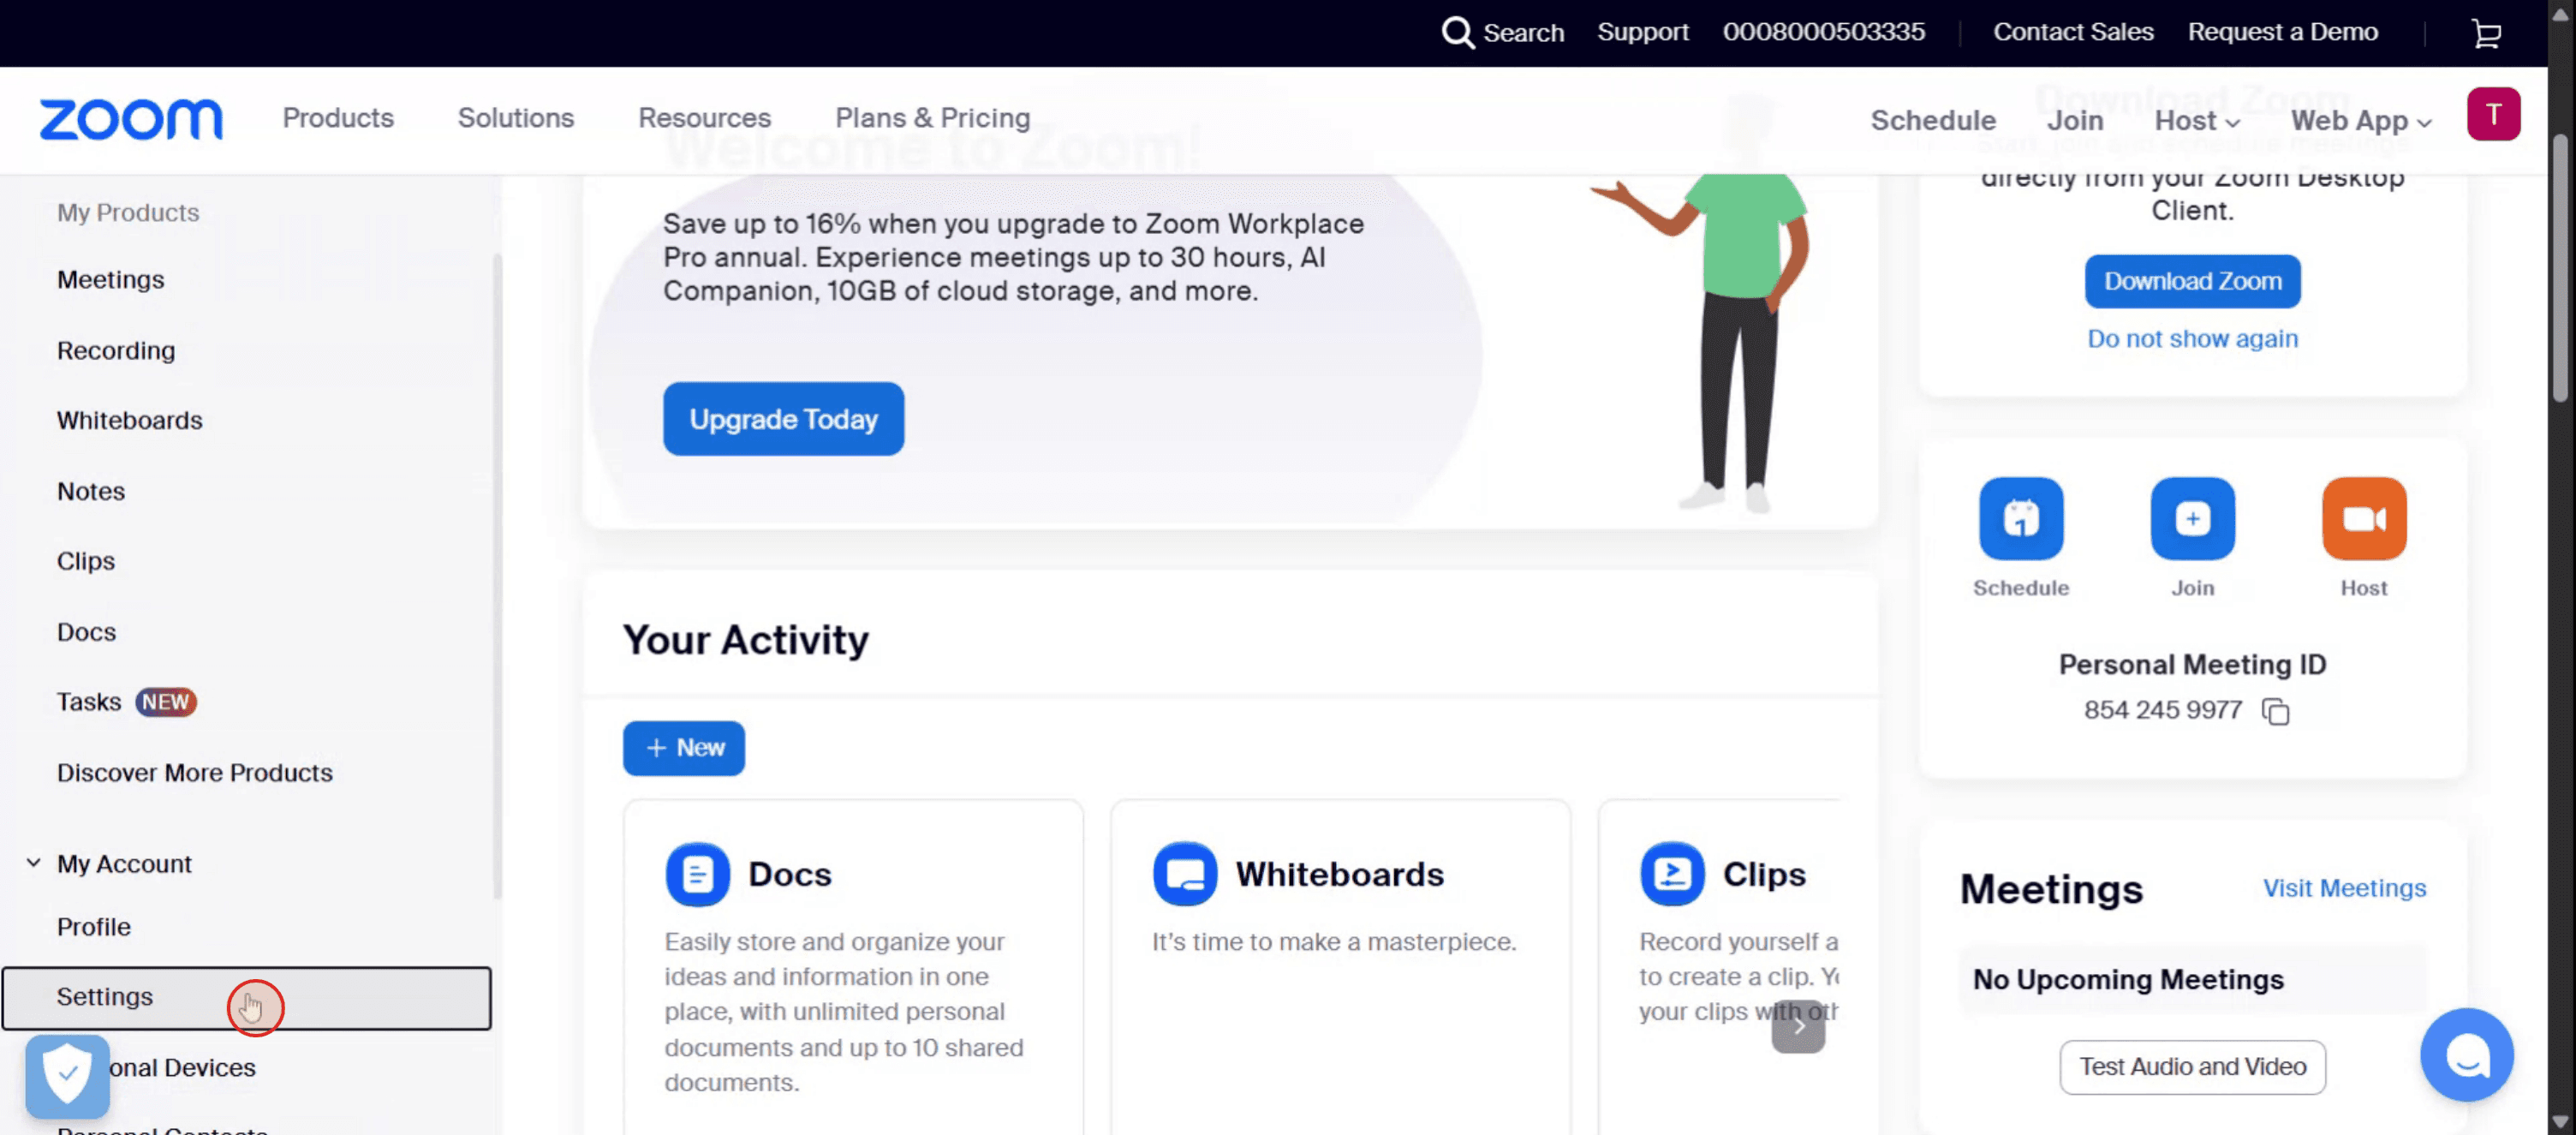
Stap 2
Klik op de optie Instellingen.
Stap 3
Selecteer de optie Vergaderingen uit de beschikbare keuzes.
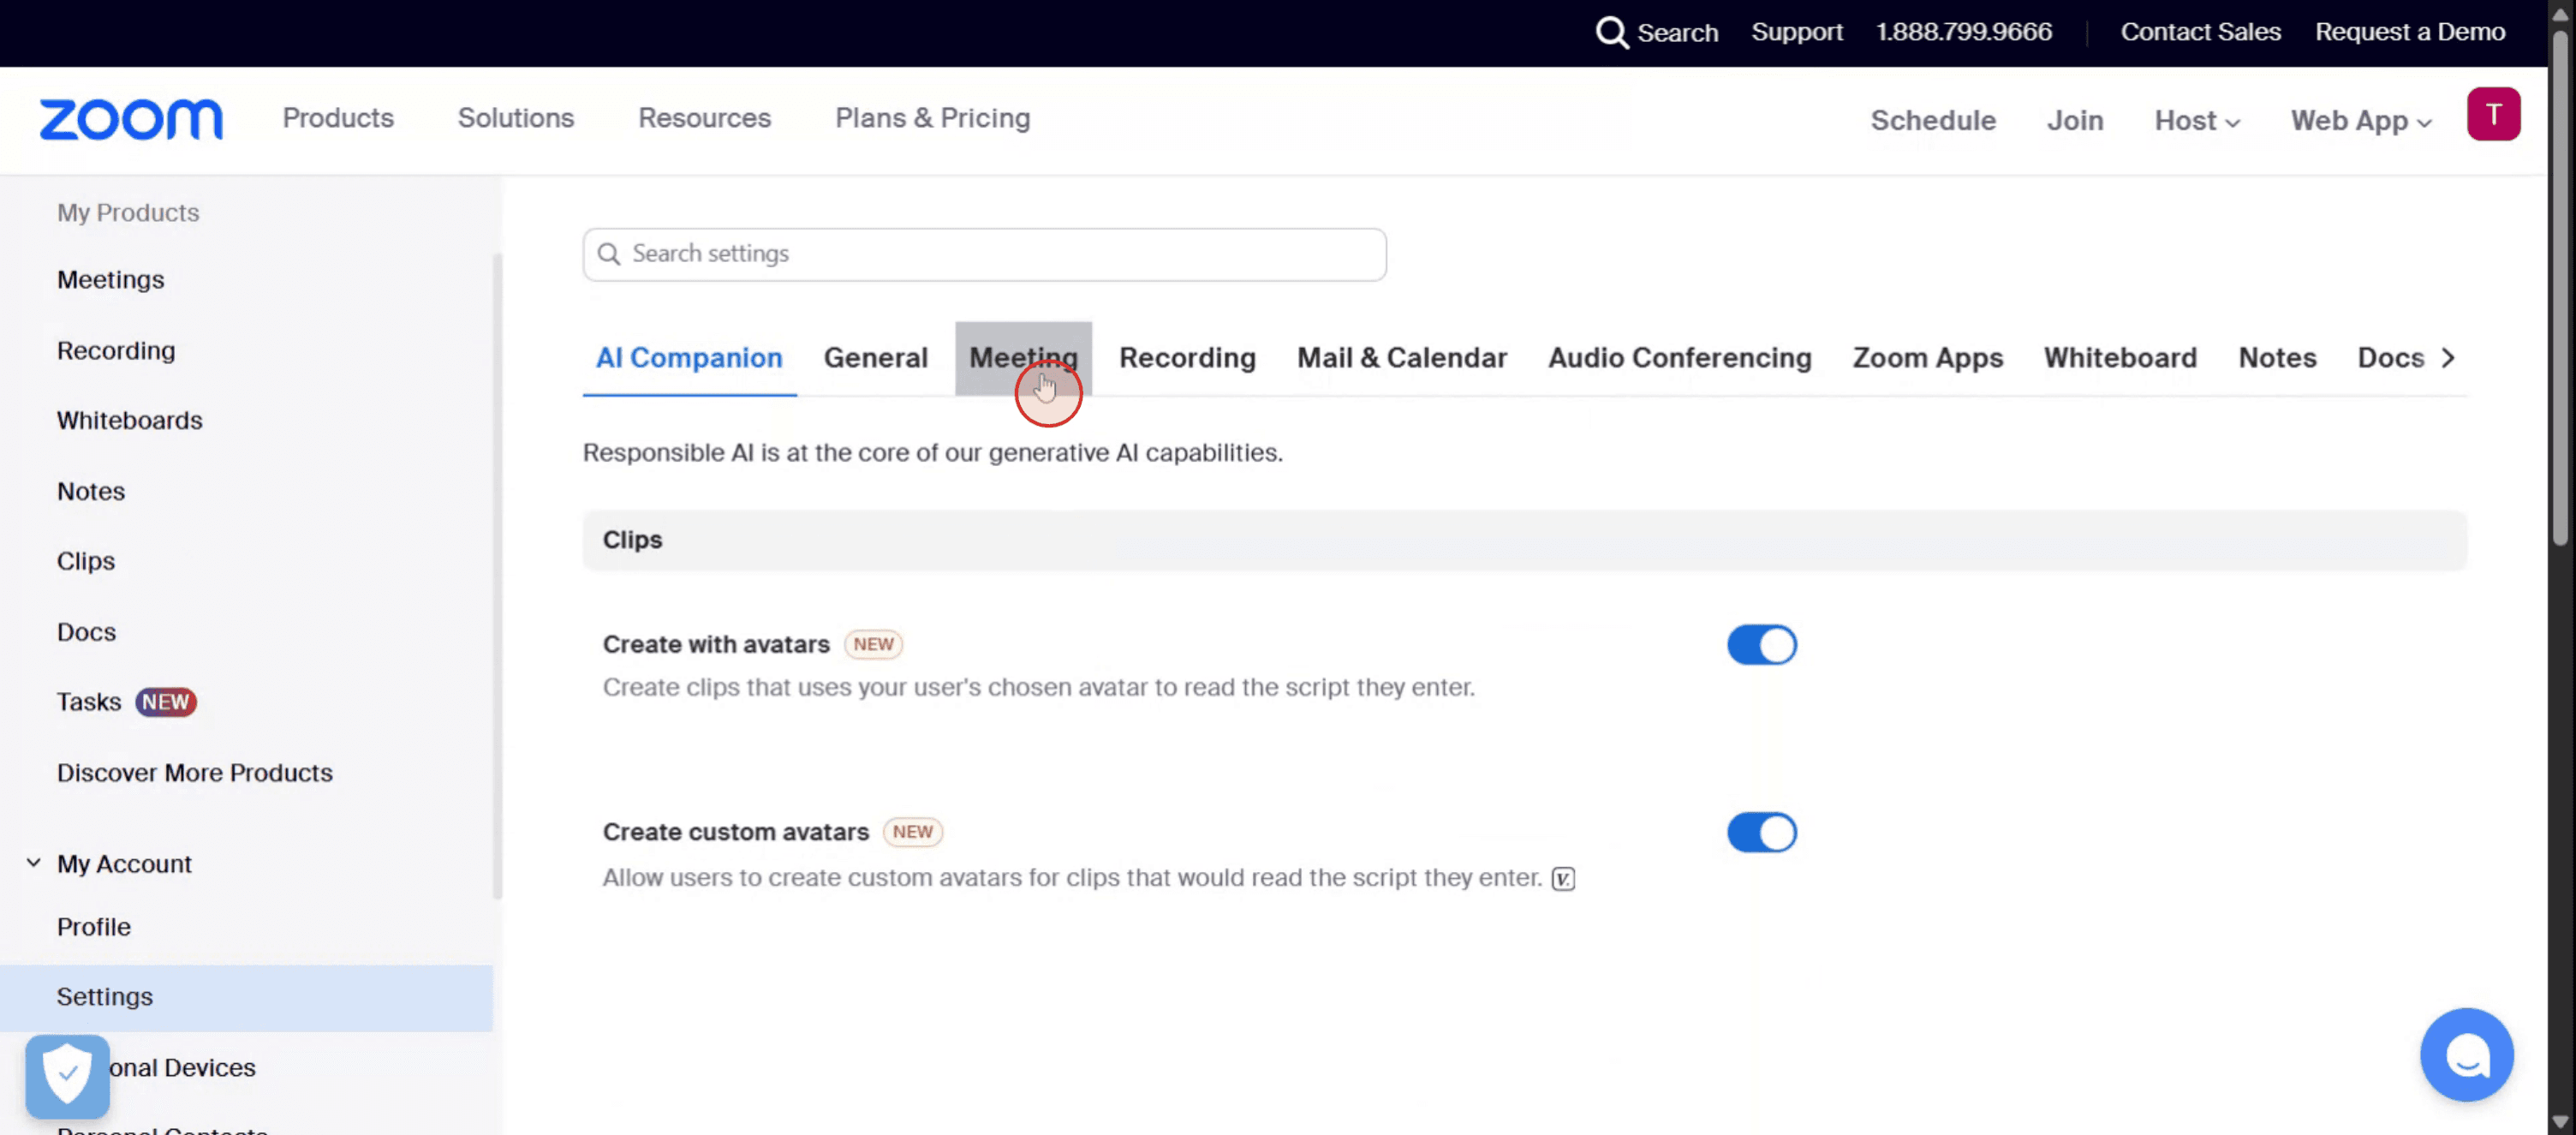
Stap 4
Zoek hier de beveiligingsopties.
Stap 5
Om de wachtruimte in Zoom uit te schakelen, zet u gewoon de schakelaar uit.
Pro-tips voor het uitschakelen van de wachtruimte in Zoom
Meld u aan bij uw Zoom-account
Ga naar de Zoom-website en meld u aan met uw beheerders- of hostgegevens.Ga naar het gedeelte Instellingen
Na het inloggen klikt u op “Instellingen” in het navigatiemenu aan de linkerkant onder de categorie “Persoonlijk” of “Beheer” afhankelijk van uw rol.Ga naar het tabblad Beveiliging
In Instellingen scrolt u naar het gedeelte “Beveiliging”. Hier staat de functie Wachtruimte meestal vermeld.Zoek de optie Wachtruimte op
Zoek de schakelaar voor “Wachtruimte”. Als deze is ingeschakeld (blauw), betekent dit dat hij momenteel actief is.Schakel de schakelaar uit
Klik op de blauwe schakelaar om de functie Wachtruimte uit te schakelen. Zodra deze is uitgeschakeld, kunnen deelnemers deelnemen aan uw vergaderingen zonder in een virtuele lobby te worden vastgehouden.
Veelvoorkomende valkuilen en hoe u ze kunt vermijden
Vergeten de wijzigingen op te slaan
Als u niet naar beneden scrolt en op “Opslaan” klikt nadat u instellingen hebt gewijzigd, kan de functie actief blijven.Wachtruimte alleen uitschakelen voor sommige vergaderingen
Controleer of u het op accountniveau uitschakelt of alleen voor afzonderlijke vergaderingen. Wees consequent met uw voorkeur.Beveiligingszorgen na het uitschakelen
Zonder Wachtruimte komen deelnemers direct binnen. Zorg ervoor dat u de binnenkomst bewaakt of toegangscodes gebruikt om ongewenste deelnemers te voorkomen.Persoonlijke vergaderruimte nog steeds ingeschakeld
Zelfs als u Wachtruimte wereldwijd uitschakelt, kan uw Persoonlijke vergaderruimte deze apart nog steeds ingeschakeld hebben. Pas beide aan.Instellingen vergrendeld door beheerder
Als u deel uitmaakt van een organisatie, kunnen sommige instellingen door de beheerder zijn vergrendeld. U hebt toestemming nodig om ze te wijzigen.
Veelgestelde vragen over het uitschakelen van de wachtruimte in Zoom
Hoe schakel ik de wachtruimte uit voor alle Zoom-vergaderingen?
Ga naar Zoom-instellingen > Beveiligingssectie en schakel de optie “Wachtruimte” uit. Pas de wijzigingen voor alle vergaderingen toe wanneer daarom wordt gevraagd.Kan ik de wachtruimte uitschakelen voor slechts één vergadering?
Ja, u kunt deze uitschakelen tijdens het plannen van een vergadering door de optie “Wachtruimte inschakelen” in de beveiligingsinstellingen uit te vinken.Is het veilig om de wachtruimte in Zoom uit te zetten?
Ja, maar u moet andere beveiligingsfuncties inschakelen, zoals toegangscodes, of de toegang beperken tot geverifieerde gebruikers om de veiligheid van de vergadering te behouden.Waarom kan ik de wachtruimte niet uitschakelen?
Als u deel uitmaakt van een Zoom-organisatie, is de instelling mogelijk vergrendeld door de beheerder. Neem contact op met uw beheerder om wijzigingen aan te vragen.Heeft het uitschakelen van de wachtruimte invloed op eerder geplande vergaderingen?
Nee, het heeft geen invloed op bestaande vergaderingen, tenzij u ze later handmatig bijwerkt om de nieuwe instelling weer te geven.Hoe neem je het scherm op op een Mac?
Om het scherm op een Mac op te nemen, kunt u Trupeer AI gebruiken. Hiermee kunt u het volledige scherm vastleggen en biedt het AI-mogelijkheden zoals het toevoegen van AI-avatars, voice-over toevoegen, in- en uitzoomen in de video. Met de AI-videotranslatiefunctie van Trupeer kunt u de video vertalen naar meer dan 30 talen.Hoe voeg ik een AI-avatar toe aan een schermopname?
Om een AI-avatar aan een schermopname toe te voegen, moet u een AI-hulpmiddel voor schermopnames gebruiken. Trupeer AI is een AI-hulpmiddel voor schermopnames dat u helpt video's met meerdere avatars te maken en u ook helpt uw eigen avatar voor de video te creëren.Hoe neem je het scherm op in Windows?
Om een schermopname te maken in Windows, kunt u de ingebouwde Game Bar (Windows + G) gebruiken of een geavanceerde AI-tool zoals Trupeer AI voor meer geavanceerde functies zoals AI-avatars, voice-over, vertaling enz.Hoe voeg ik voice-over toe aan een video?
Om voice-over aan video's toe te voegen, downloadt u de Chrome-extensie van Trupeer AI. Zodra u zich hebt aangemeld, uploadt u uw video met geluid, kiest u de gewenste voice-over van Trupeer en exporteert u uw bewerkte video.Hoe zoom ik in op een schermopname?
Om tijdens een schermopname in te zoomen, gebruikt u de zoomeffecten in Trupeer AI, waarmee u op specifieke momenten kunt in- en uitzoomen en zo de visuele impact van uw videocontent kunt versterken.
Aanbevolen leesmateriaal
Technische documentatiegenerator
Hoe roteer je een document in Canva
Hoe voeg je lettertypen toe aan Canva
Hoe pas je een masker toe in Canva
Gerelateerde tutorials

