

Calendly APIキーの取得方法
アプリやワークフローにスケジュール機能を統合するために、Calendly APIキーを取得する方法をご確認ください。Calendlyの開発者設定にアクセスするためのステップバイステップガイドです。
Calendly の API キー(Personal Access Token とも呼ばれます)を取得するには、次の手順に従ってください:
Calendly アカウントにログインします: 認証情報を使用して Calendly ダッシュボードにアクセスします。
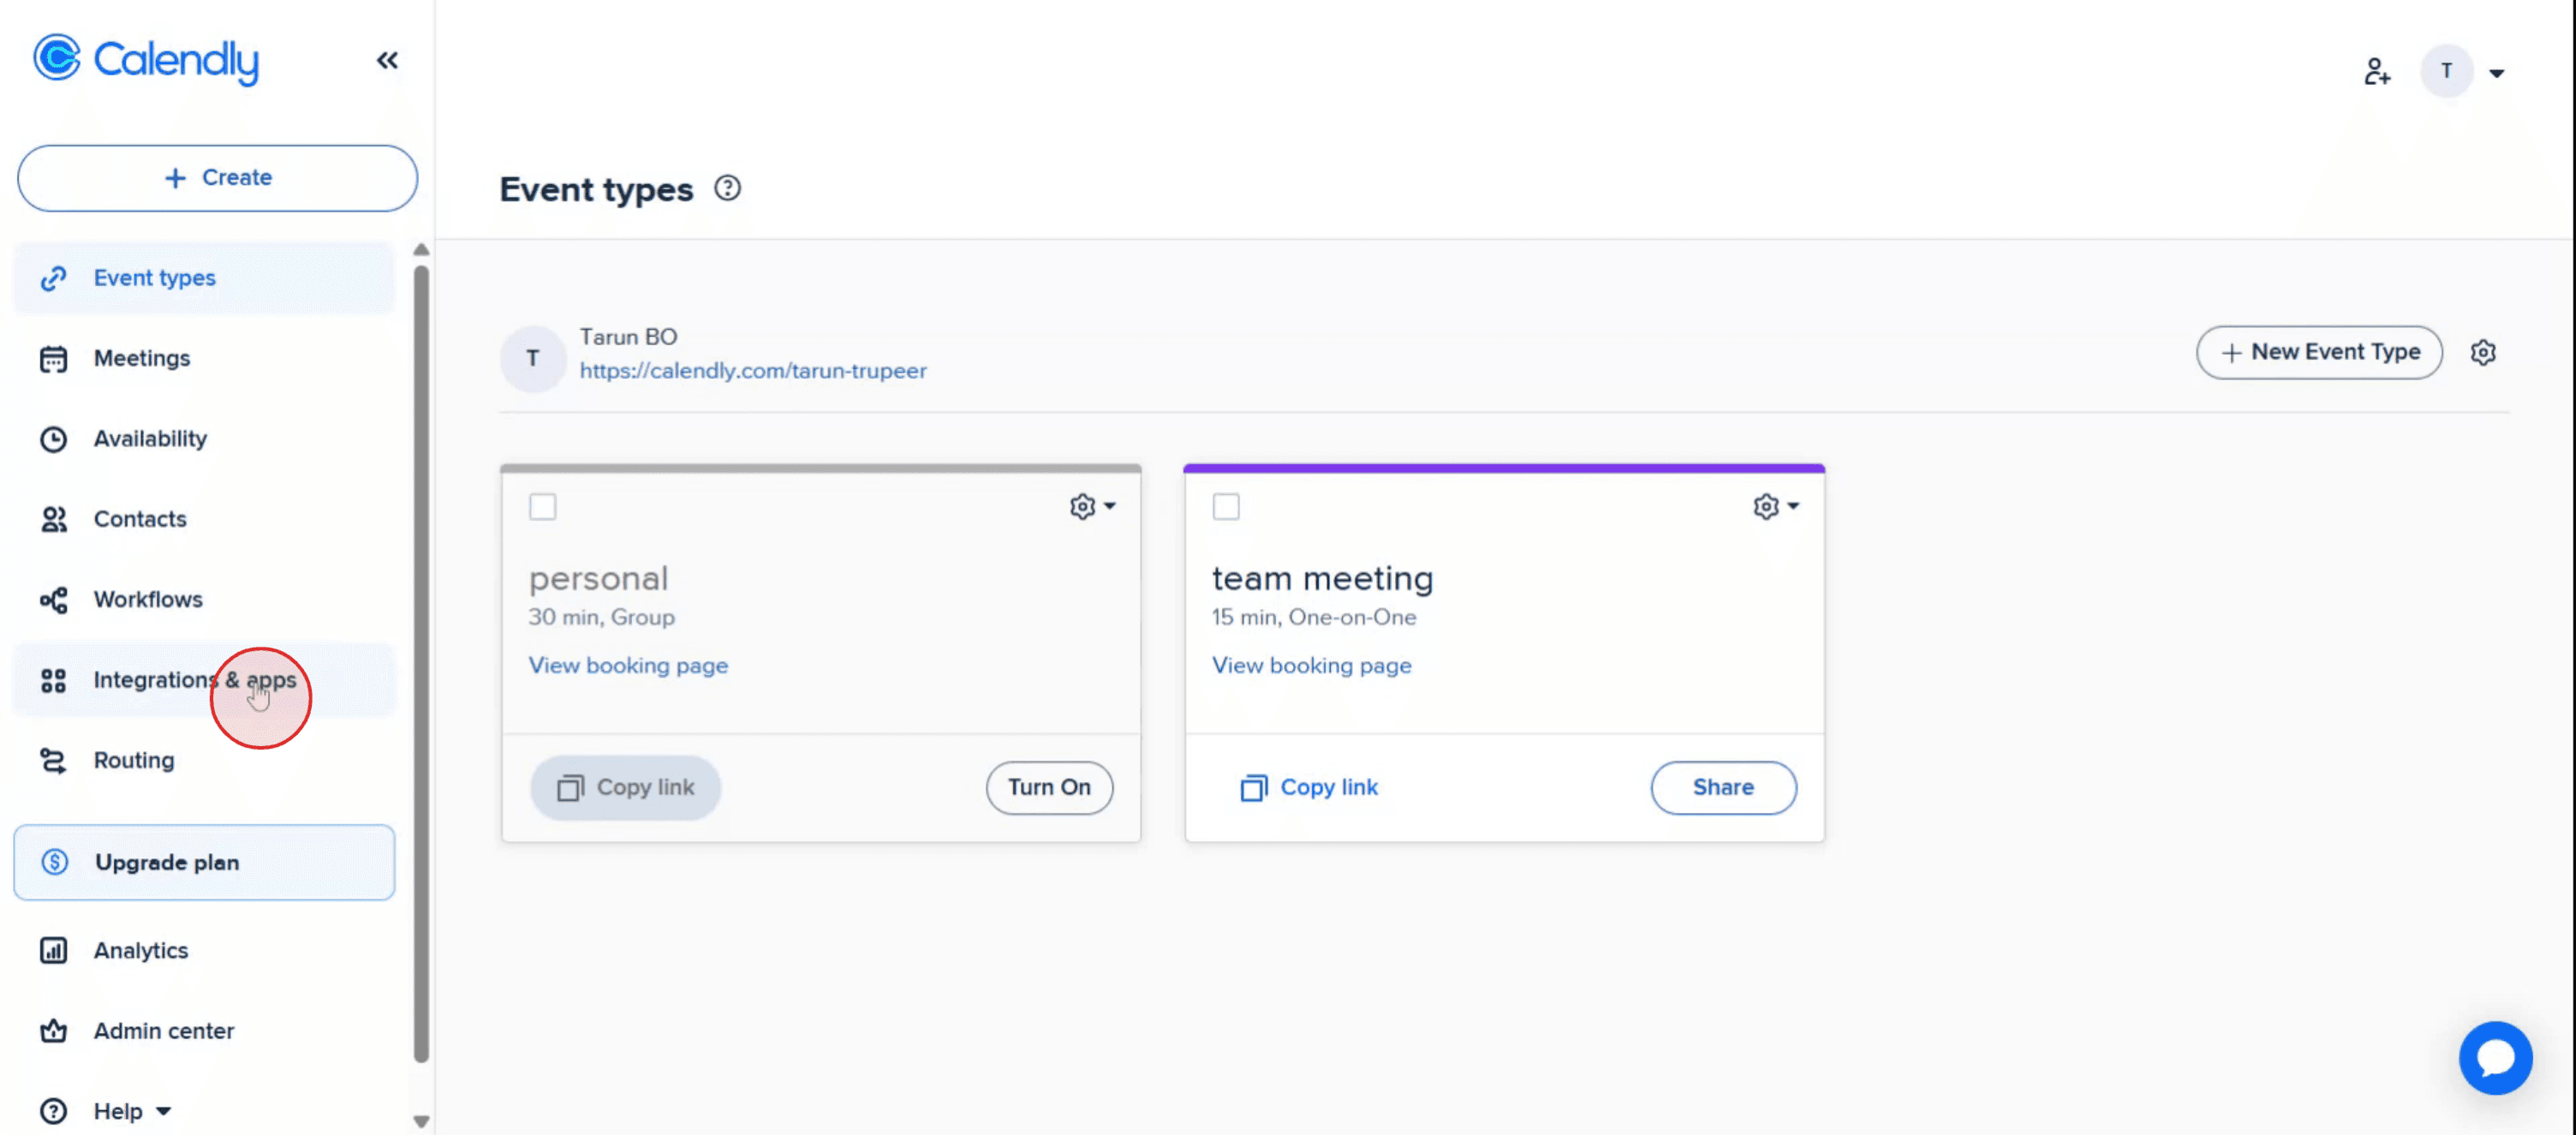
「Integrations & Apps」へ移動: ダッシュボードの左側サイドバーで「Integrations & Apps」を見つけてクリックします。
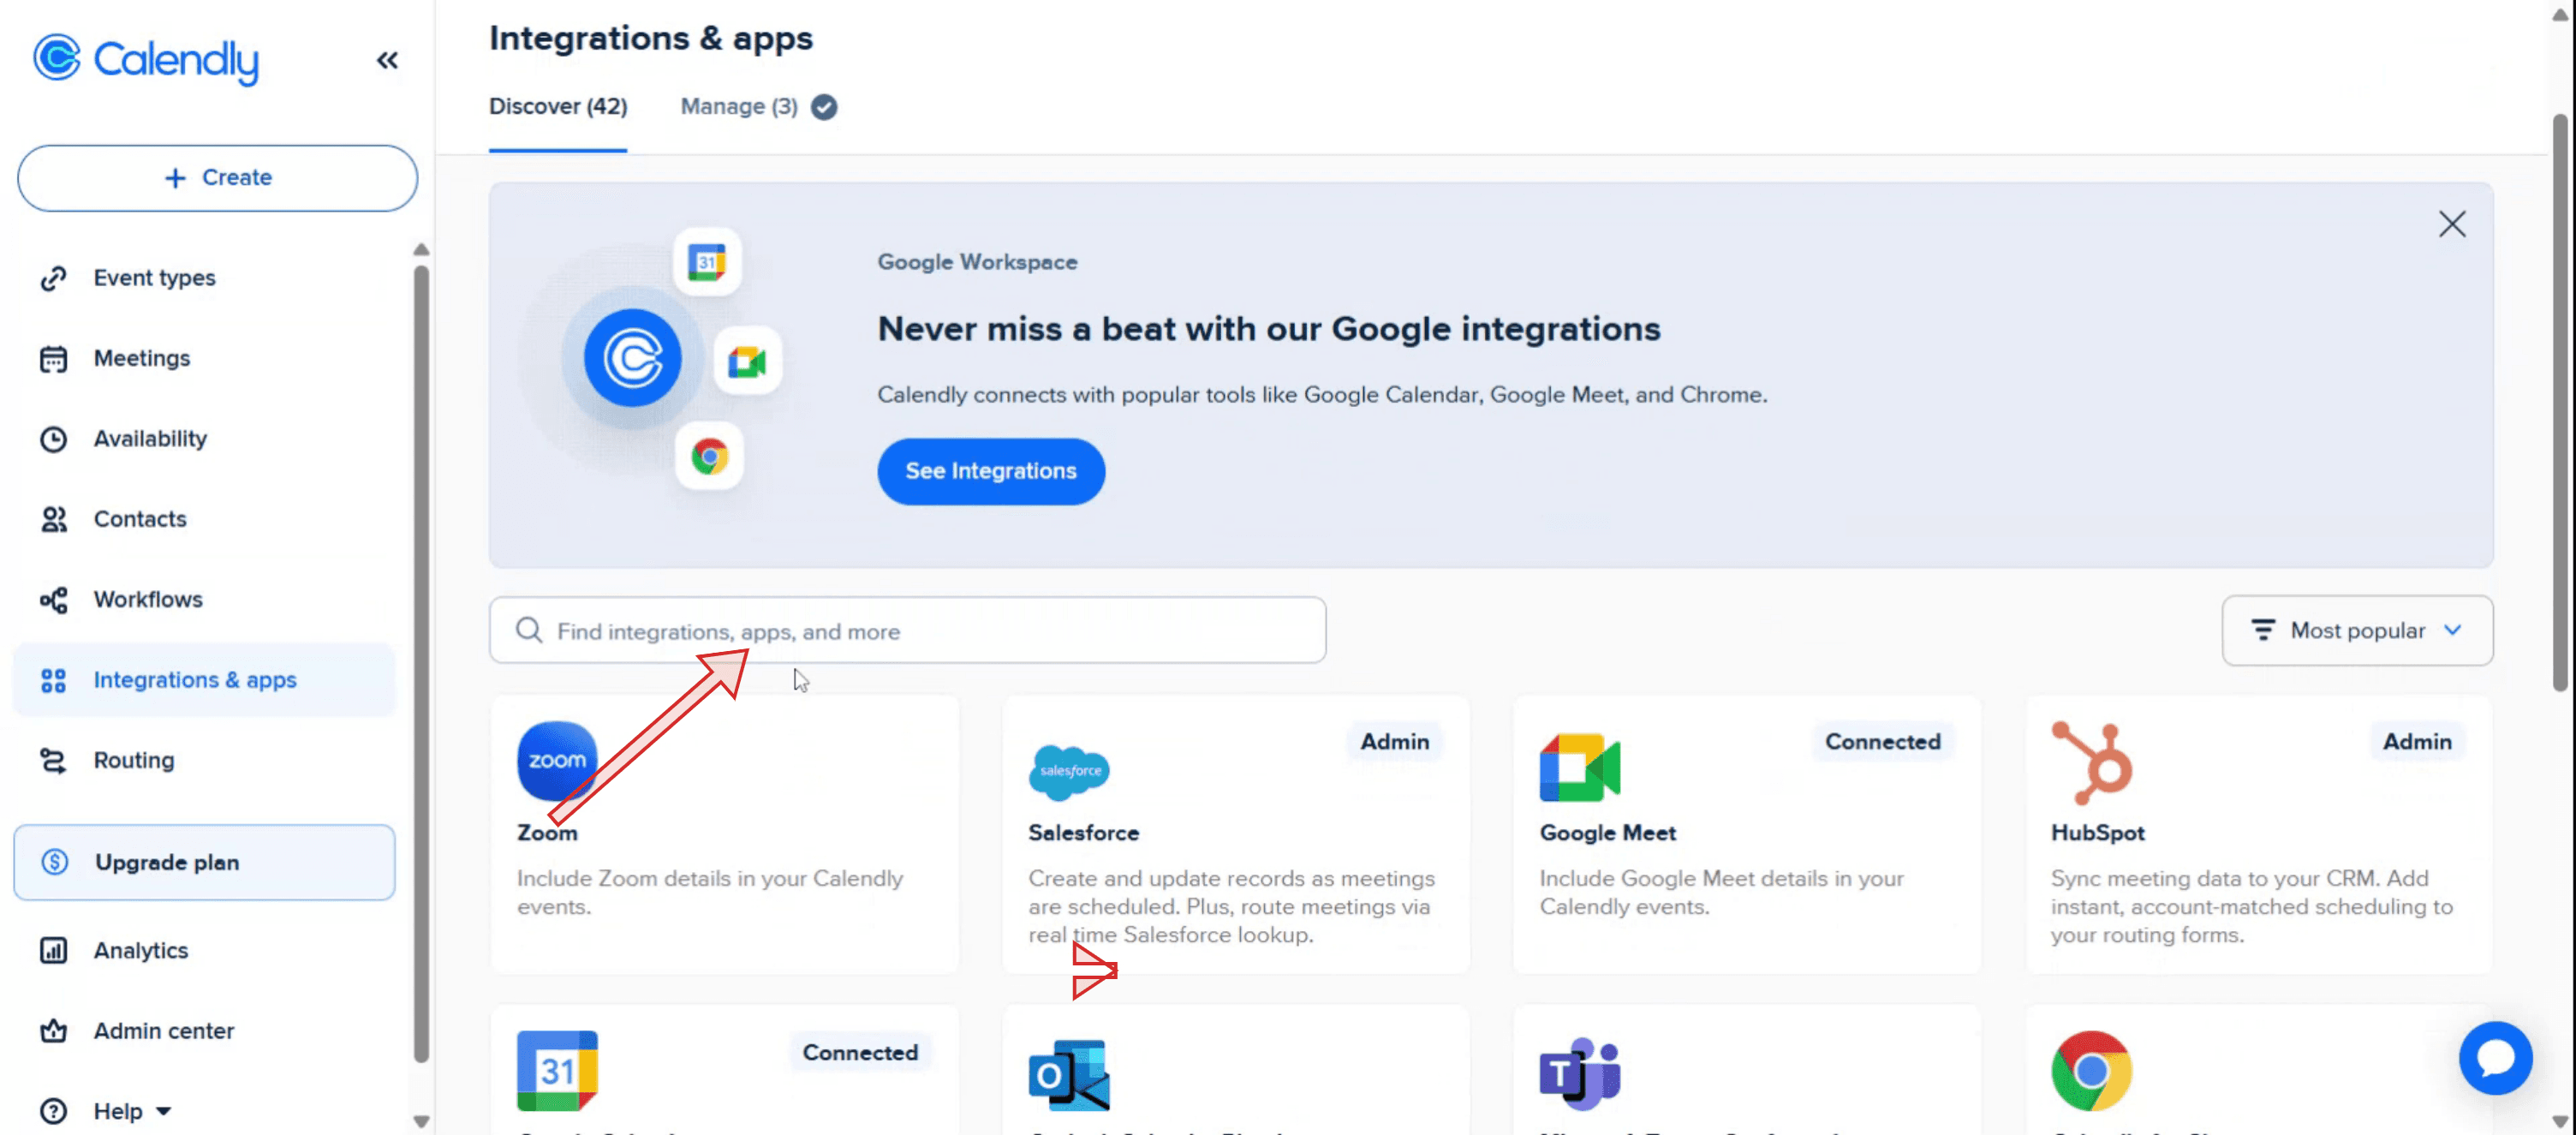
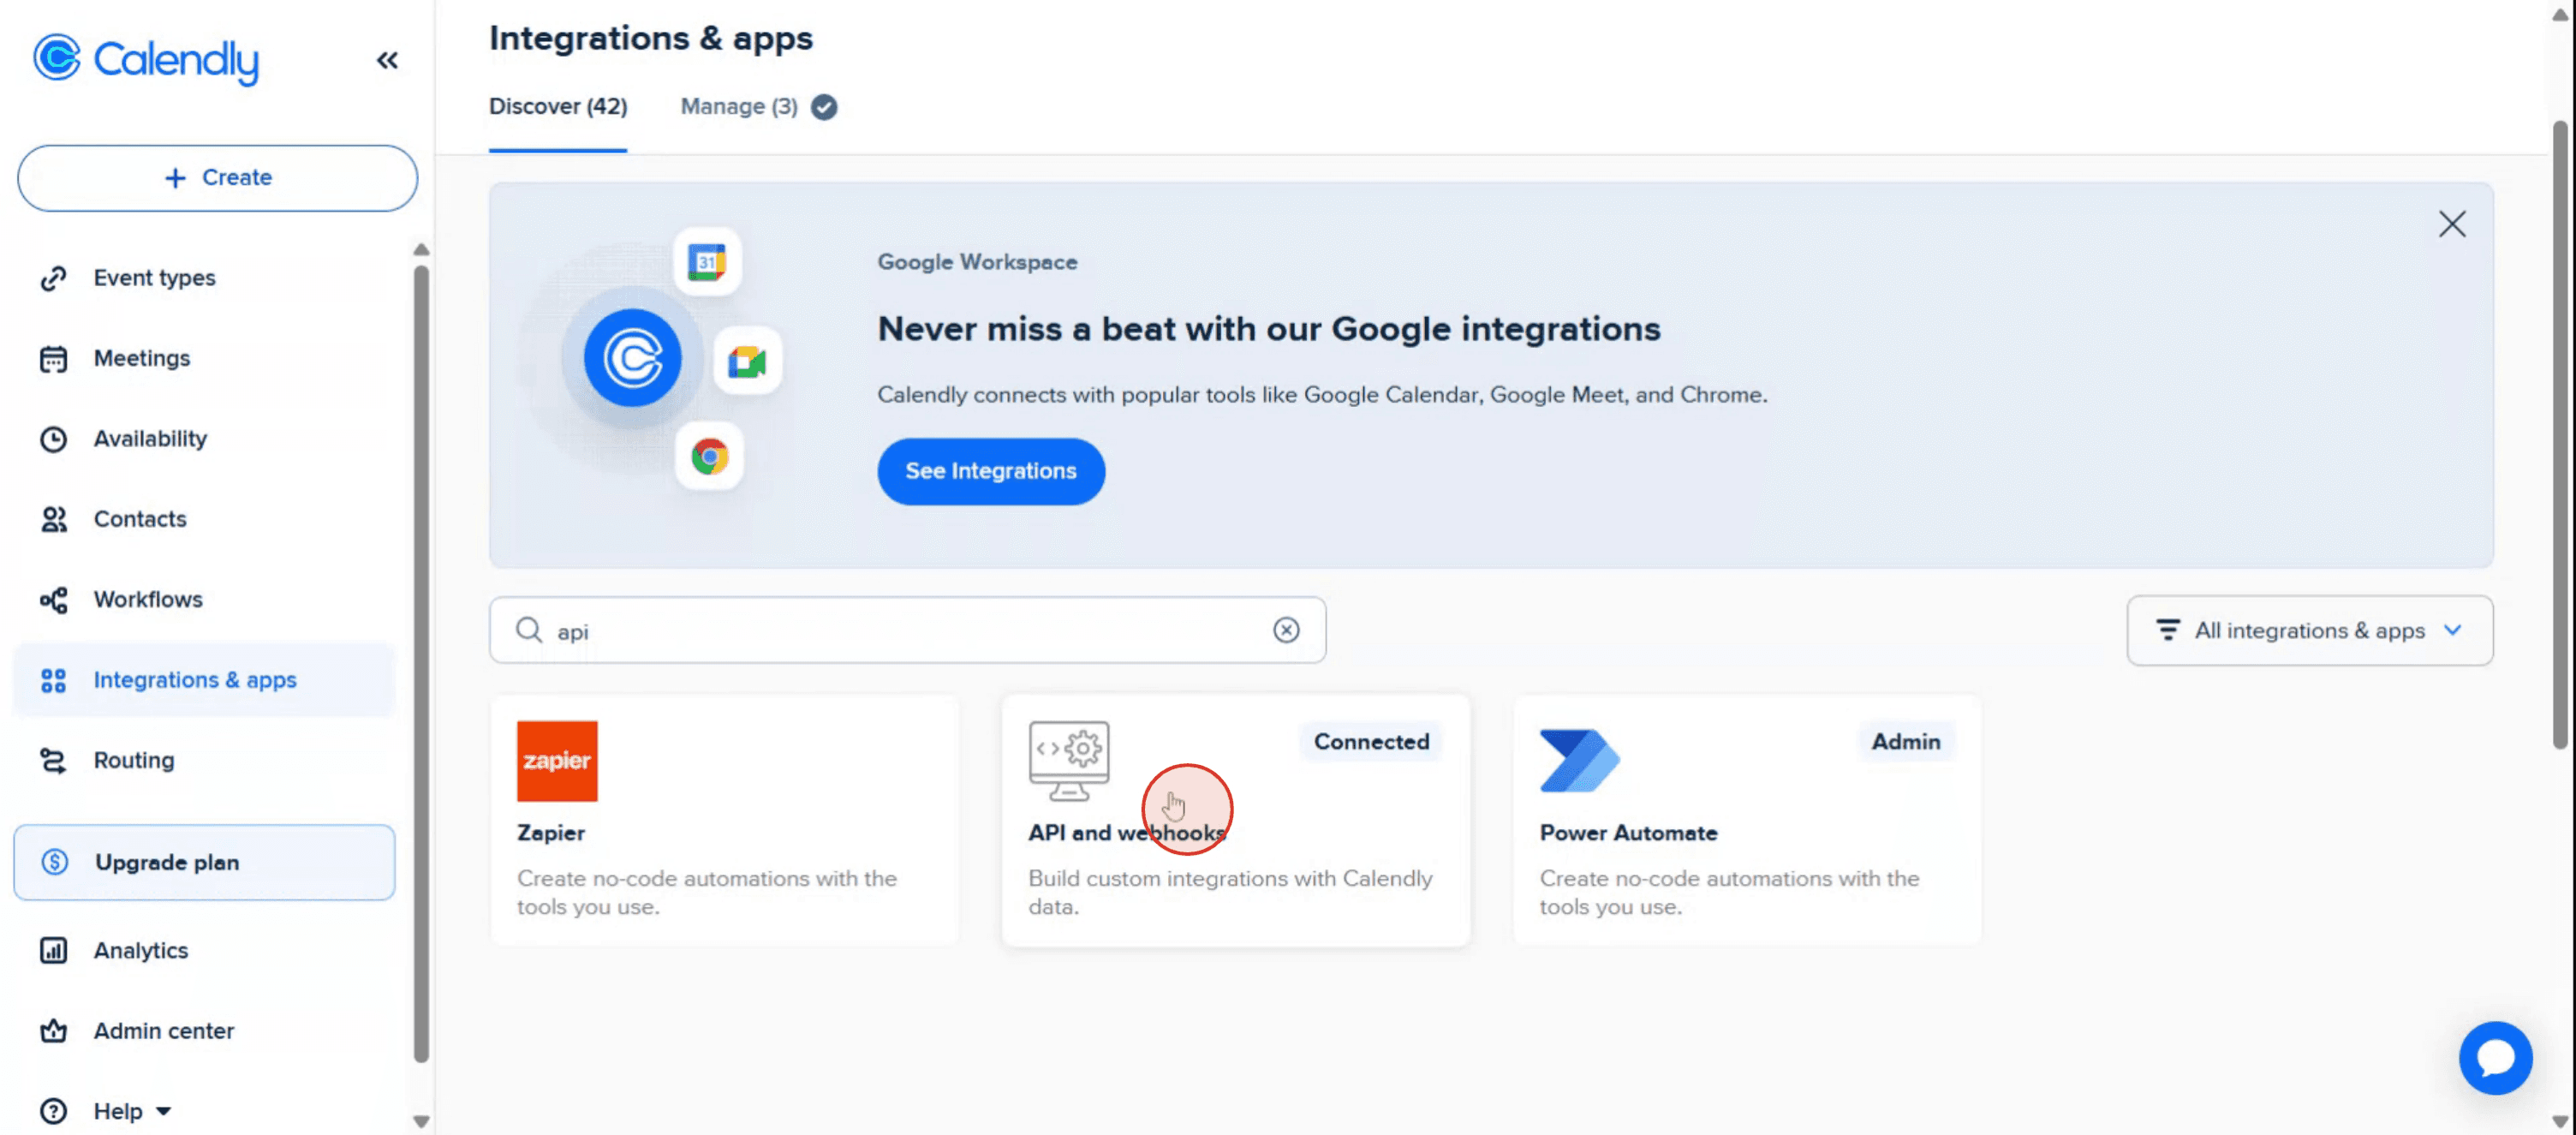
「API and Webhooks」を選択: Integrations セクション内で「API and Webhooks」を見つけてクリックします。
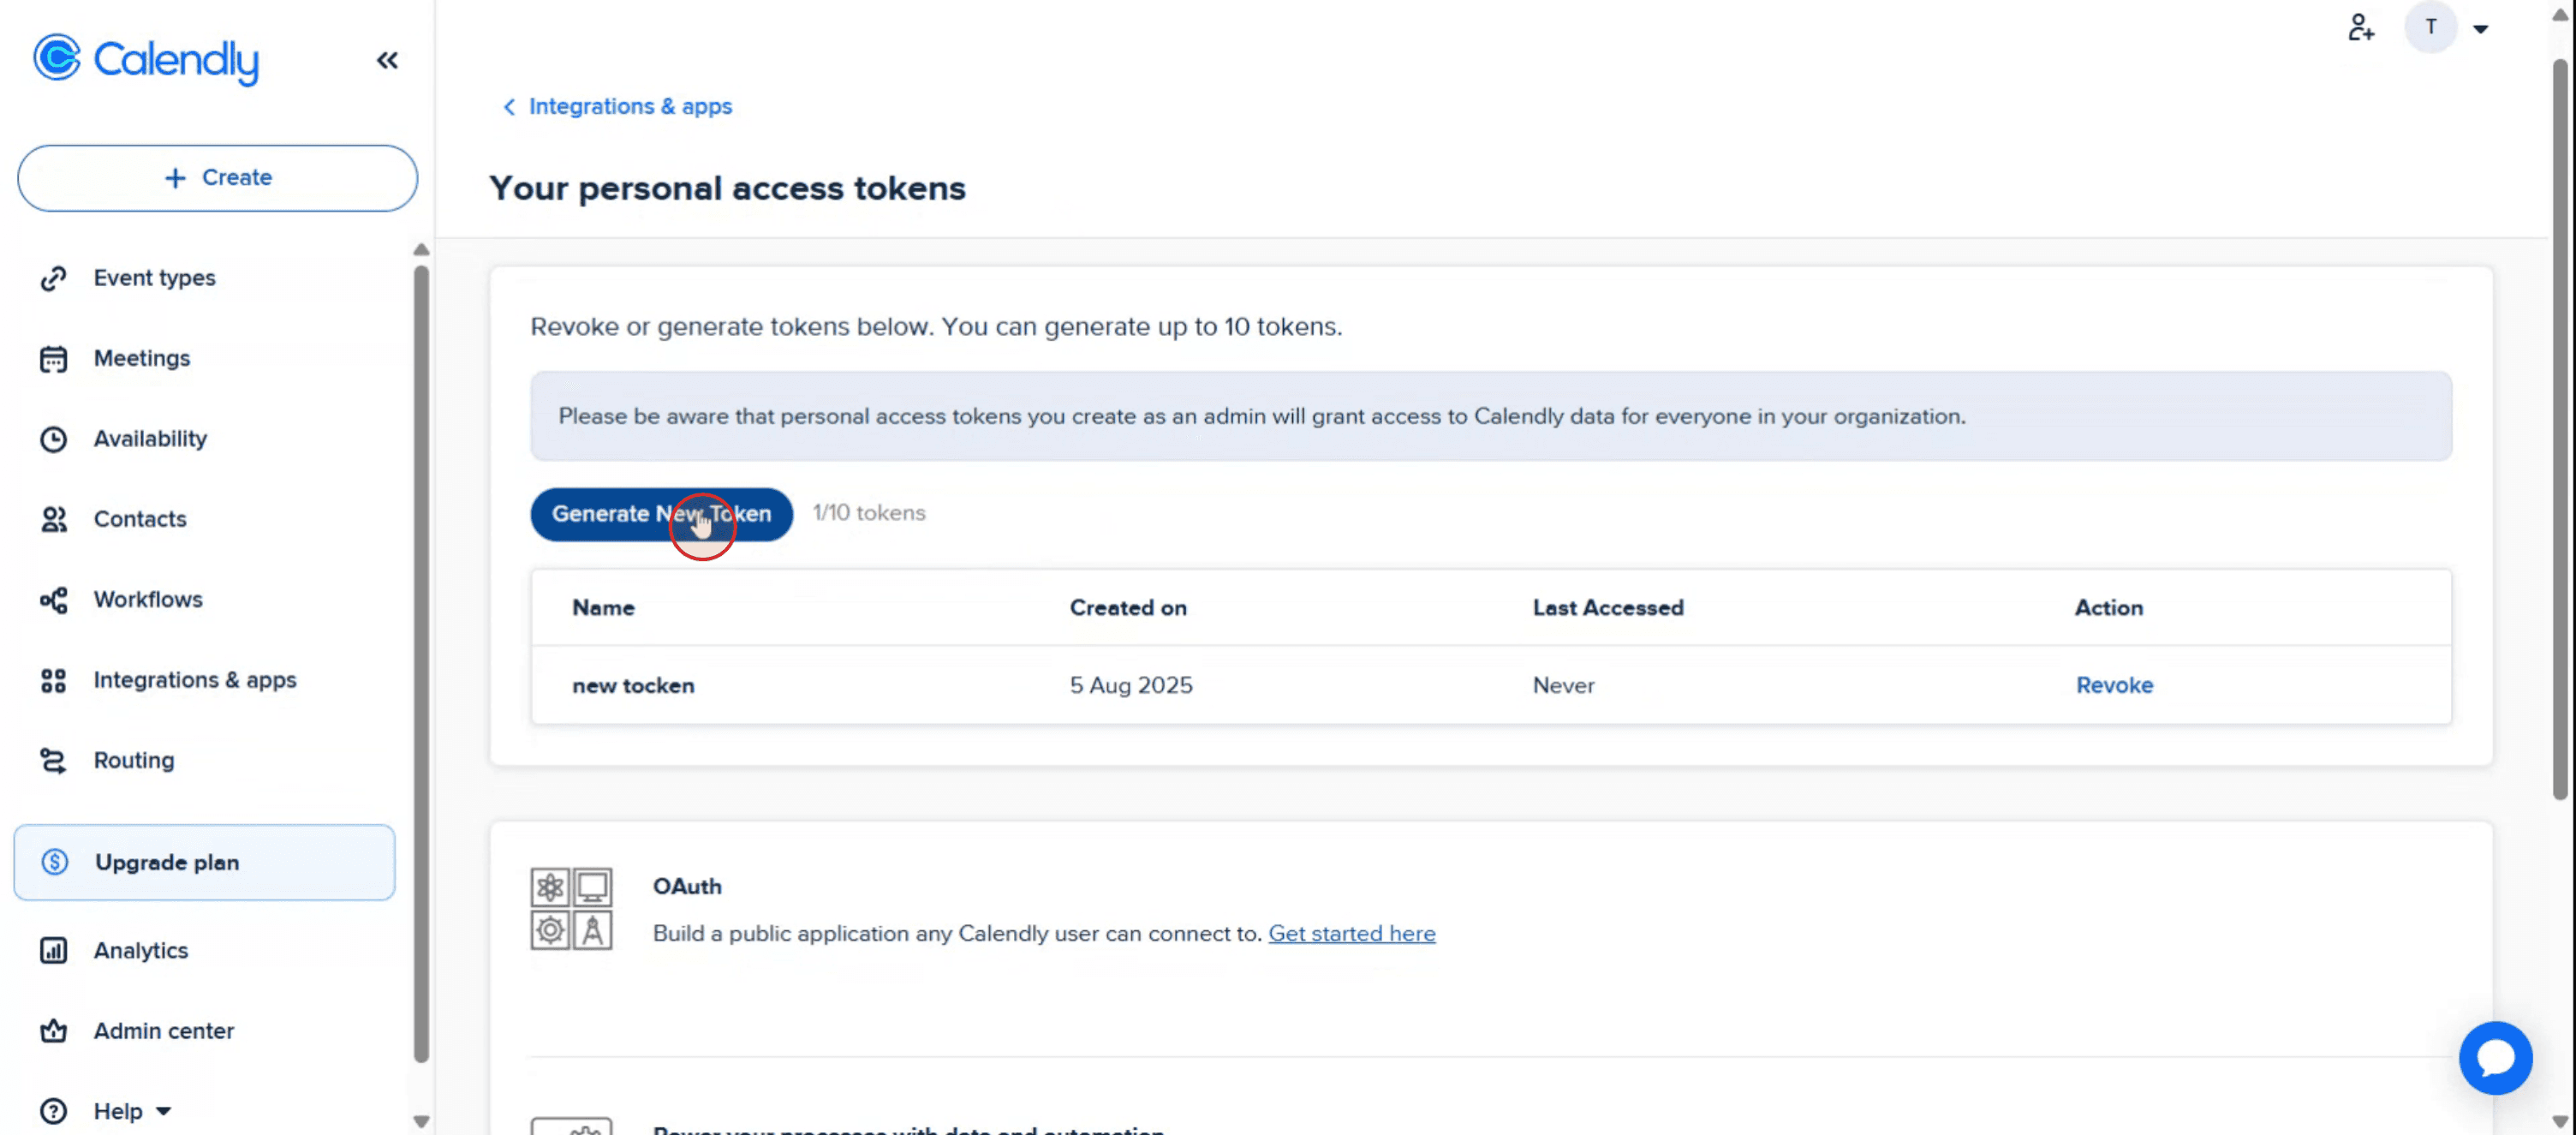
新しいトークンを生成: 既存の Personal Access Token がない場合は、「Personal Access Tokens」の下にある「Get a token now」を選択します。
すでにトークンがある場合は、
「Your personal access tokens」の下にある「Generate new token」を選択します。
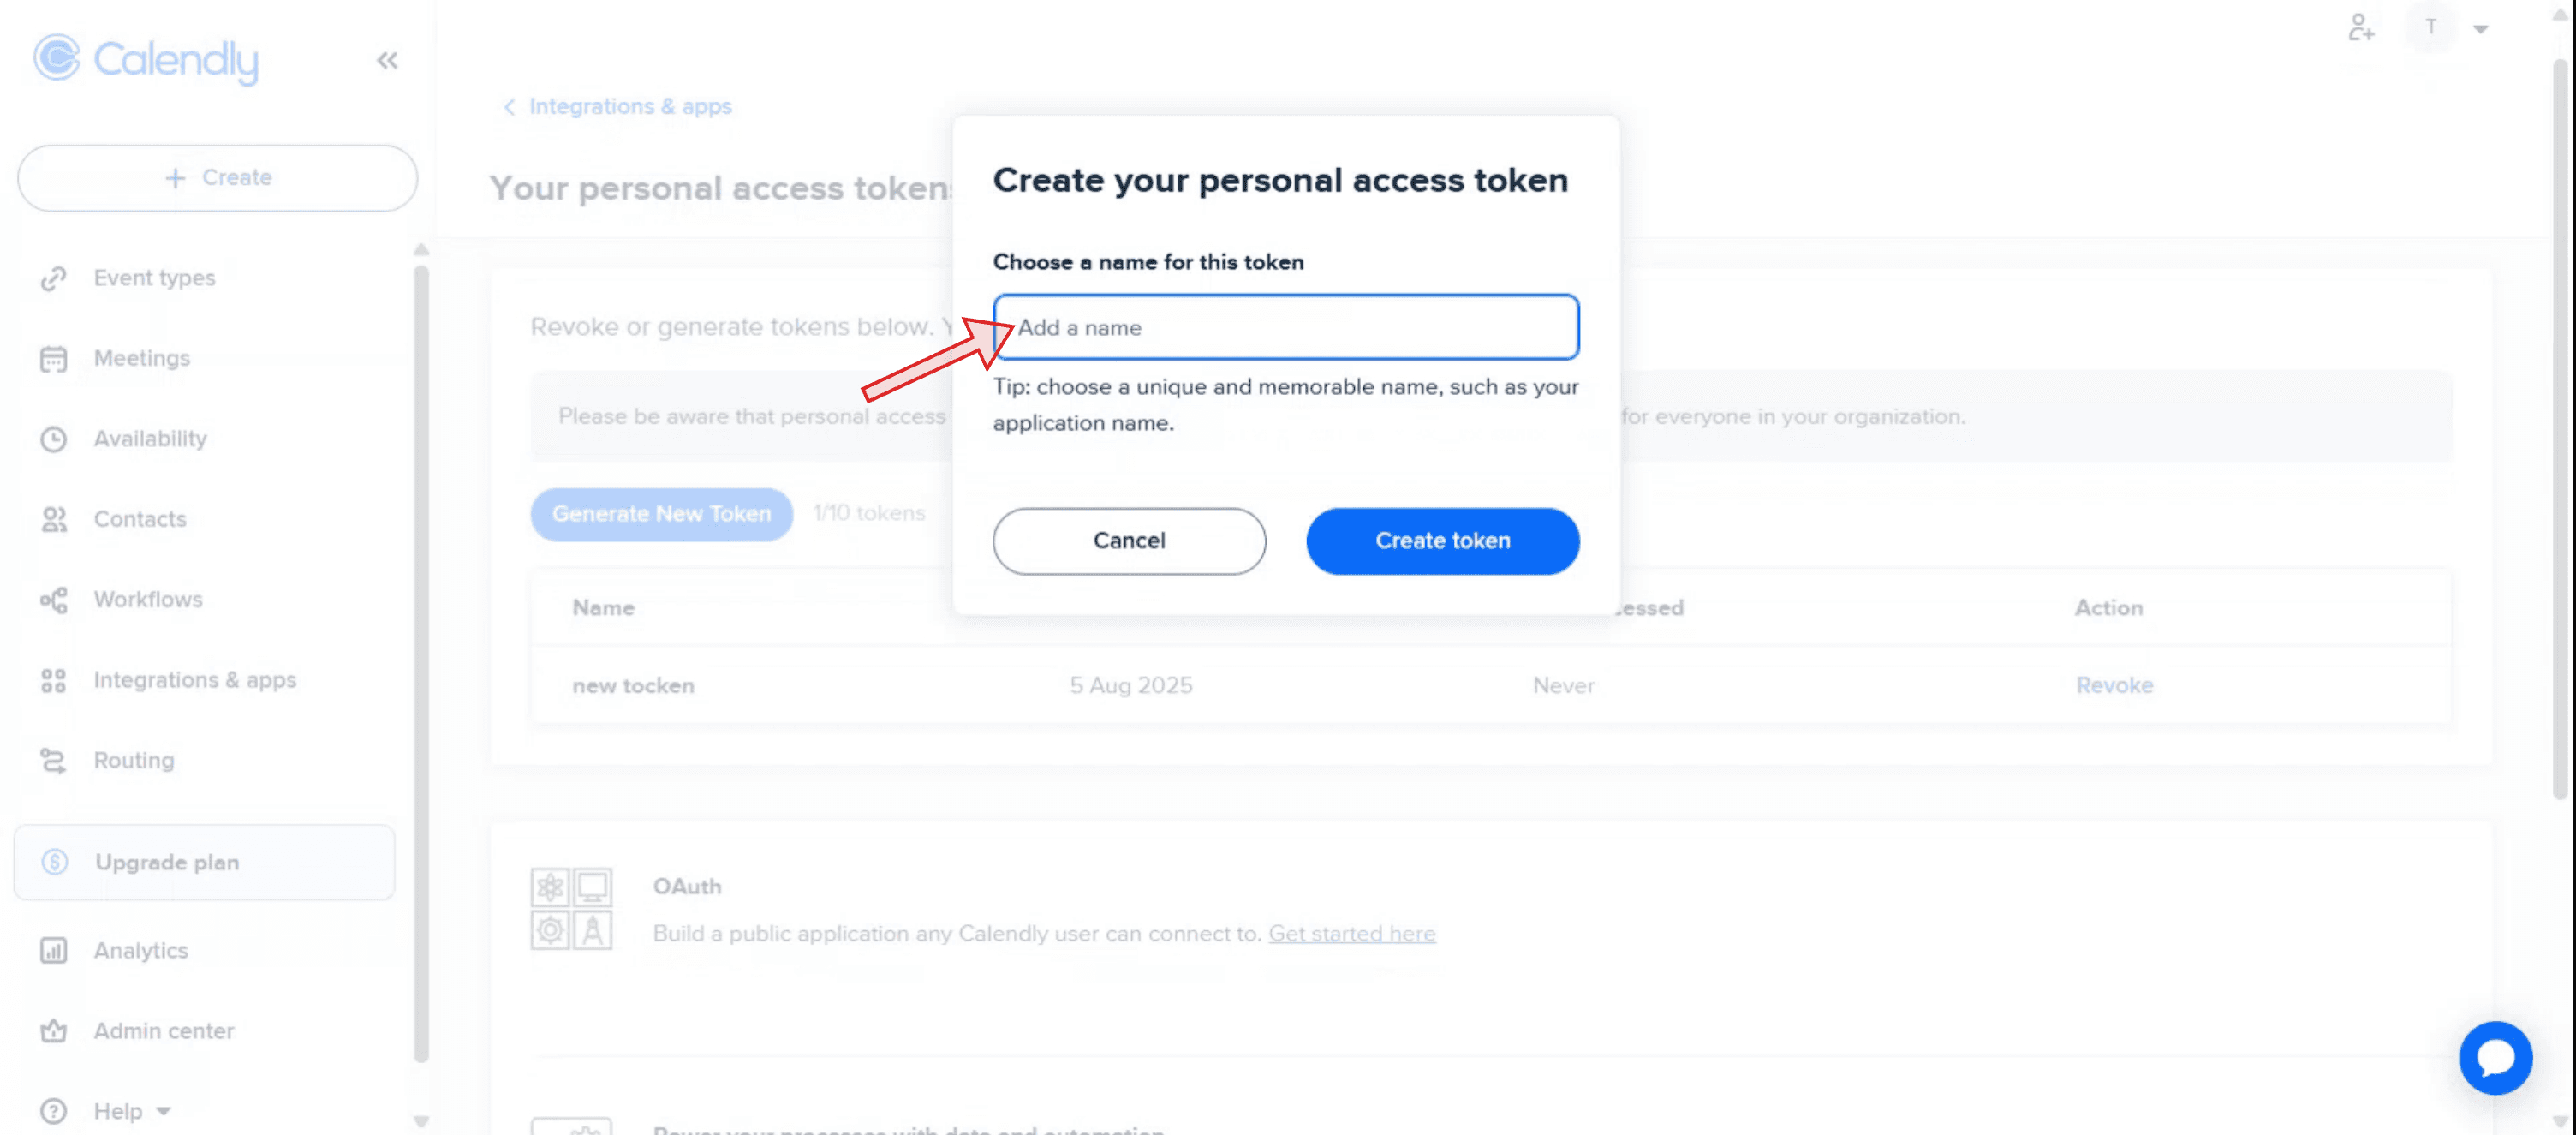
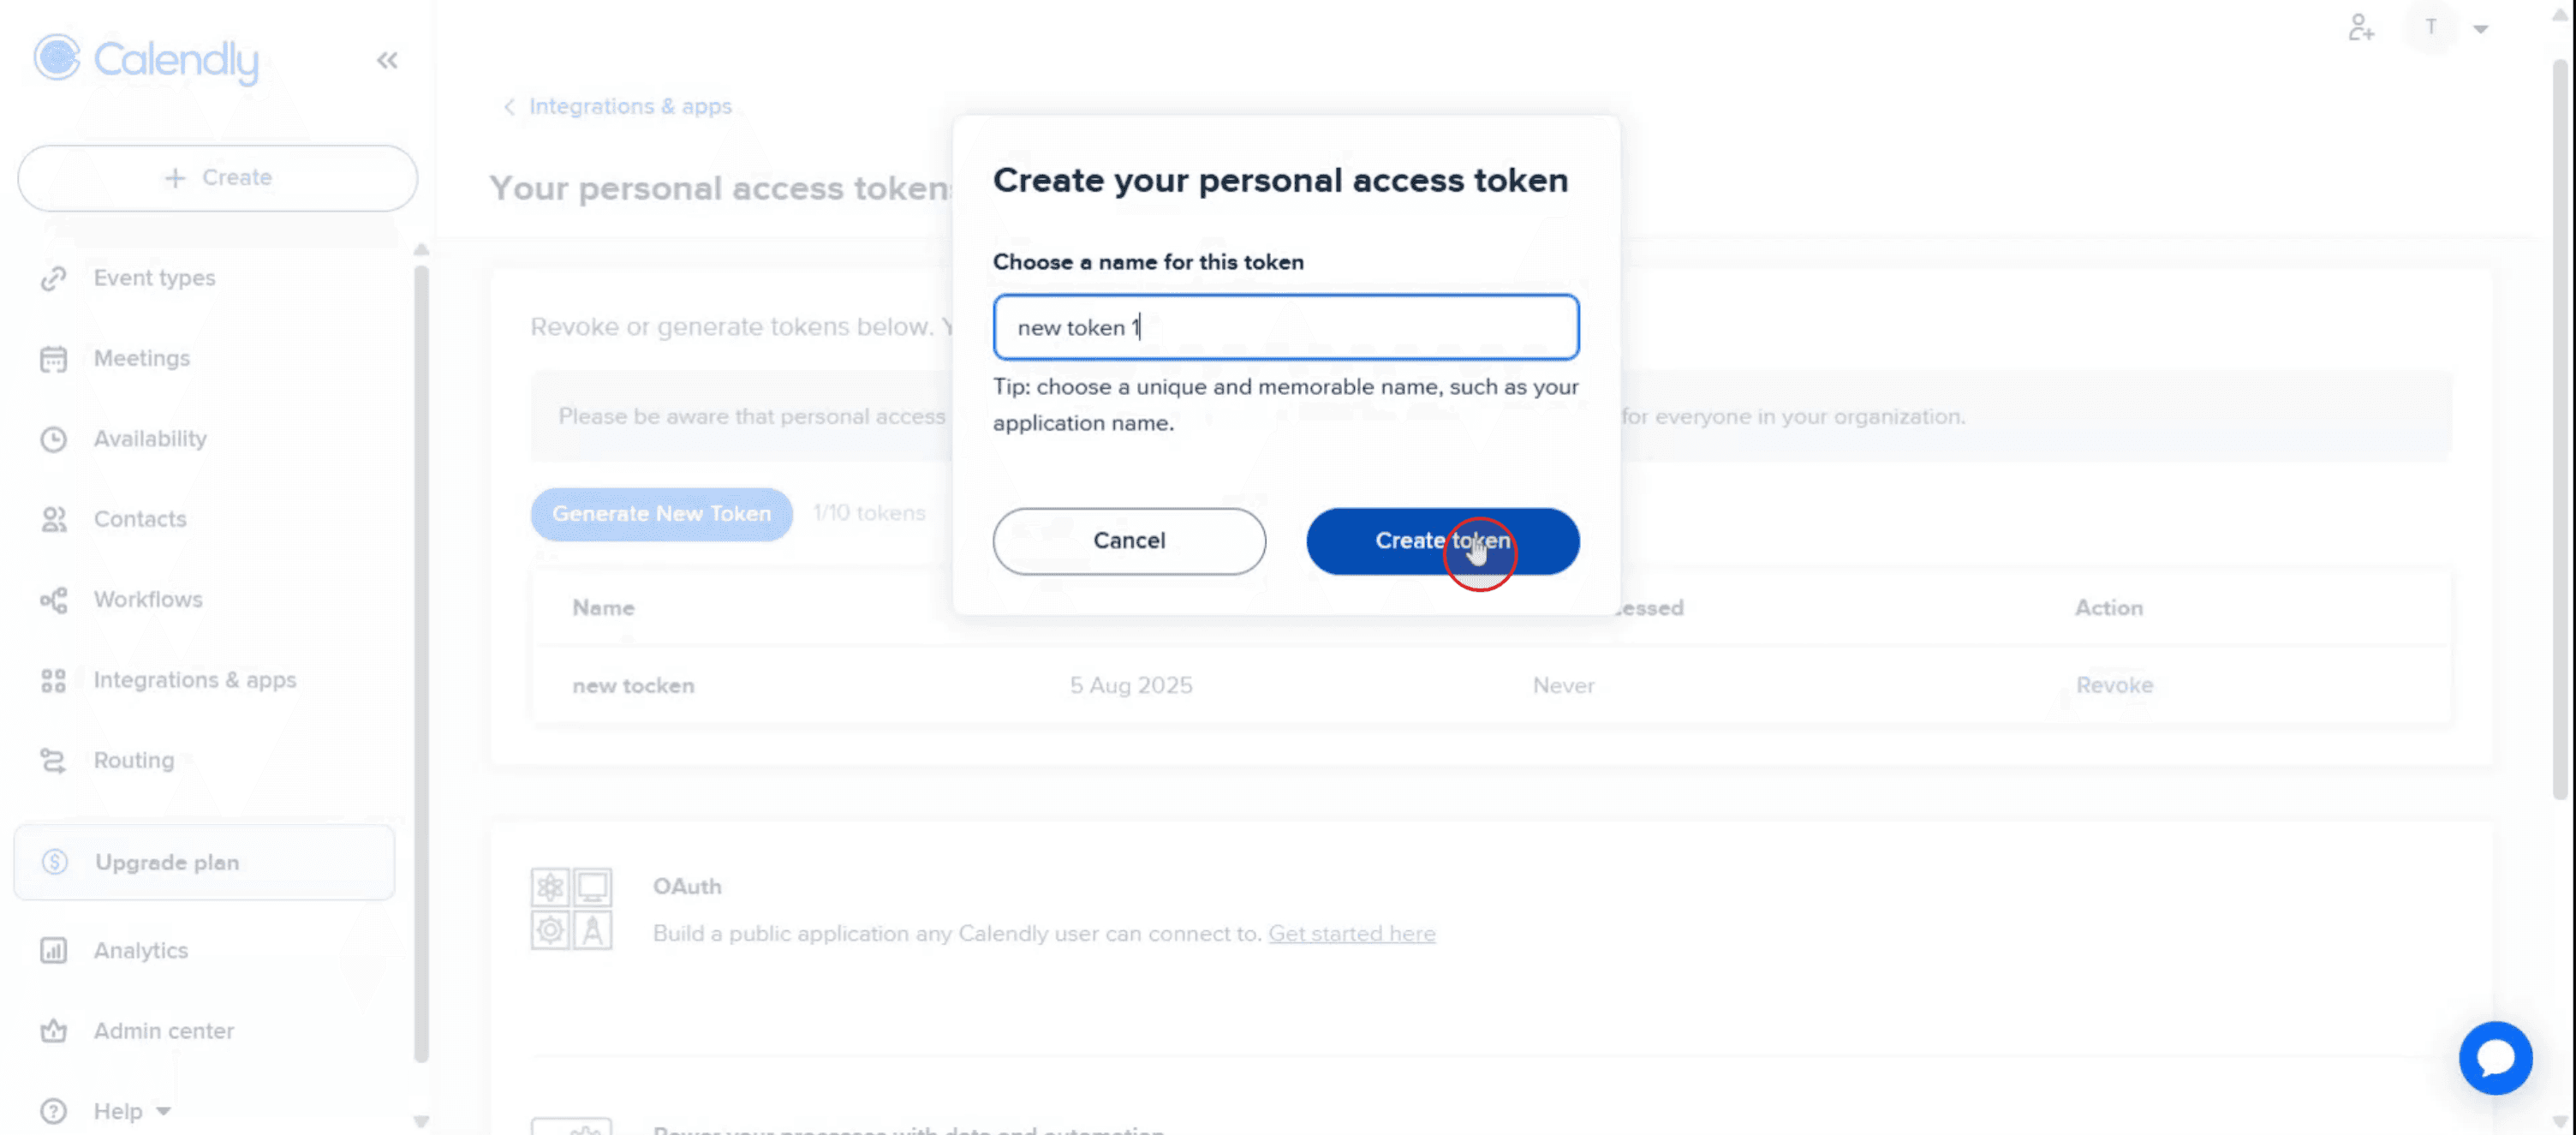
トークンを作成してコピー: 新しいトークンに識別しやすい名前を「Create your personal access token」欄に入力します。
「Create token」をクリックします。
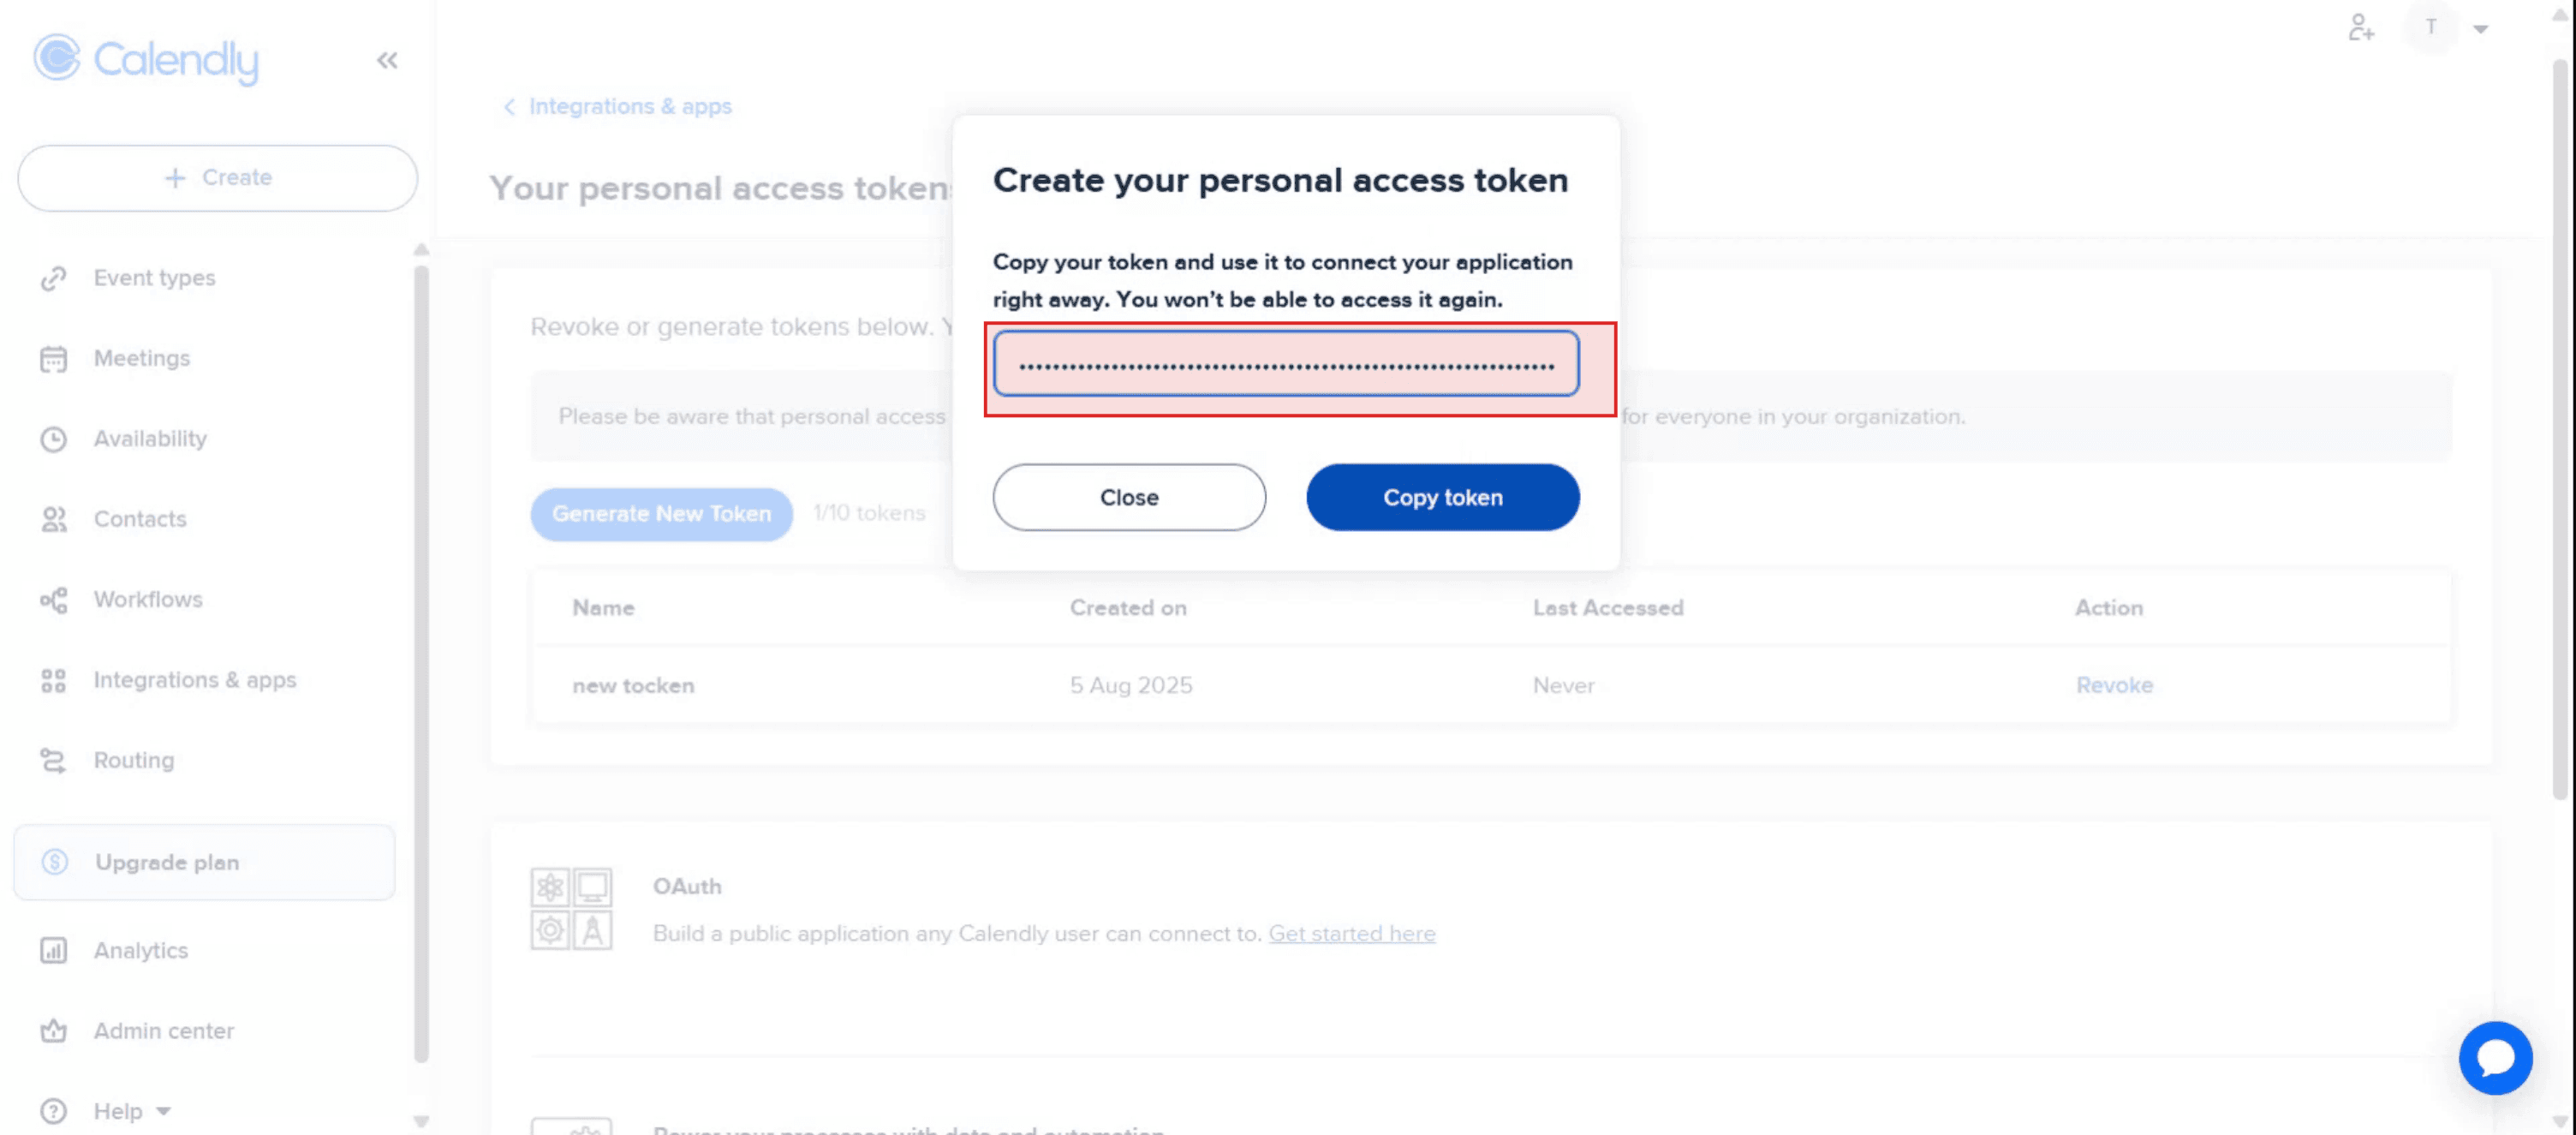
「Copy token」をクリックして、アプリケーションまたは統合で使用できるように保存します。
ステップごとのガイド: Calendly API キーの取得方法
手順 1
左側メニューを見つけて「Integrations and Apps」を選択します。
手順 2
検索バーを使って「API key and webhooks」を見つけます。
手順 3
「API key and webhooks」オプションが表示されたら、それをクリックして進みます。
手順 4
「Generate a New Token」オプションをクリックします。
手順 5
指定の欄に希望するトークン名を入力します。
手順 6
「Create Token」ボタンをクリックします。
手順 7
表示されている API キーをコピーします。これで Calendly を通じた個人 API キーの作成は完了です。
Calendly APIキーを取得するためのプロのヒント
Calendlyアカウントにサインインする
Calendlyの公式サイトにアクセスし、メールアドレスとパスワードでログインします。すると、イベントやアカウント設定を管理するメインダッシュボードが表示されます。統合ページにアクセスする
ログインしたら、右上のプロフィールアイコンを見つけてクリックします。ドロップダウンメニューから「Integrations」を選択します。ここには、Calendlyで利用可能なすべての統合と開発者向けオプションが表示されます。APIとWebhookのセクションに移動する
統合ページをスクロールし、「API and Webhooks」と表示されたセクションを見つけます。ここをクリックすると、個人用アクセストークンを生成するオプションを含む開発者向けツールを表示できます。APIキー(個人用アクセストークン)を生成する
ボタンをクリックして新しい個人用アクセストークンを生成します。識別用にトークン名の入力とパスワードの確認を求められる場合があります。送信後、トークンは一度だけ表示されるので、コピーして安全な場所に保管してください。APIキーをアプリケーションで使用する
コピーしたAPIキーをHTTPリクエストのヘッダーや、Calendlyと連携するサードパーティアプリケーションに貼り付けます。このキーはCalendlyのデータへのアクセス権を与えるため、機密として厳重に管理してください。
よくある落とし穴とその回避方法
キーをすぐにコピーしない
Calendlyでは、APIキーは生成時に一度しか表示されません。コピーし忘れた場合は、現在のキーを無効化して新しいトークンを作成する必要があります。期限切れまたは無効化されたトークンを使用する
トークンを無効化した場合や期限切れになった場合、連携は動作しなくなります。無効化されたトークンは、関連するすべてのシステムで必ず新しいものに置き換えてください。APIキーを公開する
APIキーを公開のコードリポジトリ、フォーラム、または信頼できない相手に決して共有しないでください。Calendlyアカウントへのアクセスに悪用される可能性があります。誤ったヘッダーを使用する
API呼び出しを行う際は、正しいヘッダーを使用していることを確認してください。Calendlyでは、通常、次の形式のAuthorizationヘッダーが含まれます:
Authorization: Bearer your_api_keyAPIドキュメントを読まない
APIを使用する前に、CalendlyのAPIドキュメントを読んでください。レート制限、エンドポイント、レスポンス形式を理解するのに役立ち、連携を成功させるために不可欠です。
Calendly APIキーの取得に関するよくある質問
Calendly APIキーはログインパスワードと同じですか?
いいえ、これは統合用の別のトークンで、APIリクエストでのみ使用すべきです。APIキーの有効期限はどのくらいですか?
手動で失効させるまで有効です。セキュリティのため、トークンを定期的にローテーションするのがよいでしょう。複数のAPIキーを持つことはできますか?
Calendlyは現在、ユーザーごとに一度に1つのトークンの生成のみをサポートしています。新しいものを作成するには、既存のトークンを失効させる必要があります。APIキーはどこに保存すべきですか?
安全な環境変数またはシークレットマネージャーに保存してください。スクリプトやフロントエンドコードに直書きしてはいけません。Calendly APIキーで何ができますか?
イベント、ユーザー、組織、Webhook、空き状況のエンドポイントにアクセスできます。カスタムワークフロー、データ同期、統合を可能にします。macで画面録画するには?
Macで画面録画するには、Trupeer AIを使用できます。画面全体をキャプチャでき、AIアバターの追加、ナレーションの追加、動画の拡大・縮小などのAI機能を提供します。trupeerのAI動画翻訳機能を使えば、動画を30以上の言語に翻訳できます。画面録画にAIアバターを追加するには?
画面録画にAIアバターを追加するには、AI画面録画ツールを使用する必要があります。Trupeer AIはAI画面録画ツールで、複数のアバターを使った動画作成を支援し、動画用の自分のアバター作成もサポートします。windowsで画面録画するには?
Windowsで画面録画するには、内蔵のゲームバー(Windows + G)や、AIアバター、ナレーション、翻訳などのより高度な機能を備えたTrupeer AIのような高度なAIツールを使用できます。動画にナレーションを追加するには?
動画にナレーションを追加するには、trupeer aiのChrome拡張機能をダウンロードします。サインアップ後、音声付きの動画をアップロードし、trupeerから希望のナレーションを選択して、編集した動画をエクスポートします。画面録画でズームインするには?
画面録画中にズームインするには、Trupeer AIのズーム効果を使用します。これにより、特定の瞬間に拡大・縮小でき、動画コンテンツの視覚的なインパクトを高められます。
おすすめ記事
関連チュートリアル

