Cara Menghapus Presentasi Canva – Tutorial Langkah demi Langkah
Perlu menghapus presentasi dari Canva? Pelajari cara menghapus presentasi Canva secara permanen dari desain Anda hanya dengan beberapa klik.
This guide provides step-by-step instructions on how to delete a presentation in Canva. Follow these detailed instructions to ensure the presentation is removed correctly from your account.
Please note that the process involves moving the presentation to the Trash first, with an option to permanently delete it from there.
If you want to remove a presentation from your Canva workspace, you can easily do so by moving it to the trash. Here’s how:
Step-by-Step Instructions:
Go to Your Canva Homepage
Navigate to canva.com and log in to your account.Locate the Presentation
Find the design thumbnail of the presentation you wish to delete under “Recent designs” or “Projects.”Click the Three Dots (More icon)
Hover over the thumbnail and click the three dots in the top-right corner.Select “Move to Trash”
From the dropdown menu, choose “Move to Trash” to remove the design from your workspace.
Additional Tips:
While Editing: You can also move a presentation to trash from the editor view by clicking File > Move to trash.
Shared Designs: If the design was shared with you, you can remove it from your view, but only the original owner can permanently delete it.
Recover from Trash: Trashed designs stay in the Trash section for 30 days (unless permanently deleted). You can restore them if needed.
Step-by-Step Guide: How to delete canva presentation
Step 1
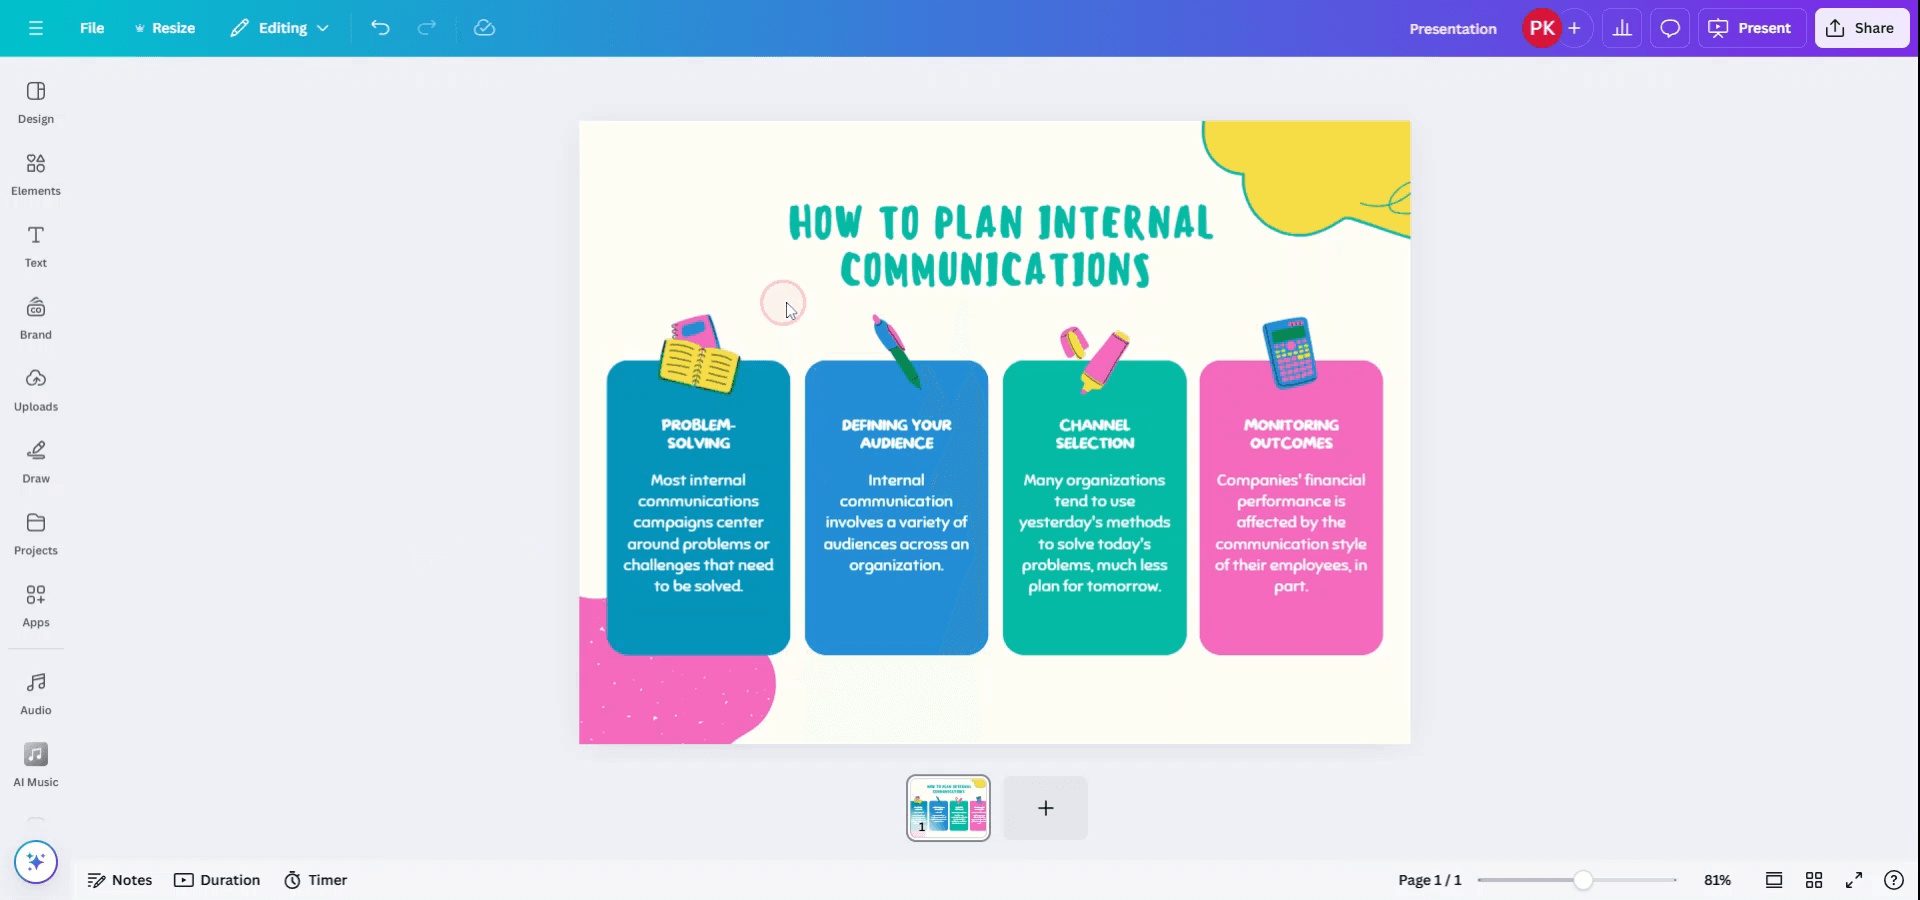
Access your Canva account and open the presentation you wish to delete.
Step 2
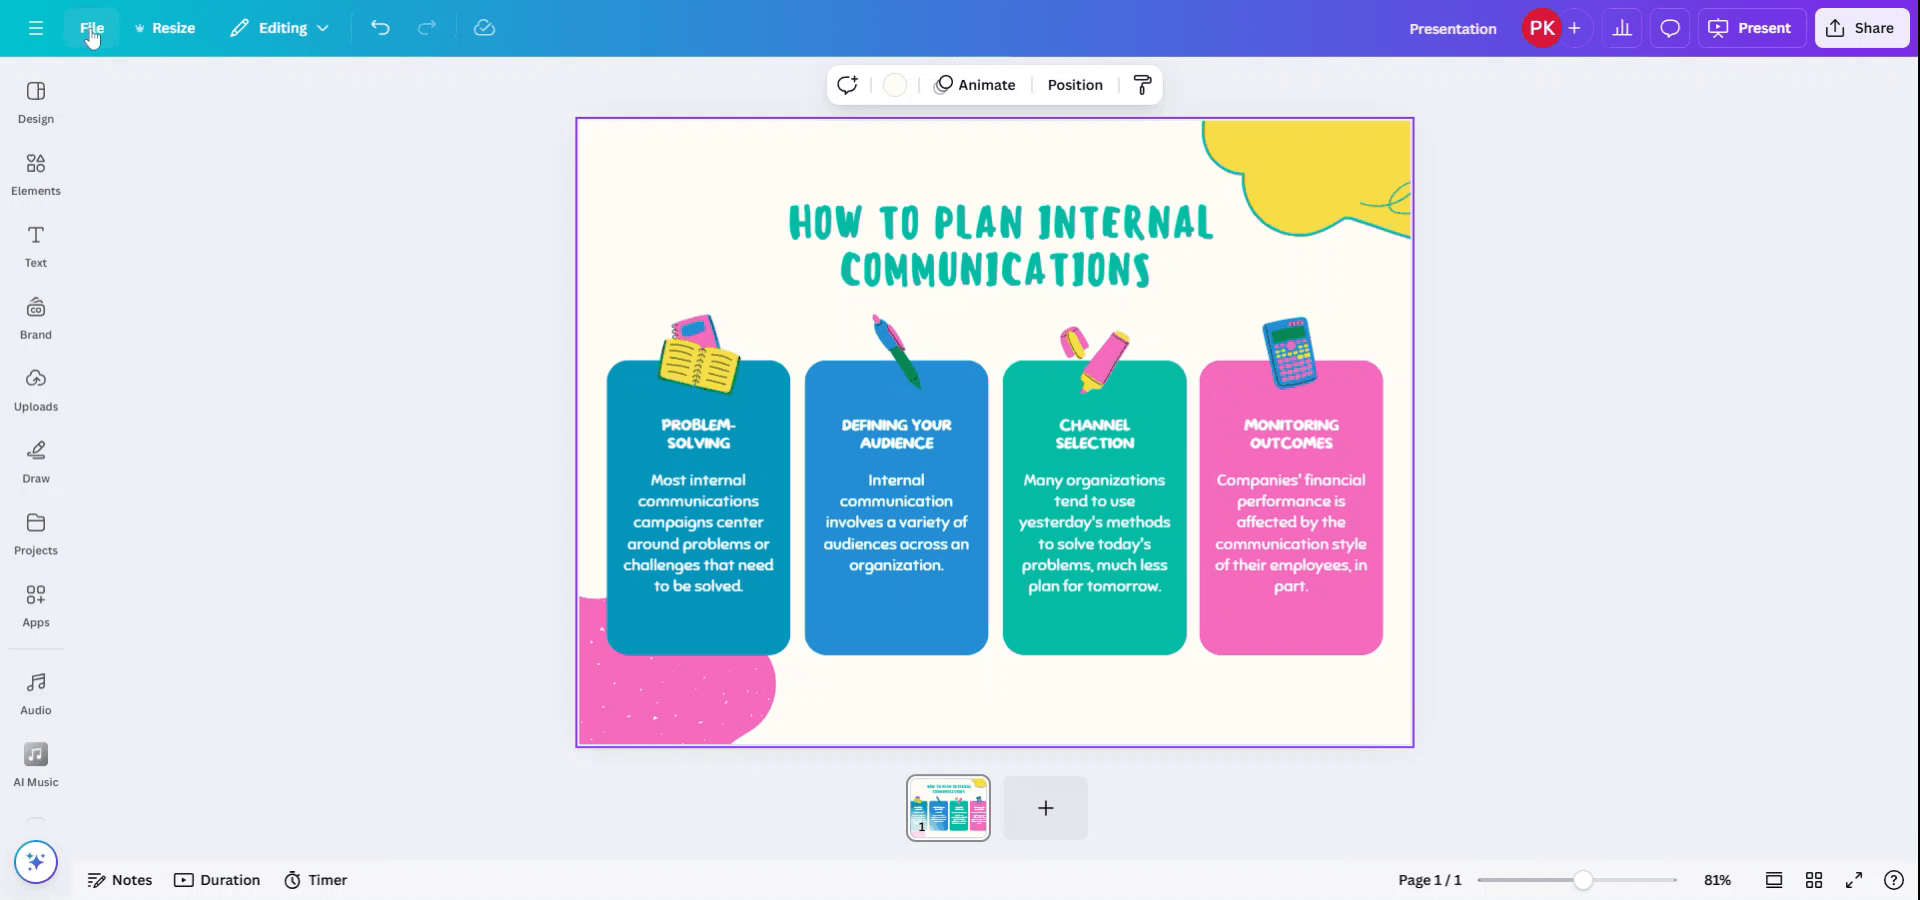
In the opened presentation, navigate to the top menu and select 'File.'
Step 3
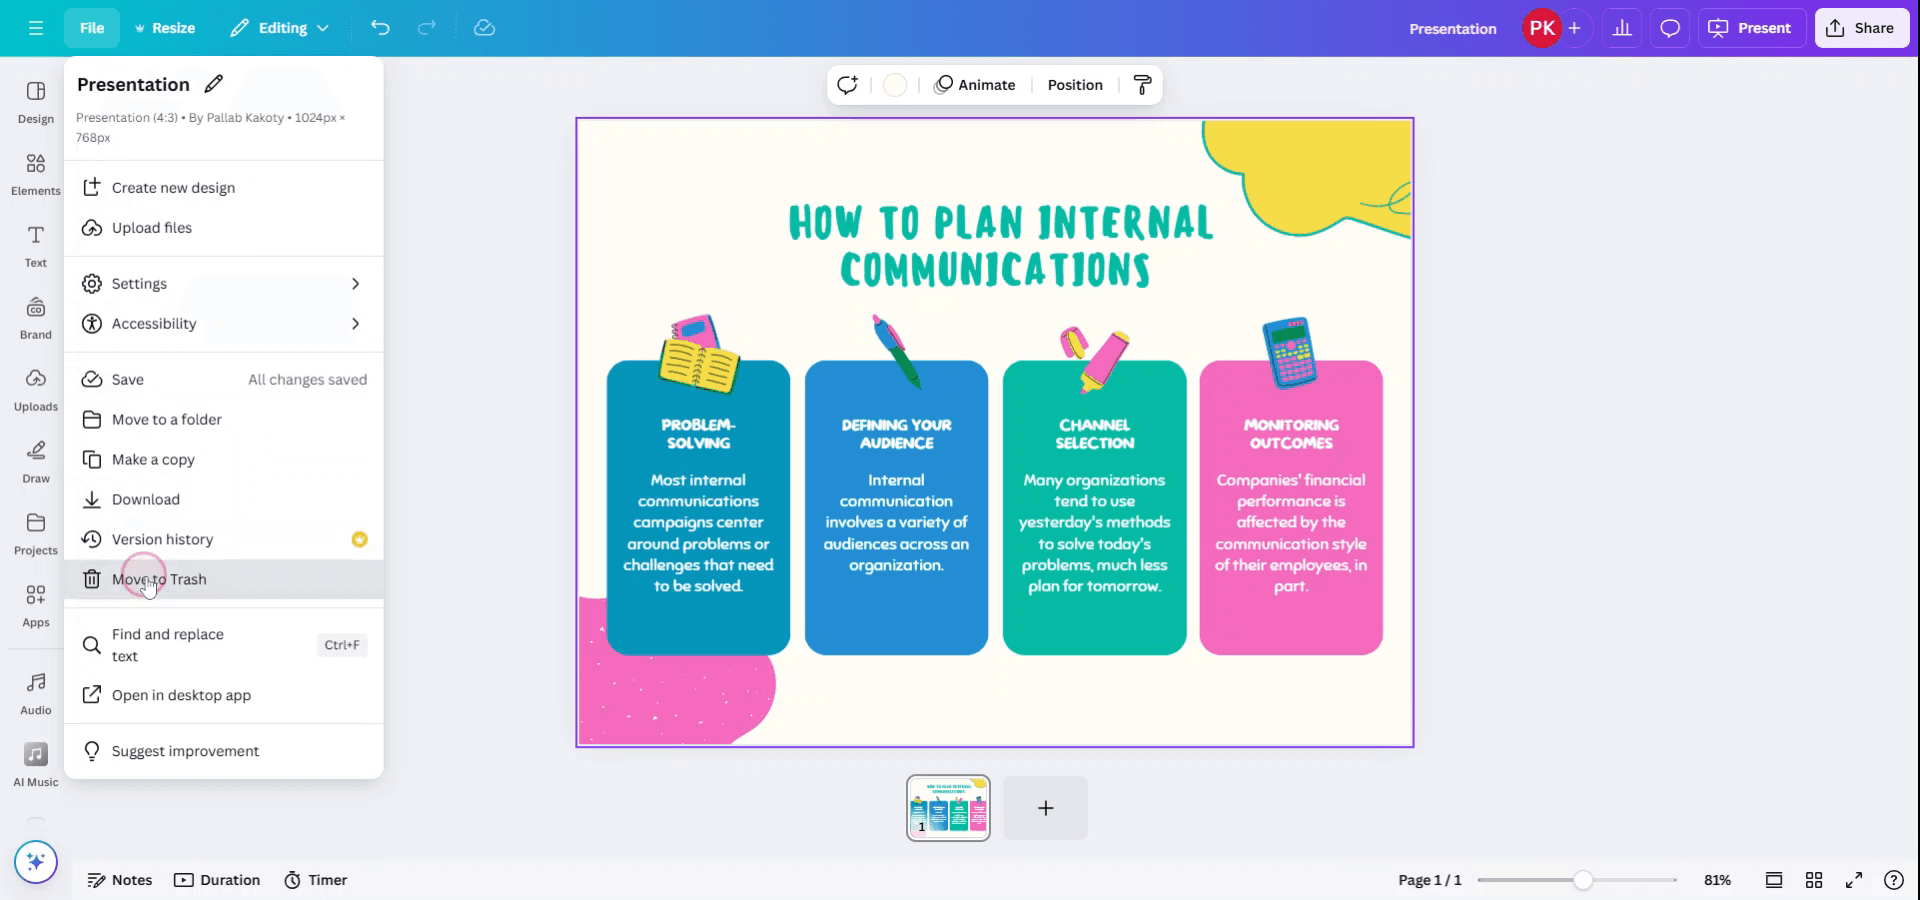
From the 'File' drop-down menu, choose the option 'Move to Trash.'
Step 4
A pop-up will appear asking for confirmation to move the presentation to Trash.

Step 5
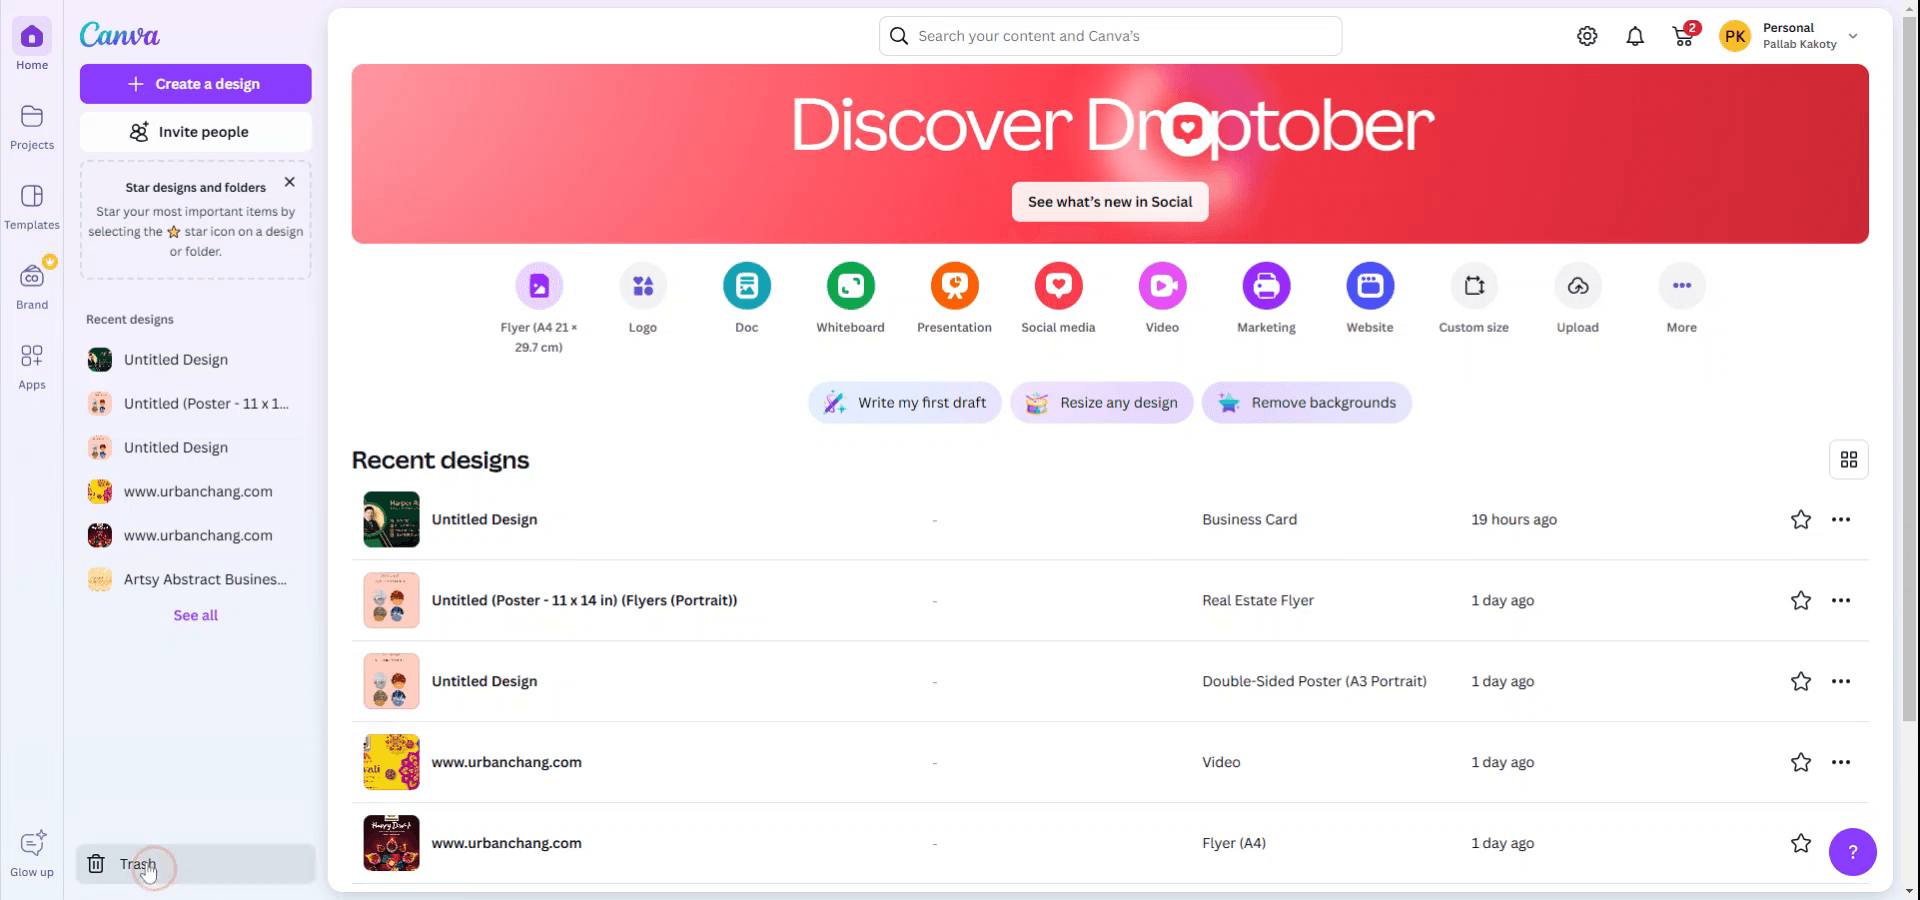
Once confirmed, the file will be automatically moved to the Trash. To delete it permanently, click on 'Trash' in the Home menu.
Step 6
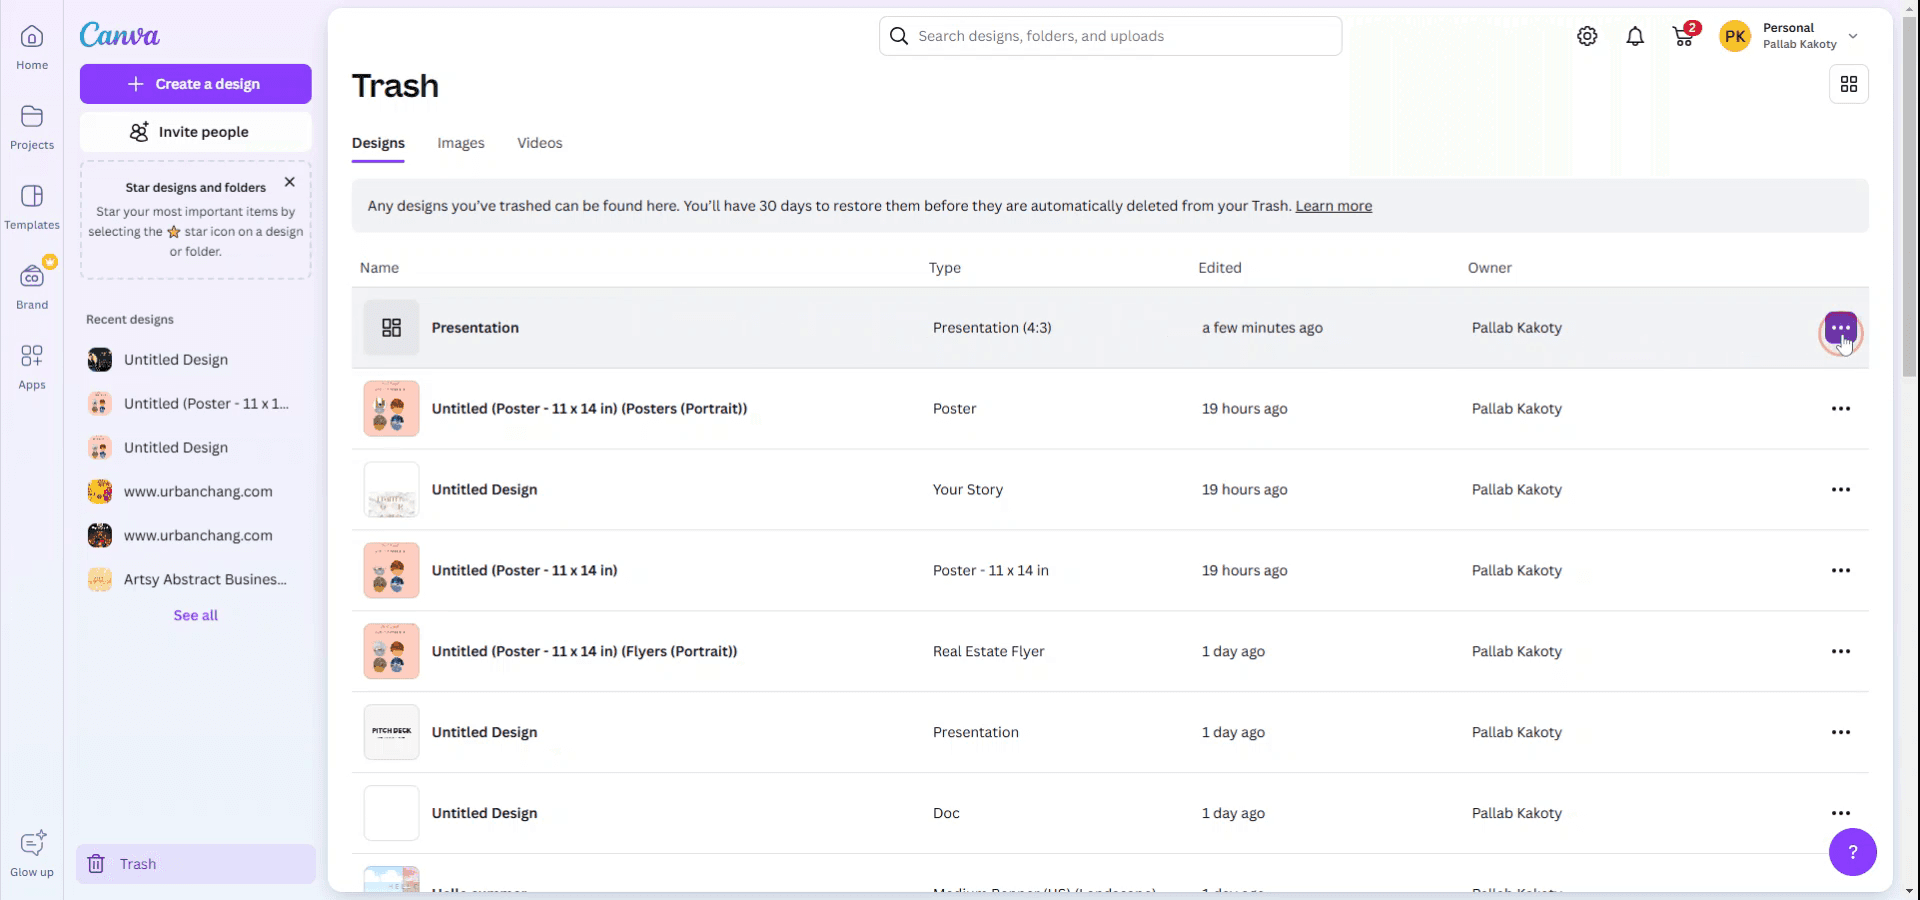
Locate the presentation in the Trash. Click on the three-dot menu associated with the presentation and select 'Delete from Trash.'
Step 7
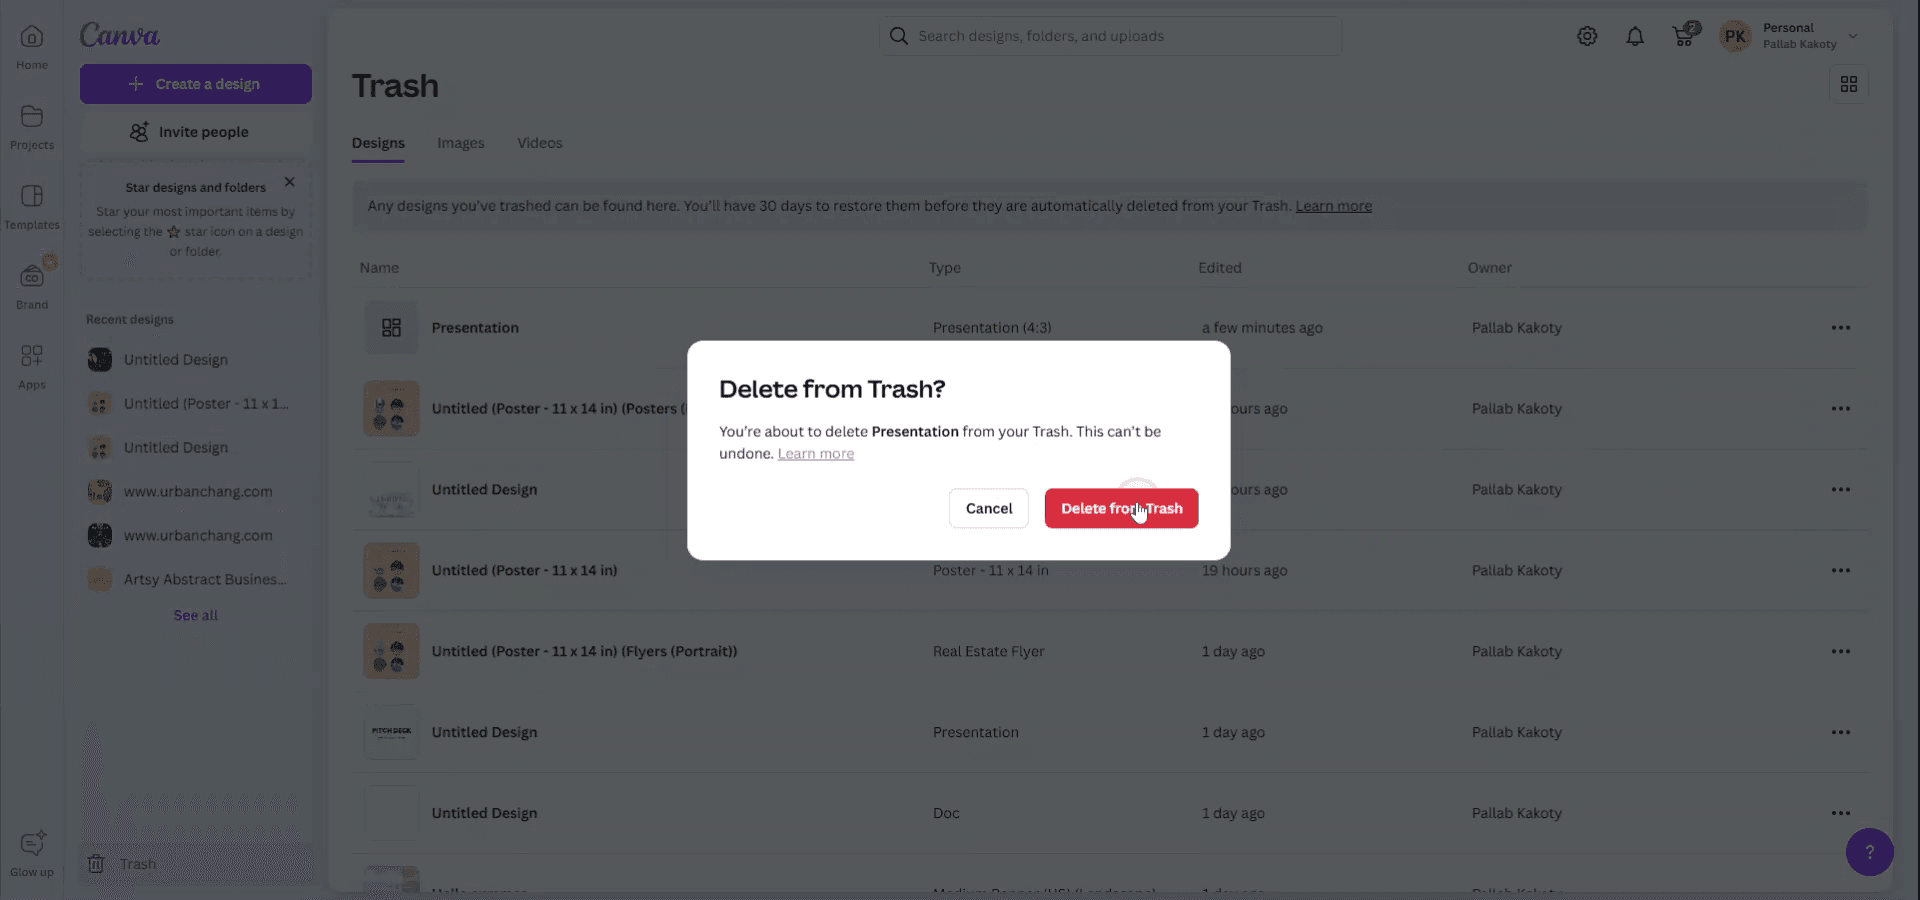
A final confirmation will be required to permanently delete the presentation from the Trash.
Tips pro untuk menghapus presentasi Canva
Buka Desain di Canva:
Buka beranda Canva Anda dan buka desain yang ingin Anda hapus.Buka Bagian "Semua desain Anda":
Di sidebar kiri, klik "Semua desain Anda" untuk melihat daftar presentasi yang tersimpan.Pilih Presentasinya:
Arahkan kursor ke presentasi yang ingin Anda hapus. Tiga titik (opsi lainnya) akan muncul di thumbnail.Klik Tiga Titik dan Pilih "Pindahkan ke Sampah":
Dari menu dropdown, pilih "Pindahkan ke Sampah" untuk menghapus desain. Ini akan memindahkan presentasi ke tempat sampah Anda.Kosongkan Sampah (Opsional):
Untuk menghapus presentasi secara permanen, buka Sampah Anda (terdapat di sidebar kiri), temukan presentasinya, lalu klik "Hapus Selamanya."
Kesalahan umum dan cara menghindarinya saat menghapus presentasi Canva
Terhapus Tidak Sengaja File yang Salah:
Solusi: Periksa desain sekali lagi sebelum mengklik "Pindahkan ke Sampah" untuk memastikan Anda menghapus presentasi yang benar.Tidak Mengosongkan Sampah:
Solusi: Setelah memindahkan desain ke Sampah, ingat bahwa desain tersebut tidak terhapus permanen sampai Anda mengosongkan Sampah. Jika Anda yakin ingin menghapus file, buka folder Sampah dan hapus permanen.Desain Masih Muncul Setelah Dihapus:
Solusi: Terkadang, perlu waktu sejenak agar desain menghilang dari workspace Anda setelah dipindahkan ke Sampah. Muat ulang halaman jika desain masih terlihat.Mengira Sampah sebagai Arsip:
Solusi: Pastikan Anda memindahkan desain ke "Sampah" dan bukan mengarsipkannya. Desain yang diarsipkan tidak dihapus dan dapat dipulihkan nanti.Tidak Bisa Membatalkan Penghapusan:
Solusi: Canva menyediakan jendela 30 hari untuk memulihkan item dari Sampah. Jika Anda perlu memulihkan desain yang terhapus, lakukan dalam rentang waktu tersebut.
FAQ Umum untuk menghapus presentasi Canva
Bagaimana cara menghapus permanen presentasi Canva?
Buka "Semua desain Anda," arahkan kursor ke presentasi, klik tiga titik, lalu pilih "Pindahkan ke Sampah." Setelah itu, buka Sampah dan klik "Hapus Permanen."Bisakah saya membatalkan penghapusan presentasi Canva?
Ya, Anda dapat memulihkan presentasi dari Sampah dalam waktu 30 hari setelah penghapusan dengan membuka Sampah dan mengklik "Pulihkan."Apakah menghapus presentasi saya akan memengaruhi pengguna lain?
Jika Anda sedang mengerjakan presentasi bersama, akses Anda saja yang akan dihapus saat Anda menghapusnya. Pengguna lain mungkin masih memiliki akses kecuali mereka juga menghapusnya dari akun mereka.Apakah ada cara untuk menghapus beberapa presentasi sekaligus?
Saat ini, Canva tidak mendukung penghapusan massal. Anda perlu menghapus setiap presentasi secara individual.Apa yang terjadi pada presentasi di Sampah?
Presentasi di Sampah masih dapat dipulihkan hingga 30 hari. Setelah itu, presentasi akan dihapus secara permanen.Bagaimana cara merekam layar di mac?
Untuk merekam layar di Mac, Anda dapat menggunakan Trupeer AI. Ini memungkinkan Anda menangkap seluruh layar dan menyediakan kemampuan AI seperti menambahkan avatar AI, menambahkan voiceover, menambahkan zoom in dan out di video. Dengan fitur terjemahan video AI dari trupeer, Anda dapat menerjemahkan video ke 30+ bahasa.Bagaimana cara menambahkan avatar AI ke rekaman layar?
Untuk menambahkan avatar AI ke rekaman layar, Anda perlu menggunakan alat perekam layar AI. Trupeer AI adalah alat perekam layar berbasis AI yang membantu Anda membuat video dengan beberapa avatar, sekaligus membantu Anda membuat avatar Anda sendiri untuk video tersebut.Bagaimana cara merekam layar di windows?
Untuk merekam layar di Windows, Anda dapat menggunakan Game Bar bawaan (Windows + G) atau alat AI canggih seperti Trupeer AI untuk fitur yang lebih lanjut, seperti avatar AI, voiceover, terjemahan, dll.Bagaimana cara menambahkan voiceover ke video?
Untuk menambahkan voiceover ke video, unduh ekstensi chrome trupeer ai. Setelah mendaftar, unggah video Anda dengan suara, pilih voiceover yang diinginkan dari trupeer, lalu ekspor video hasil edit Anda.Bagaimana cara memperbesar (Zoom in) pada rekaman layar?
Untuk melakukan zoom saat merekam layar, gunakan efek zoom di Trupeer AI yang memungkinkan Anda melakukan zoom in dan out pada momen-momen tertentu, sehingga meningkatkan dampak visual dari konten video Anda.
Orang juga bertanya
Technical Documentation Generator
Tutorial Terkait