

كيفية عمل تدرّج لوني في Canva
تعلّم كيفية إضافة خلفيات متدرجة أو تراكبات في Canva باستخدام العناصر المدمجة وحيل التصميم البسيطة—مثالي للتصاميم الاحترافية والجذابة للنظر.
في هذا المستند، ستتعلم كيفية إنشاء تدرج لوني في كانفا. سنرشدك خلال عملية تحديد الخلفية الخاصة بك، وإضافة ألوان جديدة، ومشاركة تصميمك.
ستساعدك هذه الخطوات على إنشاء تصاميم جذابة بصريًا بتأثيرات تدرج لوني في كانفا.
تجعل كانفا من السهل إضافة تدرجات لونية جميلة إلى تصاميمك، سواء كنت تعمل مع الخلفيات أو الأشكال أو حتى النص. يمكنك استخدام رسومات تدرج لوني جاهزة أو إنشاء تدرجات مخصصة مباشرة داخل المحرر.
الطريقة 1: استخدام عناصر تدرج لوني مصممة مسبقًا
1. افتح تصميمك
ابدأ بلوحة فارغة أو افتح مشروعًا موجودًا.
2. انتقل إلى علامة تبويب “العناصر”
انقر على “العناصر” في اللوحة اليسرى، ثم اكتب “تدرج لوني” في شريط البحث.
3. اختر تدرجًا لونيًا
تحت “الرسومات”، سترى خيارات متعددة للتدرج اللوني—خطي، شعاعي، ملون، خفيف، إلخ.
4. أضف وعدّل
انقر لإضافته إلى تصميمك. غيّر الحجم أو دوّر العنصر أو غيّر الألوان (إذا كانت قابلة للتحرير) باستخدام شريط الأدوات.
الطريقة 2: إنشاء تدرج لوني مخصص (لمستخدمي كانفا برو)
1. حدّد العنصر
انقر على شكل أو خلفية أو مربع نص تريد تطبيق التدرج اللوني عليه.
2. افتح منتقي الألوان
انقر على مربع اللون في شريط الأدوات العلوي.
3. اختر علامة تبويب “التدرج اللوني”
إذا كانت متاحة، فانتقل إلى علامة تبويب التدرج اللوني.
4. أضف نقاط الألوان وعدّلها
انقر على “+” لإضافة نقاط الألوان (حتى 10).
انقر على كل نقطة لتعيين لون.
اسحب لإعادة ترتيب النقاط أو ضبط الزوايا.
5. اختر نوع التدرج اللوني
اختر من خطي أو شعاعي أو أنماط أخرى حسب المتاح.
نصائح لتصاميم تدرج لوني أفضل
جرّب التباين: امزج الألوان الداكنة والفاتحة لإضفاء عمق.
استخدم ألوان الهوية: احفظ التدرجات اللونية المخصصة في حزمة العلامة التجارية الخاصة بك لضمان الاتساق.
طبّقها على مختلف العناصر: التدرجات اللونية ليست للخلفيات فقط—يمكنك استخدامها على النصوص والأيقونات والطبقات الشفافة أيضًا.
دليل خطوة بخطوة: كيفية إنشاء تدرج لوني في كانفا
الخطوة 1
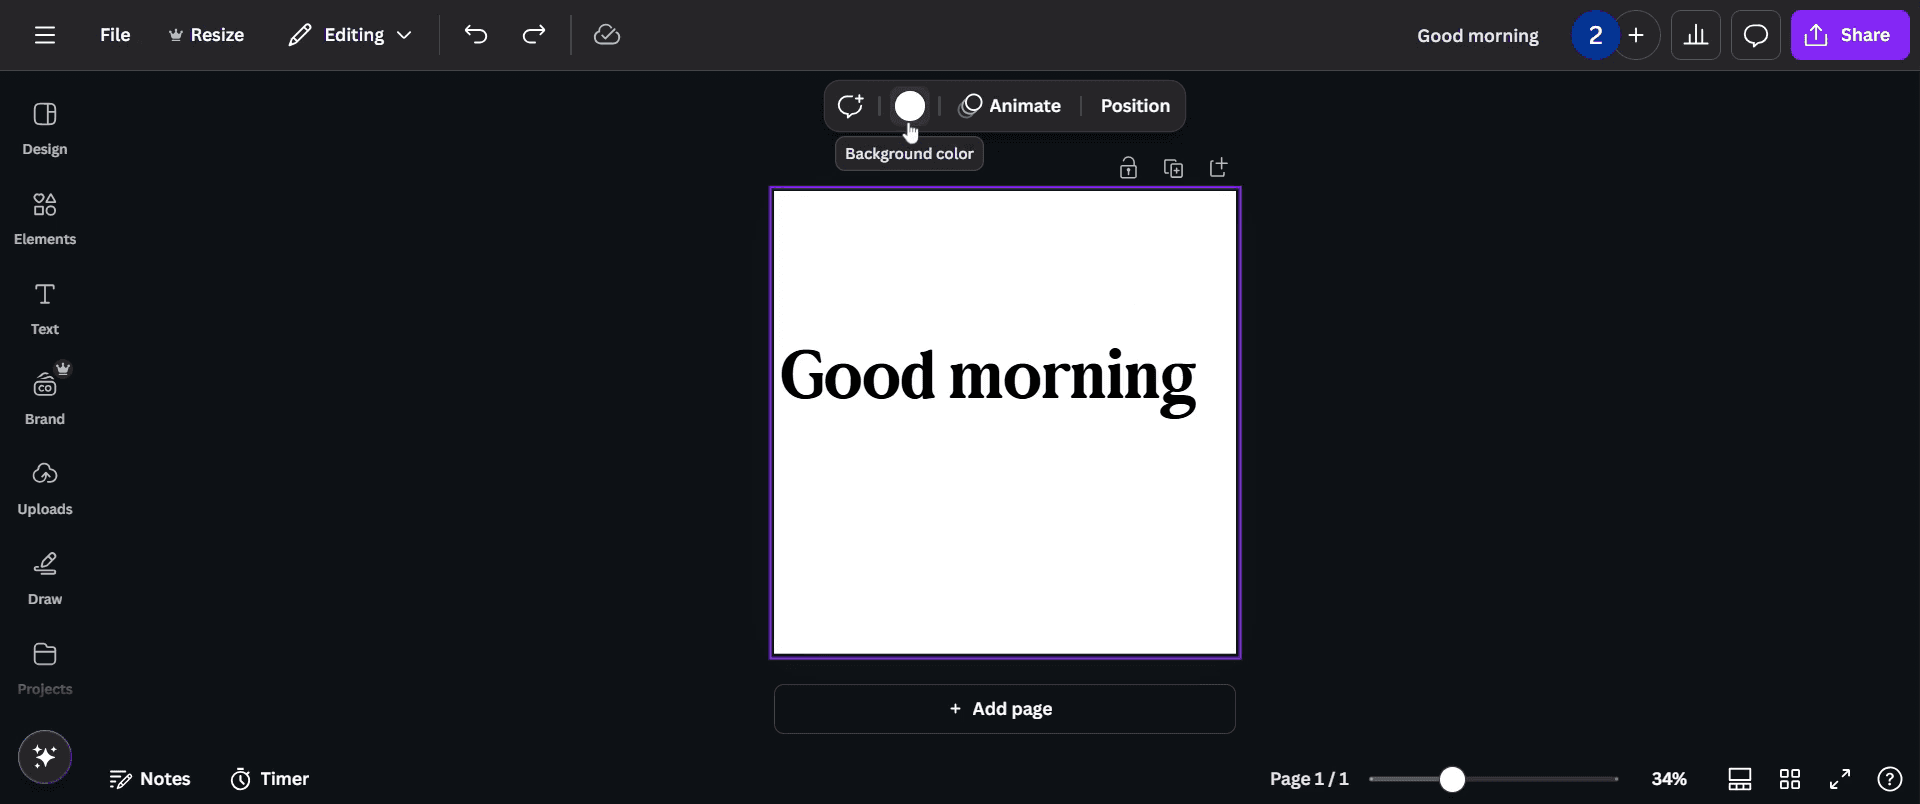
انقر على الخلفية لتحديدها.

الخطوة 2
انتقل وانقر على خيار "لون الخلفية".
الخطوة 3
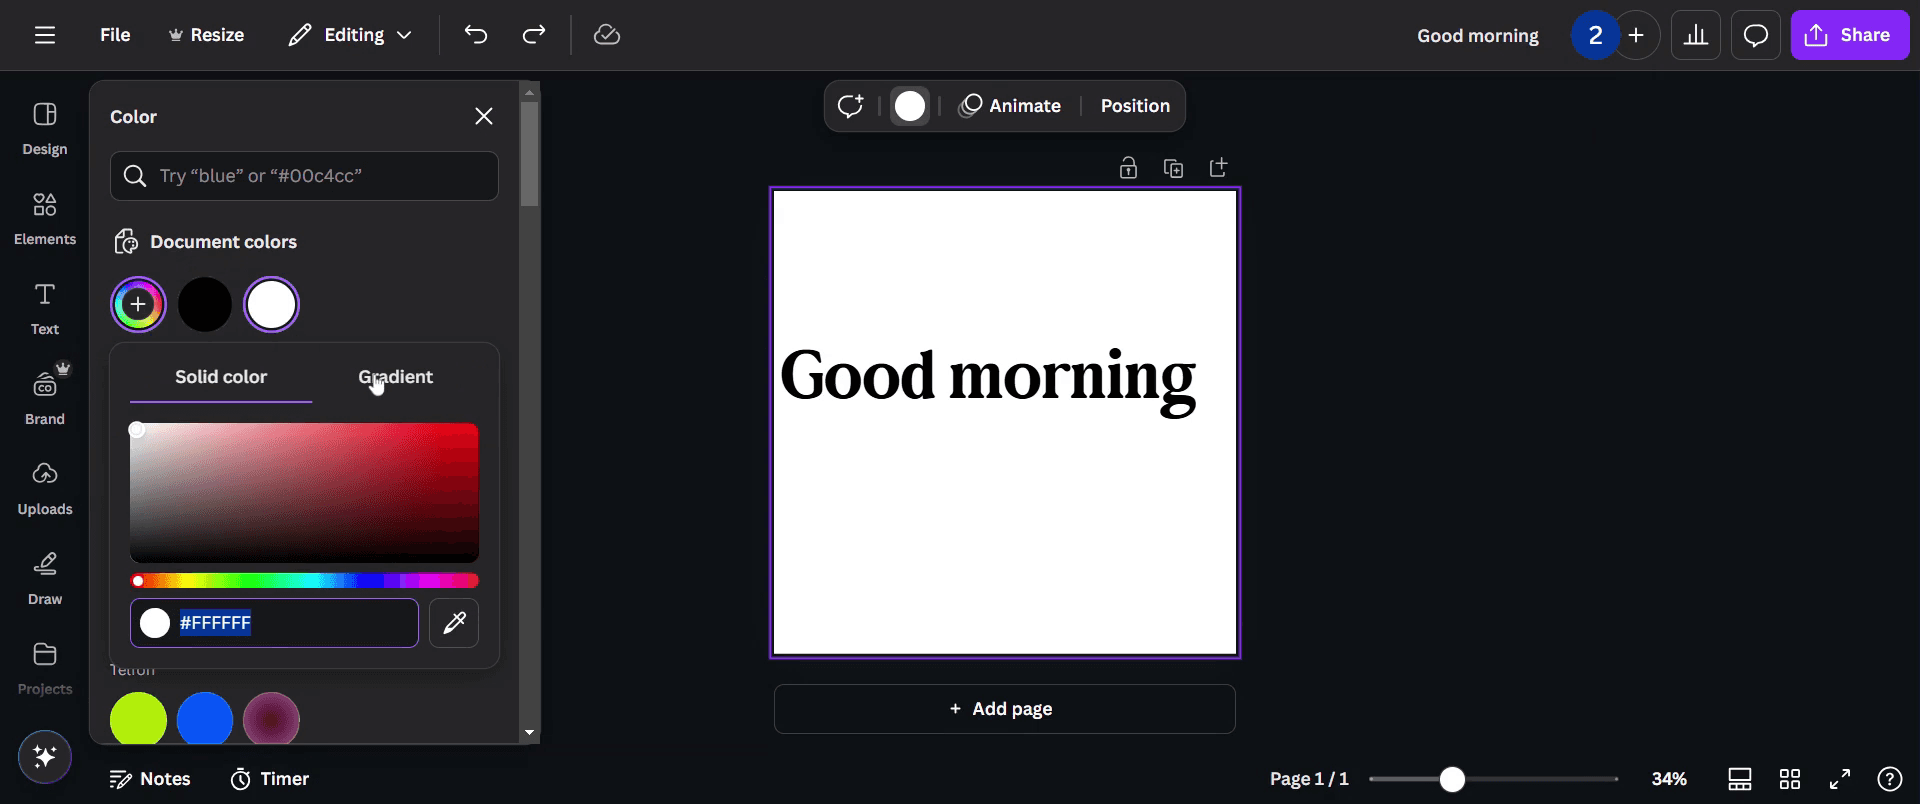
اختر خيار "إضافة ألوان جديدة" من قسم ألوان المستند.

الخطوة 4
حدد قسم "التدرج اللوني".
الخطوة 5
هنا، يمكنك اختيار وإضافة لون تدرج لوني جديد.
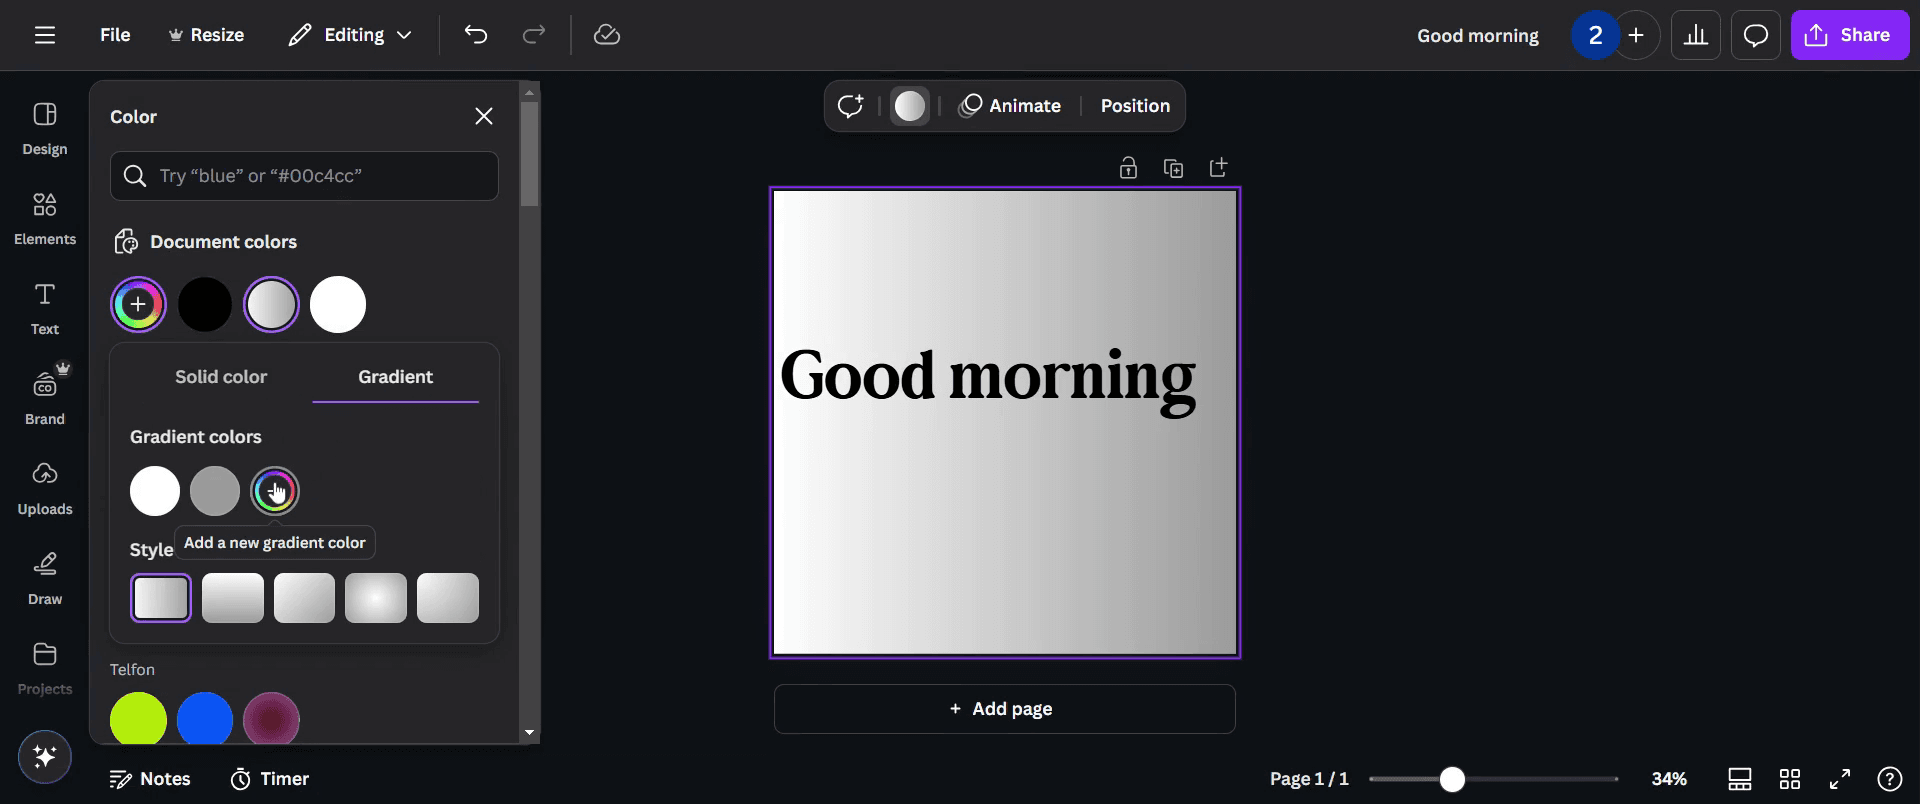
الخطوة 6
خصّص التدرج اللوني الخاص بك عن طريق اختيار الألوان حسب تفضيلاتك.

الخطوة 7
بمجرد أن تكون راضيًا عن الألوان والتصميم، انقر على زر "مشاركة".

نصائح احترافية لإنشاء تدرج لوني في Canva
استخدم عنصر التدرج من علامة تبويب العناصر لإضافة تأثير انتقال سلس إلى تصميمك بسرعة
اضبط مستويات الشفافية لدمج التدرج بسلاسة مع الخلفية أو عناصر التصميم الأخرى
جرّب ألوان تدرج مختلفة لإنشاء تأثيرات بصرية لافتة تعزز تصميمك
الأخطاء الشائعة & كيفية تجنبها عند إنشاء تدرج لوني في Canva
قد يؤدي اختيار ألوان متنافرة إلى جعل التدرج يبدو غير جذاب؛ استخدم ألوانًا متكاملة لانتقال سلس
قد يؤدي عدم ضبط الشفافية إلى ظهور حواف حادة؛ استخدم أداة الشفافية لتنعيم تأثير التدرج
قد يؤدي الإفراط في استخدام التدرجات إلى جعل التصاميم تبدو مزدحمة؛ طبّقها بشكل استراتيجي للحفاظ على مظهر نظيف واحترافي
الأسئلة الشائعة حول إنشاء تدرج لوني في Canva
1. هل يمكنني إنشاء تدرج لوني مخصص في Canva؟
حاليًا، لا يدعم Canva التدرجات اللونية القابلة للتخصيص بالكامل، ولكن يمكنك تكديس عناصر التدرج وضبط الشفافية للحصول على تأثير مشابه
2. كيف أغيّر ألوان التدرج اللوني في Canva؟
حدّد عنصر تدرج، وانقر على خيارات الألوان في الأعلى، واختر ألوانًا جديدة لتخصيص المظهر
3. هل يمكنني تطبيق تدرج لوني على النص في Canva؟
لا يدعم Canva النص المتدرج مباشرةً، ولكن يمكنك إنشاء خلفية متدرجة واستخدام تأثير قناع القص لتحقيق هذا المظهر
4. كيف أنشئ خلفية متدرجة في Canva؟
ما عليك سوى تحديد تدرج من علامة تبويب العناصر، وتغيير حجمه ليغطي اللوحة بالكامل، وضبط الألوان لتناسب تصميمك،
5. كيف أسجل الشاشة على Mac?
لاستخدام تسجيل الشاشة على جهاز Mac، يمكنك استخدام Trupeer AI. يتيح لك التقاط الشاشة بالكامل ويوفر إمكانيات ذكاء اصطناعي مثل إضافة صور رمزية بالذكاء الاصطناعي، وإضافة تعليق صوتي، وإضافة تكبير وتصغير في الفيديو. مع ميزة ترجمة الفيديو بالذكاء الاصطناعي من trupeer، يمكنك ترجمة الفيديو إلى أكثر من 30 لغة.
6. كيف أضيف صورة رمزية بالذكاء الاصطناعي إلى تسجيل الشاشة؟|
لإضافة صورة رمزية بالذكاء الاصطناعي إلى تسجيل الشاشة، ستحتاج إلى استخدام أداة تسجيل شاشة بالذكاء الاصطناعي. Trupeer AI هي أداة تسجيل شاشة بالذكاء الاصطناعي، تساعدك على إنشاء مقاطع فيديو بعدة صور رمزية، كما تساعدك في إنشاء صورتك الرمزية الخاصة بالفيديو.
7. كيف أسجل الشاشة على windows?
لتسجيل الشاشة على Windows، يمكنك استخدام Game Bar المدمج (Windows + G) أو أداة ذكاء اصطناعي متقدمة مثل Trupeer AI للحصول على ميزات أكثر تقدمًا مثل الصور الرمزية بالذكاء الاصطناعي، والتعليق الصوتي، والترجمة، إلخ.
8. كيف أضيف تعليقًا صوتيًا إلى الفيديو?
لـإضافة تعليق صوتي إلى الفيديوهات، نزّل إضافة Chrome الخاصة بـ trupeer ai. بعد التسجيل، ارفع الفيديو الخاص بك مع الصوت، واختر التعليق الصوتي المطلوب من trupeer ثم صدّر الفيديو المعدّل الخاص بك.
9. كيف أقرّب في تسجيل الشاشة?
لتقريب الصورة أثناء تسجيل الشاشة، استخدم تأثيرات التكبير في Trupeer AI التي تتيح لك التكبير والتصغير في لحظات محددة، مما يعزّز التأثير البصري لمحتوى الفيديو الخاص بك.
الأسئلة التي يطرحها الناس أيضًا
دروس ذات صلة

