
كيفية تعديل الشفافية في Canva – دليل سهل للشفافية
تعرّف على كيفية ضبط شفافية الصور والنصوص والعناصر في Canva. اجعل تصاميمك أكثر نعومة أو متعددة الطبقات مع هذا الشرح البسيط خطوة بخطوة.
يقدّم هذا الدليل طريقة مباشرة لتغيير الشفافية في Canva.
باتباع هذه الخطوات، يمكنك بسهولة تعديل شفافية العنصر الذي اخترته لتحقيق التأثير البصري المطلوب.
تتحكم الشفافية في Canva في مدى ظهور العنصر شفافًا. كلما انخفضت الشفافية زادت درجة الشفافية، بينما تكون نسبة 100% ظاهرة بالكامل.
دليل خطوة بخطوة:
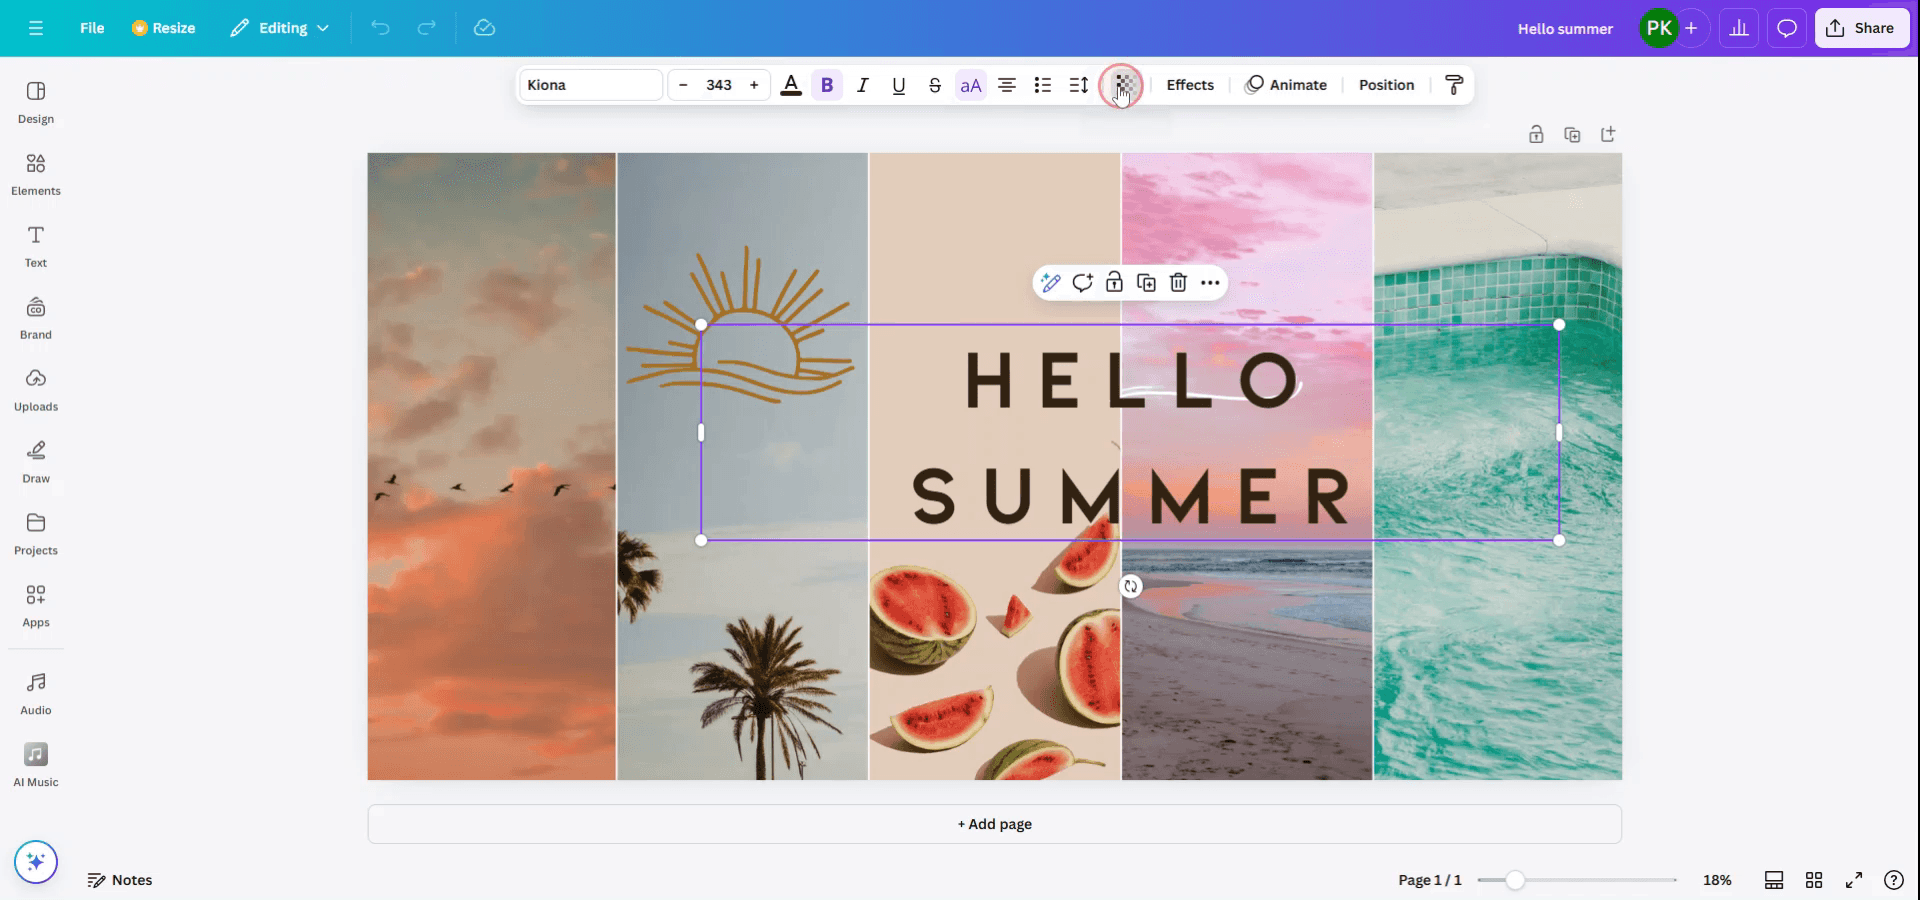
1. حدد العنصر
انقر على الصورة أو مربع النص أو الشكل أو أي عنصر آخر تريد جعله شفافًا.
2. الوصول إلى خيار الشفافية
ابحث عن أيقونة رقعة الشطرنج (أداة الشفافية) في شريط الأدوات أعلى يمين محرر Canva.
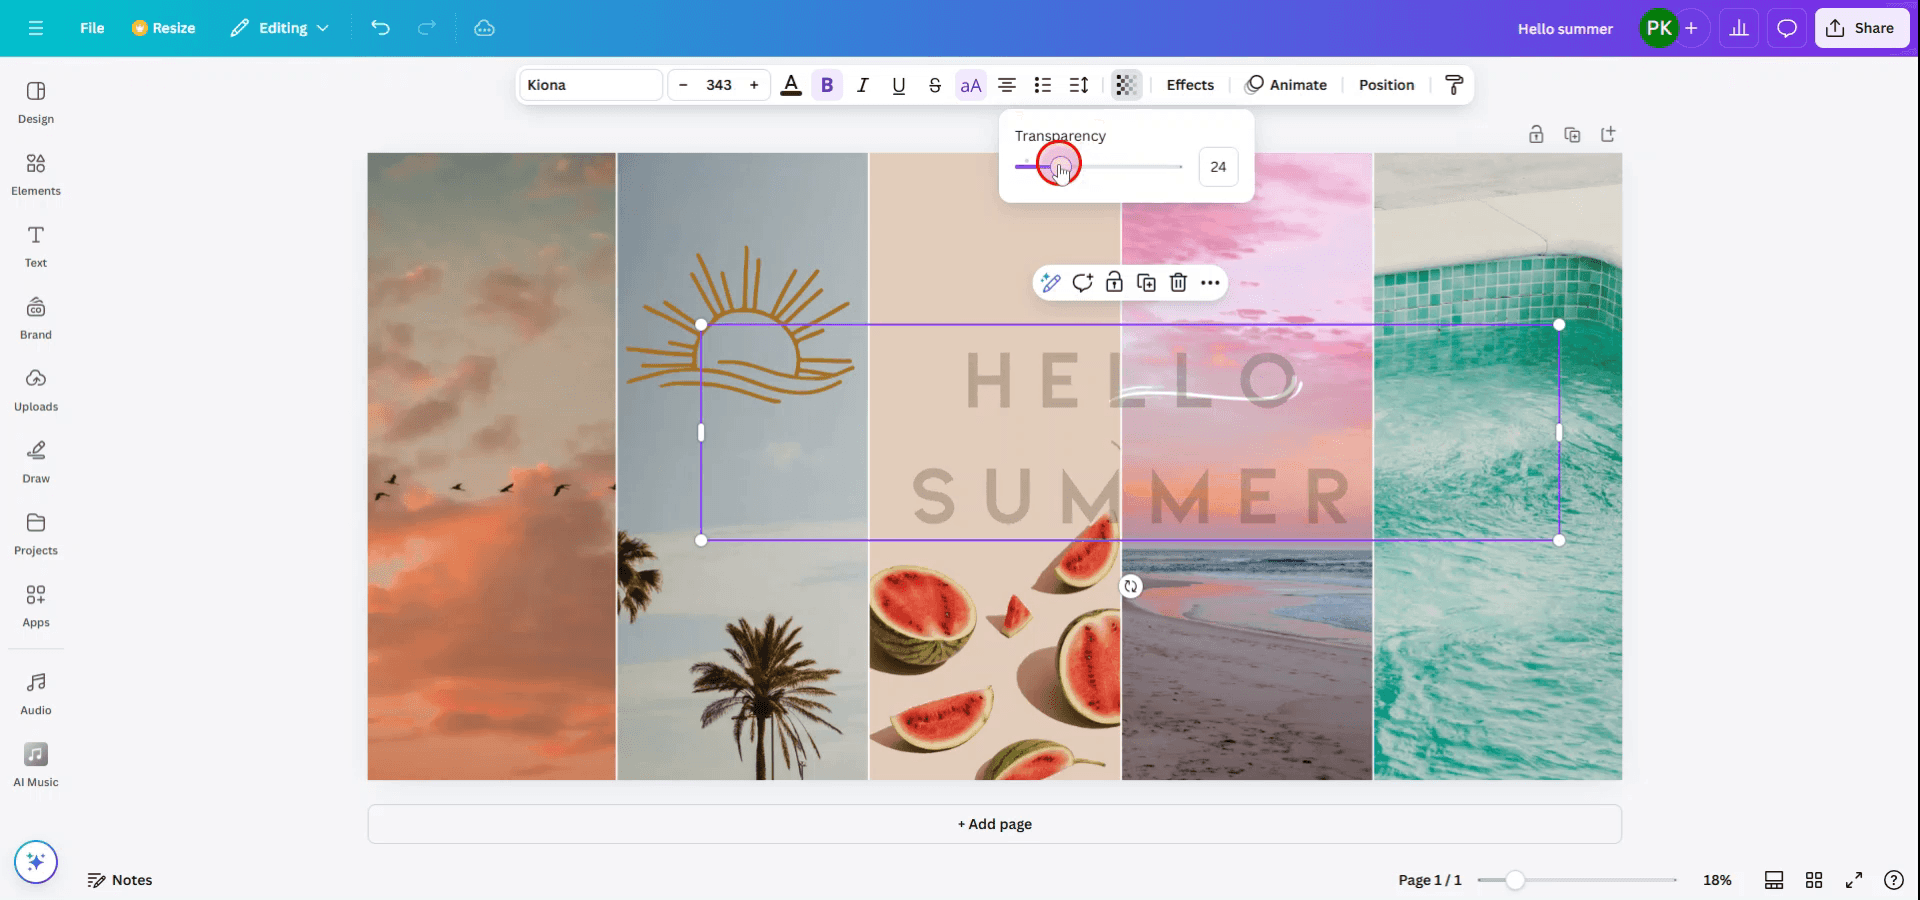
3. اضبط شريط تمرير الشفافية
اسحب شريط التمرير إلى اليسار لتقليل الشفافية (أكثر شفافية) أو إلى اليمين لزيادتها (أقل شفافية).
يمكنك أيضًا كتابة رقم محدد (من 0 إلى 100) في حقل الإدخال.
4. معاينة التغييرات
أثناء تحريك شريط التمرير، سترى العنصر يصبح أكثر أو أقل شفافية في الوقت الفعلي.
5. احفظ تصميمك
بمجرد أن تكون راضيًا عن الشفافية، انقر على "مشاركة" أو "تنزيل" لتصدير تصميمك.
دليل خطوة بخطوة: كيفية ضبط الشفافية في Canva
الخطوة 1
لتغيير شفافية عنصر في Canva، ابدأ بتحديد العنصر المحدد الذي ترغب في تعديل شفافيته.

الخطوة 2
بعد تحديد العنصر، سيظهر شريط أدوات في أعلى الشاشة. حدد خيار 'الشفافية' في شريط الأدوات هذا. ثم سيظهر شريط تمرير، مما يتيح لك ضبط شفافية العنصر حسب تفضيلك.
نصائح احترافية لتغيير الشفافية في Canva
حدّد العنصر الذي تريد تعديله:
انقر على الصورة أو مربع النص أو الشكل أو أي عنصر آخر تريد تغيير الشفافية له.استخدم شريط تمرير الشفافية:
بمجرد تحديد العنصر، انقر على زر "الشفافية" في شريط الأدوات أعلى الصفحة. سيظهر شريط تمرير يتيح لك ضبط شفافية العنصر المحدد.اضبط شريط التمرير:
حرّك شريط التمرير إلى اليسار أو اليمين لخفض الشفافية أو زيادتها. سيجعل ضبطه على 0% العنصر شفافًا بالكامل، بينما يحافظ عليه عند 100% معتمًا بالكامل.طبّق الشفافية على الطبقات:
إذا كانت لديك عناصر متداخلة، يمكنك تغيير شفافية الطبقات الفردية للحصول على تأثير مدمج. وهذا مفيد بشكل خاص لصور الخلفية أو طبقات التراكب اللوني.استخدم الشفافية لتأثيرات الألوان والتدرجات:
بالنسبة إلى النص أو الأشكال، يمكنك ضبط الشفافية لإنشاء تأثيرات شفافة على الألوان أو التدرجات، مما يسمح بدمجها بسلاسة مع الخلفية.
الأخطاء الشائعة وكيفية تجنبها عند تغيير الشفافية في Canva
الشفافية لا تظهر بعد التعديل:
تأكد من أن العنصر الذي تعدّله لديه لون أو صورة ظاهرة خلفه. إذا كانت الصورة شفافة بالكامل، فقد تبدو غير مرئية.تغيير شفافية عناصر أخرى عن طريق الخطأ:
تأكد من أنك حدّدت العنصر الصحيح قبل ضبط الشفافية. إذا غيّرت الطبقة الخطأ، فاضغط على "تراجع" أو ألغِ تحديد العنصر.إعداد الشفافية لا يظهر بعد التنزيل:
تأكد من أنك تنزّل بالصيغة الصحيحة (مثل PNG للصور الشفافة) حتى يظهر تأثير الشفافية في الملف النهائي.الشفافية تؤثر في وضوح النص:
كن حذرًا عند تطبيق الشفافية على النص، لأنها قد تقلل من وضوحه. فكّر في ضبط الشفافية بشكل خفيف أو إضافة خلفيات متباينة خلف النص.عدم استخدام الطبقات بشكل صحيح:
استخدم ميزة "الموضع" لترتيب العناصر في طبقات بفعالية. يمكن أن يؤدي ضبط الشفافية على صور الخلفية وتكديس النص أو الأشكال الشفافة إلى تصميم جذاب بصريًا.
الأسئلة الشائعة حول تغيير الشفافية في Canva
كيف أغيّر شفافية صورة أو نص في Canva؟
حدّد العنصر، ثم انقر على زر "الشفافية" في شريط الأدوات، واضبط شريط التمرير لتغيير الشفافية.هل يمكنني ضبط الشفافية لعدة عناصر في وقت واحد؟
ستحتاج إلى ضبط شفافية كل عنصر على حدة. قد يساعد تجميع العناصر، لكن يجب أن تتم تعديلات الشفافية واحدًا تلو الآخر.لماذا لا تظهر الشفافية في الملف الذي نزّلته؟
تأكد من أنك تنزّل ملفك بصيغة تدعم الشفافية، مثل PNG. قد لا تحتفظ صيغ PDF بالشفافية.هل يمكنني جعل اللون شبه شفاف؟
نعم، يمكنك تغيير شفافية أي لون أو تدرّج لوني مطبّق على الأشكال أو الخلفيات للحصول على تأثير شبه شفاف.هل يمكنني تطبيق الشفافية على تصميم كامل أو صفحة كاملة؟
لا يمكنك تطبيق الشفافية على التصميم بالكامل دفعة واحدة. ستحتاج إلى ضبط شفافية كل عنصر على حدة.كيفية تسجيل الشاشة على Mac؟
لت سجيل الشاشة على جهاز Mac، يمكنك استخدام Trupeer AI. يتيح لك التقاط الشاشة بالكامل ويوفّر إمكانات ذكاء اصطناعي مثل إضافة صور رمزية بالذكاء الاصطناعي، وإضافة تعليق صوتي، وإضافة التكبير والتصغير في الفيديو. ومع ميزة ترجمة الفيديو بالذكاء الاصطناعي من trupeer، يمكنك ترجمة الفيديو إلى أكثر من 30 لغة.كيفية إضافة صورة رمزية بالذكاء الاصطناعي إلى تسجيل الشاشة؟
لإضافة صورة رمزية بالذكاء الاصطناعي إلى تسجيل الشاشة، ستحتاج إلى استخدام أداة تسجيل شاشة بالذكاء الاصطناعي. Trupeer AI هي أداة تسجيل شاشة بالذكاء الاصطناعي، تساعدك على إنشاء مقاطع فيديو بعدة صور رمزية، كما تساعدك أيضًا في إنشاء صورتك الرمزية الخاصة للفيديو.كيفية تسجيل الشاشة على Windows؟
لتسجيل الشاشة على Windows، يمكنك استخدام شريط الألعاب المدمج (Windows + G) أو أداة ذكاء اصطناعي متقدمة مثل Trupeer AI للحصول على ميزات أكثر تقدمًا مثل الصور الرمزية بالذكاء الاصطناعي، والتعليق الصوتي، والترجمة، إلخ.كيفية إضافة تعليق صوتي إلى الفيديو؟
لإضافة تعليق صوتي إلى الفيديوهات، حمّل إضافة كروم من trupeer ai. بعد التسجيل، ارفع الفيديو الخاص بك مع الصوت، واختر التعليق الصوتي المطلوب من trupeer، ثم صدّر الفيديو المعدّل.كيف أقرّب الصورة في تسجيل الشاشة؟
للتكبير أثناء تسجيل الشاشة، استخدم تأثيرات التكبير في Trupeer AI التي تتيح لك التكبير والتصغير في لحظات محددة، مما يعزّز التأثير البصري لمحتوى الفيديو الخاص بك.
قراءات مقترحة
كيفية إنشاء دفتر يوميات في Canva
كيفية إنشاء نمط من النص في Canva
دروس ذات صلة

