
Hoe maak je gebogen tekst in Canva
Ontdek hoe je gebogen tekst maakt in Canva met slechts een paar klikken. Stapsgewijze handleiding om je ontwerpen een creatieve en professionele uitstraling te geven.
Om gebogen tekst in Canva te maken, selecteer je je tekst en ga je naar de optie "Effecten" in de bovenste werkbalk. Kies het effect "Curve" en pas de intensiteit van de kromming aan met de schuifregelaar. Je kunt ook de letterafstand aanpassen om de tekst rond vormen zoals cirkels te laten lopen
Hier is een meer gedetailleerde uitleg:
Open je ontwerp: Begin met het openen van het Canva-ontwerp waar je gebogen tekst wilt toevoegen.
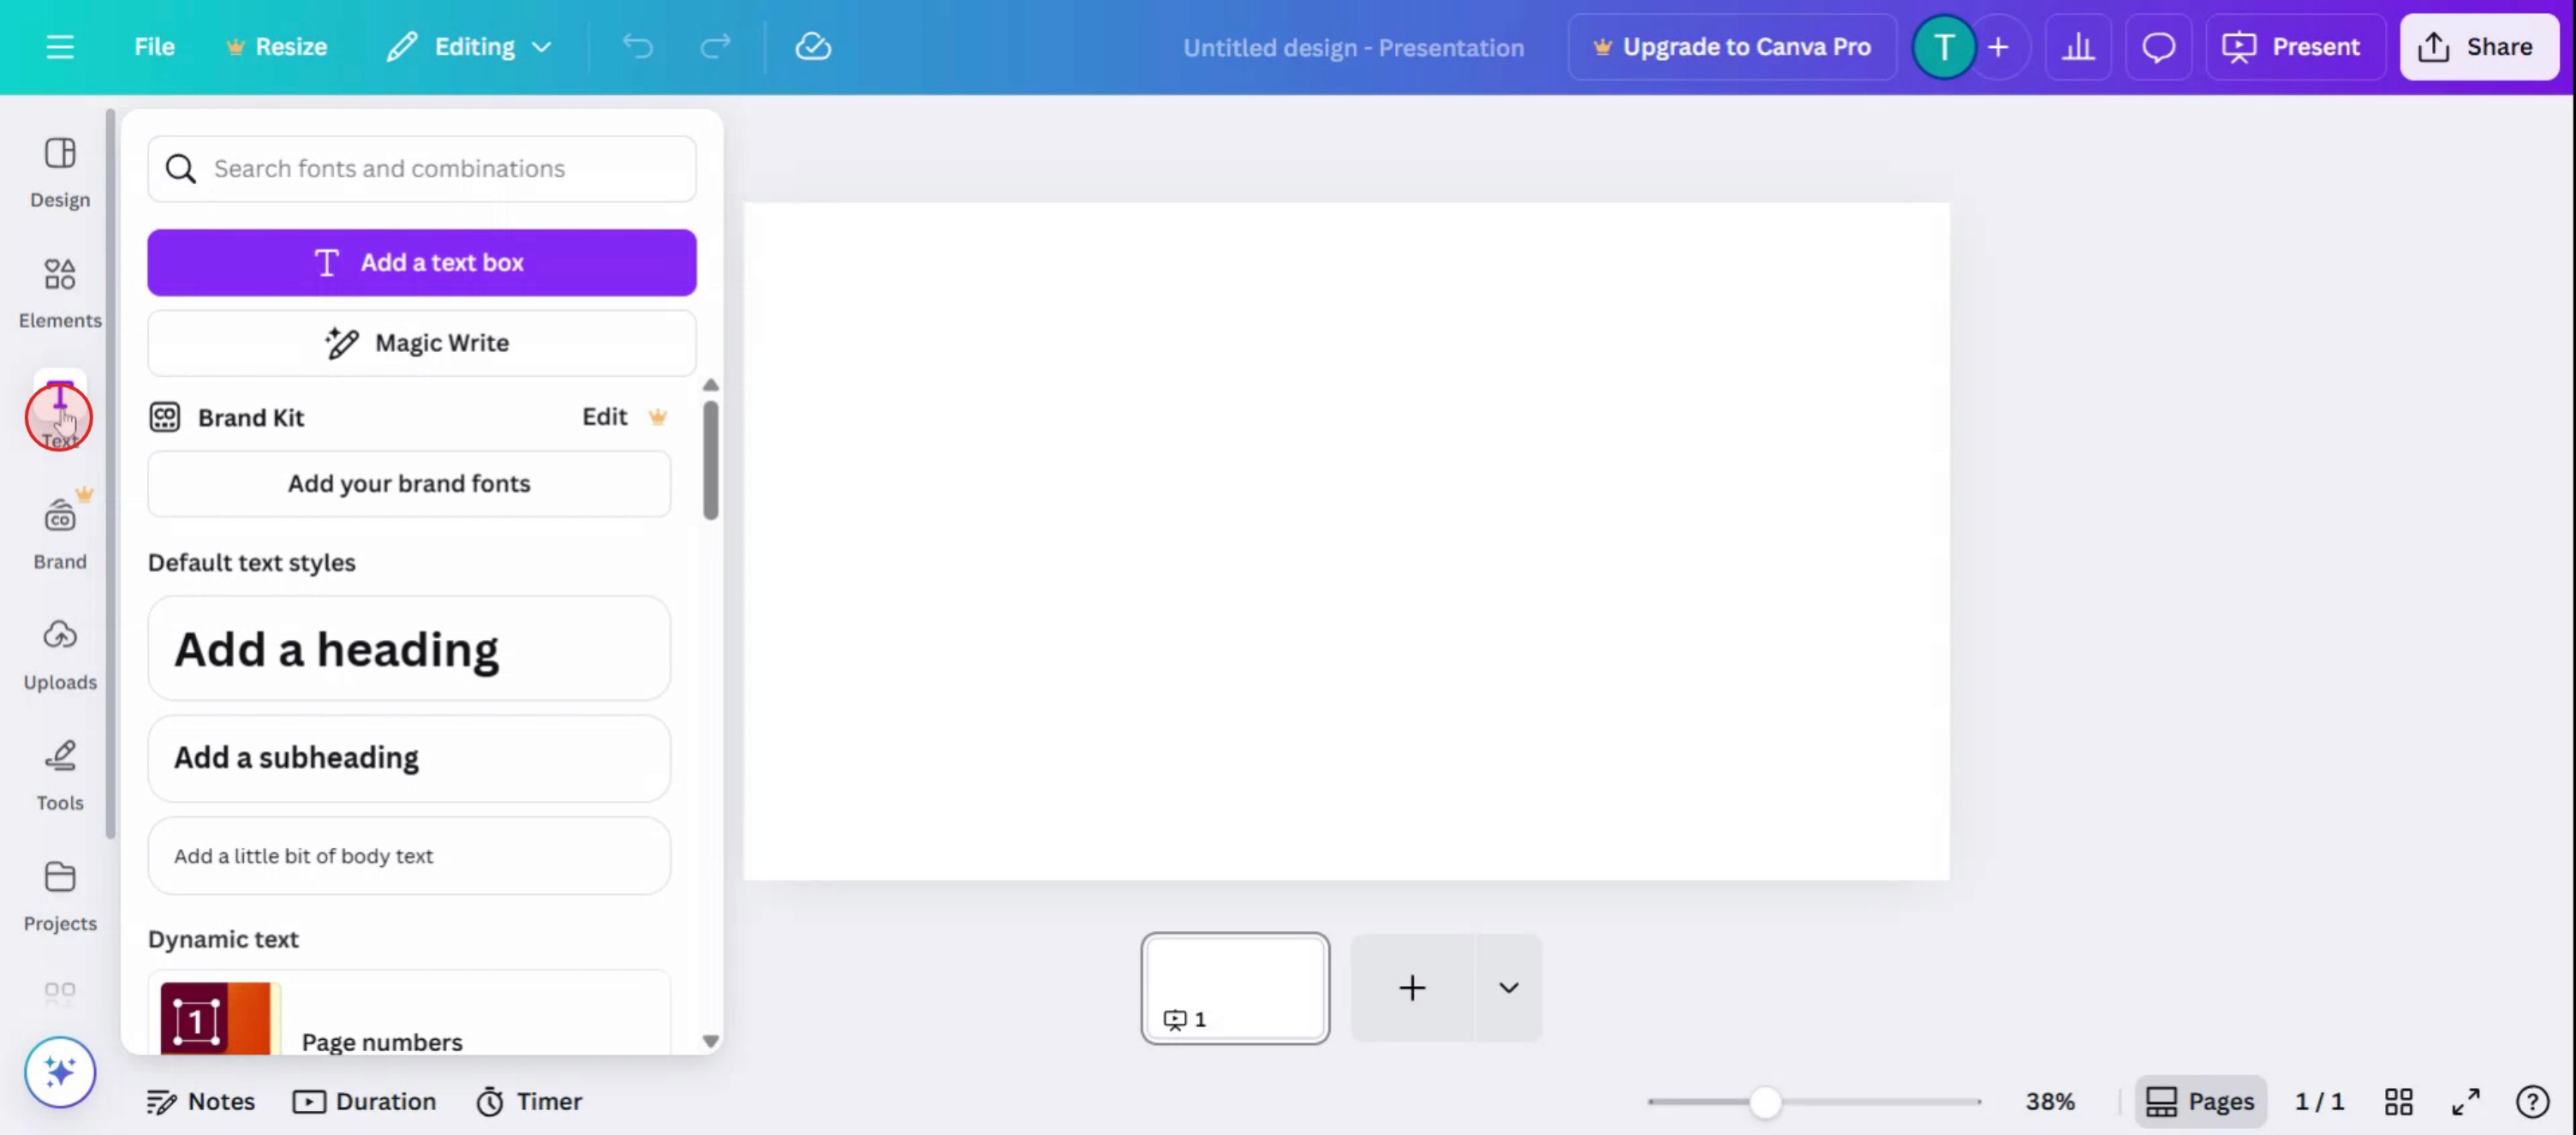
Tekst toevoegen: Klik op de optie "Tekst" in de zijbalk en voeg een tekstvak toe. Typ je gewenste tekst.
Selecteer de tekst: Klik op het tekstvak om het te selecteren.
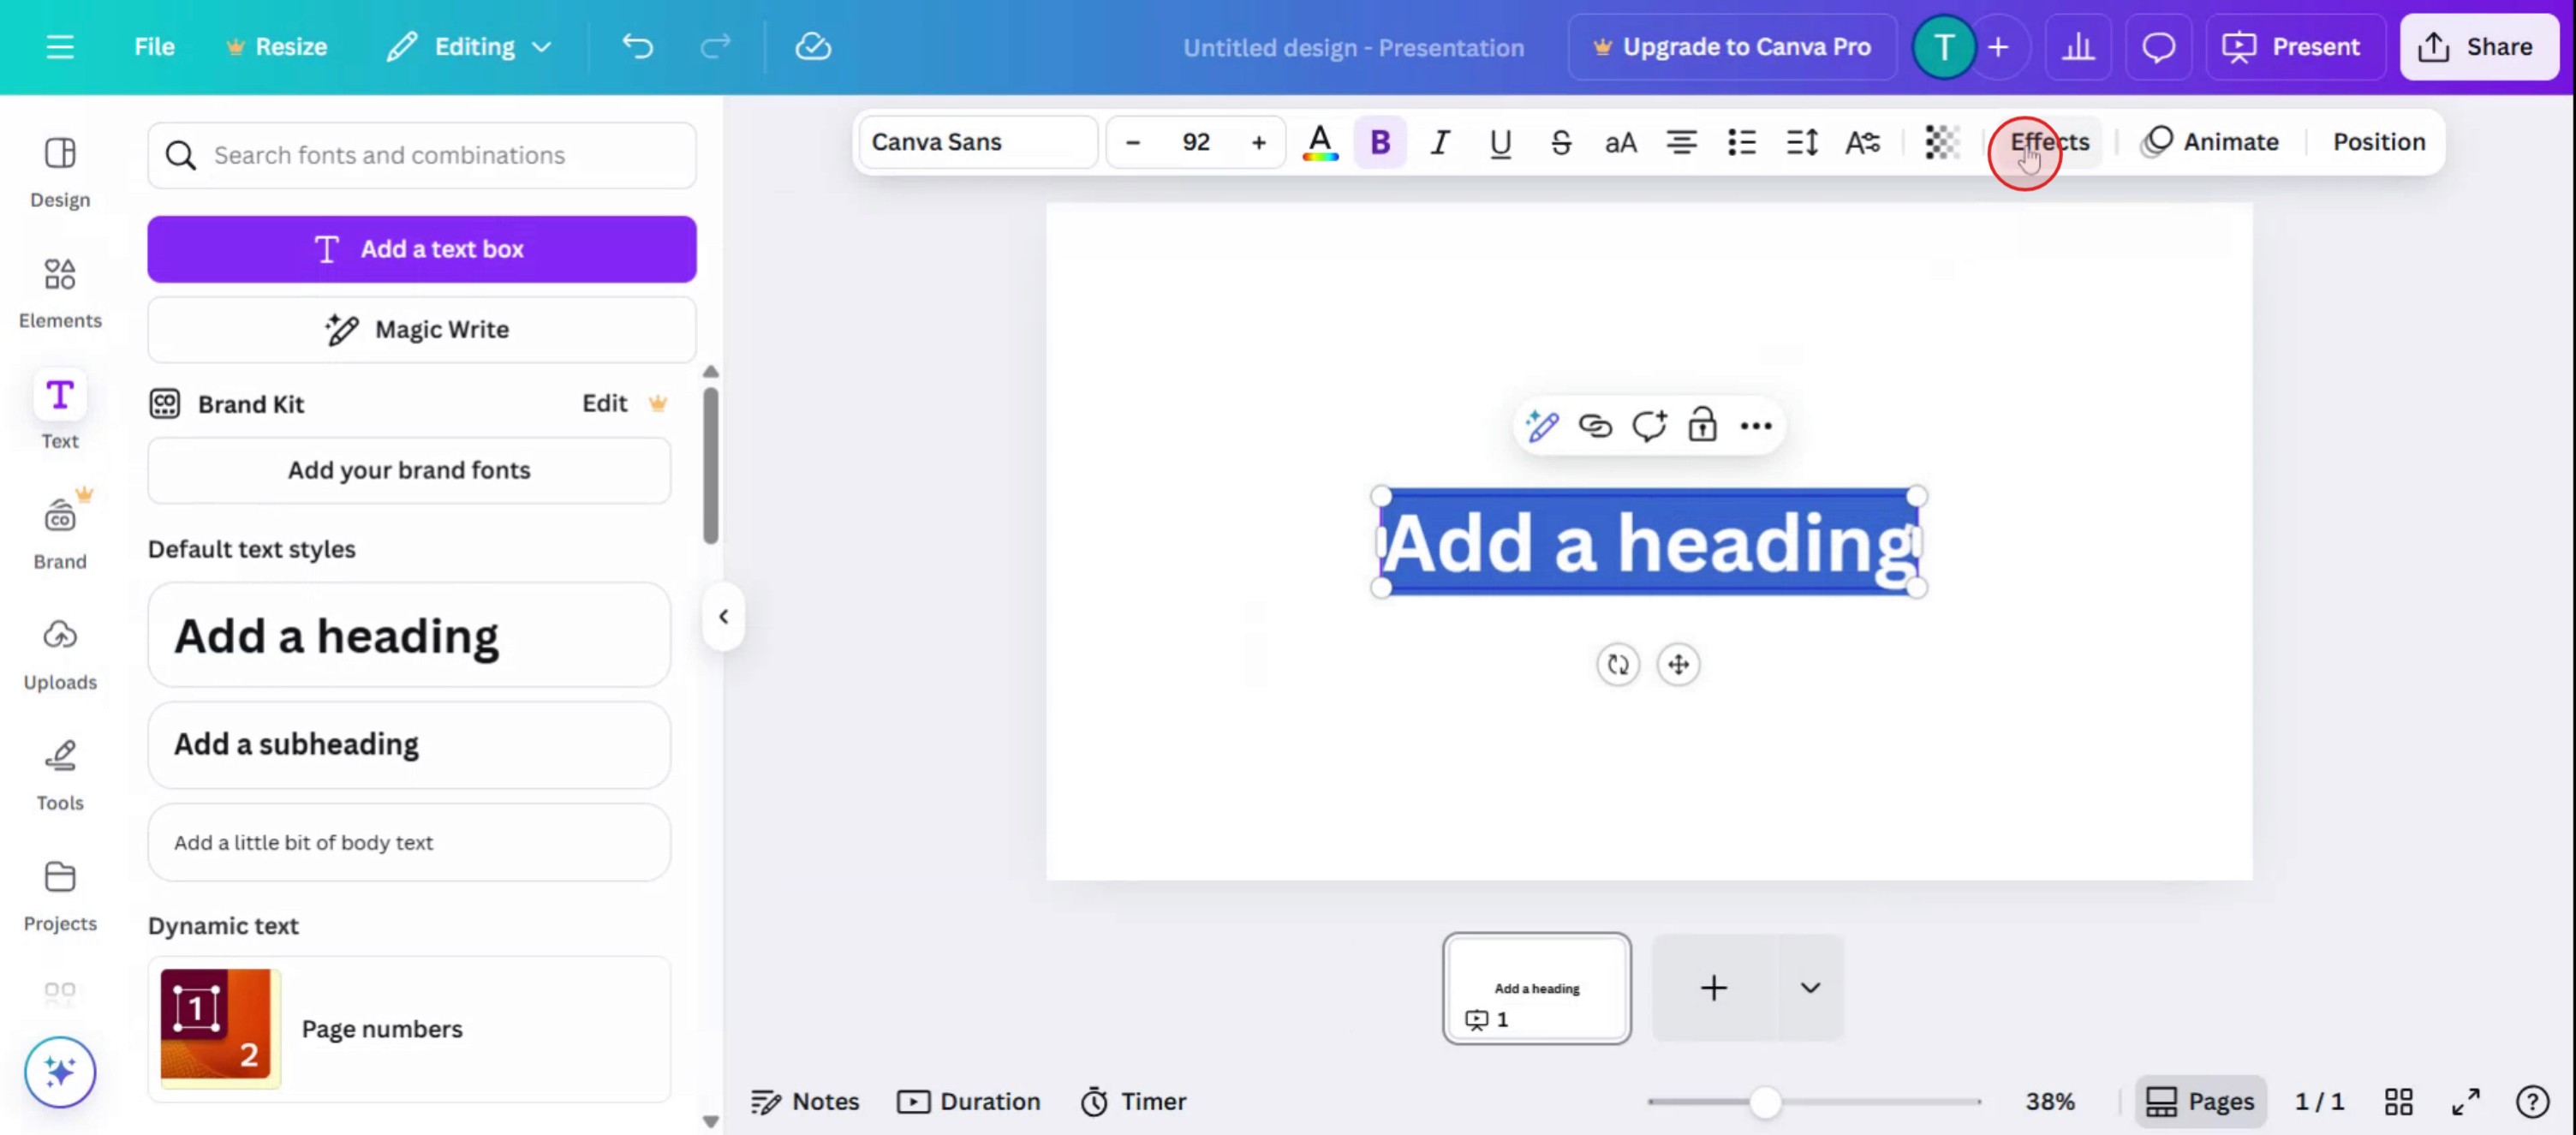
Ga naar Effecten: Klik in de bovenste werkbalk op de knop "Effecten".
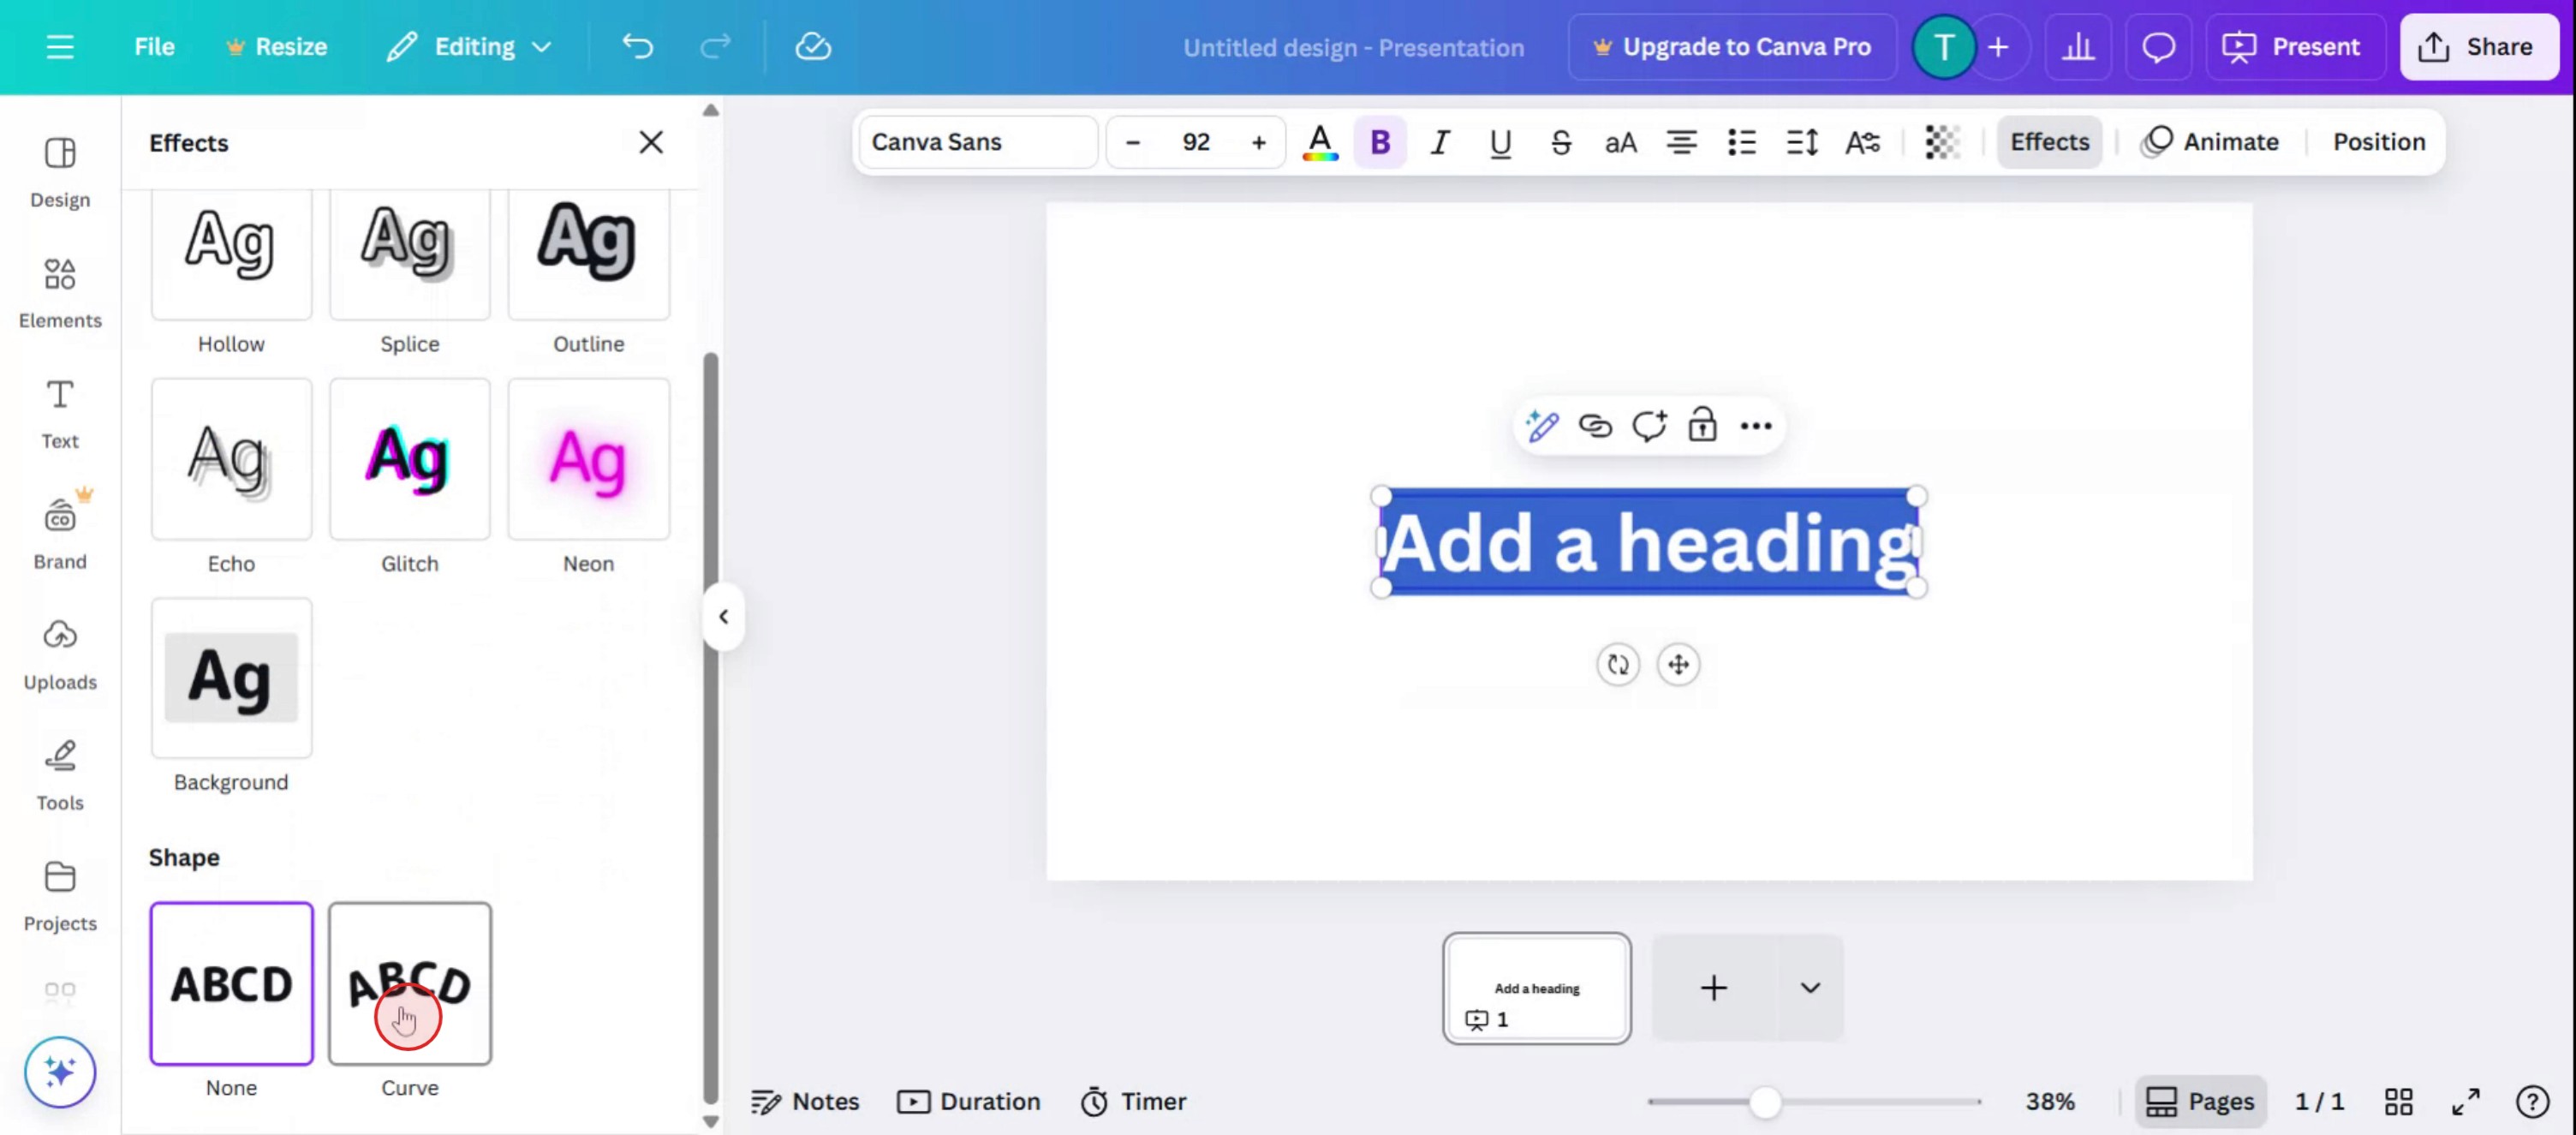
Kies Curve: Scroll omlaag in het effectenpaneel en selecteer "Curve".
Pas de kromming aan: Gebruik de schuifregelaar onder de knop "Curve" om de kromming van je tekst aan te passen. Door deze naar rechts te slepen ontstaat een glimlachvormige kromming, terwijl slepen naar links een omgekeerde kromming oplevert.
Fijn afstellen: Je kunt de letterafstand verder aanpassen met de optie "Spatiëring" in het menu voor tekstopmaak om de tekst strakker rond een cirkel of andere vormen te laten lopen.
Stapsgewijze handleiding: Hoe maak je gebogen tekst in Canva
Stap 1
Selecteer de knop Tekst.
Stap 2
Ga verder door de tekst te selecteren op basis van je keuze.

Stap 3
Klik vervolgens op de optie "Effecten".
Stap 4
Kies onder Vormen Curve.
Stap 5
Zie dat de tekst nu is omgezet in een kromme.

Pro-tips voor het maken van gebogen tekst in Canva
Open je ontwerp in Canva
Log in bij Canva en open een nieuw of bestaand ontwerp waaraan je gebogen tekst wilt toevoegen.Voeg een tekstvak toe
Klik op het tabblad “Tekst” in het linkerpaneel en kies een kop, subkop of doorlopende tekst om aan je canvas toe te voegen.Typ de gewenste tekst
Voer de tekst in die je wilt buigen. Je kunt deze vooraf opmaken met lettertypen, groottes en kleuren voordat je hem buigt.Selecteer het tekstvak
Klik op de tekst zodat het selectiekader eromheen verschijnt.Klik op de knop ‘Effecten’
Klik in het bovenste menu op “Effecten” om een paneel met opmaakopties voor tekst te openen.Kies de optie ‘Buigen’
Klik onder Teksteffecten op “Buigen”. Je tekst wordt dan automatisch gebogen.Pas de schuifregelaar voor de buiging aan
Gebruik de schuifregelaar voor de buiging om de kromming aan te passen. Schuif naar links voor een boog omhoog of naar rechts voor een boog omlaag.Stel de positie nauwkeurig af
Pas de gebogen tekst indien nodig aan qua grootte, draaiing en uitlijning zodat deze in je ontwerp past.
Veelvoorkomende valkuilen en hoe je ze voorkomt
De buigoptie wordt niet weergegeven
Zorg ervoor dat je een tekstvak hebt geselecteerd. Het effect “Buigen” verschijnt alleen wanneer tekst actief is.De tekst wordt te verspreid
Als de boog te breed is, kunnen de letters uitgerekt lijken. Gebruik kortere tekst of verlaag de intensiteit van de buiging.Het lettertype ziet er niet goed uit wanneer het gebogen is
Sommige lettertypen zien er vreemd uit wanneer ze worden gebogen. Probeer te experimenteren met vetgedrukte of eenvoudige lettertypen voor een strakkere uitstraling.Je kunt afzonderlijke letters in gebogen tekst niet bewerken
Buigen wordt toegepast op het hele tekstvak. Als je verschillende stijlen voor specifieke letters wilt, maak dan aparte tekstvakken.Het buigeffect werkt niet in de mobiele app
Het buigeffect kan beperkt zijn of moeilijker te vinden in de Canva mobiele app. Gebruik de desktopversie voor volledige controle.
Veelgestelde vragen over het maken van gebogen tekst in Canva
Hoe buig ik tekst in Canva?
Selecteer het tekstvak, klik op Effecten en kies vervolgens de Curve-optie en pas de schuifregelaar aan.Kan ik de richting van de kromming wijzigen?
Ja, schuif de krommingsregelaar naar links of rechts om de richting van de boog te wijzigen.Is de functie voor gebogen tekst beschikbaar in de gratis versie van Canva?
Ja, tekst buigen is beschikbaar in zowel de gratis als de Pro-versie.Kan ik gebogen tekst met animaties gebruiken?
Ja, nadat je de kromming hebt toegepast, kun je nog steeds tekstanimaties toevoegen voor dynamische presentaties.Kan ik alleen een deel van de zin buigen?
Nee, het kromme-effect wordt toegepast op het hele tekstvak. Gebruik aparte tekstvakken als je alleen bepaalde woorden gebogen wilt hebben.Hoe maak je een schermopname op Mac?
Om een schermopname op een Mac te maken, kun je Trupeer AI gebruiken. Hiermee kun je het hele scherm vastleggen en krijg je AI-mogelijkheden zoals AI-avatars toevoegen, voice-over toevoegen, in- en uitzoomen in de video. Met de AI-videotranslatiefunctie van trupeer kun je de video naar meer dan 30 talen vertalen.Hoe voeg ik een AI-avatar toe aan een schermopname?
Om een AI-avatar toe te voegen aan een schermopname, heb je een AI-tool voor schermopnames. Trupeer AI is een AI-tool voor schermopnames, waarmee je video's met meerdere avatars kunt maken en die je ook helpt bij het maken van je eigen avatar voor de video.Hoe maak je een schermopname op Windows?
Om op Windows een schermopname te maken, kun je de ingebouwde Game Bar (Windows + G) gebruiken of een geavanceerde AI-tool zoals Trupeer AI voor meer geavanceerde functies zoals AI-avatars, voice-over, vertaling enz.Hoe voeg ik voice-over toe aan video?
Om voice-over aan video's toe te voegen, download je de Chrome-extensie van trupeer ai. Nadat je je hebt aangemeld, upload je je video met stem, kies je de gewenste voice-over van trupeer en exporteer je je bewerkte video.Hoe zoom ik in op een schermopname?
Om tijdens een schermopname in te zoomen, gebruik je de zoomeffecten in Trupeer AI, waarmee je op specifieke momenten kunt in- en uitzoomen en de visuele impact van je videomateriaal versterkt.
Aanbevolen artikelen
Generator voor technische documentatie
Hoe draai je een document in Canva
Gerelateerde tutorials

