

Notionでタイムラインを作成する方法
Notionでタイムラインを作成して、プロジェクト、締め切り、タスクを視覚的に管理する方法を学びましょう。組み込みのタイムラインビューとデータベース機能を使ったシンプルなガイドです。
ステップバイステップガイド:Notionでタイムラインを作成する方法
ステップ 1
まず、Notionで新しいページを開きます。ページ上の三点メニューを見つけてください。

ステップ 2
表示されるオプションから、タイムラインのオプションを選択します。

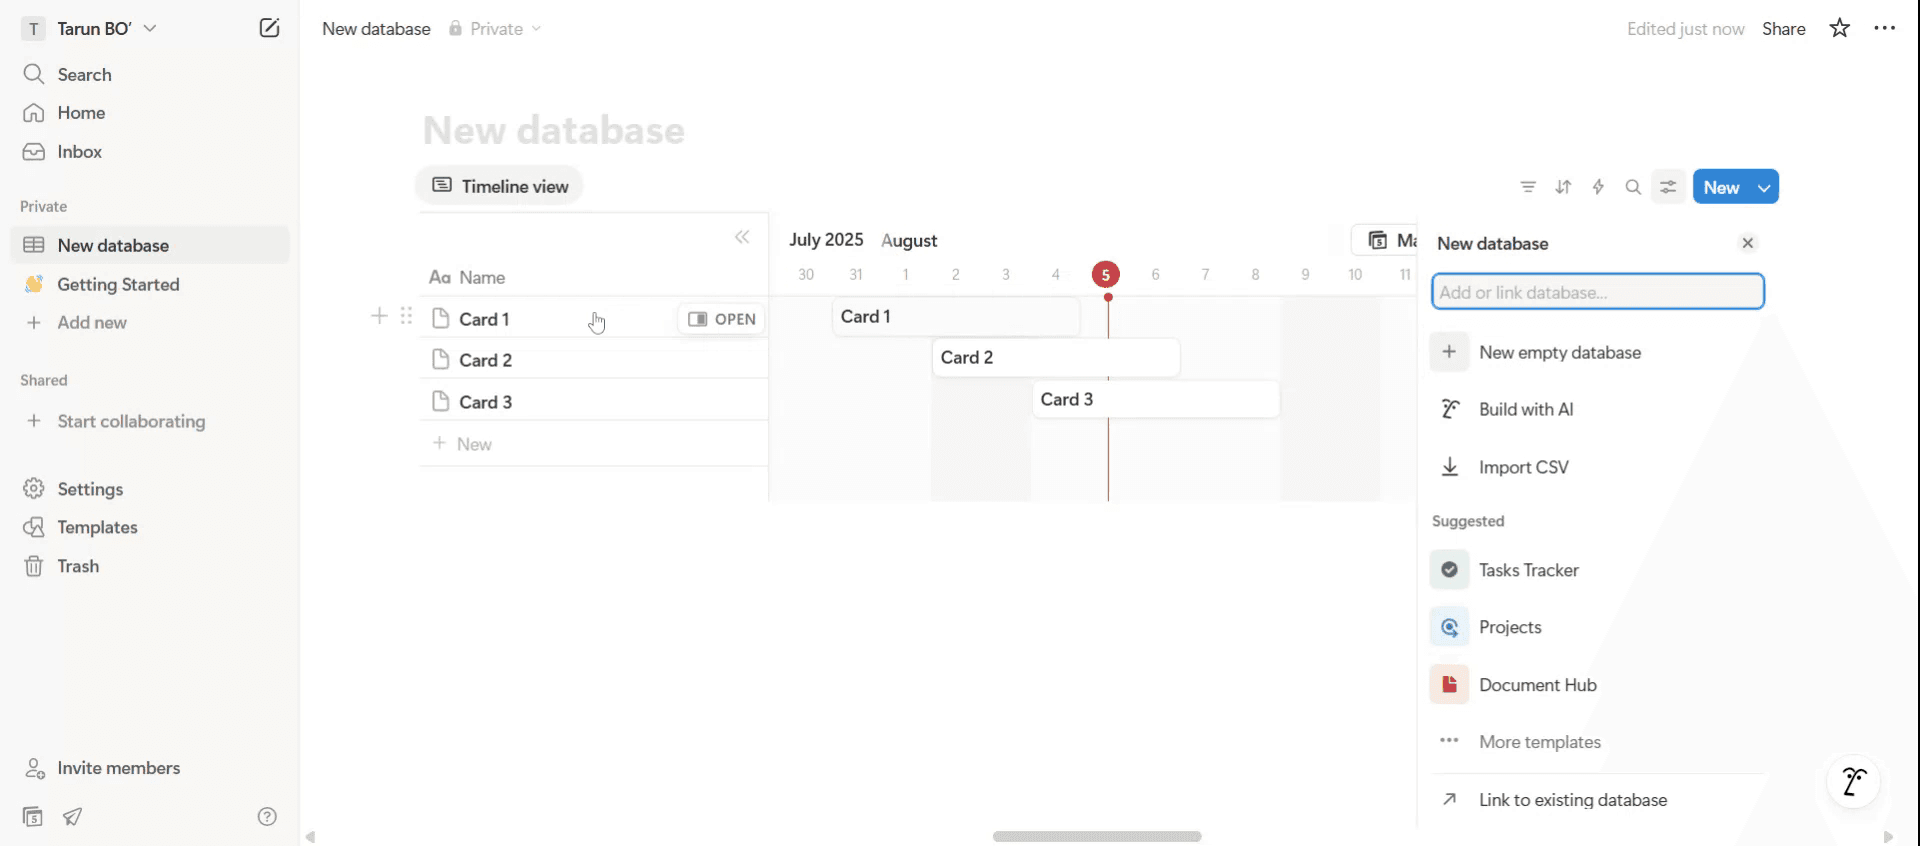
ステップ 3
タイムラインが表示されます。空のデータベースのオプションをクリックして新しいデータベースを追加するか、必要に応じて既存のデータベースを編集します。
ステップ 4
データベース名を変更できます。必要に応じて、適切な名前に変更してください。

ステップ 5
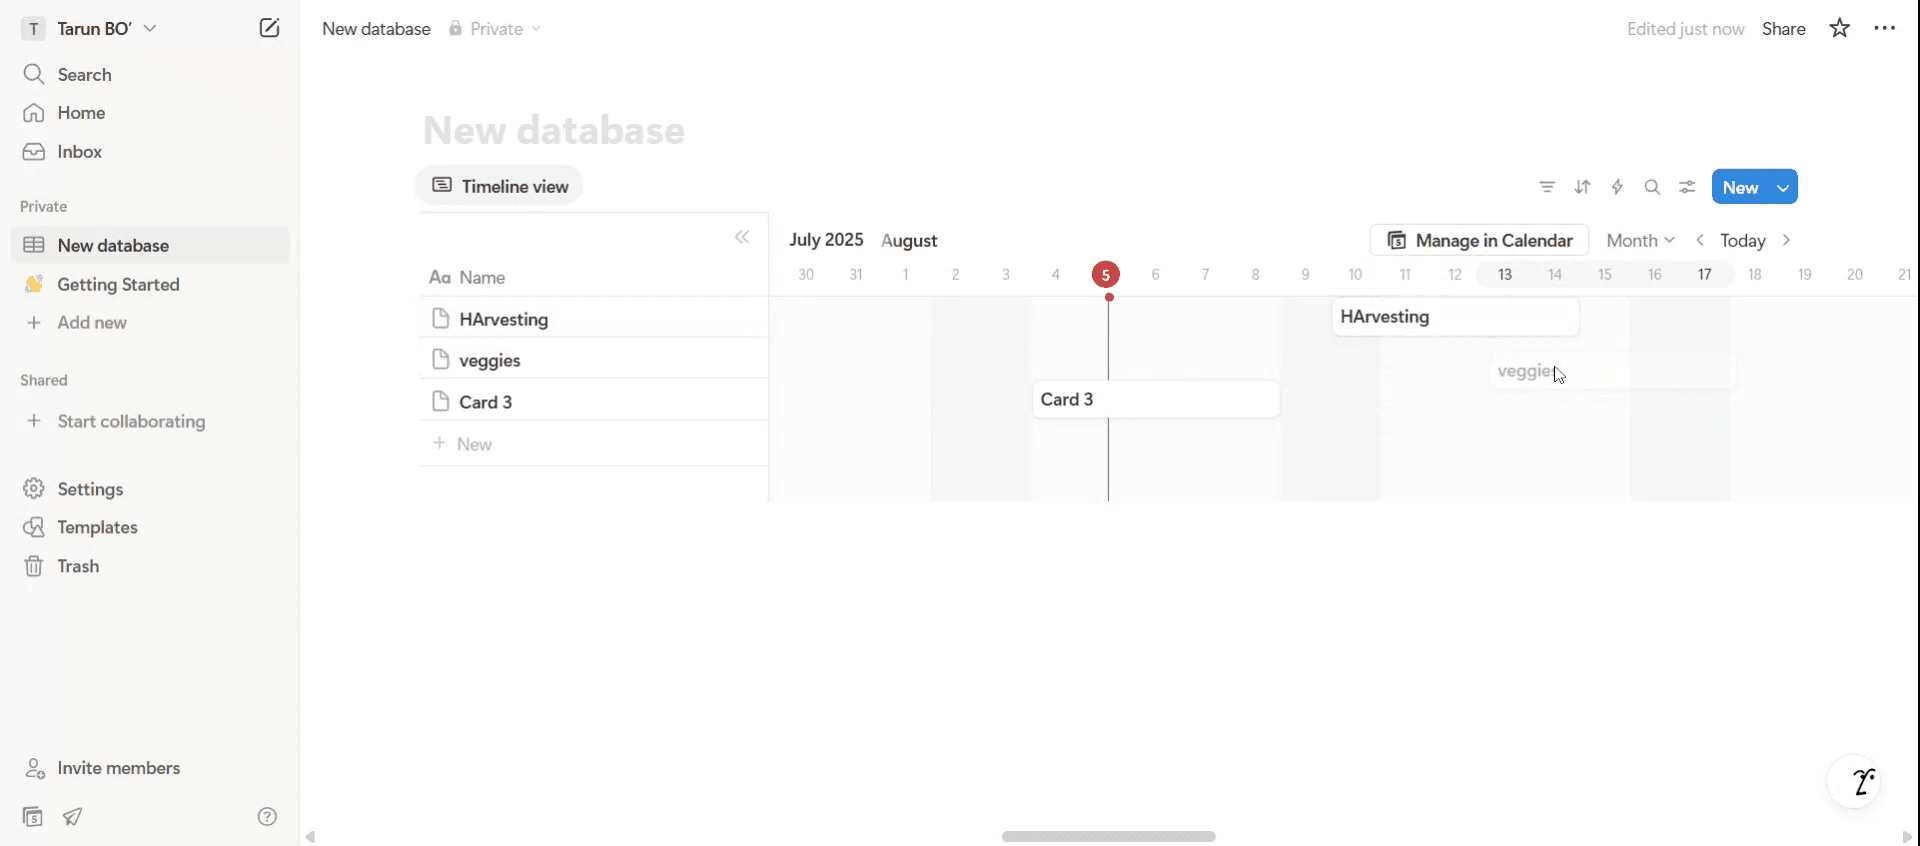
ドラッグ&ドロップを使って、指定どおりにタイムラインを整理します。
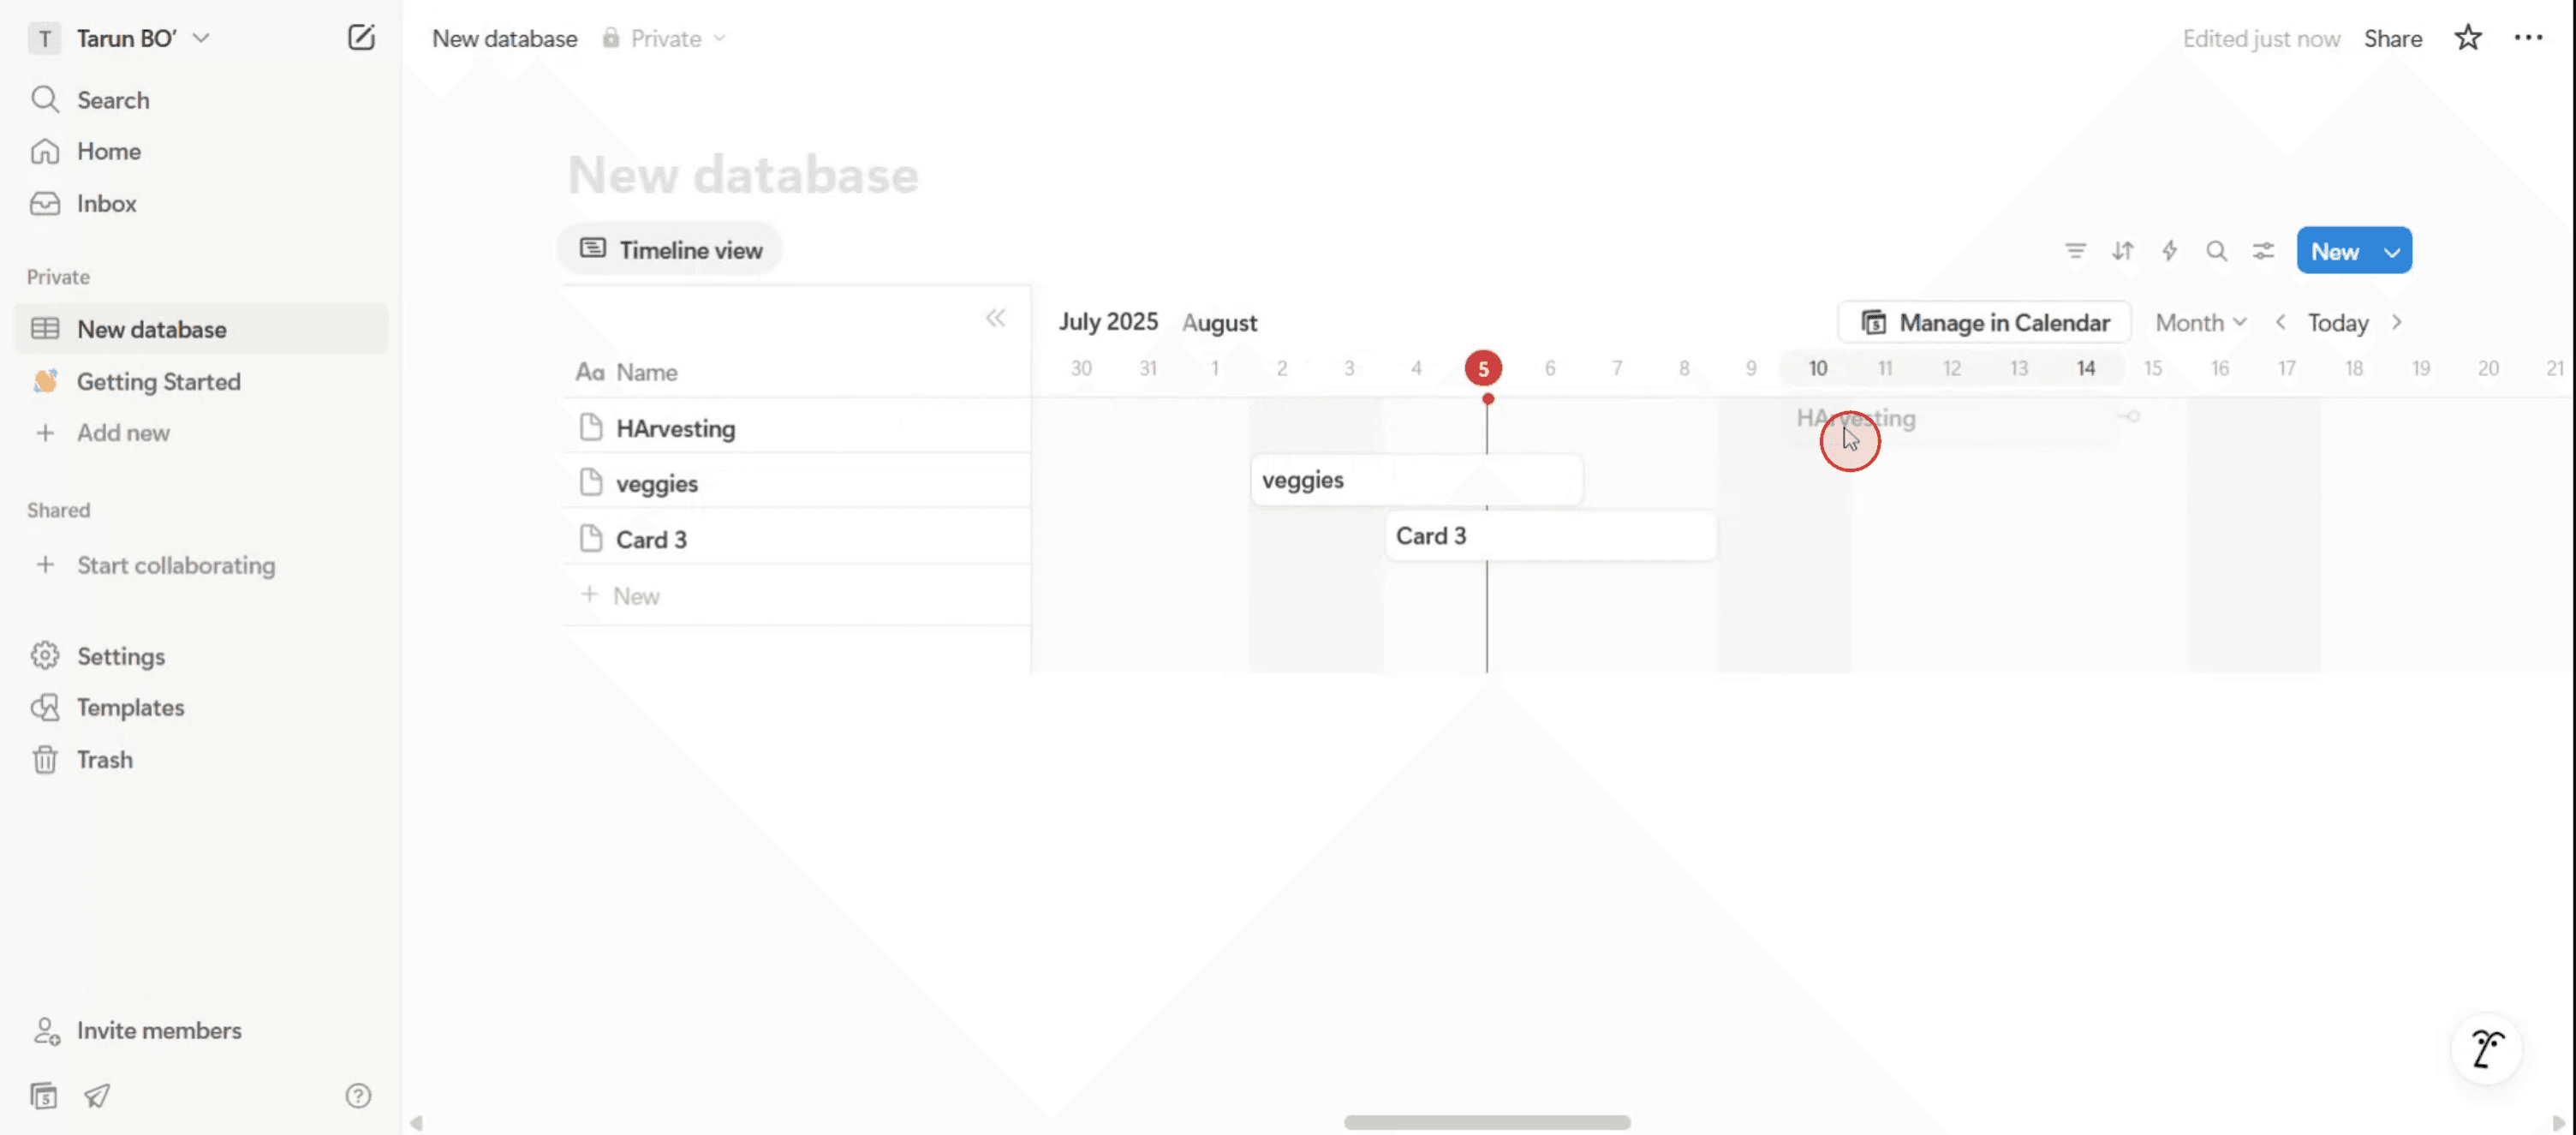
ステップ 6
これには、特定の日付にアイテムをドラッグ&ドロップしたり、特定の日付や時刻に合わせてタイムラインをカスタマイズしたりすることが含まれます。
Notion でタイムラインを作成するためのプロのヒント
データベースで「タイムライン」ビューを使う
まずデータベース(テーブルやボードなど)を作成し、次に新しいビューを追加して「タイムライン」を選択します。これにより、タスク、イベント、プロジェクトを横方向の時間軸で可視化できます。タイムラインを正しく表示するには、各アイテムに日付プロパティが必要です。アイテムに日付プロパティを追加する
データベースに「日付」プロパティが含まれていることを確認してください。これがないと、アイテムはタイムラインに表示されません。必要に応じて、単一日付または日付範囲を使えます。プロパティでタイムラインをカスタマイズする
プロジェクトの進捗状況、優先度、担当者などの重要な詳細を、タイムラインバー上に直接表示できます。「プロパティ」に移動し、「タグ」や「担当者」などのフィールドを有効にすると、一覧性の高い管理がしやすくなります。グループを使って整理しやすくする
プロジェクトのフェーズ、部門、チームメンバーなどのプロパティでタイムラインをグループ化します。これによりタイムライン上に横方向のレーンが作成され、異なる作業カテゴリを分けやすくなります。タイムラインのスケールを調整する
プロジェクトの規模に応じて、日、週、月、四半期、年の単位で表示できるようにズームイン/ズームアウトします。これにより、短期タスクと長期計画の両方を見通しやすくなります。
よくある落とし穴とその回避方法
日付プロパティの追加を忘れる
タイムライン項目が表示されない場合は、各アイテムに「日付」プロパティが設定されているか確認してください。これがないと、タイムラインは機能しません。情報を詰め込みすぎる
表示するプロパティが多すぎると、タイムラインが煩雑になります。見やすさを保つために、最も重要な詳細だけを表示しましょう。必要なのにグループ化しない
プロジェクトに複数のチームやカテゴリがある場合は、混乱を避けて整理しやすくするために「グループ」機能を使いましょう。締め切りを見落とす
重要なマイルストーンを見逃さないように、日付プロパティ内のリマインダーを使うか、他のタスク管理ツールと連携してください。作業に合わないビューを使う
リストやカンバンボードのほうが管理しやすいプロジェクトなら、無理にタイムラインに当てはめないでください。ワークフローに最も合うビューを選びましょう。
Notionでタイムラインを作成する際によくある質問
データベースなしでタイムラインを作成できますか?
いいえ、タイムラインビューはNotionのデータベースでのみ利用できます。1つのページに複数のタイムラインを表示できますか?
はい、異なるタイムラインビューを持つ複数のデータベースを同じNotionページに追加できます。アイテムの開始日と終了日を変更するにはどうすればよいですか?
アイテムの日付プロパティをクリックし、単一の日付ではなく日付範囲を選択します。タイムラインを複製できますか?
はい、データベースまたはビューを複製し、必要に応じてカスタマイズできます。タイムラインビューはモバイルで使えますか?
はい、ただし表示はよりコンパクトになる場合があります。より使いやすくするには、完全に表示されるデスクトップ版またはWeb版を使用してください。Macで画面録画する方法は?
Macで画面録画するには、Trupeer AIを使用できます。画面全体をキャプチャでき、AIアバターの追加、ナレーションの追加、動画内のズームイン・ズームアウトなどのAI機能を提供します。Trupeer AIの動画翻訳機能を使えば、動画を30以上の言語に翻訳できます。画面録画にAIアバターを追加するにはどうすればよいですか?
画面録画にAIアバターを追加するには、AI画面録画ツールを使用する必要があります。Trupeer AIはAI画面録画ツールで、複数のアバターを使った動画の作成を支援し、動画用の独自アバターの作成もサポートします。Windowsで画面録画する方法は?
Windowsで画面録画するには、組み込みのゲームバー(Windows + G)や、AIアバター、ナレーション、翻訳など、より高度な機能を備えたTrupeer AIのような高度なAIツールを使用できます。動画にナレーションを追加するにはどうすればよいですか?
動画にナレーションを追加するには、trupeer aiのChrome拡張機能をダウンロードします。サインアップ後、音声付きの動画をアップロードし、Trupeerから希望のナレーションを選択して、編集した動画を書き出します。画面録画をズームインするにはどうすればよいですか?
画面録画中にズームインするには、Trupeer AIのズーム効果を使用します。特定の瞬間にズームイン・ズームアウトでき、動画コンテンツの視覚的なインパクトを高めます。
おすすめ記事
関連チュートリアル

