

Figmaで円グラフを作成する方法
Figmaでデータを視覚化したいですか? 図形、角度、プラグインを使って円グラフを作成する方法を学びましょう。すっきりとした、データに基づくビジュアルを作るためのシンプルなガイドです。
以下により詳細な内訳を示します。
1. 楕円を作成する: 楕円ツールを選択して円を描きます。ドラッグ中に Shift キーを押し続けると、完全な円にできます。
2. 円弧オプションにアクセスする: 円にカーソルを合わせると、点が表示されます。この点をクリックしてドラッグすると、円弧のコントロールが表示されます。
3. スイープと開始位置を調整する: 円弧のコントロールでは、円弧の「sweep」(スライスの大きさ)と「start」(開始角度)を調整できます。
4. スライスを作成する: 最初の円弧(スライス)を複製して、円グラフの追加スライスを作成します。各複製のスイープ角と開始角を調整して、希望する比率にします。
5. スライスに色を付ける: 各スライスを異なる色で塗り分けて区別します。テキストツールを使って各スライスにラベルを追加することもできます。
6. 配置して調整する: 必要に応じてスライスとラベルを配置します。要素をグループ化して、チャートを整理しておくこともできます。
ステップバイステップガイド: Figmaで円グラフを作成する方法
ステップ 1
「Actions」セクションをクリックします。

ステップ 2
円グラフのオプションが表示されたら、それをクリックして選択します。

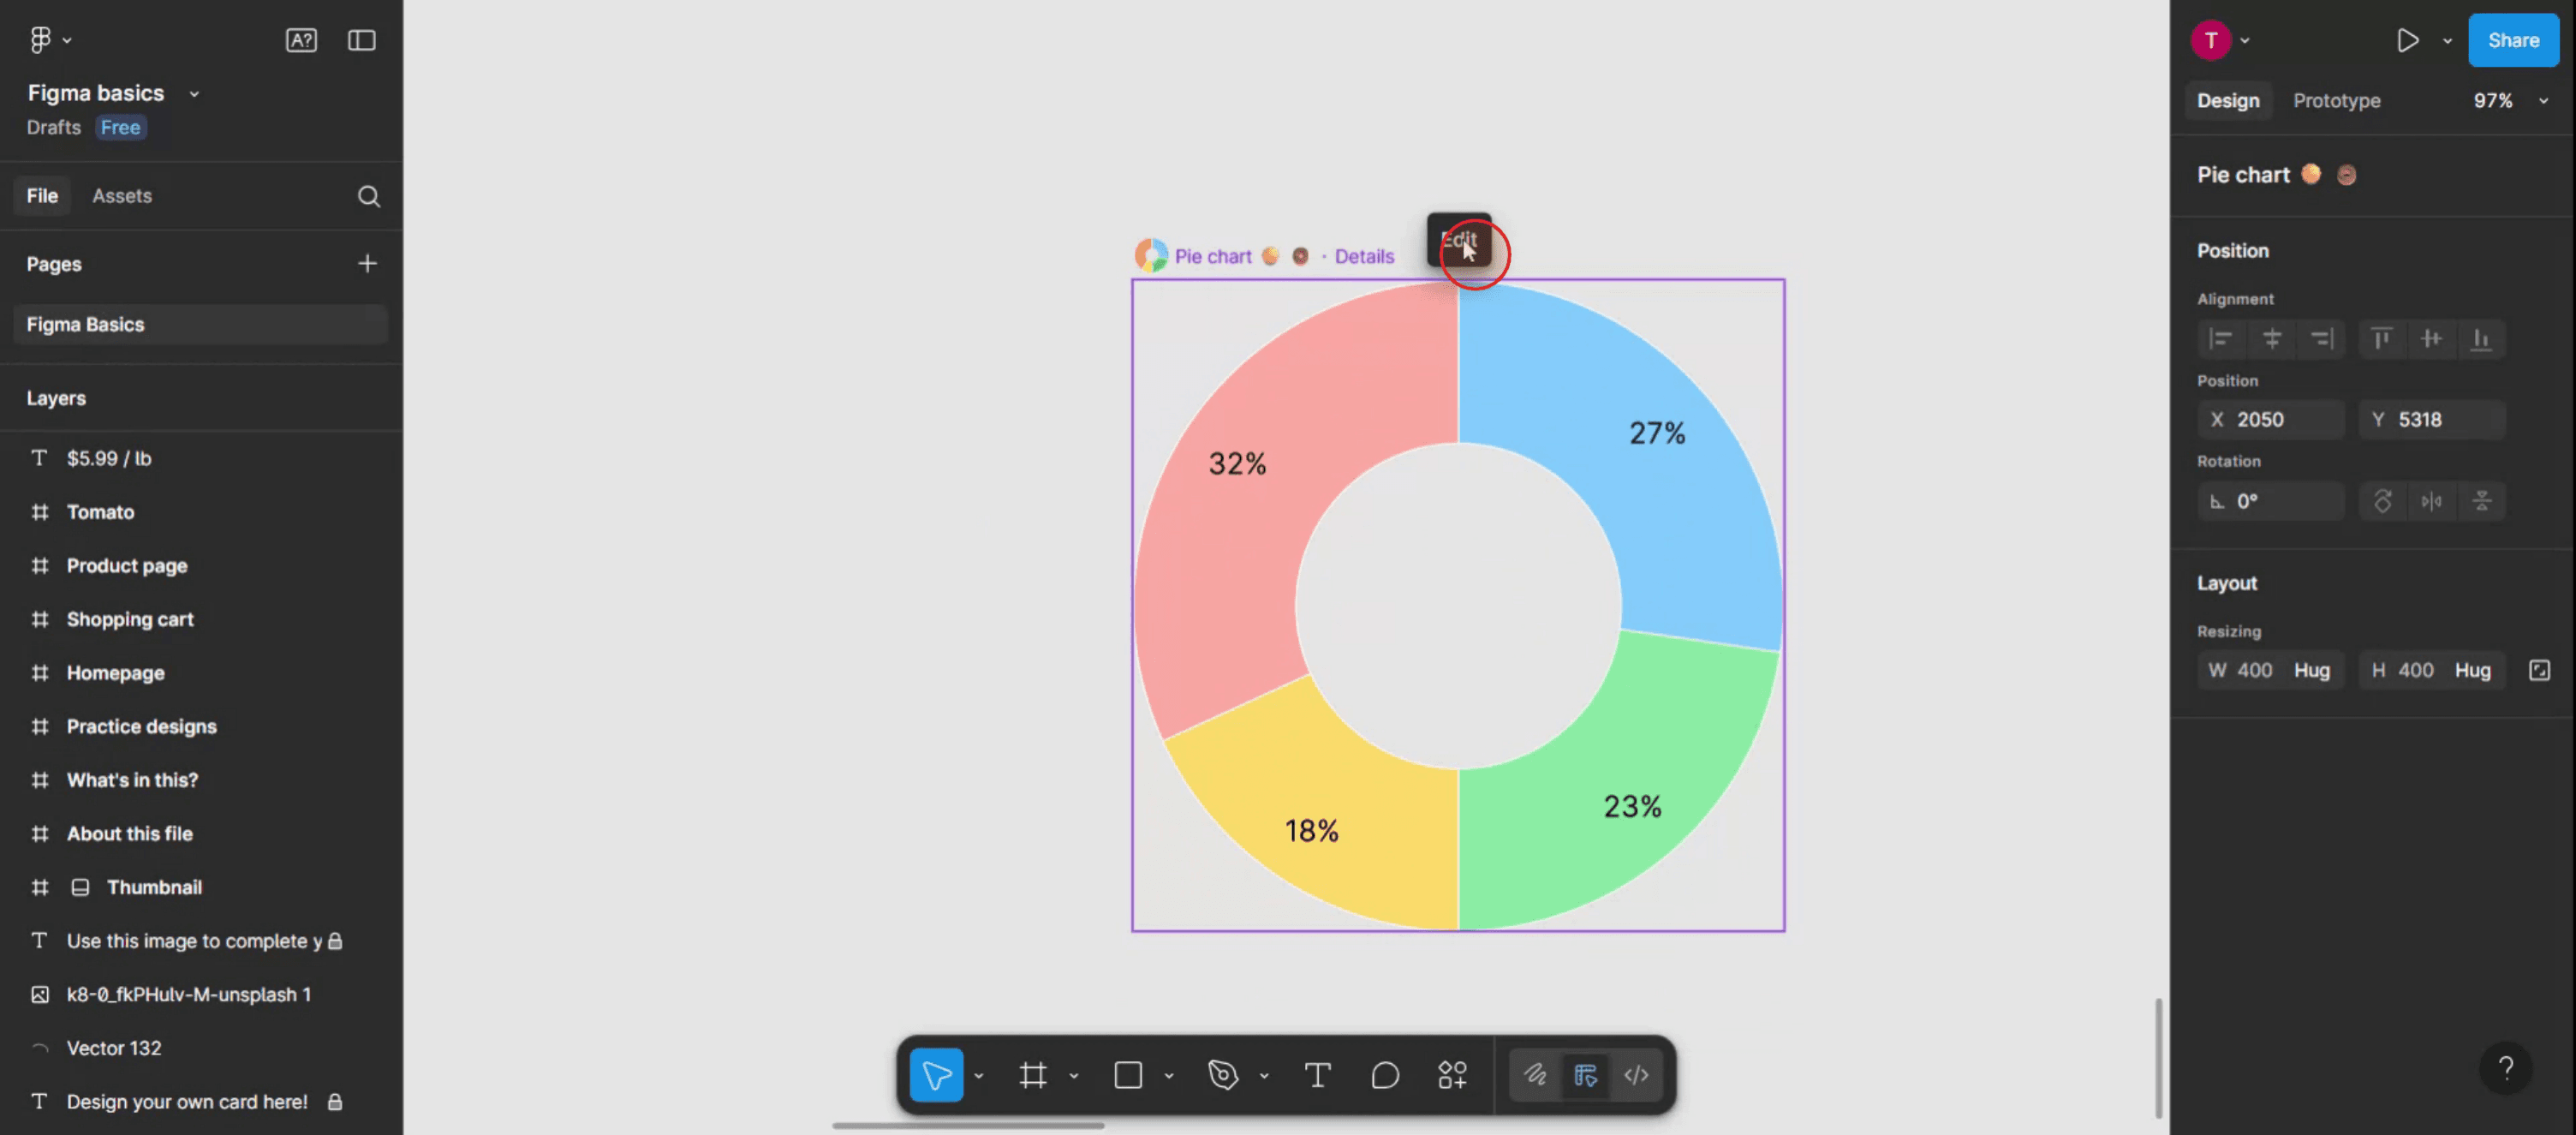
ステップ 3
円グラフが画面に表示されます。さらに、「Edit」オプションが表示されるので、それをクリックして次へ進みます。
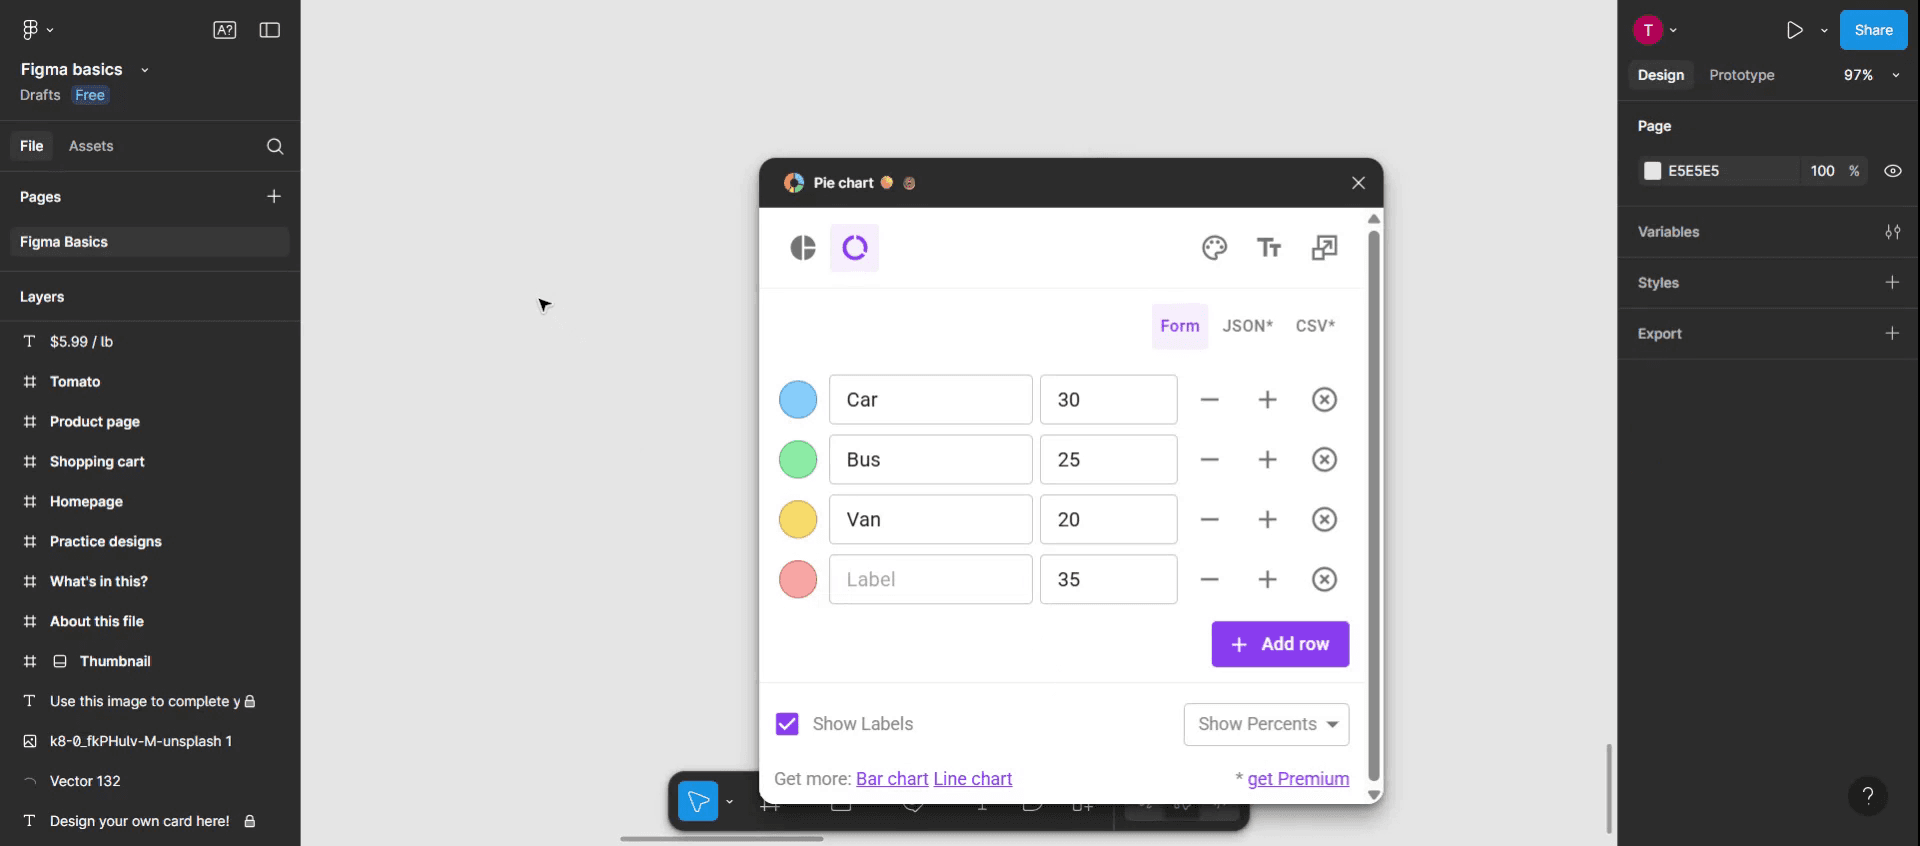
ステップ 4
この手順では、円グラフを必要に応じてカスタマイズします。必要なラベルを入力し、完了したら、
ステップ 5
画面上のどこかをタップして編集モードを終了します。

ステップ 6
変更内容が円グラフに適用されます。

Figmaで円グラフを作成するためのプロのヒント
楕円ツールでベースを描く
楕円ツール(O)を選択し、Shiftキーを押しながらキャンバス上でクリック&ドラッグして、完全な円を描きます。これが円グラフ全体のベースになります。円を弧に変換する
円を選択した状態で、プロパティパネルを開き、「Arc」設定を調整します。「Start」と「End」の角度を変更して有効にすると、スライスのような効果を作れます。複数のセグメントを作るために複製する
さらにスライスを増やすには、円を複製(Ctrl/Cmd + D)し、各弧の角度を調整して異なるデータ値を表します。各スライスには別々の色を使いましょう。数式でグラフを分割する
データがパーセンテージであれば、360(円の度数)に割合を掛けて各スライスの角度を求めます。たとえば、25% = 90°です。わかりやすくするために色分けする
Fillツールを使って各スライスに異なる色を割り当てます。これにより、可読性と見た目の魅力が向上します。
よくある失敗とその回避方法
弧が正しく揃っていない
各弧のスライスが前のスライスの終わる位置から始まるようにして、隙間や重なりを防ぎましょう。正確にするには開始角度と終了角度を手動で入力します。角度を把握できなくなる
レイヤーにスライスの角度やデータラベルを付けて、どのセグメントが何を表すのか分かるようにします。テキストラベルの位置がずれている
スマートガイドを使うか、各スライスの中央に手動でテキストを配置して、すっきりとしたプロフェッショナルな見た目を保ちます。スライスが互いに重なってしまう
スライスを追加するときはレイヤーの順序に注意してください。必要に応じてスライスを前面または背面に移動し、他の部分が隠れないようにします。比率が正確でない
パーセンテージを角度に変換するときは、正確なデータ表現のために計算を必ず確認してください。
Figmaの円グラフに関するよくある質問
プラグインなしでFigmaで円グラフを作成できますか?
はい。楕円ツールとアーク設定を使えば、プラグインなしで手動で円グラフを作成できます。Figmaで円グラフを作成するためのプラグインはありますか?
はい。「Chart」や「Pie Chart Maker」などのプラグインを使うと、データ入力に基づいて自動化できます。ちょうど25%のスライスを作るにはどうすればよいですか?
360に0.25(25%)を掛けると90度になります。アークの角度を90°に設定すると、正確な25%のスライスになります。Figmaで円グラフをアニメーション化できますか?
Figmaは簡単なプロトタイプアニメーションに対応していますが、複雑なデータ駆動のアニメーションはFigma外で作成する必要があります。Figmaから円グラフをエクスポートできますか?
はい、円グラフを選択し、エクスポートパネルを開いて、希望の形式(PNG、SVG、PDF)を選び、エクスポートをクリックします。Macで画面録画する方法
Macで画面録画するには、Trupeer AIを使用できます。画面全体をキャプチャでき、AIアバターの追加、ナレーションの追加、動画内のズームイン・ズームアウトなどのAI機能も備えています。TrupeerのAI動画翻訳機能を使えば、動画を30以上の言語に翻訳できます。画面録画にAIアバターを追加するには?
画面録画にAIアバターを追加するには、AI画面録画ツールを使う必要があります。AI画面録画ツールであるTrupeer AIは、複数のアバターを使った動画作成を支援し、さらに動画用の独自アバター作成もサポートします。Windowsで画面録画する方法?
Windowsで画面録画するには、組み込みのGame Bar(Windows + G)を使用するか、AIアバター、ナレーション、翻訳などの高度な機能を備えたTrupeer AIのような高度なAIツールを使用できます。動画にナレーションを追加するには?
動画にナレーションを追加するには、trupeer aiのChrome拡張機能をダウンロードします。登録後、音声付きの動画をアップロードし、Trupeerから希望のナレーションを選択して、編集済みの動画をエクスポートします。画面録画でズームインするにはどうすればよいですか?
画面録画中にズームインするには、Trupeer AIのズーム効果を使用します。これにより、特定のタイミングでズームイン・ズームアウトでき、動画コンテンツの視覚的な印象を高められます。
おすすめの読み物
関連チュートリアル

