
FigmaでGIFを作成する方法
FigmaでアニメーションGIFを作りたいですか?このステップバイステップガイドに従って、Figmaとサードパーティツールを使い、自分だけのGIFをデザイン、アニメーション化、書き出ししましょう。
1. プラグインをインストールします:
Figmaを開き、「Plugins」>「Manage Plugins」に移動します。
「Export to GIF/Video」または「Animated GIF Maker」を検索してインストールします。
あるいは、Figmaコミュニティのウェブサイトからプラグインを見つけてインストールできます。
2. フレームを選択します:
アニメーション化したいフレームを作成し、GIFに表示したい順番に並べます。
GIFに含めたいフレームをすべて選択します。
3. GIFの設定を行います:
インストールしたプラグインを開きます。
利用可能であればGIF形式を選択します。
フレームレート(アニメーションの再生速度)を設定します。
GIFの希望するサイズを選択します。
GIFをループ再生にするか、1回だけ再生するかを決めます。
一部のプラグインでは、透明な背景の追加などの追加機能が用意されている場合があります。
4. GIFを書き出します:
設定に満足したら、「Export」または「Generate GIF」ボタンをクリックします。
プラグインがGIFファイルを作成し、コンピュータにダウンロードできるようにします。
ステップごとのガイド: FigmaでGIFを作成する方法
ステップ1
アニメーションGIFに変換したいテンプレートを選択します。
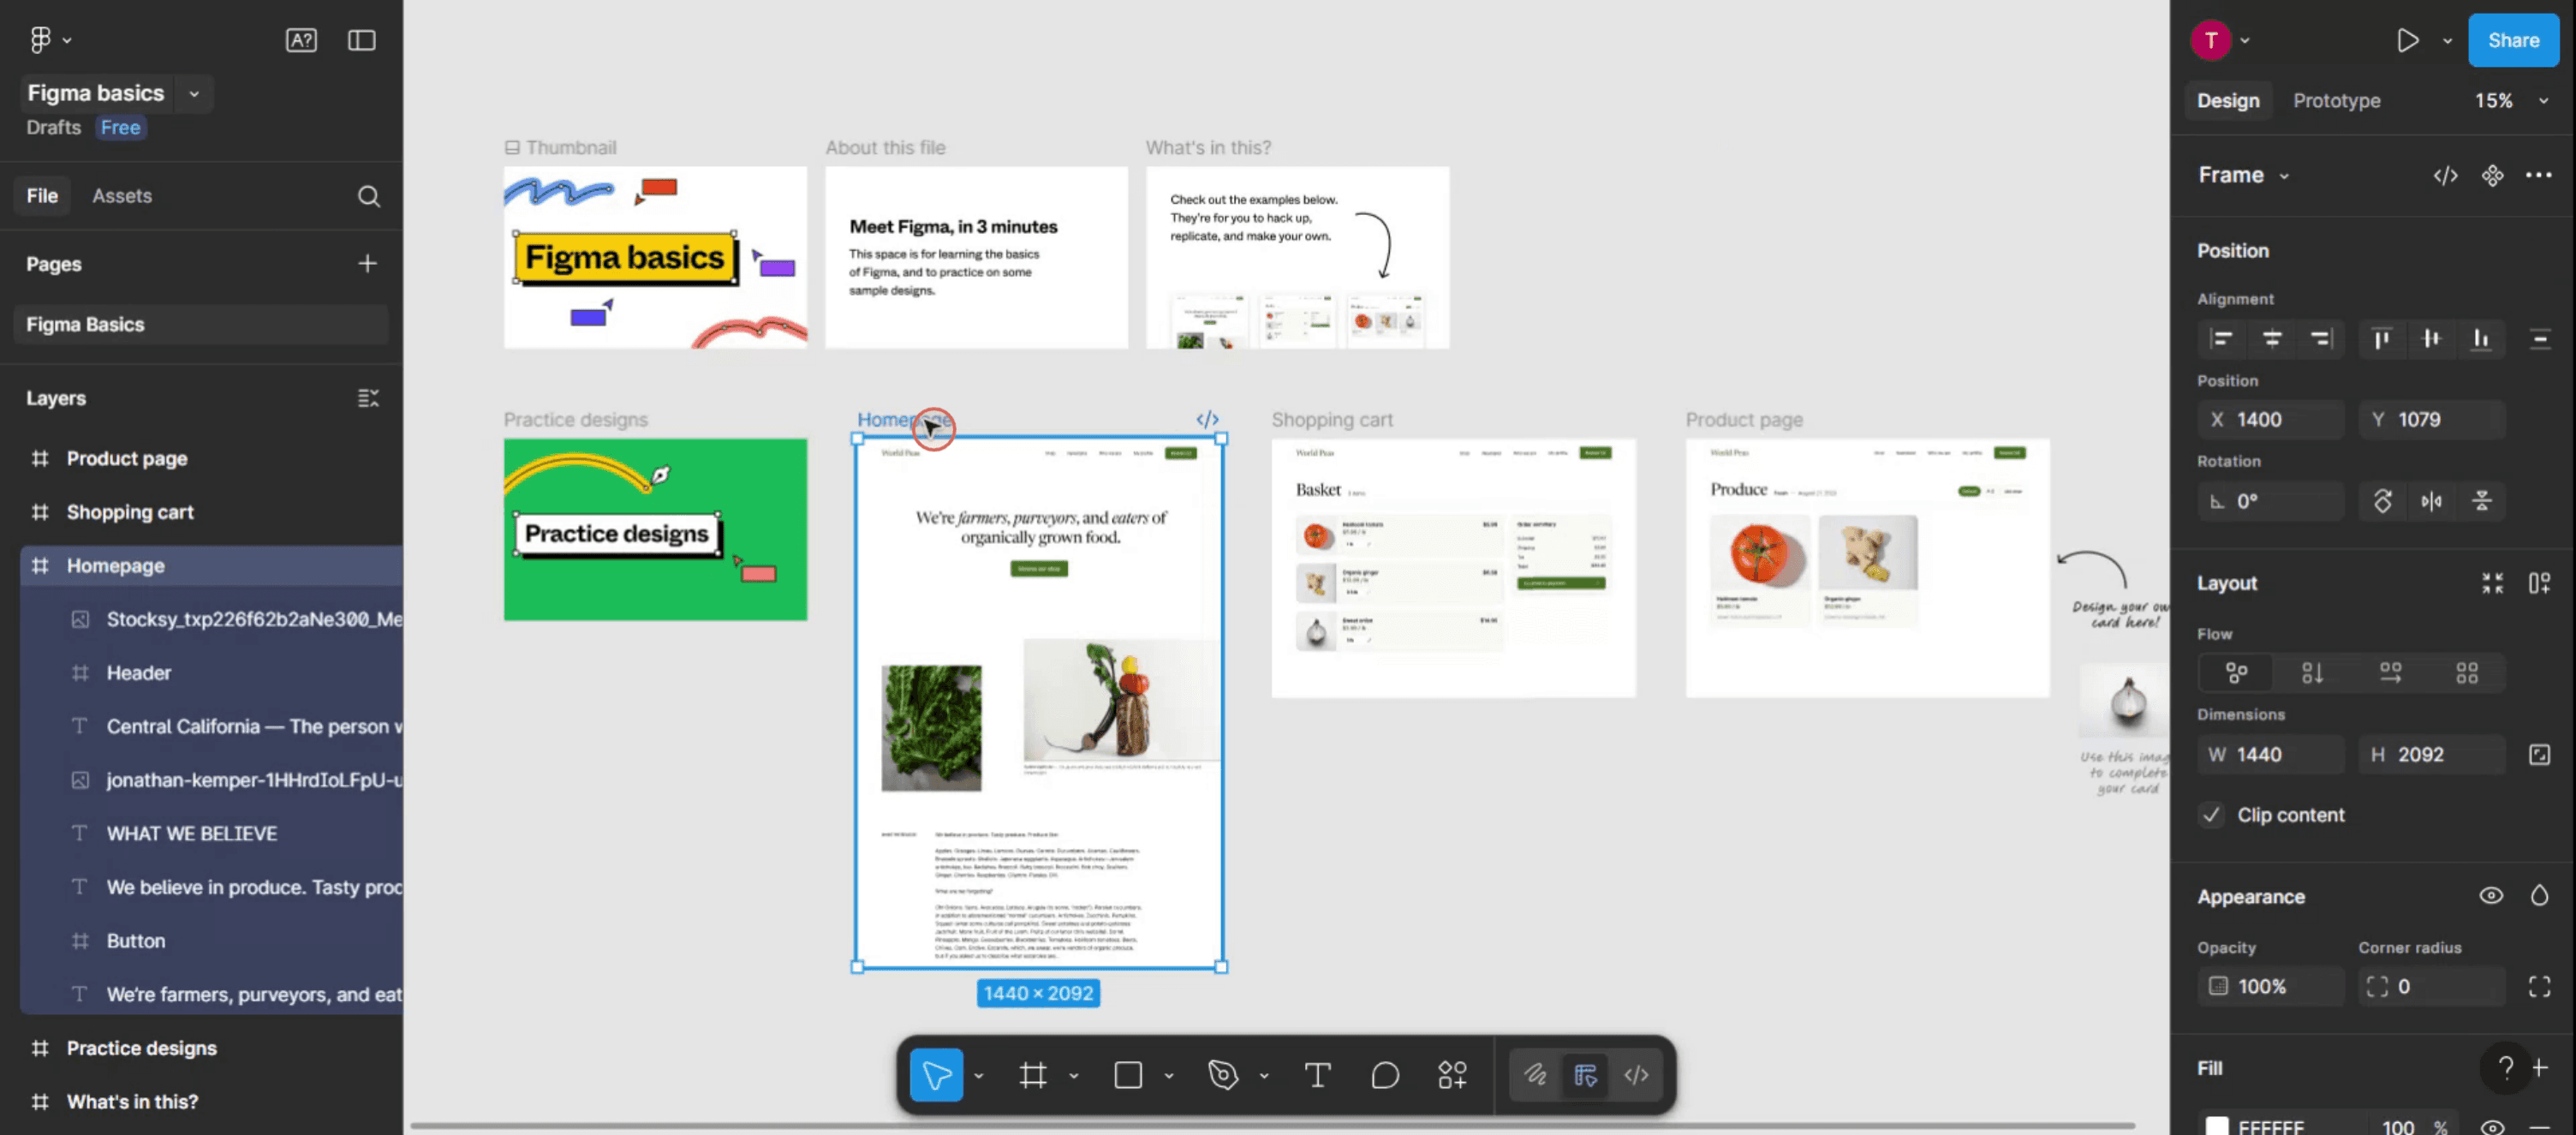
ステップ2
次に、Figma内のActionsメニューをクリックします。

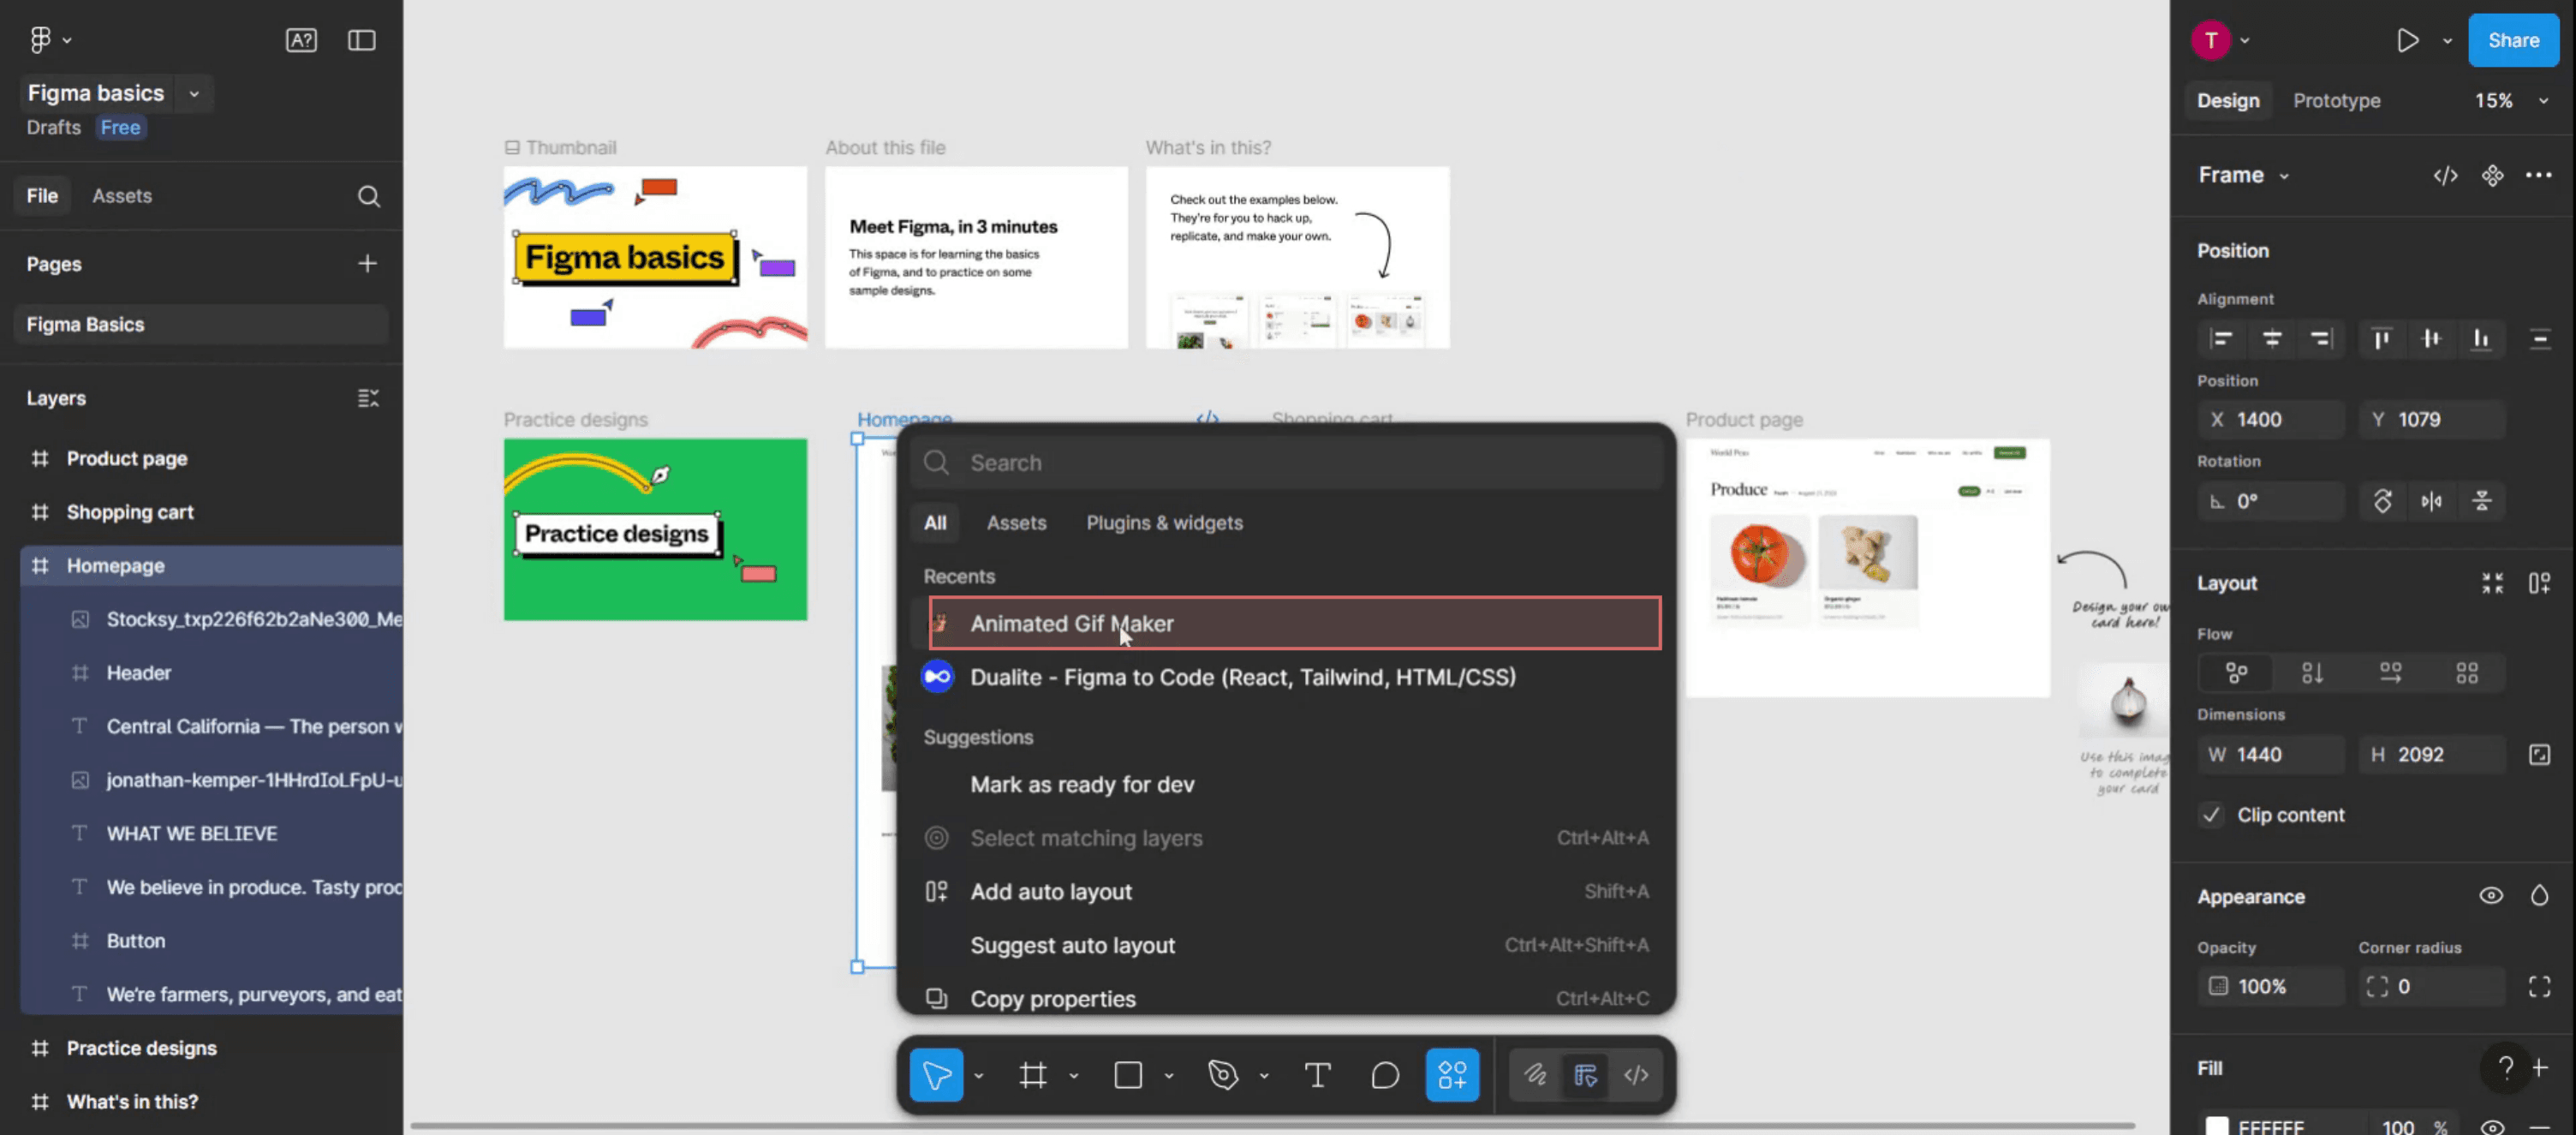
ステップ3
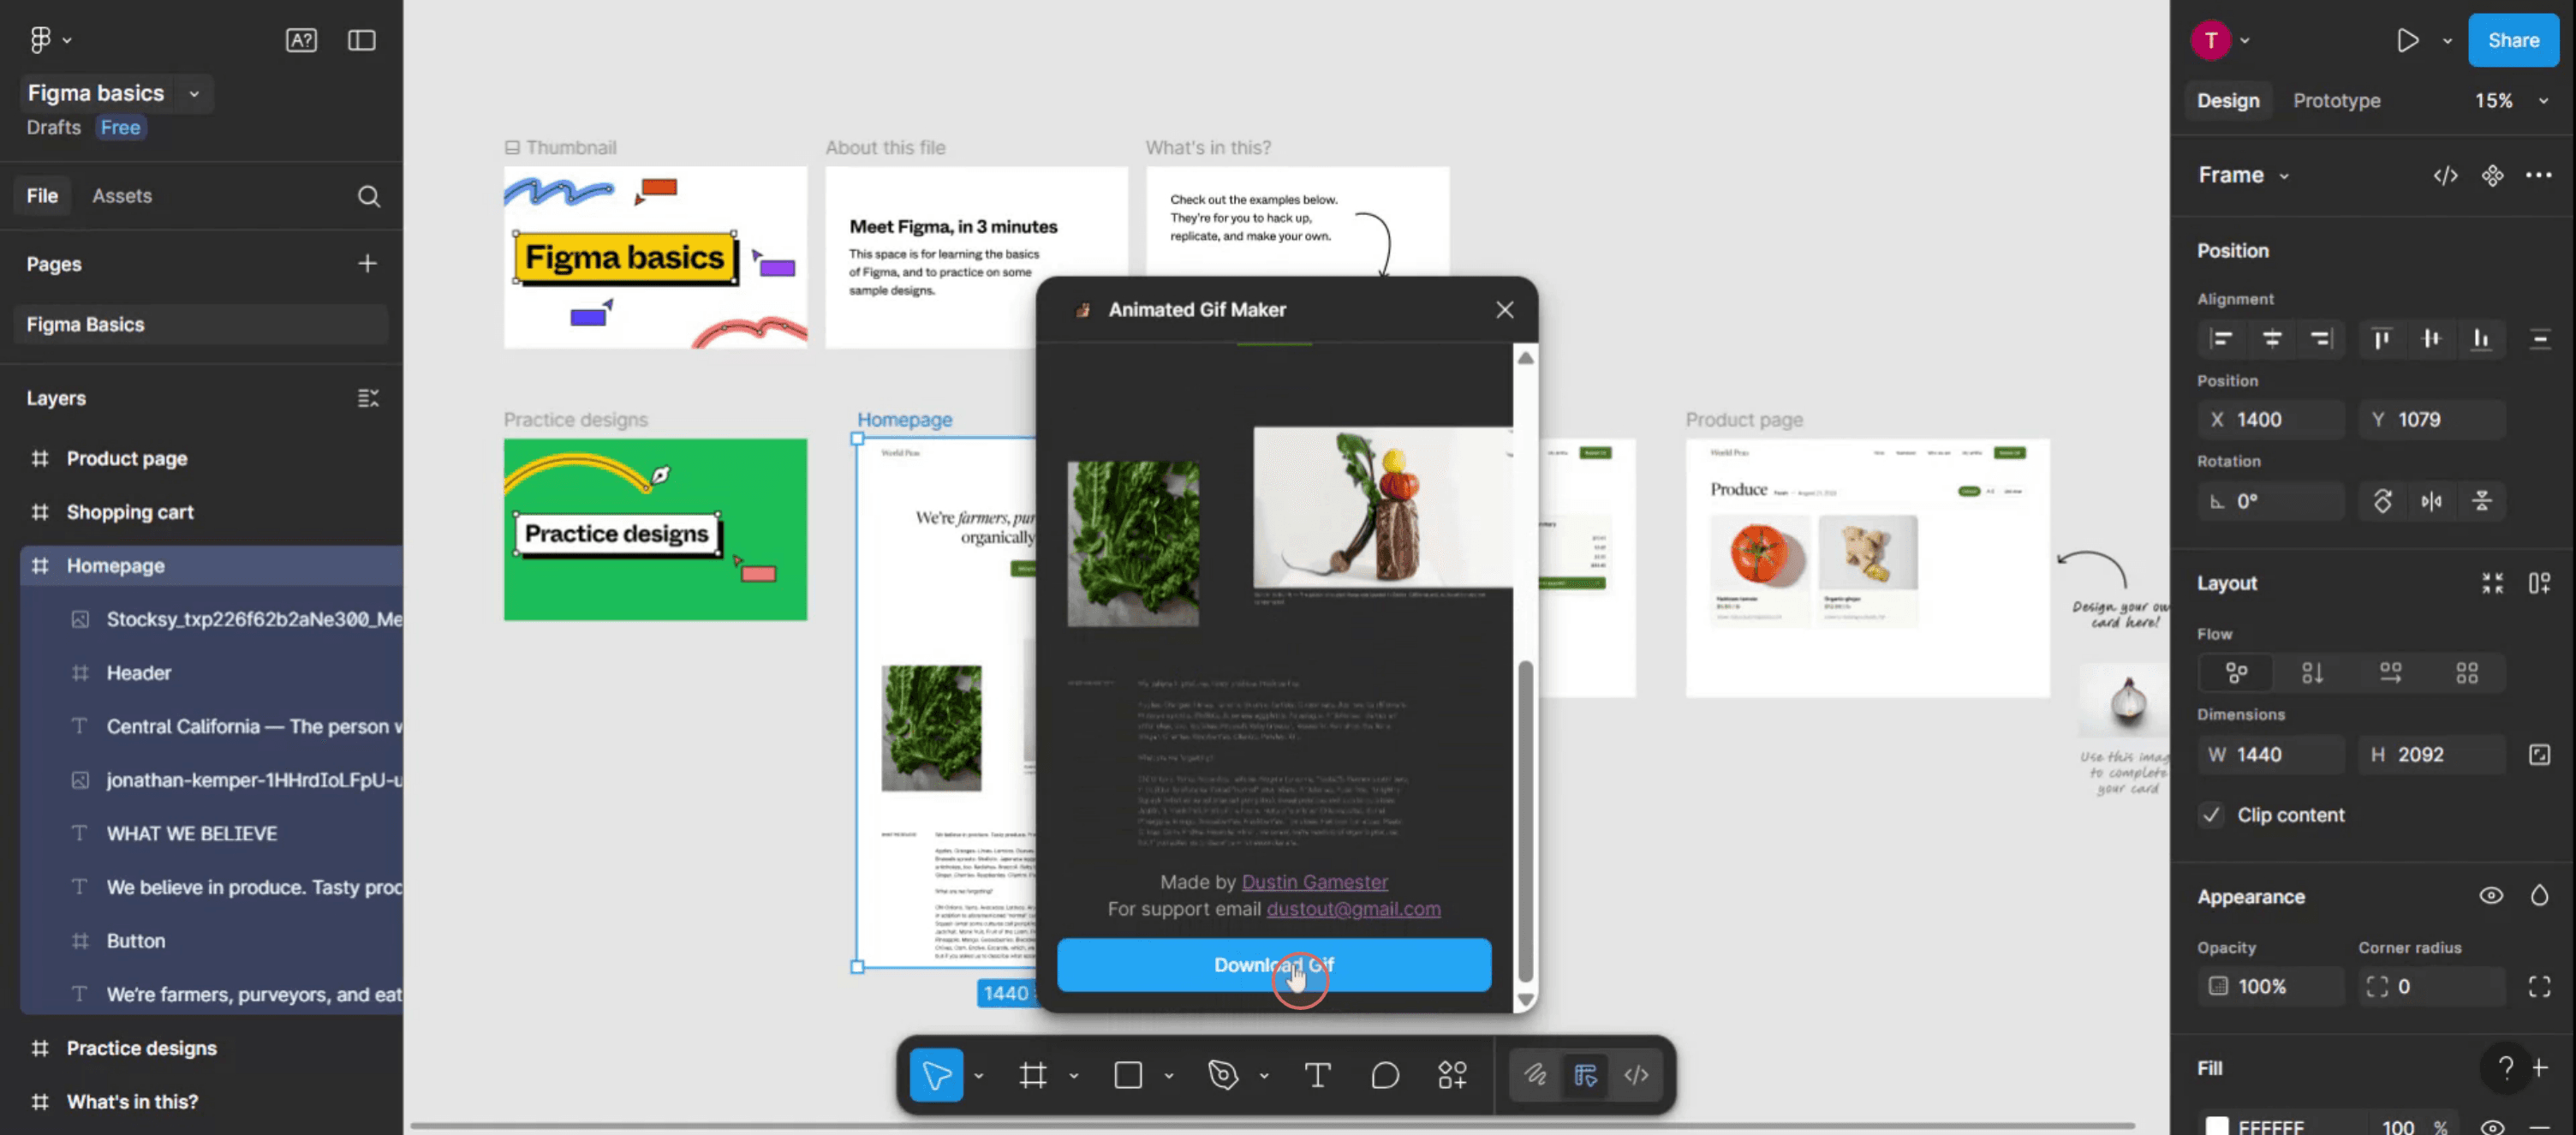
検索バーで「animated GIF maker」プラグインを探します。
ステップ4
するとポップアップウィンドウが表示され、ここでGIFの要件をカスタマイズできます、
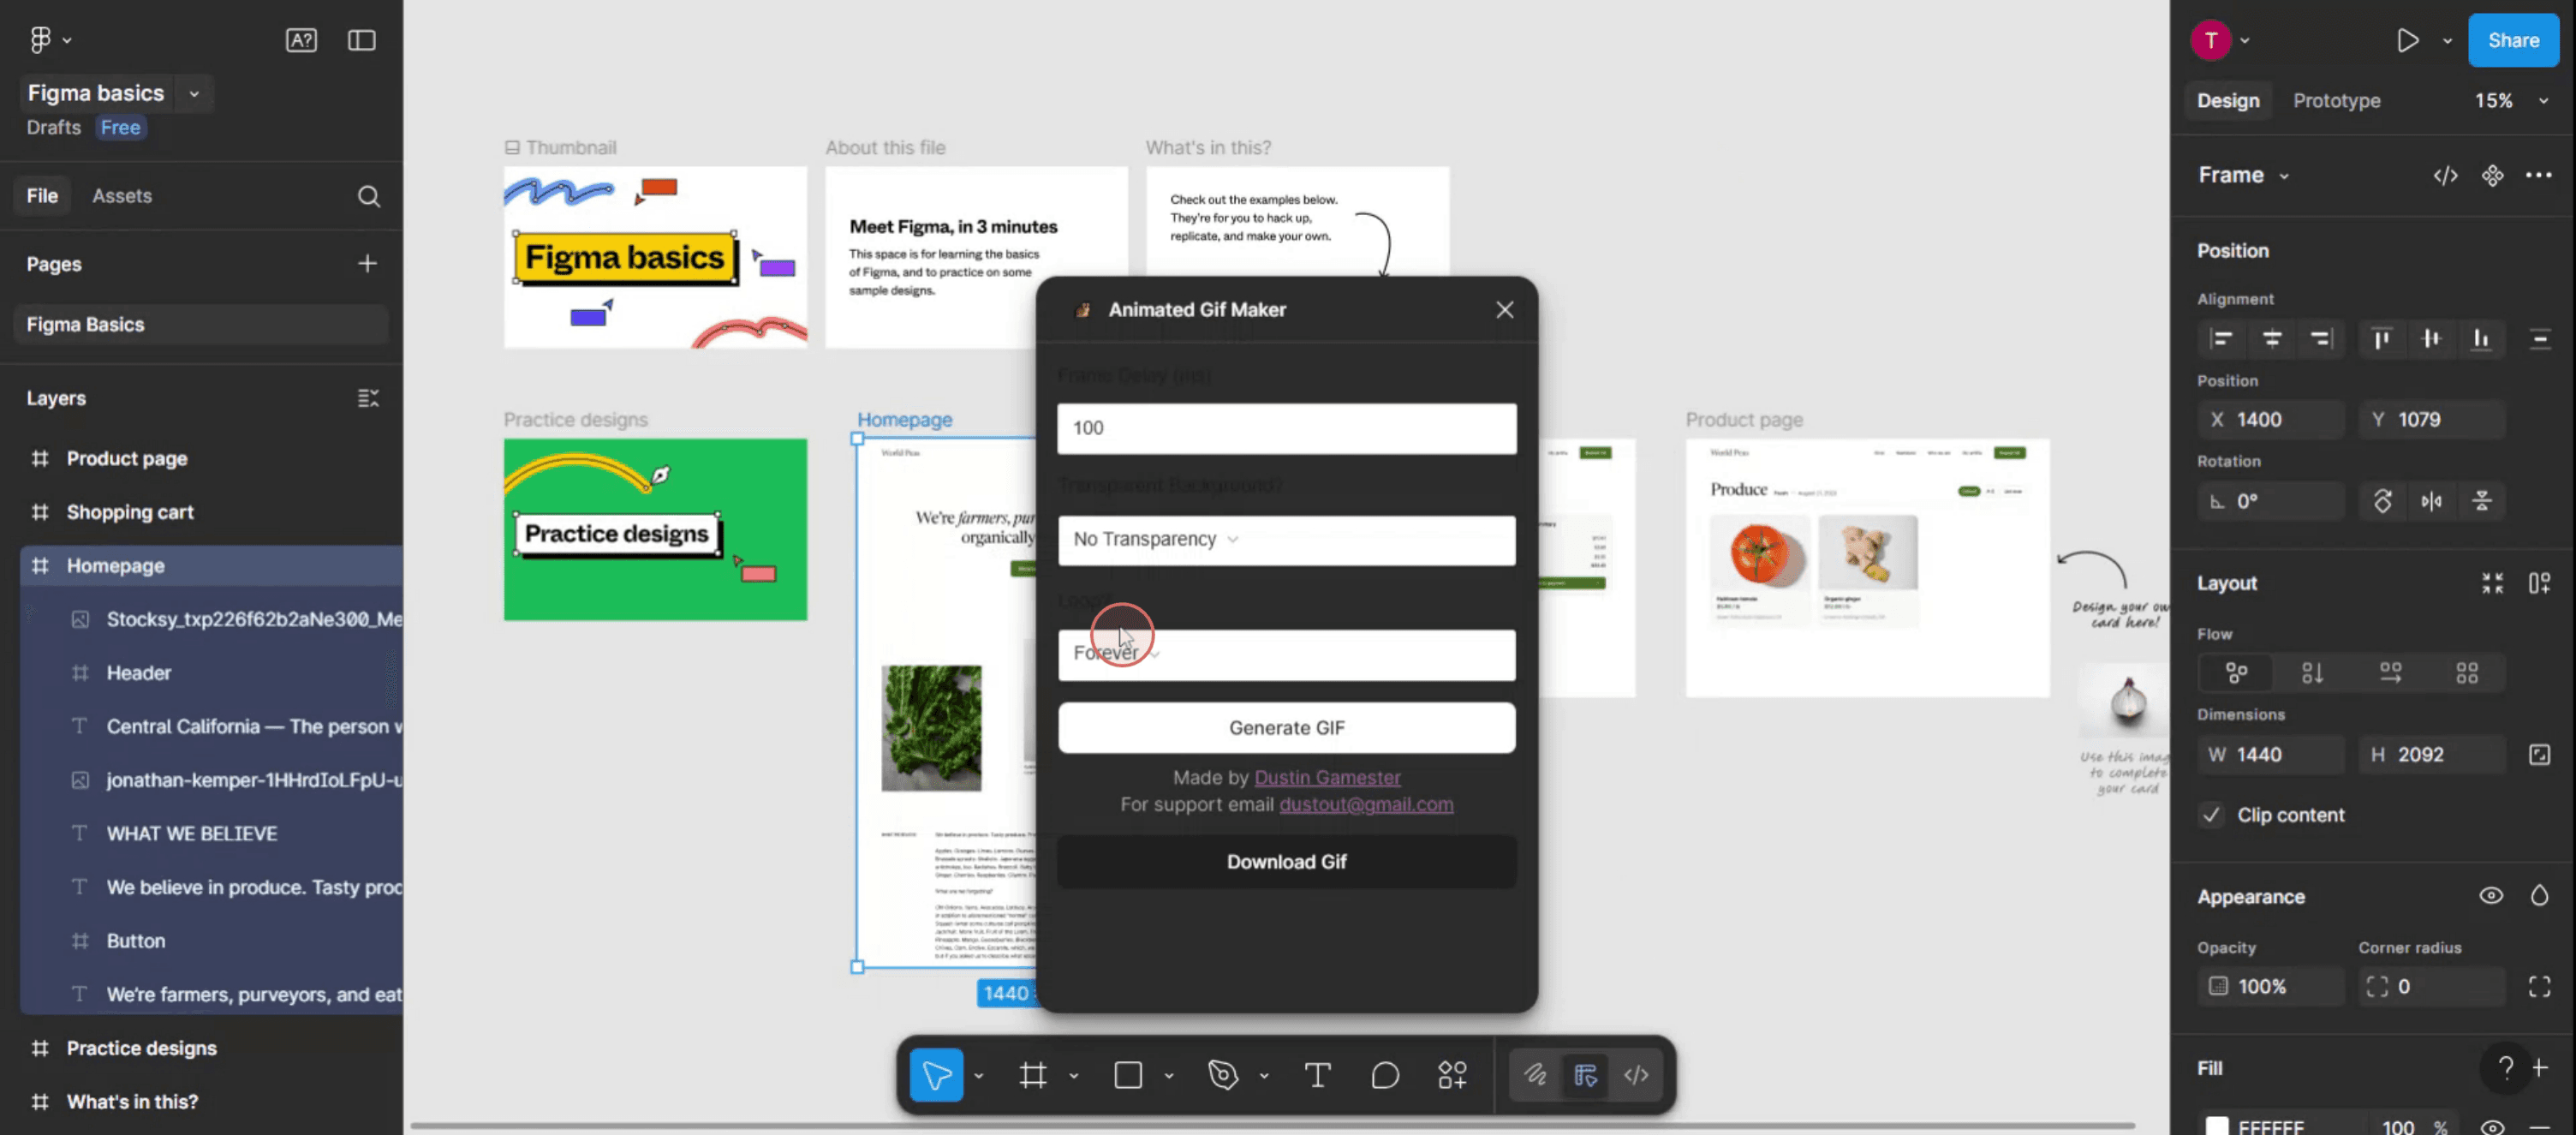
ステップ5
作成したものを保存するには、Download GIFをクリックします。
FigmaでGIFを作るためのプロのヒント
Figmaでフレームをデザインする
アートボード(フレーム)を複製し、各フレームに動きや変化を反映させることで、アニメーションさせたいフレームの連続を作成します。フレームに順番に名前を付ける
各フレームに「Frame 1」「Frame 2」などのように順番が分かる名前を明確に付けておくと、後で書き出し作業をする際に識別しやすくなります。フレームをPNGとして書き出す
各フレームを選択し、右下パネルのExportオプションをクリックして、PNGファイルとして書き出します。すべてのフレームでサイズとスケールを統一してください。外部のGIF作成ツールを使う
ezgif.com、Photoshop、またはその他のオンラインGIF作成ツールを開きます。書き出したPNGを正しい順序でまとめてアップロードしてください。フレームの表示時間とループ設定
フレーム間の遅延時間を調整し、ループ再生を有効にして、GIFが連続再生されるようにします。最終GIFを書き出す
設定が確定したら、GIFファイルを書き出してダウンロードします。これで、プレゼンテーション、Webサイト、UIプレビューなどで使用できます。
よくある落とし穴とその回避方法
フレームの位置ずれ
すべての要素が各フレームで一貫して揃っていることを確認し、カクついたり揺れたりするGIFを防ぎましょう。命名規則を省略する
フレームに連番の名前が付いていないと、GIF作成ツールにアップロードする際に順序を保つのが難しくなります。異なるサイズで書き出す
なめらかなアニメーションにするため、各フレームの解像度とスケールが同じであることを必ず再確認してください。低品質な出力
オンラインGIF作成ツールを使う場合は、ピクセル化を避けるため、高解像度出力に対応したものを選びましょう。ファイルサイズが大きすぎる
GIFのファイルサイズが大きくなりすぎる場合は、フレーム数を減らすか、アップロード前に画像を少し圧縮してください。
FigmaでGIFを作成する際のよくある質問
FigmaからGIFを直接書き出せますか?
いいえ、FigmaにはGIFの標準エクスポート機能はありません。フレームを書き出して外部ツールを使用する必要があります。Figmaからフレームを書き出すのに最適な形式は何ですか?
PNGは画質が高く、透明度をサポートするため推奨されます。FigmaのデザインからGIFを作成するために使える外部ツールはどれですか?
一般的なツールには、ezgif.com、Adobe Photoshop、Giphy などがあります。滑らかなGIFにするには何フレーム使うべきですか?
通常、短いアニメーションなら10〜20フレームで十分です。フレーム数が増えるほど動きは滑らかになりますが、ファイルサイズも大きくなります。アニメーションの速度を調整できますか?
はい、ほとんどのGIFツールではフレーム間の遅延時間を設定して再生速度を調整できます。Macで画面録画する方法は?
Macで画面録画するには、Trupeer AIを使用できます。画面全体をキャプチャでき、AIアバターの追加、ナレーションの追加、動画内でのズームイン・ズームアウトなどのAI機能を利用できます。TrupeerのAI動画翻訳機能を使えば、動画を30以上の言語に翻訳できます。画面録画にAIアバターを追加するには?
画面録画にAIアバターを追加するには、AI画面録画ツールを使用する必要があります。Trupeer AIはAI画面録画ツールで、複数のアバターを使った動画の作成を支援し、動画用の独自アバターの作成もサポートします。Windowsで画面録画する方法は?
Windowsで画面録画するには、標準搭載のGame Bar(Windows + G)や、AIアバター、ナレーション、翻訳などのより高度な機能を備えたTrupeer AIのような高度なAIツールを使用できます。動画にナレーションを追加するには?
動画にナレーションを追加するには、Trupeer AIのChrome拡張機能をダウンロードします。登録後、音声付きの動画をアップロードし、Trupeerから希望のナレーションを選んで、編集した動画を書き出します。画面録画でズームインするにはどうすればよいですか?
画面録画中にズームインするには、Trupeer AIのズーム効果を使用します。これにより、特定のタイミングでズームイン・ズームアウトでき、動画コンテンツの視覚的なインパクトを高められます。
よくある質問
関連チュートリアル

