
FigmaからSVGファイルをエクスポートする方法
FigmaからSVGファイルを正確に書き出す方法を学びましょう。このシンプルなガイドに従って、Web、デザイン、開発プロジェクトで使うベクター素材をダウンロードできます。
詳細な手順:
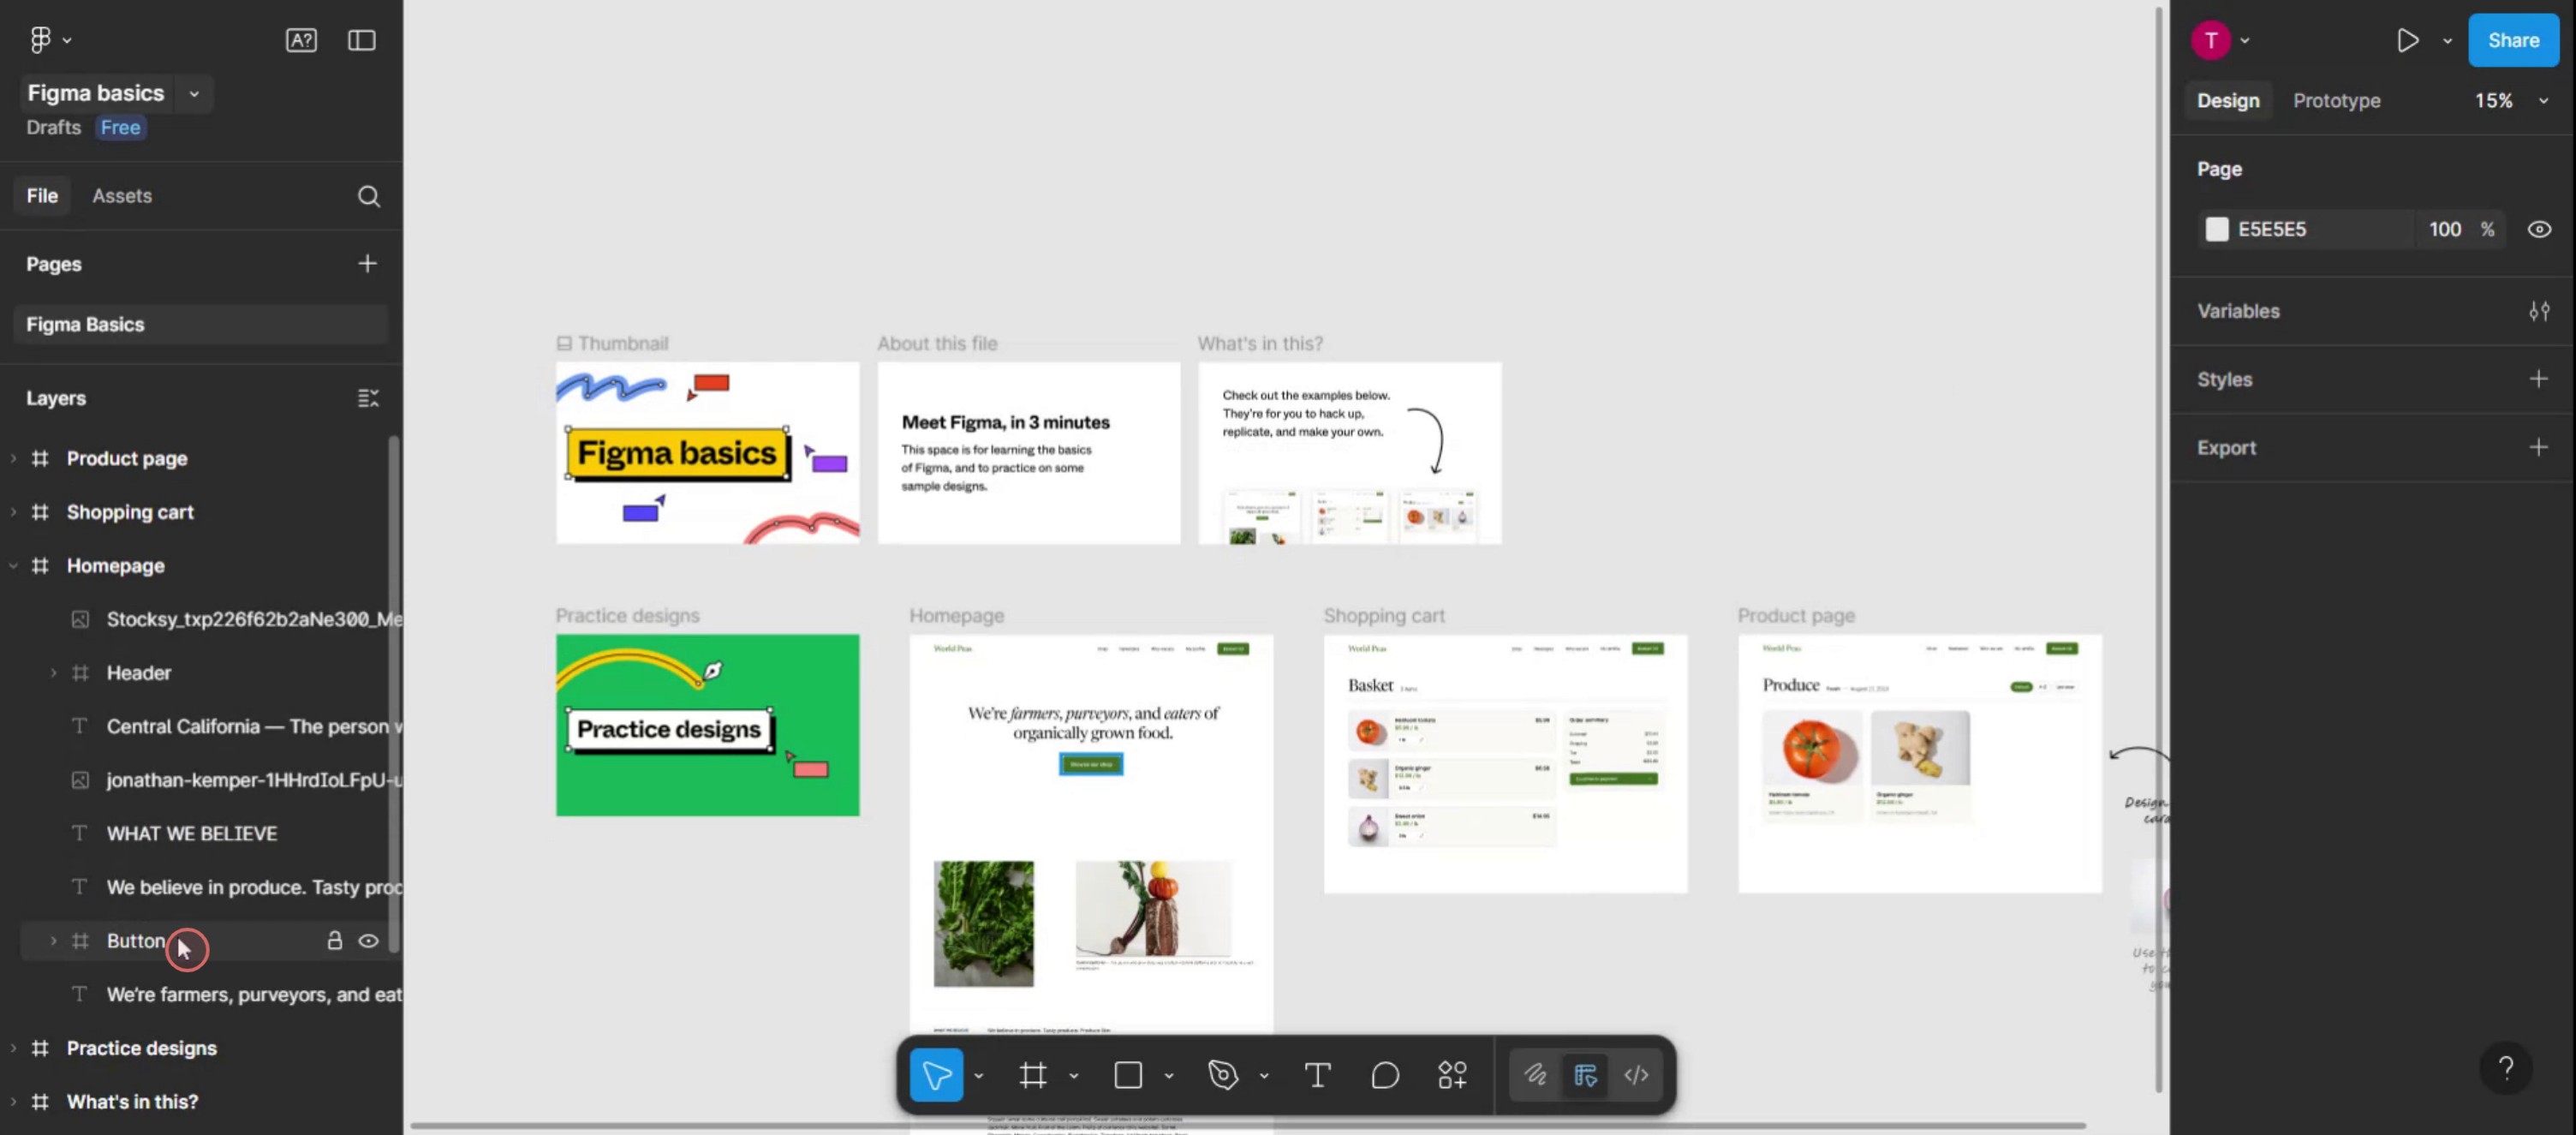
1. 要素を選択します: SVGとして書き出したい特定のフレーム、グループ、または個別のオブジェクトを選択します。
2. 書き出しセクションを見つけます: Figmaインターフェースの右側サイドバーにある「Export」セクションを見つけます。
3. 形式を選択します: 「Export」の横にある「+」ボタンをクリックして書き出し設定を追加します。次に、形式のドロップダウンから「SVG」を選択します。
4. ファイルを書き出します: 「Export」ボタンをクリックし、コンピューター上でSVGファイルの保存先を選択します。
ステップバイステップガイド: FigmaからSVGファイルを書き出す方法
手順 1
SVGファイルに変換したい特定のレイヤーを選択します。
手順 2
続行するにはプラスアイコンをクリックします。

手順 3
このドロップダウンメニューをクリックします,
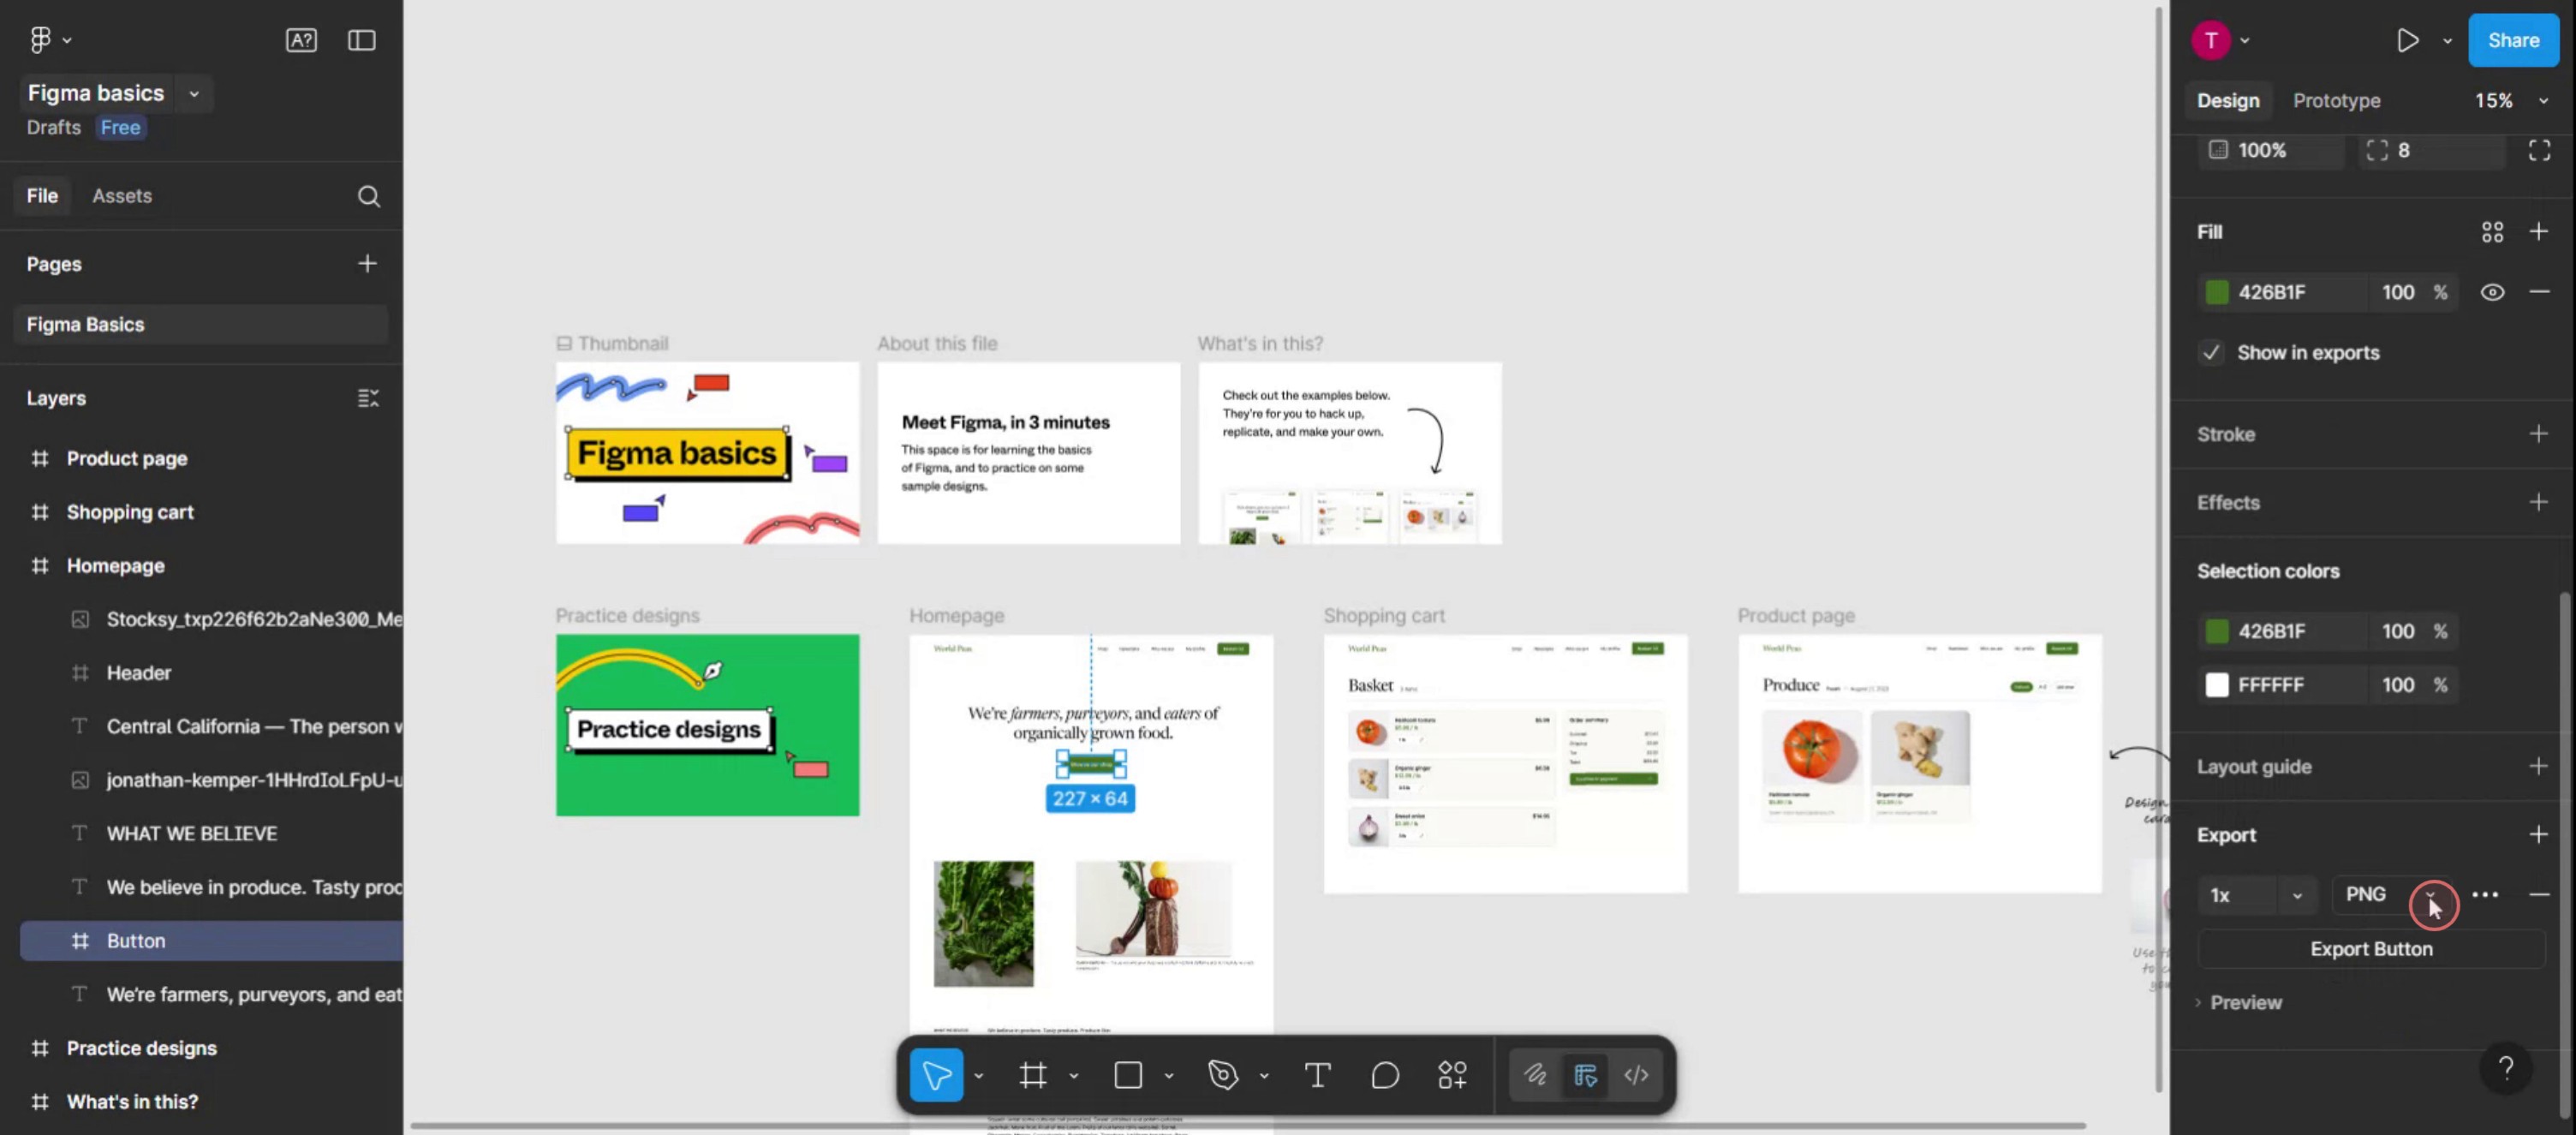
手順 4
ファイルのSVG形式を選択します。

FigmaからSVGファイルを書き出すためのプロのヒント
オブジェクトまたはフレームを選択する
SVGとして書き出したい特定のオブジェクト、アイコン、またはフレームをクリックします。目的の要素だけが選択されていることを確認してください。右側のサイドバーの書き出しセクションに移動する
右側のサイドバーを下にスクロールして、「書き出し」セクションを見つけます。折りたたまれている場合は、展開する必要があるかもしれません。「+」アイコンをクリックして書き出し設定を追加する
選択したオブジェクトまたはフレームに対して書き出しオプションを有効にするには、書き出しラベルの横にある「+」をクリックします。フォーマットのドロップダウンから「SVG」を選択する
書き出し形式のドロップダウンメニューで、利用可能な形式の一覧(PNG、JPG、PDF、SVG など)から「SVG」を選択します。「書き出し」ボタンをクリックする
SVGを選択したら、「[レイヤー名]を書き出し」ボタンをクリックします。FigmaがSVGファイルを生成し、コンピューターにダウンロードします。
よくある落とし穴とその回避方法
書き出したSVGが正しく動作しない
SVGにぼかしや未対応フォントなどの効果が含まれている場合、正常に表示されないことがあります。書き出す前にデザインを簡素化してください。ファイルがPNGなど別の形式で書き出される
フォーマットのドロップダウンで「SVG」が選択されていることを必ず再確認してください。既定ではPNGが表示されることがあります。書き出しに不要な要素が含まれる
書き出したいものだけを選択していることを確認してください。グループやフレームを使って、書き出し対象を分離します。書き出したSVGの品質が低下する
SVGはベクターベースなので品質の問題はまれですが、フラット化されたベクターを使い、ファイル内に複雑なラスター画像を含めないようにしてください。SVGファイルのサイズが大きすぎる
未使用のレイヤーやパスを整理します。必要に応じてテキストをアウトラインに変換し、ファイルサイズを削減してください。
FigmaからSVGをエクスポートすることに関するよくある質問
FigmaでSVGファイルをエクスポートするには?
オブジェクトまたはフレームを選択し、右サイドバーでエクスポート設定を追加し、形式としてSVGを選んでから、[エクスポート]をクリックします。複数のSVGを一度にエクスポートできますか?
はい。複数のフレームやコンポーネントを選択し、それぞれにエクスポート設定を適用してから、一度にエクスポートできます。SVG内のテキストは編集可能なままですか?
デフォルトでははい。互換性を確保したい場合は、エクスポート前にテキストをアウトラインに変換してください。PNGではなくSVGを使う利点は何ですか?
SVGファイルは拡大縮小可能で軽量、どんな解像度でも品質を維持できます。アイコンやUIアセットに最適です。エクスポートしたSVGをWebサイトで使えますか?
はい。FigmaからエクスポートしたSVGはWeb向けで、HTMLに直接埋め込んだり、画像アセットとして使用したりできます。Macで画面録画する方法は?
Macで画面録画するには、Trupeer AIを使用できます。画面全体をキャプチャでき、AIアバターの追加、ナレーションの追加、動画内の拡大・縮小などのAI機能を利用できます。trupeerのAI動画翻訳機能を使えば、動画を30以上の言語に翻訳できます。画面録画にAIアバターを追加するには?
画面録画にAIアバターを追加するには、AI画面録画ツールを使用する必要があります。Trupeer AIはAI画面録画ツールで、複数のアバターを使った動画作成を支援し、動画用の独自のアバター作成もサポートします。Windowsで画面録画するには?
Windowsで画面録画するには、内蔵のGame Bar(Windows + G)や、AIアバター、ナレーション、翻訳などのより高度な機能を備えたTrupeer AIのような高度なAIツールを使用できます。動画にナレーションを追加するには?
動画にナレーションを追加するには、Trupeer AIのChrome拡張機能をダウンロードします。登録後、音声付きの動画をアップロードし、Trupeerから希望のナレーションを選択して、編集した動画を書き出します。画面録画でズームインするには?
画面録画中にズームインするには、Trupeer AIのズーム効果を使用します。これにより、特定の瞬間に拡大・縮小でき、動画コンテンツの視覚的な印象を高められます。
関連する質問
関連チュートリアル

