
Canvaで影を追加する方法
Canvaで画像やテキストに影を追加して、奥行きと視覚的な魅力を生み出す方法を学びましょう。Canvaのシャドウ効果をプロのように使うための、この簡単なガイドに従ってください。
より詳しい内訳はこちらです:
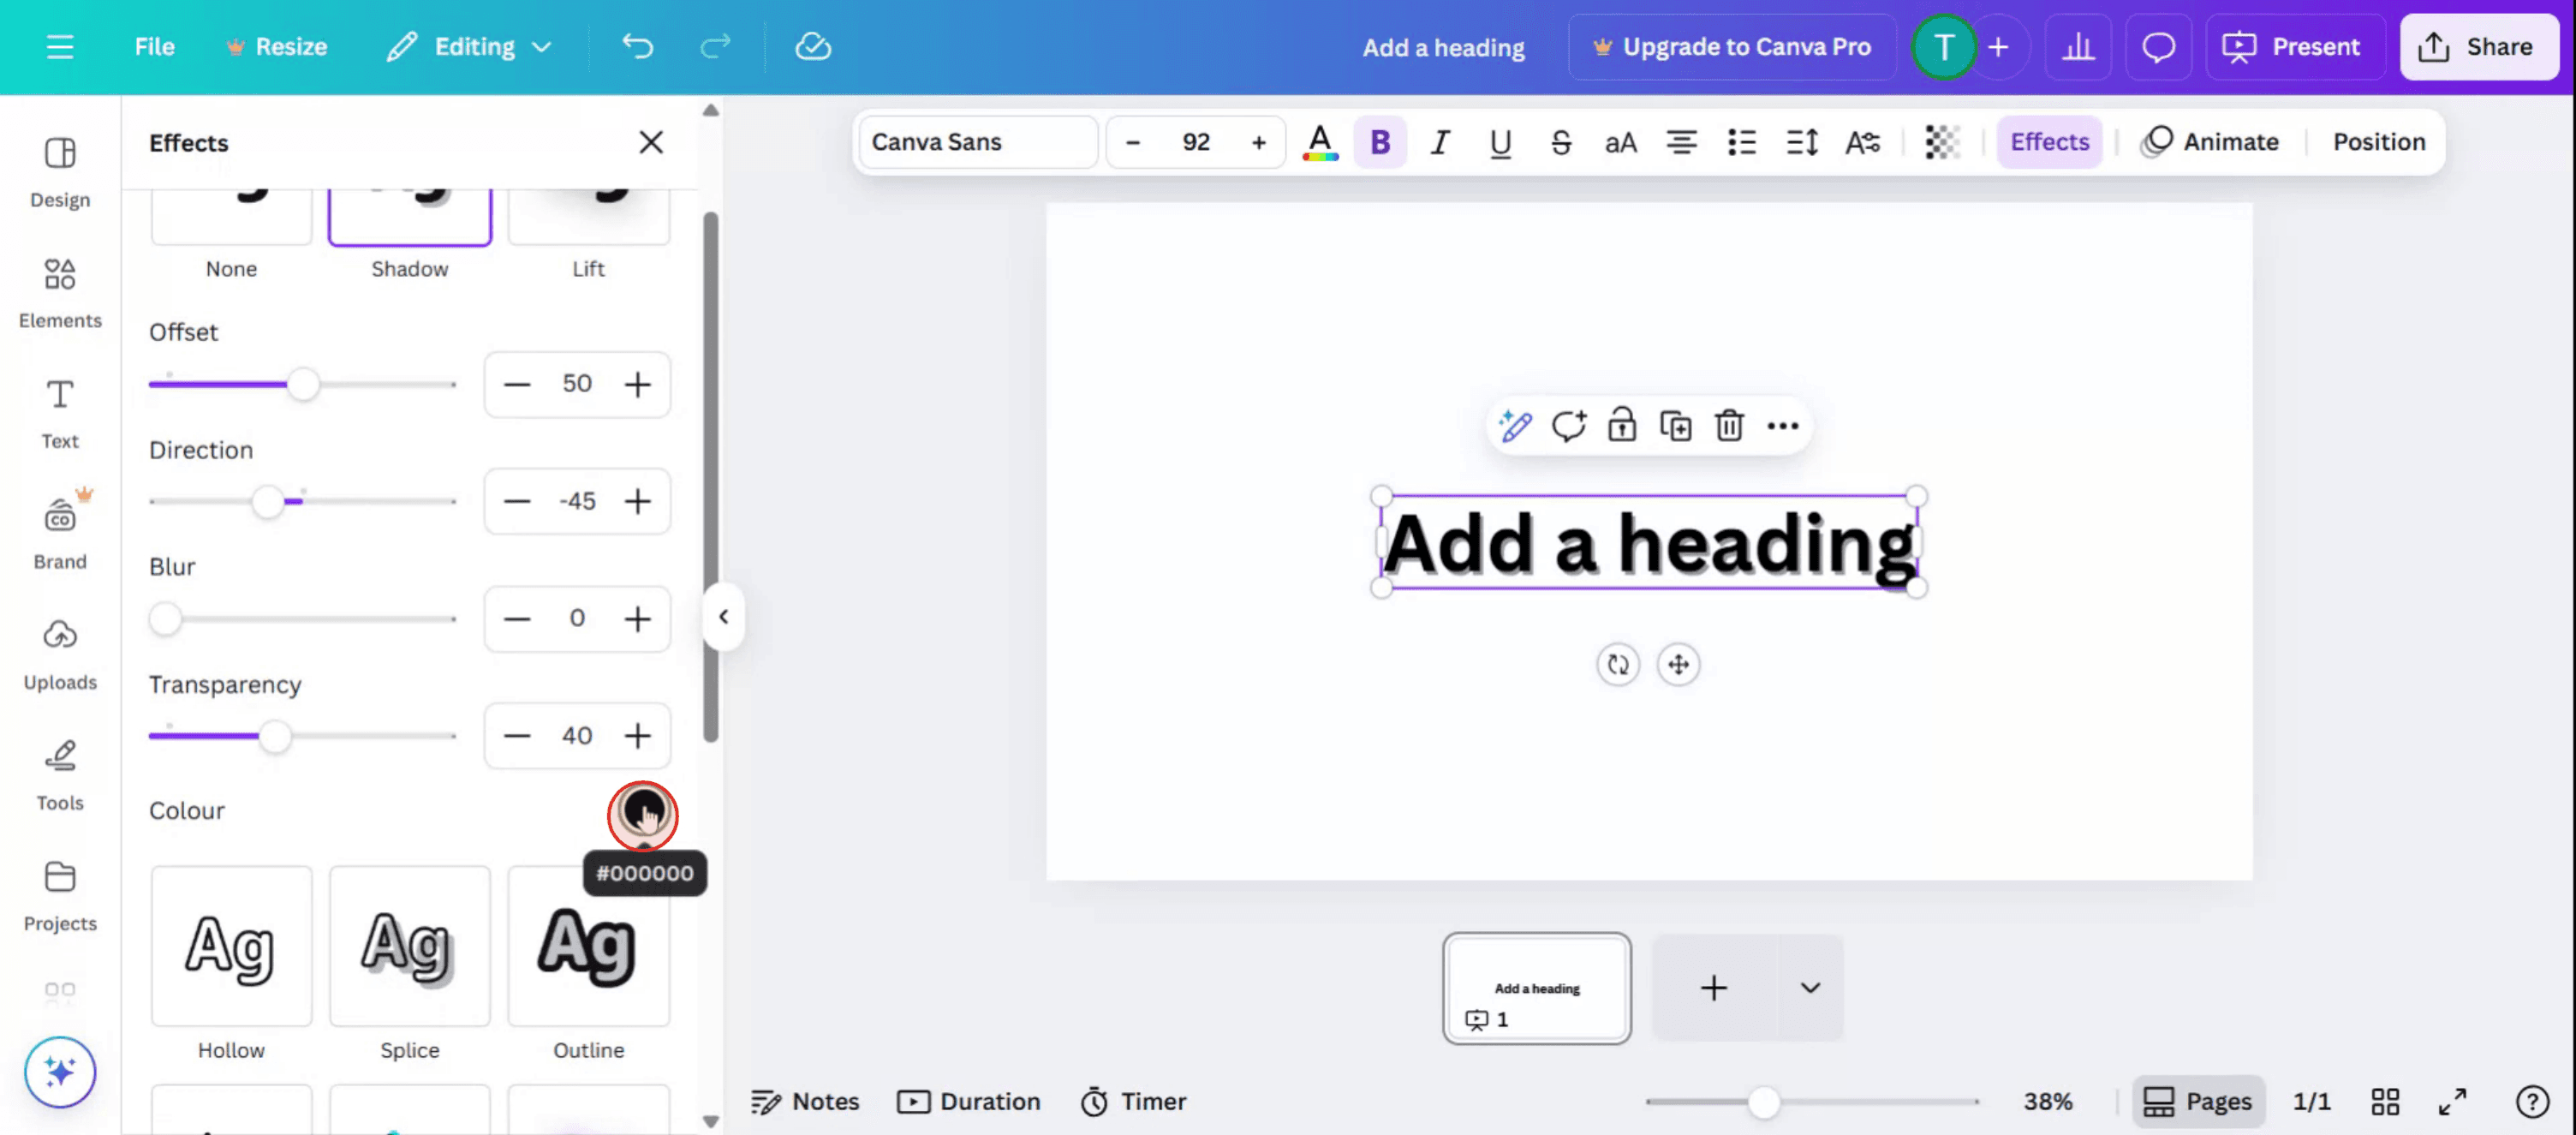
要素を選択する: Canva のデザインを開き、影を追加したい画像、テキスト、または図形をクリックします。 影を追加します。
エフェクトパネルにアクセスする: 「画像を編集」をクリックし、「エフェクト」または「シャドウ」オプションを見つけます。
影のスタイルを選ぶ: 「ドロップシャドウ」「グロー」「アウトライン」などの影のスタイルを選択します。
影をカスタマイズする: 用意されたスライダーやオプションを使って、影のぼかし、角度、距離、色、強さを調整します。
適用して微調整する: 「適用」または「完了」をクリックして、要素に影を追加します。位置や透明度を調整して、影をさらに微調整できます。
ステップバイステップガイド: linkedlnアカウントを無効化する方法
ステップ 1
エフェクトオプションをクリックします。

ステップ 2
クリックして影の効果を選択します。

ステップ 3
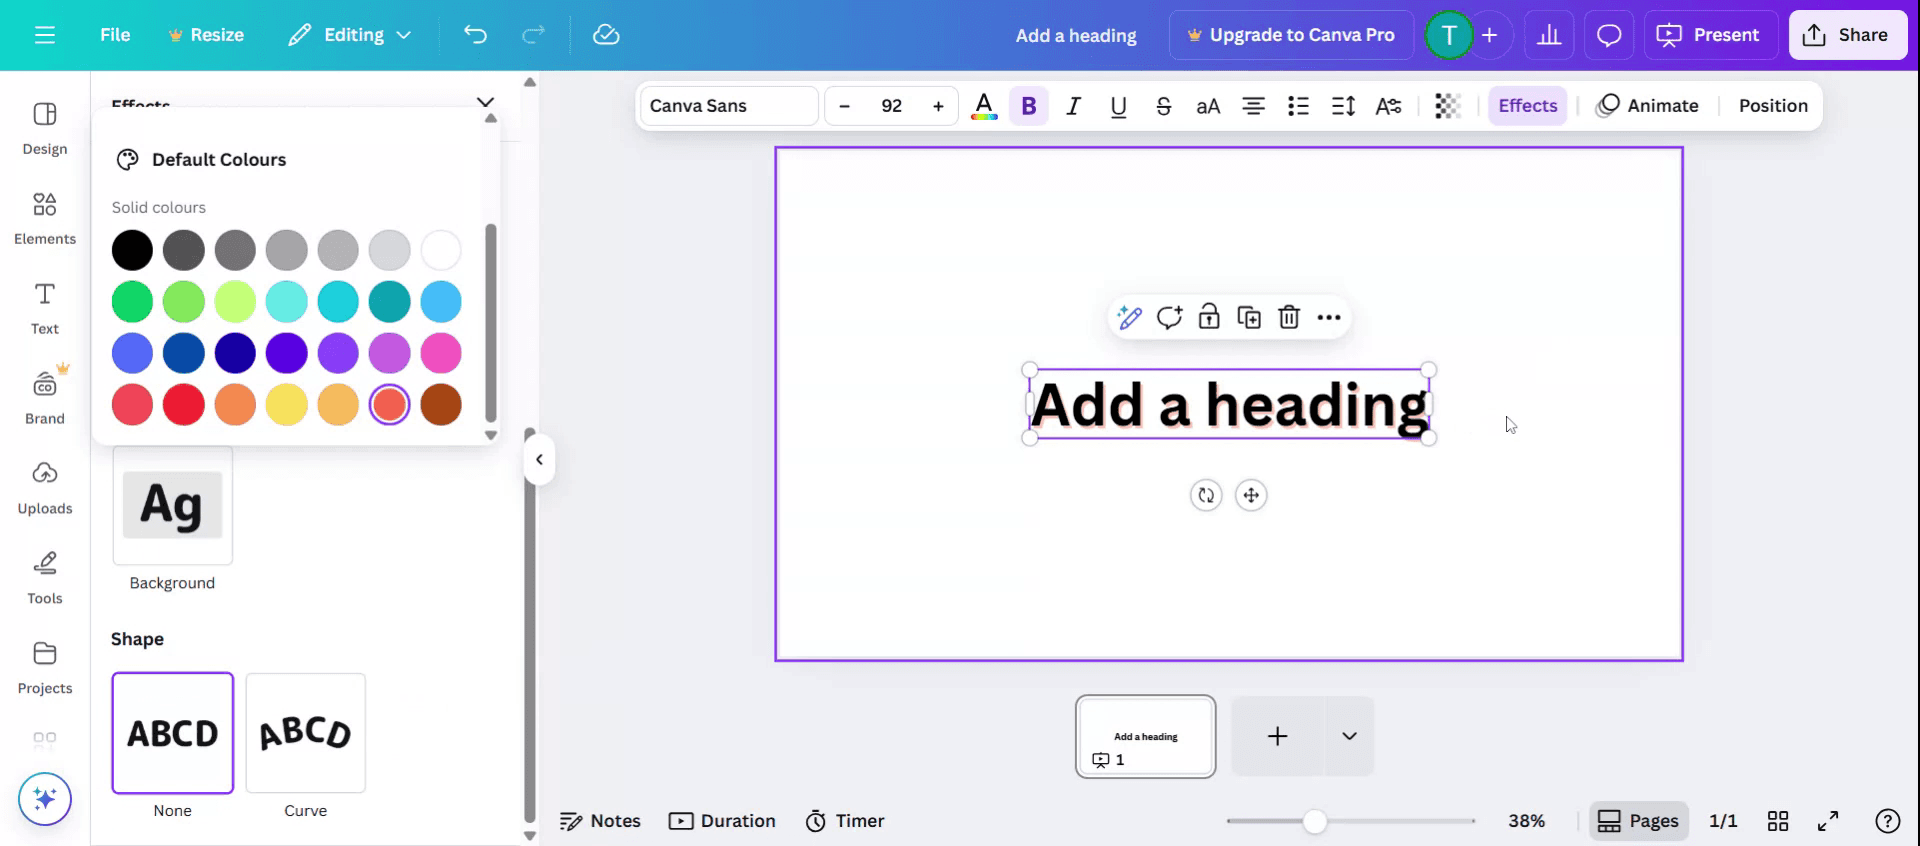
色のオプションをクリックし、希望の色合いを選択します。
ステップ 4
これで Canva でテキストに影を追加する方法がわかります。
Canvaで影を追加するためのプロのコツ
要素またはテキストを選択する
影を追加したいテキストボックス、画像、またはグラフィックをクリックします。続行する前に、選択状態になっていることを確認してください。上部メニューの「エフェクト」をクリックする
要素を選択したら、上部ツールバーの「エフェクト」ボタンを探してクリックし、スタイル設定を開きます。「シャドウ」を選択する
「エフェクト」パネルで「シャドウ」を選びます。要素によっては、「リフト」「グロー」「ドロップ」などの他の影の種類も表示される場合があります。影の設定をカスタマイズする
影の種類を選択したら、調整スライダーを使って透明度、方向、ぼかし、色を調整します。これにより、影の見え方を細かく調整できます。影をプレビューする
さまざまな影の種類や設定にカーソルを合わせて、リアルタイムのプレビューを確認します。デザインのスタイルに合うまで調整してください。変更を適用する
満足できたら、パネルの外をクリックするか、「完了」を押して、要素に影の効果を適用します。
よくある落とし穴とその回避方法
影が見えない
影の色が背景と十分に対照的であることを確認してください。白い背景では、薄い影は見落とされがちです。影ツールが表示されない
すべての要素が影効果に対応しているわけではありません。「エフェクト」が使えない場合は、代わりにテキストボックスや画像を試してください。影効果を使いすぎる
ぼかしや不透明度を強くしすぎると、デザインが雑に見えることがあります。よりすっきり見せるために、控えめな調整にとどめましょう。影の方向がずれている感じがする
角度または方向の設定を使って、デザインの光源に自然に合うよう影を調整します。Canvaが影の調整に反応しない
設定が変更を反映しない場合は、Canvaを更新するか、要素を再選択して効果を再適用してみてください。
Canvaで影を追加する際のよくある質問
Canvaでテキストに影を付けるにはどうすればよいですか
テキストを選択し、「エフェクト」をクリックして、オプション一覧から「影」を選びます。影の色は変更できますか
はい、「影」設定のカラーピッカーを使って、影の色を任意に選択できます。影効果は無料のCanvaユーザーでも利用できますか
基本的な影スタイルは無料アカウントでも利用できますが、より高度な影オプションにはCanva Proのサブスクリプションが必要になる場合があります。画像にも影を付けられますか
はい、画像でも影効果を使えます。画像を選択し、「エフェクト」パネルから影を適用してください。適用した影を削除するにはどうすればよいですか
「エフェクト」パネルに戻り、「なし」をクリックするか、影オプションの選択を解除するだけで削除できます。Macで画面録画するには?
Macで画面録画をするには、Trupeer AIを使用できます。画面全体をキャプチャでき、AIアバターの追加、音声ナレーションの追加、動画のズームイン・ズームアウトなどのAI機能を利用できます。trupeerのAI動画翻訳機能を使えば、動画を30以上の言語に翻訳できます。AIアバターを画面録画に追加するにはどうすればよいですか?
画面録画にAIアバターを追加するには、AI画面録画ツールを使用する必要があります。Trupeer AIはAI画面録画ツールで、複数のアバターを使った動画の作成を支援し、動画用の自分のアバター作成も手伝います。Windowsで画面録画するには?
Windowsで画面録画をするには、組み込みのGame Bar(Windows + G)を使うか、AIアバター、ナレーション、翻訳などのより高度な機能を使えるTrupeer AIのような高度なAIツールを利用できます。動画にナレーションを追加するには?
動画にナレーションを追加するには、trupeer aiのChrome拡張機能をダウンロードしてください。登録後、音声付きの動画をアップロードし、trupeerから希望のナレーションを選んで、編集した動画をエクスポートします。画面録画でズームインするには?
画面録画中にズームインするには、Trupeer AIのズーム効果を使用します。これにより、特定の瞬間にズームイン・ズームアウトでき、動画コンテンツの視覚的なインパクトを高められます。
関連する質問
関連チュートリアル

