
Canvaで印刷用デザインに塗り足しを追加する方法
Canvaで塗り足しを追加して、印刷時に白い縁が出ないようにする方法を学びましょう。名刺、チラシ、パンフレットに最適です。
この文書では、Canva でデザインプロジェクトに塗り足しを追加するための簡単な手順を説明します。これにより、印刷後に望ましくない白い縁が出るのを防ぎ、デザインを印刷可能な状態にできます。
塗り足しを追加すると、印刷デザインは端まできれいに色が入り、意図しない白い余白がなくなります。
手順ガイド:
1. 印刷用の塗り足しを有効にする
Canva でデザインを開きます。
上部メニューで、[ファイル]>[印刷用の塗り足しを表示]をクリックします。
端の近くに破線が表示されます。これは塗り足しが始まる場所を示します。
2. デザイン要素を外側まで拡張する
背景、画像、色は破線を越えてキャンバスの端まで広げてください。
テキストや重要なグラフィックは、トリミングの問題を避けるために安全ゾーン(破線の内側)に収めてください。
3. 印刷用ファイルをダウンロードする
[共有]>[ダウンロード]をクリックします。
ファイル形式を PDF 印刷に設定します。
"トリムマークと塗り足し"にチェックを入れます。
[ダウンロード]をクリックします。
手順ガイド:印刷用に Canva で塗り足しを追加する方法
ステップ 1
変更したい既存のプロジェクトを選択します。

ステップ 2
次に、[ファイル]オプションに移動してクリックします。

ステップ 3
[設定]を選択します。
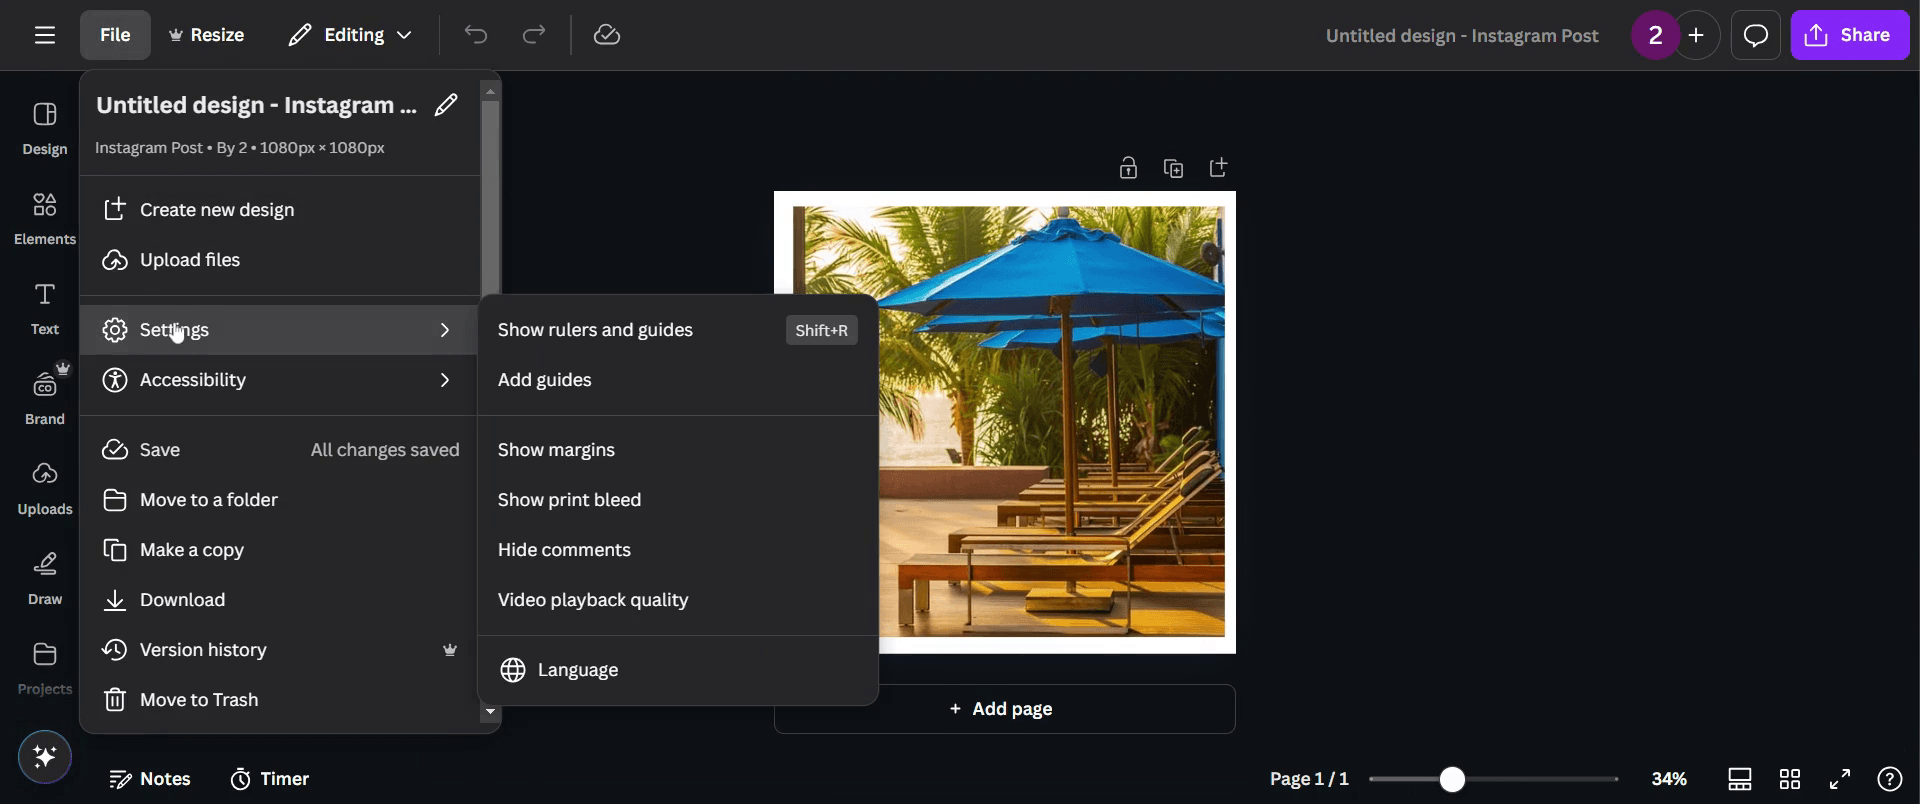
ステップ 4
[印刷用の塗り足しを表示]をクリックします。

ステップ 5
端の白い隙間をすべて覆うように画像を調整します。

ステップ 6
調整が完了したら、[共有]ボタンをクリックして進みます。

ステップ 7
次に、[ダウンロード]をクリックします。

ステップ 8
ファイル形式を[PDF 印刷]に変更します。
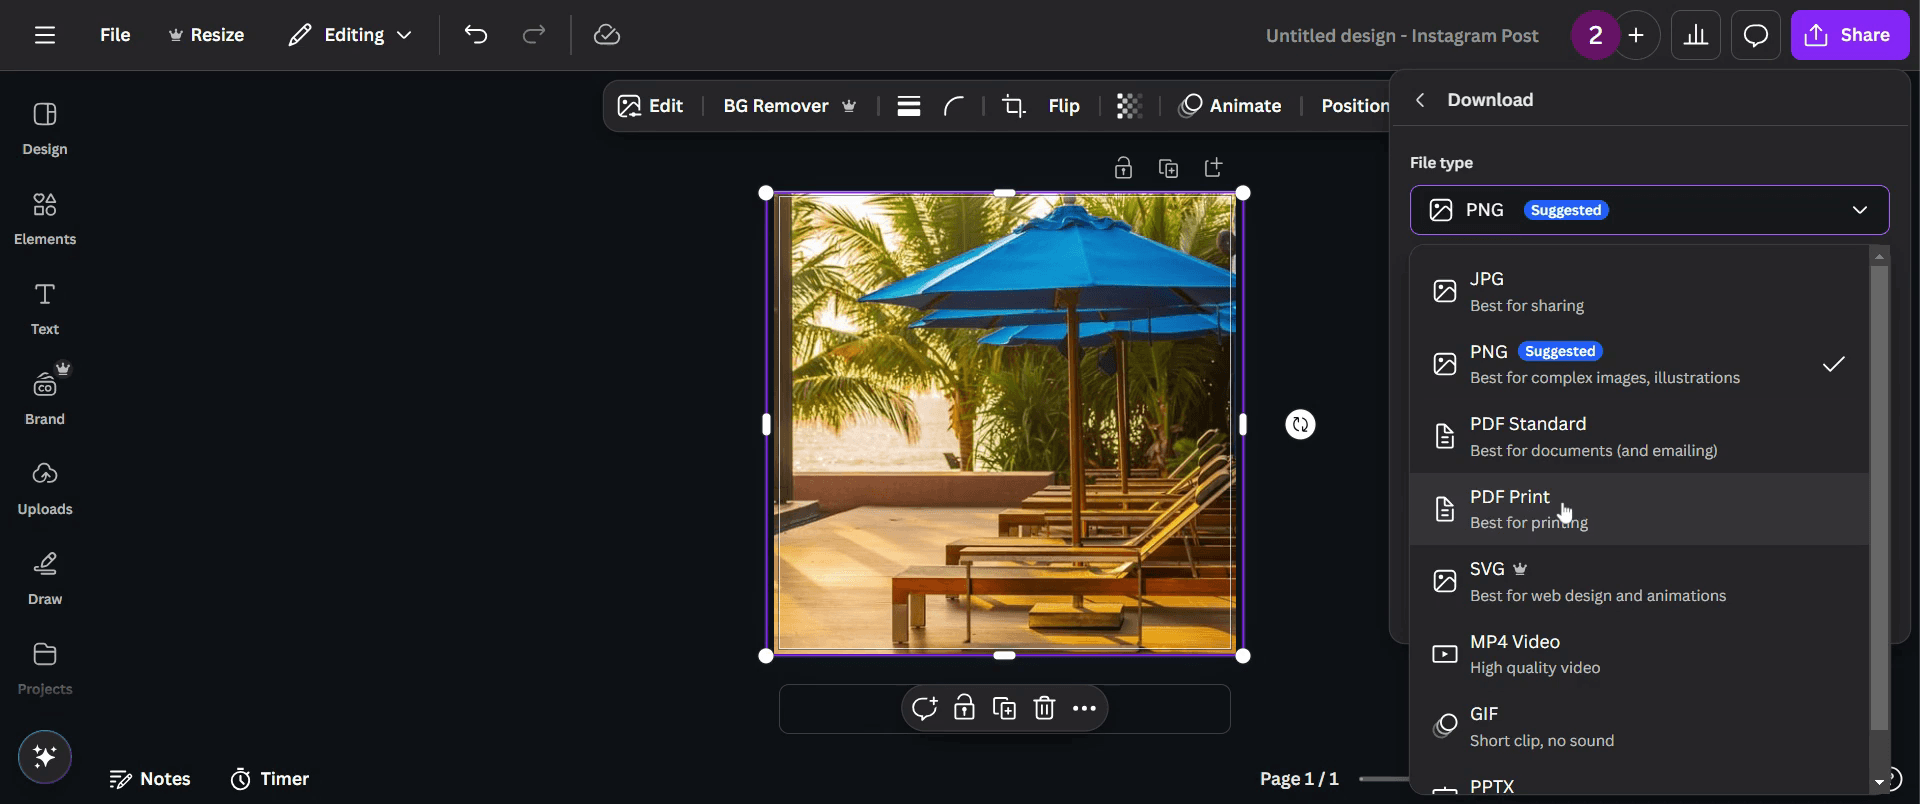
ステップ 9
[トリムマークと塗り足し]にチェックを入れてください。

ステップ 10
最後に、[ダウンロード]をクリックします。これでデザインの準備は完了です。

Canvaで塗り足しを追加するためのプロのコツ
Canvaのファイルメニューで塗り足し設定を有効にして、重要なデザイン要素が印刷時に切れてしまわないようにする
トリミング後の白い縁を避けるために、背景画像や色を塗り足し線の外側まで延ばす
プロ品質の印刷結果を得るために、必ずトンボと塗り足し付きのPDFとしてデザインをダウンロードする
Canvaで塗り足しを追加する際によくある落とし穴とその回避方法
塗り足し設定を有効にし忘れると、不要な白い縁が出る可能性があります。仕上げる前に必ず塗り足し設定を確認しましょう
テキストや重要な要素を塗り足し領域に近づけすぎると切り取られてしまうことがあります。安全マージンの内側に十分な余白を取って配置しましょう
正しい書き出し形式を使わないと印刷品質に影響することがあります。必ずPDFプリント形式でトンボと塗り足し付きでダウンロードしましょう
Canvaで塗り足しを追加する際のよくある質問
1. Canvaデザインで塗り足しはなぜ重要ですか?
塗り足しは、デザインがトリムラインを越えて広がることを保証し、印刷時に不要な白い縁が出るのを防ぎます
2. Canvaで塗り足しのサイズを調整できますか?
Canvaでは標準の塗り足しマージンが自動的に設定され、プラットフォーム内で手動調整することはできません
3. 塗り足し付きのCanvaデザインを印刷用に書き出すにはどうすればよいですか?
ダウンロードをクリックし、PDF印刷形式を選択して、保存前に「トリムマークと塗り足し」オプションにチェックを入れます
4. デザインを印刷したとき、塗り足し部分は見えますか?
いいえ、塗り足し部分は裁ち落とされ、不要な境界線のない最終デザインだけが残ります
5. Macで画面録画するには?
Macで画面を録画するには、Trupeer AIを使用できます。これにより、画面全体をキャプチャでき、AIアバターの追加、ナレーションの追加、動画内のズームイン/ズームアウトなどのAI機能も利用できます。trupeerのAI動画翻訳機能を使えば、動画を30以上の言語に翻訳できます。
6. AIアバターを画面録画に追加するには?
画面録画にAIアバターを追加するには、AI画面録画ツールを使用する必要があります。Trupeer AIはAI画面録画ツールで、複数のアバターを使った動画作成を支援し、動画用の独自アバター作成もサポートします。
7. Windowsで画面録画するには?
Windowsで画面録画するには、標準のゲームバー(Windows + G)またはTrupeer AIのような高度なAIツールを使って、AIアバター、ナレーション、翻訳などのより高度な機能を利用できます。
8. 動画にナレーションを追加するには?
動画にナレーションを追加するには、trupeer aiのChrome拡張機能をダウンロードします。サインアップ後、音声付きの動画をアップロードし、trupeerから希望のナレーションを選択して、編集した動画を書き出します。
9. 画面録画でズームインするにはどうすればよいですか?
画面録画中にズームインするには、Trupeer AIのズームエフェクトを使用します。これにより、特定のタイミングでズームインとズームアウトができ、動画コンテンツの視覚的なインパクトを高められます。
よくある質問
関連チュートリアル

