
Cómo usar marcos en Canva
Aprende a usar marcos en Canva para mostrar de forma creativa imágenes, vídeos y diseños. Guía paso a paso para añadir y personalizar marcos y crear composiciones llamativas.
Para usar marcos en Canva, ve a la pestaña "Elementos", busca "Marcos" y selecciona la forma que desees. Luego puedes arrastrar y soltar una imagen o un vídeo sobre el marco para rellenarlo, o subir tu propio contenido multimedia y colocarlo dentro.
Aquí tienes un desglose más detallado:
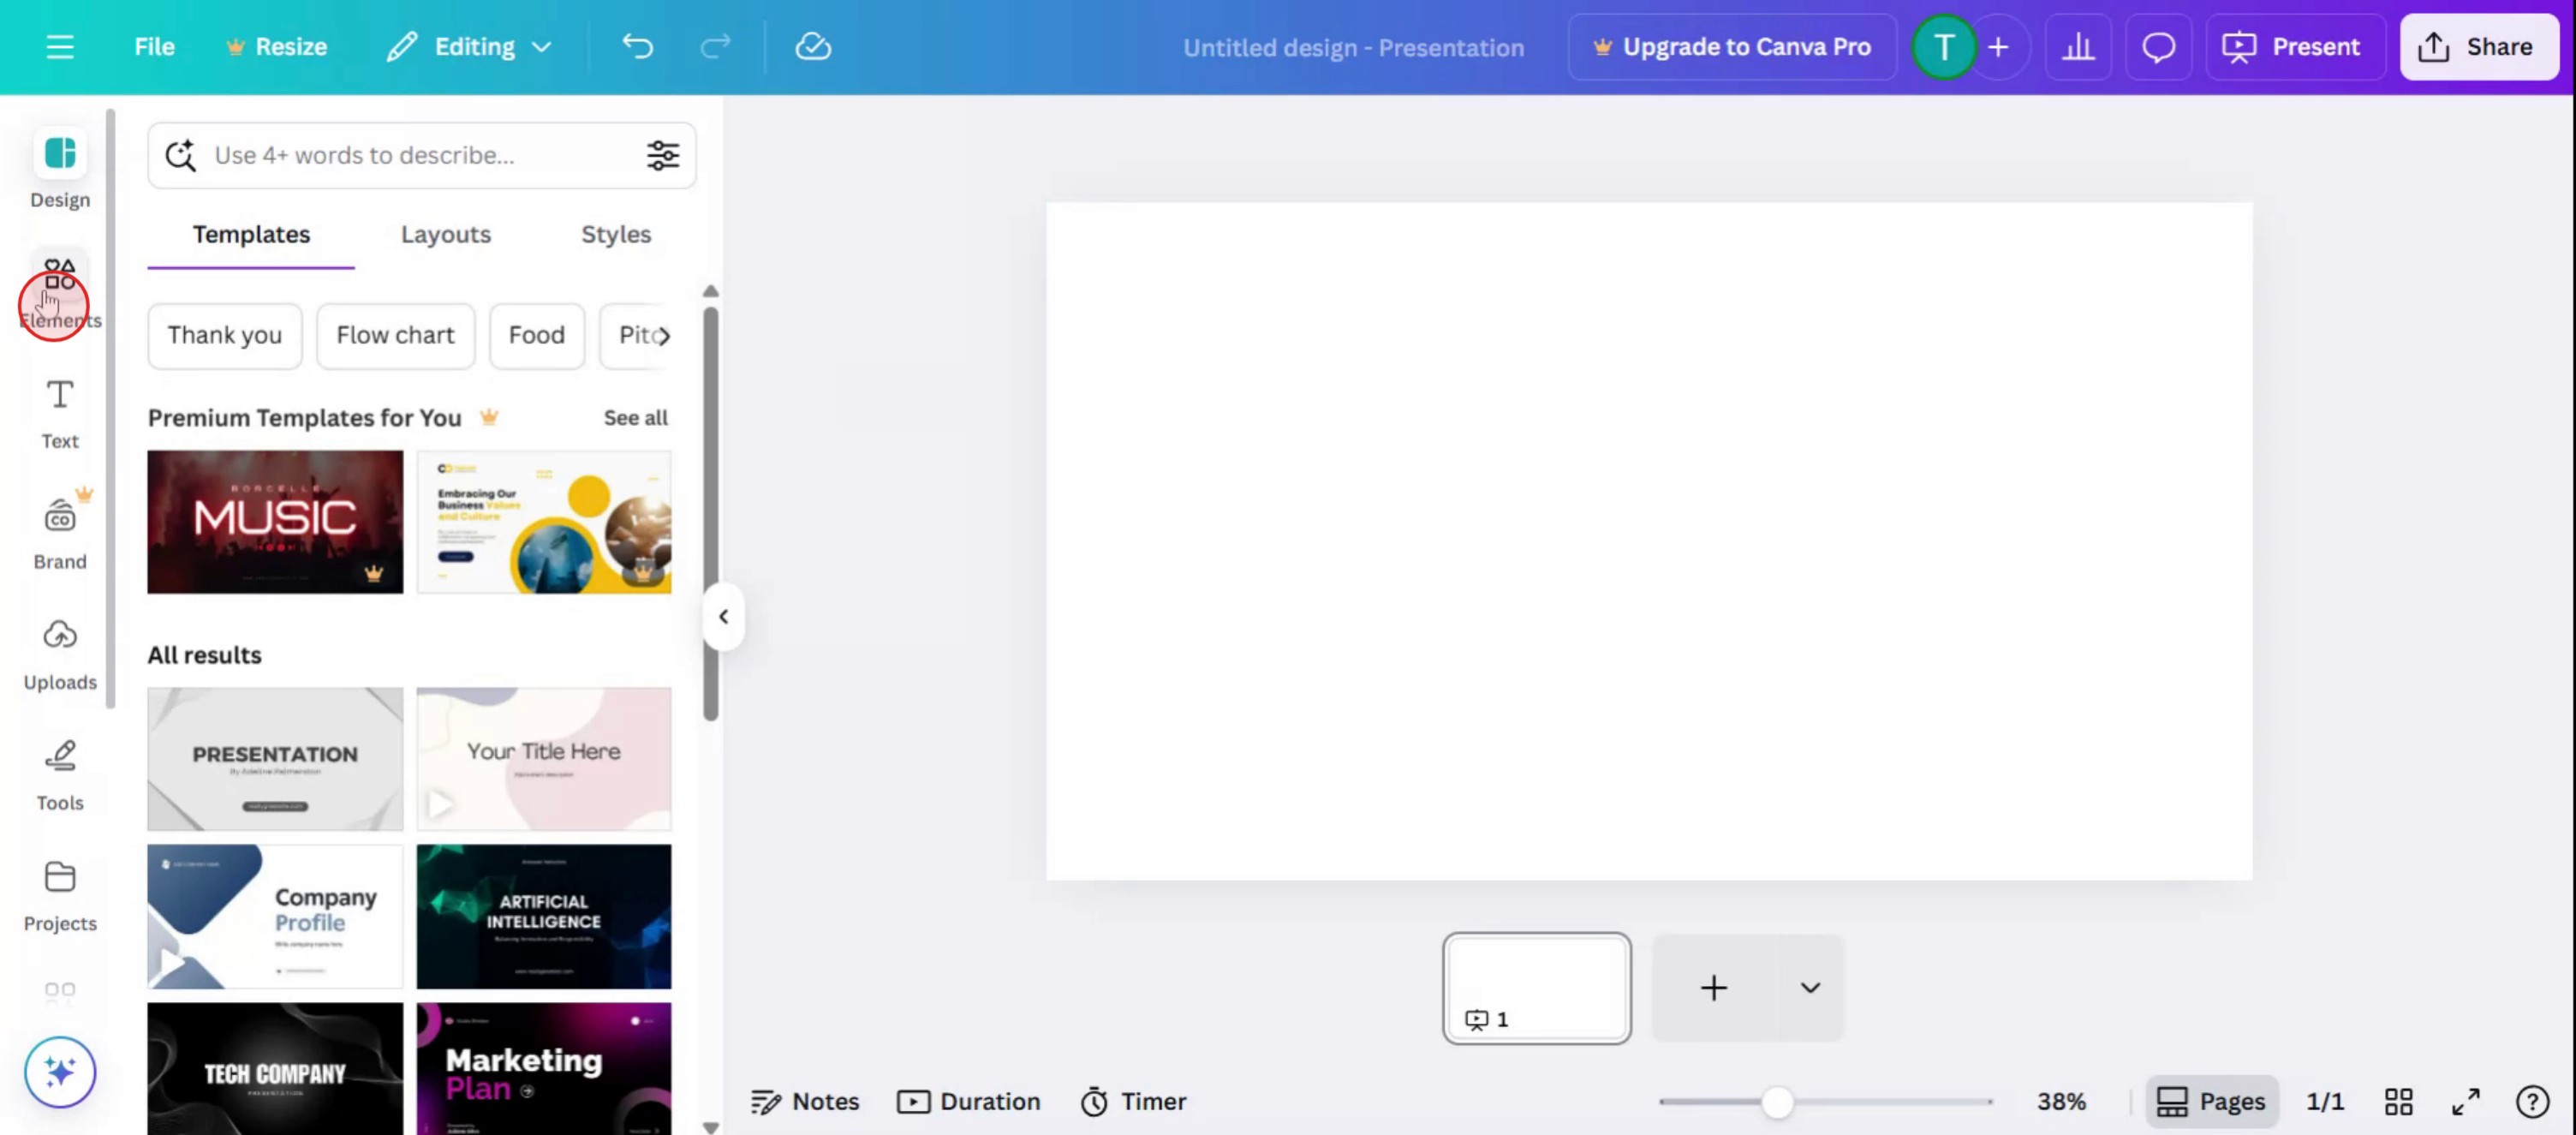
1. Acceso a los marcos:
Abre tu diseño en Canva. Ve a la pestaña "Elementos" en la barra lateral izquierda. Busca "Marcos" o desplázate hacia abajo para encontrar la sección "Marcos".
2. Añadir un marco:
Haz clic en un marco para añadirlo a tu diseño. Puedes cambiar el tamaño y la posición del marco arrastrando sus esquinas y bordes.
3. Añadir contenido al marco:
Desde la biblioteca multimedia de Canva: haz clic en el marco que quieras rellenar. Pulsa "Reemplazar" en la barra de herramientas del editor. Selecciona "Fotos" o "Vídeos". Busca o elige una imagen/vídeo para añadir.
Desde las subidas: haz clic en el marco que quieras rellenar. Pulsa "Reemplazar" en la barra de herramientas del editor. Selecciona "Carrete" o "Subidas". Sube tu propio contenido multimedia si es necesario. Haz clic en la imagen o el vídeo para añadirlo al marco.
4. Ajustar el contenido dentro del marco:
Haz clic en el marco para seleccionarlo. Puedes ajustar el tamaño y la posición del contenido dentro del marco arrastrándolo.
5. Personalizar los marcos:
Puedes personalizar aún más el marco y su contenido usando las distintas herramientas de edición de Canva. Por ejemplo, puedes cambiar el color del marco, añadir efectos a la imagen o añadir texto al diseño.
Guía paso a paso: cómo usar marcos en Canva
Paso 1
selecciona la opción Elementos.
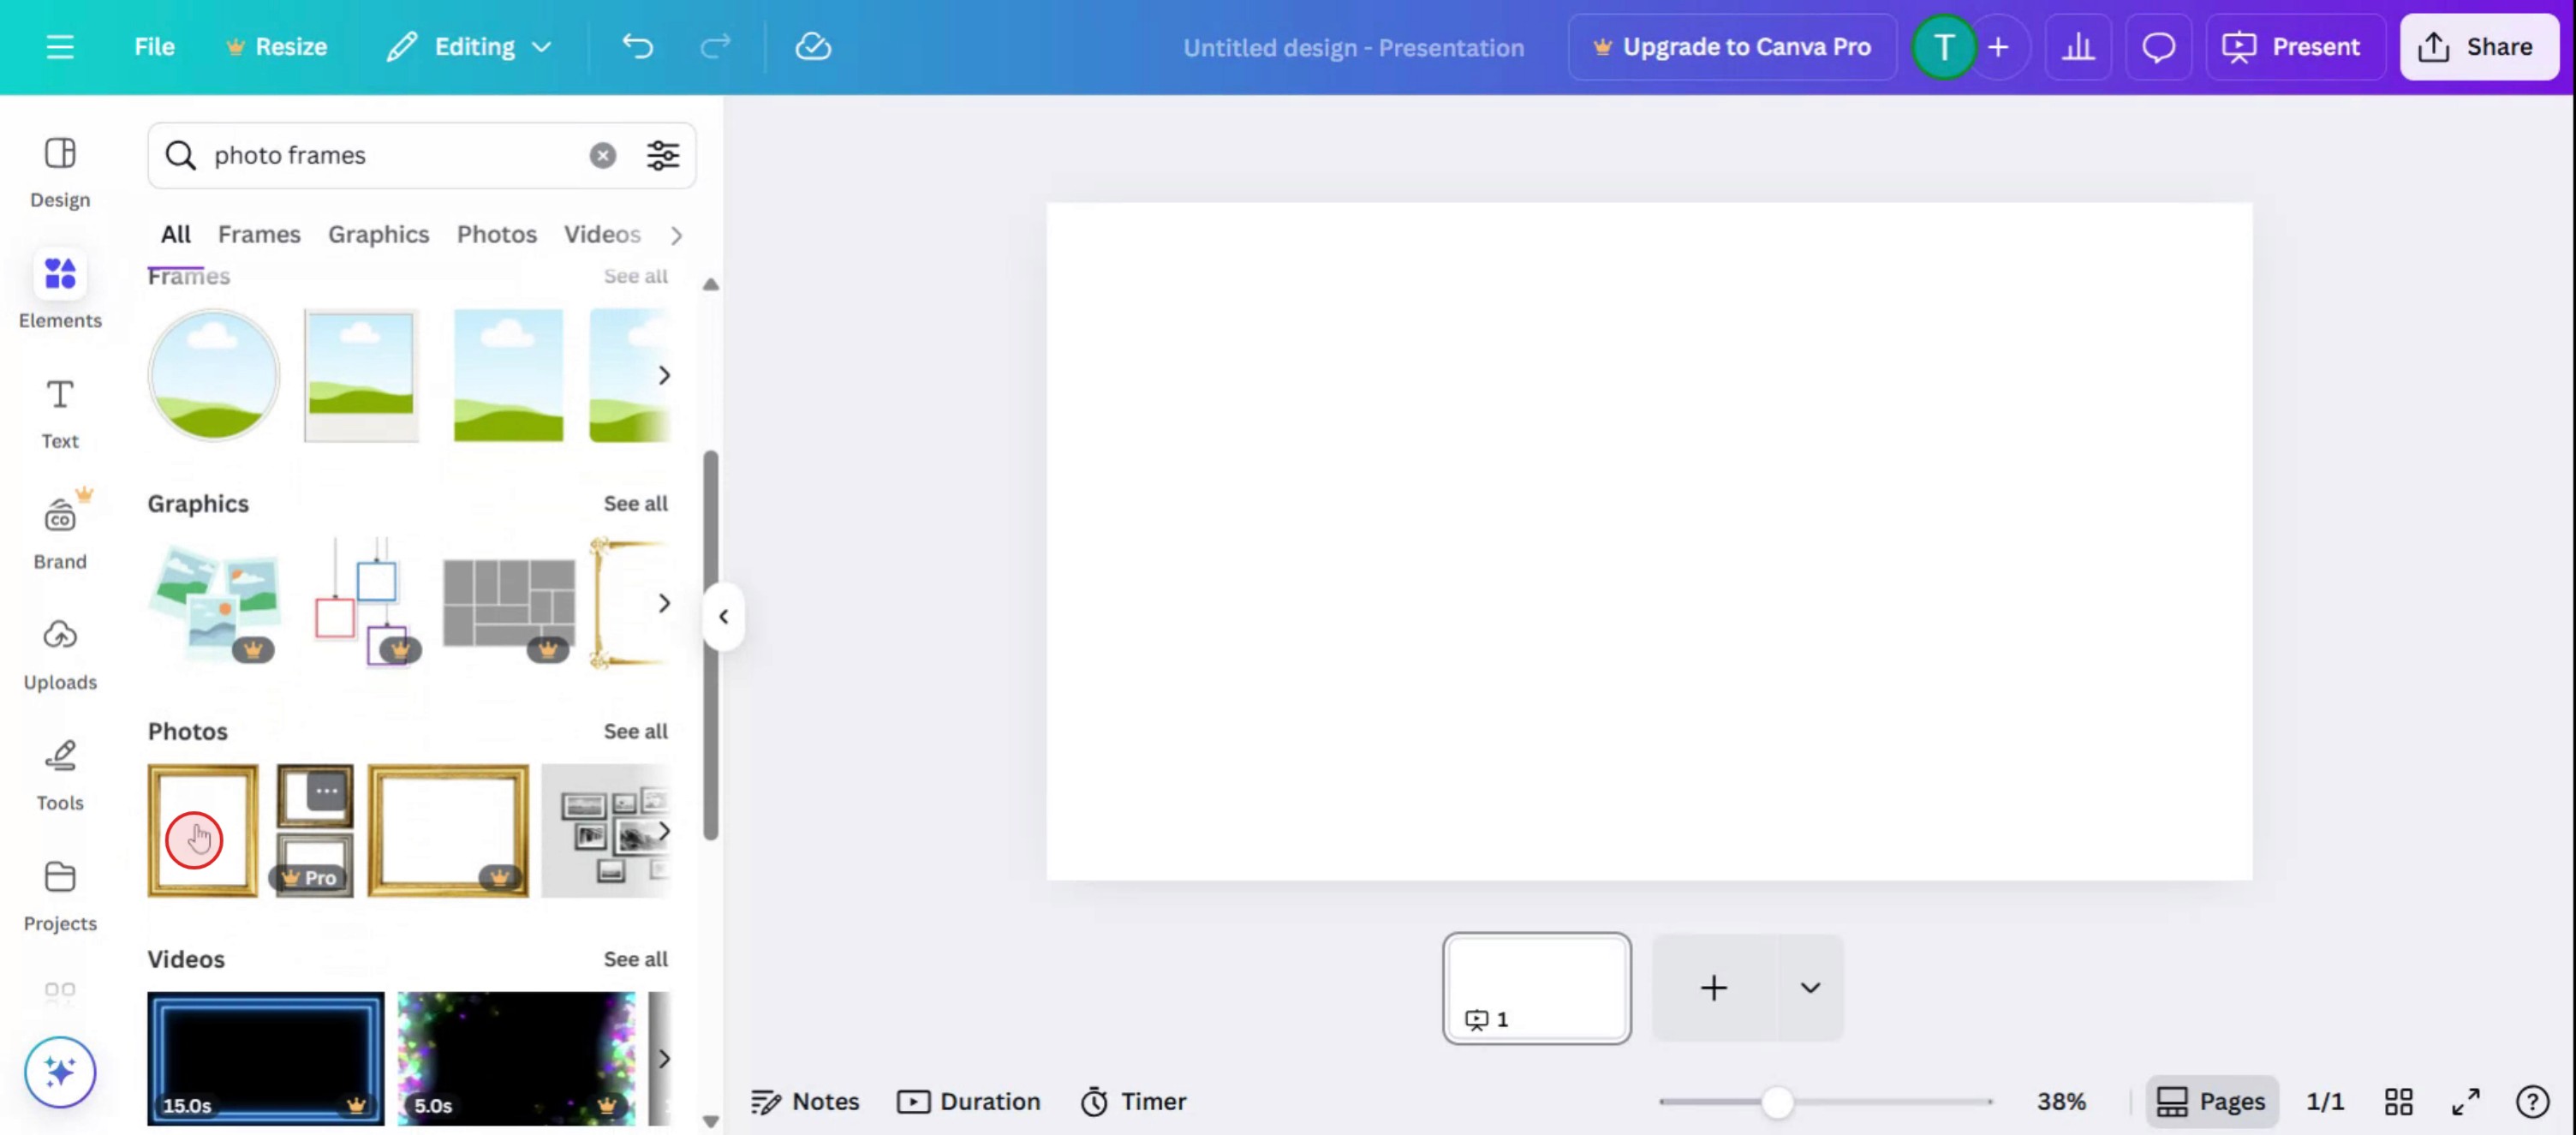
Paso 2
En la barra de búsqueda, escribe marcos para localizar las opciones disponibles.

Paso 3
Elige un marco que satisfaga mejor tus necesidades.
Paso 4
Haz clic en Subir para añadir la imagen.

Paso 5
Personaliza el marco y la imagen según tus preferencias.

Consejos profesionales para usar marcos en Canva
Abre tu diseño o crea uno nuevo
Inicia sesión en Canva y elige una plantilla o crea un diseño de tamaño personalizado para empezar.Ve a la pestaña Elementos
En el panel lateral izquierdo, haz clic en “Elementos” para acceder a los componentes de diseño.Busca marcos
En la barra de búsqueda dentro de la pestaña Elementos, escribe “marcos” y presiona Intro para ver todas las opciones de marcos disponibles.Elige un estilo de marco
Explora la colección y haz clic en cualquier forma de marco que te guste. Aparecerá en tu lienzo.Arrastra y suelta imágenes dentro del marco
Desde la pestaña Subidos o la sección Fotos, arrastra una imagen sobre el marco. La imagen encajará automáticamente en su lugar.Ajusta la imagen dentro del marco
Haz doble clic en la imagen para volver a colocarla, cambiar su tamaño o acercarla o alejarla dentro de los límites del marco.Añade efectos o filtros si es necesario
Haz clic en la imagen dentro del marco para aplicar filtros, ajustar el brillo o añadir efectos para lograr un acabado pulido.
Errores comunes y cómo evitarlos
La imagen no encaja en el marco
Asegúrate de arrastrar la imagen directamente sobre el marco y no junto a él. Espera a que encaje antes de soltarla.Mover accidentalmente el marco en lugar de la imagen
Ten cuidado al realizar ajustes. Haz doble clic para mover la imagen dentro del marco en lugar de arrastrar todo el marco.Usar un tamaño de marco incorrecto para el diseño
Elige tamaños de marco que se ajusten a tu diseño general. Los marcos demasiado grandes o demasiado pequeños pueden alterar el flujo de tu diseño.Aplicar filtros a todo el diseño en lugar de a la imagen
Selecciona solo la imagen dentro del marco antes de añadir filtros o ajustes.Saturar el diseño con demasiados marcos
Demasiados marcos diferentes pueden hacer que tu diseño se vea recargado. Mantén un estilo minimalista para una apariencia limpia.
Preguntas frecuentes comunes sobre el uso de marcos en Canva
¿Para qué se utilizan los marcos en Canva?
Los marcos te permiten colocar imágenes dentro de formas personalizadas como círculos, letras o cuadrículas.¿Cómo inserto una foto en un marco?
Arrastra una imagen sobre el marco hasta que encaje automáticamente en su interior.¿Puedo cambiar el tamaño del marco después de insertar la imagen?
Sí, selecciona el marco y arrastra sus esquinas para cambiar el tamaño sin que la imagen salga de él.¿Puedo recortar la imagen dentro del marco?
Haz doble clic en la imagen para recortarla o recolocarla dentro del marco.¿Los marcos están disponibles en la versión gratuita de Canva?
Sí, muchos marcos están disponibles de forma gratuita, aunque algunos estilos premium requieren Canva Pro.¿Cómo grabar la pantalla en Mac?
Para grabar la pantalla en un Mac, puedes usar Trupeer AI. Te permite capturar toda la pantalla y ofrece funciones de IA como añadir avatares de IA, añadir locución y añadir zoom de acercamiento y alejamiento en el vídeo. Con la función de traducción de vídeo con IA de Trupeer, puedes traducir el vídeo a más de 30 idiomas.¿Cómo añadir un avatar de IA a una grabación de pantalla?
Para añadir un avatar de IA a una grabación de pantalla, tendrás que usar una herramienta de grabación de pantalla con IA. Trupeer AI es una herramienta de grabación de pantalla con IA, que te ayuda a crear vídeos con varios avatares y también te ayuda a crear tu propio avatar para el vídeo.¿Cómo grabar la pantalla en Windows?
Para grabar la pantalla en Windows, puedes usar la Barra de juegos integrada (Windows + G) o una herramienta avanzada de IA como Trupeer AI para funciones más avanzadas, como avatares de IA, locución, traducción, etc.¿Cómo añadir locución a un vídeo?
Para añadir locución a los vídeos, descarga la extensión de Chrome de Trupeer AI. Una vez registrado, sube tu vídeo con voz, elige la locución deseada de Trupeer y exporta tu vídeo editado.¿Cómo hago zoom en una grabación de pantalla?
Para hacer zoom durante una grabación de pantalla, usa los efectos de zoom de Trupeer AI, que te permiten acercar y alejar en momentos concretos, mejorando el impacto visual del contenido de tu vídeo.
La gente también pregunta
Generador de documentación técnica
Software de base de conocimientos
Cómo girar un documento en Canva
Tutoriales relacionados

