

Cómo citar en Canva
Aprende cómo añadir citas en Canva para proyectos académicos, empresariales o creativos. Esta guía cubre cómo citar correctamente texto, imágenes y fuentes dentro de tus diseños de Canva
Pasos detallados para añadir citas:
1. Añadir un cuadro de texto: Abre tu diseño de Canva y selecciona el icono "Texto".
Haz clic en "Añadir un cuadro de texto" y escribe o pega la información de tu cita.
Redimensiona y recoloca el cuadro de texto según sea necesario.
2. Uso de la función de atribución: Si has subido una imagen, haz clic en ella para añadirla a tu diseño.
Para encontrar la información de atribución, sitúa el cursor sobre la imagen y haz clic en "Más" o haz clic en la imagen y selecciona "Información" en la barra de herramientas.
A continuación, puedes incluir la información de atribución (p. ej., "©[Nombre del creador del elemento multimedia] vía Canva.com") en un cuadro de texto o en una sección de créditos designada.
3. Referenciar material gratuito: Si utilizas material gratuito de Canva, puedes encontrar los detalles de atribución situándote sobre el elemento y haciendo clic en "Más" o haciendo clic en el elemento y seleccionando "Información" en la barra de herramientas.
Incluye la información de atribución en tu diseño, ya sea junto a la imagen o en una sección de créditos aparte.
4. Descarga tu diseño: Haz clic en la flecha de descarga en la esquina superior derecha de la pantalla. Elige tu formato de archivo preferido (p. ej., PNG para uso digital, PDF para impresión)
Guía paso a paso: Cómo citar en Canva
Paso 1
Comienza navegando hasta la barra de herramientas en Canva. Haz clic en 'Subidas'.
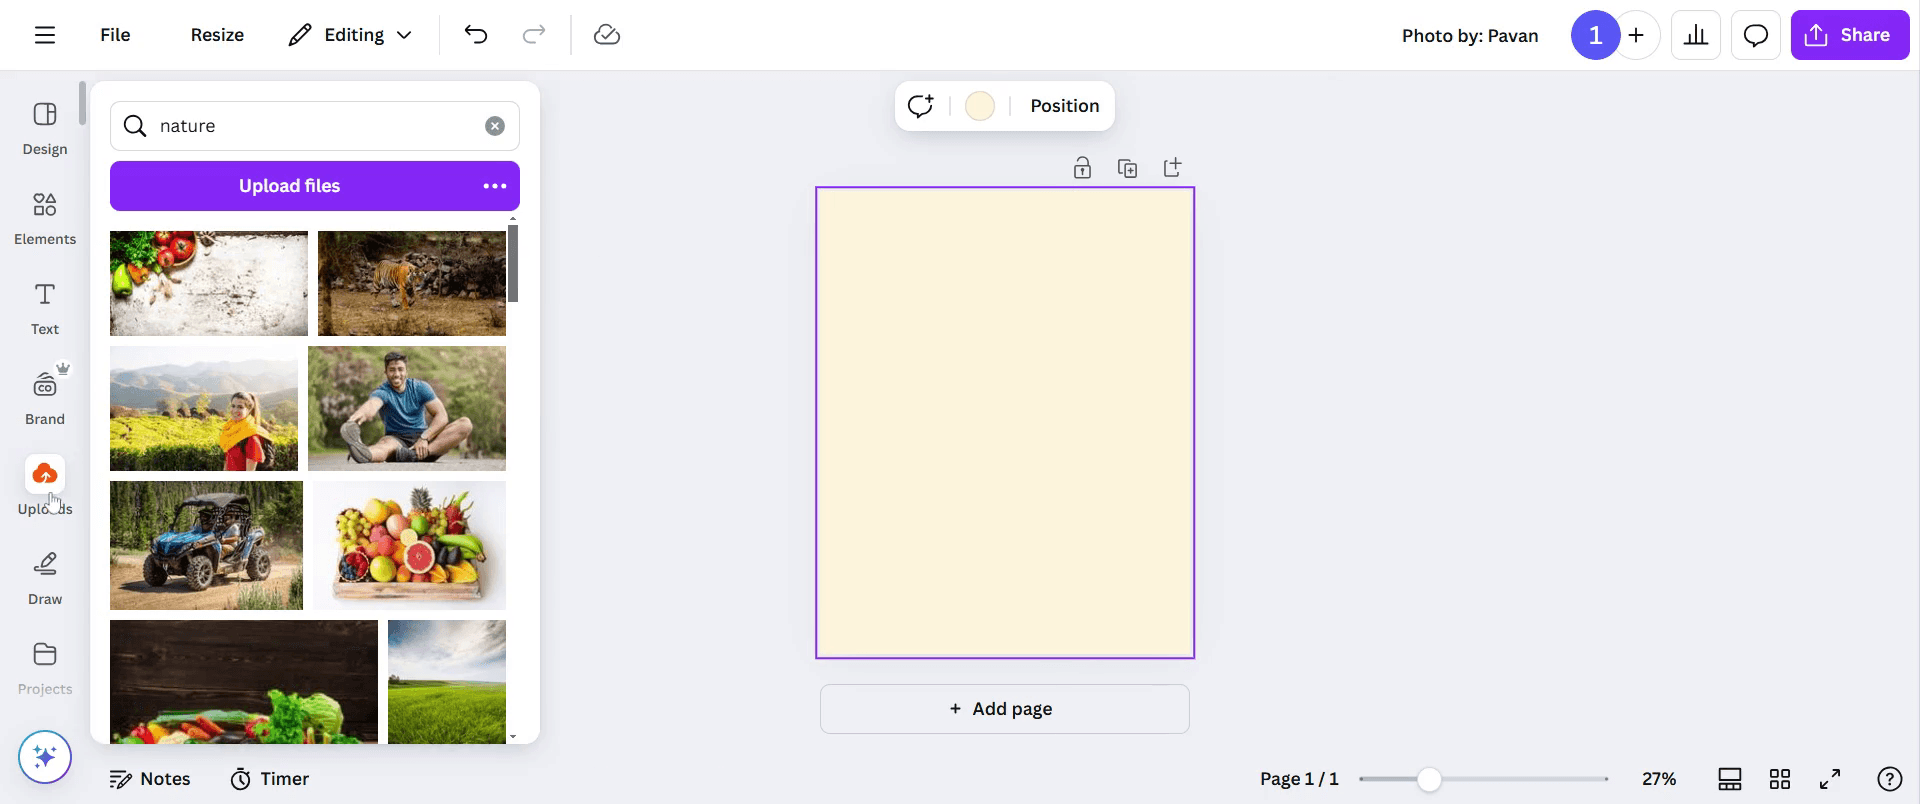
Paso 2
selecciona la imagen que deseas añadir a tu hoja.

Paso 3
Después de subirla, ajusta la imagen para que se adapte a tus necesidades. A continuación, ve a la opción 'Texto' y haz clic en ella.
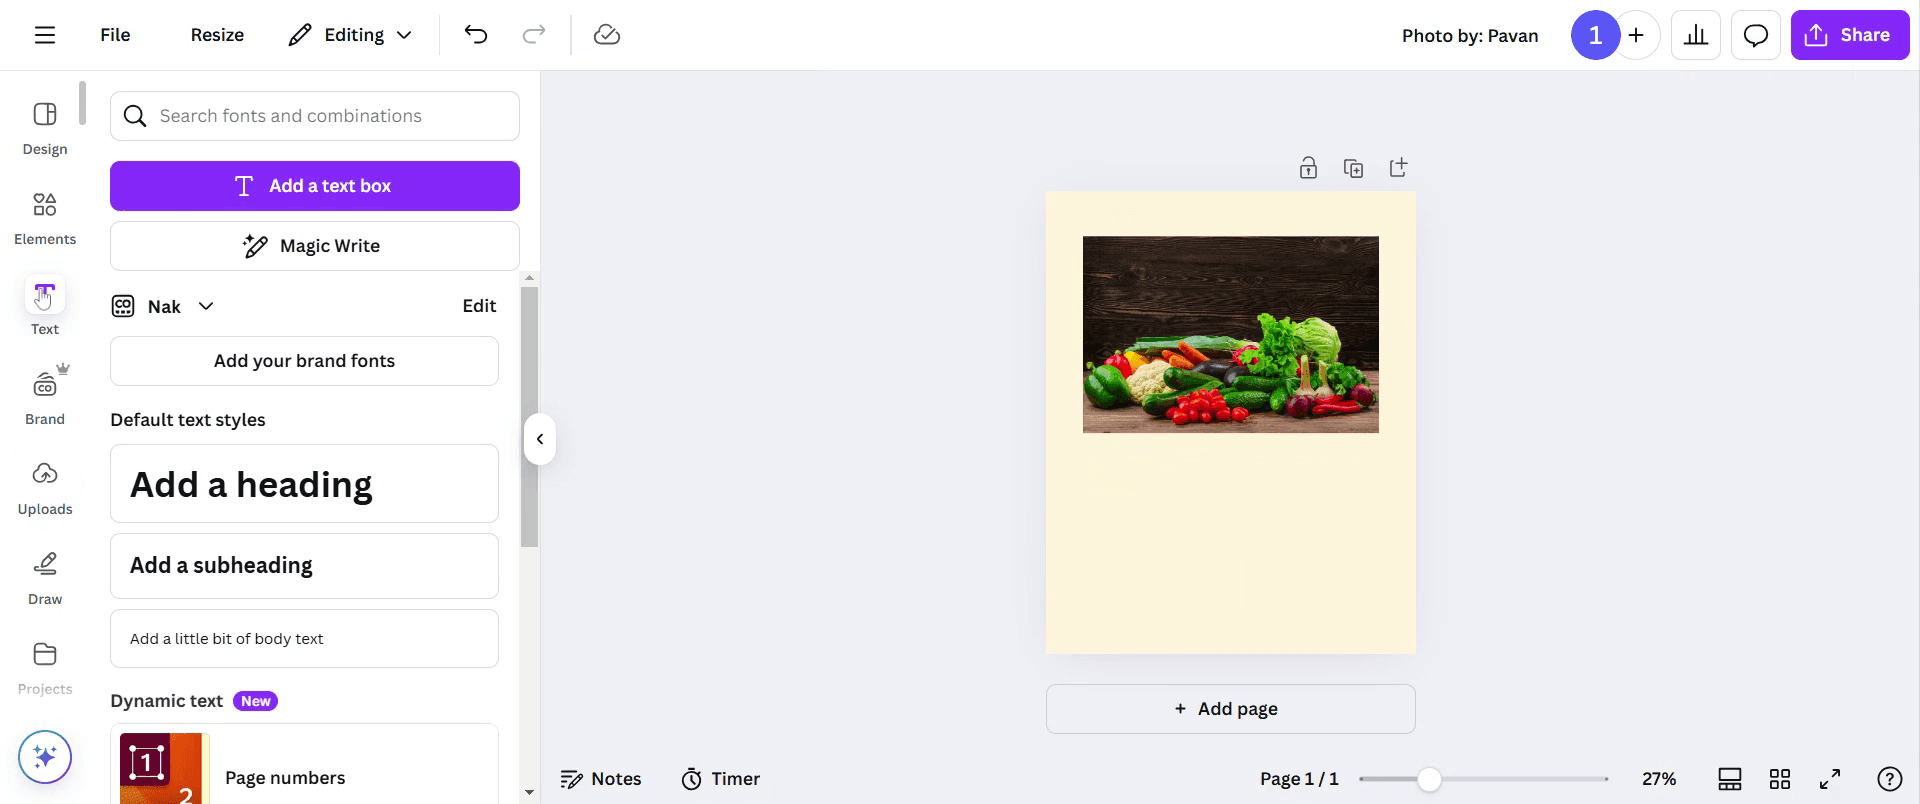
Paso 4
haz clic en 'Añadir un cuadro de texto' para incorporar el contenido que deseas.
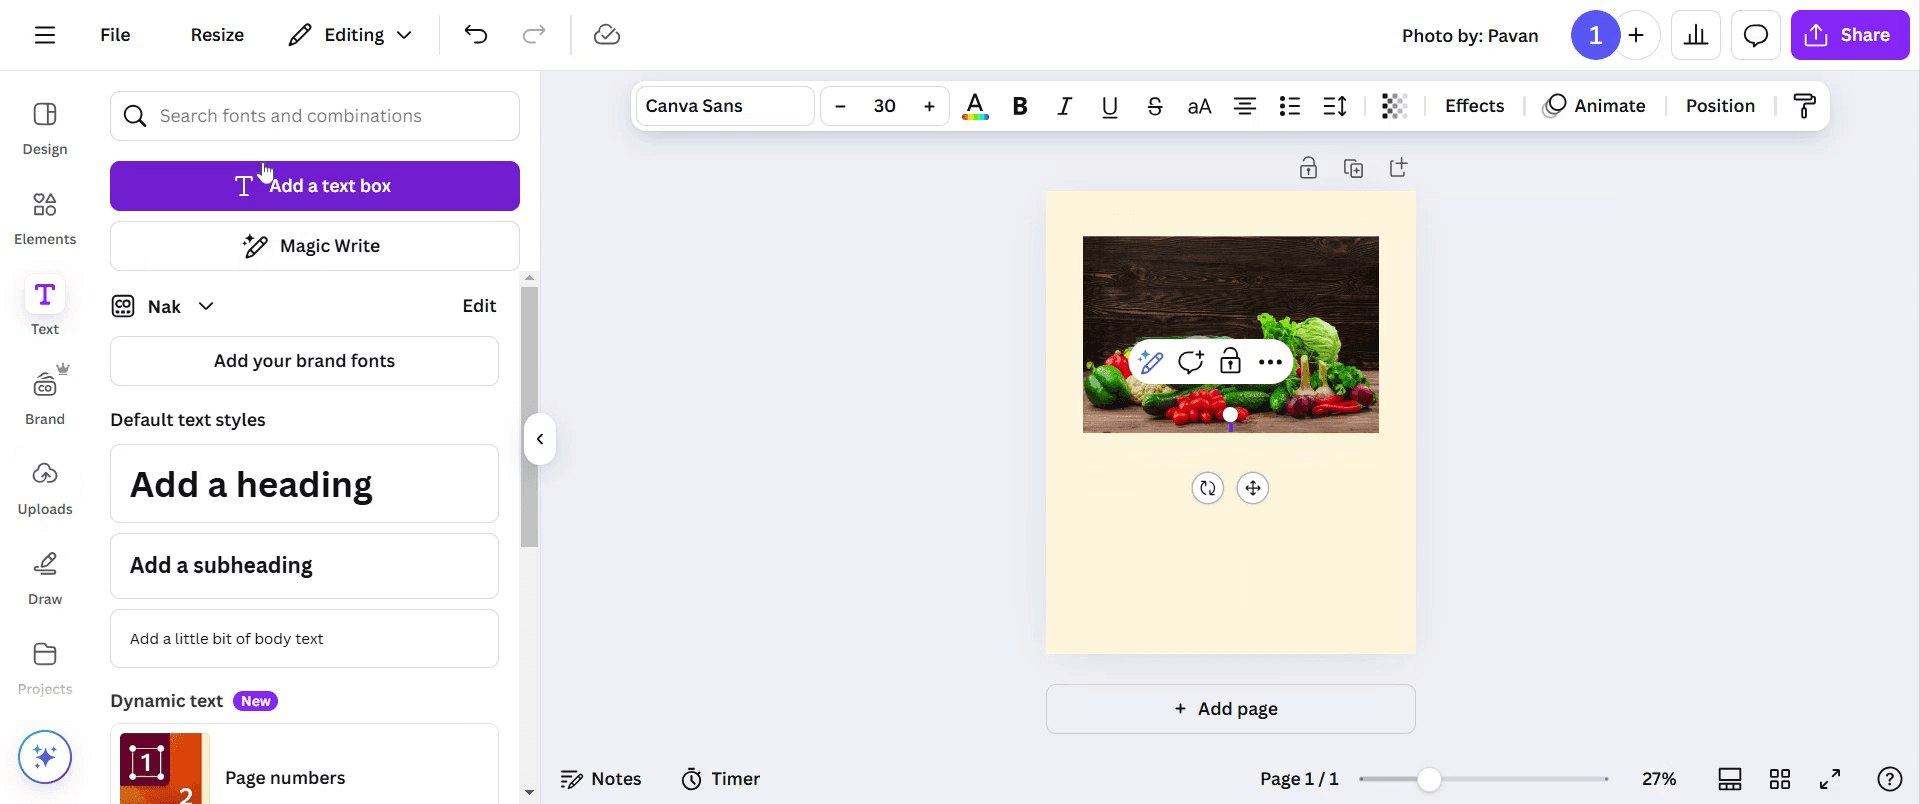
Paso 5
Escribe el contenido que deseas mostrar sobre la imagen.
Paso 6
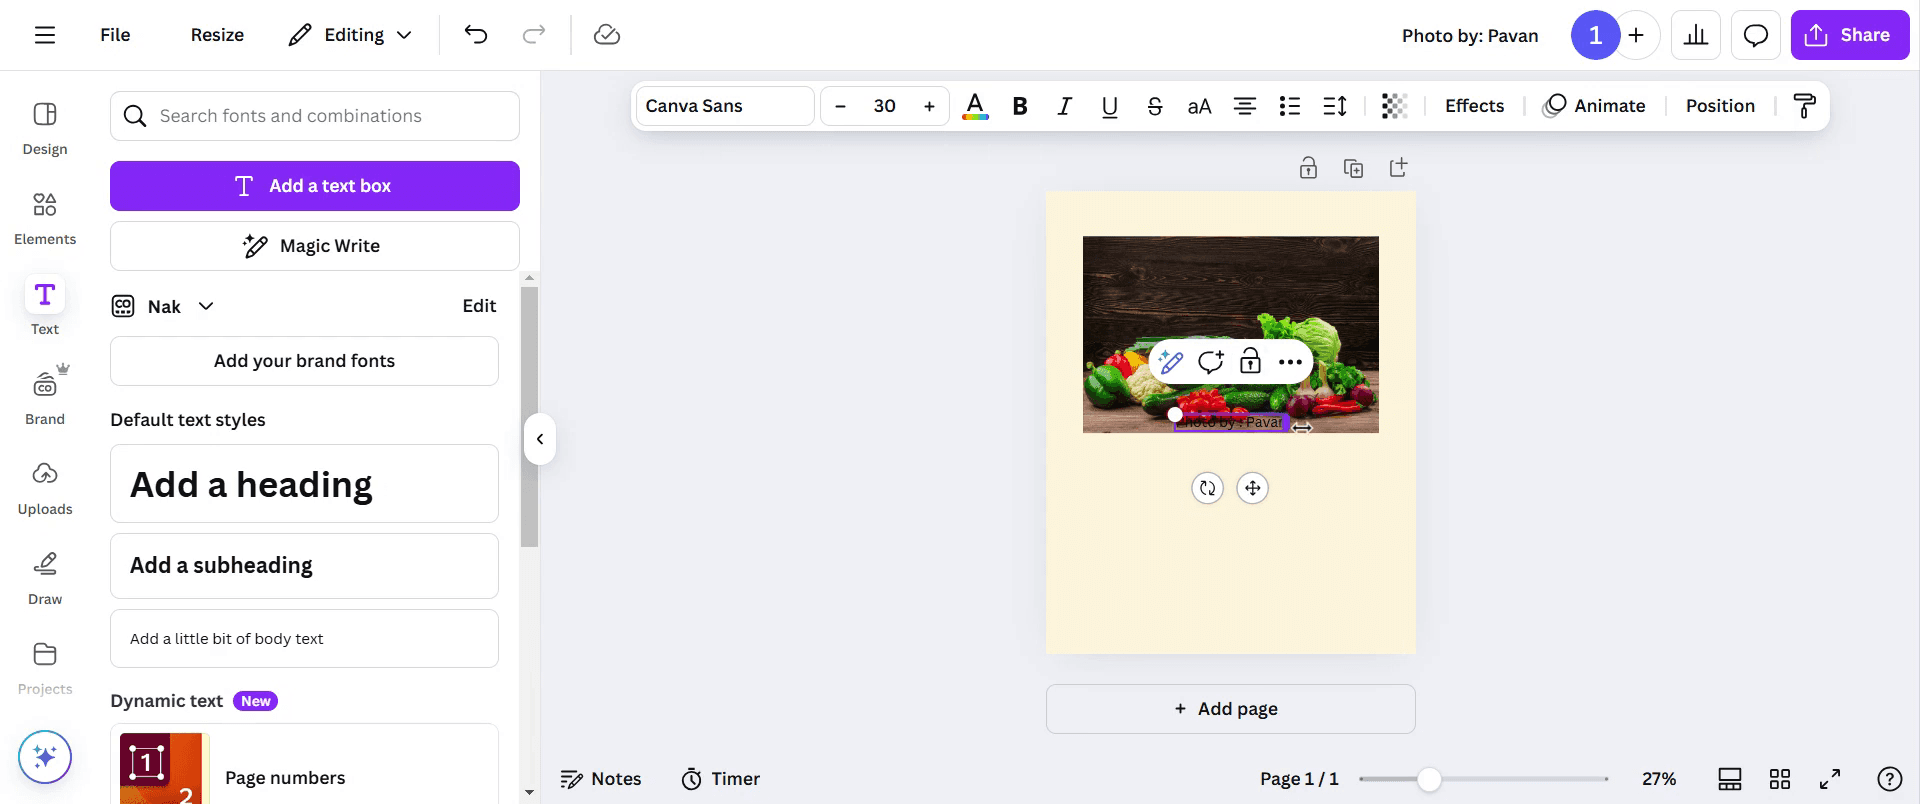
Haz los ajustes necesarios al texto y colócalo adecuadamente en la hoja.

Paso 7
Tienes la opción de añadir enlaces para mejorar aún más tu contenido. Inserta el enlace donde sea necesario.
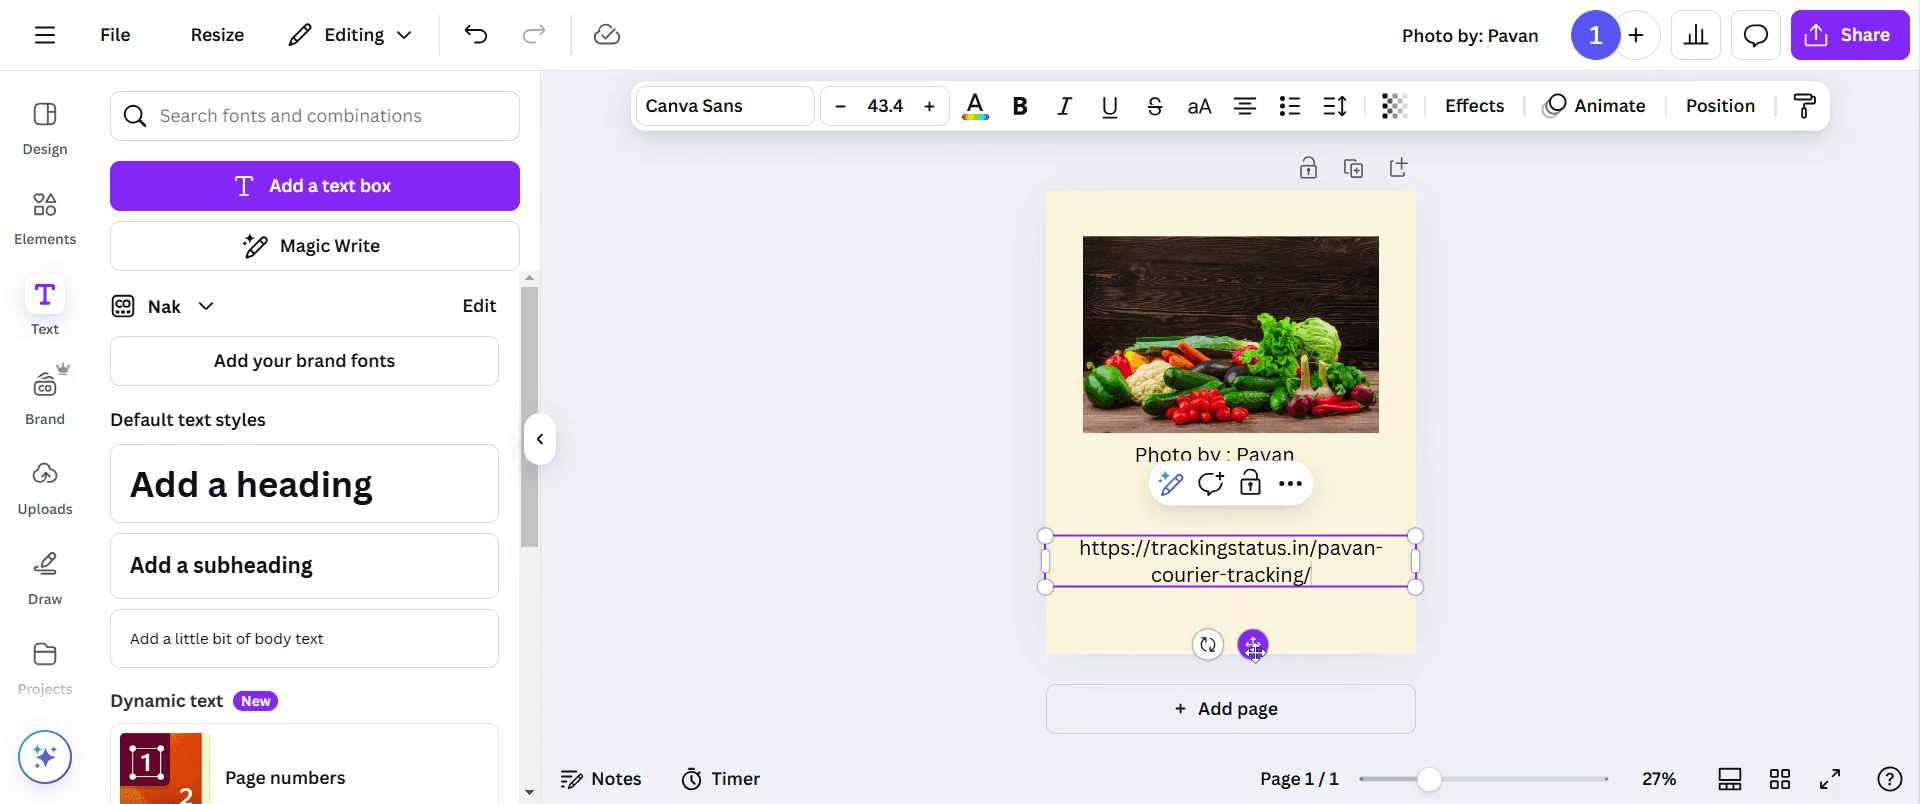
Paso 8
Para mejorar las capacidades de cita y referencia, añade enlaces según sea necesario. Una vez que hayas finalizado tu diseño, haz clic en el botón 'Compartir' para distribuir tu trabajo.

Consejos profesionales para citar en Canva
Añade un cuadro de texto para la cita
Haz clic en la opción “Texto” de la barra lateral izquierda y selecciona “Añade un poco de texto del cuerpo”. Esto crea un nuevo cuadro de texto donde puedes escribir tu cita.Coloca las citas cerca de la fuente
Ubica tu cita cerca de la imagen, cita o dato referenciado. Esto ayuda a los espectadores a entender a qué se refiere la cita.Usa formatos de cita adecuados
Escribe las citas en formato APA, MLA, Chicago o cualquier formato requerido. Canva no da formato a las citas automáticamente, así que debes introducir manualmente el formato correcto.Incluye URLs cuando sea necesario
Para las fuentes en línea, incluye la URL completa. Puedes pegarla directamente en el cuadro de texto o convertirla en hipervínculo seleccionando el texto y haciendo clic en el icono del enlace.
Errores comunes y cómo evitarlos
Olvidar añadir citas
Si tu diseño incluye datos, citas o medios de terceros, cita siempre tus fuentes. Omitir las citas puede provocar problemas de credibilidad.Usar estilos de cita inconsistentes
Elige un estilo de cita (APA, MLA, etc.) y manténlo durante todo tu diseño para lograr coherencia.Poca visibilidad del texto
Las fuentes de color claro o excesivamente estilizadas pueden hacer que las citas sean difíciles de leer. Usa colores de alto contraste y fuentes limpias.Recargar el diseño
Evita colocar demasiadas citas dentro del área principal del diseño. Usa notas al pie o una diapositiva/página final para organizarlas mejor.Los hipervínculos no funcionan en los PDF
Si exportas tu diseño como PDF, prueba tus hipervínculos para asegurarte de que sigan siendo clicables en la versión final.
Preguntas frecuentes comunes sobre cómo citar en Canva
¿Cómo cito una imagen usada en Canva?
Puedes añadir un pequeño cuadro de texto debajo de la imagen y escribir “Imagen de Canva” o incluir los datos de la fuente si están disponibles.¿Puedo poner un hipervínculo en una cita en Canva?
Sí. Selecciona el texto, haz clic en el icono de enlace de la barra de herramientas y pega tu URL.¿Canva ofrece formato automático de citas?
No. Canva no da formato automáticamente a las citas; debes introducir la cita manualmente en el formato que desees.¿Dónde debería colocar las citas en una presentación?
Colócalas cerca del contenido al que hacen referencia o en una diapositiva aparte de “Referencias” al final.¿Puedo guardar un estilo de cita para reutilizarlo más tarde?
Sí. Puedes agrupar el texto y el formato de tu cita como una plantilla personalizada y reutilizarla en otros diseños.¿Cómo grabar pantalla en Mac?
Para grabar pantalla en un Mac, puedes usar Trupeer AI. Te permite capturar toda la pantalla y ofrece capacidades de IA como añadir avatares de IA, añadir voz en off, añadir zoom in y out en el vídeo. Con la función de traducción de vídeo con IA de Trupeer, puedes traducir el vídeo a más de 30 idiomas.¿Cómo añadir un avatar de IA a una grabación de pantalla?
Para añadir un avatar de IA a una grabación de pantalla, tendrás que usar una herramienta de grabación de pantalla con IA. Trupeer AI es una herramienta de grabación de pantalla con IA, que te ayuda a crear vídeos con múltiples avatares; además, también te ayuda a crear tu propio avatar para el vídeo.¿Cómo grabar pantalla en Windows?
Para grabar pantalla en Windows, puedes usar la Barra de juegos integrada (Windows + G) o una herramienta de IA avanzada como Trupeer AI para funciones más avanzadas, como avatares de IA, voz en off, traducción, etc.¿Cómo añadir voz en off a un vídeo?
Para añadir voz en off a los vídeos, descarga la extensión de Chrome de trupeer ai. Una vez registrado, sube tu vídeo con voz, elige la voz en off que desees de Trupeer y exporta tu vídeo editado.¿Cómo hago zoom en una grabación de pantalla?
Para hacer zoom durante una grabación de pantalla, usa los efectos de zoom en Trupeer AI, que te permiten acercar y alejar en momentos específicos, mejorando el impacto visual del contenido de tu vídeo.
Lecturas sugeridas
Generador de documentación técnica
Software de base de conocimientos
Cómo girar un documento en Canva
Tutoriales relacionados

