
如何在 Canva 中调整设计尺寸——适用于任何格式的快速步骤
了解如何在 Canva 中调整设计尺寸,无论是否使用 Pro。轻松更改社交媒体、印刷或自定义尺寸的大小。
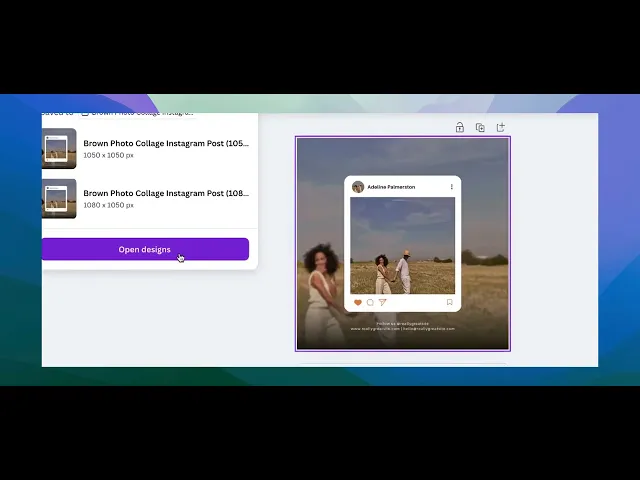
本文档提供了使用 Canva 的调整大小功能来调整画板和画布尺寸的详细流程。
要在 Canva 中调整设计大小,请点击编辑器顶部的 "调整大小" 按钮。你可以从预设尺寸中选择,也可以输入自定义尺寸。如果你需要更高级的功能,"魔法切换" 工具可以帮助你将设计重新格式化为不同平台所需的样式,甚至将其翻译成其他语言。
详细步骤:
1. 打开调整大小工具:
在 Canva 编辑器中,找到顶部菜单里的 "调整大小" 按钮;它通常会带有一个图标。
2. 选择你想如何调整大小:
预定义尺寸:选择 Instagram、Facebook 等平台的常用尺寸。
自定义尺寸:输入你想要的宽度和高度。你还可以根据需要锁定或解锁宽高比。
魔法切换:使用此工具可快速将设计适配为不同格式、语言,甚至内容类型,如演示文稿或社交帖子。
3. 应用调整大小:
选择你要调整大小的页面——全部页面或仅特定页面都可以。然后 Canva 会根据你的选择调整设计、复制并缩放,或创建多个新版本。
4. 调整单个元素大小:
要调整文本框、图像或其他元素的大小,只需拖动角落控制点或输入精确尺寸。
分步指南:如何在 Canva 中调整设计大小
步骤 1
首先在 Canva 中打开你的设计。然后点击屏幕顶部的“调整大小”按钮。

步骤 2
选择“自定义尺寸”选项,指定你想要的尺寸。选定后,你可以选择按相应尺寸复制并调整设计。

步骤 3
等待设计下载完成。完成后,你会看到文件已成功调整大小。

步骤 4
要手动调整设计大小,请返回主页。在主页上,创建一个新设计。
返回 主页。
点击 创建设计 > 自定义尺寸 并输入新尺寸。

步骤 5
将原始设计中的所有元素复制并粘贴到新设计中,并按调整后的尺寸进行设置。
你可能需要调整元素的位置或大小,以适应新的尺寸。

在 Canva 中成功编辑画板尺寸的实用技巧
专业版用户可使用“Resize”工具:如果你使用的是 Canva Pro,可以在顶部工具栏中使用“Resize”选项,立即调整设计的尺寸。
免费用户可手动设置尺寸:在首页点击“Custom Size”,输入所需的宽度和高度,即可创建具有自定义尺寸的新设计。
锁定纵横比以按比例调整大小:在调整尺寸时,确保已启用“lock”图标,以保持设计的比例不变。
调整尺寸后重新摆放元素:更改尺寸后,重新定位并调整各元素大小,确保它们能完美适配新的画板尺寸。
以正确的分辨率下载:当为打印或大型显示屏调整尺寸时,请将设计下载为 PNG 或 PDF Print 格式,以保留质量。
编辑 Canva 画板尺寸时的常见问题及避免方法
设计对齐丢失:更改尺寸可能会破坏设计元素的版式。
解决方法:调整画板尺寸后,重新定位并调整元素大小,以恢复对齐。纵横比失真:调整大小时如果不保持纵横比,设计可能会被拉伸或压缩。
解决方法:调整大小时使用“lock”图标以保持比例。免费用户的调整限制:Canva 免费用户无法直接调整现有设计的尺寸。
解决方法:手动创建具有所需尺寸的新设计,并从旧设计中复制粘贴元素。图片质量下降:放大设计可能会降低嵌入图片的分辨率。
解决方法:从高分辨率图片开始,以避免调整大小时出现质量问题。意外出现空白区域:调整尺寸可能会在设计中产生额外的空白区域。
解决方法:使用相应的设计元素或背景颜色来填充或调整新的空白区域。
关于如何在 Canva 中编辑画板尺寸的常见问题
如何在 Canva 中调整画板大小?
专业版用户可以使用顶部工具栏中的“调整大小”工具。免费用户需要使用自定义尺寸创建一个新设计。Canva 允许的最大尺寸是多少?
Canva 允许的最大设计尺寸为 8000 x 3125 像素。我可以在不损失设计质量的情况下调整画板大小吗?
可以,使用高分辨率图像并保持纵横比,以便在调整大小时保持质量。Canva 免费用户可以使用调整大小功能吗?
免费用户无法直接调整现有设计的大小,但可以使用新尺寸手动重新创建。如何在 Mac 上录屏?
要在 Mac 上录屏,您可以使用 Trupeer AI。它可以让您捕获整个屏幕,并提供诸如添加 AI 虚拟形象、添加旁白、在视频中放大和缩小等 AI 功能。借助 trupeer 的 AI 视频翻译功能,您可以将视频翻译成 30 多种语言。如何在录屏中添加 AI 虚拟形象?
要在录屏中添加 AI 虚拟形象,您需要使用一款 AI 录屏工具。Trupeer AI 是一款 AI 录屏工具,可帮助您创建带有多个虚拟形象的视频,也能帮助您为视频创建自己的虚拟形象。如何在 Windows 上录屏?
要在 Windows 上录屏,您可以使用内置的 Game Bar(Windows + G),或者使用像 Trupeer AI 这样的高级 AI 工具,以获得 AI 虚拟形象、旁白、翻译等更高级功能。如何为视频添加旁白?
要为视频添加旁白,请下载 trupeer ai Chrome 扩展程序。注册后,上传带有声音的视频,从 trupeer 中选择所需的旁白并导出编辑后的视频。如何在录屏中放大?
在录屏过程中放大,请使用 Trupeer AI 中的缩放效果,它允许您在特定时刻放大和缩小,从而增强视频内容的视觉冲击力。

