
Google ドキュメントでテキストボックスを挿入する方法 – 簡単ガイド
Google ドキュメントで、描画ツールや表を使ってテキストボックスを挿入する方法を学びましょう。注釈、引用、カスタムレイアウトに最適です。
このガイドでは、Google ドキュメントの文書にテキストボックスを追加するための手順を、ステップごとに説明します。
これらの手順に従えば、コンテンツに合わせてテキストボックスを簡単に作成し、カスタマイズできます。
Google ドキュメントには直接の「テキストボックス」ボタンはありませんが、描画ツールを使えば簡単に挿入できます。
ステップごとのガイド
ドキュメントを開く
テキストボックスを追加したい Google ドキュメントに移動します。テキストボックス。
描画を挿入する
[挿入] > [描画] > [新規] をクリックして、描画ダイアログボックスを開きます。
テキストボックスを追加する
描画ツールバーで、テキストボックスのアイコン(枠内の "T")をクリックします。
キャンバス上をクリックしてドラッグし、テキストボックスを描画します。
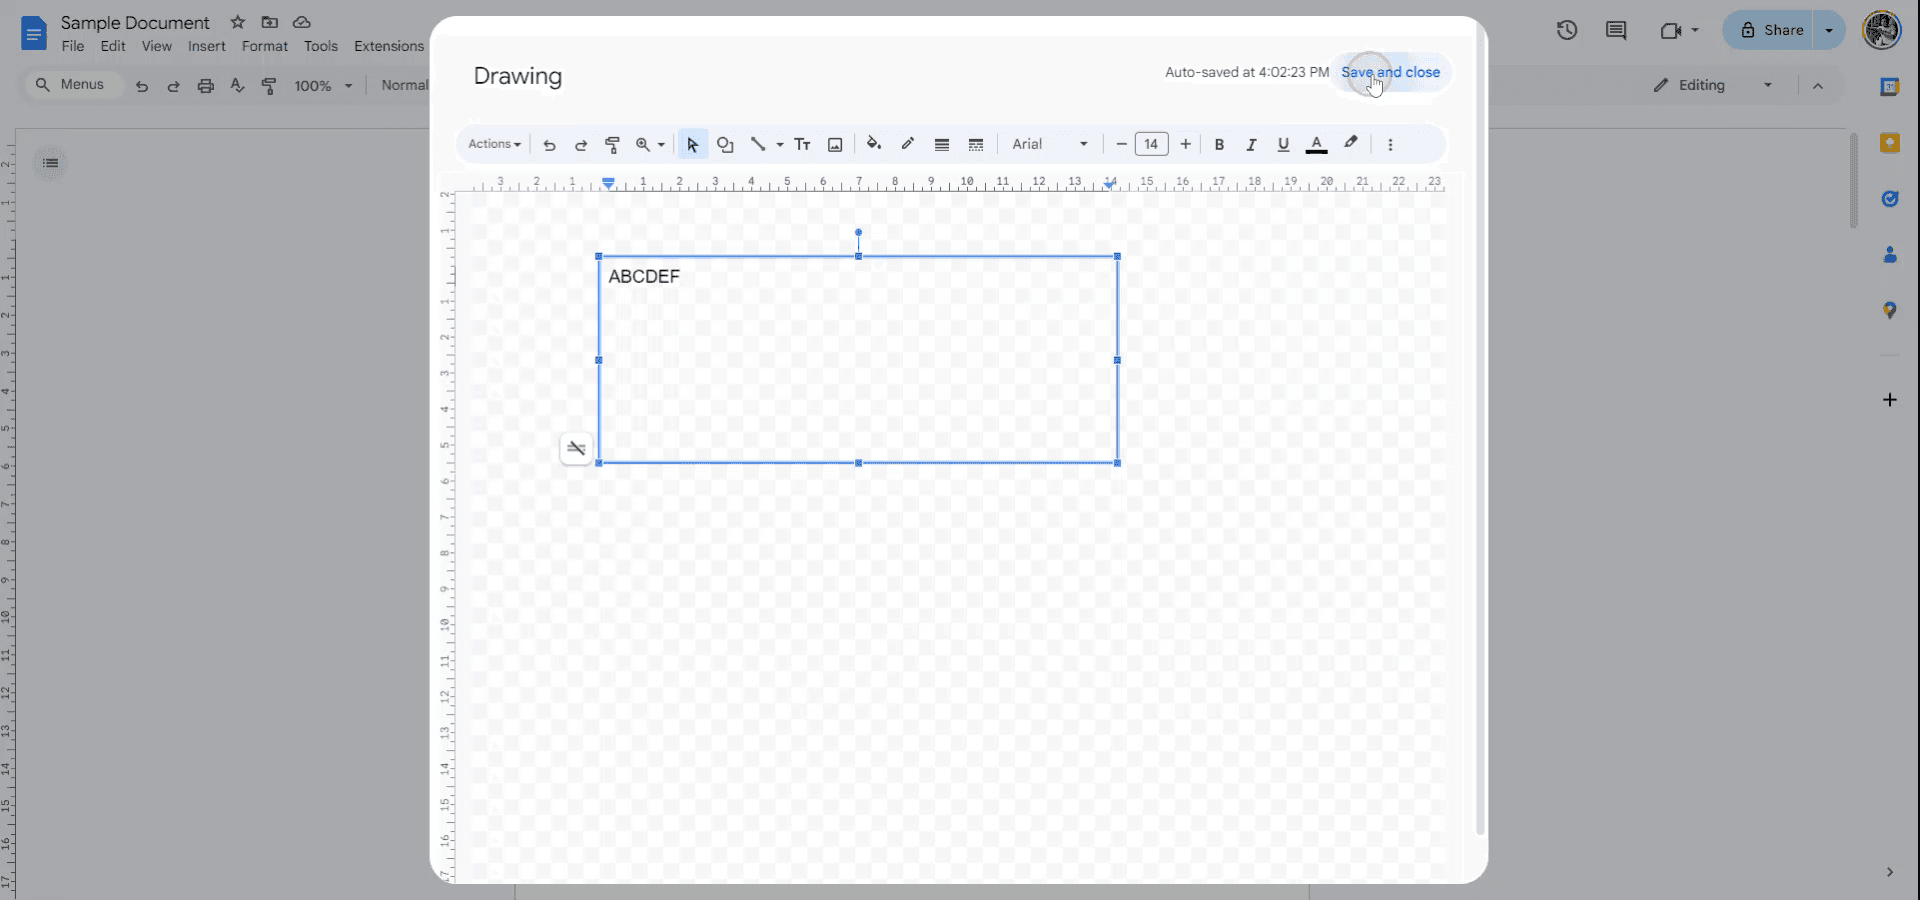
テキストを入力して書式設定する
ボックス内にテキストを入力します。
フォントサイズ、色、配置などを調整するには、書式設定ツールを使用します。
保存して挿入する
完了したら、「保存して閉じる」をクリックします。テキストボックスが文書に埋め込まれます。
Google ドキュメントにテキストボックスを挿入する方法:ステップごとのガイド
ステップ 1
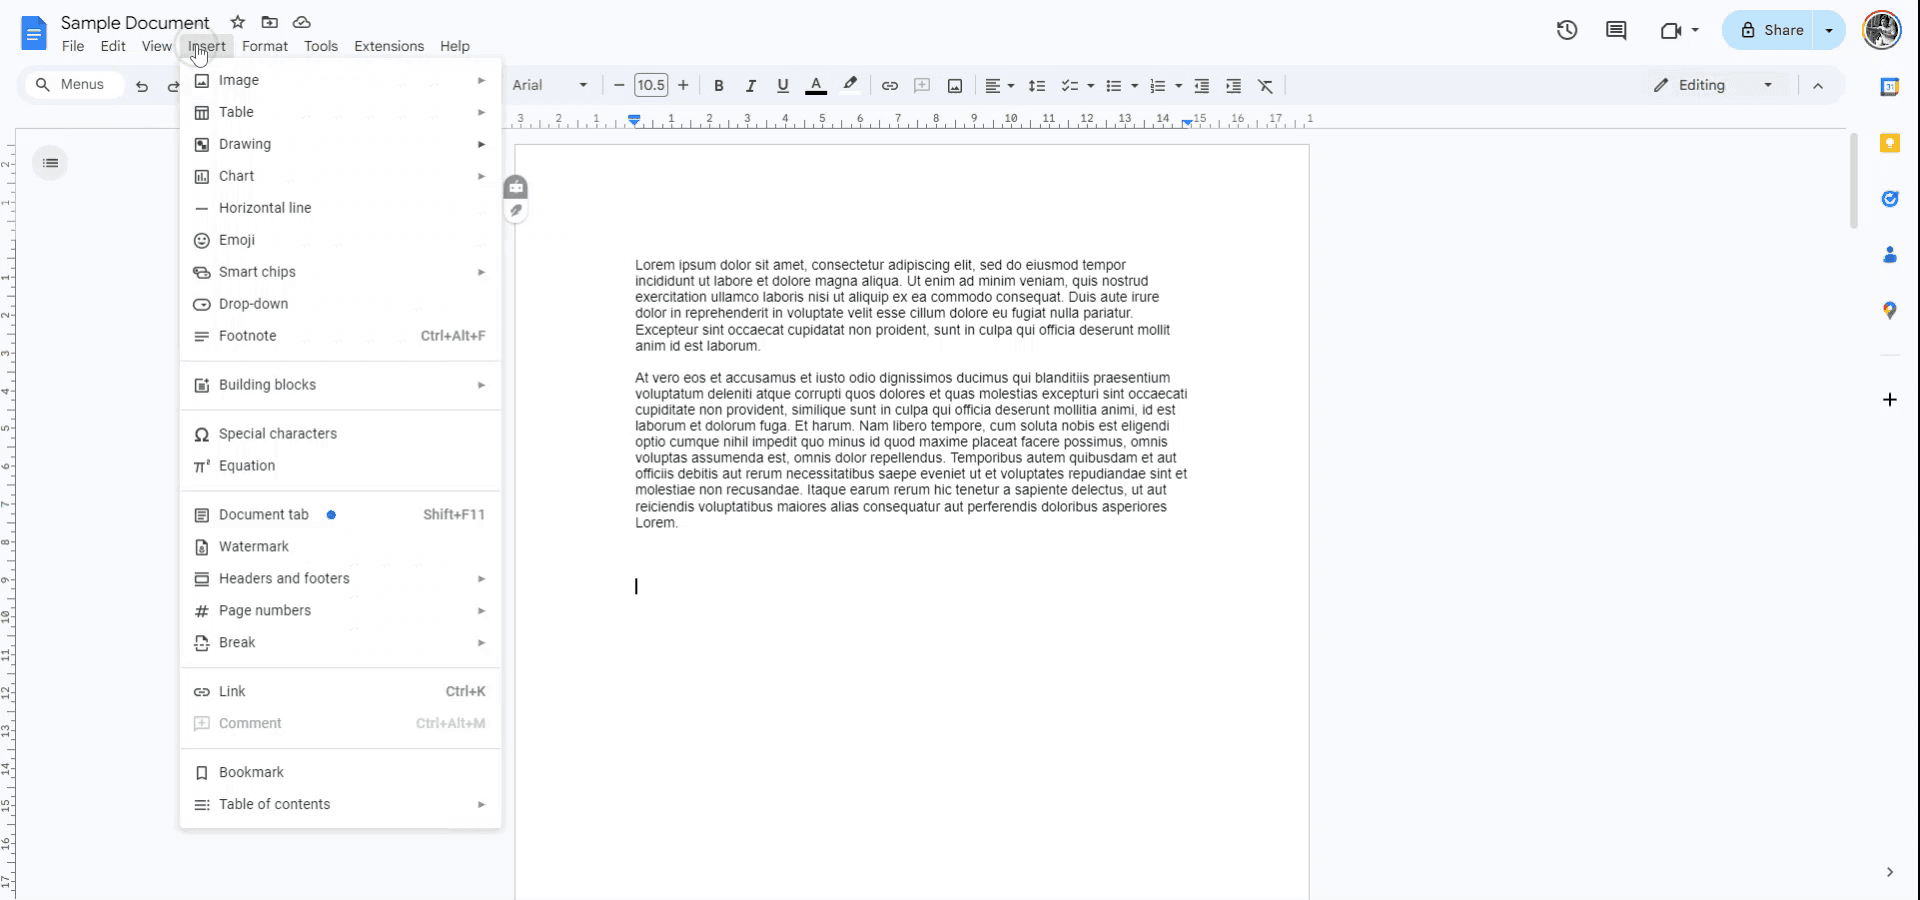
Google ドキュメントにテキストボックスを挿入するには、まずテキストボックスを追加したい文書を開きます。次に、「挿入」メニューに移動します。
ステップ 2
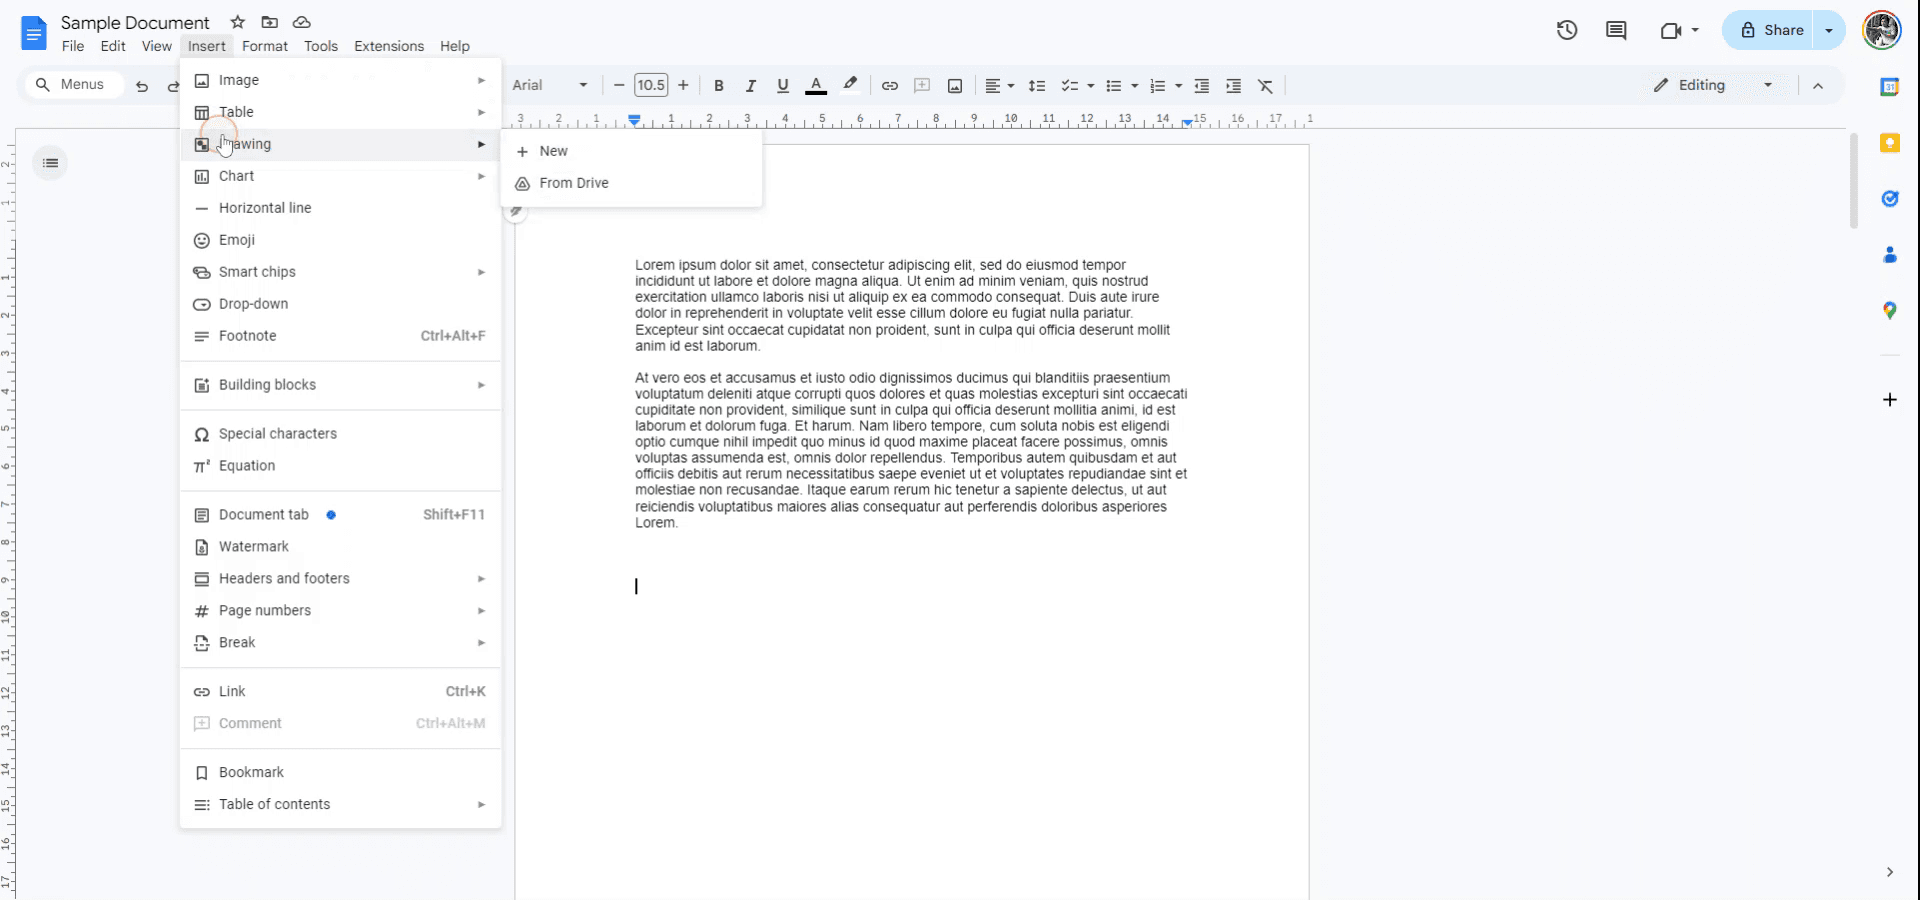
「挿入」メニューで、「描画」オプションを選択します。
ステップ 3
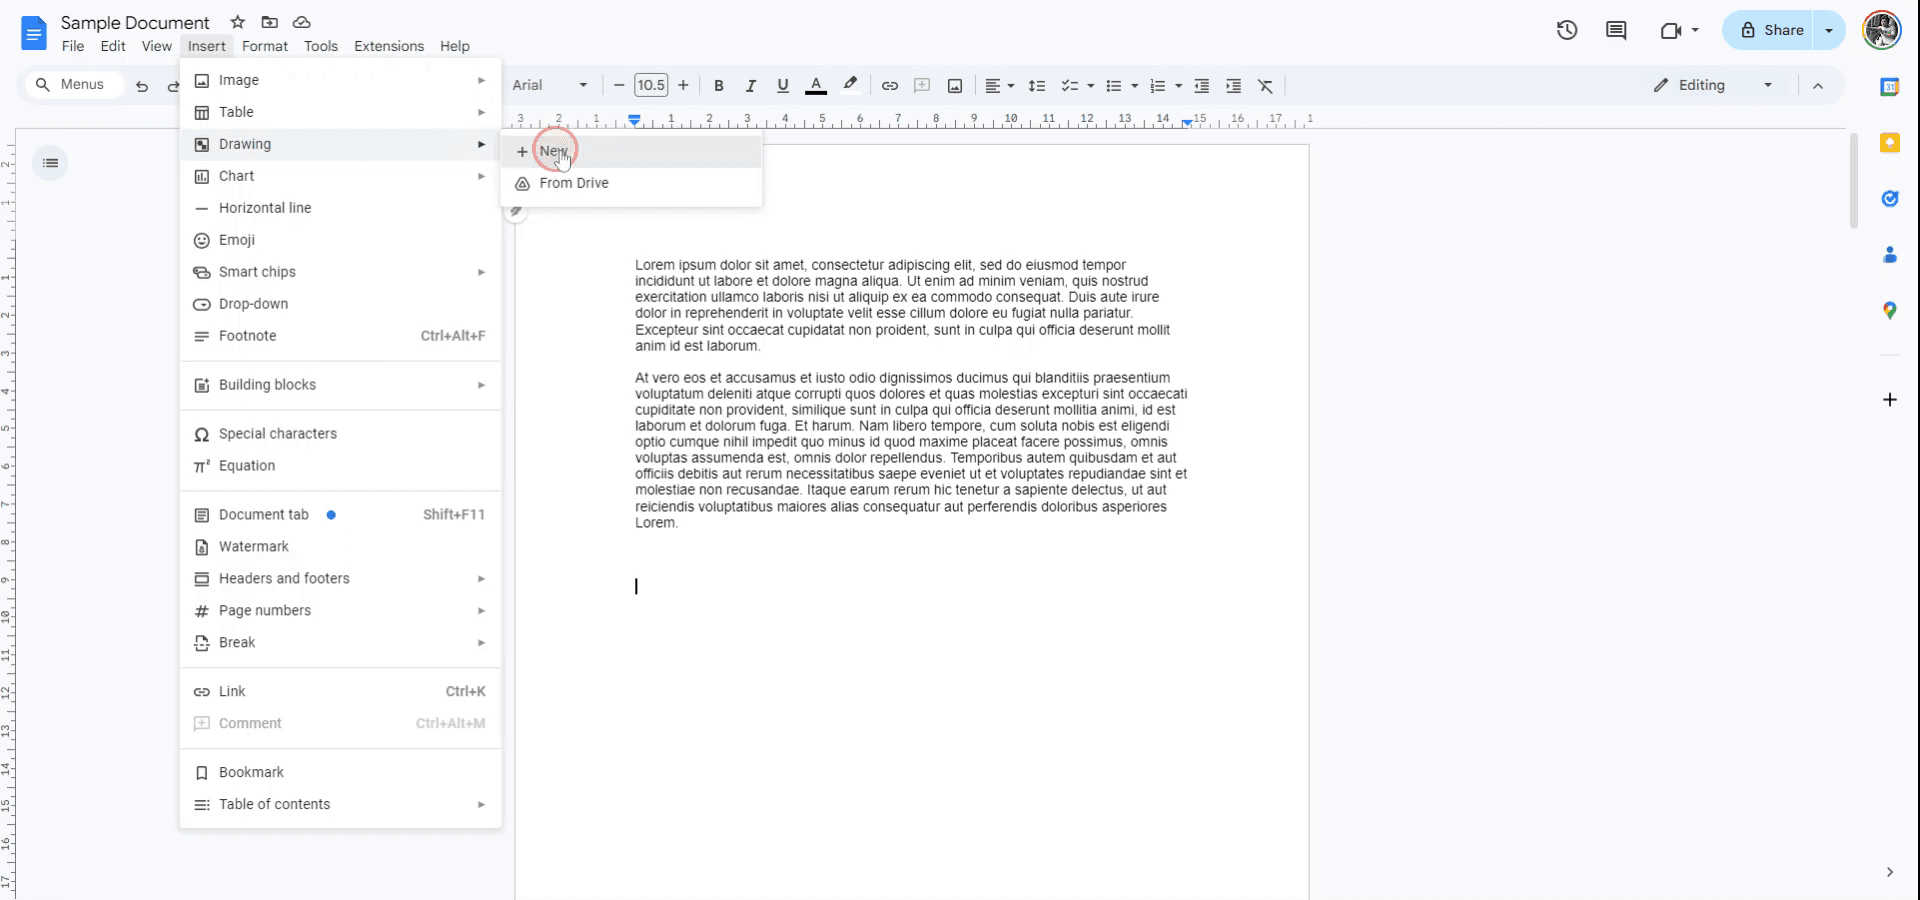
描画サブメニューから「新規」を選択して、新しい描画ウィンドウを開きます。
ステップ 4
描画ウィンドウで、アクションツールバーから「テキストボックス」ツールを選択します。希望のサイズでテキストボックスを描画し、テキストを入力します。満足したら、「保存して閉じる」をクリックして、テキストボックスを文書に挿入します。
Google ドキュメントにテキストボックスを挿入するためのプロのヒント
描画ツールを使う: 挿入 > 描画 > 新規 に移動し、テキストボックスオプションを使って、詳細な書式設定が可能なカスタマイズ可能なテキストボックスを作成します。
サイズと位置を調整する: テキストボックスを挿入したら、角をクリックしてドラッグし、サイズを変更します。位置オプションを使って、ページ上での配置を微調整します。
背景色を追加する: テキストボックスを目立たせるには、描画ツールの塗りつぶしの色オプションを使って背景色を追加します。
テキストボックスを重ねる: 描画ツールの配置 > 順序 オプションを使って複数のテキストボックスを重ね、適切な要素が最前面に表示されるようにします。
ツールバーで手早く書式設定する: テキストボックスを挿入したら、ツールバーを使ってテキストの書式を整え、フォントサイズ、色、配置を必要に応じて変更します。
Google ドキュメントにテキストボックスを挿入する際のよくある落とし穴
描画ツール外では柔軟性が限られる: 描画ツール経由で挿入したテキストボックスは、文書内で直接簡単に移動したりサイズ変更したりできません。
対処法: テキストボックスを文書に挿入する前に、描画ツール内で調整します。配置の不一致: テキストボックスは、特にサイズ変更や位置調整の際に、他のコンテンツとずれることがあります。
対処法: 位置オプションを使って、文書の他の部分に対するテキストボックスの配置を正確に調整します。テキストのはみ出し: ボックスが小さすぎると、テキストボックス内の文字がはみ出したり、収まりきらなかったりすることがあります。
対処法: テキストボックスのサイズを変更するか、ボックス内の文字サイズを調整して、すべてがきちんと収まるようにします。印刷時に背景色が表示されない: テキストボックスの背景色の一部は、印刷時に表示されない場合があります。
対処法: 文書を完成させる前に印刷プレビューを確認し、背景色が見えるか、印刷されるかを確認します。挿入後の編集が難しい: 一度挿入すると、特に複数の要素を扱っている場合、テキストボックスの編集や調整が難しいことがあります。
対処法: テキストボックスをダブルクリックして描画ツールを再度開き、編集や修正をしやすくします。
Google ドキュメントでテキストボックスを挿入する際のよくある質問
Google ドキュメントにテキストボックスを挿入するにはどうすればよいですか?
[挿入] > [図形描画] > [新規] に移動し、次に「テキストボックス」オプションをクリックしてテキストボックスを作成します。挿入後にテキストボックスのサイズを変更できますか?
はい、挿入後に角をクリックしてドラッグすることでサイズを変更できます。テキストボックスに色やスタイルを追加できますか?
はい、背景色を追加したり、枠線のスタイルを調整したり、図形描画ツールを使ってテキストボックス内のテキストを整形したりできます。Google ドキュメントに複数のテキストボックスを挿入できますか?
はい、図形描画ツールを使って同じ手順を繰り返せば、必要な数だけテキストボックスを挿入できます。ドキュメントでテキストボックスが正しく表示されないのはなぜですか?
テキストボックスが正しい位置に配置されており、適切にサイズ変更されていることを確認してください。さらに、位置オプションで配置や位置を調整すると、より細かく制御できます。Macで画面録画する方法は?
Macで画面録画するには、Trupeer AIを使用できます。これにより画面全体をキャプチャでき、AIアバターの追加、ナレーションの追加、動画のズームイン/ズームアウトなどのAI機能を利用できます。TrupeerのAI動画翻訳機能を使えば、動画を30以上の言語に翻訳できます。画面録画にAIアバターを追加するには?
画面録画にAIアバターを追加するには、AI画面録画ツールを使用する必要があります。Trupeer AIはAI画面録画ツールで、複数のアバターを使った動画作成を支援し、動画用の自分専用アバターの作成にも役立ちます。Windowsで画面録画する方法は?
Windowsで画面録画するには、内蔵のGame Bar(Windows + G)や、AIアバター、ナレーション、翻訳などの高度な機能を備えたTrupeer AIのような高度なAIツールを使用できます。動画にナレーションを追加するには?
動画にナレーションを追加するには、Trupeer AIのChrome拡張機能をダウンロードしてください。登録後、音声付きの動画をアップロードし、Trupeerから希望のナレーションを選択して、編集した動画を書き出します。画面録画でズームインするにはどうすればよいですか?
画面録画中にズームインするには、Trupeer AIのズーム効果を使用してください。これにより、特定のタイミングでズームイン/ズームアウトでき、動画コンテンツの視覚的な印象を高められます。
おすすめの読み物
関連チュートリアル

