
Figmaで画像をトリミングする方法
Figmaで画像をすばやく効率的に切り抜く方法を学びましょう。このステップバイステップガイドでは、切り抜きツールの使い方、画像の境界の調整、そしてすっきりとしたデザインに仕上げるためのヒントを紹介します。
より詳しい内訳は次のとおりです:
画像を選択します: 切り抜きたい画像レイヤーをクリックします.
切り抜きモードに入る: ツールバーの「切り抜き」ボタンをクリックするか、キーボードショートカット(Option/Alt + ダブルクリック)を使用できます。
切り抜きハンドルを調整する: 画像の周囲に青いハンドルが表示されます。
これらのハンドルをドラッグして 切り抜き領域のサイズを変更します。
画像を再配置する: 切り抜き領域内をクリックしてドラッグし、切り抜きボックス内で画像を移動します。
切り抜きを確定する: 画像の外側をクリックするか、Esc/Return キーを押して変更を適用します。
縦横比を維持する: 元の縦横比を保つには、ドラッグしながら Shift/Control を押したままにします。
反対側を拡大縮小する: 反対側の画像のサイズを変更するには、ドラッグしながら Option/Alt を押したままにします。
ステップバイステップガイド: Figma で画像を切り抜く方法
ステップ 1
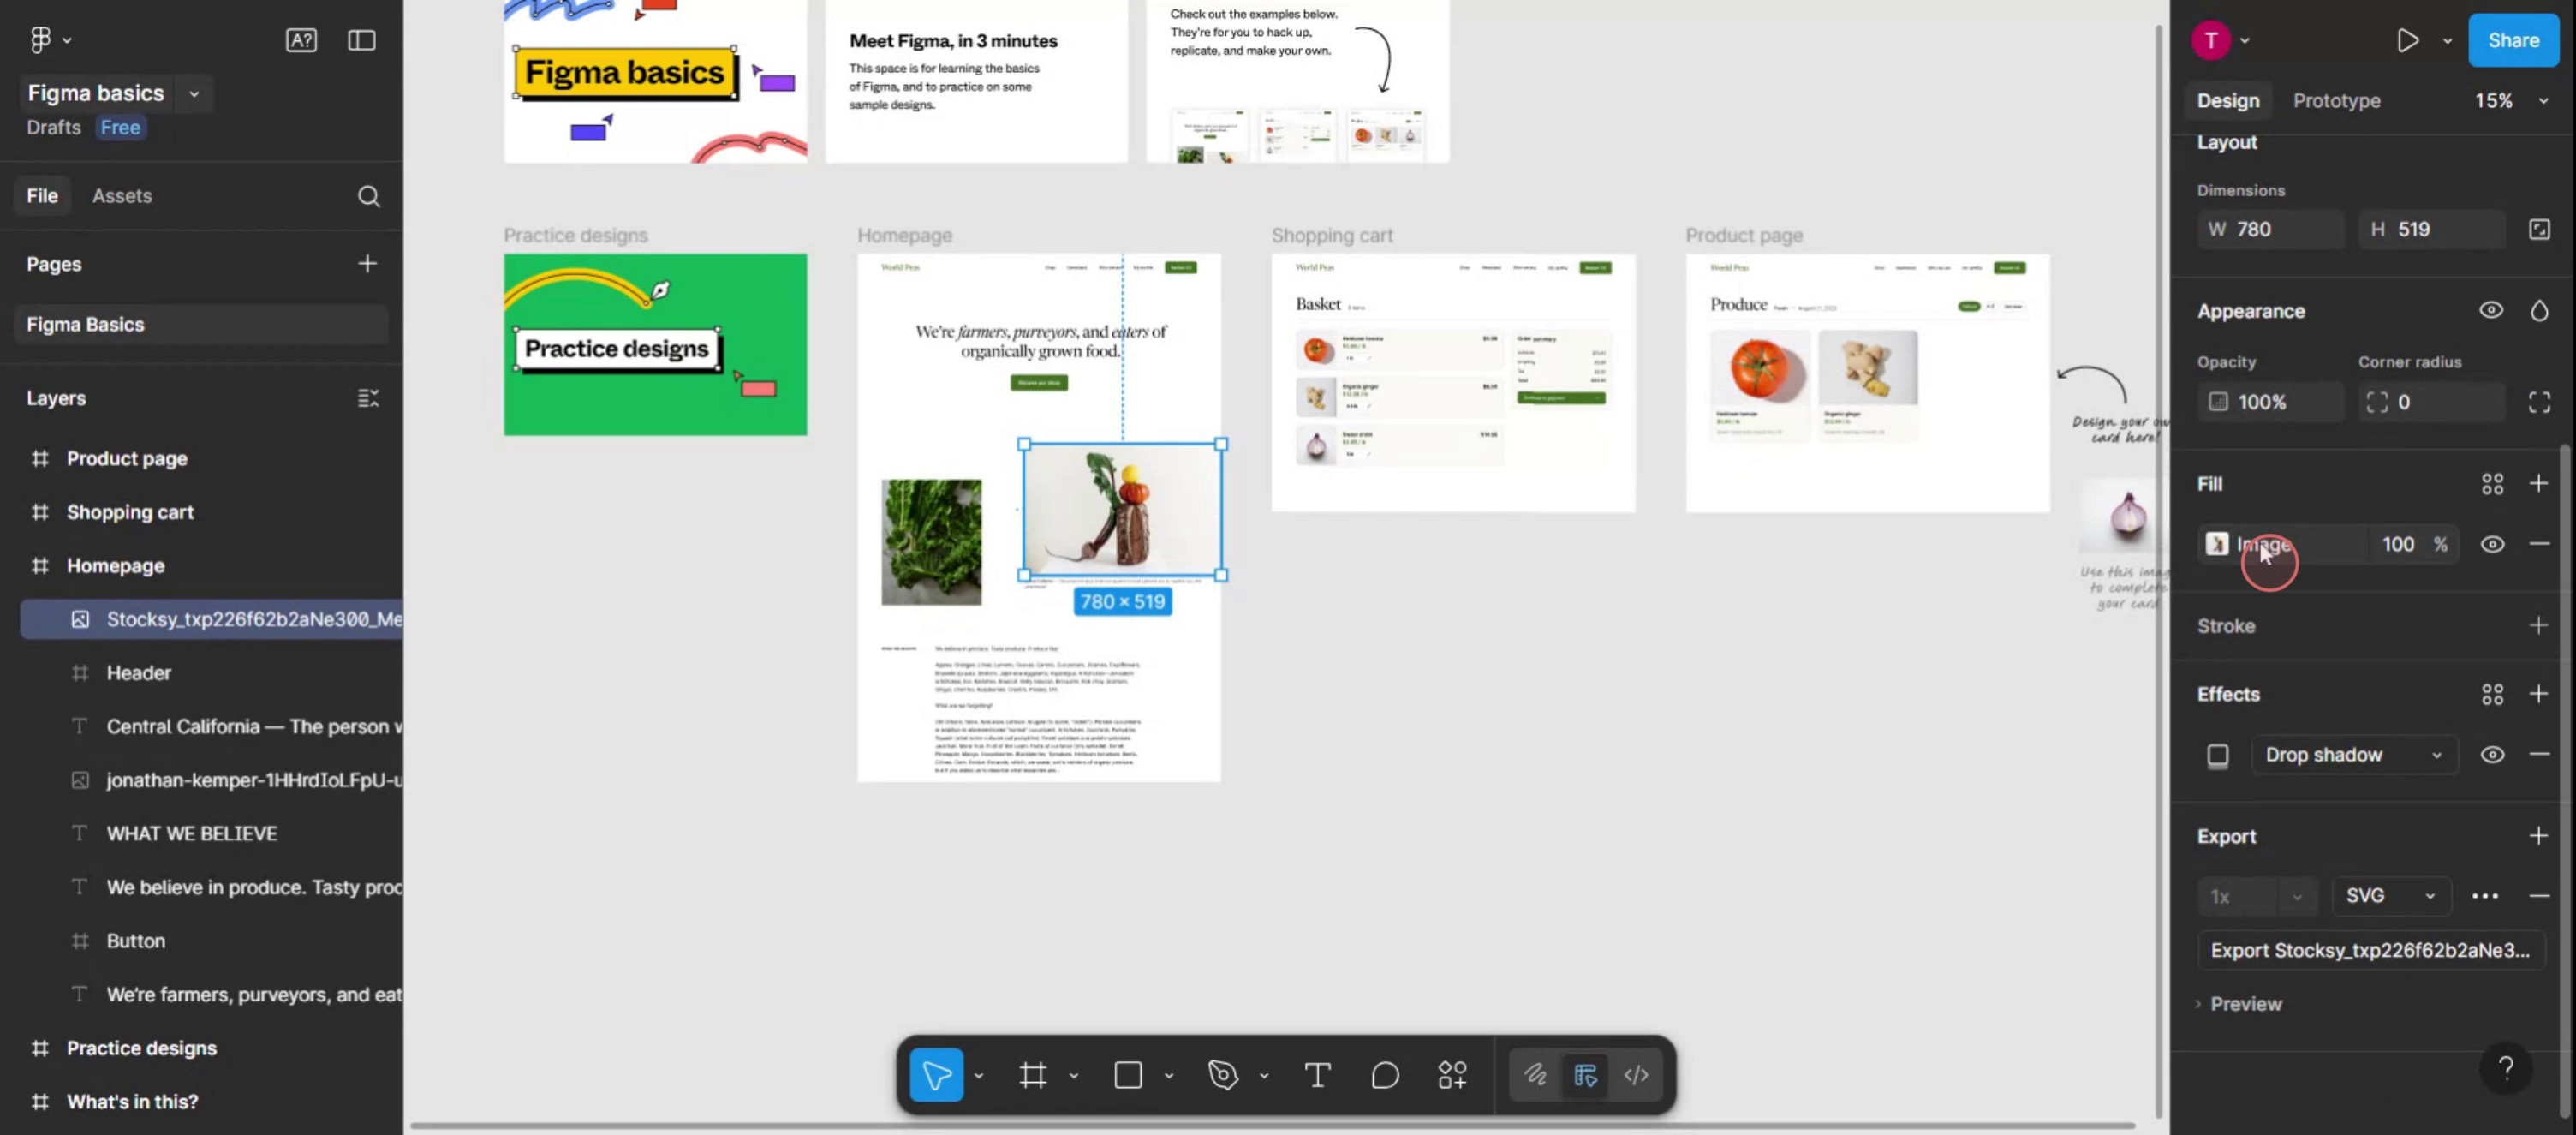
まず、Figma のテンプレートから画像を選択します。

ステップ 2
このメニュー内の画像セクションをクリックして、ポップアップウィンドウを開きます。
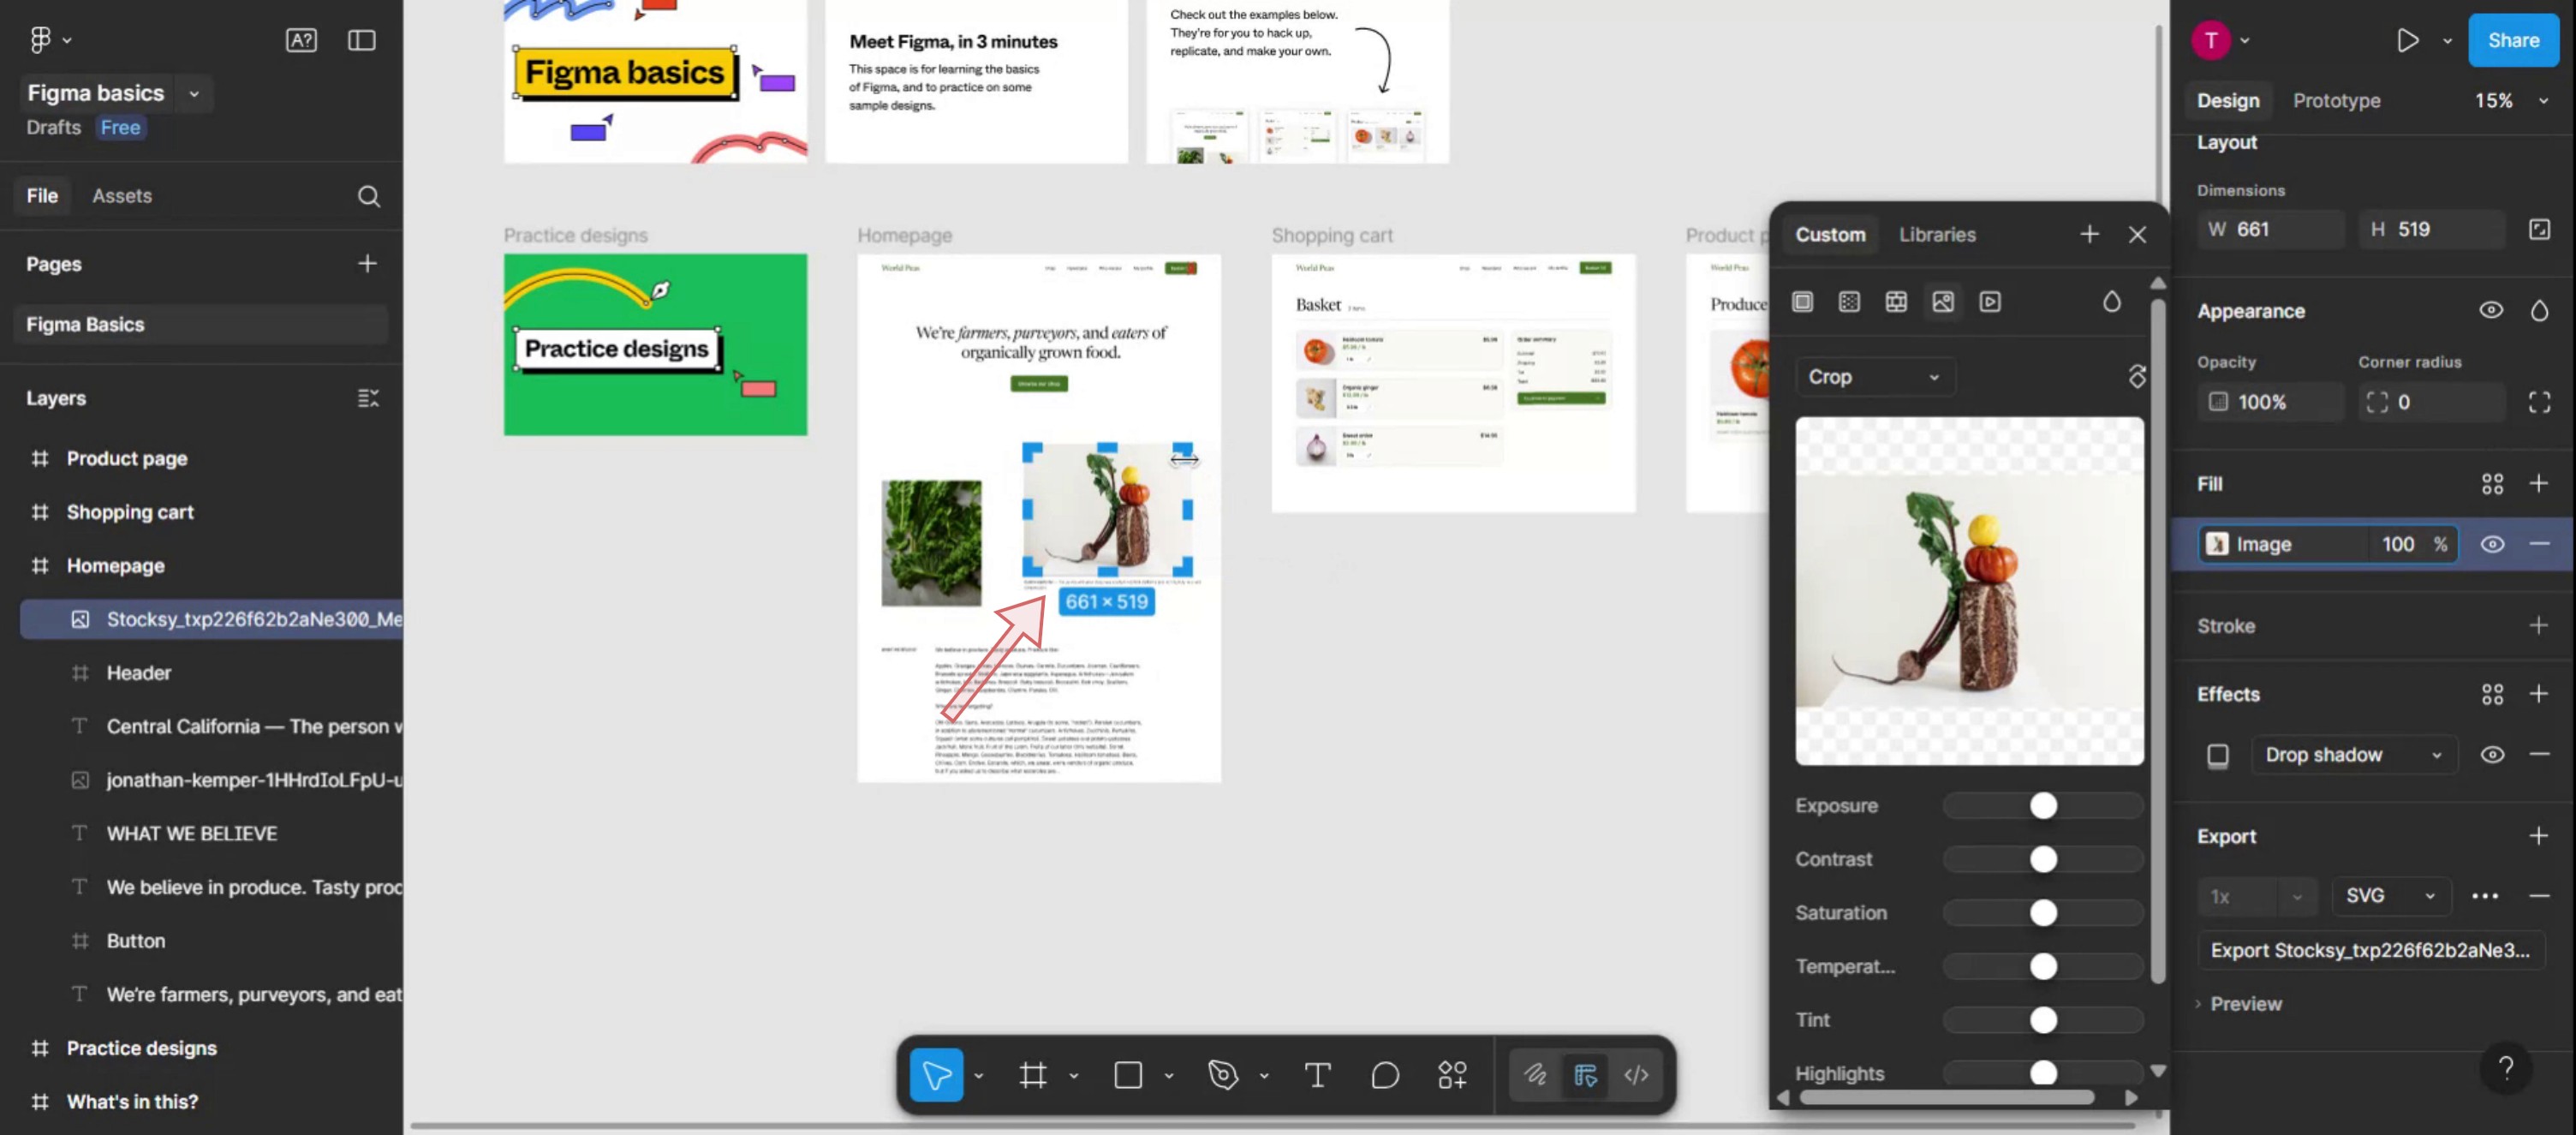
ステップ 3
ドロップダウンメニューをクリックします。

ステップ 4
切り抜きオプションを選択します。

ステップ 5
これで画像に切り抜き機能が有効になります。必要に応じて切り抜きを調整してください。
Figmaで画像をトリミングするためのプロのヒント
画像をキャンバスに取り込む
画像ファイルをFigmaのキャンバスにドラッグ&ドロップするか、File > Place Imageオプションを使って挿入します。画像レイヤーを選択する
トリミングしたい画像をクリックします。画像だけが選択されており、他の要素とグループ化されていないことを確認してください。「Crop」モードをクリックする
上部ツールバーで、「Fill」と表示されたドロップダウンを探します。それをクリックし、モードのオプションから「Crop」を選択します。トリミング範囲を調整する
端や角にある黒いハンドルをドラッグして、画像の表示範囲を指定します。フレーム内で画像の位置を調整する
トリミング枠の内側で画像をクリックしてドラッグし、表示する部分を調整します。「Done」をクリックするかEnterキーを押す
トリミングに満足したら、Enterキーを押すか、画像の外側をクリックして変更を適用します。
よくある落とし穴とその回避方法
Cropオプションが表示されない
画像が選択されていること、そして図形やグループ化されたレイヤーではないことを確認してください。Cropツールは画像に対してのみ表示されます。トリミングではなく画像が伸びてしまう
画像の一部を隠したい場合は、ScaleやFitのオプションは使わないでください。必ずCropモードを使用します。フレーム全体を誤って移動してしまう
外側の青いバウンディングボックスではなく、白いトリミングハンドルを使って範囲を調整してください。青い枠はフレームを移動させます。サイズ変更後にトリミング範囲がリセットされる
トリミング後に画像フレームのサイズを変更した場合は、トリミング設定がまだ保持されているか再確認してください。Cropが適用されない
Enterキーを押すか、画像の外側をクリックしてトリミングを確定し、完了させてください。適用されない場合、変更が失われることがあります。
Figmaで画像をクロップする際によくあるFAQ
Figmaで画像をクロップするには?
画像を選択し、Fillドロップダウンを開いてCropを選択し、クロップ枠を調整してから、Enterキーを押して適用します。一度に複数の画像をクロップできますか?
いいえ、クロップは画像ごとに個別に行う必要があります。Figmaは一括クロップをサポートしていません。Figmaでクロップとマスクの違いは何ですか?
クロップは画像の一部を直接非表示にします。マスキングは別の図形を使って表示領域を定義します。Figmaでクロップを元に戻せますか?
はい、画像を選択し、Fillモードに戻して、クロップ範囲をリセットするか再調整します。クロップすると画像サイズは小さくなりますか?
いいえ、クロップは画像の一部を見た目上非表示にするだけで、ファイルサイズを減らしたり、非表示部分のピクセルを削除したりはしません。Macで画面録画するには?
Macで画面録画するには、Trupeer AIを使用できます。画面全体をキャプチャでき、AIアバターの追加、ナレーションの追加、動画内でのズームイン・ズームアウトなどのAI機能も備えています。TrupeerのAI動画翻訳機能を使えば、動画を30以上の言語に翻訳できます。画面録画にAIアバターを追加するには?
画面録画にAIアバターを追加するには、AI画面録画ツールを使用する必要があります。Trupeer AIはAI画面録画ツールで、複数のアバターを使った動画の作成を支援し、動画用の独自アバターの作成もサポートします。Windowsで画面録画するには?
Windowsで画面録画するには、標準搭載のGame Bar(Windows + G)または、AIアバター、ナレーション、翻訳などのより高度な機能を備えたTrupeer AIのような高度なAIツールを使用できます。動画にナレーションを追加するには?
動画にナレーションを追加するには、trupeer aiのChrome拡張機能をダウンロードしてください。登録後、音声付きの動画をアップロードし、trupeerから希望のナレーションを選択して、編集済み動画をエクスポートします。画面録画でズームインするには?
画面録画中にズームインするには、Trupeer AIのズーム効果を使用します。これにより、特定のタイミングでズームイン・ズームアウトでき、動画コンテンツの視覚的なインパクトを高められます。
おすすめ記事
関連チュートリアル

