
Come arrotondare gli angoli in Canva
Scopri come arrotondare gli angoli in Canva usando i controlli del raggio degli angoli, le cornici e le impostazioni dei bordi per creare immagini e forme dai contorni morbidi. Segui questo breve tutorial e crea guide con Trupeer.
Per arrotondare gli angoli degli elementi in Canva, seleziona l'elemento (immagine, forma, ecc.), fai clic su "Stile bordo" nella barra degli strumenti e quindi usa il cursore o il campo di input "Arrotondamento angoli" per regolare il raggio degli angoli arrotondati
Ecco una spiegazione più dettagliata:
Seleziona l'elemento: fai clic sull'immagine, la forma o un altro elemento che vuoi modificare.
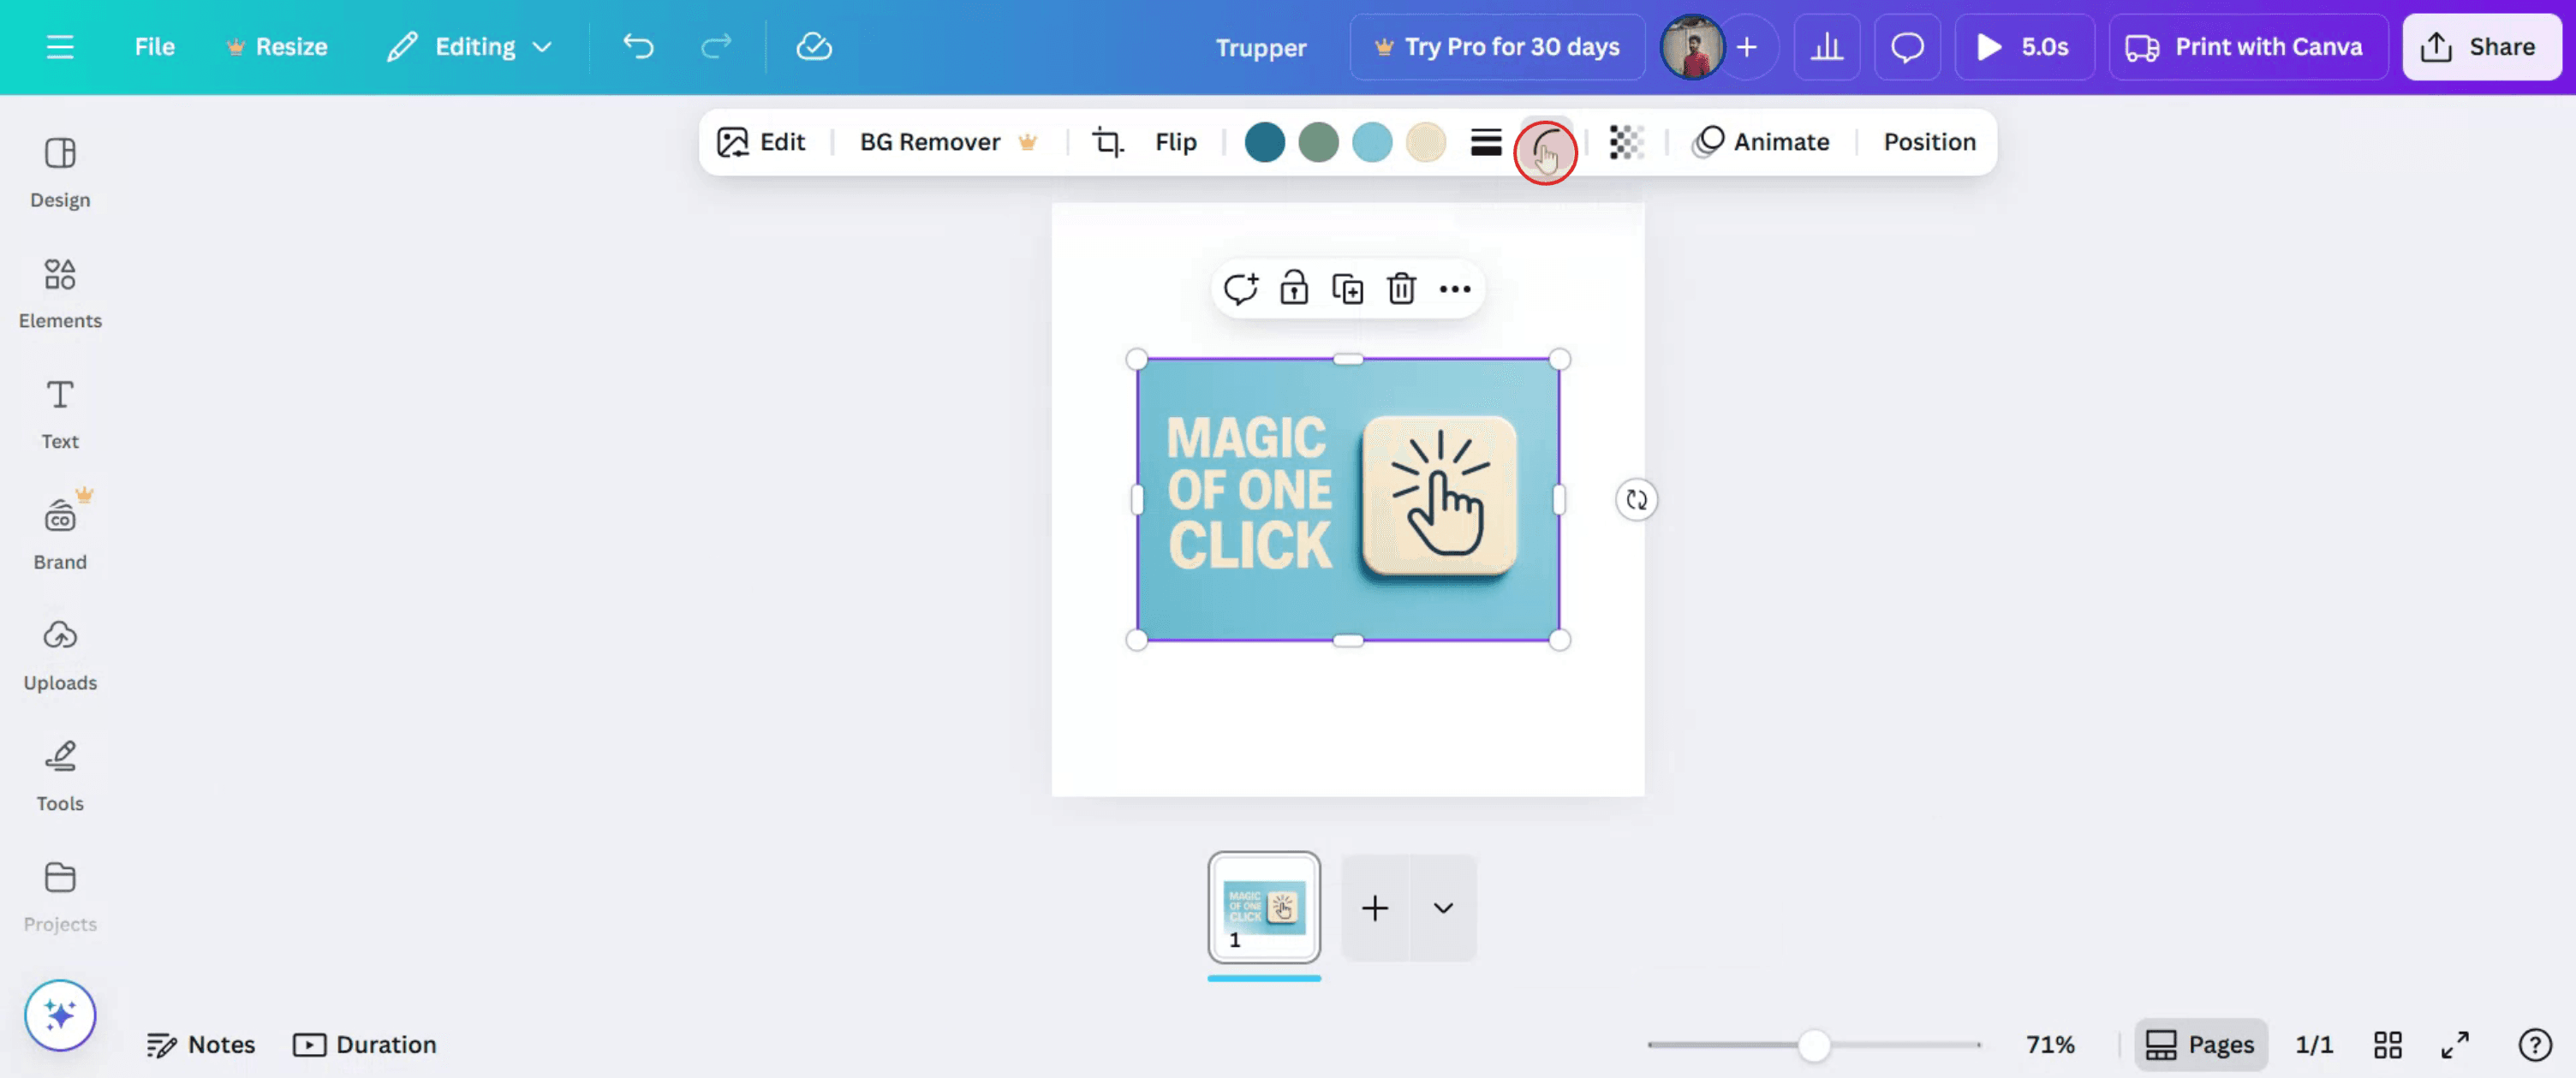
Apri Stile bordo: nella barra degli strumenti sopra l'editor, fai clic su "Stile bordo".
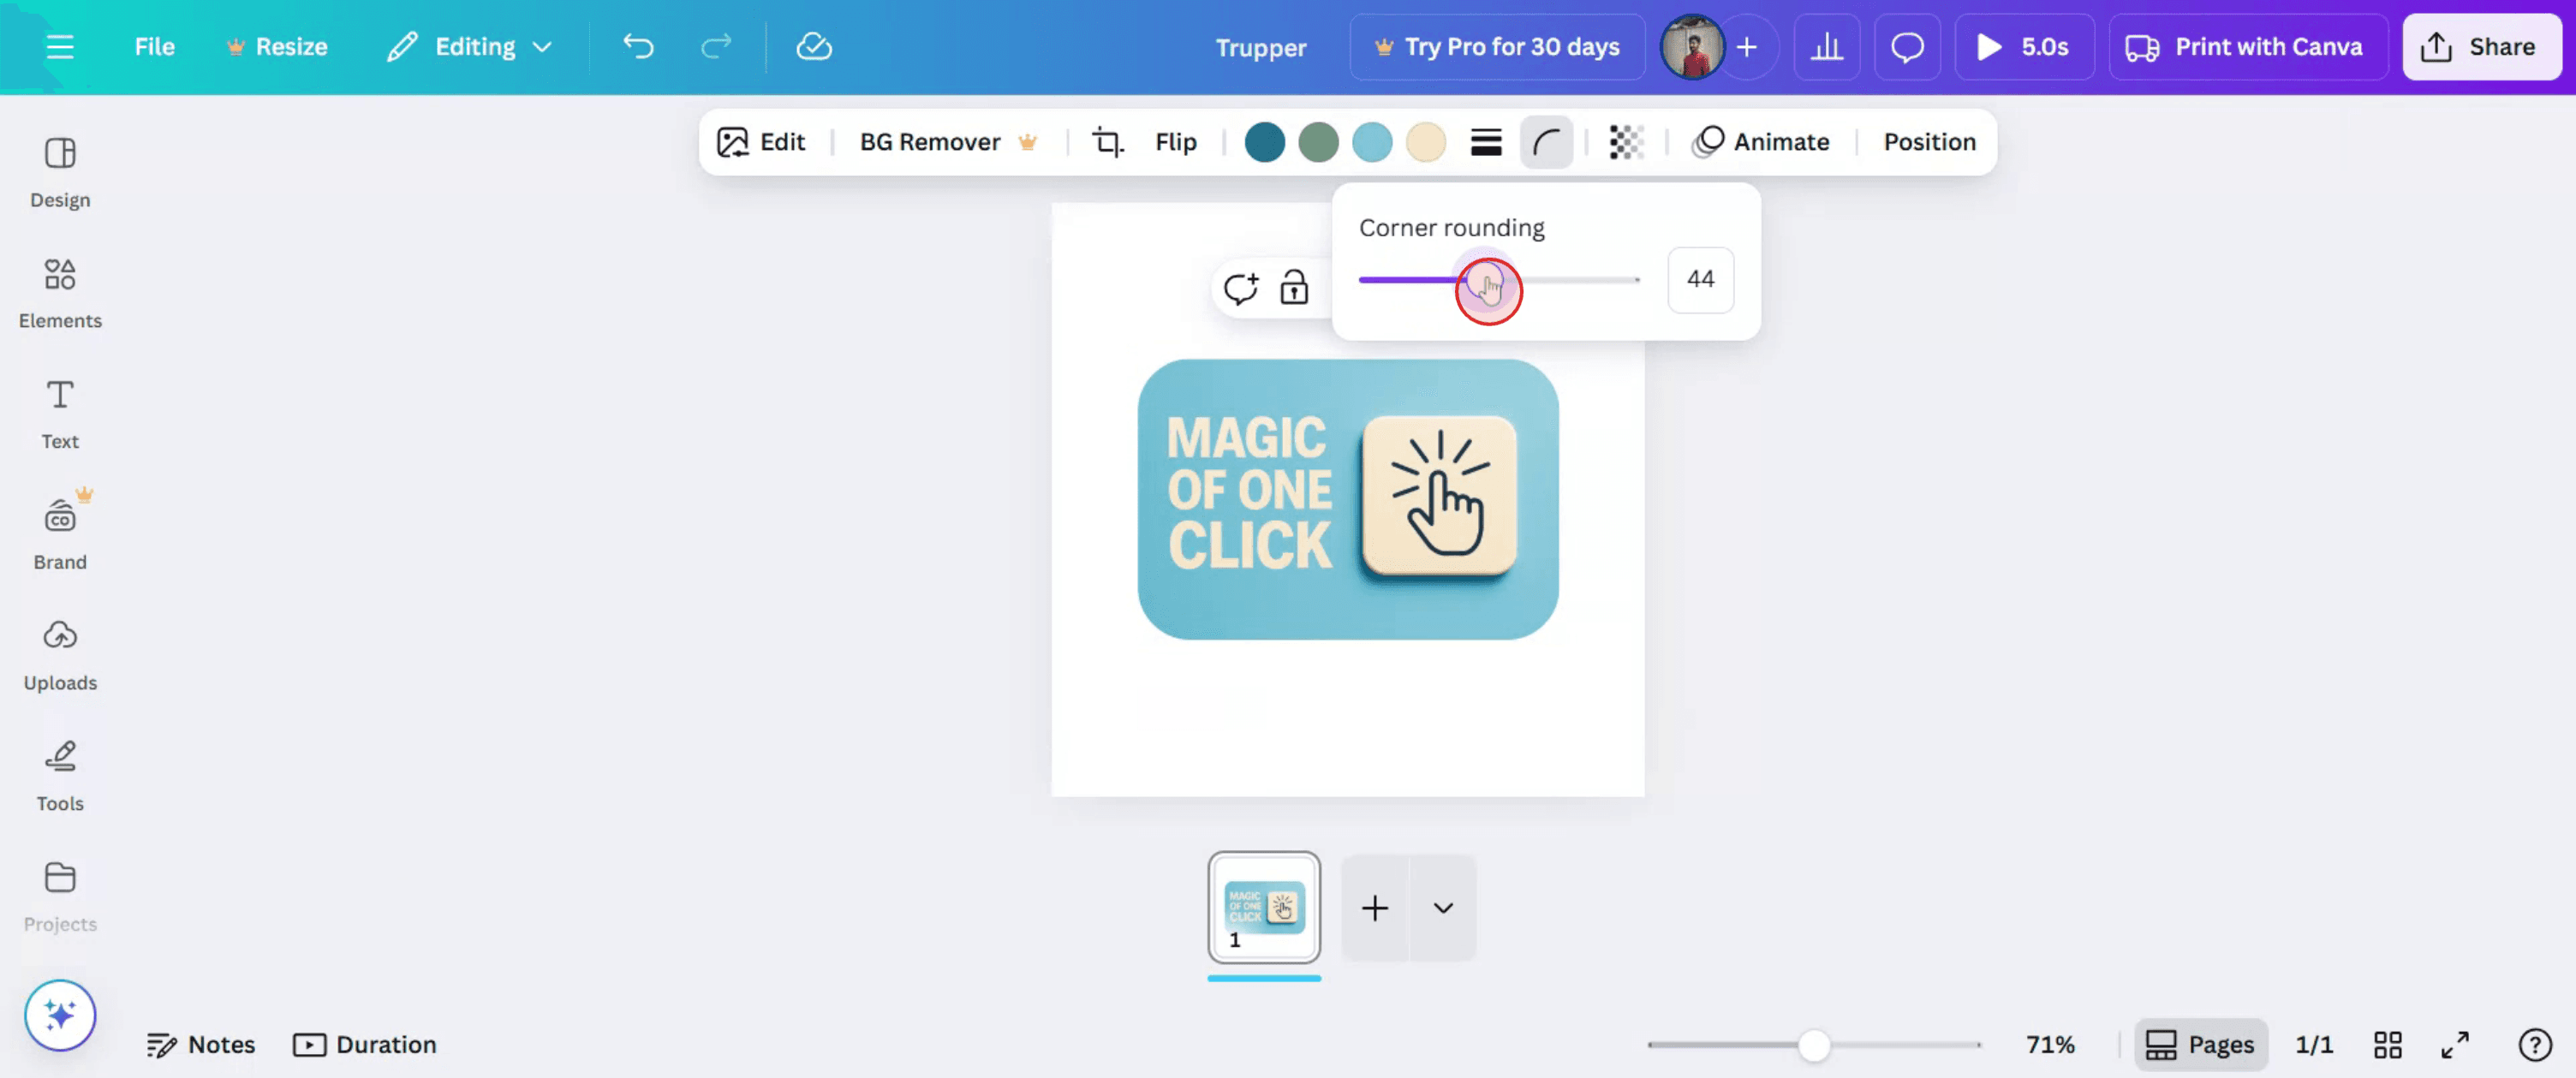
Regola l'arrotondamento degli angoli: usa il cursore "Arrotondamento angoli" per aumentare o diminuire il grado di arrotondamento degli angoli. Puoi anche inserire direttamente un valore numerico nel campo di input accanto al cursore.
(Facoltativo) Aggiungi un bordo: se desideri un bordo visibile attorno all'elemento, puoi anche regolare il peso e il colore del bordo usando le altre opzioni nel pannello "Stile bordo".
Guida passo passo: come arrotondare gli angoli in Canva
Passaggio 1
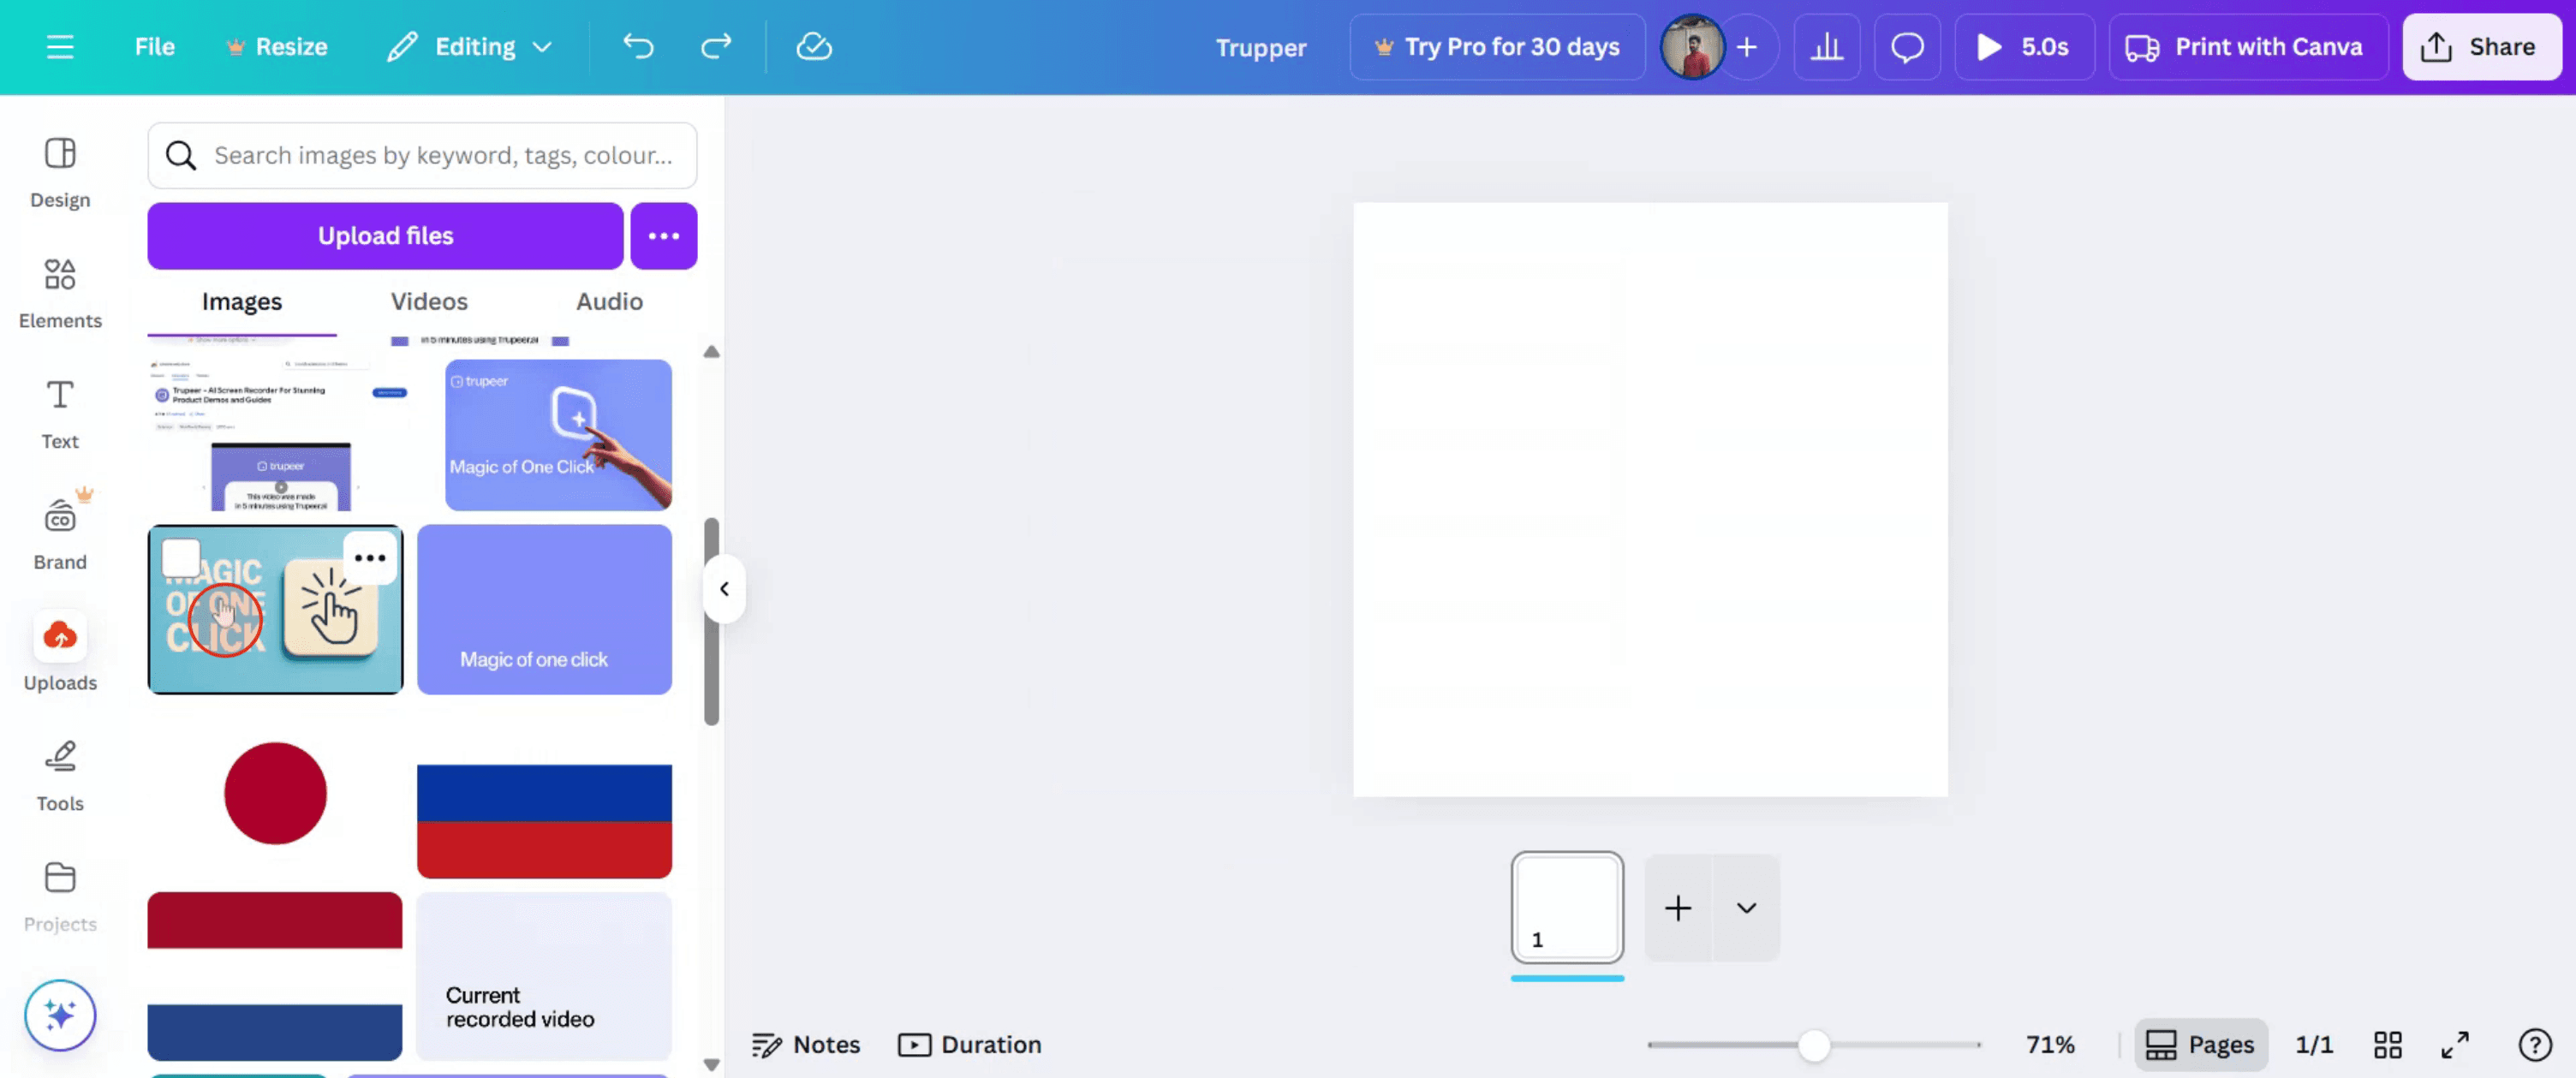
Inizia andando alla sezione Caricamenti in Canva e facendoci clic.

Passaggio 2
Seleziona un'immagine dalla sezione Caricamenti.
Passaggio 3
Una volta selezionata l'immagine, individua e fai clic sull'opzione "Angoli arrotondati".
Passaggio 4
Regola il grado di arrotondamento per ottenere la curvatura desiderata degli angoli della tua immagine.
Passaggio 5
Una volta soddisfatto degli angoli arrotondati, fai clic sul pulsante "Condividi" per distribuire l'immagine ad altri.

Consigli professionali per arrotondare gli angoli in Canva
Apri il tuo progetto in Canva
Accedi e apri il progetto in cui desideri arrotondare gli angoli di un elemento.Seleziona l'immagine o la forma
Fai clic sull'immagine, sulla forma o sull'elemento che desideri modificare.Fai clic su “Modifica immagine” per le foto
Se stai modificando una foto, seleziona l'immagine e poi fai clic sull'opzione “Modifica immagine” nella barra degli strumenti in alto.Applica una cornice per arrotondare gli angoli della foto
Usa la scheda Elementi e cerca una cornice arrotondata. Trascina l'immagine nella cornice per rendere gli angoli arrotondati.Usa il cursore del raggio degli angoli per le forme
Per alcune forme, Canva ti consente di regolare direttamente il raggio degli angoli usando le maniglie di arrotondamento degli angoli o i cursori nella barra degli strumenti.Ridimensiona e riposiziona secondo necessità
Dopo aver arrotondato gli angoli, regola dimensioni e posizione per adattarle al tuo progetto complessivo.
Errori comuni e come evitarli
Tentare di arrotondare gli angoli di elementi non supportati
Non tutti gli elementi supportano l'arrotondamento degli angoli. Prova a usare cornici o forme che consentano regolazioni del raggio.Usare cornici che distorcono l'immagine
Alcune cornici arrotondate possono allungare o ritagliare l'immagine. Scegli una cornice che corrisponda alle dimensioni e alle proporzioni del tuo layout.Gli angoli non appaiono arrotondati dopo il download
Se gli angoli sembrano netti nel file scaricato, assicurati che l'effetto sia stato applicato correttamente e usa il formato PNG per una migliore precisione visiva.Trascinare le immagini nelle cornici in modo errato
Assicurati che l'immagine si agganci alla cornice. Se non lo fa, non erediterà gli angoli arrotondati.Nessuna opzione per arrotondare le caselle di testo
Le caselle di testo non possono essere arrotondate direttamente. Usa una forma arrotondata dietro il testo per ottenere un effetto simile.
Domande frequenti comuni sull'arrotondamento degli angoli in Canva
Come arrotondo gli angoli di un'immagine in Canva
Usa una cornice arrotondata dalla scheda Elementi e trascina la tua immagine al suo interno.Posso arrotondare gli angoli di una forma
Sì, per alcune forme puoi usare i controlli del raggio del bordo per arrotondare gli angoli.Esiste uno strumento diretto per arrotondare gli angoli in Canva
Solo alcuni elementi hanno questa funzione. Cornici e forme offrono la massima flessibilità.Posso arrotondare gli angoli di una casella di testo
No, ma puoi posizionare il testo sopra una forma rettangolare arrotondata per un effetto simile.La funzione di arrotondamento degli angoli è disponibile per gli utenti gratuiti
Sì, puoi usare cornici e strumenti per gli angoli disponibili nella versione gratuita.Come registrare lo schermo su Mac?
Per registrare lo schermo su un Mac, puoi usare Trupeer AI. Ti consente di acquisire l'intero schermo e offre funzionalità AI come aggiungere avatar AI, aggiungere una voce fuori campo e aggiungere zoom avanti e indietro nel video. Con la funzione di traduzione video AI di Trupeer, puoi tradurre il video in oltre 30 lingue.Come aggiungere un avatar AI a una registrazione dello schermo?
Per aggiungere un avatar AI a una registrazione dello schermo, dovrai utilizzare uno strumento di registrazione dello schermo AI. Trupeer AI è uno strumento di registrazione dello schermo AI, che ti aiuta a creare video con più avatar e ti aiuta anche a creare il tuo avatar per il video.Come registrare lo schermo su Windows?
Per registrare lo schermo su Windows, puoi usare la Game Bar integrata (Windows + G) o uno strumento AI avanzato come Trupeer AI per funzionalità più avanzate come avatar AI, voce fuori campo, traduzione ecc.Come aggiungere una voce fuori campo al video?
Per aggiungere una voce fuori campo ai video, scarica l'estensione Chrome di trupeer ai. Una volta registrato, carica il tuo video con voce, scegli la voce fuori campo desiderata da Trupeer ed esporta il video modificato.Come faccio a ingrandire in una registrazione dello schermo?
Per ingrandire durante una registrazione dello schermo, usa gli effetti zoom in Trupeer AI che ti consentono di ingrandire e ridurre in momenti specifici, migliorando l'impatto visivo dei contenuti video.
Letture suggerite
Generatore di documentazione tecnica
Software per la knowledge base
Come creare un journal in Canva
Come stampare fronte-retro su Canva
Come allungare il testo in Canva
Tutorial correlati

