

كيفية الحصول على مفتاح واجهة برمجة التطبيقات لـ Calendly
اكتشف كيفية الحصول على مفتاح API الخاص بـ Calendly لدمج ميزات الجدولة في تطبيقك أو سير عملك. دليل خطوة بخطوة للوصول إلى إعدادات المطوّر في Calendly.
للحصول على مفتاح API من Calendly، ويُشار إليه أيضًا باسم رمز وصول شخصي، اتبع الخطوات التالية:
سجّل الدخول إلى حساب Calendly الخاص بك: ادخل إلى لوحة التحكم الخاصة بك في Calendly باستخدام بيانات الاعتماد الخاصة بك.
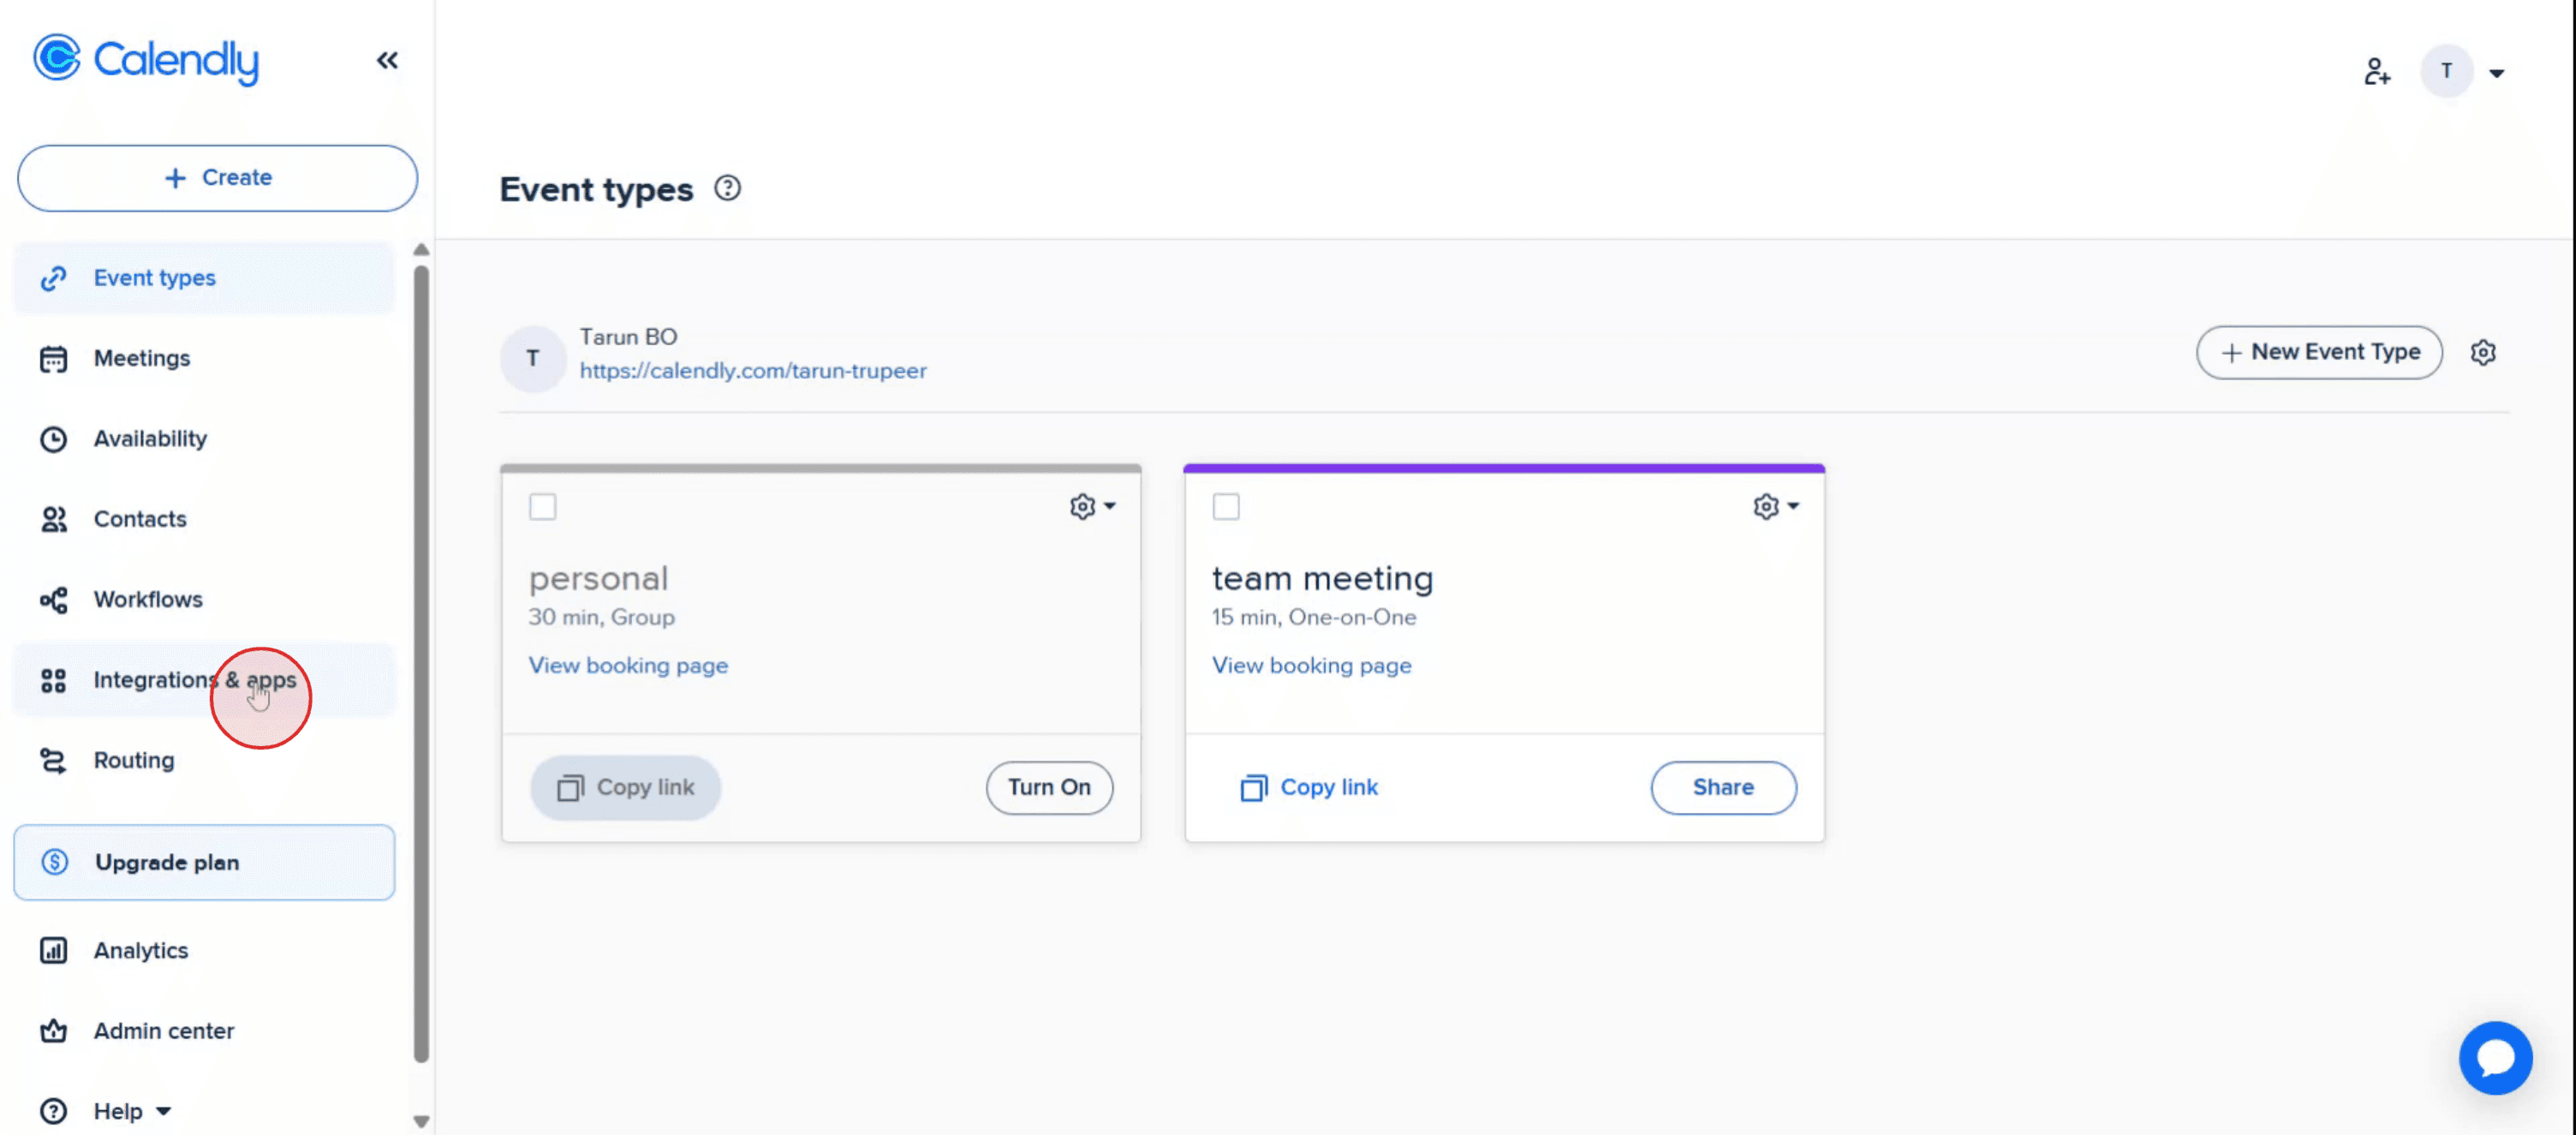
انتقل إلى عمليات التكامل والتطبيقات: في الشريط الجانبي الأيسر من لوحة التحكم، ابحث عن "عمليات التكامل والتطبيقات." وانقر عليها.
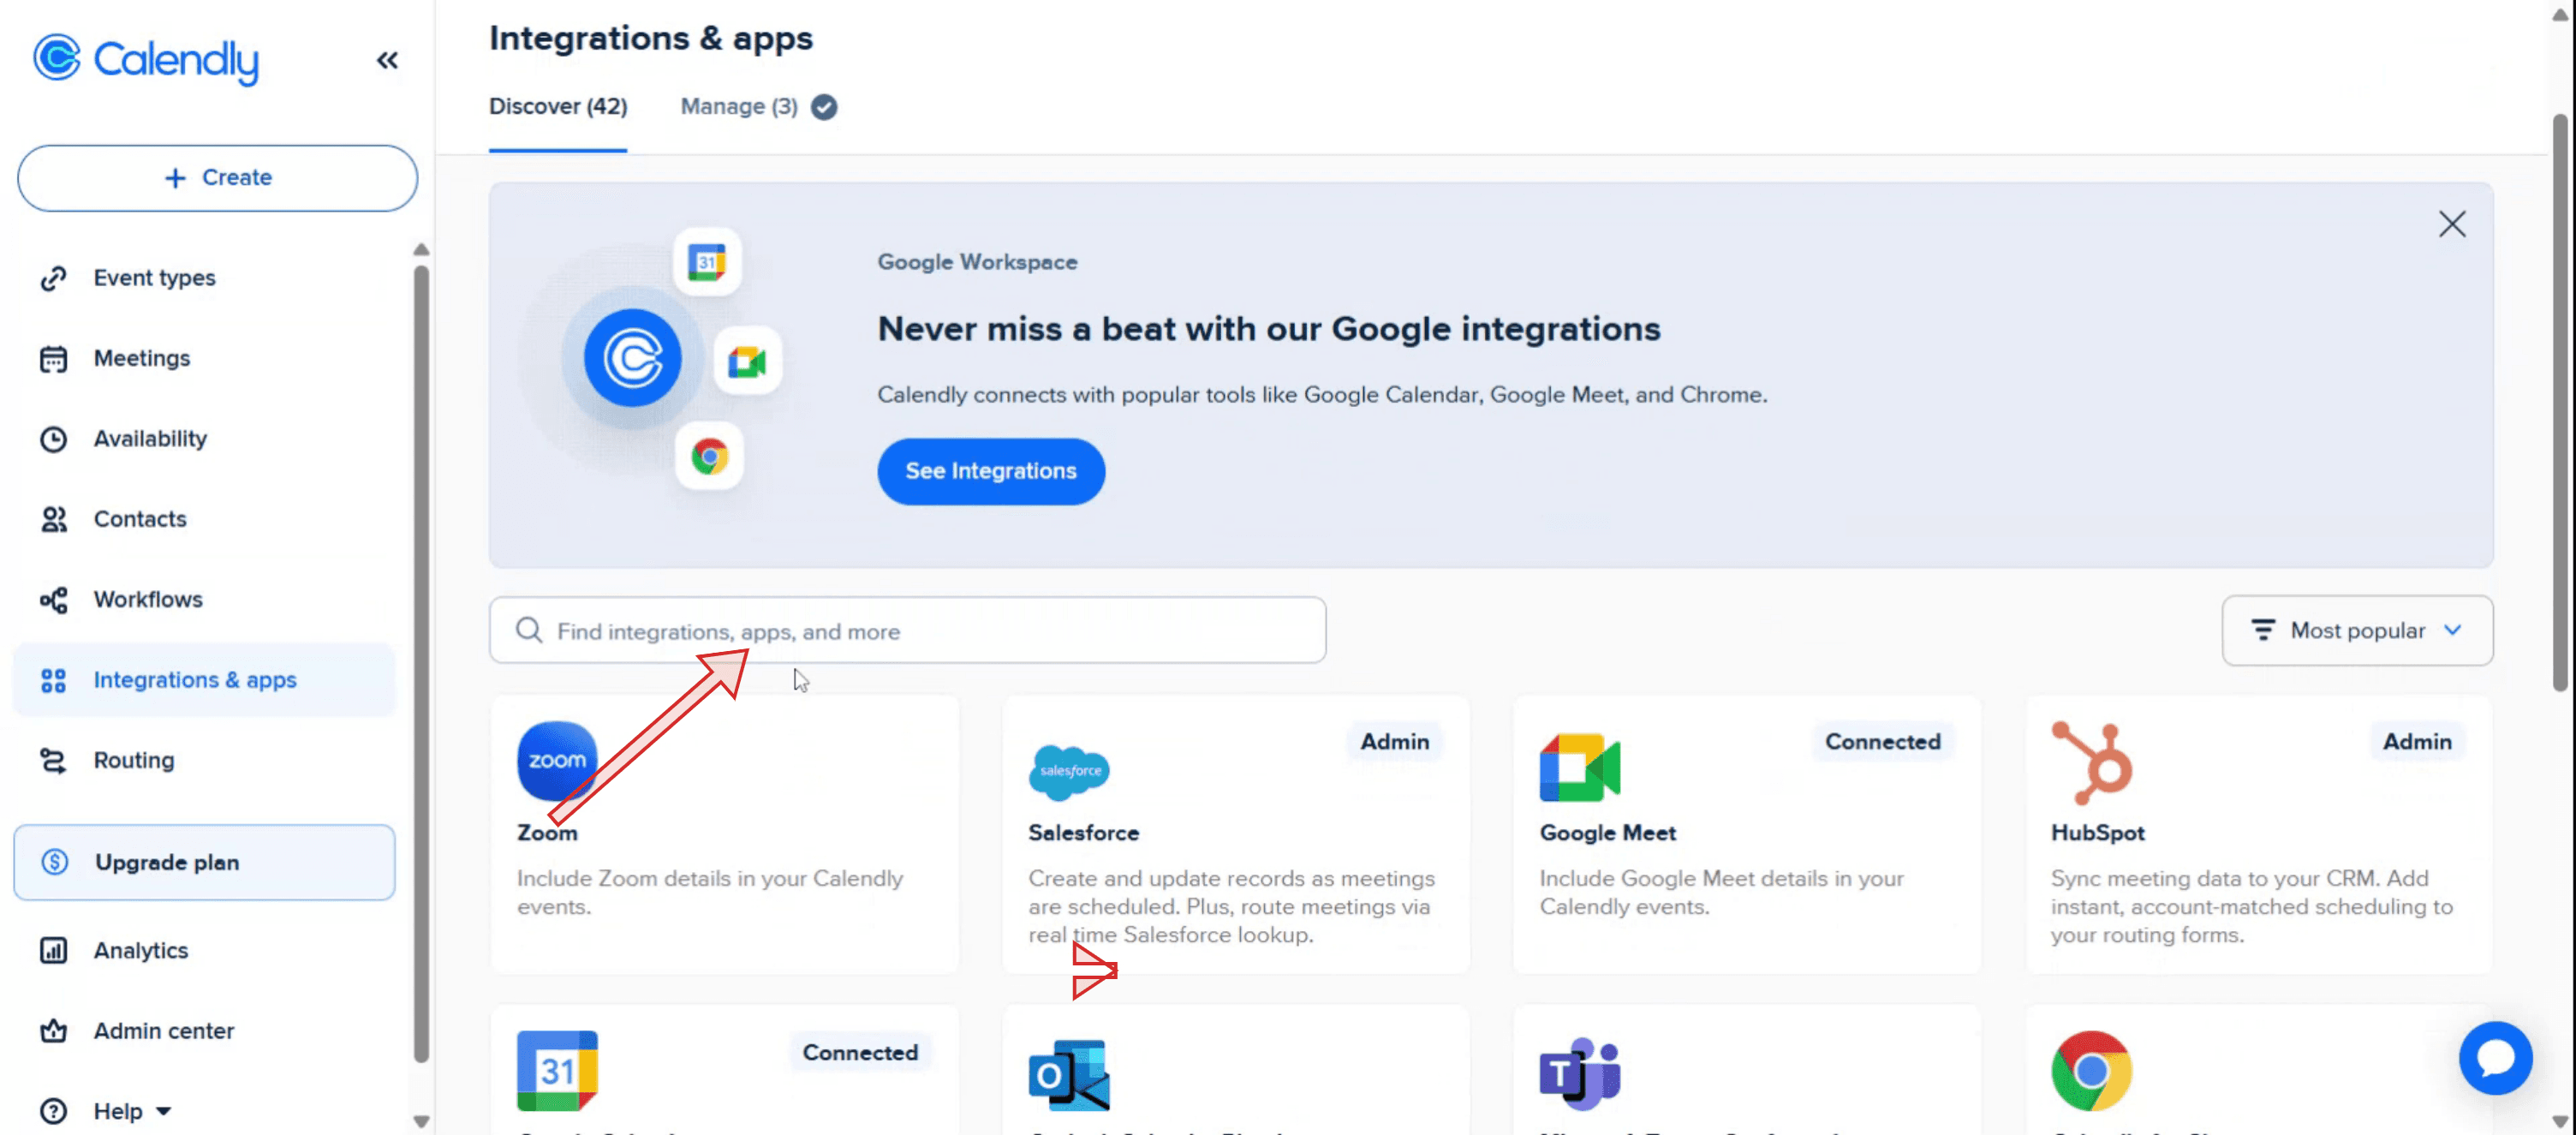
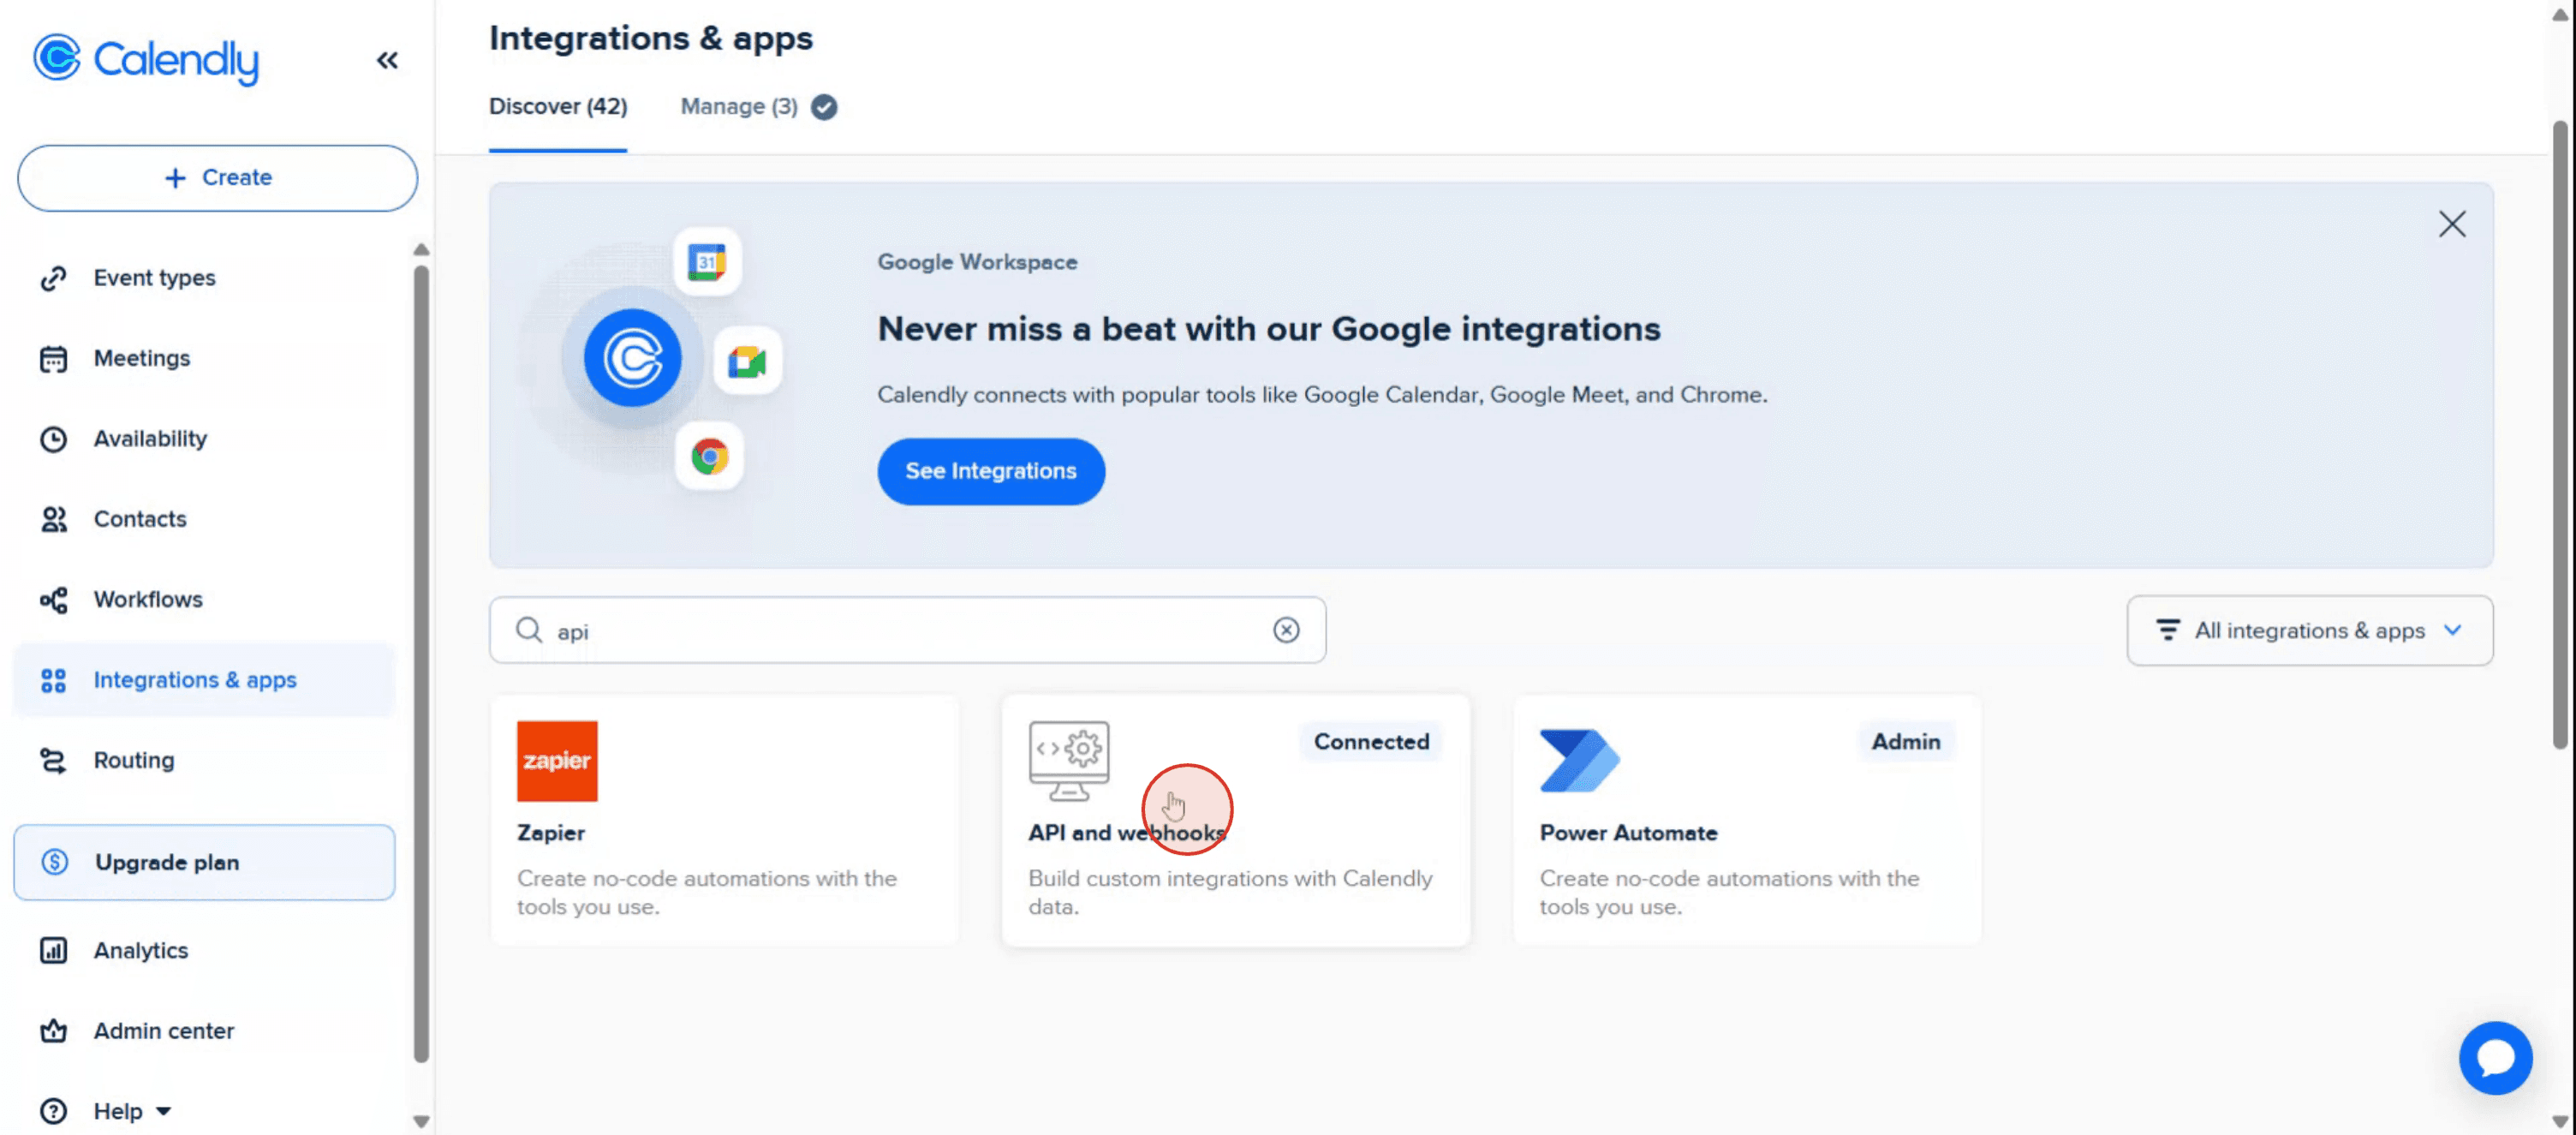
حدد واجهة برمجة التطبيقات وخطافات الويب: ضمن قسم عمليات التكامل، ابحث عن "واجهة برمجة التطبيقات وخطافات الويب." وانقر عليها.
أنشئ رمزًا جديدًا: إذا لم يكن لديك أي رموز وصول شخصية موجودة، فحدد "احصل على رمز الآن" ضمن "رموز الوصول الشخصية."
إذا كانت لديك رموز بالفعل،
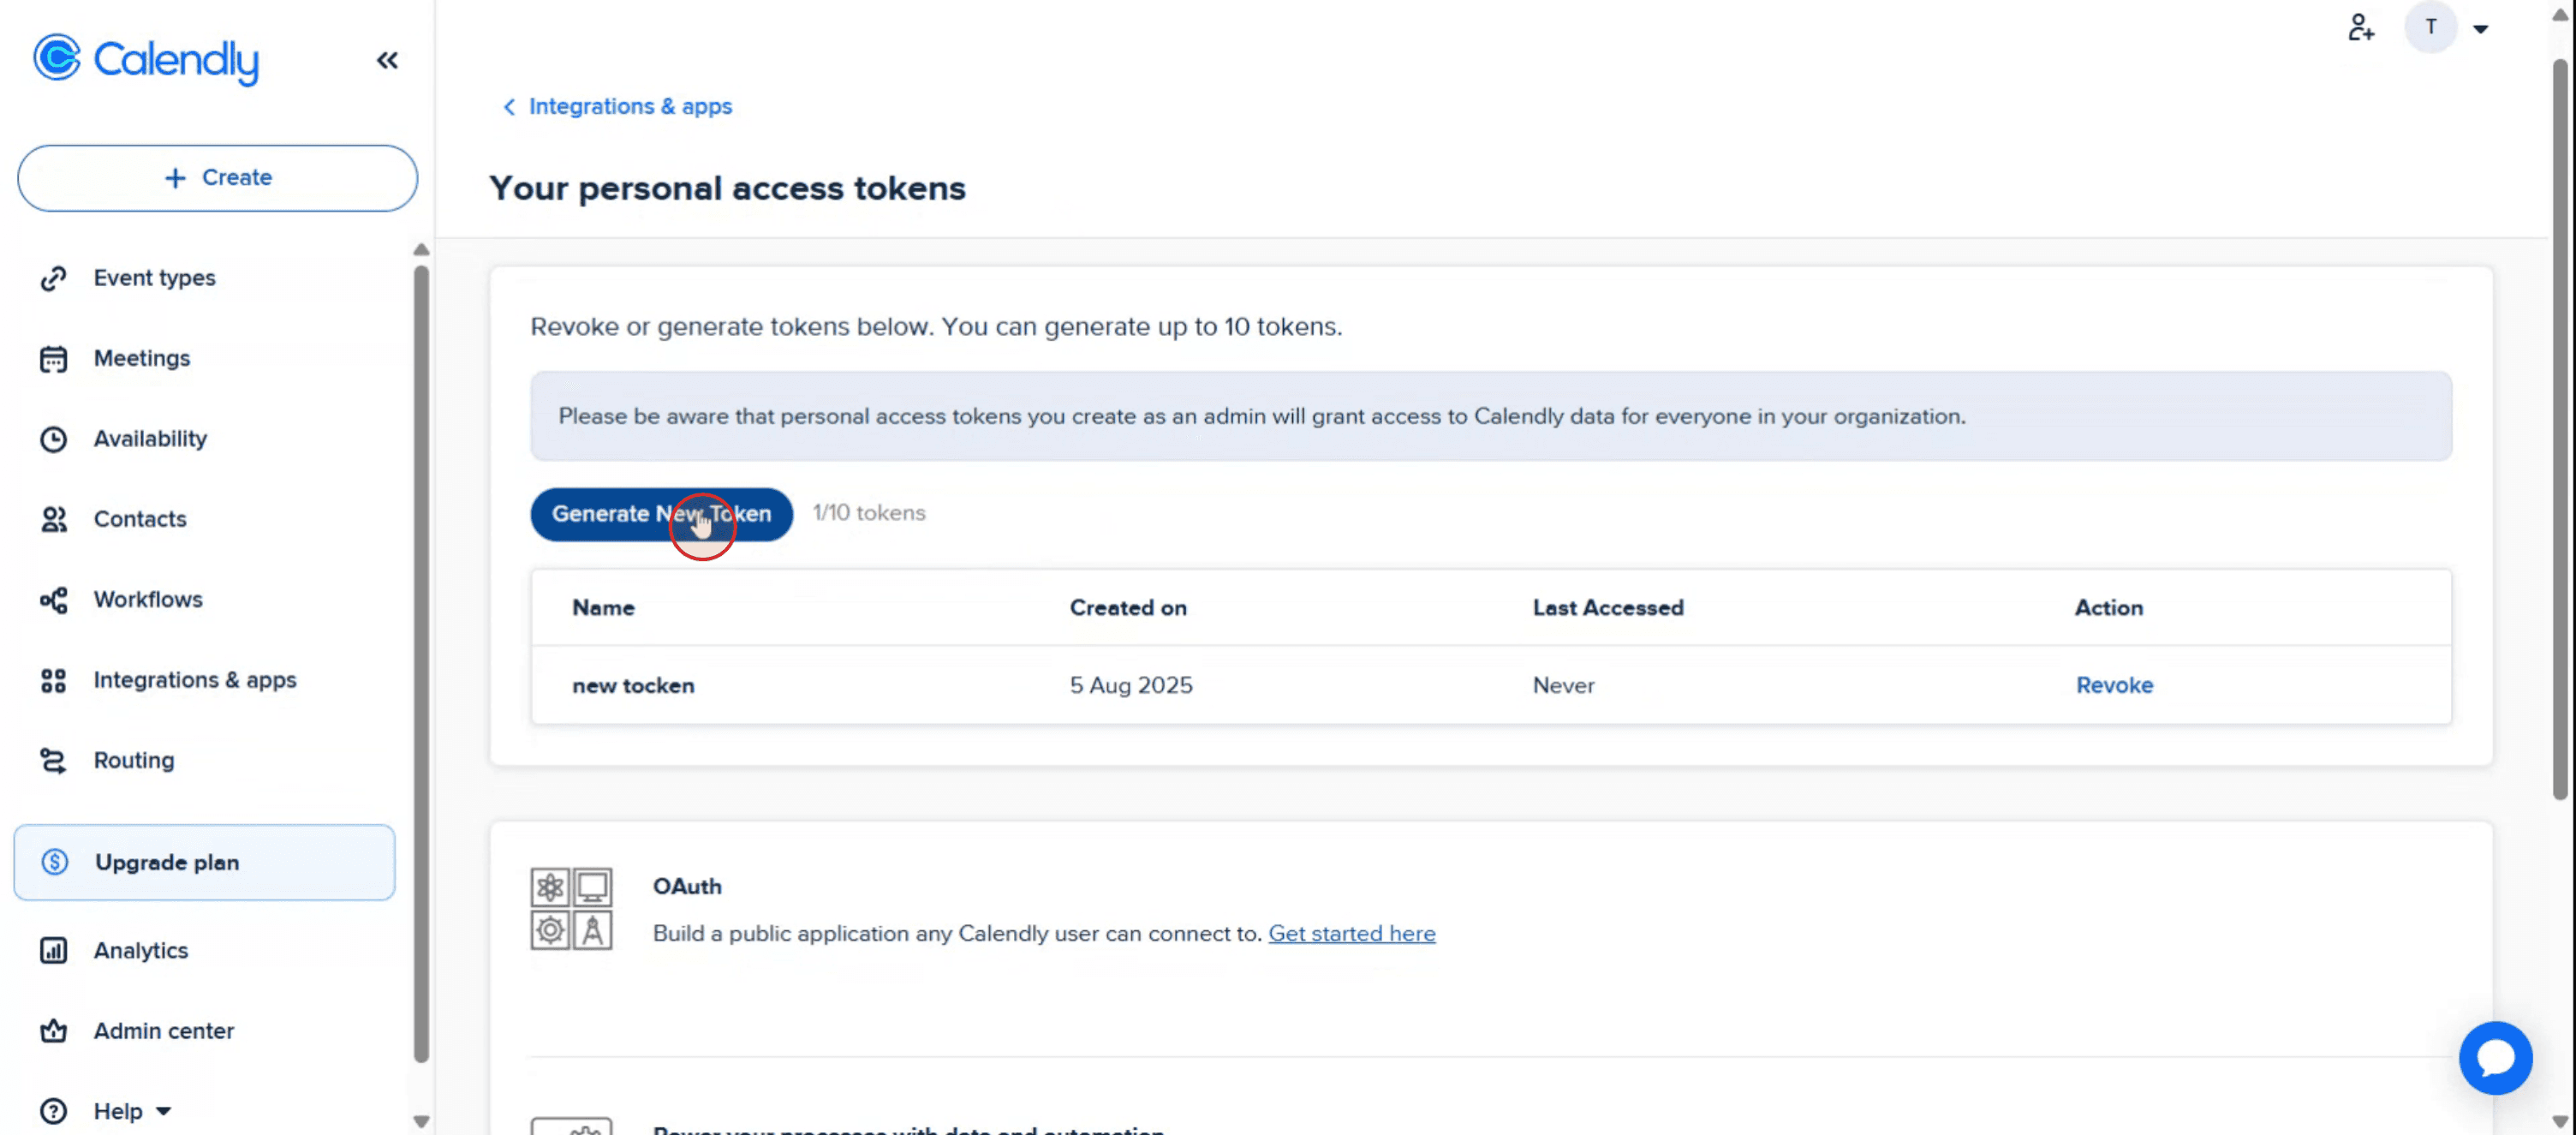
فحدد "إنشاء رمز جديد" ضمن "رموز الوصول الشخصية الخاصة بك."
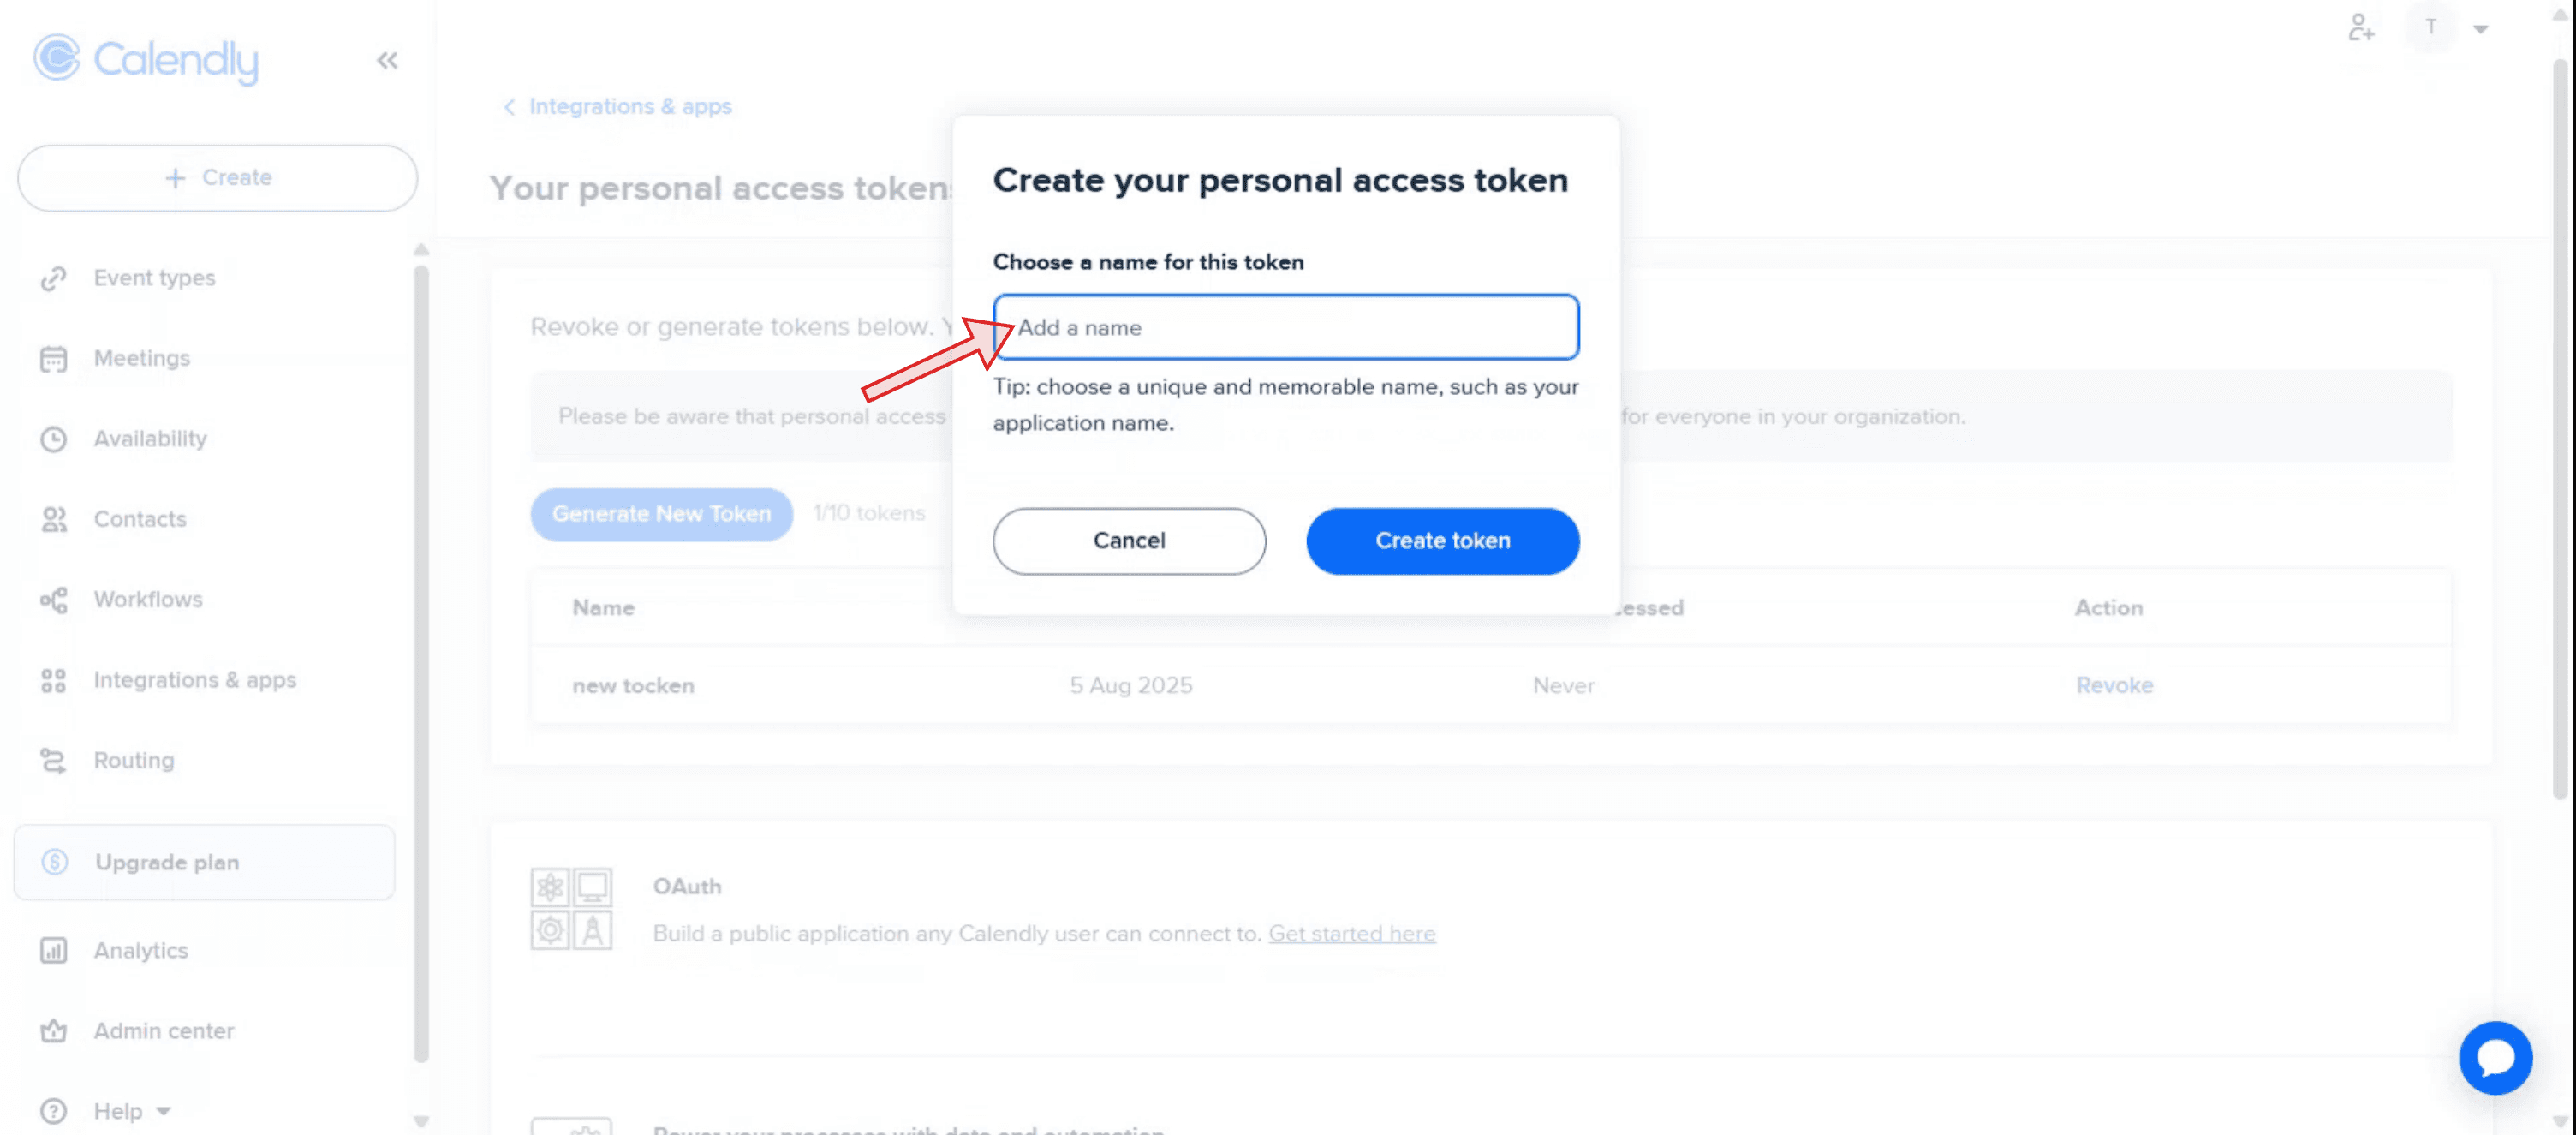
أنشئ الرمز وانسخه: أدخل اسمًا يمكن التعرف عليه لرمزك الجديد في حقل "أنشئ رمز الوصول الشخصي الخاص بك".
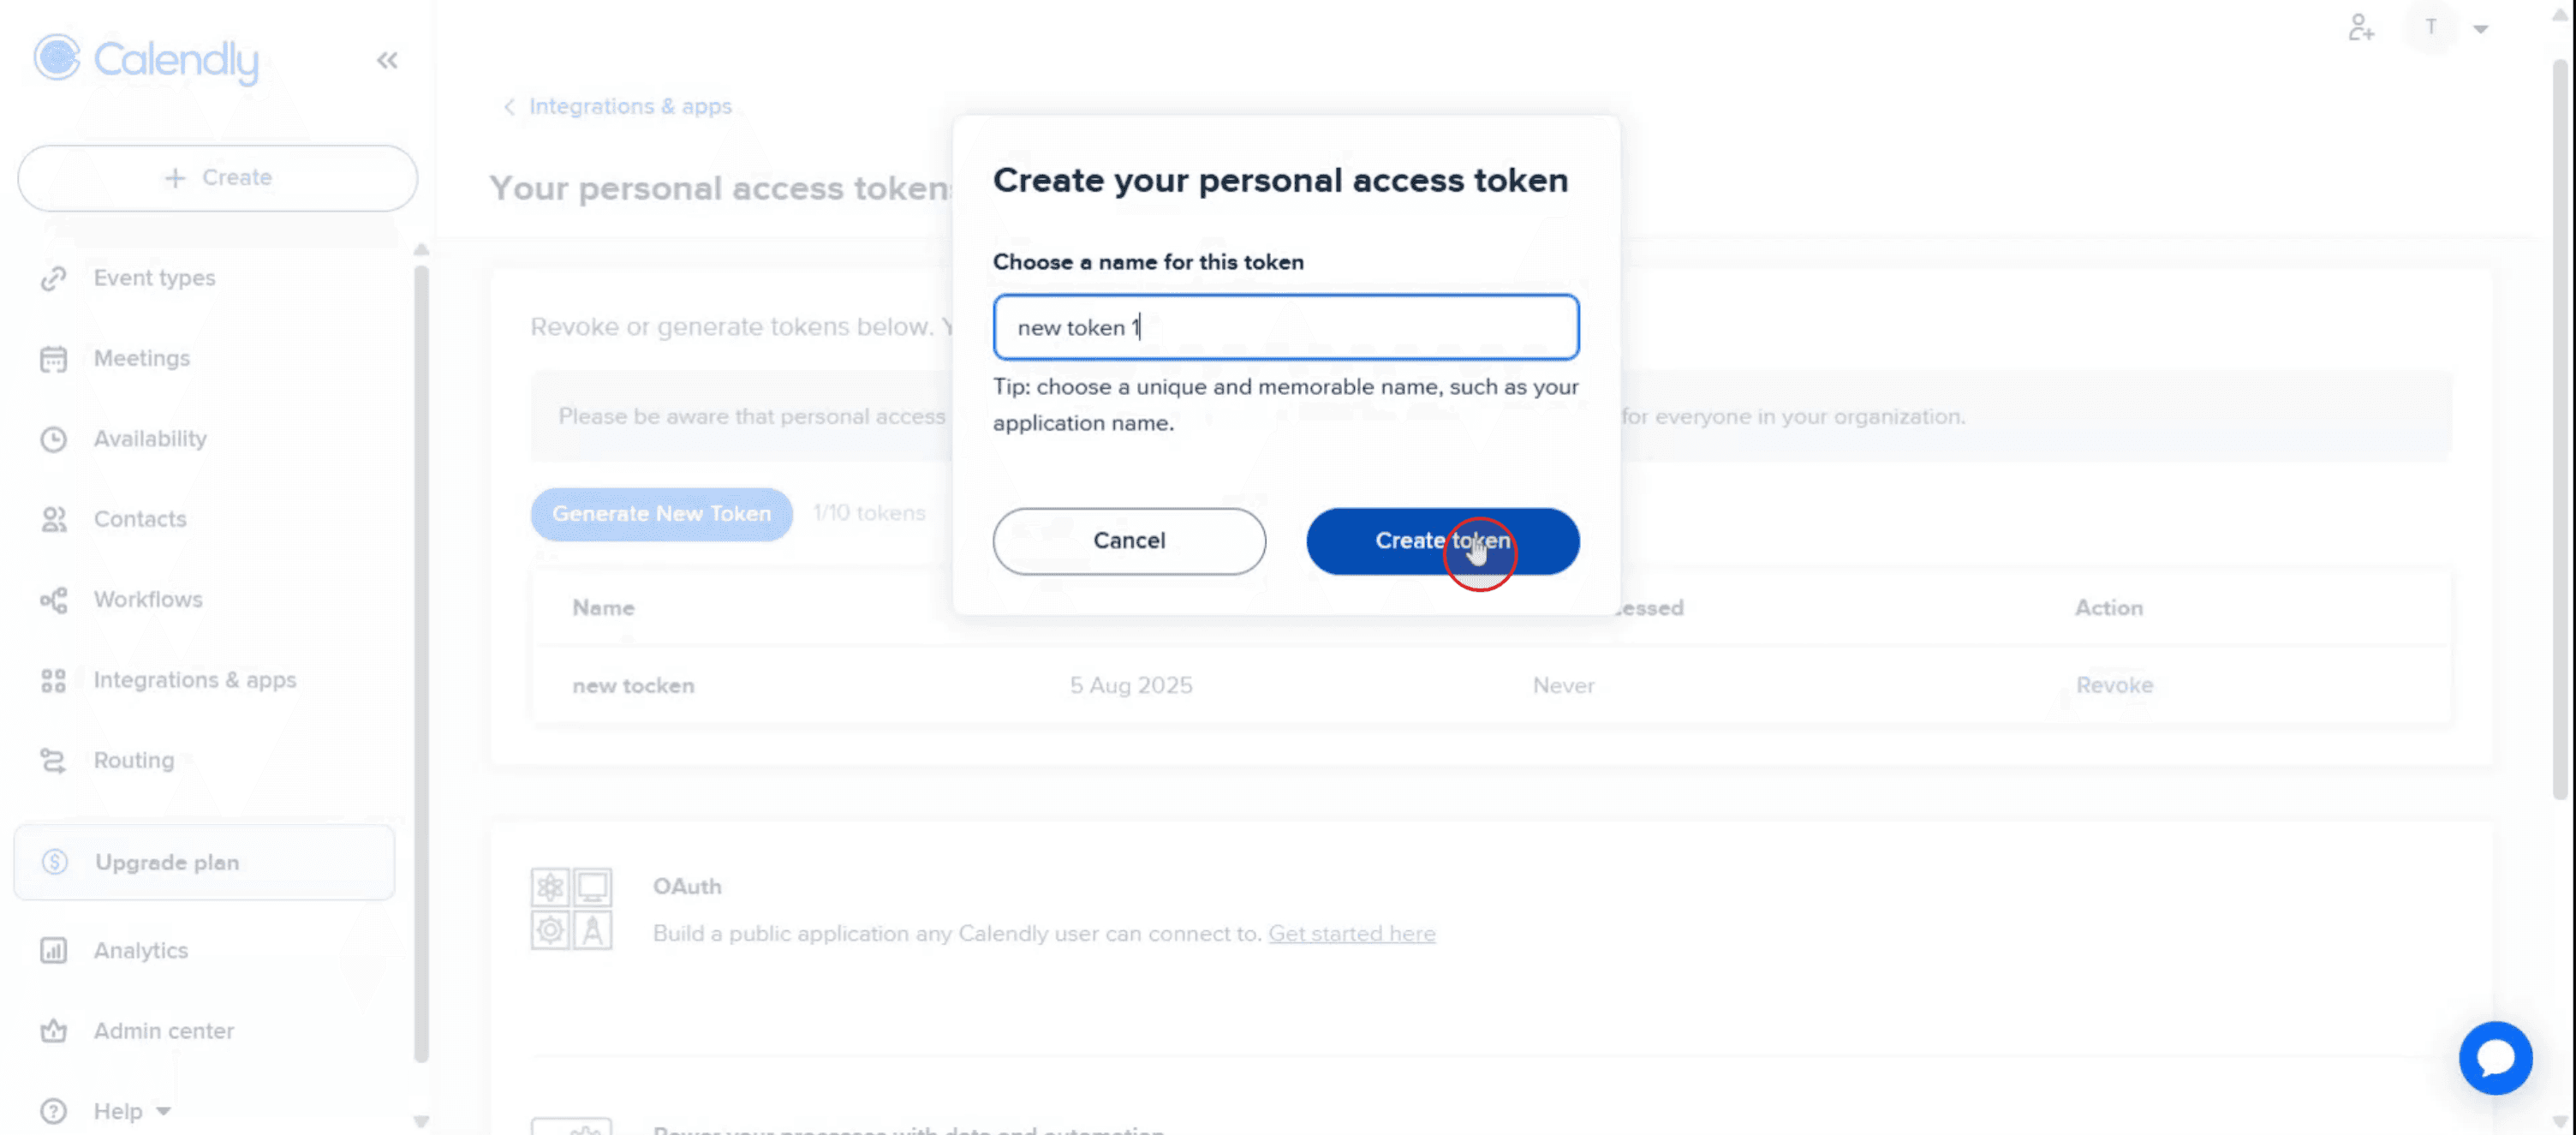
انقر على "إنشاء الرمز.
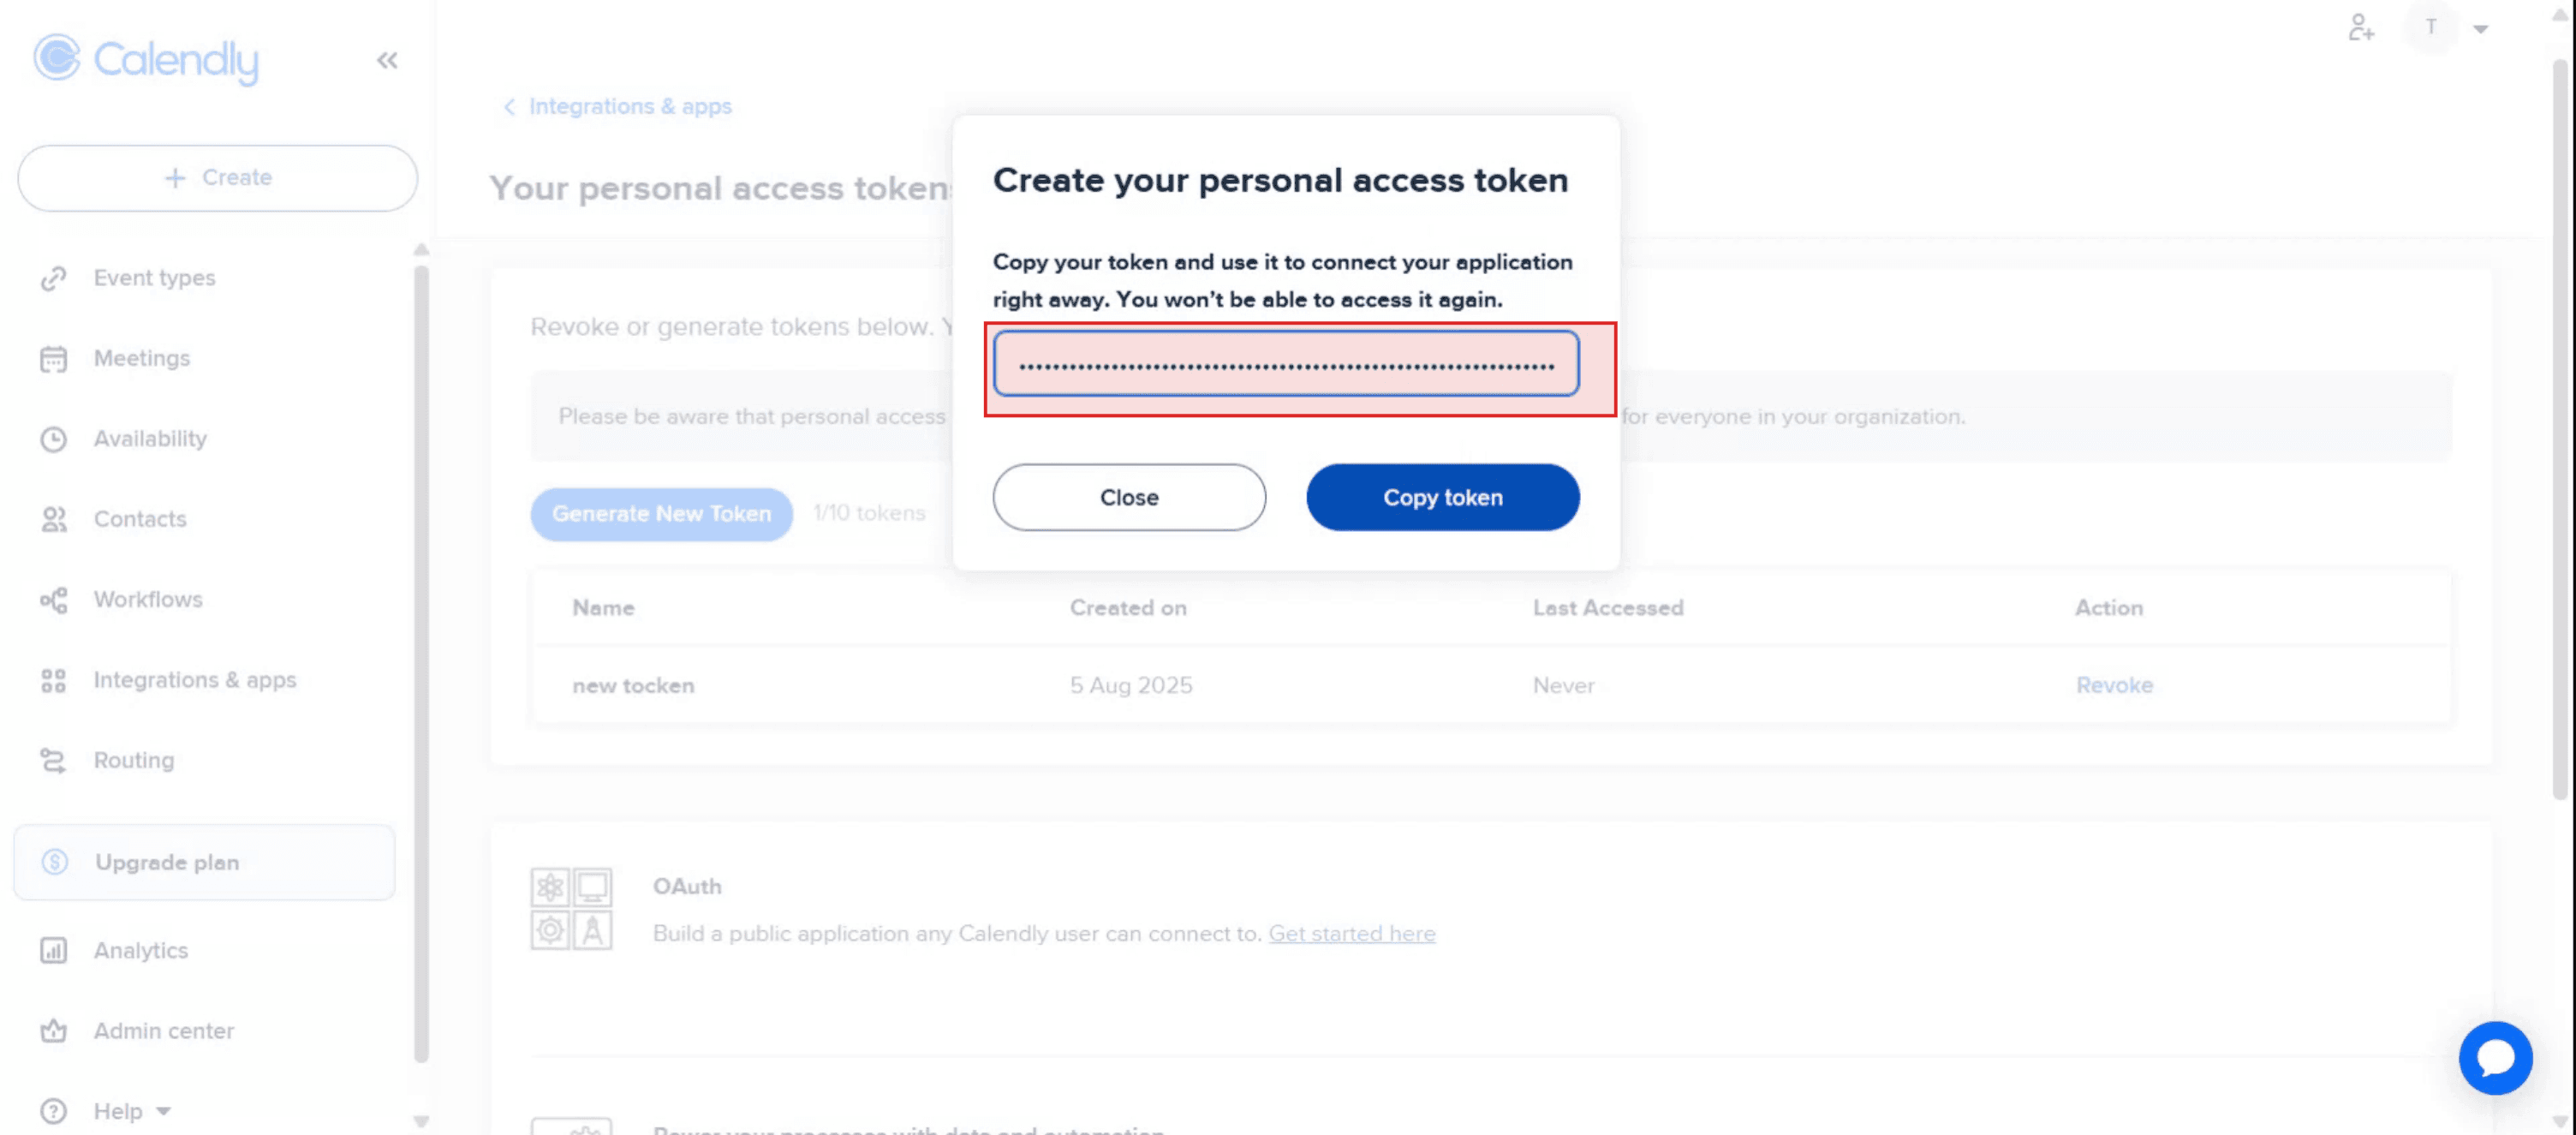
انقر على "نسخ الرمز" لحفظه لتطبيقك أو عملية التكامل الخاصة بك.
دليل خطوة بخطوة: كيفية الحصول على مفتاح Calendly API
الخطوة 1
حدد القائمة الجانبية اليسرى واختر "عمليات التكامل والتطبيقات."
الخطوة 2
استخدم شريط البحث للعثور على "مفتاح API وخطافات الويب."
الخطوة 3
عندما ترى خيار "مفتاح API وخطافات الويب"، انقر عليه للمتابعة.
الخطوة 4
انقر على خيار "إنشاء رمز جديد".
الخطوة 5
أدخل اسم الرمز الذي تريده في الحقل المخصص.
الخطوة 6
انقر على زر "إنشاء الرمز".
الخطوة 7
انسخ مفتاح API كما هو معروض. وبذلك تكتمل عملية إنشاء مفتاح API الشخصي الخاص بك عبر Calendly.
نصائح احترافية للحصول على مفتاح API الخاص بـ Calendly
سجّل الدخول إلى حسابك في Calendly
انتقل إلى الموقع الرسمي لـ Calendly وسجّل الدخول باستخدام بريدك الإلكتروني وكلمة المرور. سينقلك هذا إلى لوحة التحكم الرئيسية حيث يمكنك إدارة الأحداث وإعدادات الحساب.الوصول إلى صفحة عمليات التكامل
بعد تسجيل الدخول، حدّد موقع أيقونة ملفك الشخصي في الزاوية العلوية اليمنى وانقر عليها. من القائمة المنسدلة، اختر “عمليات التكامل”. هنا يعرض Calendly جميع عمليات التكامل المتاحة وخيارات المطوّرين.الانتقال إلى قسم API وخطافات الويب
مرّر عبر صفحة عمليات التكامل حتى تجد القسم المسمّى “API وخطافات الويب”. انقر عليه لعرض أدوات المطوّرين، بما في ذلك خيار إنشاء رمز وصول شخصي.إنشاء مفتاح API الخاص بك (رمز وصول شخصي)
انقر على الزر لإنشاء رمز وصول شخصي جديد. قد يُطلب منك تسمية الرمز (للتعريف) وتأكيد كلمة المرور. بعد الإرسال، سيظهر الرمز مرة واحدة فقط — انسخه واحتفظ به في مكان آمن.استخدام مفتاح API الخاص بك في التطبيقات
الصق مفتاح API الذي نسخته في ترويسات طلبات HTTP أو في تطبيقات الجهات الخارجية التي تتكامل مع Calendly. احرص على إبقاء المفتاح سريًا، لأنه يمنح الوصول إلى بيانات Calendly الخاصة بك.
الأخطاء الشائعة وكيفية تجنبها
عدم نسخ المفتاح فورًا
يعرض Calendly مفتاح API مرة واحدة فقط عند إنشائه. إذا نسيت نسخه، فستحتاج إلى إلغاء المفتاح الحالي وإنشاء رمز جديد.استخدام رمز منتهي الصلاحية أو ملغي
إذا ألغيت الرمز الخاص بك أو انتهت صلاحيته، فستتوقف عمليات التكامل لديك عن العمل. استبدل دائمًا الرموز الملغاة برموز جديدة في جميع الأنظمة المرتبطة.مشاركة مفتاح API علنًا
لا تشارك مفتاح API الخاص بك أبدًا في مستودعات الأكواد العامة أو المنتديات أو مع أطراف غير موثوقة. يمكن استخدامه للوصول إلى حساب Calendly الخاص بك.استخدام الترويسات الخاطئة
عند إجراء استدعاءات API، تأكد من استخدام الترويسات الصحيحة. بالنسبة إلى Calendly، تتضمن عادةً ترويسة Authorization بالتنسيق التالي:
Authorization: Bearer your_api_keyعدم قراءة وثائق API
قبل استخدام API، اقرأ وثائق API الخاصة بـ Calendly. فهي تساعدك على فهم حدود المعدل ونقاط النهاية وتنسيقات الاستجابة، وهو أمر أساسي لنجاح عملية التكامل.
الأسئلة الشائعة حول الحصول على مفتاح Calendly API
هل مفتاح Calendly API هو نفسه كلمة مرور تسجيل الدخول؟
لا، إنه رمز مميز منفصل مخصص للتكاملات ويجب استخدامه فقط في طلبات API.إلى متى يظل مفتاح API صالحًا؟
يظل صالحًا حتى تلغيه يدويًا. ولأسباب أمنية، من الأفضل تدوير الرموز المميزة دوريًا.هل يمكنني الحصول على عدة مفاتيح API؟
يدعم Calendly حاليًا إنشاء رمز مميز واحد في كل مرة لكل مستخدم. لإنشاء رمز جديد، يجب إلغاء الرمز الحالي.أين يجب أن أخزن مفتاح API الخاص بي؟
خزّنه في متغير بيئة آمن أو في مدير أسرار—ولا تقم أبدًا بتضمينه بشكل ثابت في البرامج النصية أو في كود الواجهة الأمامية.ماذا يمكنني أن أفعل بمفتاح Calendly API؟
يمكنك استخدامه للوصول إلى نقاط النهاية الخاصة بالأحداث والمستخدمين والمؤسسات وwebhooks والتوافر. كما يتيح سير عمل مخصصًا ومزامنة البيانات والتكاملات.كيف تسجل الشاشة على Mac؟
يمكنك تسجيل الشاشة على جهاز Mac باستخدام Trupeer AI. يتيح لك التقاط الشاشة بالكامل ويوفر قدرات ذكاء اصطناعي مثل إضافة صور رمزية بالذكاء الاصطناعي، وإضافة تعليق صوتي، والتكبير والتصغير في الفيديو. ومع ميزة ترجمة الفيديو بالذكاء الاصطناعي من trupeer، يمكنك ترجمة الفيديو إلى أكثر من 30 لغة.كيف تضيف صورة رمزية بالذكاء الاصطناعي إلى تسجيل الشاشة؟
لإضافة صورة رمزية بالذكاء الاصطناعي إلى تسجيل الشاشة، ستحتاج إلى استخدام أداة لتسجيل الشاشة بالذكاء الاصطناعي. Trupeer AI هي أداة لتسجيل الشاشة بالذكاء الاصطناعي، وتساعدك على إنشاء مقاطع فيديو بعدة صور رمزية، كما تساعدك في إنشاء صورتك الرمزية الخاصة للفيديو.كيف تسجل الشاشة على Windows؟
لتسجيل الشاشة على Windows، يمكنك استخدام Game Bar المدمجة (Windows + G) أو أداة ذكاء اصطناعي متقدمة مثل Trupeer AI للحصول على ميزات أكثر تقدمًا مثل الصور الرمزية بالذكاء الاصطناعي، والتعليق الصوتي، والترجمة، إلخ.كيف تضيف تعليقًا صوتيًا إلى الفيديو؟
لإضافة تعليق صوتي إلى مقاطع الفيديو، نزّل إضافة Chrome من trupeer ai. بعد التسجيل، ارفع الفيديو الخاص بك مع الصوت، واختر التعليق الصوتي المطلوب من trupeer، ثم صدّر الفيديو المعدّل.كيف أقوم بالتكبير في تسجيل الشاشة؟
للتكبير أثناء تسجيل الشاشة، استخدم تأثيرات التكبير في Trupeer AI، والتي تتيح لك التكبير والتصغير في لحظات محددة، مما يعزز التأثير البصري لمحتوى الفيديو الخاص بك.
قراءات مقترحة
دروس ذات صلة

