

كيفية حذف تذكرة في Jira
تعرّف على كيفية حذف تذكرة Jira باستخدام قائمة الإجراءات وتأكيد الإزالة النهائية. اتبع هذا الشرح خطوة بخطوة وأنشئ أدلة سير العمل باستخدام Trupeer.
يوفر هذا المستند شرحًا موجزًا لكيفية حذف تذكرة Jira. تتضمن العملية الوصول إلى المشروع، والعثور على التذكرة، وتنفيذ أمر الحذف عبر سلسلة من الخطوات الإرشادية.
لحذف تذكرة Jira، انتقل إلى المشكلة وحدد "حذف" من قائمة الإجراءات، ثم أكد عملية الحذف. لاحظ أن هذا إجراء دائم ولا يمكن التراجع عنه.
خطوات حذف تذكرة Jira:
افتح التذكرة: انتقل إلى مشكلة Jira المحددة التي تريد حذفها. الوصول إلى قائمة الإجراءات: ابحث عن قائمة (غالبًا ما تكون ممثلة بثلاث نقاط أو زر "المزيد"). اختر "حذف": اختر خيار "حذف" من القائمة. تأكيد الحذف: من المحتمل أن يُطلب منك تأكيد الإجراء، لأن حذف تذكرة Jira دائم. إنهاء الحذف: انقر على "حذف" مرة أخرى لإنهاء العملية.
اعتبارات مهمة:
الديمومة: حذف التذكرة لا رجعة فيه. فكّر في أرشفتها بدلًا من ذلك إذا كنت قد تحتاج إلى المعلومات لاحقًا. الأذونات: تأكد من أن لديك الأذونات اللازمة لحذف القضايا في المشروع. البيانات التاريخية: يؤدي حذف القضايا إلى إزالتها من النظام، مما قد يؤثر في البيانات التاريخية وإعداد التقارير.
دليل خطوة بخطوة: كيفية حذف تذكرة Jira
الخطوة 1
انقر على قسم المشاريع.
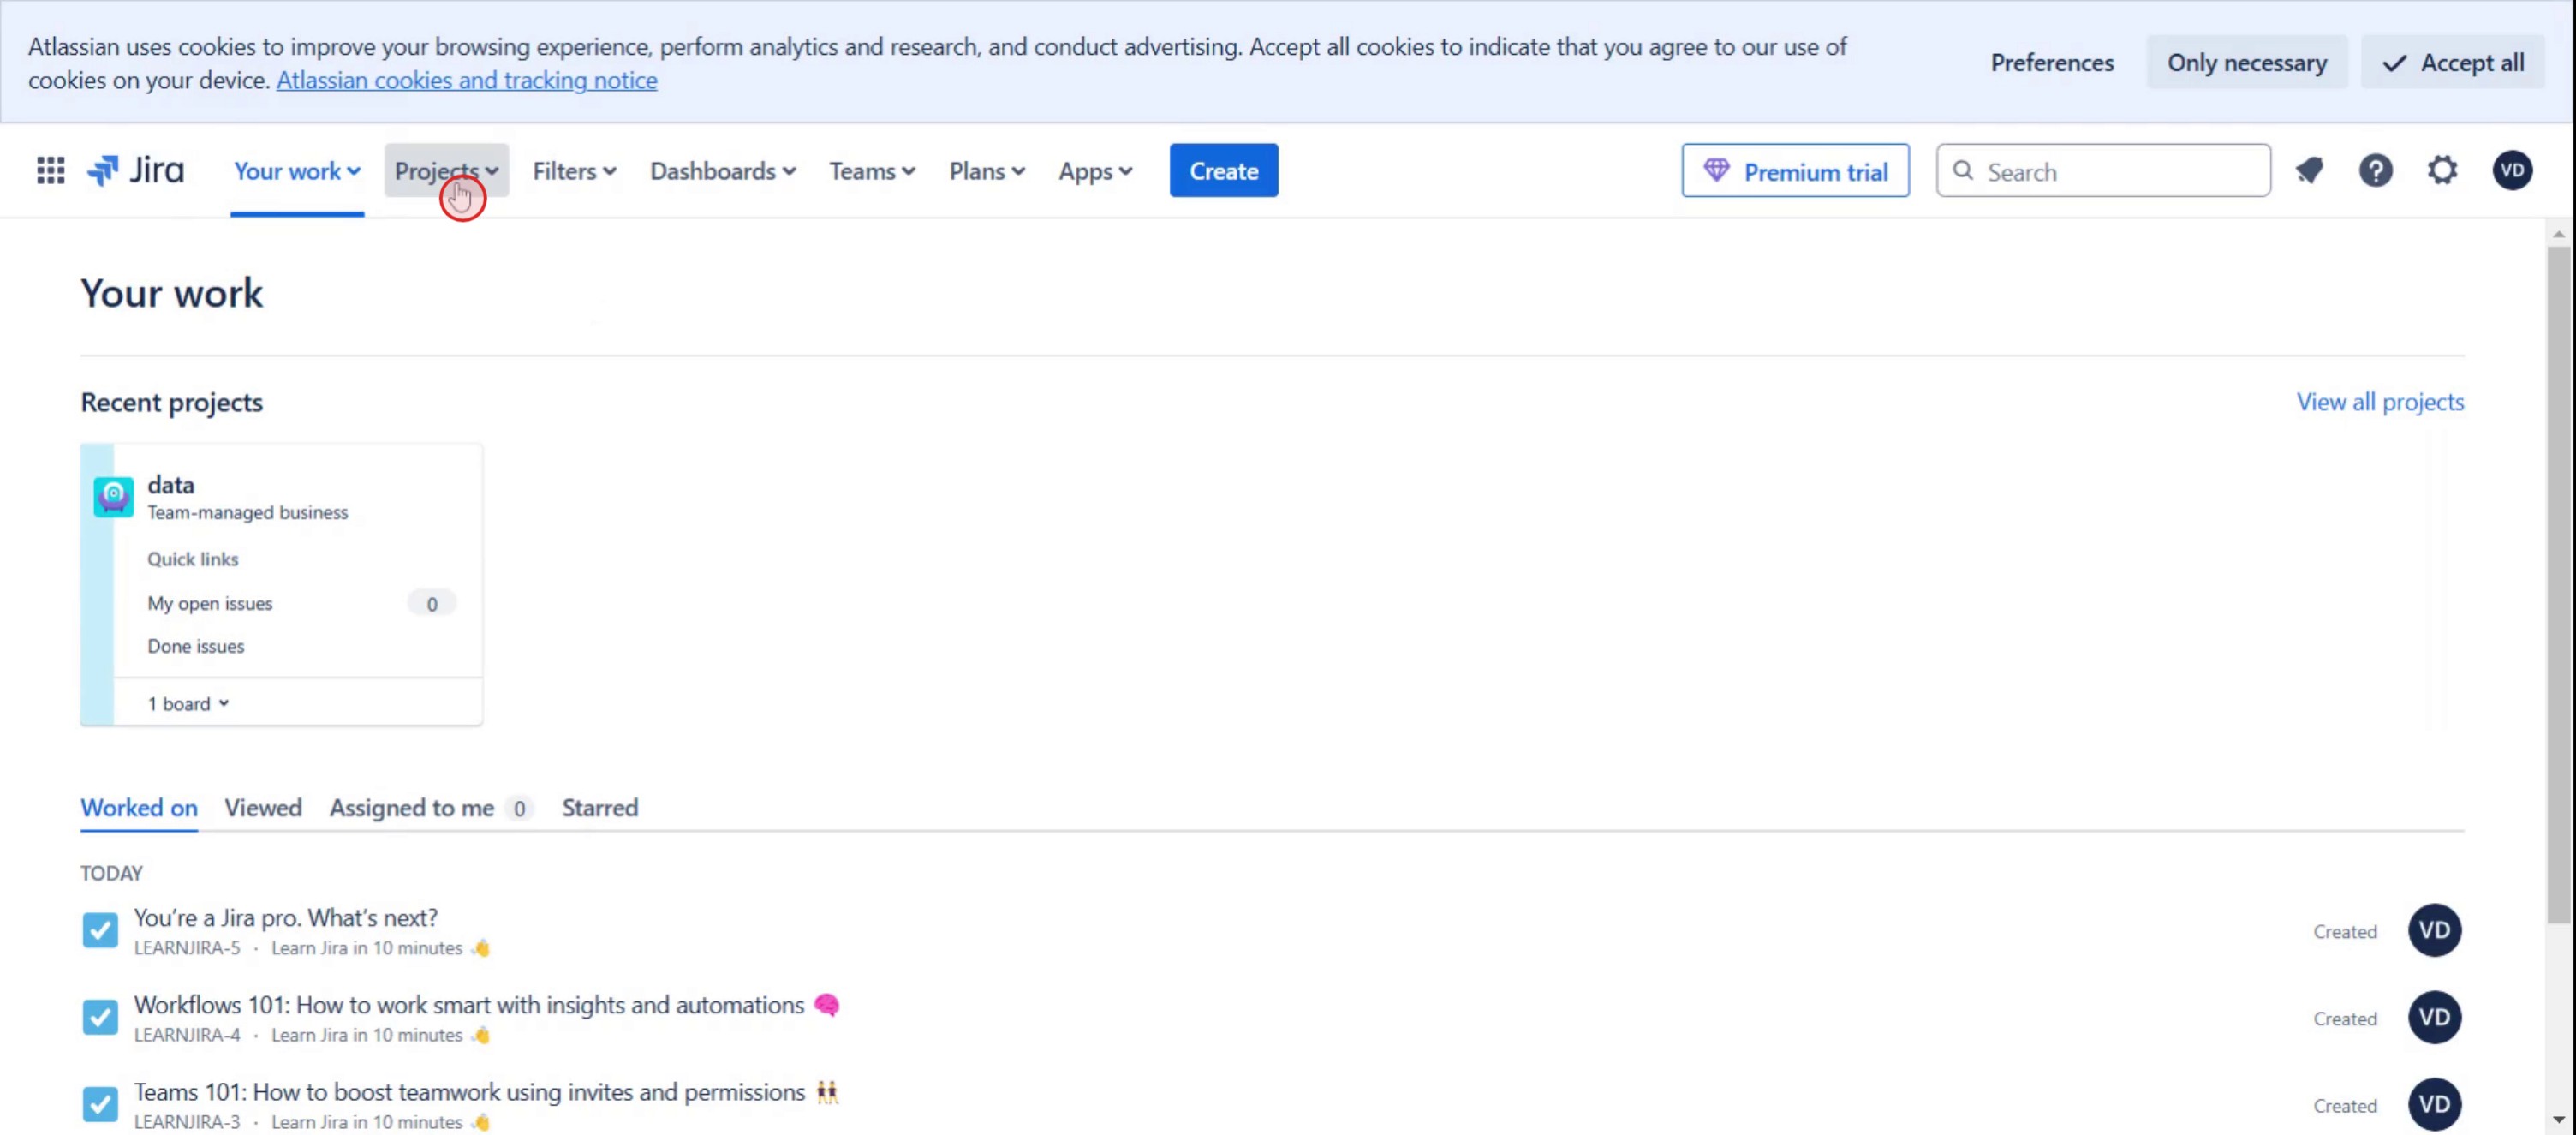
الخطوة 2
حدد المشروع الأخير الذي تريد العمل عليه.

الخطوة 3
حدد خيار اللوحة.

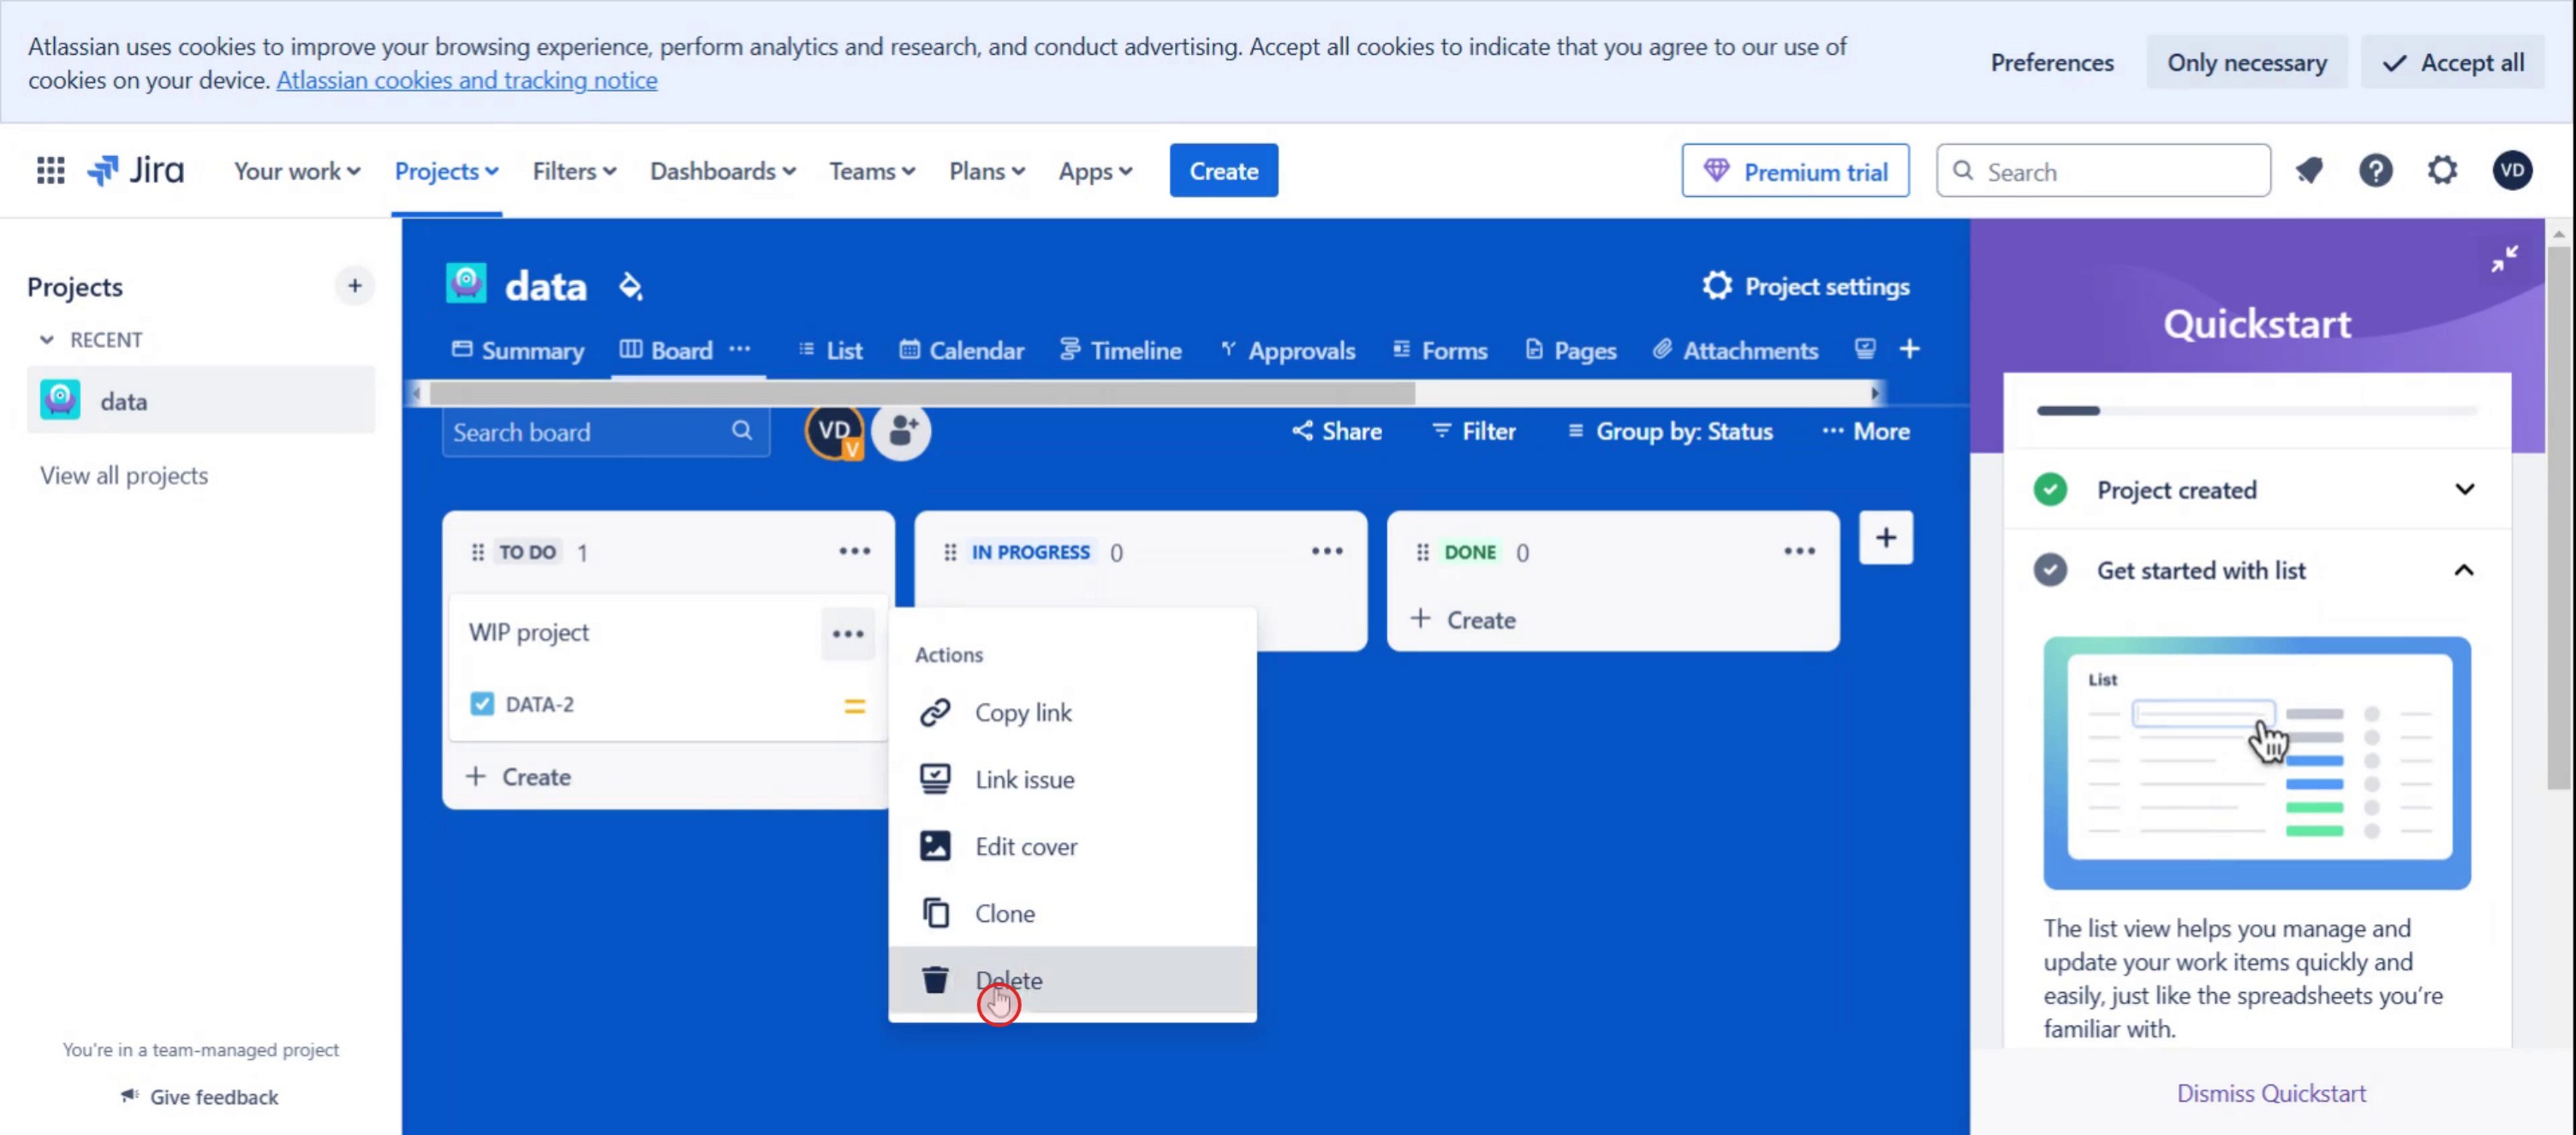
الخطوة 4
انقر على النقاط الثلاث.

الخطوة 5
ثم حدد خيار الحذف.
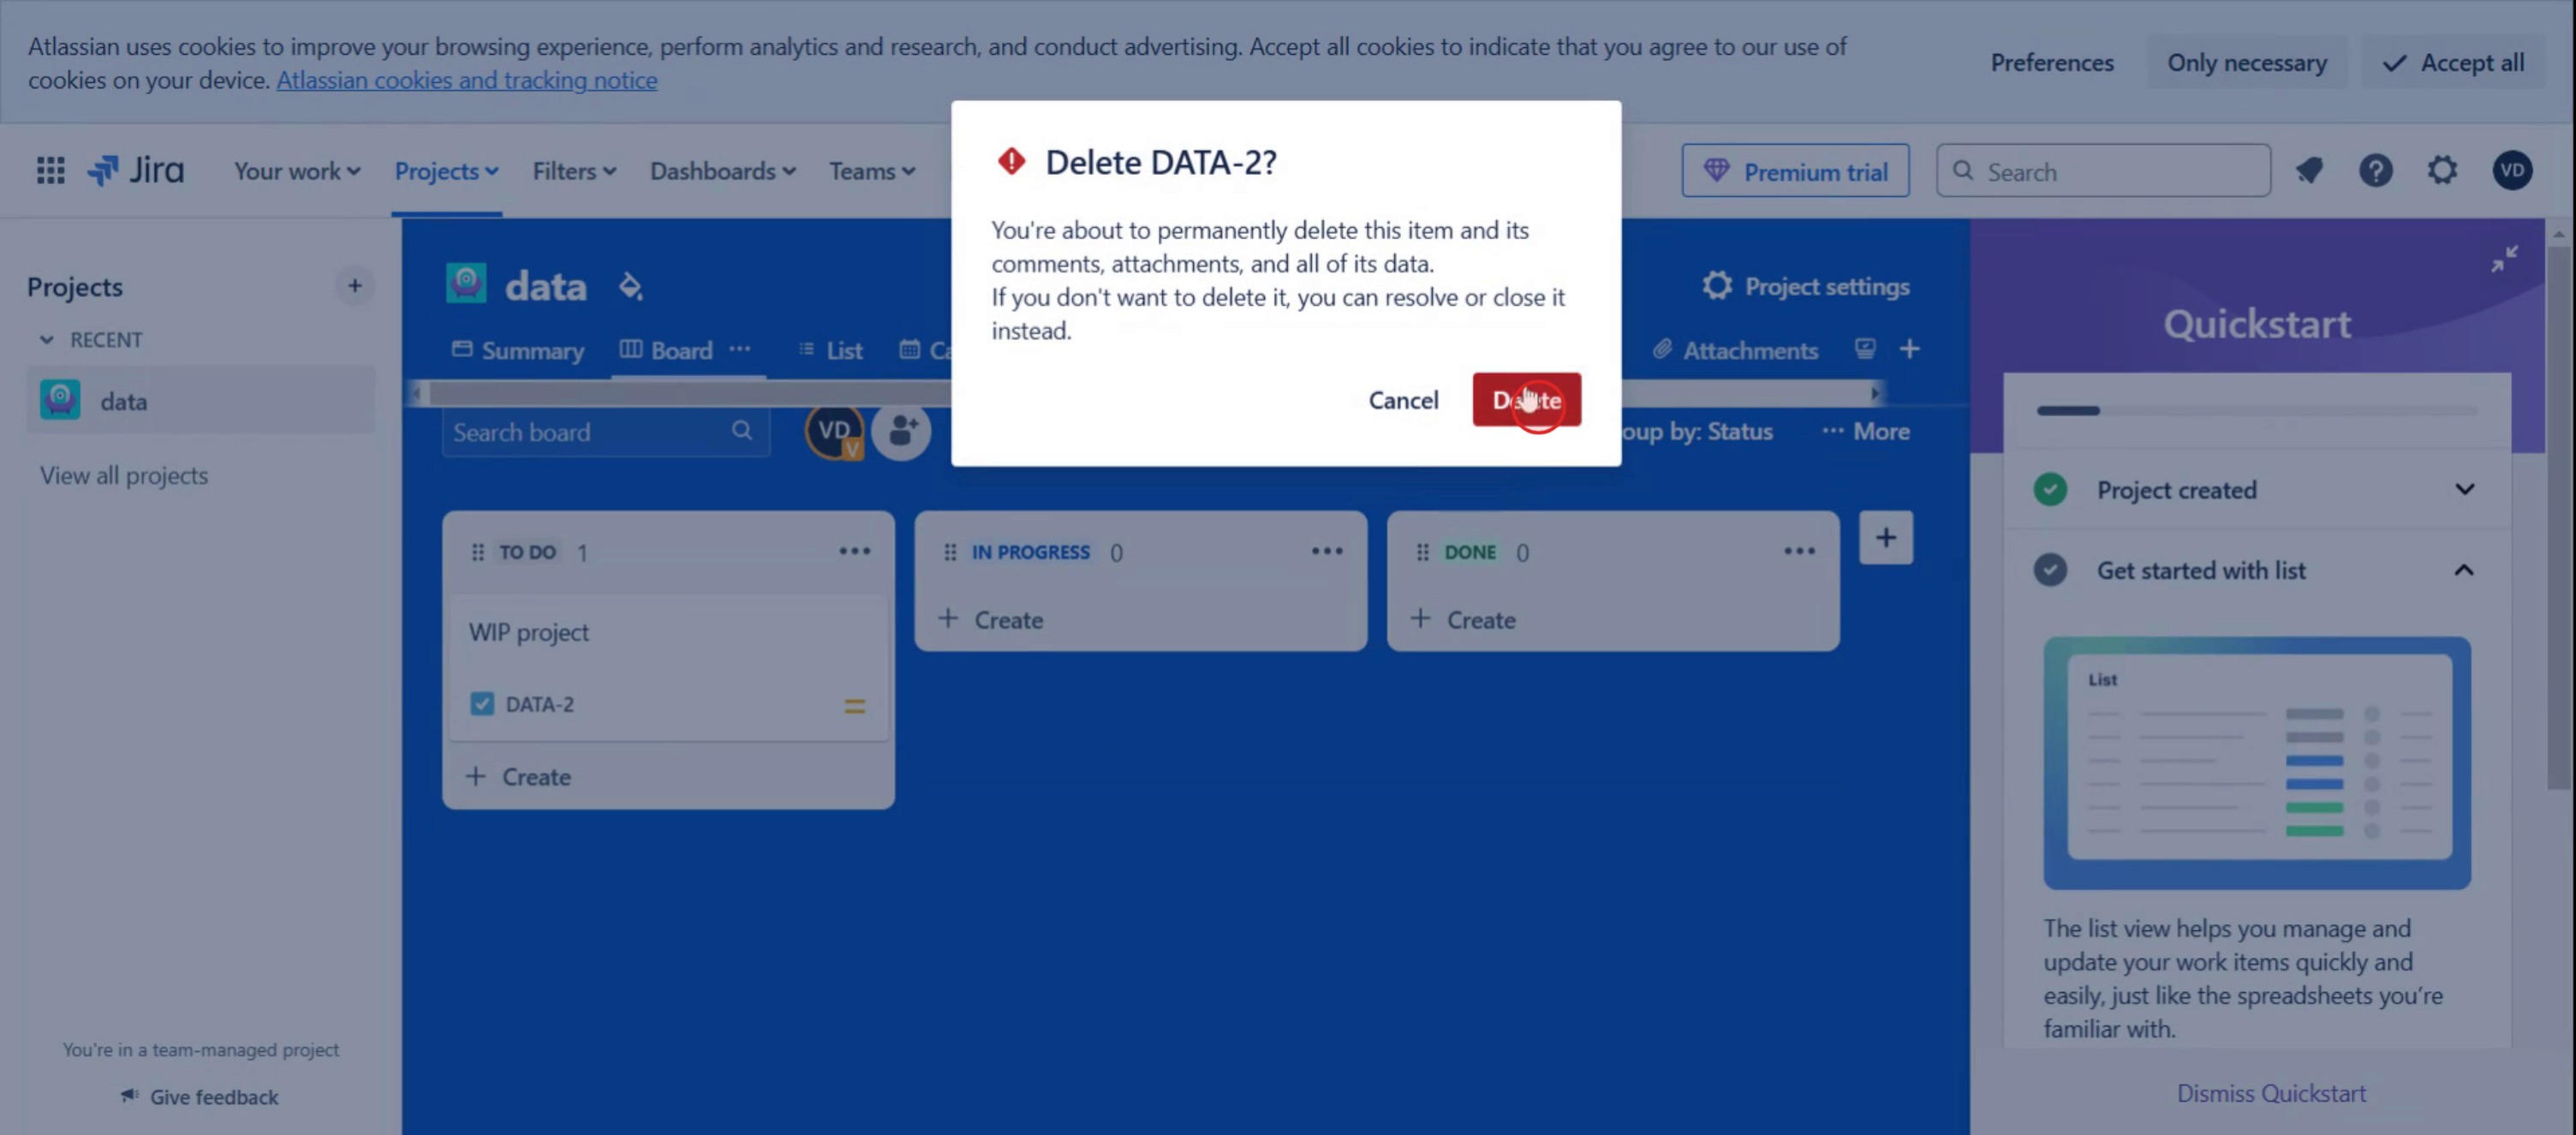
الخطوة 6
ثم انقر على حذف،
نصائح احترافية لحذف تذكرة Jira
تحقق من الأذونات لديك – يمكن فقط للمستخدمين الذين لديهم إذن Delete Issues في Jira حذف التذكرة. إذا لم ترَ خيار الحذف، فاطلب الوصول من مسؤول Jira لديك.
فكر في الأرشفة بدلًا من ذلك – إذا كنت لا تريد فقدان التذكرة نهائيًا، ففكر في حلها أو أرشفتها بدلًا من حذفها.
كن حذرًا عند الحذف – بمجرد حذف تذكرة Jira، لا يمكن استعادتها. تأكد من أن لديك نسخة احتياطية أو لقطة شاشة قبل الحذف.
المطبات الشائعة وكيفية تجنبها
عدم وجود أذونات الحذف – إذا لم تتمكن من حذف التذكرة، فتحقق من مسؤول Jira لمنحك الأذونات اللازمة.
الحذف غير المقصود – لا يمكن استعادة التذاكر المحذوفة. تأكد دائمًا قبل المتابعة.
الحذف دون إشعار أعضاء الفريق – أخبر فريقك قبل حذف التذكرة، خاصةً إذا كانت مرتبطة بمشكلات أخرى.
محاولة حذف تذكرة سبرنت – قد تتطلب التذاكر المرتبطة بسباقات نشطة إعادة إسنادها أو إغلاقها قبل الحذف.
الأسئلة الشائعة حول حذف تذكرة Jira
هل يمكنني استعادة تذكرة Jira محذوفة؟
لا، لا يوفّر Jira وظيفة استعادة مدمجة للتذاكر المحذوفة. بمجرد حذفها، تتم إزالة التذكرة نهائيًا.لماذا لا أرى خيار الحذف؟
قد لا تكون لديك صلاحية حذف المشكلات. تواصل مع مسؤول Jira لطلب الوصول.هل يمكنني حذف عدة تذاكر Jira دفعةً واحدة؟
نعم، يمكنك استخدام ميزة الحذف الجماعي في Jira. انتقل إلى مستعرض المشكلات، وحدد عدة تذاكر، واختر خيار الحذف. تأكد من المراجعة جيدًا قبل التأكيد.كيف يمكن تسجيل الشاشة على جهاز Mac؟
لتسجيل الشاشة على جهاز Mac، يمكنك استخدام Trupeer AI. يتيح لك التقاط الشاشة بالكامل ويوفر إمكانات ذكاء اصطناعي مثل إضافة صور رمزية بالذكاء الاصطناعي، وإضافة تعليق صوتي، وإضافة تأثير التكبير والتصغير في الفيديو. مع ميزة ترجمة الفيديو بالذكاء الاصطناعي من Trupeer، يمكنك ترجمة الفيديو إلى أكثر من 30 لغة.كيف تضيف صورة رمزية بالذكاء الاصطناعي إلى تسجيل شاشة؟
لإضافة صورة رمزية بالذكاء الاصطناعي إلى تسجيل شاشة، ستحتاج إلى استخدام أداة لتسجيل الشاشة بالذكاء الاصطناعي. Trupeer AI هي أداة لتسجيل الشاشة بالذكاء الاصطناعي، وتساعدك على إنشاء مقاطع فيديو بعدة صور رمزية، كما تساعدك أيضًا في إنشاء صورتك الرمزية الخاصة للفيديو.كيف يمكن تسجيل الشاشة على Windows؟
لتسجيل الشاشة على Windows، يمكنك استخدام شريط الألعاب المدمج (Windows + G) أو أداة ذكاء اصطناعي متقدمة مثل Trupeer AI للحصول على ميزات أكثر تقدّمًا مثل الصور الرمزية بالذكاء الاصطناعي، والتعليق الصوتي، والترجمة، إلخ.كيف تضيف تعليقًا صوتيًا إلى الفيديو؟
لإضافة تعليق صوتي إلى مقاطع الفيديو، نزّل إضافة Trupeer AI لمتصفح Chrome. بعد التسجيل، ارفع الفيديو الخاص بك مع الصوت، واختر التعليق الصوتي المطلوب من Trupeer، ثم صدّر الفيديو المعدّل.كيف أقوم بالتكبير في تسجيل الشاشة؟
للتكبير أثناء تسجيل الشاشة، استخدم تأثيرات التكبير في Trupeer AI التي تتيح لك التكبير والتصغير في لحظات محددة، مما يعزز التأثير البصري لمحتوى الفيديو الخاص بك.
قراءات مقترحة
كيفية تصدير قائمة Jira المتراكمة إلى Excel
دروس ذات صلة

