
كيفية حذف عرض تقديمي في Canva – شرح خطوة بخطوة
هل تحتاج إلى إزالة عرض تقديمي من Canva؟ تعرّف على كيفية حذف عرض Canva التقديمي نهائيًا من تصاميمك في بضع نقرات فقط.
يوفر هذا الدليل تعليمات خطوة بخطوة حول كيفية حذف عرض تقديمي في Canva. اتبع هذه التعليمات التفصيلية للتأكد من إزالة العرض التقديمي بشكل صحيح من حسابك.
يرجى ملاحظة أن العملية تتضمن أولًا نقل العرض التقديمي إلى سلة المهملات، مع خيار حذفه نهائيًا من هناك.
إذا كنت ترغب في إزالة عرض تقديمي من مساحة عمل Canva الخاصة بك، فيمكنك فعل ذلك بسهولة بنقله إلى سلة المهملات. إليك كيفية القيام بذلك:
تعليمات خطوة بخطوة:
انتقل إلى الصفحة الرئيسية في Canva
انتقل إلى canva.com وسجّل الدخول إلى حسابك.حدد موقع العرض التقديمي
اعثر على الصورة المصغرة للتصميم الخاص بالعرض التقديمي الذي تريد حذفه ضمن “التصاميم الأخيرة” أو “المشاريع”.انقر على النقاط الثلاث (رمز المزيد)
مرّر مؤشر الفأرة فوق الصورة المصغرة وانقر على النقاط الثلاث في الزاوية العلوية اليمنى.اختر “نقل إلى سلة المهملات”
من القائمة المنسدلة، اختر “نقل إلى سلة المهملات” لإزالة التصميم من مساحة العمل الخاصة بك.
نصائح إضافية:
أثناء التحرير: يمكنك أيضًا نقل عرض تقديمي إلى سلة المهملات من نافذة المحرر بالنقر على ملف > نقل إلى سلة المهملات.
التصاميم المشتركة: إذا كان التصميم قد تمت مشاركته معك، فيمكنك إزالته من عرضك، لكن المالك الأصلي فقط يمكنه حذفه نهائيًا.
الاستعادة من سلة المهملات: تبقى التصاميم المحذوفة في قسم سلة المهملات لمدة 30 يومًا (ما لم تُحذف نهائيًا). يمكنك استعادتها إذا لزم الأمر.
دليل خطوة بخطوة: كيفية حذف عرض تقديمي في Canva
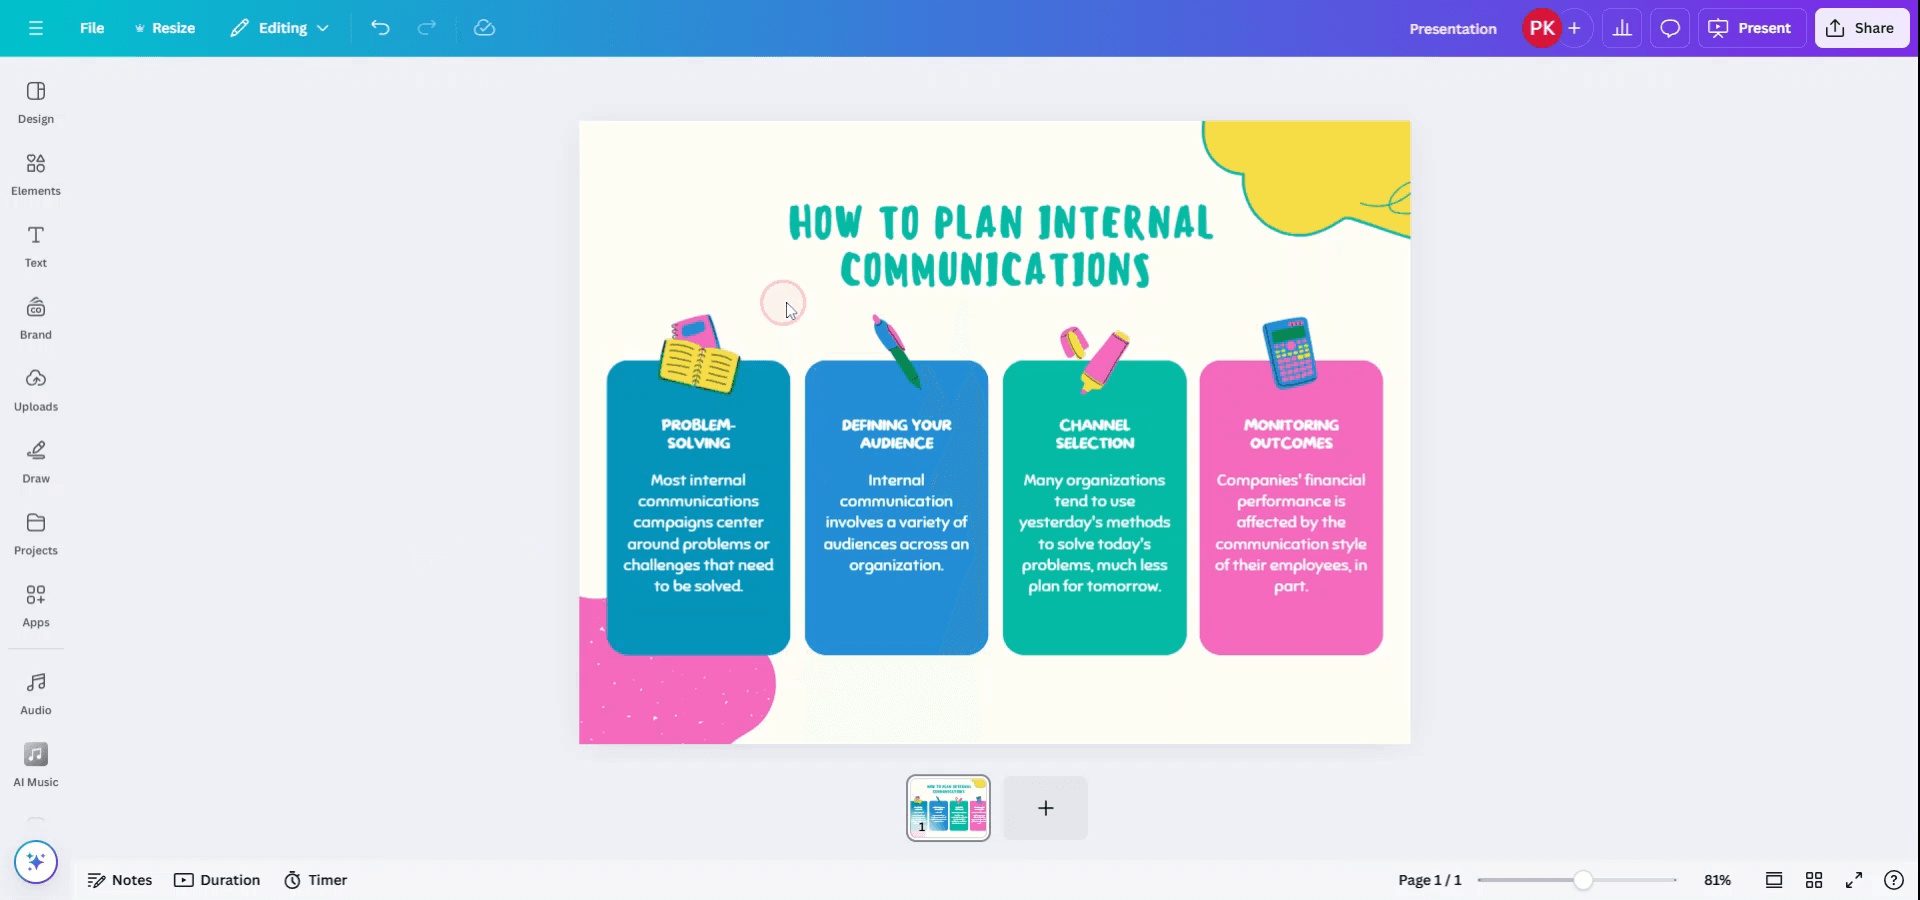
الخطوة 1
ادخل إلى حساب Canva الخاص بك وافتح العرض التقديمي الذي تريد حذفه.
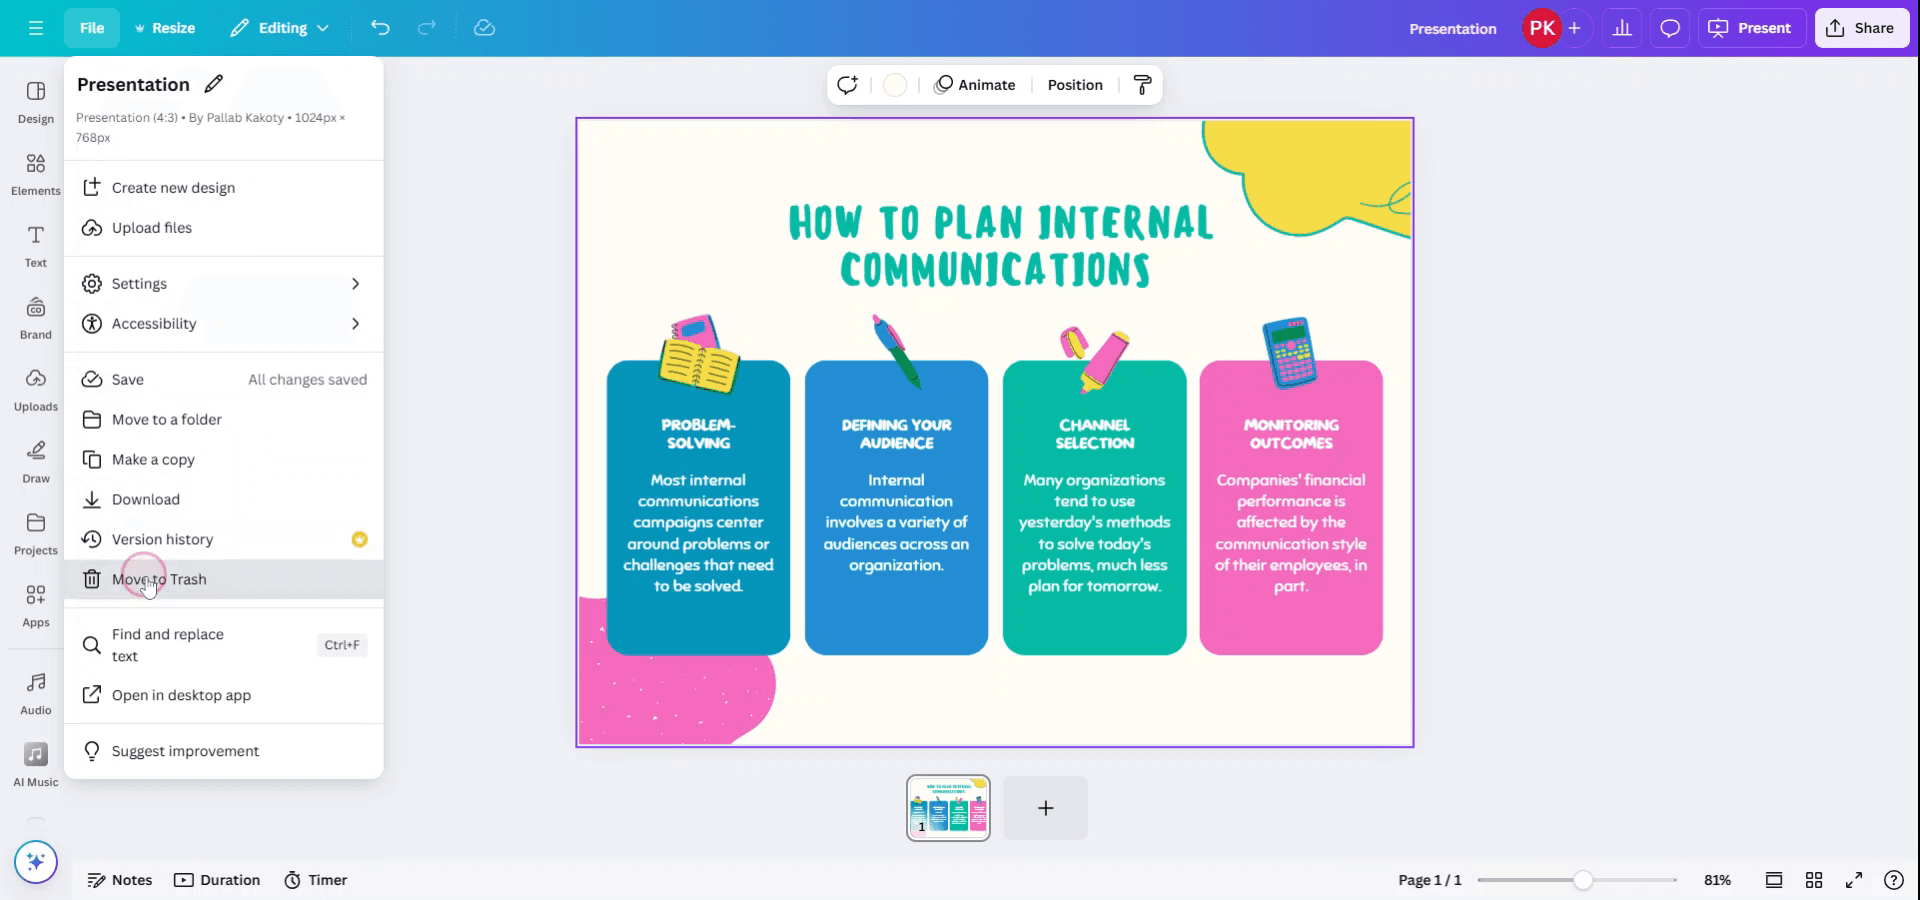
الخطوة 2
في العرض التقديمي المفتوح، انتقل إلى القائمة العلوية واختر "ملف".

الخطوة 3
من القائمة المنسدلة "ملف"، اختر خيار "نقل إلى سلة المهملات".
الخطوة 4
ستظهر نافذة منبثقة تطلب تأكيد نقل العرض التقديمي إلى سلة المهملات.

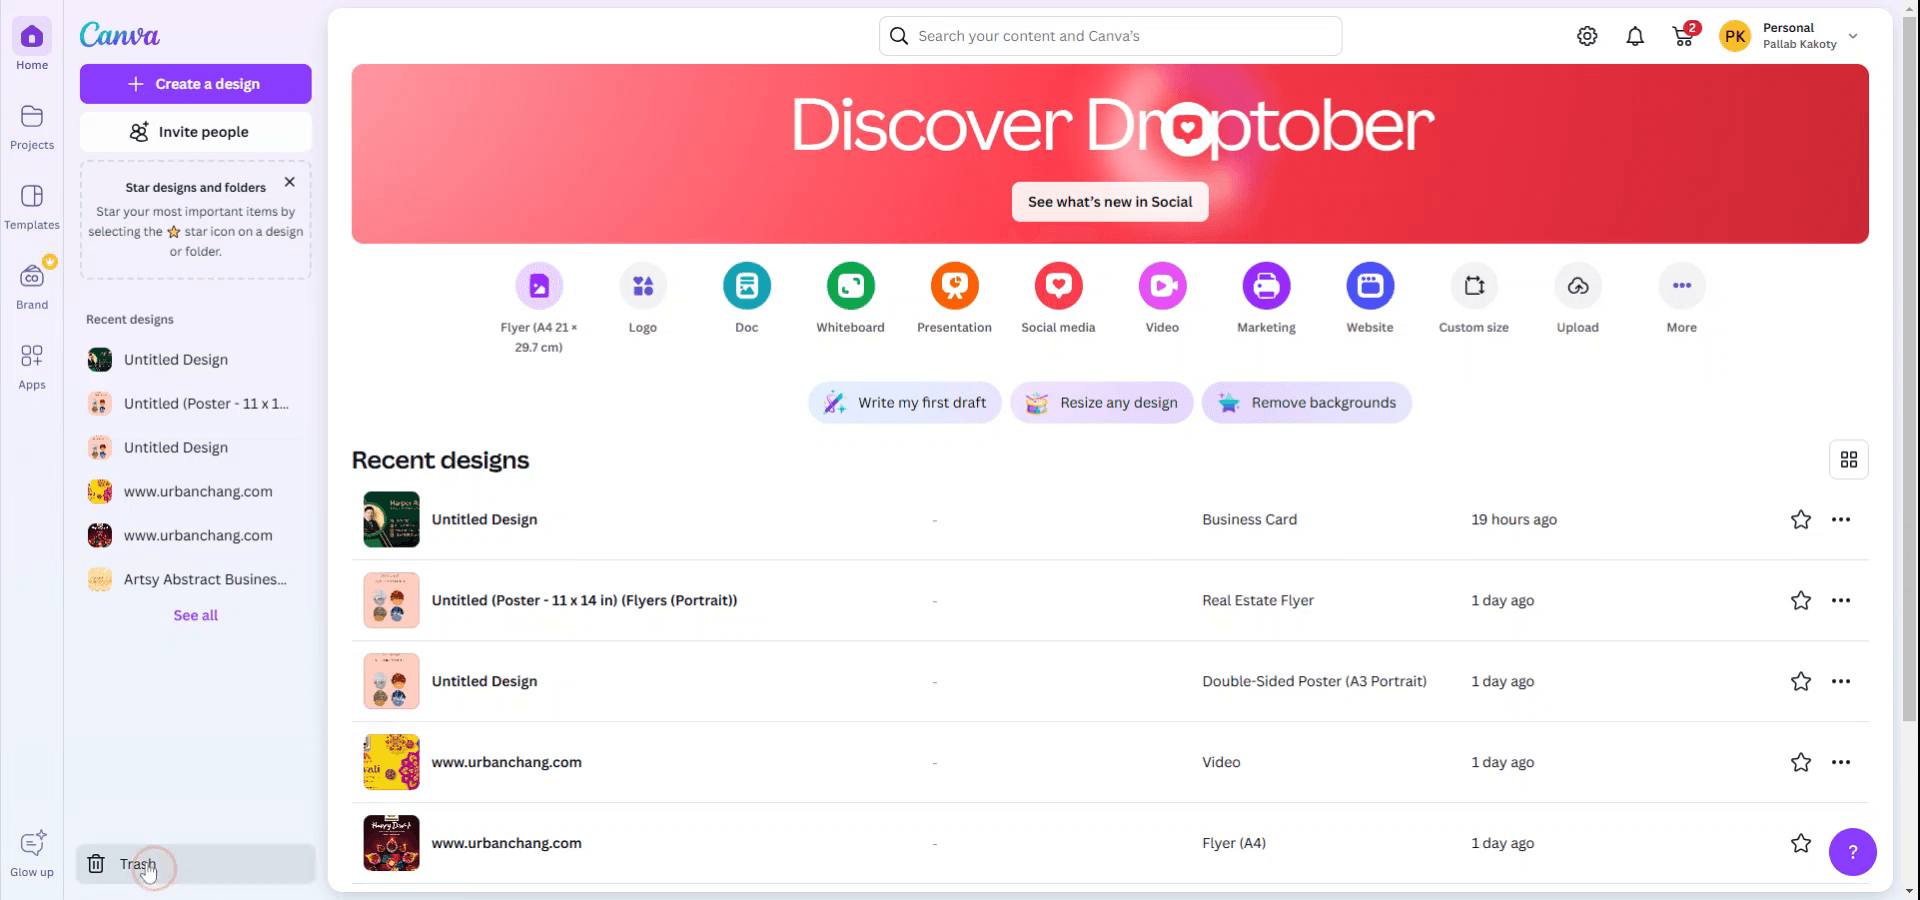
الخطوة 5
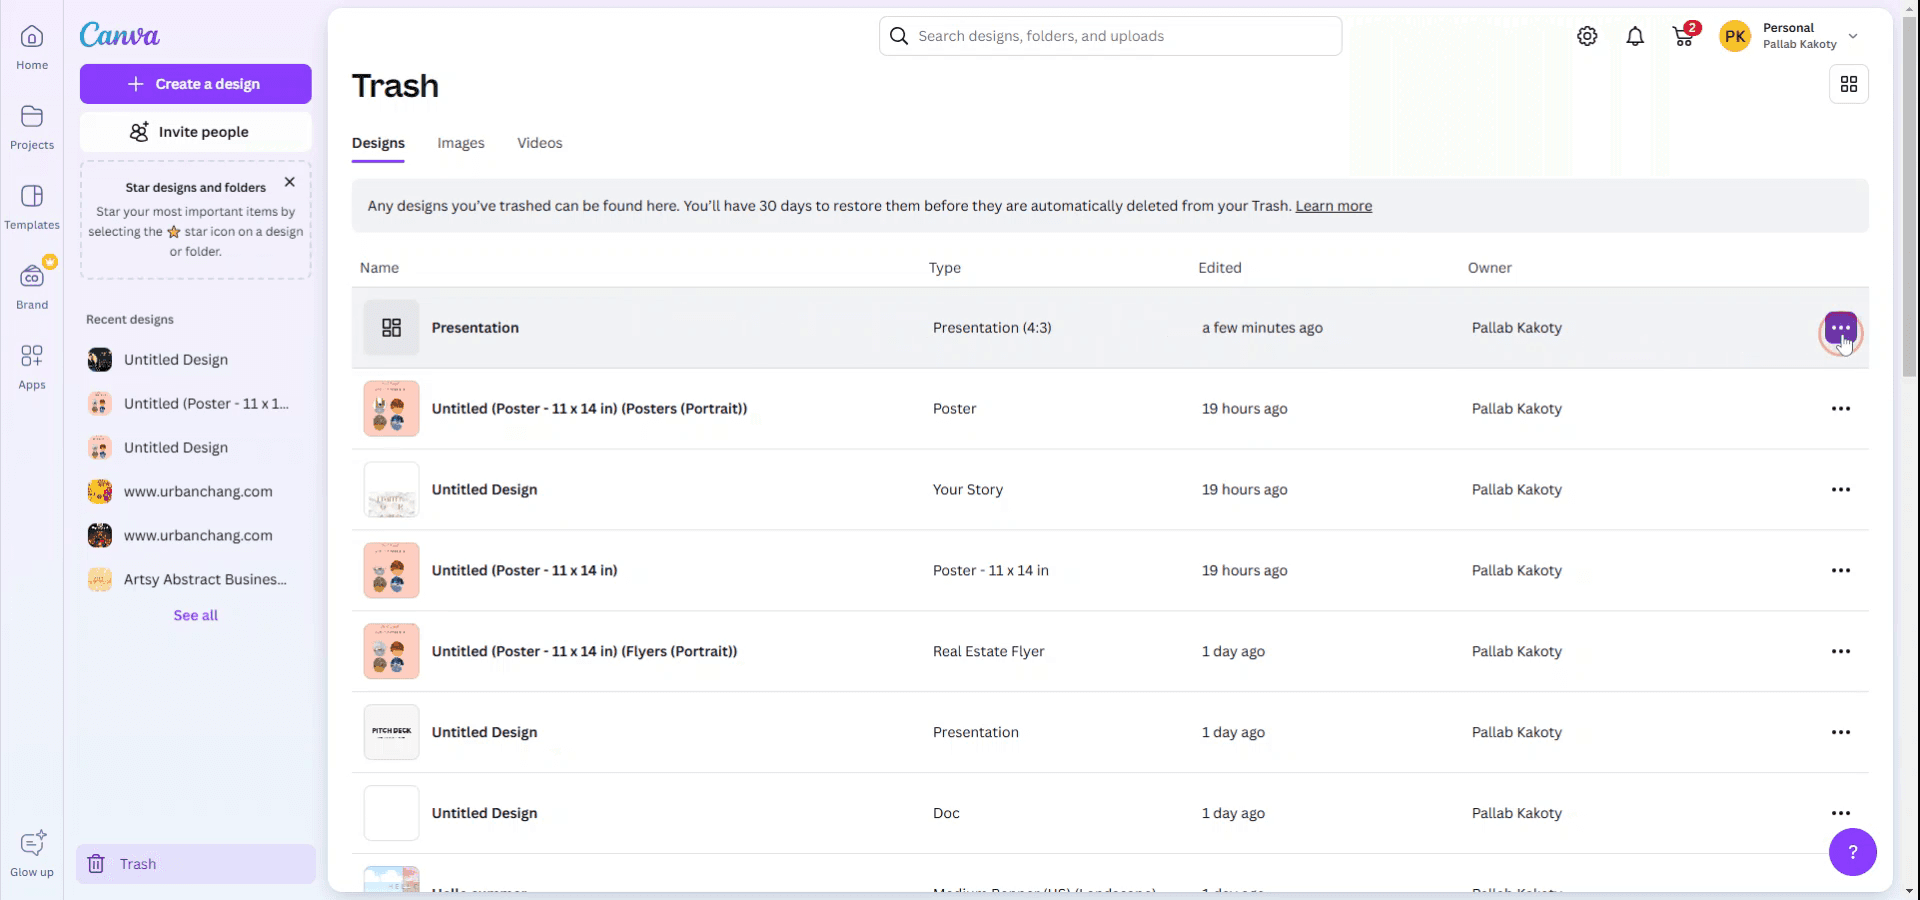
بمجرد التأكيد، سيتم نقل الملف تلقائيًا إلى سلة المهملات. لحذفه نهائيًا، انقر على "سلة المهملات" في قائمة الصفحة الرئيسية.
الخطوة 6
حدد موقع العرض التقديمي في سلة المهملات. انقر على قائمة النقاط الثلاث المرتبطة بالعرض التقديمي واختر "حذف من سلة المهملات".
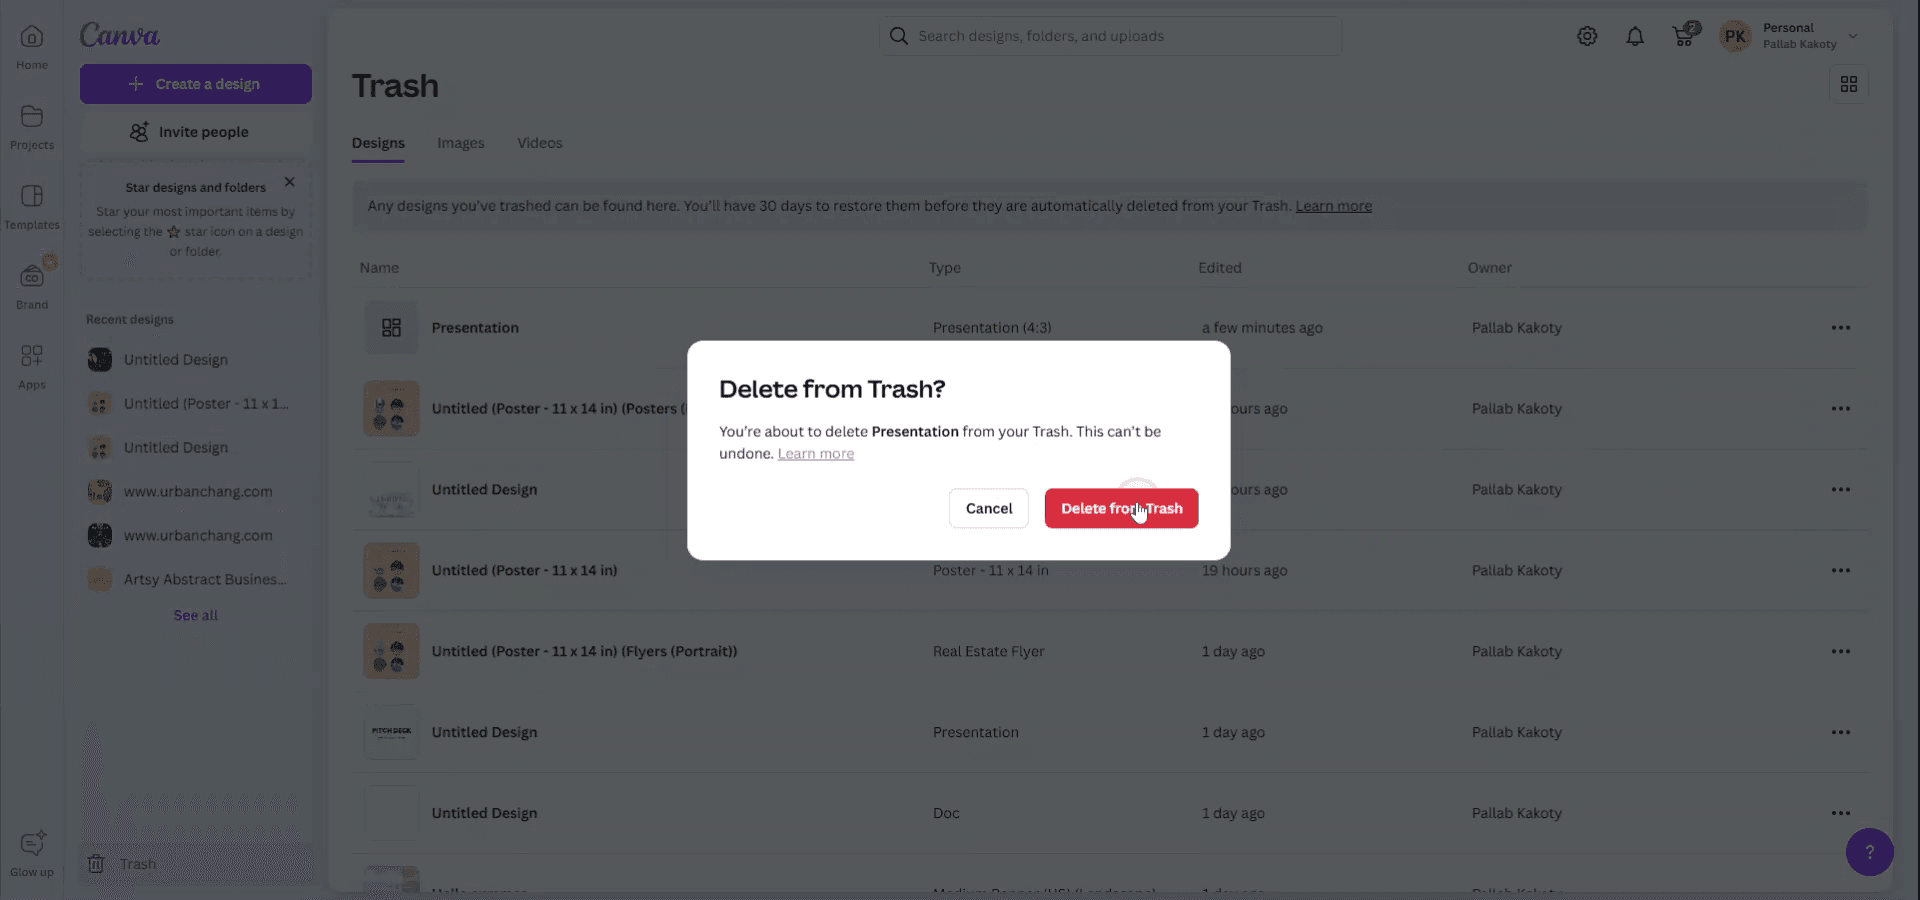
الخطوة 7
سيُطلب تأكيد نهائي لحذف العرض التقديمي نهائيًا من سلة المهملات.
نصائح احترافية لحذف عرض تقديمي في Canva
افتح التصميم في Canva:
انتقل إلى الصفحة الرئيسية في Canva وافتح التصميم الذي ترغب في حذفه.اذهب إلى قسم "كل تصاميمك":
في الشريط الجانبي الأيسر، انقر على "كل تصاميمك" لعرض قائمة العروض التقديمية المحفوظة لديك.حدّد العرض التقديمي:
مرّر المؤشر فوق العرض التقديمي الذي تريد حذفه. ستظهر ثلاث نقاط (المزيد من الخيارات) على الصورة المصغرة.انقر على النقاط الثلاث واختر "نقل إلى سلة المهملات":
من القائمة المنسدلة، اختر "نقل إلى سلة المهملات" لحذف التصميم. سيؤدي ذلك إلى نقل العرض التقديمي إلى سلة المهملات.إفراغ سلة المهملات (اختياري):
لحذف العرض التقديمي نهائيًا، انتقل إلى سلة المهملات (الموجودة في الشريط الجانبي الأيسر)، وابحث عن العرض التقديمي، ثم انقر على "حذف نهائيًا".
الأخطاء الشائعة وكيفية تجنبها عند حذف عرض تقديمي في Canva
حذف الملف الخطأ عن طريق الخطأ:
الحل: تحقّق مرة أخرى من التصميم قبل النقر على "نقل إلى سلة المهملات" للتأكد من أنك تحذف العرض التقديمي الصحيح.عدم إفراغ سلة المهملات:
الحل: بعد نقل التصميم إلى سلة المهملات، تذكّر أنه لن يُحذف نهائيًا إلا بعد إفراغ سلة المهملات. إذا كنت متأكدًا من رغبتك في حذف الملف، فانتقل إلى مجلد سلة المهملات وأزله نهائيًا.لا يزال التصميم يظهر بعد الحذف:
الحل: أحيانًا يستغرق اختفاء التصميم من مساحة العمل لديك لحظة بعد نقله إلى سلة المهملات. حدّث الصفحة إذا كان التصميم لا يزال ظاهرًا.الخلط بين سلة المهملات والأرشيف:
الحل: تأكد من أنك تنقل التصميم إلى "سلة المهملات" وليس إلى الأرشيف. التصاميم المؤرشفة لا تُحذف ويمكن استعادتها لاحقًا.عدم القدرة على التراجع عن الحذف:
الحل: يوفّر Canva نافذة مدتها 30 يومًا لاستعادة العناصر من سلة المهملات. إذا كنت بحاجة إلى استعادة تصميم محذوف، فقم بذلك خلال هذه المدة.
الأسئلة الشائعة حول حذف عرض تقديمي في Canva
كيف يمكنني حذف عرض تقديمي في Canva نهائيًا؟
افتح "جميع تصاميمك"، مرّر المؤشر فوق العرض التقديمي، ثم انقر على النقاط الثلاث، واختر "نقل إلى سلة المهملات". بعد ذلك، انتقل إلى سلة المهملات وانقر على "حذف نهائيًا".هل يمكنني التراجع عن حذف عرض تقديمي في Canva؟
نعم، يمكنك استعادة العرض التقديمي من سلة المهملات خلال 30 يومًا من حذفه بالانتقال إلى سلة المهملات والنقر على "استعادة".هل سيؤثر حذف العرض التقديمي الخاص بي على المستخدمين الآخرين؟
إذا كنت تعمل على عرض تقديمي مشترك، فسيتم فقط إلغاء وصولك عند حذفه. قد يظل لدى المستخدمين الآخرين وصول إليه ما لم يحذفوه من حساباتهم أيضًا.هل توجد طريقة لحذف عدة عروض تقديمية دفعة واحدة؟
حاليًا، لا يدعم Canva الحذف الجماعي. ستحتاج إلى حذف كل عرض تقديمي على حدة.ماذا يحدث للعرض التقديمي في سلة المهملات؟
يمكن استعادة العروض التقديمية في سلة المهملات لمدة تصل إلى 30 يومًا. بعد ذلك، سيتم حذفها نهائيًا.كيف تسجل الشاشة على ماك؟
لتسجيل الشاشة على جهاز ماك، يمكنك استخدام Trupeer AI. يتيح لك التقاط الشاشة بالكامل ويوفر إمكانات ذكاء اصطناعي مثل إضافة صور رمزية للذكاء الاصطناعي، وإضافة تعليق صوتي، وإضافة التكبير والتصغير داخل الفيديو. باستخدام ميزة ترجمة الفيديو بالذكاء الاصطناعي من trupeer، يمكنك ترجمة الفيديو إلى أكثر من 30 لغة.كيف تضيف صورة رمزية للذكاء الاصطناعي إلى تسجيل الشاشة؟
لإضافة صورة رمزية للذكاء الاصطناعي إلى تسجيل شاشة، ستحتاج إلى استخدام أداة تسجيل شاشة بالذكاء الاصطناعي. Trupeer AI هي أداة تسجيل شاشة بالذكاء الاصطناعي، تساعدك على إنشاء مقاطع فيديو باستخدام عدة صور رمزية، كما تساعدك على إنشاء صورتك الرمزية الخاصة للفيديو.كيف تسجل الشاشة على ويندوز?
لتسجيل الشاشة على Windows، يمكنك استخدام شريط الألعاب المدمج (Windows + G) أو أداة ذكاء اصطناعي متقدمة مثل Trupeer AI للحصول على ميزات أكثر تقدمًا مثل الصور الرمزية للذكاء الاصطناعي، والتعليق الصوتي، والترجمة، إلخ.كيف تضيف تعليقًا صوتيًا إلى الفيديو?
لإضافة تعليق صوتي إلى مقاطع الفيديو، حمّل إضافة Chrome من trupeer ai. بعد التسجيل، ارفع الفيديو الخاص بك مع الصوت، واختر التعليق الصوتي المطلوب من trupeer ثم صدّر الفيديو المعدّل.كيف أقوم بالتكبير في تسجيل شاشة؟
للتكبير أثناء تسجيل الشاشة، استخدم تأثيرات التكبير في Trupeer AI التي تتيح لك التكبير والتصغير في لحظات محددة، مما يعزز التأثير البصري لمحتوى الفيديو الخاص بك.
قد يسأل أيضًا
دروس ذات صلة

