
كيفية إنشاء نمط من النص في Canva – تكرارات طباعية سهلة
تعلم كيف تحول الكلمات إلى أنماط متكررة جميلة في كانفا باستخدام أدوات النص والتباعد والتكرار. مناسب جدًا للخلفيات، والهوية البصرية، وتأثيرات التصميم.
يرشدك هذا الدليل خلال عملية إنشاء نمط نصي جذاب في Canva.
باتباع هذه الخطوات البسيطة، ستتمكن من تخصيص عناصر النص لإنشاء أنماط جذابة بصريًا لتصاميمك.
يمكنك إنشاء أنماط نصية مذهلة في Canva باستخدام أنماط في Canva باستخدام تطبيقات مدمجة مثل PatternedAI وTypeCraft وMagic Morph، أو عن طريق تكرار عناصر النص يدويًا.
1. استخدام PatternedAI (مولّد الأنماط بالذكاء الاصطناعي)
افتح تصميمًا في Canva.
انقر على التطبيقات من شريط الأدوات الجانبي الأيسر.
ابحث عن PatternedAI وحدده.
صف النمط الذي تريده في خانة الإدخال.
اختر عدد التنويعات التي ترغب بها ثم انقر على إنشاء.
اختر المفضل لديك وخصّصه في محرر التصميم.
2. استخدام TypeCraft
في لوحة التطبيقات، ابحث عن TypeCraft وافتحه.
اختر نمط الخط ومعالجة الشكل (مثل: منحنى، موجة، متعرج).
اضبط الحجم واللون والتخطيط.
انقر على إضافة إلى التصميم لإدراج النص المنسق.
3. استخدام Magic Morph
افتح تصميمك في Canva.
انتقل إلى التطبيقات وحدد Magic Morph.
اكتب نصك وطبّق نمط تشويه (مثل التموج أو الحلزون).
خصّص شدة التحويل واتجاهه.
أضف النص المحوّل إلى لوحتك.
4. الطريقة اليدوية: تكرار النص وترتيبه
أضف عنصر النص إلى اللوحة.
استخدم Ctrl+D (Cmd+D) لتكرار النص.
اسحب النسخ المكررة واصطفّها لإنشاء نمط متصل بسلاسة (استخدم أداة “الموضع” للتباعد المتساوي).
جمّع العناصر لتحريك النمط بالكامل أو تغيير حجمه
دليل خطوة بخطوة: كيفية إنشاء نمط من النص في Canva
الخطوة 1
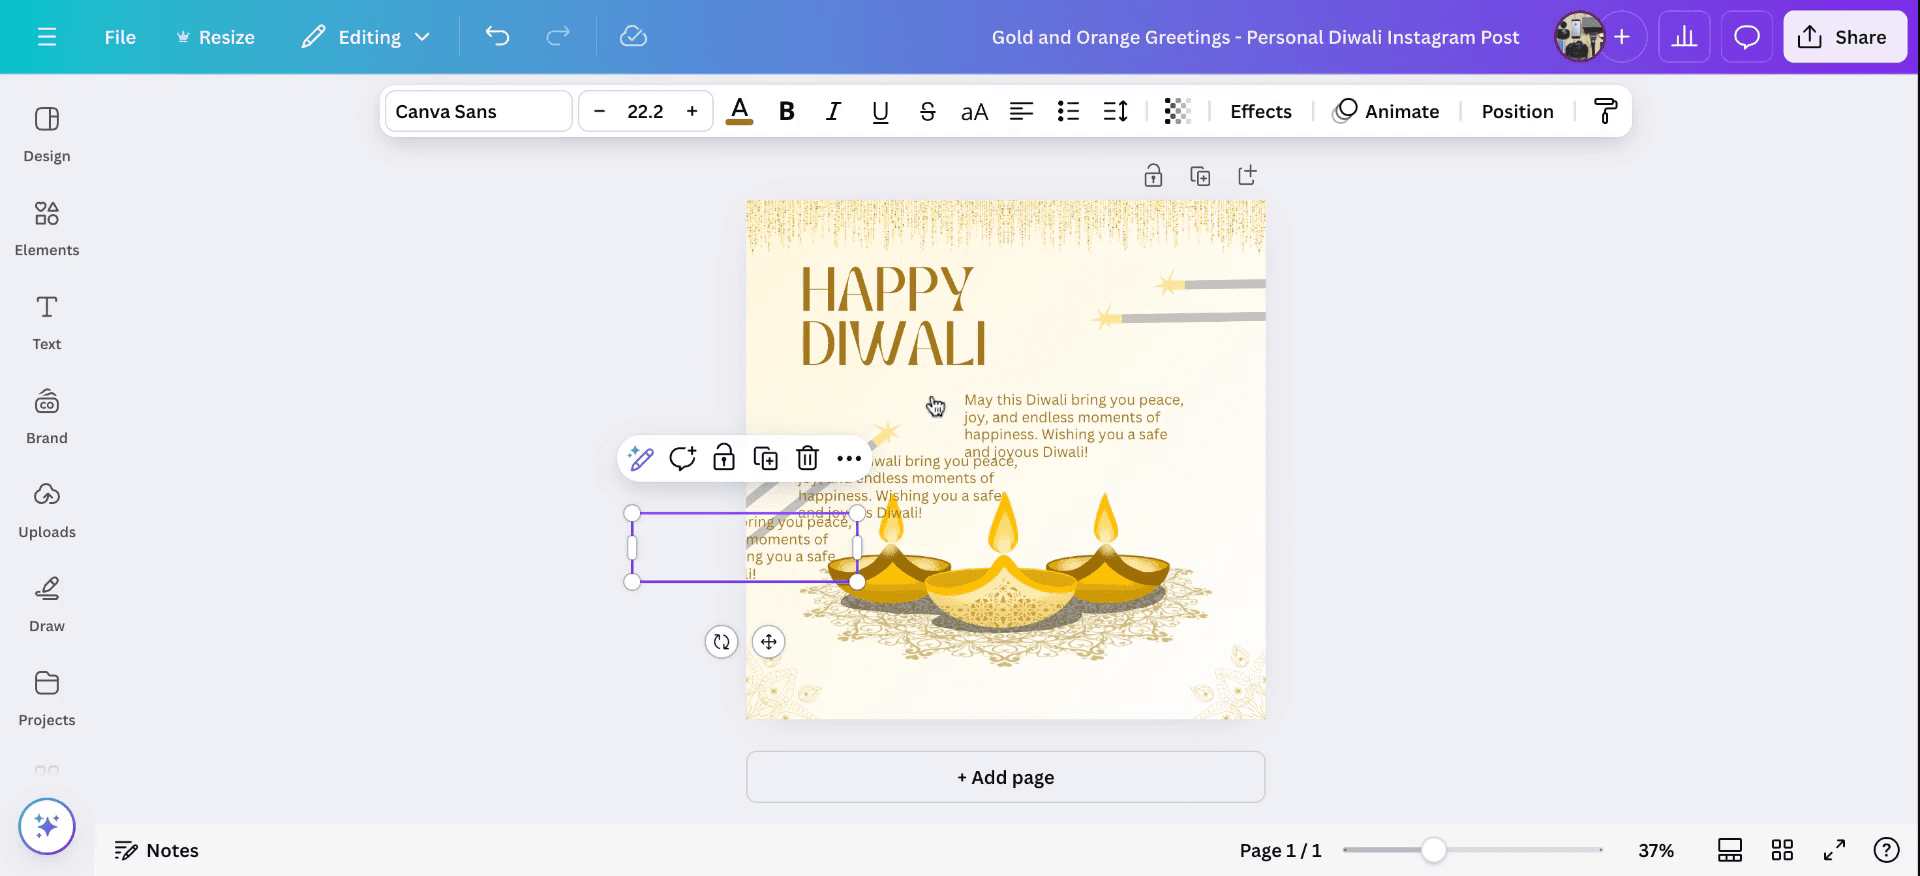
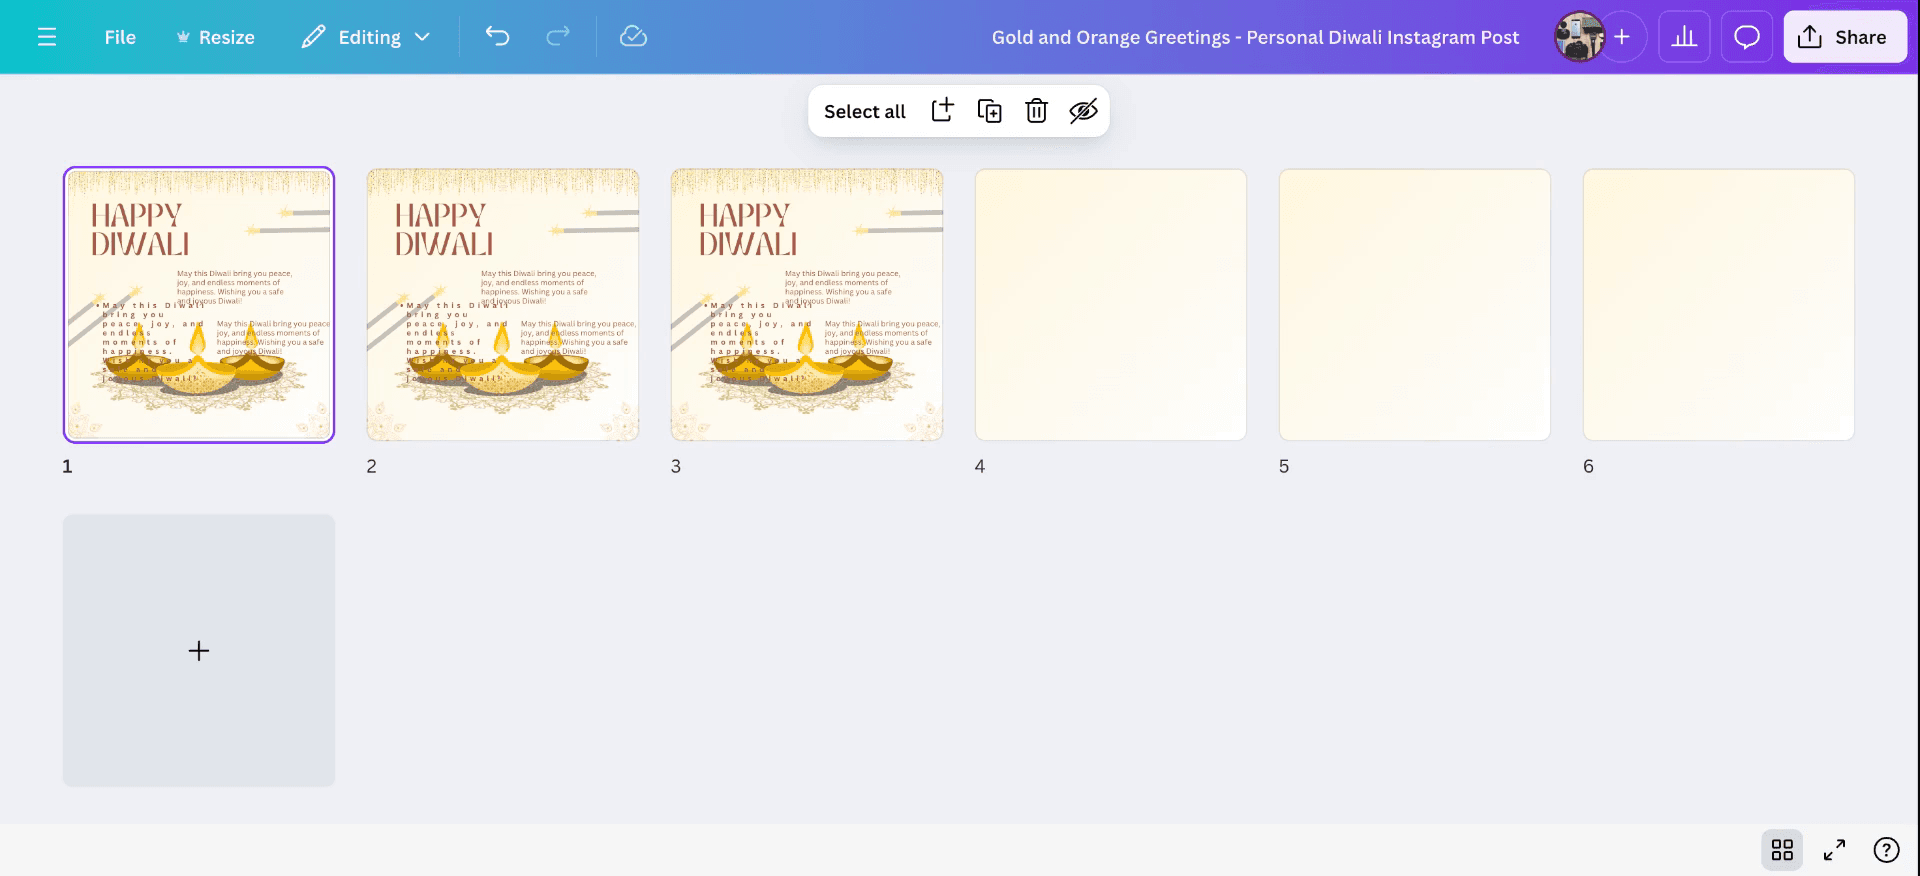
ابدأ بفتح مشروع في Canva. حدّد النص الذي تريد استخدامه لإنشاء نمط. يمكنك إما نسخ هذا النص أو إنشاء نسخة مكررة منه باستخدام 'command +D'. وإذا لزم الأمر، يمكنك إضافة عدة نسخ مكررة لمزيد من التخصيص.
الخطوة 2
خصّص النص بتغيير الخط، وتغيير ألوان النص، وتطبيق التأثيرات والتباعد النصي، وضبط التباعد حسب تفضيلك.

الخطوة 3
باتباع هذه الخطوات، يمكنك تكرار الصفحة مع التغييرات، وستكمل الدرس حول كيفية إنشاء نمط من النص في Canva.
نصائح احترافية لإنشاء نمط من النص في Canva
استخدم أداة النص:
أولًا، أنشئ النص الخاص بك عن طريق اختيار أداة "Text" من الشريط الجانبي الأيسر، ثم اختر خطًا واكتب النص الذي تريده.غيّر حجم النص وكرره:
غيّر حجم النص إلى حجم الخط الذي تريده، ثم انسخ مربع النص عدة مرات. يمكنك النسخ واللصق أو استخدام زر "Duplicate" لزيادة الكفاءة.رتّب النص:
ضع عناصر النص في بنية تشبه الشبكة أو في نمط متكرر عبر منطقة التصميم. تأكد من أن المسافة بين كل مربع نص متساوية.جمّع وعدّل:
بمجرد أن ترتّب النص، حدّد جميع مربعات النص واجمعها معًا (Ctrl + G أو Cmd + G) حتى يمكن تعديلها كوحدة واحدة. يمكنك الآن تغيير حجم نمطك ووضعه بحرية.استخدم العناصر لإضافة لمسة تصميمية إضافية:
عزّز نمط النص بإضافة عناصر رسومية مثل الخطوط أو الأشكال أو الأيقونات بين النص للحصول على تصميم أكثر تعقيدًا.صدّر كصورة:
بعد رضاك عن نمط النص، صدّر التصميم بصيغة PNG أو JPG لاستخدامه كنمط في مشاريع أخرى.
الأخطاء الشائعة وكيفية تجنبها عند إنشاء نمط من النص في Canva
تباعد غير متسق بين النصوص:
تأكد من أن النص متباعد بشكل متساوٍ باستخدام أدوات المحاذاة في Canva أو بضبط المسافة يدويًا بين كل نسخة مكررة.صعوبة محاذاة النص:
استخدم أداة "Position" في Canva لمحاذاة النص عموديًا وأفقيًا. يمكن لهذه الأداة المساعدة في الحفاظ على التماثل والتباعد.تداخل النص:
تحقق من أن عناصر النص لا تتداخل عند إنشاء النمط. اضبط حجم النص أو زد التباعد لضمان وضوح الرؤية.مشكلات تغيير الحجم بعد التجميع:
عند تغيير حجم النمط المجمّع، كن حذرًا بشأن النسب. اضغط باستمرار على مفتاح Shift أثناء التحجيم للحفاظ على نسبة الأبعاد.عدم استخدام تصدير عالي الدقة:
للحصول على جودة أفضل، تأكد من تصدير النمط بدقة عالية (صيغة PNG مع خلفية شفافة إذا كنت تخطط لوضعه فوق عنصر آخر).
الأسئلة الشائعة حول إنشاء نمط من النص في كانفا
هل يمكنني إنشاء نمط نصي متصل في كانفا؟
نعم، يمكنك ترتيب النص بنمط يشبه الشبكة والتأكد من أن المسافات بين العناصر متساوية للحصول على تأثير متصل.كيف أضبط المسافة بين كل عنصر نصي في النمط؟
استخدم أدوات المحاذاة في كانفا أو اسحب كل عنصر وضعه يدويًا مع الحفاظ على مسافات متناسقة.هل يمكنني استخدام نمط النص الخاص بي كخلفية؟
نعم، بمجرد إنشاء نمط النص، يمكنك تصديره واستخدامه كخلفية عبر رفعه إلى مشاريع كانفا الأخرى.هل من الممكن إنشاء نمط بعناصر نصية مختلفة؟
نعم، يمكنك مزج خطوط أو ألوان مختلفة للنص لإنشاء نمط متنوع وجذاب.هل يمكنني استخدام خط مخصص لنمط النص؟
بالتأكيد! يمكنك استخدام أي خط متاح في كانفا، أو رفع خطك الخاص إذا كانت لديك نسخة Canva Pro.كيف أسجل الشاشة على Mac؟
لتسجيل الشاشة على Mac، يمكنك استخدام Trupeer AI. يتيح لك التقاط الشاشة كاملة ويوفر إمكانات ذكاء اصطناعي مثل إضافة أفاتارات بالذكاء الاصطناعي، وإضافة تعليق صوتي، وإضافة التكبير والتصغير في الفيديو. وباستخدام ميزة ترجمة الفيديو بالذكاء الاصطناعي من trupeer، يمكنك ترجمة الفيديو إلى أكثر من 30 لغة.كيف أضيف أفاتارًا بالذكاء الاصطناعي إلى تسجيل الشاشة؟
لإضافة أفاتار بالذكاء الاصطناعي إلى تسجيل الشاشة، ستحتاج إلى استخدام أداة تسجيل شاشة بالذكاء الاصطناعي. Trupeer AI هي أداة تسجيل شاشة بالذكاء الاصطناعي، تساعدك على إنشاء مقاطع فيديو بأفاتارات متعددة، كما تساعدك على إنشاء أفاتارك الخاص للفيديو.كيف أسجل الشاشة على windows؟
لتسجيل الشاشة على Windows، يمكنك استخدام Game Bar المدمج (Windows + G) أو أداة ذكاء اصطناعي متقدمة مثل Trupeer AI للحصول على ميزات أكثر تقدمًا مثل الأفاتارات بالذكاء الاصطناعي، والتعليق الصوتي، والترجمة، إلخ.كيف أضيف تعليقًا صوتيًا إلى الفيديو؟
لإضافة تعليق صوتي إلى مقاطع الفيديو، حمّل إضافة trupeer ai لمتصفح Chrome. بمجرد التسجيل، ارفع الفيديو الذي يحتوي على صوت، واختر التعليق الصوتي المطلوب من Trupeer ثم صدّر الفيديو المعدل.كيف أقوم بالتكبير في تسجيل شاشة؟
لتكبير الصورة أثناء تسجيل الشاشة، استخدم تأثيرات التكبير في Trupeer AI التي تتيح لك التكبير والتصغير في لحظات محددة، مما يعزز التأثير البصري لمحتوى الفيديو الخاص بك.
يسأل أيضًا
كيفية إنشاء مجلة يوميات في كانفا
كيفية الطباعة على الوجهين في كانفا
دروس ذات صلة

