
كيفية الدردشة في Figma
تعلم كيفية التواصل في Figma باستخدام التعليقات، والإشارات، ومحادثة المؤشر. يغطّي هذا الدليل أدوات التعاون في الوقت الفعلي لتبسيط ملاحظات التصميم.
سيأخذك هذا الدليل خطوة بخطوة خلال عملية استخدام ميزتَي التعليقات والتعاون في Figma. ستتعلم كيفية ترك التعليقات، وذكر أعضاء الفريق، ومشاركة ملف Figma الخاص بك للتعاون في الوقت الفعلي.
يسهّل Figma التعاون مع الآخرين باستخدام ثلاث أدوات رئيسية: محادثة المؤشر، ومحادثة الصوت، والتعليقات.
محادثة المؤشر
تتيح لك محادثة المؤشر إرسال رسائل نصية سريعة تتبع حركة الماوس لديك، وهي مثالية للعمل الجماعي في الوقت الفعلي.
لتشغيلها: انقر بزر الماوس الأيمن في أي مكان على اللوحة واختر Cursor Chat، أو اضغط ببساطة على المفتاح
/.للكتابة: ابدأ بالكتابة وستظهر رسالتك بجوار المؤشر.
لإعادة الضبط: اضغط
Escلمسح رسالتك الحالية.ملاحظة: لديك حد أقصى 52 حرفًا لكل رسالة.
محادثة الصوت
إذا كنت تفضّل التحدث، فإن Figma يدعم المحادثات الصوتية (على سطح المكتب والمتصفح فقط).
للبدء: مرّر المؤشر فوق صورة ملفك الشخصي، وانقر على بدء المحادثة، ثم اسمح بالوصول إلى الميكروفون.
للانضمام: انقر انضم إلى المحادثة في شريط الأدوات العلوي إذا كان شخص آخر قد بدأ محادثة بالفعل.
التعليقات
تُعد التعليقات رائعة لمشاركة الأفكار أو الاقتراحات أو الملاحظات حتى عندما لا يكون الآخرون متصلين بالإنترنت.
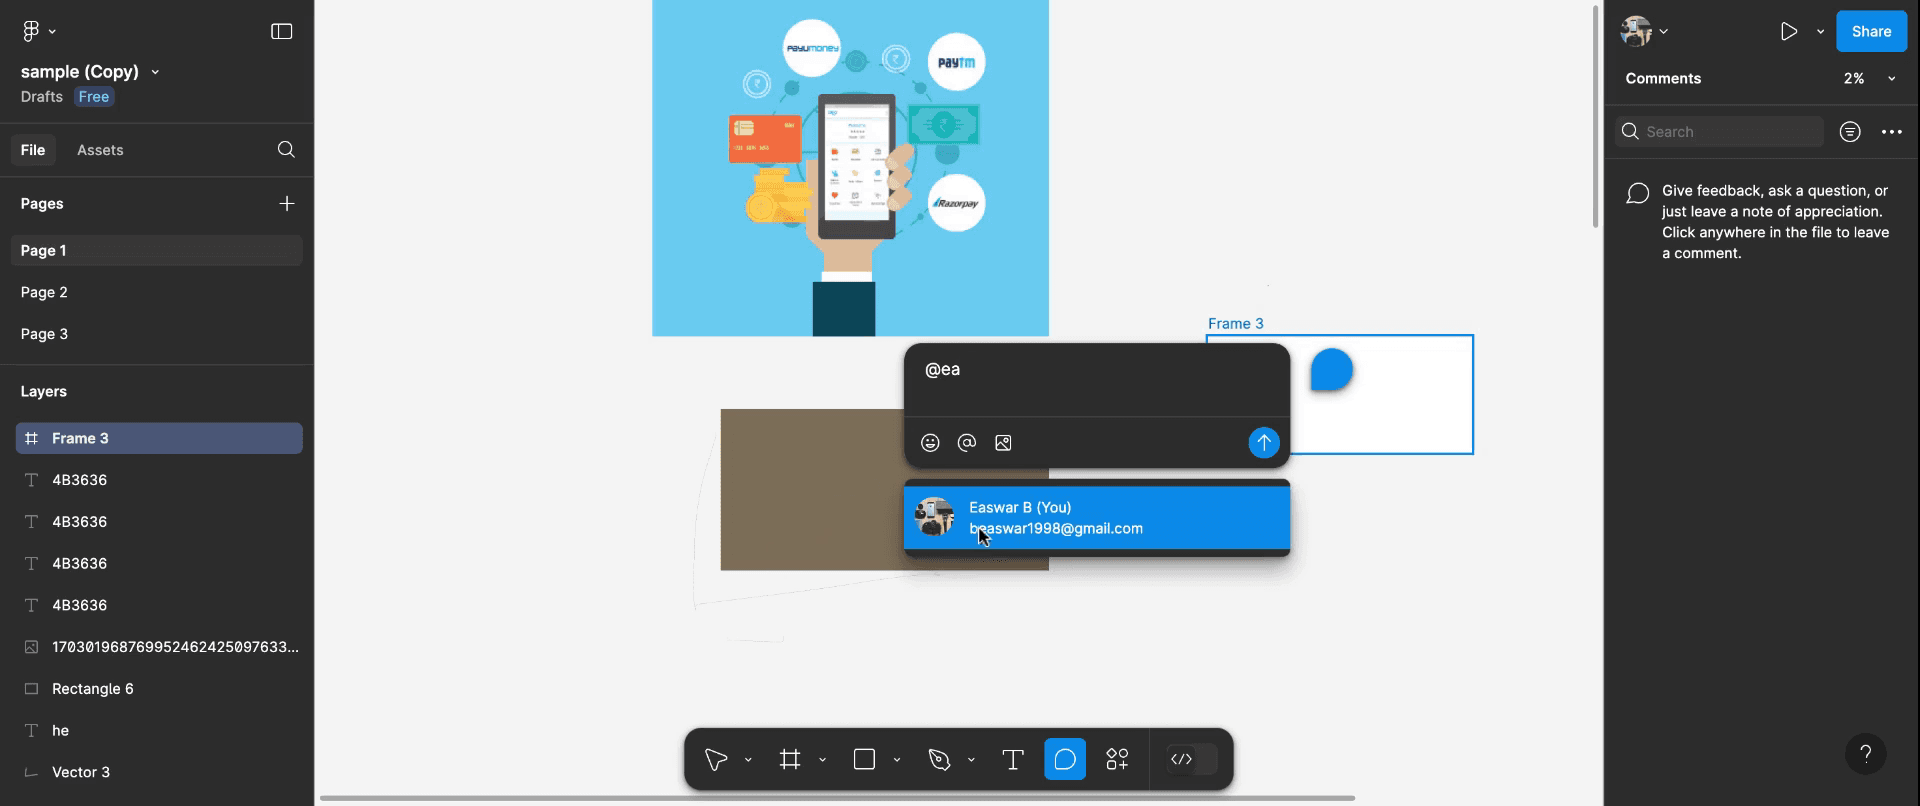
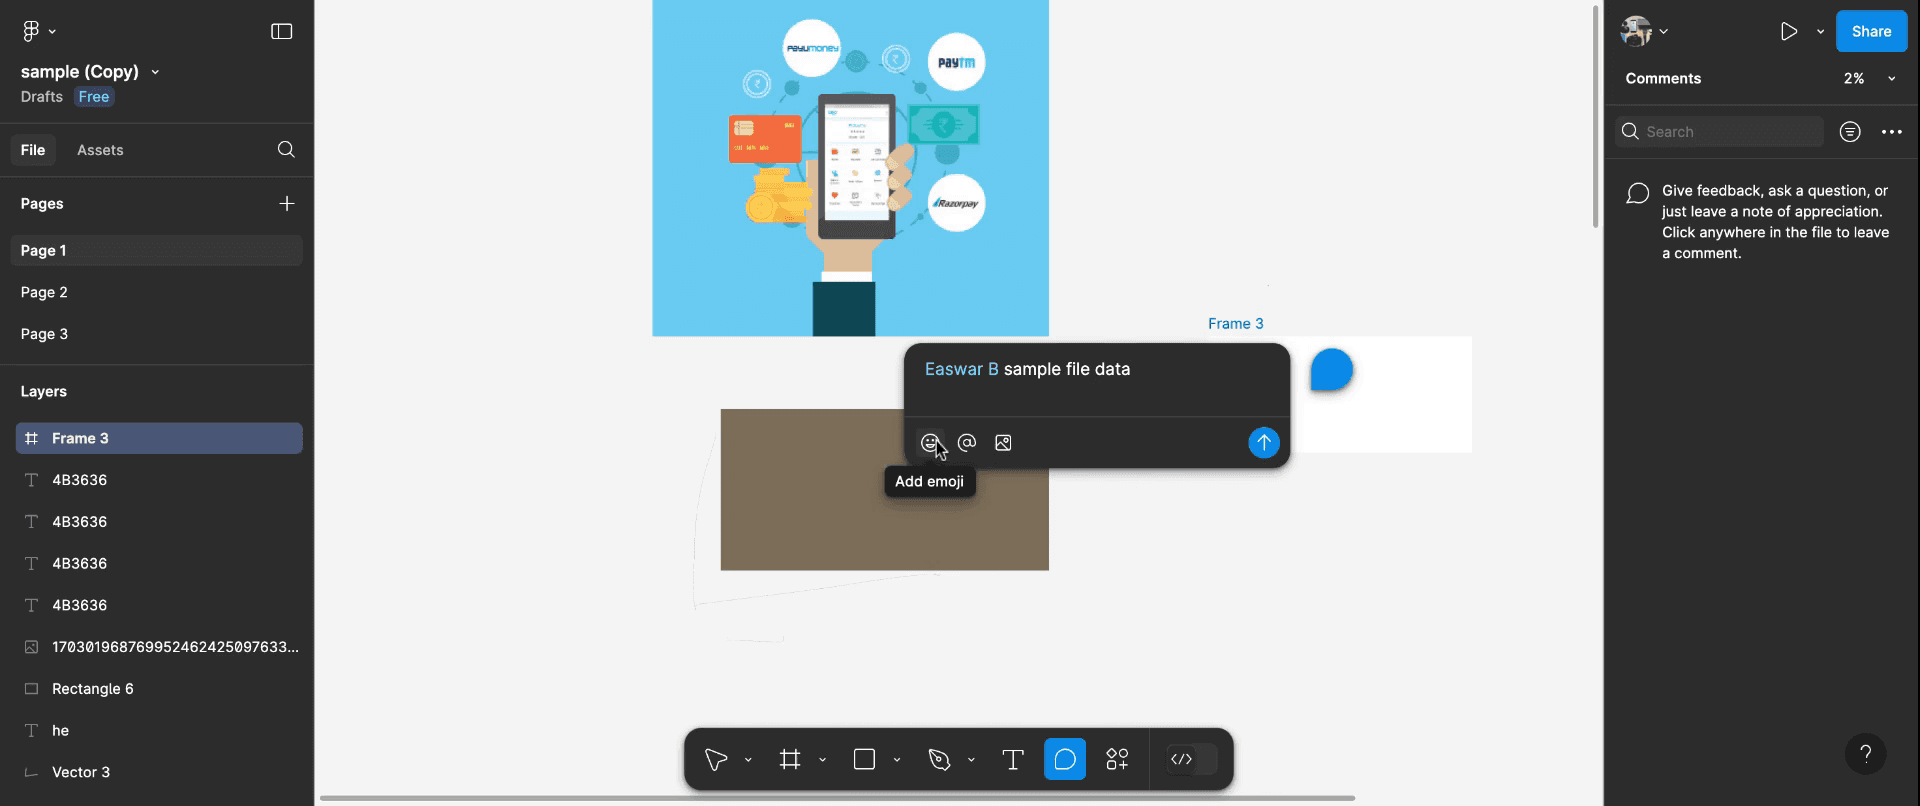
لإضافة تعليق: انقر على أيقونة 💬 أو اضغط
Cللدخول إلى وضع التعليق.لتثبيته: انقر في أي مكان على اللوحة لوضع تعليقك.
لإخطار شخص ما: استخدم
@متبوعًا باسمه لوسمه، وسيصله إشعار.
دليل خطوة بخطوة: كيفية الدردشة في Figma
الخطوة 1
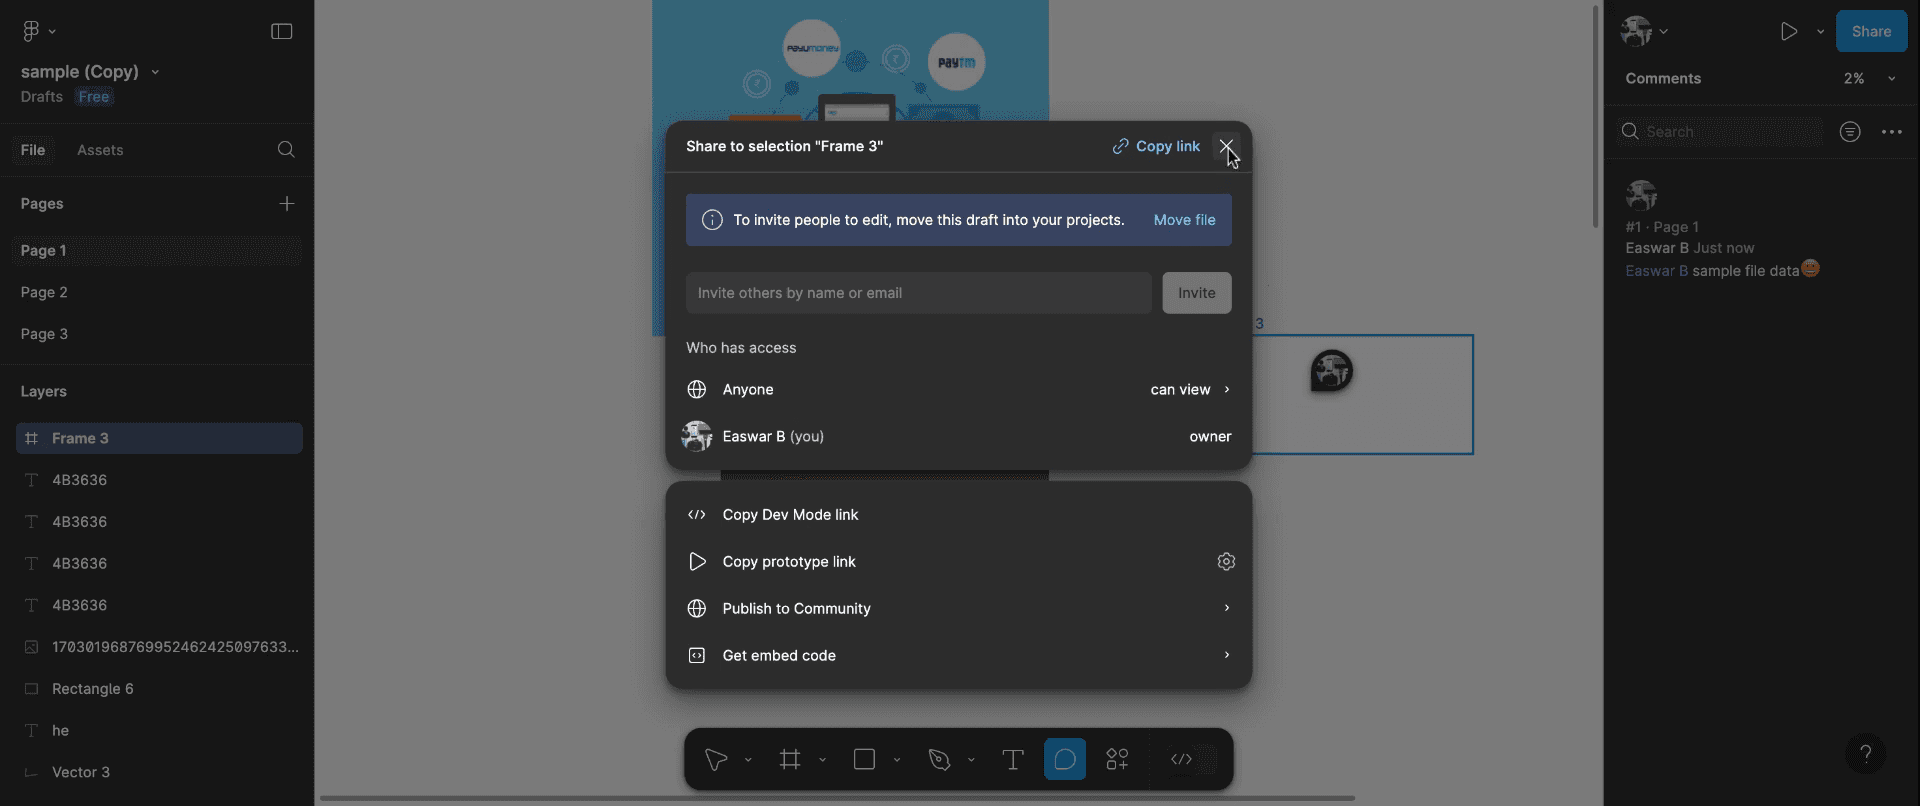
للبدء بكيفية الدردشة في Figma، افتح ملف Figma وحدد أداة التعليقات، الموجودة في أسفل يمين الواجهة.

الخطوة 2
انقر في أي مكان على اللوحة لترك تعليق. يمكنك ذكر أحد أعضاء الفريق بالاسم أو كتابة أي نص لجذب انتباهه، وكذلك منحه إمكانية عرض التعليق والرد عليه.
الخطوة 3
بعد كتابة تعليقك، لديك خيار تحميل مرفق، وإضافة رموز تعبيرية، وإدراج صور. عندما تكون جاهزًا، اضغط Enter لنشر تعليقك.
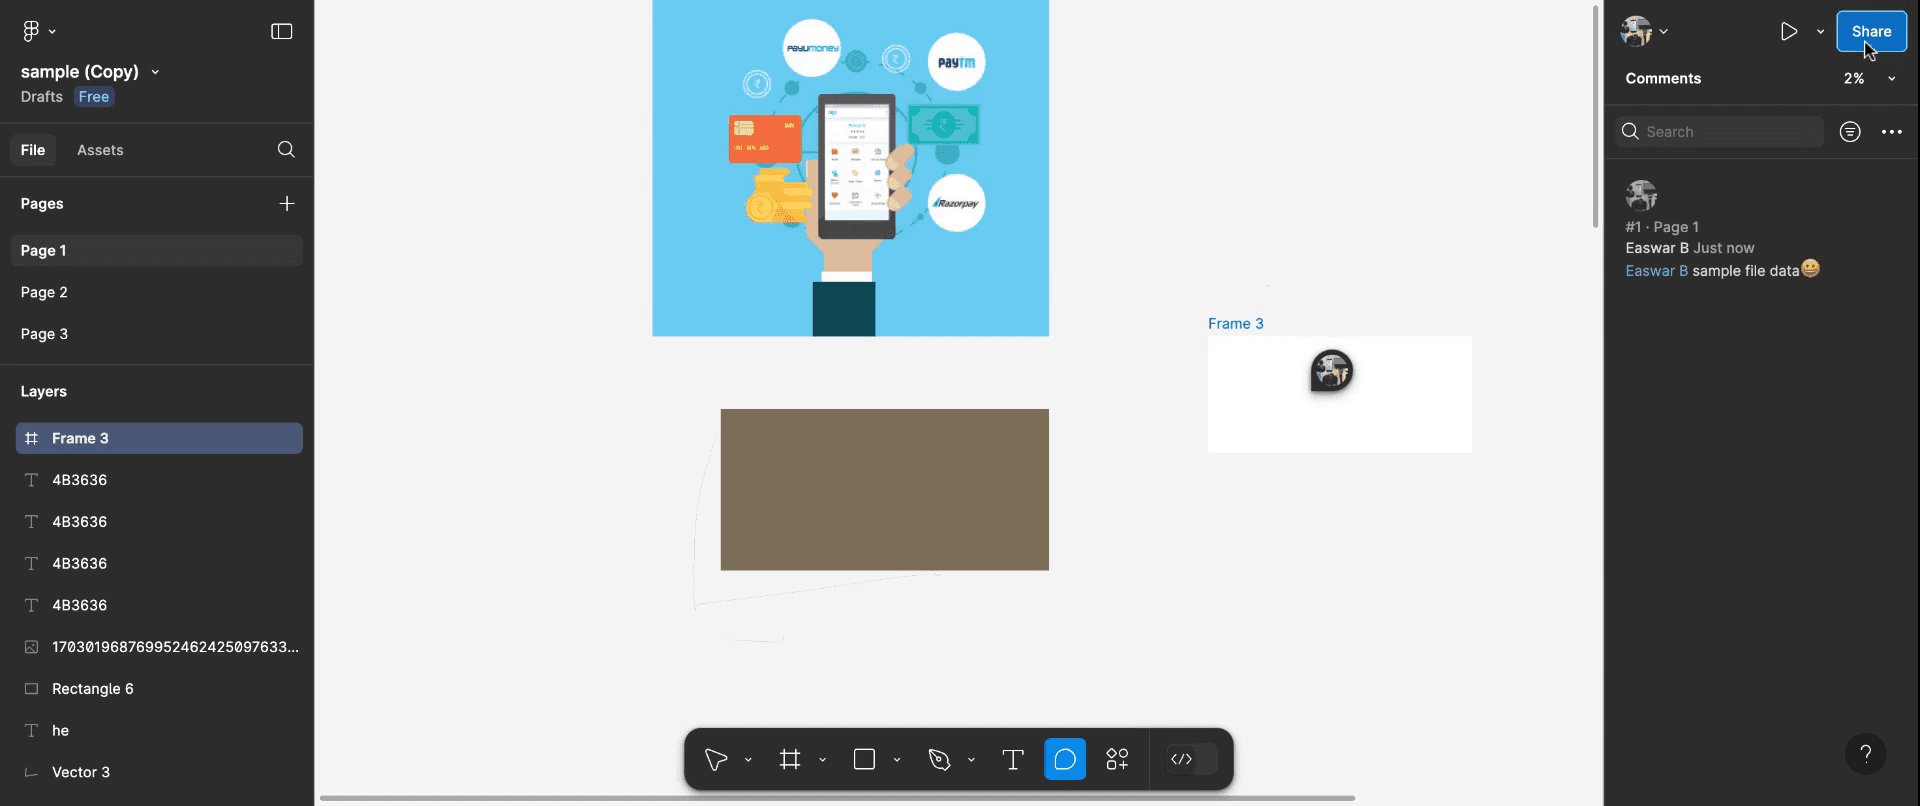
الخطوة 4
سيصبح تعليقك الآن مرئيًا ومثبتًا على اللوحة لسهولة الرجوع إليه. وبدلاً من ذلك، يمكنك استخدام طريقة المؤشر في الوقت الفعلي للتعاون مع الآخرين. من خلال منح الوصول أو مشاركة الرابط، يمكن للآخرين عرض الملف أو تعديله.
الخطوة 5
يمكنك تمرير المؤشر فوق مؤشر أحد أعضاء الفريق أثناء جلسة تعاونية لرؤية موقعه على اللوحة أثناء العمل أو النقاش.
نصائح احترافية للدردشة في Figma
افتح لوحة التعليقات:
في Figma، تتيح ميزة التعليقات لأعضاء الفريق ترك الملاحظات. انقر على زر التعليق في الزاوية العلوية اليمنى لفتح لوحة التعليقات.اترك تعليقات على عناصر محددة:
للدردشة أو التعليق على جزء محدد من التصميم، انقر على العنصر (شكل، نص، إلخ) الذي تريد ترك الملاحظات عليه. يؤدي ذلك إلى تثبيت تعليقك مباشرةً على ذلك العنصر.وسّم أعضاء الفريق:
استخدم @mentions لوسم أعضاء الفريق في التعليقات. ما عليك سوى كتابة @ متبوعةً باسم المستخدم الخاص بهم لجذب انتباههم وإشعارهم بملاحظات محددة.استخدم الرموز التعبيرية أو ردود الفعل:
للاعتراف بالملاحظات بسرعة أو التعبير عن أفكارك دون كتابة تعليق، استخدم الرموز التعبيرية أو ردود الفعل بتمرير المؤشر فوق تعليق واختيار الرمز التعبيري المناسب.الرد على التعليقات:
للمشاركة في محادثة، رُد على التعليقات بالنقر على زر "رد" أسفل التعليق. يساعد ذلك في إبقاء الملاحظات منظمة وضمن سلاسل.حلّ التعليقات:
بمجرد معالجة المشكلة، انقر على زر "حلّ" لتمييز التعليق على أنه تم حله. يساعد ذلك في الحفاظ على عملية الملاحظات نظيفة ومنظمة.
الأخطاء الشائعة وكيفية تجنبها عند الدردشة في Figma
عدم استخدام @mentions بشكل صحيح:
الحل: وسّم أعضاء الفريق دائمًا عندما تريد منهم اتخاذ إجراء أو قراءة تعليقك، لضمان عدم تجاهل الملاحظات المهمة.الإفراط في التعليقات:
الحل: تجنب الإفراط في التعليق. كن محددًا ومختصرًا، ولا تعلق إلا عند الضرورة لتجنب إرباك التصميم بالعديد من الرسائل.سوء التواصل في التعليقات:
الحل: لتجنب سوء الفهم، كن واضحًا في تعليقاتك وتجنب اللغة المبهمة. إذا لزم الأمر، استخدم مراجع مرئية أو توضيحات لشرح وجهة نظرك.تجاهل التعليقات التي تم حلها:
الحل: لا تترك التعليقات التي تم حلها معلقة. قم بتمييزها على أنها محلولة بمجرد معالجة المشكلة للحفاظ على انسيابية عملية الملاحظات.عدم تنظيم التعليقات:
الحل: حافظ على التنظيم من خلال تجميع التعليقات المرتبطة معًا والرد في السلاسل الصحيحة، مما يسهل تتبع التقدم.
الأسئلة الشائعة حول الدردشة في Figma
هل يمكنني الدردشة في Figma في الوقت الفعلي مثل تطبيق المراسلة؟
لا يوفّر Figma دردشة مباشرة في الوقت الفعلي مثل تطبيقات المراسلة، لكنه يوفّر ميزة التعليقات لترك الملاحظات وإجراء مناقشات حول التصاميم.هل يمكنني التعليق على منطقة محددة من التصميم؟
نعم، يمكنك النقر على أي عنصر أو منطقة داخل التصميم وترك تعليق مثبت على هذا العنصر المحدد.كيف أرى جميع التعليقات في Figma؟
يمكنك عرض جميع التعليقات في لوحة التعليقات. تعرض هذه اللوحة التعليقات التي تم حلّها والتي لم يتم حلّها.هل يمكنني حذف أو تعديل تعليقاتي في Figma؟
نعم، يمكنك حذف تعليقاتك الخاصة بالنقر على النقاط الثلاث بجوار التعليق واختيار حذف. ومع ذلك، لا يمكنك تعديل التعليق بعد نشره.هل يمكنني الدردشة مع عدة أشخاص في Figma؟
نعم، يدعم Figma التعاون بين الفريق، لذا يمكن لعدة أشخاص ترك تعليقات والرد على بعضها البعض في سلاسل التعليقات.كيف أسجّل الشاشة على جهاز ماك؟
لتسجيل الشاشة على جهاز Mac، يمكنك استخدام Trupeer AI. يتيح لك التقاط الشاشة كاملة ويوفّر إمكانات ذكاء اصطناعي مثل إضافة صور رمزية بالذكاء الاصطناعي، وإضافة تعليق صوتي، وإضافة التكبير والتصغير في الفيديو. مع ميزة ترجمة الفيديو بالذكاء الاصطناعي من trupeer، يمكنك ترجمة الفيديو إلى أكثر من 30 لغة.كيف أضيف صورة رمزية بالذكاء الاصطناعي إلى تسجيل الشاشة؟
لإضافة صورة رمزية بالذكاء الاصطناعي إلى تسجيل شاشة، ستحتاج إلى استخدام أداة لتسجيل الشاشة بالذكاء الاصطناعي. Trupeer AI هي أداة لتسجيل الشاشة بالذكاء الاصطناعي، وتساعدك على إنشاء فيديوهات متعددة الصور الرمزية، كما تساعدك على إنشاء صورتك الرمزية الخاصة بالفيديو.كيف أسجّل الشاشة على ويندوز؟
لتسجيل الشاشة على Windows، يمكنك استخدام شريط Game Bar المدمج (Windows + G) أو أداة ذكاء اصطناعي متقدمة مثل Trupeer AI للحصول على ميزات أكثر تقدّمًا مثل الصور الرمزية بالذكاء الاصطناعي، والتعليق الصوتي، والترجمة، إلخ.كيف أضيف تعليقًا صوتيًا إلى الفيديو؟
لإضافة تعليق صوتي إلى الفيديوهات، نزّل إضافة Chrome الخاصة بـ trupeer ai. بعد التسجيل، ارفع الفيديو الخاص بك مع الصوت، واختر التعليق الصوتي المطلوب من trupeer ثم صدّر الفيديو المعدّل.كيف أُكبّر في تسجيل الشاشة؟
لتكبير الصورة أثناء تسجيل الشاشة، استخدم تأثيرات التكبير في Trupeer AI التي تتيح لك التكبير والتصغير في لحظات محددة، مما يعزّز الأثر البصري لمحتوى الفيديو الخاص بك
قراءات مقترحة
كيفية تحويل صورة إلى صفحة تلوين في Canva
كيفية الطباعة على الوجهين في Canva
دروس ذات صلة

