

Hoe pictogrammen toevoegen in Figma
Leer hoe je iconen toevoegt in Figma met behulp van plug-ins, SVG-uploaden en ontwerpbibliotheken. Een stapsgewijze handleiding om je UI-ontwerpen te verbeteren met aangepaste en kant-en-klare iconen.
Icon-plug-ins gebruiken:
Installeer een plug-in: Ga naar "Plugins" in het Figma-menu,
selecteer "Blader door alle plug-ins...", en zoek naar de gewenste pictogram-plug-in (bijv. Iconify, Material Design Icons, Font Awesome).
Installeer de plug-in: Klik op "Installeren" om deze aan je Figma-bestand toe te voegen.
Blader en voeg toe: Start de plug-in (rechtsklik -> Plugins -> [Naam van de plug-in]), blader door de pictogrambibliotheek en klik om te importeren of sleep het pictogram naar je canvas.
Aanpassen: Net als geïmporteerde SVG's kun je de pictogrammen van de plug-in naar wens aanpassen.
Voorbeeld: Met Material Design Icons: Open de Material Design Icons-plug-in, zoek naar een pictogram (bijv. "home"), en klik om het aan je ontwerp toe te voegen.
Stapsgewijze handleiding: Hoe je pictogrammen toevoegt in Figma
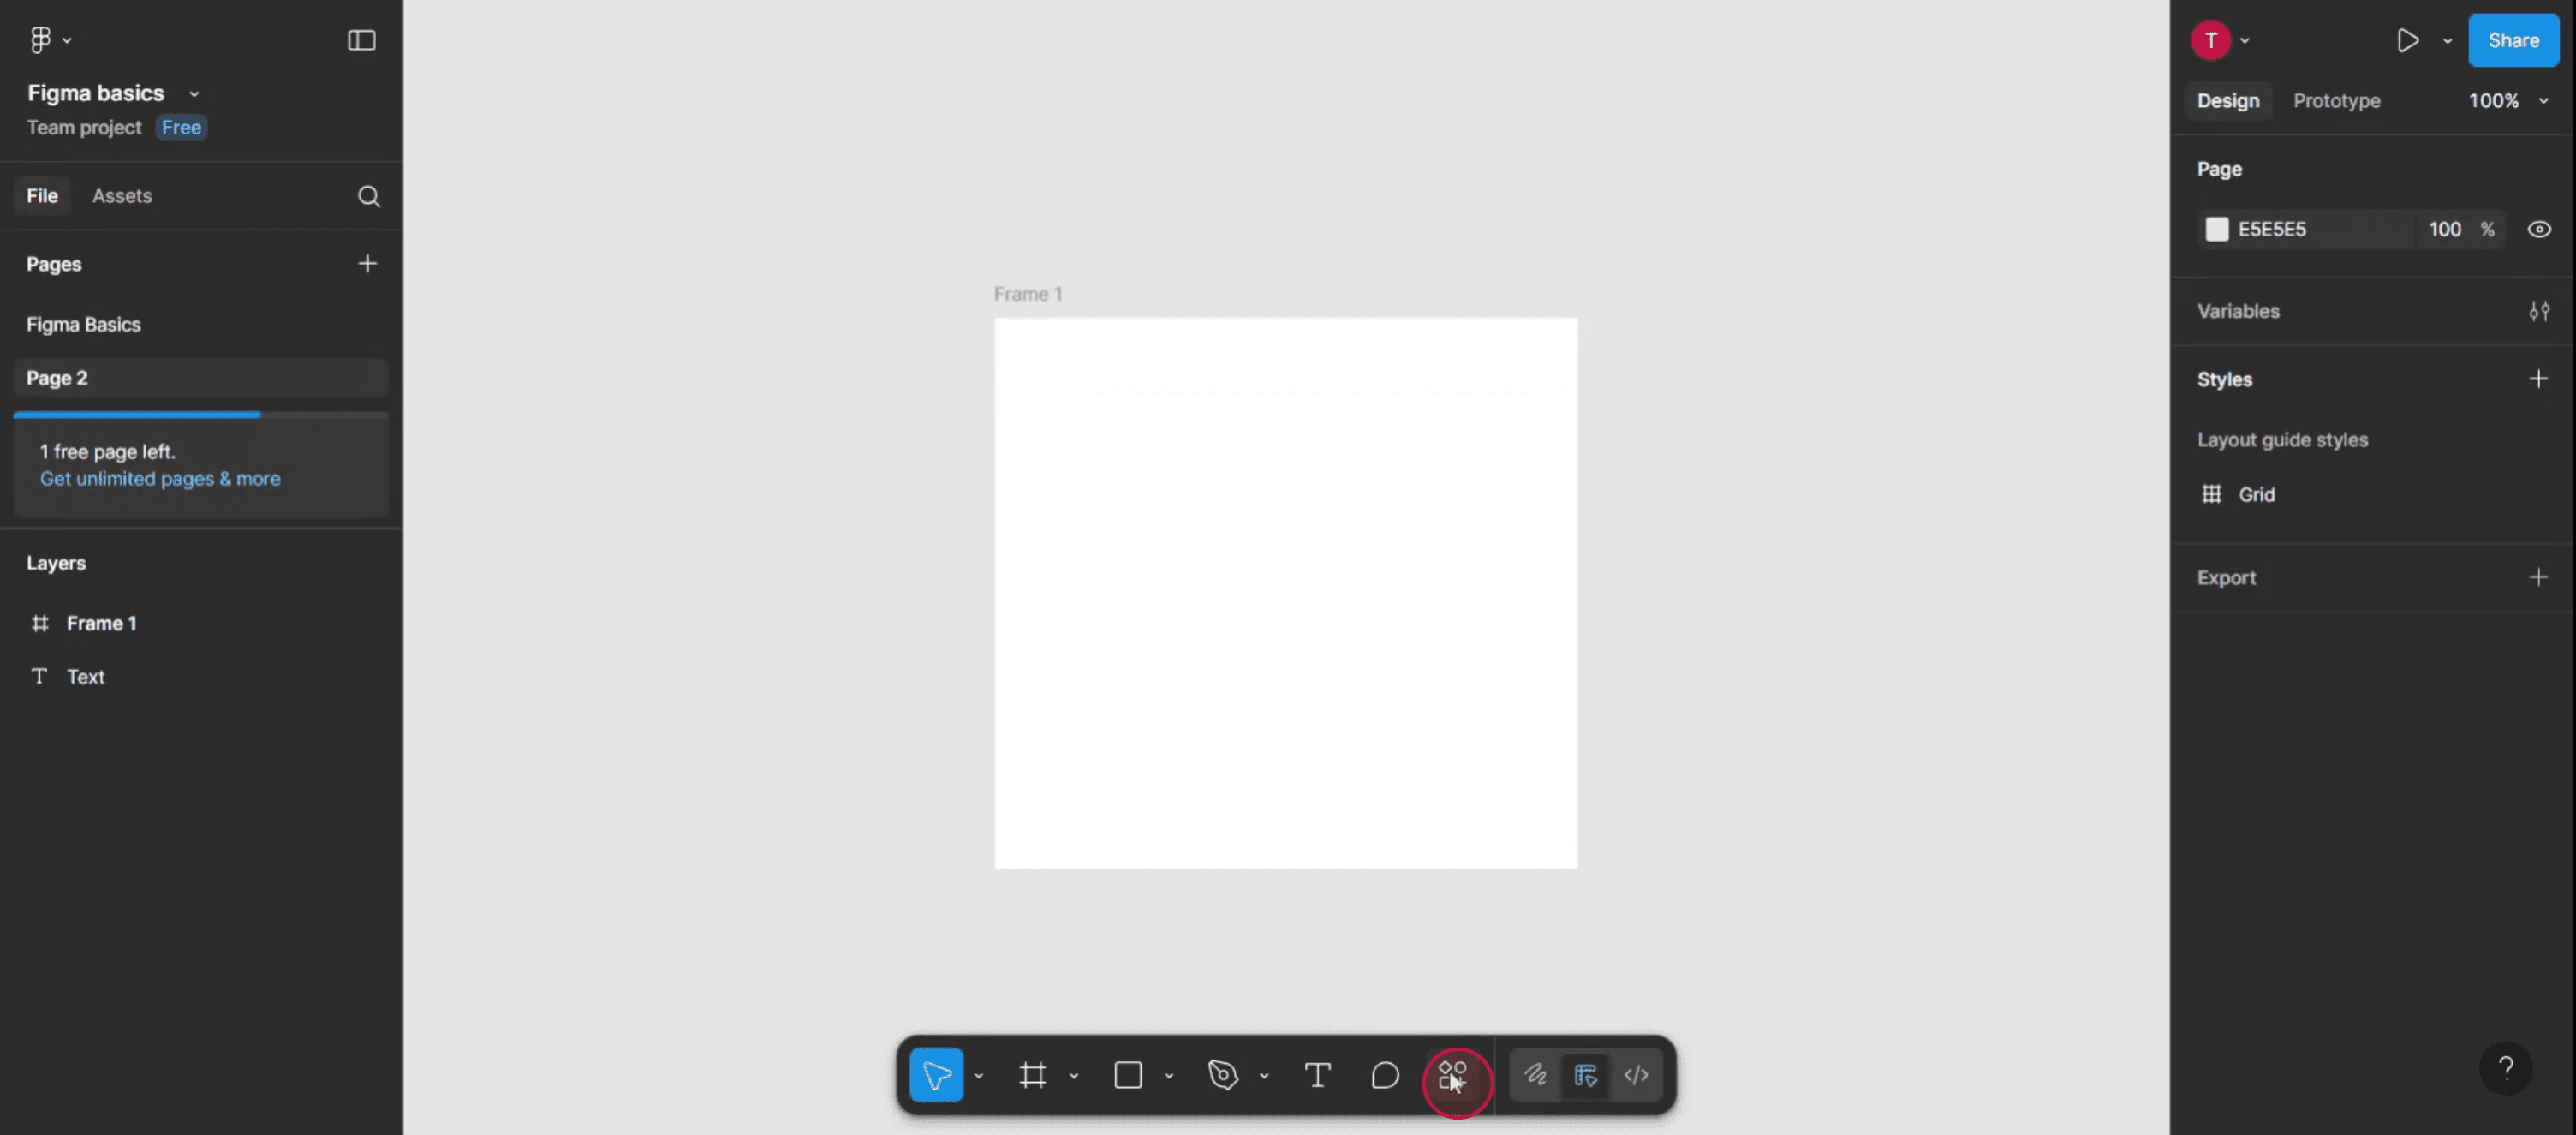
Stap 1
Selecteer de optie "Actions".
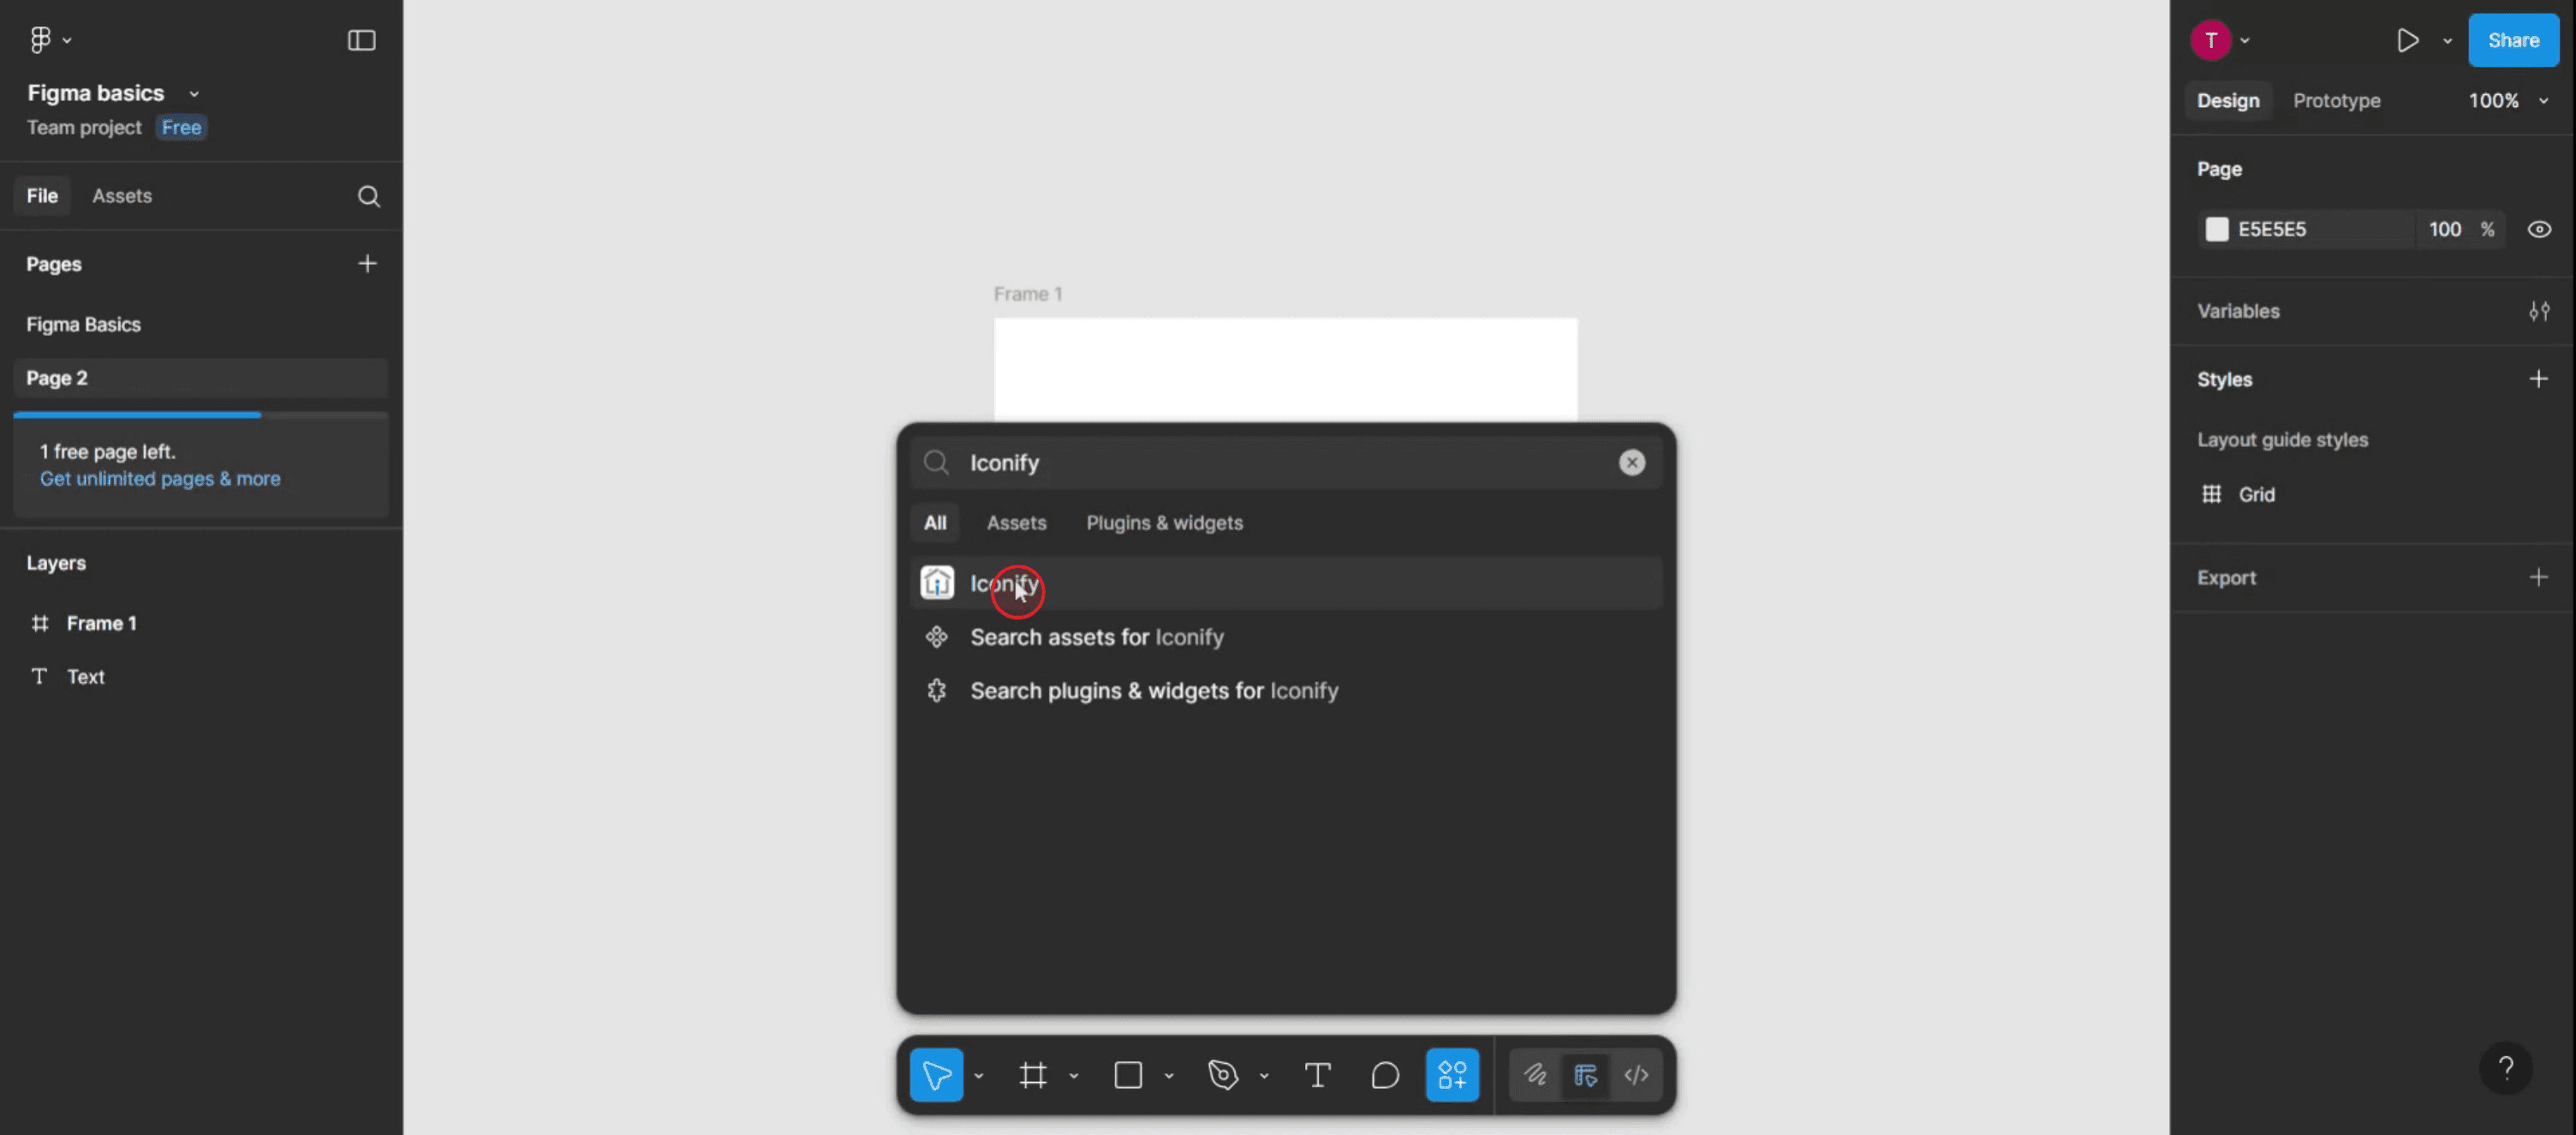
Stap 2
Voer in de zoekbalk "Iconify" in om de benodigde plug-in te vinden.

Stap 3
Nadat de zoekresultaten verschijnen, klik op de optie "Iconify".
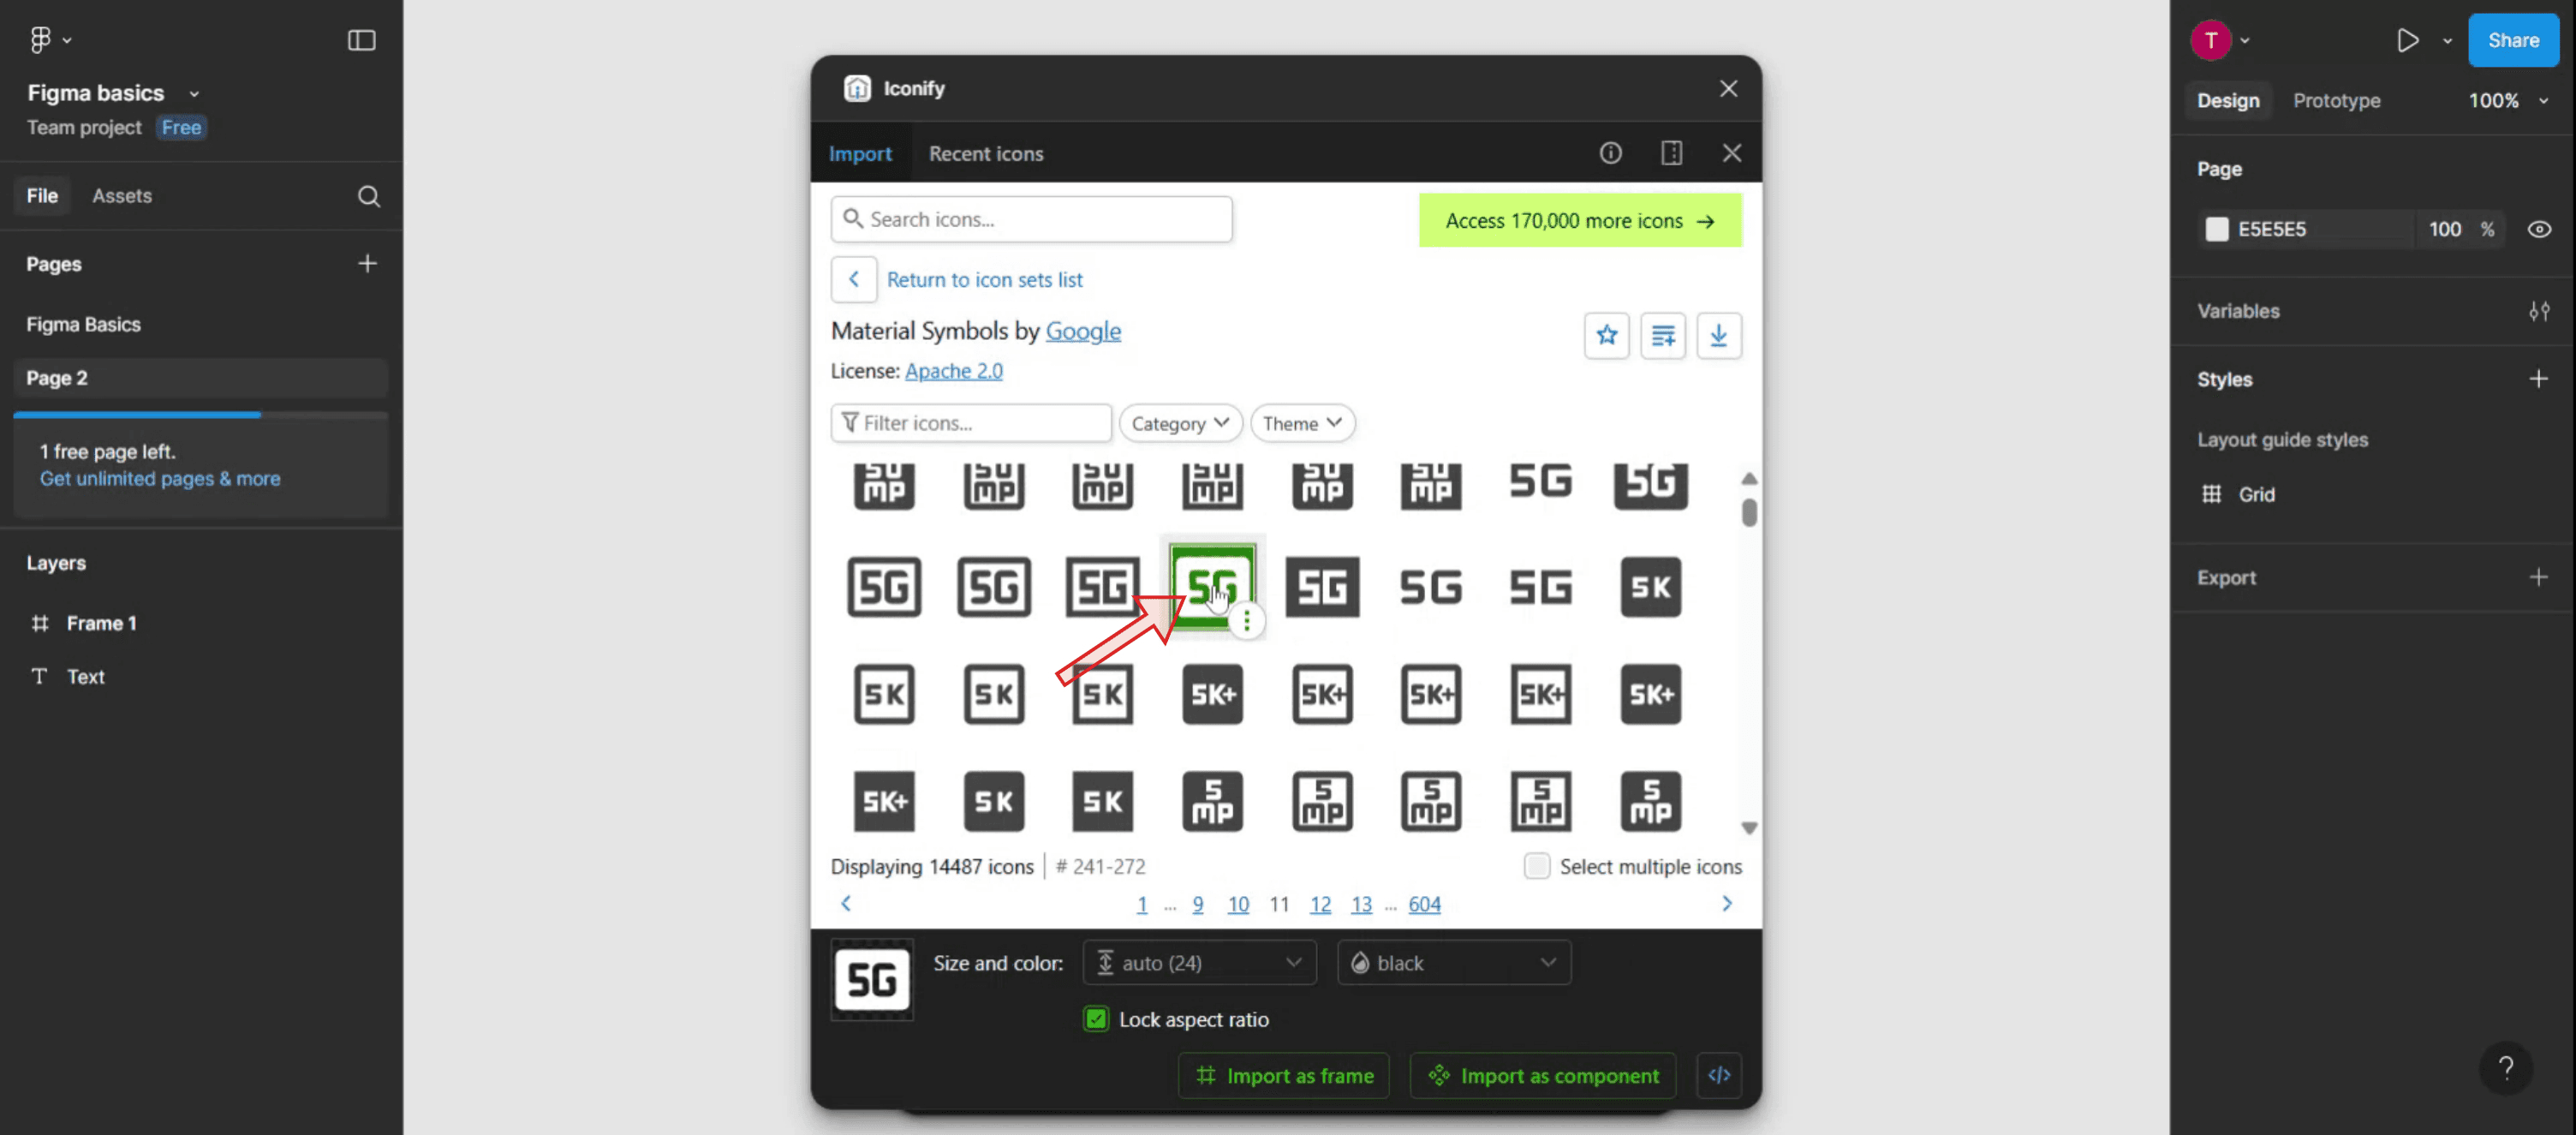
Stap 4
Selecteer vervolgens het pictogram,
Stap 5
Klik op de optie "Importeren als component".
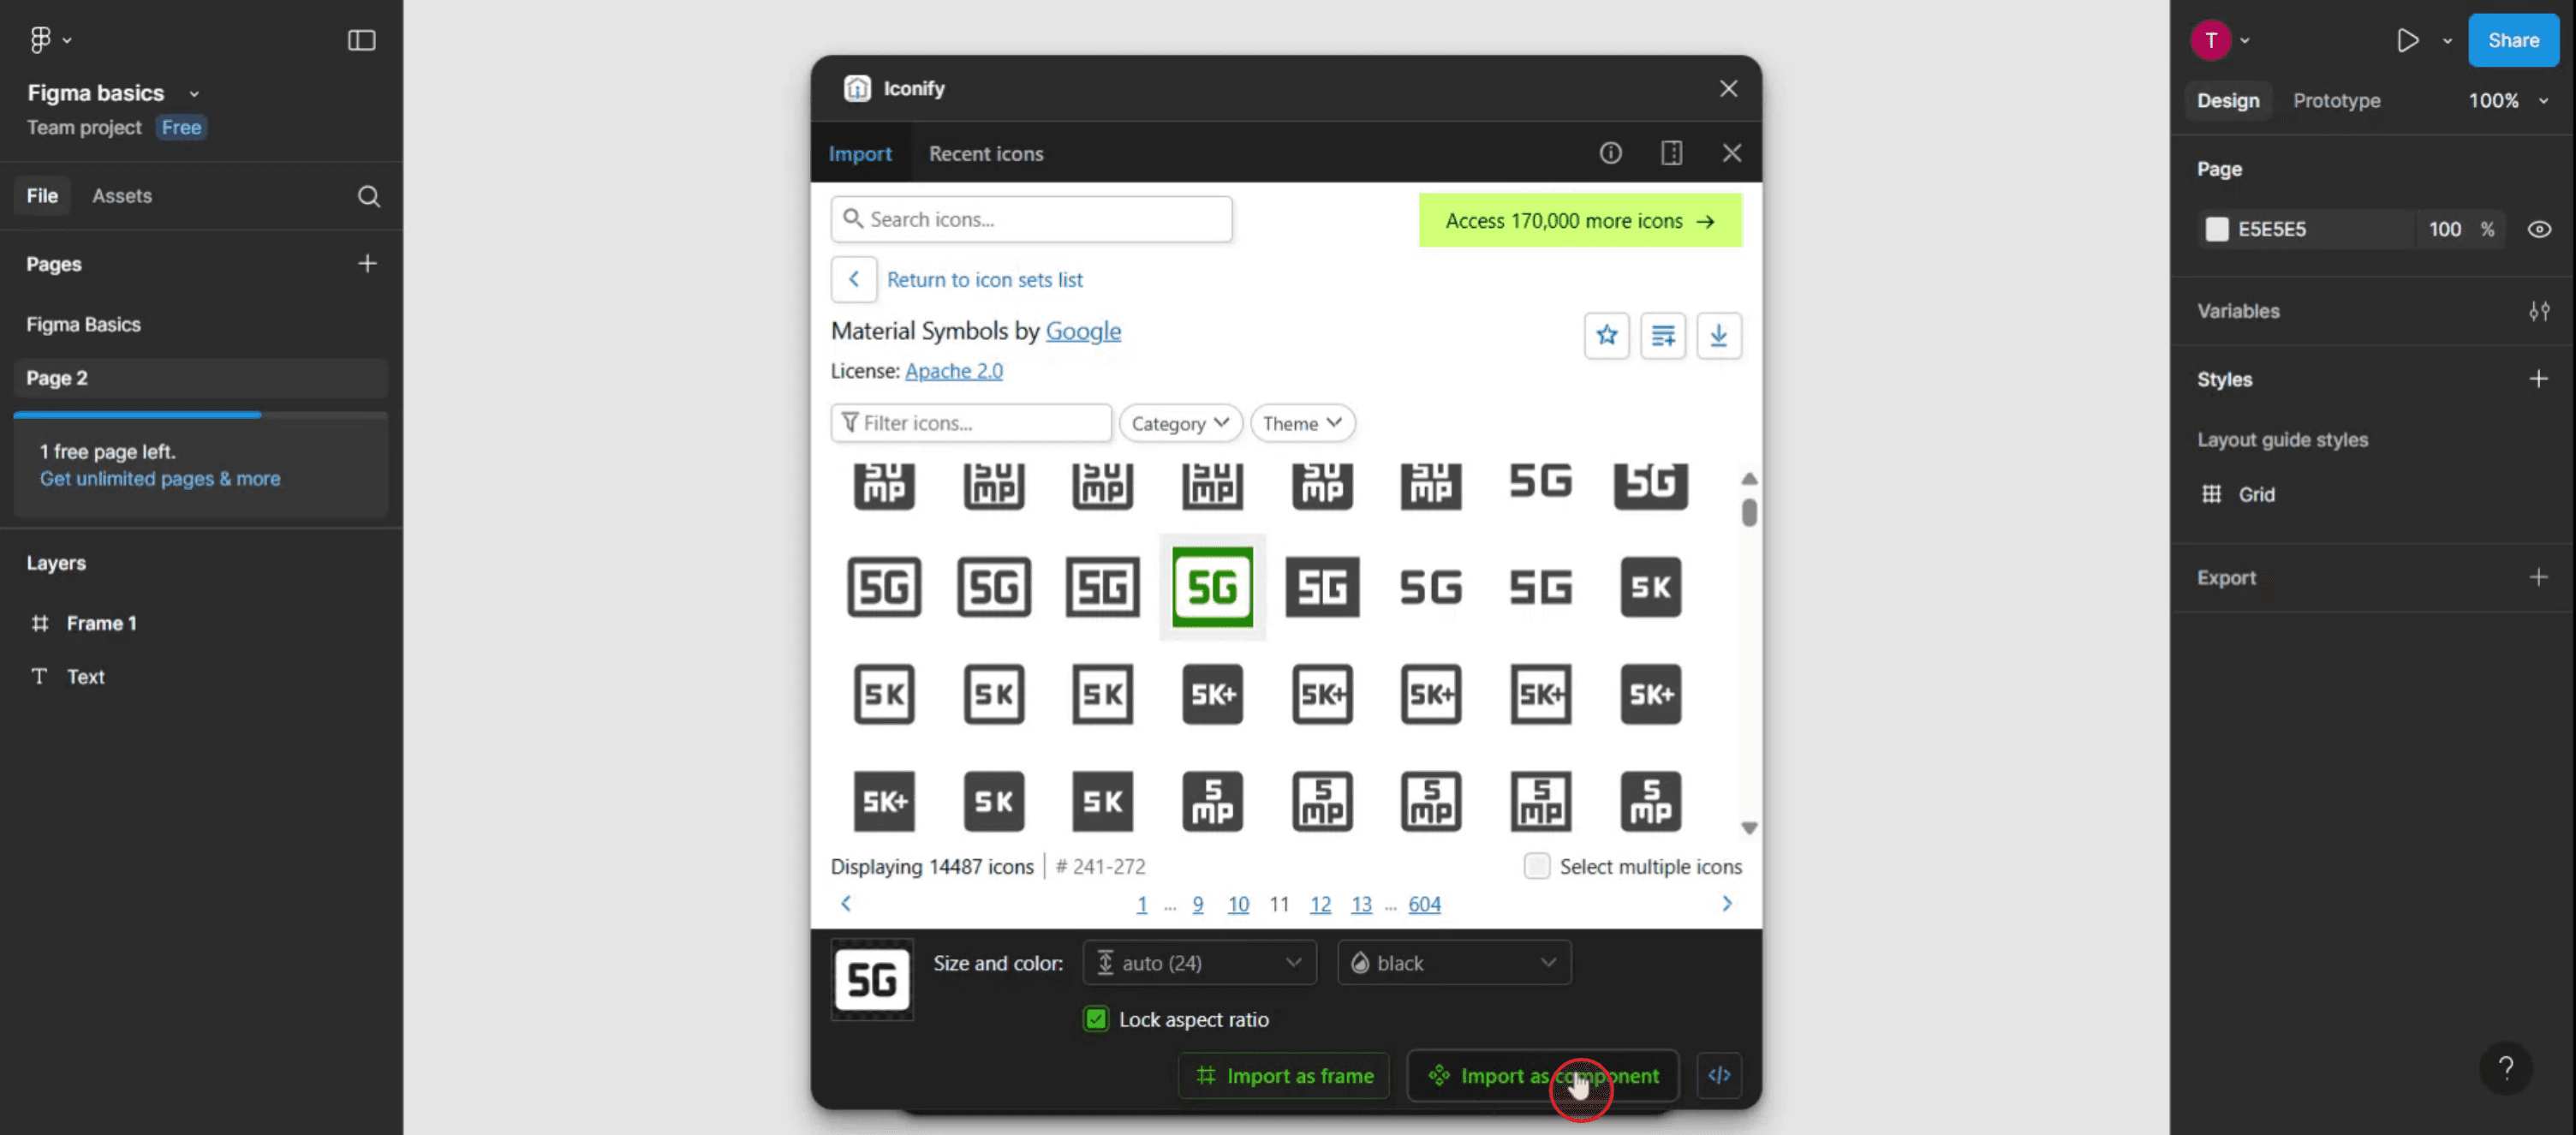
Stap 6
Je ziet nu dat het pictogram aan je frame is toegevoegd. Pas het pictogram indien nodig aan om aan de projectspecificaties te voldoen.

Pro-tips voor het toevoegen van pictogrammen in Figma
Gebruik de ingebouwde pictogram-plugins
Figma heeft verschillende gratis plugins zoals “Iconify,” “Feather Icons,” en “Material Design Icons.” Om ze te gebruiken, ga naar de menubalk, klik op “Bronnen,” selecteer het tabblad “Plug-ins,” en zoek naar de gewenste pictogramplugin. Zodra deze is geïnstalleerd, kun je pictogrammen rechtstreeks in je ontwerp slepen en neerzetten.Pictogrammen kopiëren uit externe bibliotheken
Je kunt gratis pictogrambibliotheken zoals Font Awesome of Google Material Icons bezoeken, vervolgens SVG-versies van pictogrammen kopiëren en ze in je Figma-bestand plakken. Dit is handig wanneer je pictogrammen nodig hebt die merkspecifiek zijn of universeel herkenbaar.SVG-bestanden importeren
Als je pictogrammen als SVG-bestanden op je computer hebt opgeslagen, kun je ze eenvoudig naar Figma importeren door ze naar het canvas te slepen. Figma behoudt de vectorkwaliteit en maakt eenvoudig schalen en kleuraanpassingen mogelijk.Gebruik componenten voor consistentie
Zet vaak gebruikte pictogrammen om in componenten. Zo wordt, als je er ooit één moet bijwerken, die automatisch bijgewerkt in alle exemplaren in je ontwerp.Organiseer pictogrammen in een bibliotheek
Maak een gedeelde bibliotheek van pictogramcomponenten voor je team. Dit bevordert consistentie en bespaart tijd doordat veelgebruikte pictogrammen vanaf één centrale locatie toegankelijk zijn.
Veelvoorkomende valkuilen en hoe je ze kunt vermijden
Niet omzetten naar contouren
Sommige pictogrammen die uit externe bronnen zijn geplakt, zijn mogelijk niet bewerkbaar. Klik met de rechtermuisknop op het pictogram en selecteer “Outline Stroke” of “Flatten” om ze om te zetten in bewerkbare vormen.Te veel stijlen gebruiken
Vermijd het mengen van verschillende pictogramstijlen (bijv. gevuld, contour, duotone) in één ontwerp. Houd je overal aan één stijl voor visuele consistentie.Afbeeldingen van lage kwaliteit importeren
Gebruik altijd SVG- of vectorformaten in plaats van PNG's of JPG's om de helderheid op elke grootte te behouden.Schalen zonder Shift ingedrukt te houden
Houd tijdens het wijzigen van de grootte van pictogrammen Shift ingedrukt om de verhoudingen te behouden en vervorming te voorkomen.Vergeten lagen een naam te geven
Geef je pictogramlagen of componenten altijd duidelijke namen. Dat helpt bij de organisatie en maakt zoeken makkelijker, vooral in grotere ontwerpbestsanden.
Veelgestelde vragen over het toevoegen van pictogrammen in Figma
Kan ik de kleur van pictogrammen in Figma aanpassen?
Ja, als het pictogram een vector (SVG) is, kun je de vul- en lijnkleur eenvoudig wijzigen in het eigenschappenpaneel aan de rechterkant.Kosten plugins geld?
De meeste pictogram-plugins zoals Iconify zijn gratis. Sommige geavanceerde plugins hebben mogelijk betaalde functies, maar basisbibliotheken voor pictogrammen zijn meestal gratis toegankelijk.Kan ik mijn eigen aangepaste pictogrammen gebruiken?
Ja, je kunt je eigen pictogramontwerpen in Figma importeren door ze te uploaden of naar je bestand te slepen.Hoe zorg ik voor consistente pictogrammen binnen een project?
Gebruik componenten en stijlen. Maak een designsysteem waarin alle pictogrammen gebaseerd zijn op dezelfde grootte-, dikte- en kleurregels.Kan ik pictogrammen animeren in Figma?
Je kunt basisovergangen toepassen met de prototypingfuncties van Figma, maar voor geavanceerde animaties heb je mogelijk tools zoals Figmotion nodig of kun je pictogrammen exporteren om ze in externe apps te gebruiken.Hoe neem je het scherm op op een Mac?
Om het scherm op een Mac op te nemen, kun je Trupeer AI gebruiken. Hiermee kun je het volledige scherm vastleggen en krijg je AI-mogelijkheden zoals het toevoegen van AI-avatars, voice-over toevoegen, in- en uitzoomen in de video. Met de AI-videotranslatiefunctie van Trupeer kun je de video vertalen naar meer dan 30 talen.Hoe voeg ik een AI-avatar toe aan een schermopname?
Om een AI-avatar aan een schermopname toe te voegen, moet je een AI-schermopnametool. Trupeer AI is een AI-schermopnametool, waarmee je video's met meerdere avatars kunt maken en die je ook helpt je eigen avatar voor de video te creëren.Hoe neem je het scherm op op Windows?
Om het scherm op Windows op te nemen, kun je de ingebouwde Game Bar (Windows + G) gebruiken of een geavanceerde AI-tool zoals Trupeer AI voor meer geavanceerde functies zoals AI-avatars, voice-over, vertaling enz.Hoe voeg ik voice-over toe aan video?
Om voice-over aan video's toe te voegen, download je de Chrome-extensie van Trupeer AI. Na aanmelding upload je je video met stem, kies je de gewenste voice-over van Trupeer en exporteer je je bewerkte video.Hoe zoom ik in op een schermopname?
Om tijdens een schermopname in te zoomen, gebruik je de zoomeffecten in Trupeer AI, waarmee je op specifieke momenten kunt in- en uitzoomen en zo de visuele impact van je videoinhoud vergroot.
Aanbevolen lectuur
Technische documentatiegenerator
Hoe frame-namen in Figma verbergen
Hoe je een Figma-bestand opslaat
Hoe je een raster maakt in Figma
Gerelateerde tutorials

